DIY Kids Summer Journal & Free Printable
Journaling is a great way for kids to keep their writing skills up over summer break or on a vacation. Help encourage them to write daily by DIY’ing a cute journal using a simple composition notebook!
I find it very very easy to slip into a lazy routine during the summer. It seems like we always start out the summer with good intentions with schedules, and reading times and chores, but by August we’re just laying around the house all day.
Why A Summer Journal?
One thing that I devised to help avoid this is to have my kids keep summer journals. We designate a time every day to sit down and write about what’s going on. If we’ve been somewhere fun (like to the movies)
I have my kids glue their ticket stubs into the journal too. That way, at the end of the summer, they have a fun memory of all the things we did, and it also helps them keep up their writing skills over the summer. I also love to do the same thing with my kids when we go on family vacations.
About the Journal
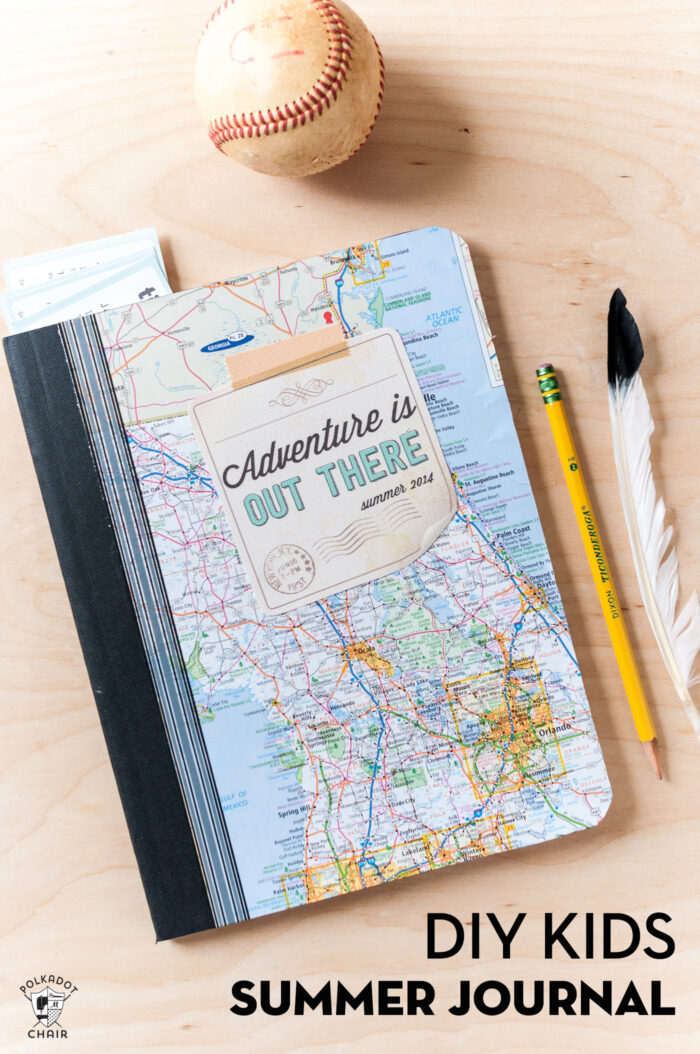
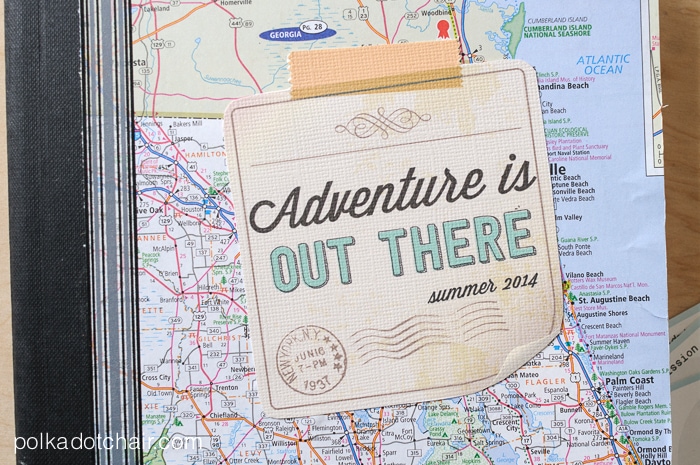
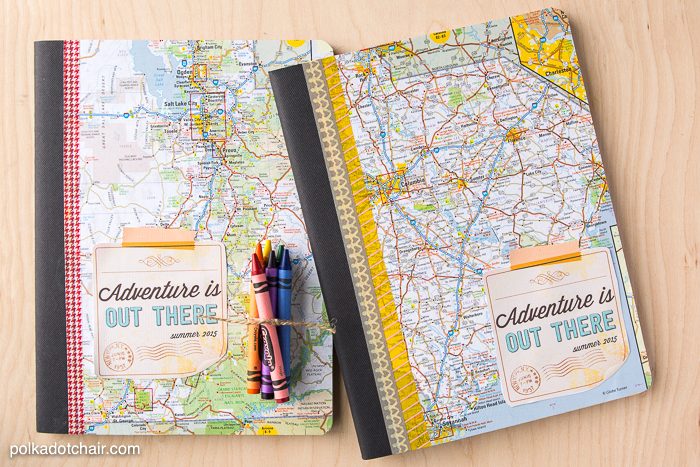
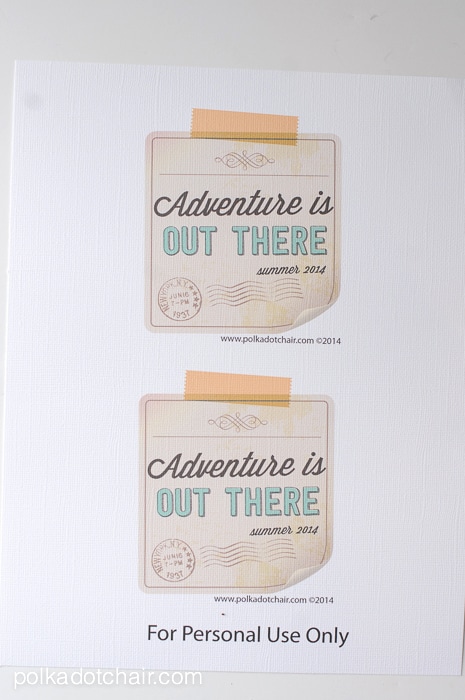
Being a big fan of the movie UP, I decided to borrow a little bit of inspiration from Disney this year for our annual summer journals. I made an “Adventure is Out There” printable for the journal’s front (You can download it for free on my blog, click here).
Keeping with that same theme, I also covered the front of the journal with an old map! If you’re headed somewhere fun for a summer vacation, you could use the map from the place you will visit.
Supplies
Want to make one? Here’s what you’ll need:
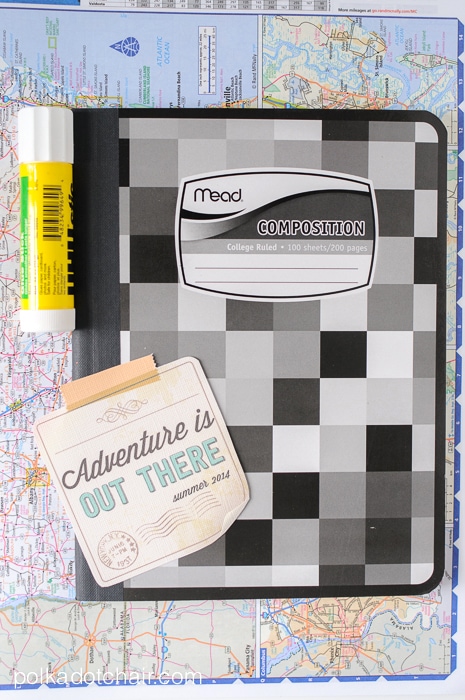
- Composition Notebook
- Glue Stick
- A map at least as big as your notebook
- an Exacto knife
- Washi Tape
- Free Printable Title (download here)
Directions
Print and cut out the title for the notebook. I put two on a page for you.
Next, loosely cut your map about 2″ bigger than the front of your notebook. On the left side of the map, use a straight edge to get a straight, clean cut.
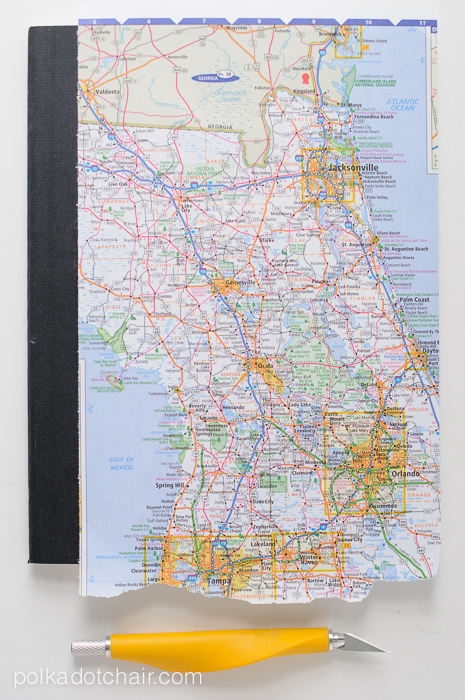
With your glue stick, apply glue to the back of the map generously. Glue the map to the front of the notebook with the straight edge you cut on the map flush with the notebook’s spine. Rub the map well to distribute the glue.
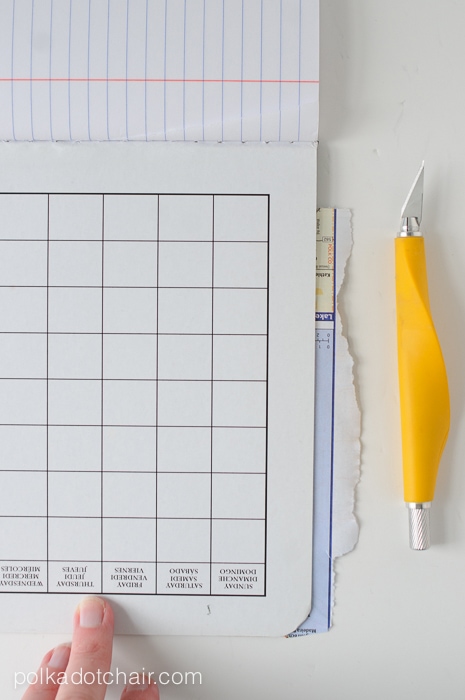
Flip the notebook over and, using an Exacto knife and a cutting mat, cut the map flush with the edge of the notebook. Depending on the age of your kids, you may want to do this step for them. My 12-year-olds can be trusted with an Exacto knife, but double-check before letting your kids use one.
Use a bit of washi tape to cover the edge of the map next to the spine of the notebook.
Repeat for the back cover of the notebook. The last step is to glue the title to the front of the book.
That’s it! Now all you’ve got to do is convince your kids to write in it!
This post first appeared on Skip to My Lou as a part of their Fun Crafts for Kids Series.


Super cute idea! I have to make one.
Are you planning on making a new “Adventure is out there” for 2015? I would love to use this with my kiddos!
Yes!!
It’s on my “to do” list!
Hello, I think that I would use modge podge or even clear contact paper to apply the cover to the book. Just a thought 🙂
These are absolutely adorable!!! The perfect gift idea that I have been dreaming to give my nieces that graduated from high school and about to start college:) Would it be possible to print them without the “summer 2014” written on them? Sure love all of your amazing talent!!
Thanks so much for sharing!
Cherie
Thanks for the post. I need to make one of these for me. I think I have all the supplies even.