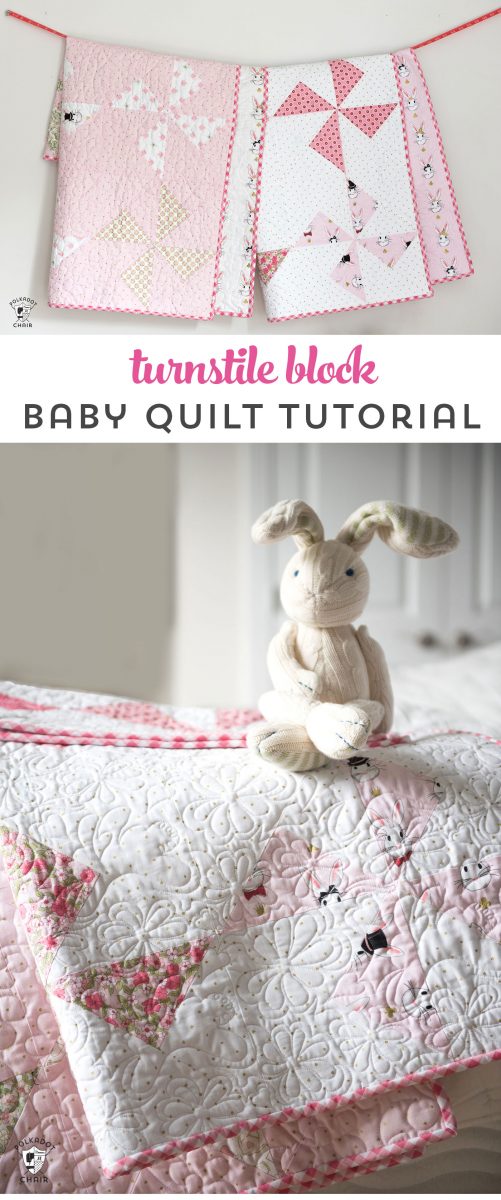
Free Baby Quilt Patterns featuring simple Turnstile Quilt Blocks!
Don’t you just love projects that are so simple that you can make them in a day? This Turnstile Quilt block baby quilt is one of those projects! It’s so quick to sew that I ended up making two. It would make a great beginner quilt project. Keep reading to find out more about this and a few other free baby quilt patterns!
Many of you may know that I’m a twin mom. My twins (boy/girl) are now 16 so we are pretty far in our life from the “baby” stage but I still have not forgotten the joys and challenges that come with taking care of two babies at the same time.
Our twins came after a few years of struggling to get pregnant. Our oldest was 5 years old when we were right in the “throws” of the struggle and I think was about to disown us if we didn’t get her a younger brother or sister soon.
Little did she know that a brother AND a sister were on their way and she would remark at a later point in her childhood that they, “ruined her life”. Thankfully they are all older now, and no one thinks anyone “ruined their life” anymore.
How to Get the Baby Quilt Pattern
Option 1:
You can now purchase this tutorial in PRINTABLE PDF version, with 2 of our most popular Baby Quilt Patterns!
Option 2: Read the Tutorial off of this website
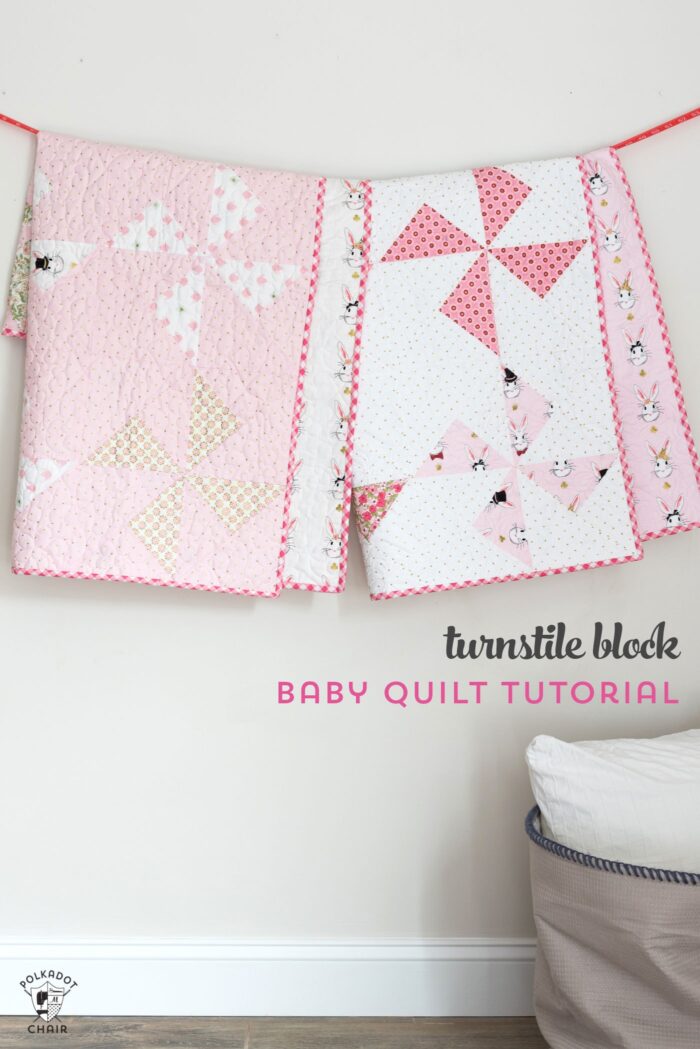
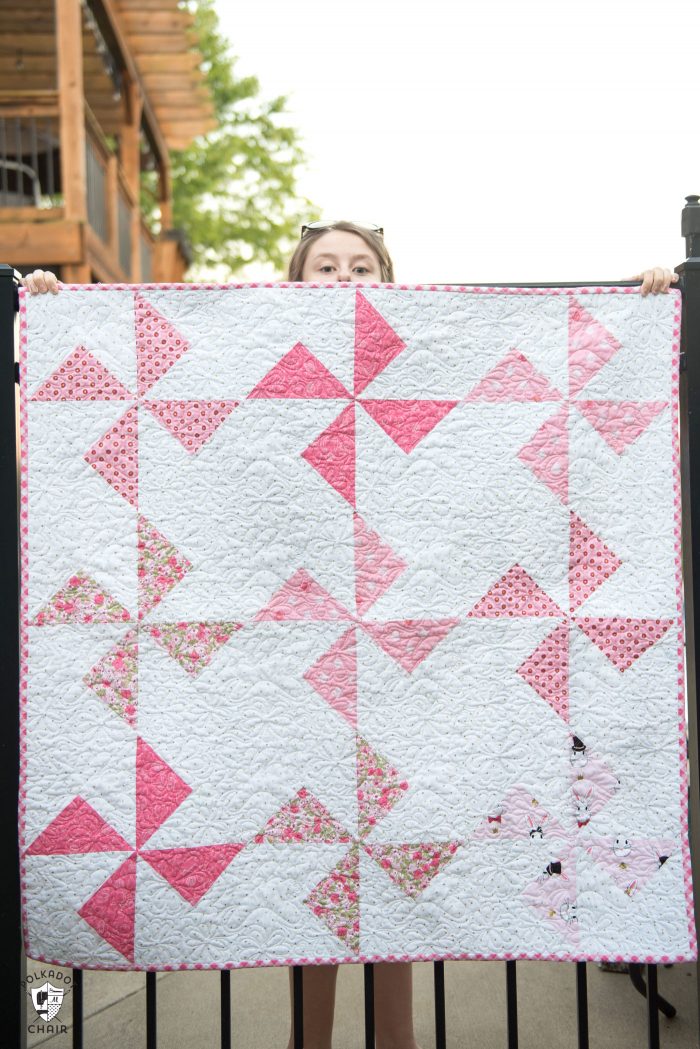
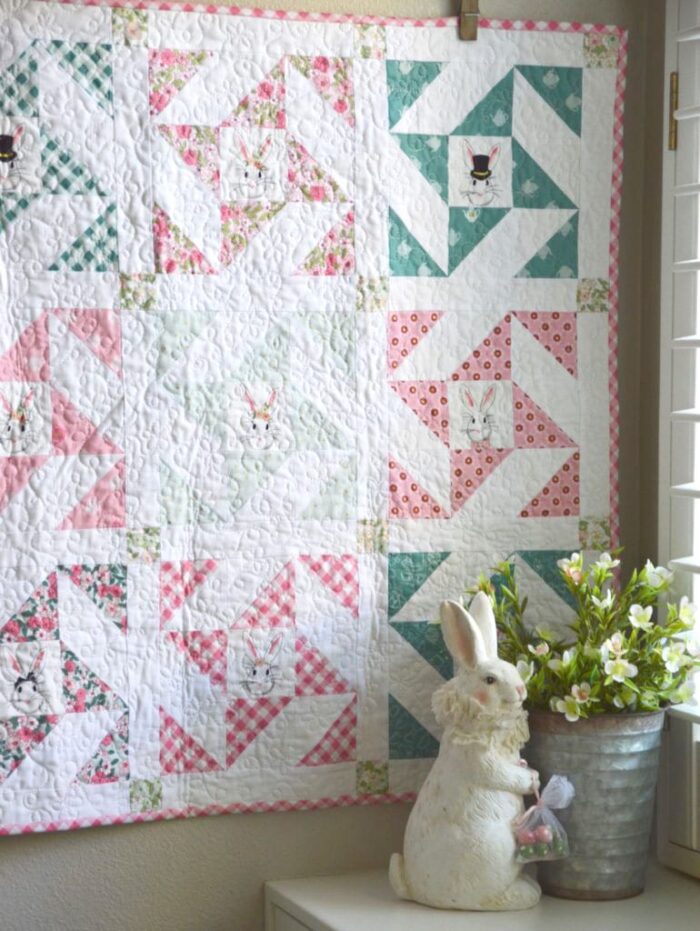
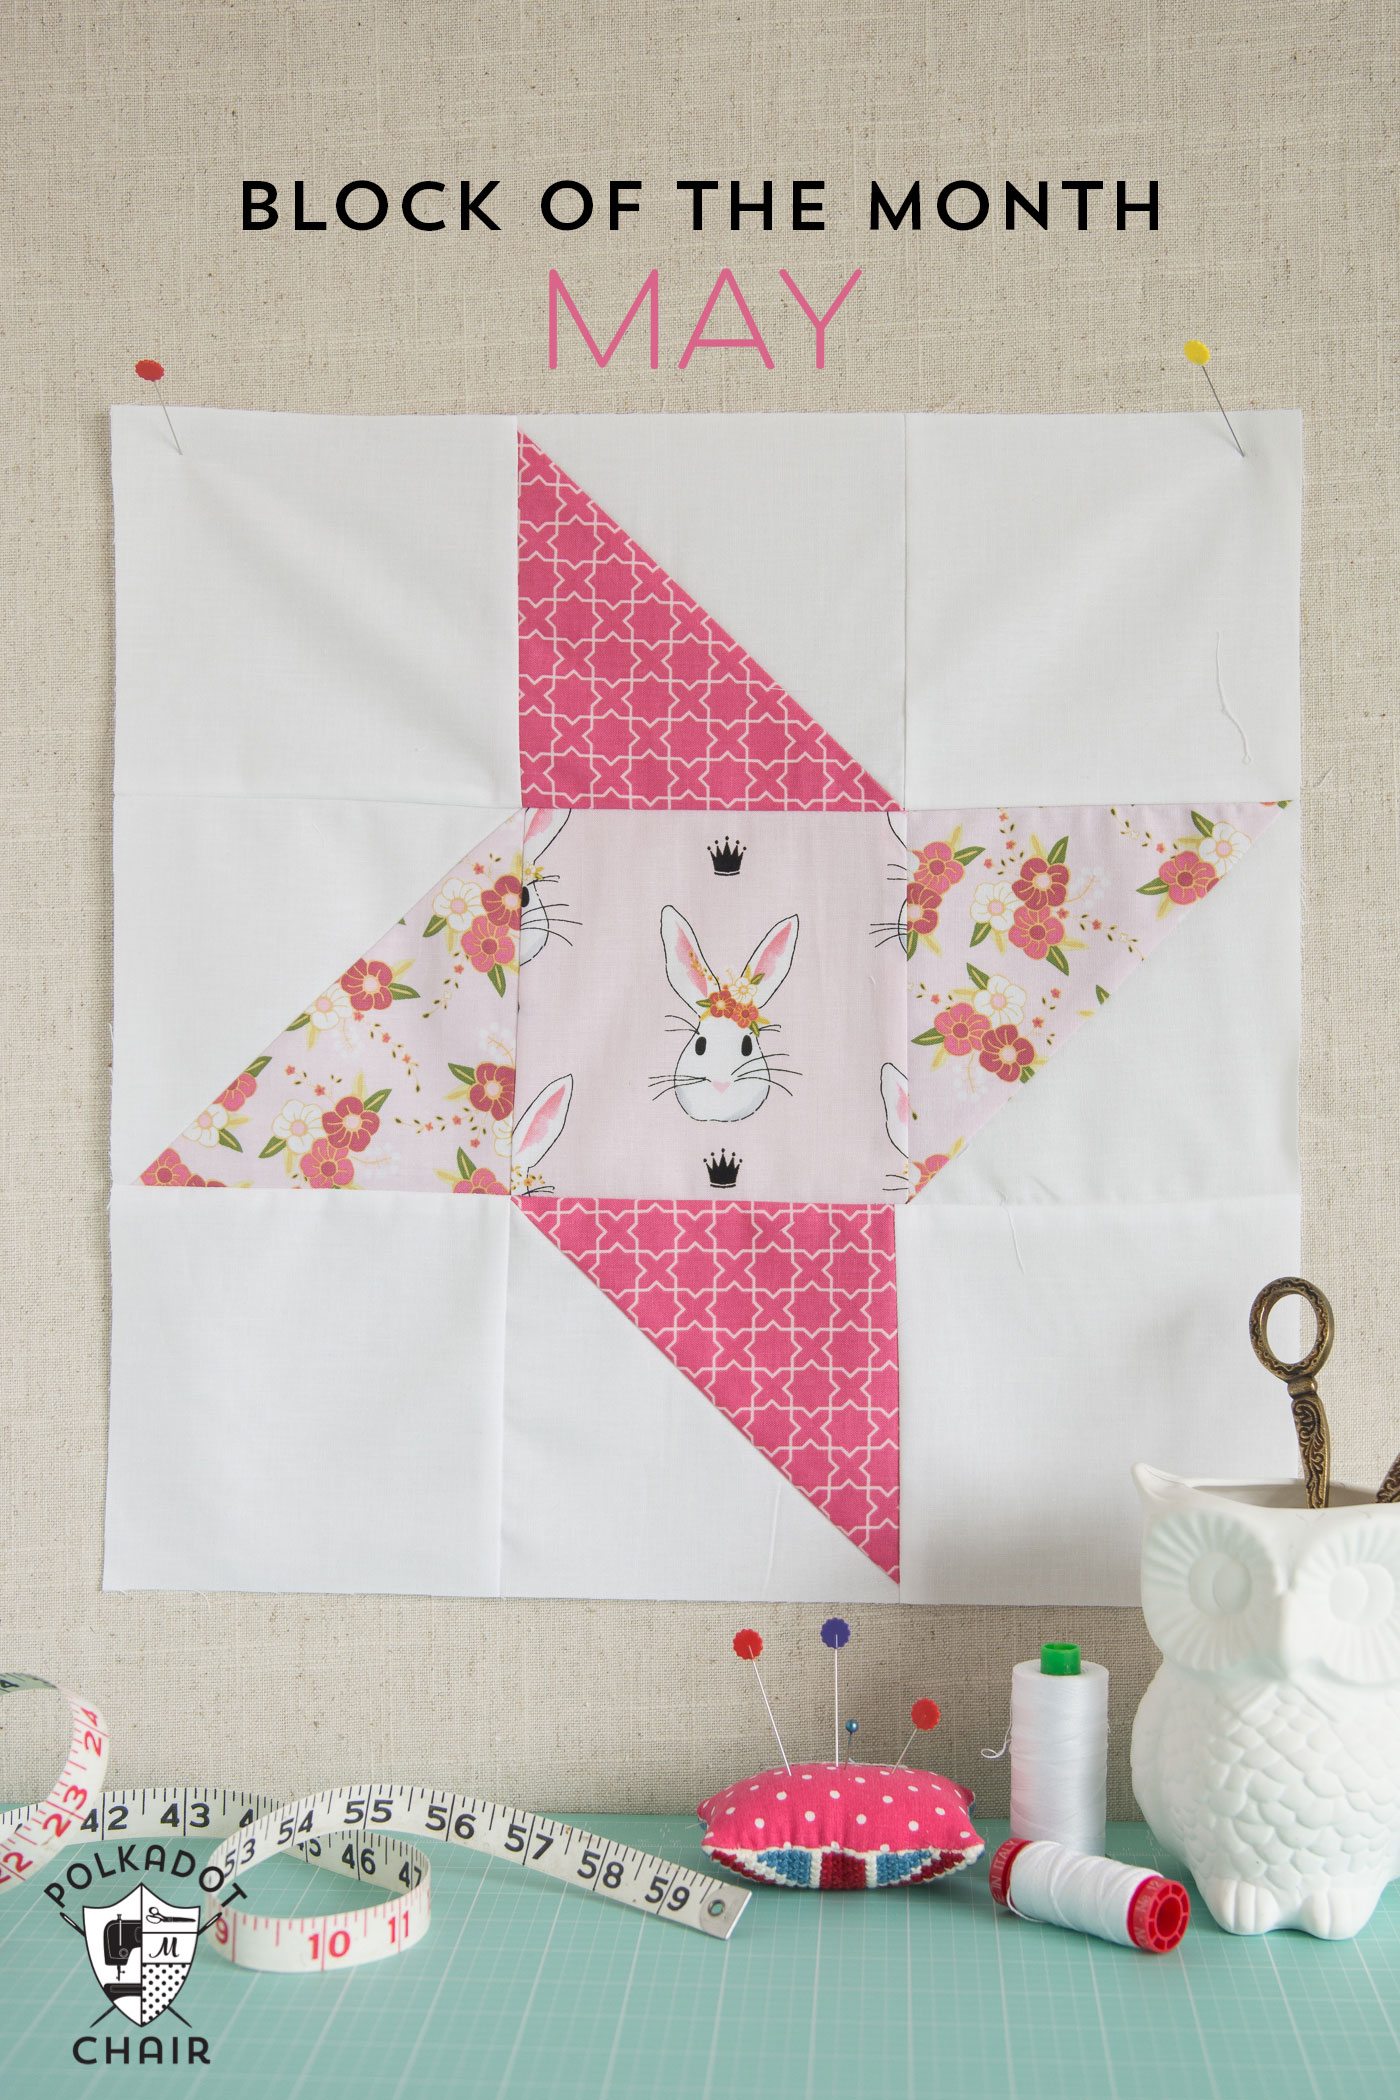
Turnstile Block Free Baby Quilt Pattern
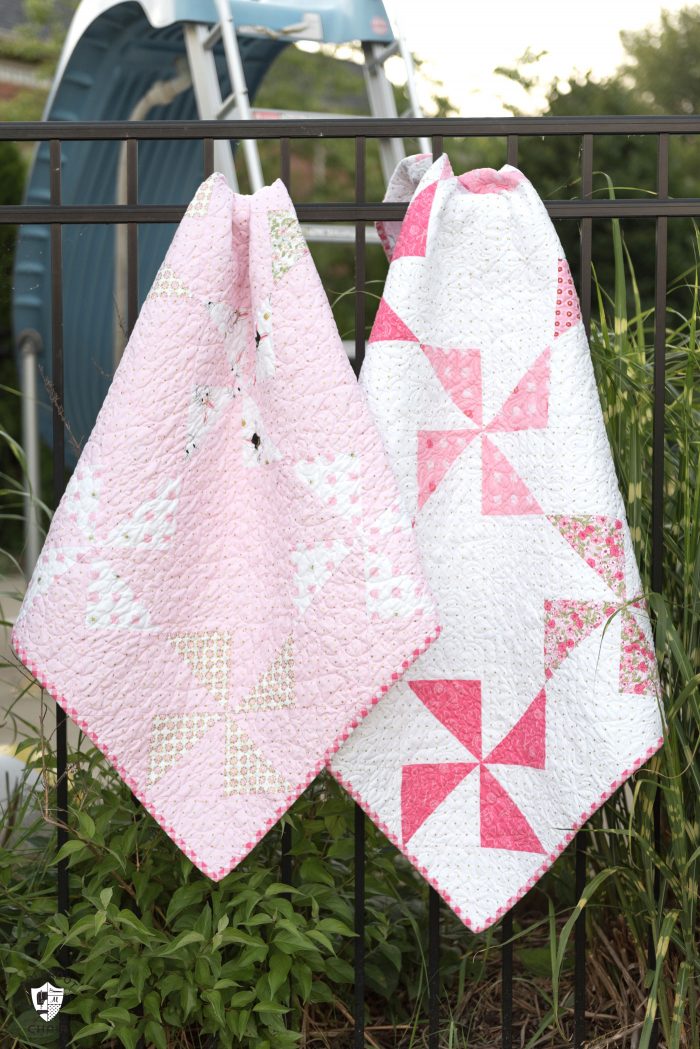
A friend of mine recently welcomed twin girls after years of struggle. To celebrate, I did what I know how to do best, make something. I stitched up two simple baby quilts using my Wonderland Two line of fabrics.
The quilts were super simple to piece, so making two at once was not a big deal. I debated about making the quilts EXACTLY alike and decided not to. Having twins myself I know that sometimes you need CLEAR boundaries of what belongs to who.

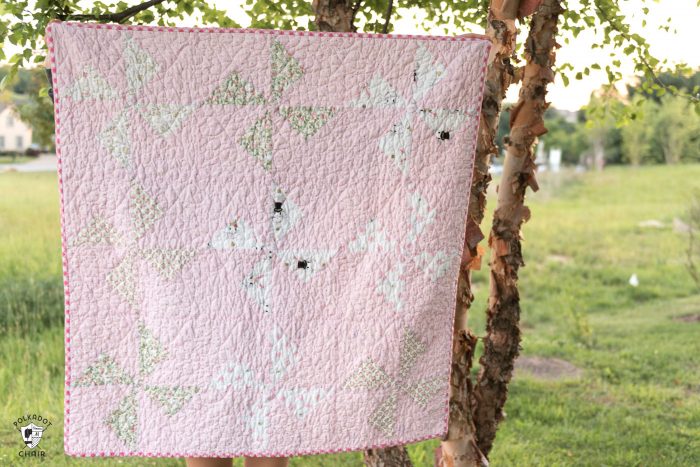
Instead, I made the quilts mirror images of each other. One was white with pink blocks and the other was pink with white blocks. I then also backed them in opposite colors of the bunny print from the line.
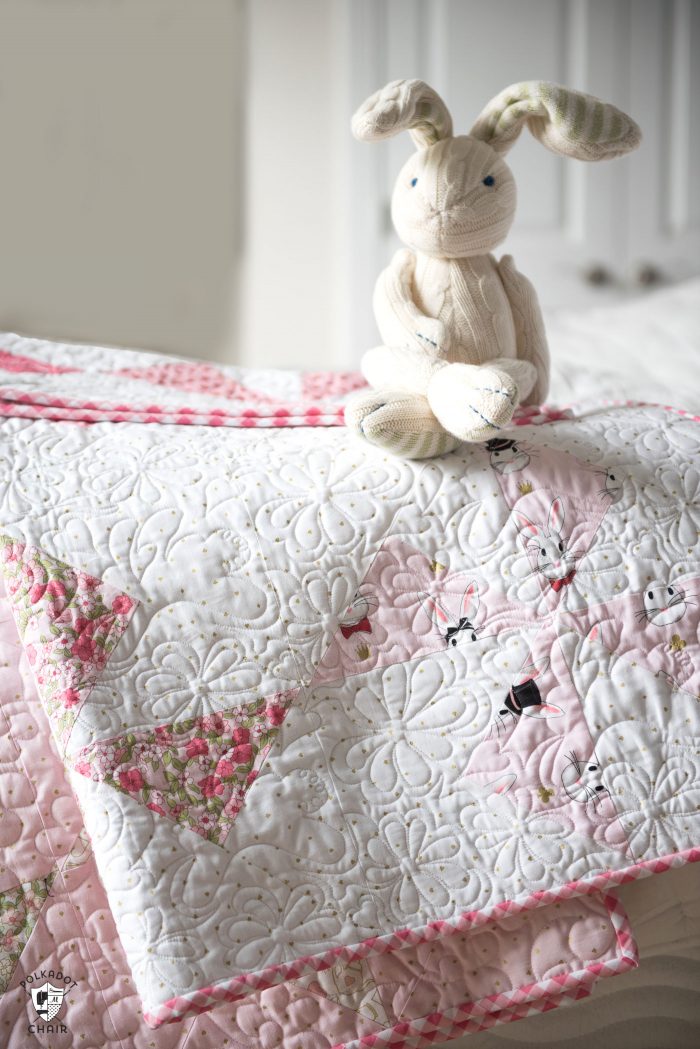
(one of my twins, now an expert “quilt holder”)
I love how they turned out!
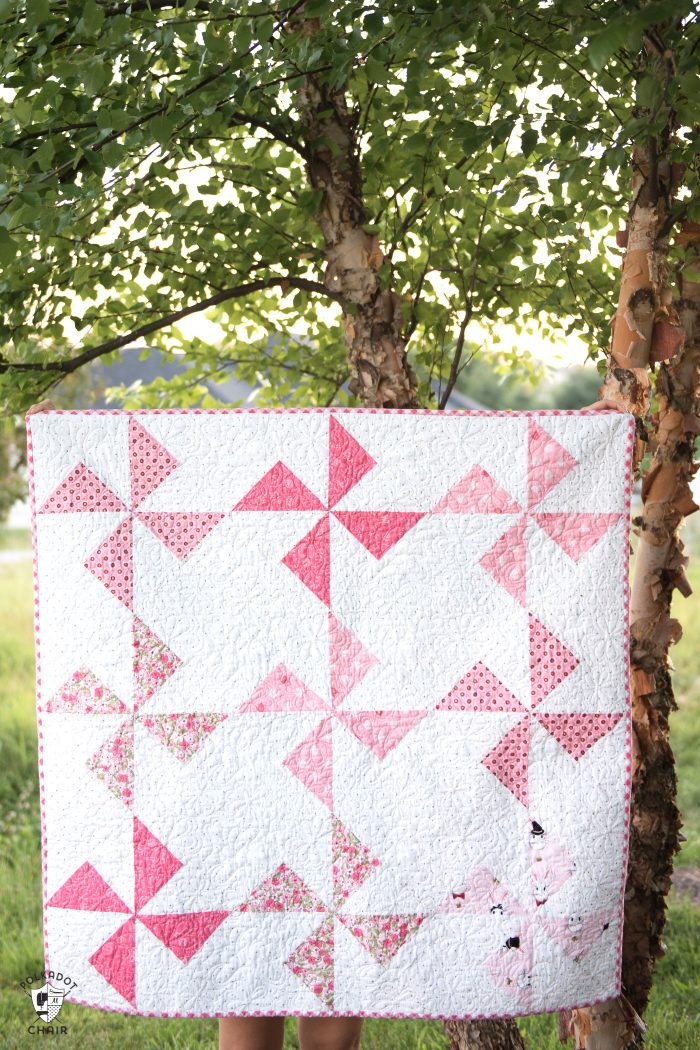
The pink quilt doesn’t photograph quite as well as the white quilt (I think the camera is confused by the pink background) so you can’t quite see all the detail in the quilting and the blocks, but it features many of the “sparkle” prints from the line and I think it’s just right for a baby girl!
Do you want to make a quilt?
Here’s what you’ll need- Quilt measures approx. 45″ x 45″ when finished and the instructions are for ONE quilt.
Supplies
- 9 Fat Quarters of Fabric for Blocks
- 2 Yards of Fabric for Background
- 1/2 Yard Fabric for Binding
- 3 Yards of Fabric for Backing
Cutting Directions:
- CUT for EACH BLOCK (there are 9 blocks in the quilt):
- 9 x 9 square of fabric cut from the print fabric
- 9 x 9 square of fabric cut from the background fabric
- Two 8 1/2″ x 8 1/2″ squares of fabric cut from the background fabric
- Cut backing fabric into two pieces 54 x width of the fabric and sew them together along the 54″ sides using a 1/2″ seam allowance. This will become your quilt backing.
Assembly Instructions
Note: Due to some confusion with the block construction, I’ve added photos of each step of the block construction. To make it easier to see the instructions, I’ve created them from smaller squares using a stripe fabric so you can see the direction of the blocks easier. Just know that your squares will be larger, the smaller squares in the photos are for illustrative purposes only.
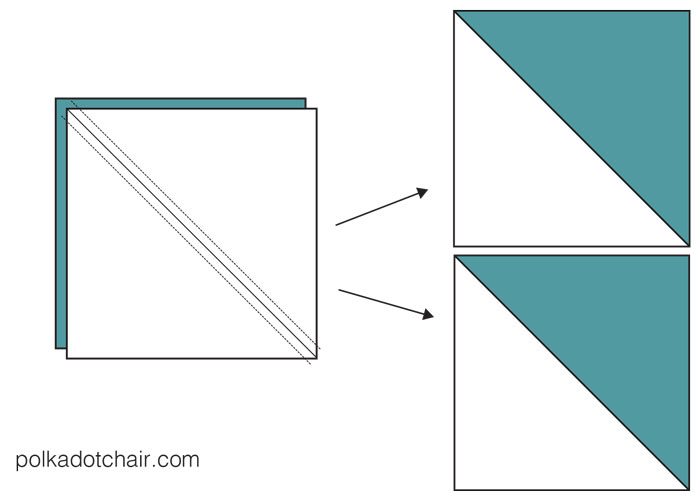
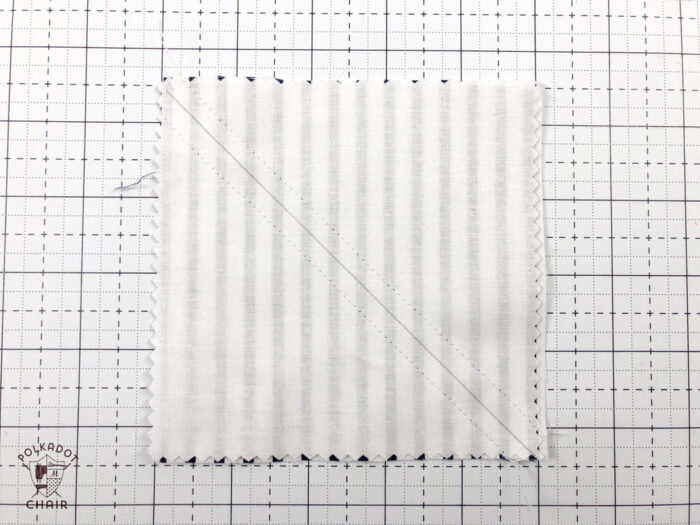
Begin by making two HST from the 9×9 pieces of fabric. Draw a diagonal line on the wrong side of the 9×9 background fabric. Lay it right sides facing with the 9×9 print fabric. Stitch 1/4″ off each side of the line.
Use a rotary cutter to cut the blocks in half along the line you drew. Press (for more help with making HST see THIS post or THIS post)
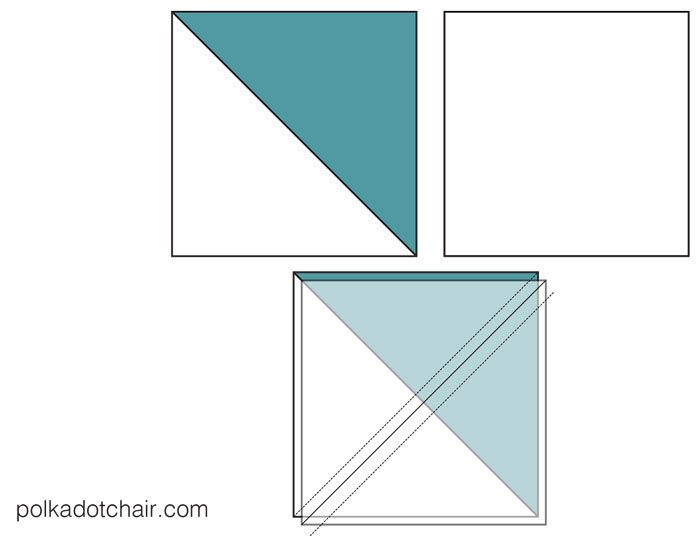
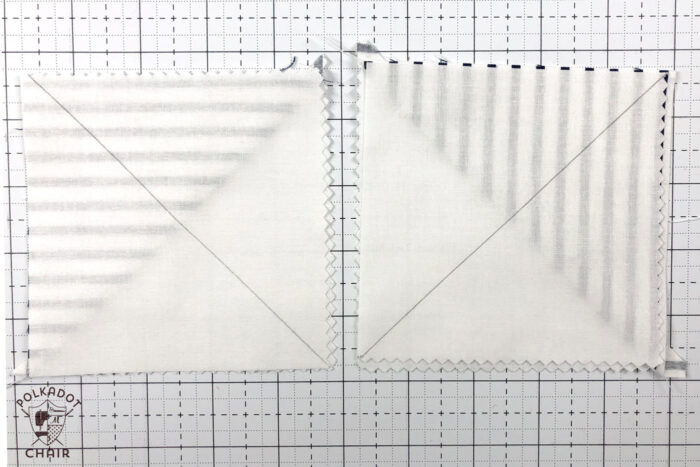
Draw a diagonal line on the wrong side of both of the 8 1/2″ squares cut from your background fabric.
Layer one square on top of one of the sewn HST so that the diagonal lines are facing in opposite directions. In the above illustration, I’ve adjusted the opacity of the top fabric a bit so you can see how the squares line up on top of each other.
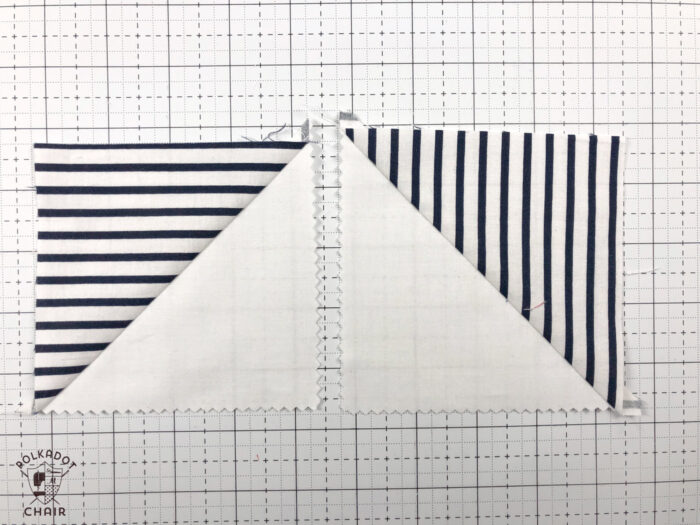
Stitch 1/4″ on each side of the line you drew. Cut along the line and square up the blocks to 8″ x 8″. Repeat for the other HST and background fabric.
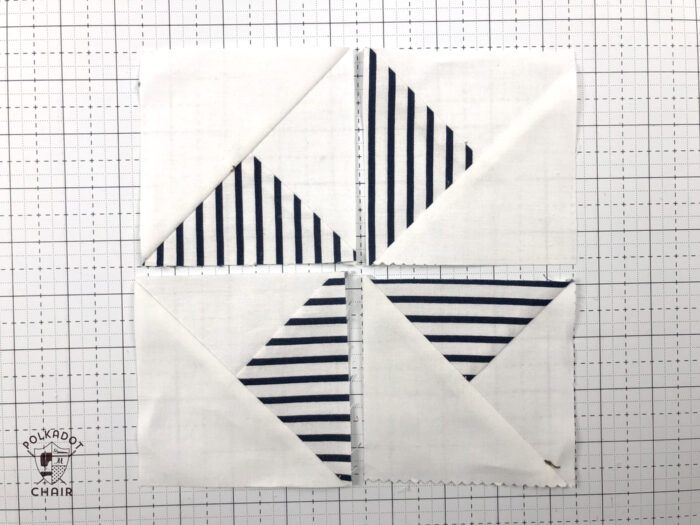
You will now have 4 blocks. Line up as shown in the diagram above. Stitch the squares together in the top row, then stitch the squares in the bottom row. Press seams and stitch two rows together.
Repeat until you have sewn 9 blocks.
Stitch the blocks together into 3 rows of 3 blocks.
Finishing:
Quilt and bind as desired
Just a quick reminder: This project along with ALL of the other projects on this blog are offered to you for free. The only thing that I ask is that you do not use them for any commercial purpose. If you have a shop, this is not meant to be a pattern for you to use in your store. It’s meant to help build the online community of people who all LOVE quilting. Please respect that so that I can go on sharing these projects for everyone. If you have a shop and want to kit this quilt, just shoot me an email and I’ll send you a PDF with a unique url to include in the kit taking your customers to the directions online.
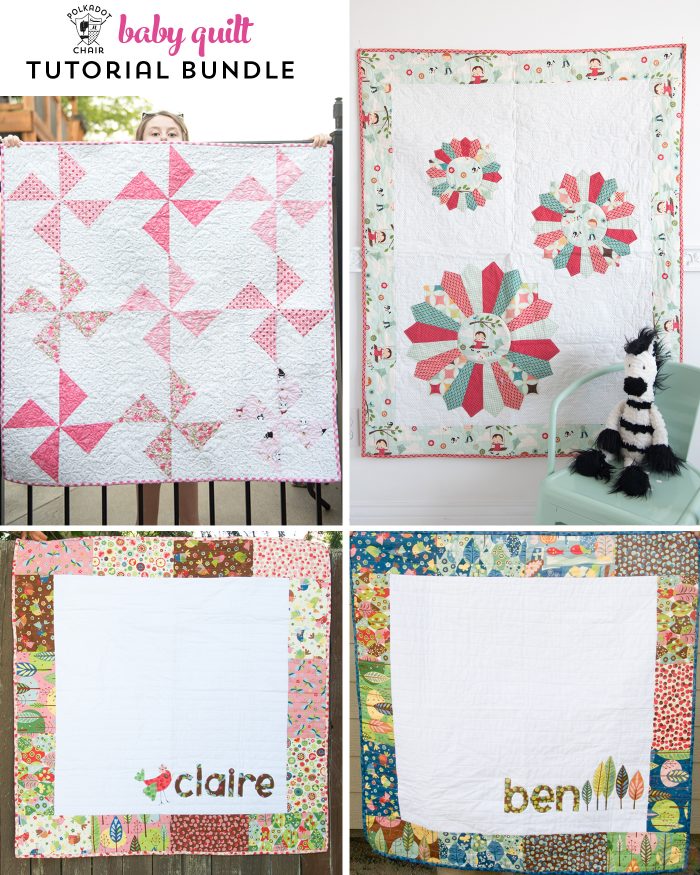
If you liked this baby quilt pattern then you may also enjoy these free quilt patterns and tutorials!

I made this quilt top quite awhile ago and just getting around to finishing it (maybe two years???). I am noticing that the points on the pinwheels are right to the edge of the fabric, so even a quarter inch will cut off the tips. It looks that way in your directions too. Is this right? If not, how can I fix it? Adding a small border would still cut off the tips. Any advice? Judi
You can add a small border if you want, but ther e is not a mistake in the directions. This is just the nature of sewing Half Square triangles to each other. Since there is a diagonal seam, when you sew the triangle block to one seam the point is “blunted off” however when you sew the second seam of the block the point comes back. On the border of the quilt, there is not a seam on the side so it appears that you lose the points, but you don’t. You can either add a border or if your binding is 1/4″ it will bring the point back.
I finally tried the turnstile baby quilt. I couldn’t get Wonderland 2, but used pinks from Gingham Garden. I gifted it to a friend for her son’s firstborn. My friend said it was the prettiest quilt she has even seen, so I guess I did OK. It really was pretty easy, although a little challenging for my poor vision. Thanks for all you do for the quilting world.
Thank you for this pattern. I whipped up one for a baby shower this weekend. It turned out so wonderfully. Your directions were clear and concise. Thanks again.
I’m so glad you enjoyed it!
I purchased this pattern 2 years ago, and finally I’m brave enough to try it. I was just curious. Do you remember what background fabric you used? I never would have thought to use anything other than solid white. Your quilts are adorable. Thank you for sharing.
Beautiful. I am making memory quilts and this pinwheel on point is perfect!
ah ha, I figured it out!!! But I had to piece it together using construction paper to see how those triangles end up making one huge square!! cool, sorry for my ignorance.
I’m about to try this quilt but I’m confused how you get a 45″ x 45″ quilt when only using 3 finished squares across and down and you only start with 9″ square before cutting and sewing the triangles together which makes the squares even smaller than the 9″ in the end? 9 x 9 is only 27 and then take 1/4″ seams into consideration??? Am I thinking incorrectly?
Each FINISHED block is made up of 4 squares that are 9″ each.
Your pattern is darling–as are your line of fabrics! Thanks for sharing! Any tips on how the seams should be pressed? There is SO much bulk in the very center where all those seams converge. I’ve tried pressing to one side and pressing them all open and it still feels bulky. Just wondering what the designer did 😀
I loved the pinwheel quilts! It’s especially fun to see the two different versions. I got inspired and made one with batik pinwheels and a low volume background. It turned out well but next time I think I will cut all the squares out at 9” and make HSTs with the originally 8.5” background fabrics before putting them on top of the other HSTs. That way the assorted background pieces are all 1/4 square triangles.
Hello! Thank you for this great idea for a baby quilt. Recently found out I am going to be a grandma so finding you blog was quite fortuitous. May I ask where you got the stick hung pattern for the quilt? Thank you in advance.
Thank you for this! I was looking for a patter for my first quilt and I believe this is it!
Wondering if you made the stuffed bunny in this picture? If so do you have the pattern?
It’s purchased. I didn’t make it
This quilt is gorgeous. Quick question, do you not use wadding or anything in between the front and back fabrics?
On the turnstile quilt block I am having trouble getting the 4 blocks to make the turnstile. On your diagram the print block ends up on the same side on all four blocks but when you stitch and cut as per the instructions the print block is on opposite side for two of the blocks. I bought the pattern download from you but sure wish I would have tried it from the free instructions before spending the money. Can you tell me what I’m doing wrong?
If you notice my quilt in the example, my bunnies are not all facing the same direction. They are rotated.
The diagram is with solid fabrics, which is why I think some were confused.
I was so happy to find this tutorial! I love this pattern! I have one question. Which way did you press your seam allowances? I am in the process of making it for my upcoming granddaughter. I have finished three blocks and have pressed the seams three different ways. What do you suggest?
These are lovely, I cant wait to make one.. Thank you so much for the free pattern!!!
Your Wonderland fabric is one of my all time favorite…I just love the gold and the pink and the bunny and have made mini quilts for all my grandaughters doll beds and they are adorable. Now I am working on a baby quilt. Thank you for being so creative and sharing your free patterns for those of us retiree’s on a budget. Happy Spring
Oh thank you so much. I love the Wonderland fabrics too! I have a soft spot for pink for sure!