How to Add a Waistband to a Pillowcase Dress
Use this simple modification to a pillowcase dress pattern to create an adorable girls’ dress.
Sewing with Sheets (Vintage & New)
The tutorial to make this will be at the end of this post, but I wanted to share the reason for this little sundress with you.
Even before I started this blog, one of my favorite things to sew with was sheets. I know that many sew with wonderful found vintage sheets, but I’ve always sewn with new ones.
Sheets are a wonderful way to get LOTS of fabric for a reasonable price. Do you remember when PBK had Liberty of London sheets??? I saw those in the catalog and knew that I would buy them; the trick was being patient enough for them to go on sale.
Good Liberty prints are upwards of $20 a yard at the fabric store. These sheets (actually, this is a twin duvet cover) yielded me the equivalent of 5 yards of 60″ wide fabric. That’s probably over $100 worth if you pay retail. I can’t remember what I bought the duvet cover for, but it is nowhere near $100.
For example, this duvet cover is on clearance for $9.99. You can get 5 yards of fabric out of it!!! It would be the perfect print to make a girl’s skirt or dress or add an accent to a pillow.
Traci of Amazing Mae is a good friend of mine and has many ideas on her blog for sewing with sheets. She always amazes me with her creativity and the things that she thinks to sew with. She uses both vintage sheets and new ones.
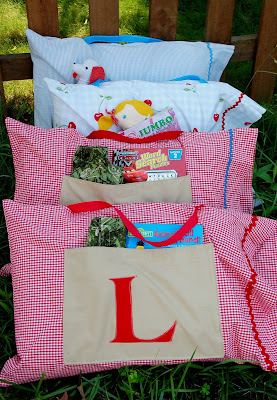
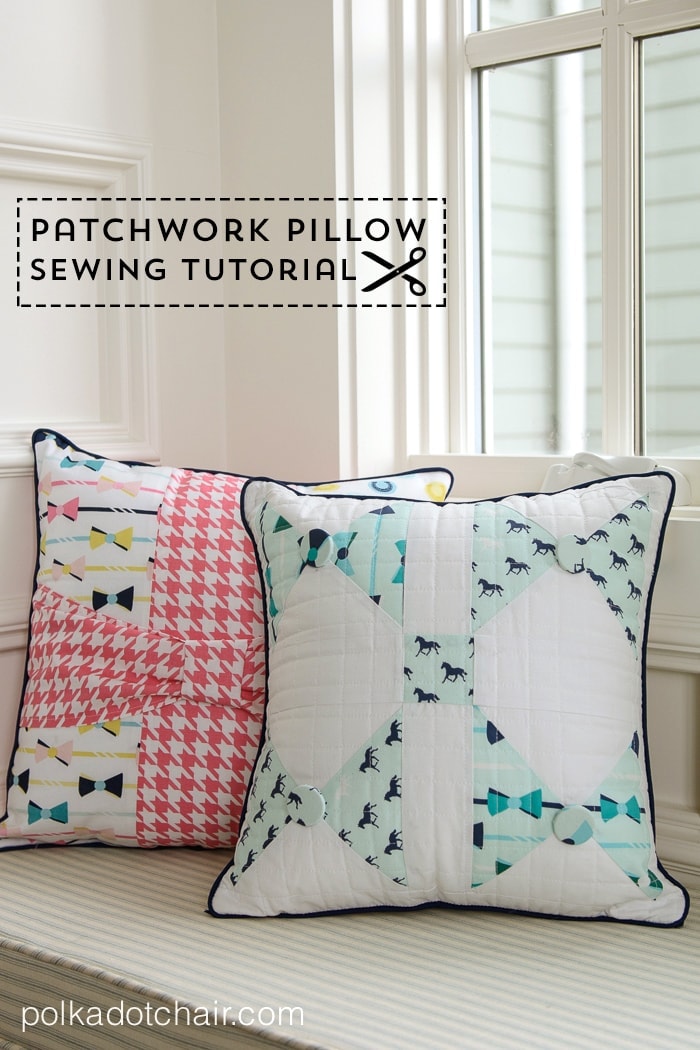
These Road Trip Pillowcases are a favorite project of mine. You can get the info here.
She also makes pj’s out of sheets. Wash them a few times, and they get super soft and comfy.
Another project that I saw online recently was this beautiful display by Amy of Diary of Quilter.

She used vintage sheets that she had been collecting for the display. You can read more about it here.
Now that I have hopefully convinced you to start hunting for sheets. I thought I’d share with you a quick tutorial, a modification of the classic Pillowcase Dress…
So is it funny that I made a pillowcase dress out of a duvet cover and not a pillowcase??
Pillowcase Dress Variations
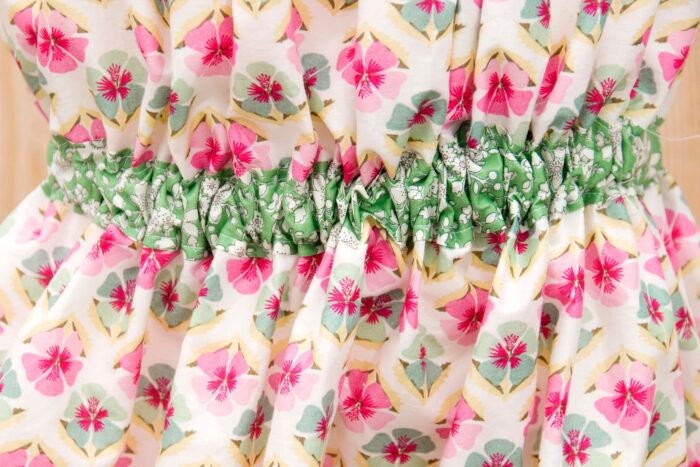
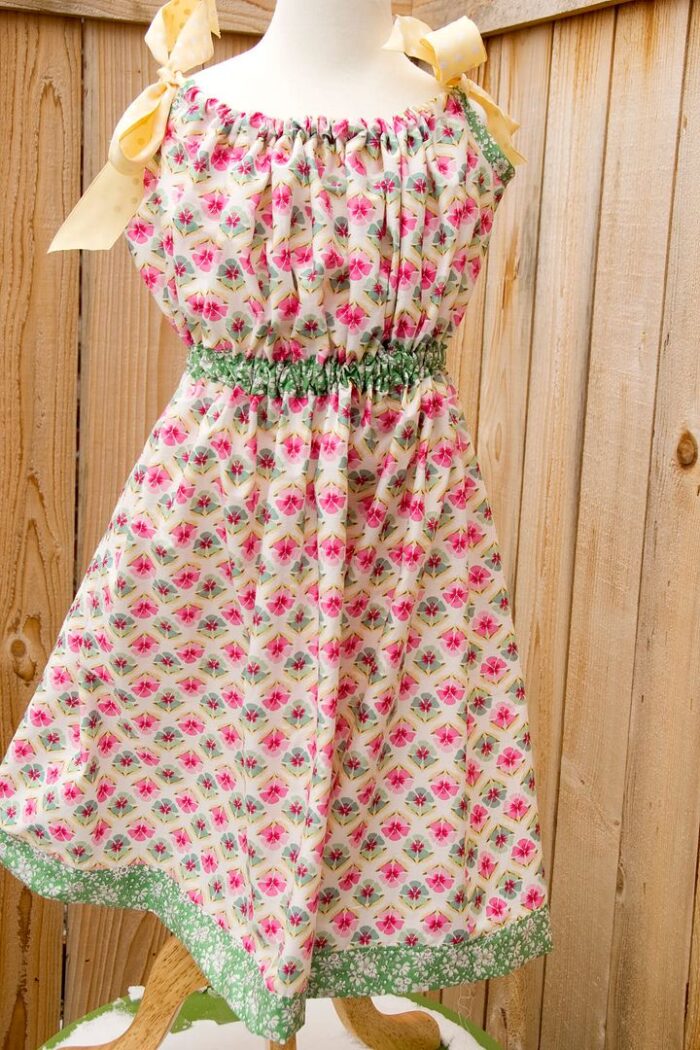
I thought the standard pillowcase dress needed was a waist; as my daughter is getting older, I think she wants a bit more shape to her clothes.
I’ve been making pillowcase dresses on my blog this year, trying to find different variations to the same basic simple pattern.
To make this dress, you need to make a pillowcase dress. You can use our tutorial if you don’t have a favorite pattern already.
The measurements for my dress were 37″ wide by 38″ long with a 1″ x 6″ cut out for the arms. I also used ribbon for the neckties, not elastic, and used bias tape to fill the holes. The band on the bottom is made from a 4″ wide piece of fabric. It’s essentially the same construction process I used for the Pillowcase Shirt tutorial that you can find here.
What Fabric to Use
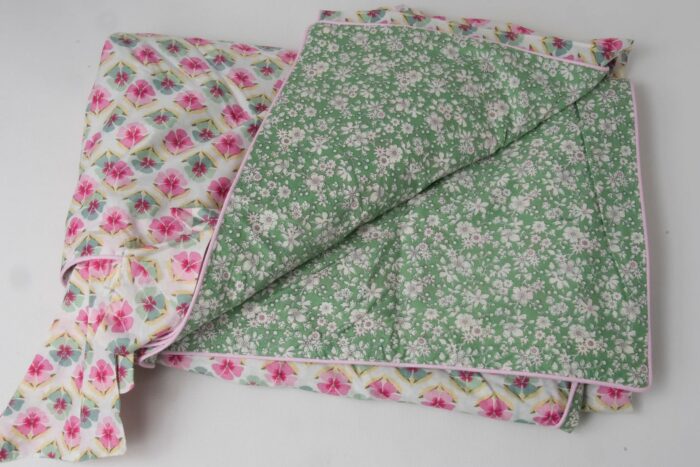
This project, I think, works best out of lightweight cotton. (quilting weight would be fine, just not heavier than that)… Something like a sheet washed several times or a voile fabric (it would be great out of the Anna Maria Horner Voiles or Velveteen’s). This particular sheet set is Liberty of London, which is similar in weight to a voile fabric.
Supplies
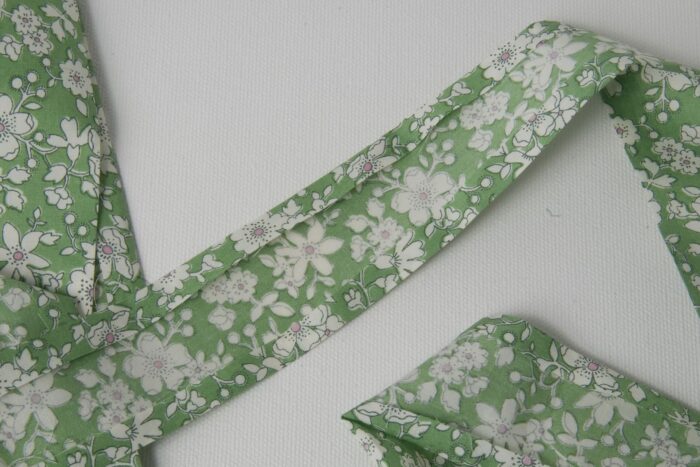
- 2 yards ribbon (for the neck ties)
- 2″ strip of fabric long enough to go all the way around your dress. (this will hold the elastic waist). If you are not sure, cut 2 strips 2″ wide from 44″ fabric.
- 1/2″ wide elastic
Instructions
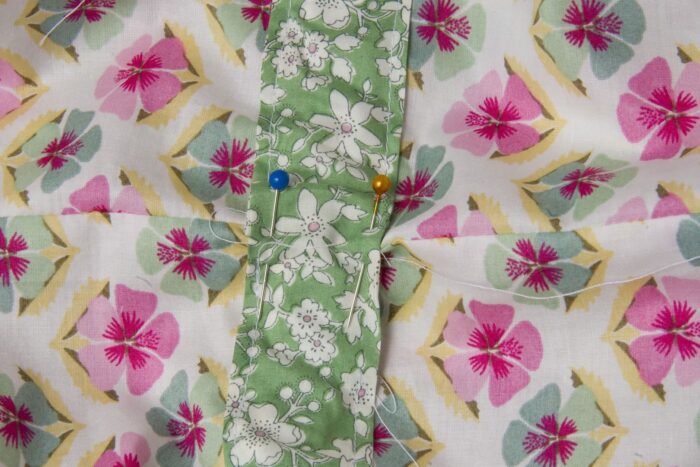
After you have sewn your pillowcase dress. Take your 2″ wide piece of fabric and press it under 1/4″ on each long edge. In addition to the pillowcase dress fabric, you will need:
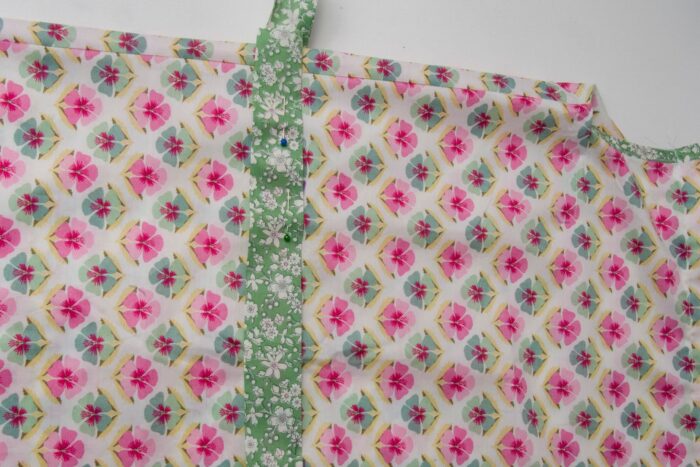
Measure down 1/3″ the length of your dress. For example, if your dress is 30″ from neck to hem, it measures 10″.
Place pins 10″ down and several spots to make sure your fabric strip is placed on straight.
After you have pinned it in place, leaving about 1″ overlap at each end (you are wrapping your 2″ wide piece of fabric all the way around the dress like you would a belt). Leave the opening in the side seam.
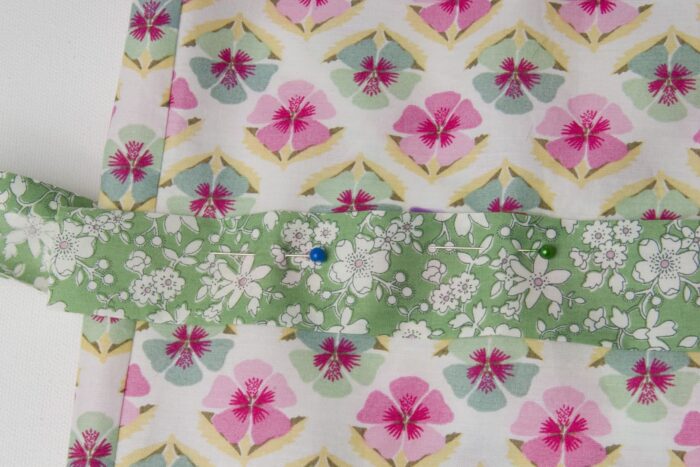
Stitch in place close to both edges of your fabric strip. You are making a casing for your elastic.
Cut your elastic to the correct length (measure your child’s waist, then cut the elastic the same size).
Feed the elastic through. Stitch ends of elastic together.
To close the opening. Layover, the top of elastic and stitch, closed where pins are. Fold under the raw edge of the fabric 1/2″.
To finish up, thread ribbon through the neck and hem the dress!
I just made one for my niece, sight unseen since Christmas. It turns out that I over estimated the dress width a bit and it was down to her knees rather than the planed tunic shirt. There were matching short bloomers prepped up to compensate for the assumed short hem, but those came out more Victorian at knee length.
It’s a lucky thing that the whole works was gathered because she she now has a set bordering on Gothic Lolita summer wear. Since she was “a bit goth”(her words) anyway, there is a very happy 8 year old running around in purple flounce with powered blue trim.
Great job! Perfect for older girls!
Thanks for the heads up on PBK for bedding discounts. I hopped over there and the creative juices started flowing. Love your ideas.
Deanna in sunny AZ.
Very, very cute! You shoudl check oout my fabric swap. http://thepatchworkchronicles.blogspot.com/2011/01/fabric-swap.html
Although all of the ideas were great, I am so in love with the dress on the first photo. The colors and the design are matching great. Perfect for an easter brunch.
You’re awesome, Thanks for the link!!
Is there some tool that would make turning over and pressing 1/4″ edges more enjoyable? I am getting ready to do a lot of this for an apron that I want to make and thought I might ask.
Thanks!
The Dress is Precious! I love the road trip pillow cases!
Here in Utah, Downeast carries discounted Pottery Barn sheets, bedding, decor, etc. They have an outlet in West Valley, UT, which carries damaged or monogrammed items from Pottery Barn. Great when you are using it for sewing! I once went to a blow out sale there and bought all the sheets I could fit into a black garbage bag for only $30.
I love the idea of using sheets. I’m not sure why I haven’t thought of that.
very cute!