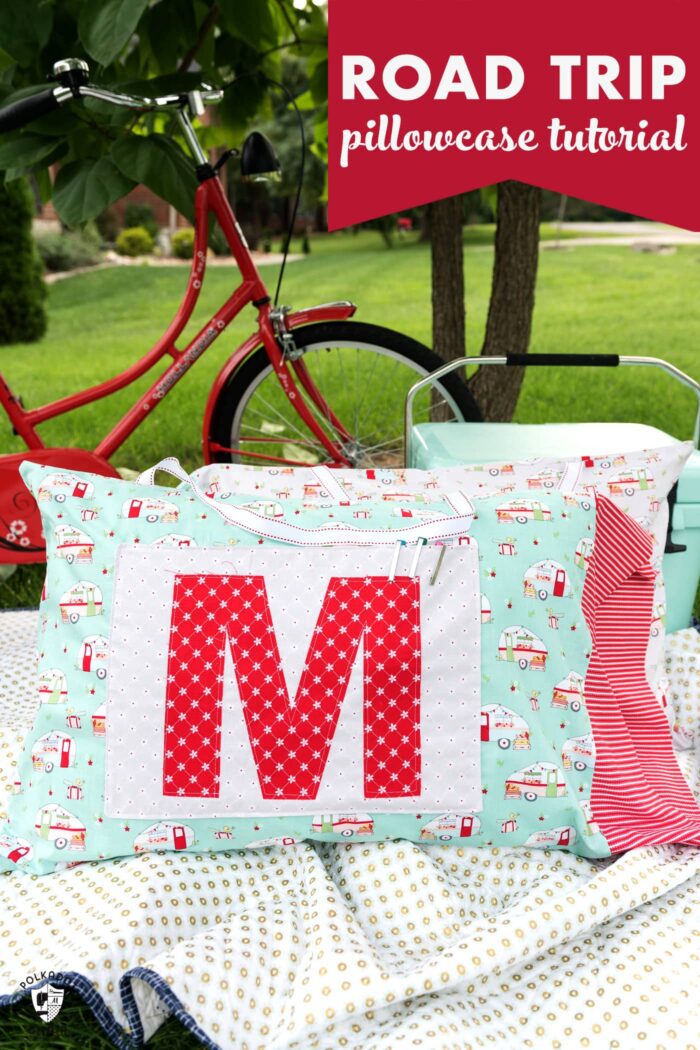
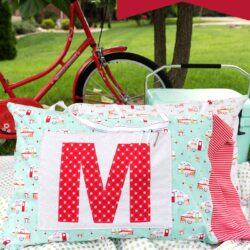
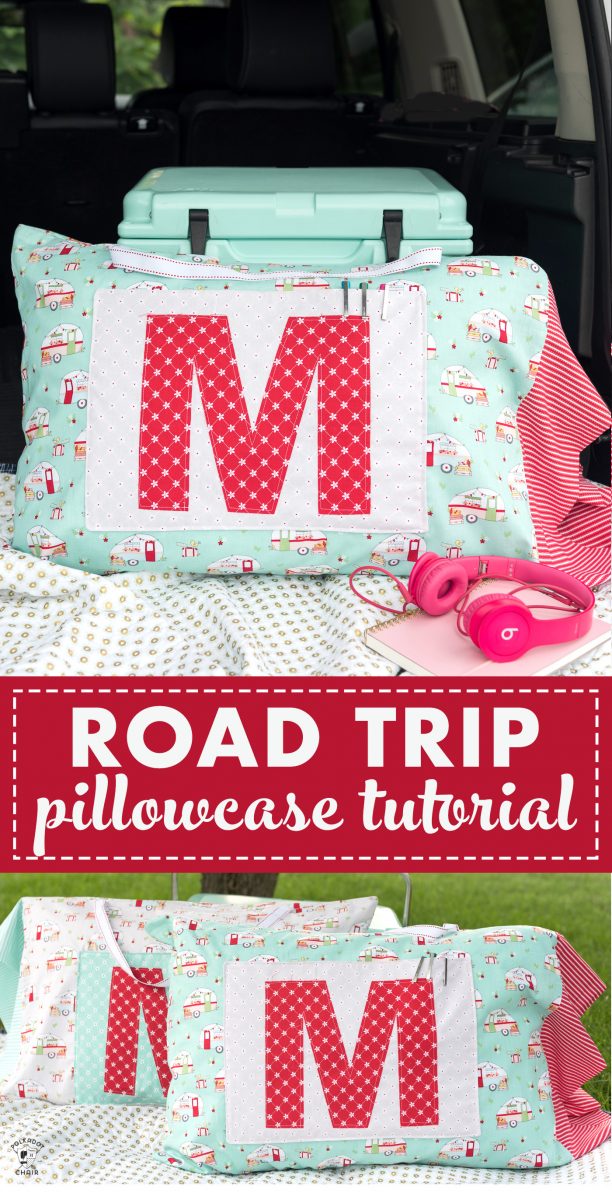
Road Trip Pillowcase Pattern & Free Sewing Tutorial
Tired of your kids losing all of their “stuff” in the back seat of the car when you’re on a road trip? Why not stitch them up this special pillowcase with a pocket to hold all their road trip stuff with this Road Trip Pillowcase Pattern?
{this post has been updated from a previous version}
This post was originally shared as a part of the blog tour for Bev of Flamingo Toe’s debut fabric line, Vintage Adventure. She’s known for her gorgeous vintage-inspired DIYs, sewing projects, and embroidery hoop art.
To see more about Bev, and get lots of fun project ideas for it, hop on over to Flamingo Toes. Here are two of my favorite new projects featuring Vintage Adventure.
What is a Road Trip Pillowcase?
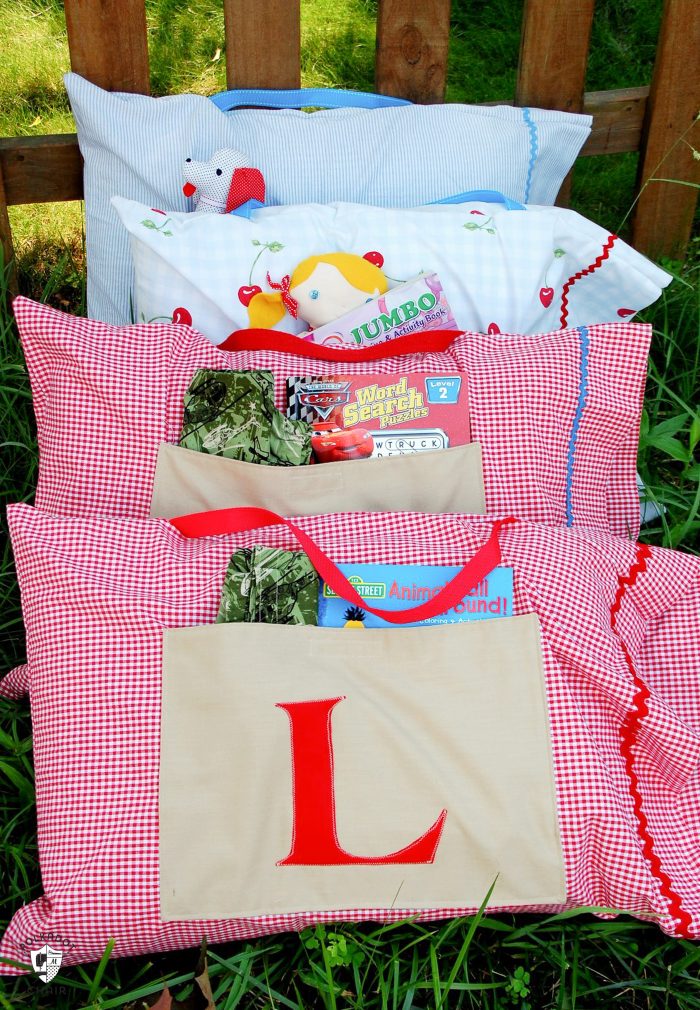
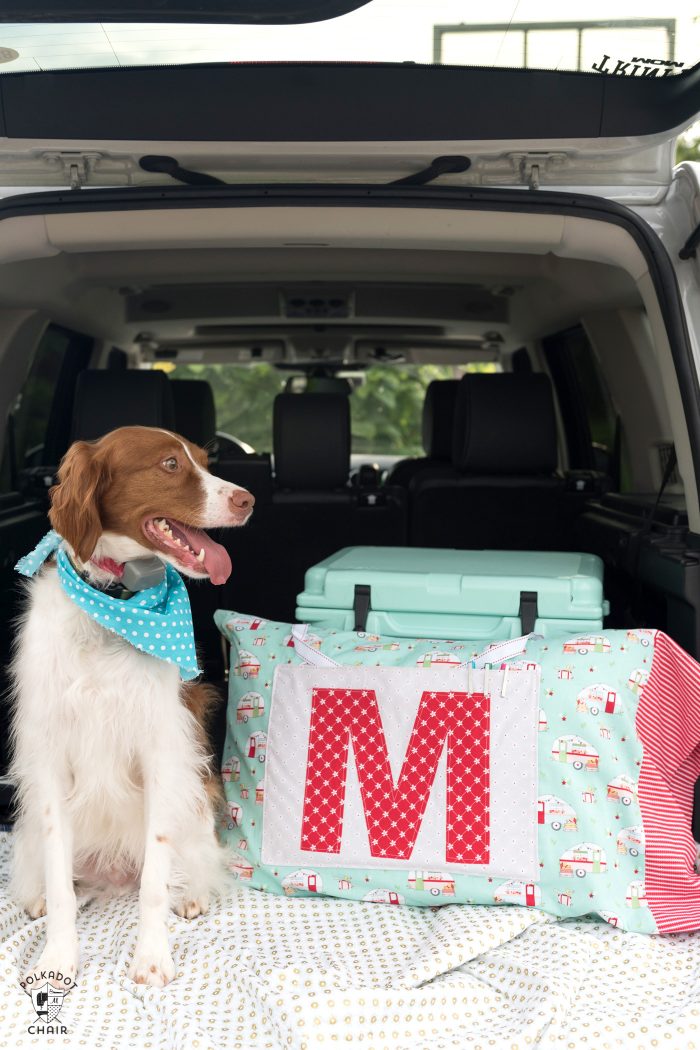
Since we have an RV, I knew right away that it would be so fun to stitch up a fun project to go in our motorhome. I immediately thought about a set of Road Trip Pillowcases that my dear friend Traci made years ago. She always comes up with the best projects and is such a big inspiration to me. She posted the tutorial for these special pillowcases on her blog YEARS ago.
I asked her if it would be ok for me to make the projects using her tutorial and share it with you, and she graciously agreed, so if you think you’ve seen this project before, you have! Don’t worry; she gave me her blessing to share it with you today.
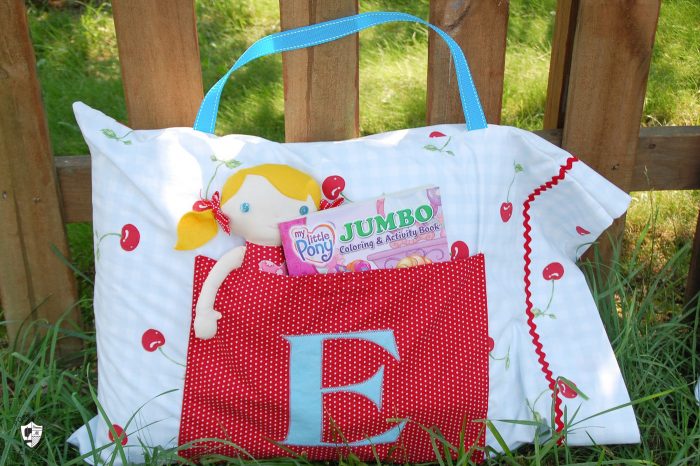
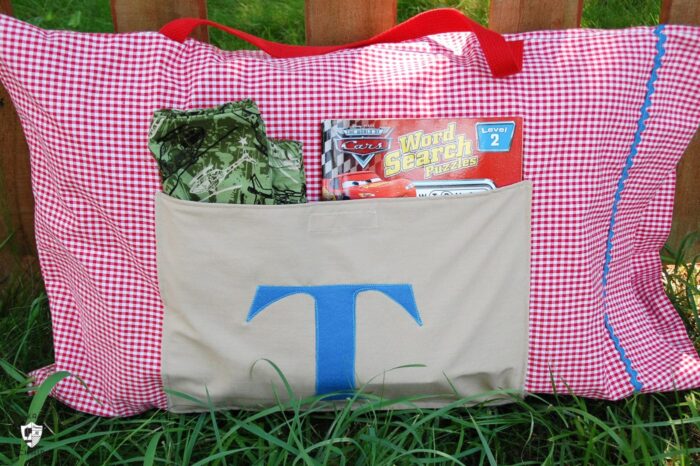
Traci’s pillowcases were made from vintage sheets and monogrammed for some really special friends of ours that moved away.
She stitched up the pillowcases for them to use on their road trip as they moved to another state. She filled them with all kinds of kid boredom busters perfect for a road trip. Coloring books, crayons, notebooks, and even a few snacks.
Additional Pillow Patterns
The tutorial in this post is for a pillowcase with a pocket; if you’d prefer a more complete pocket pillow, you may like our Reading Pillow pattern.
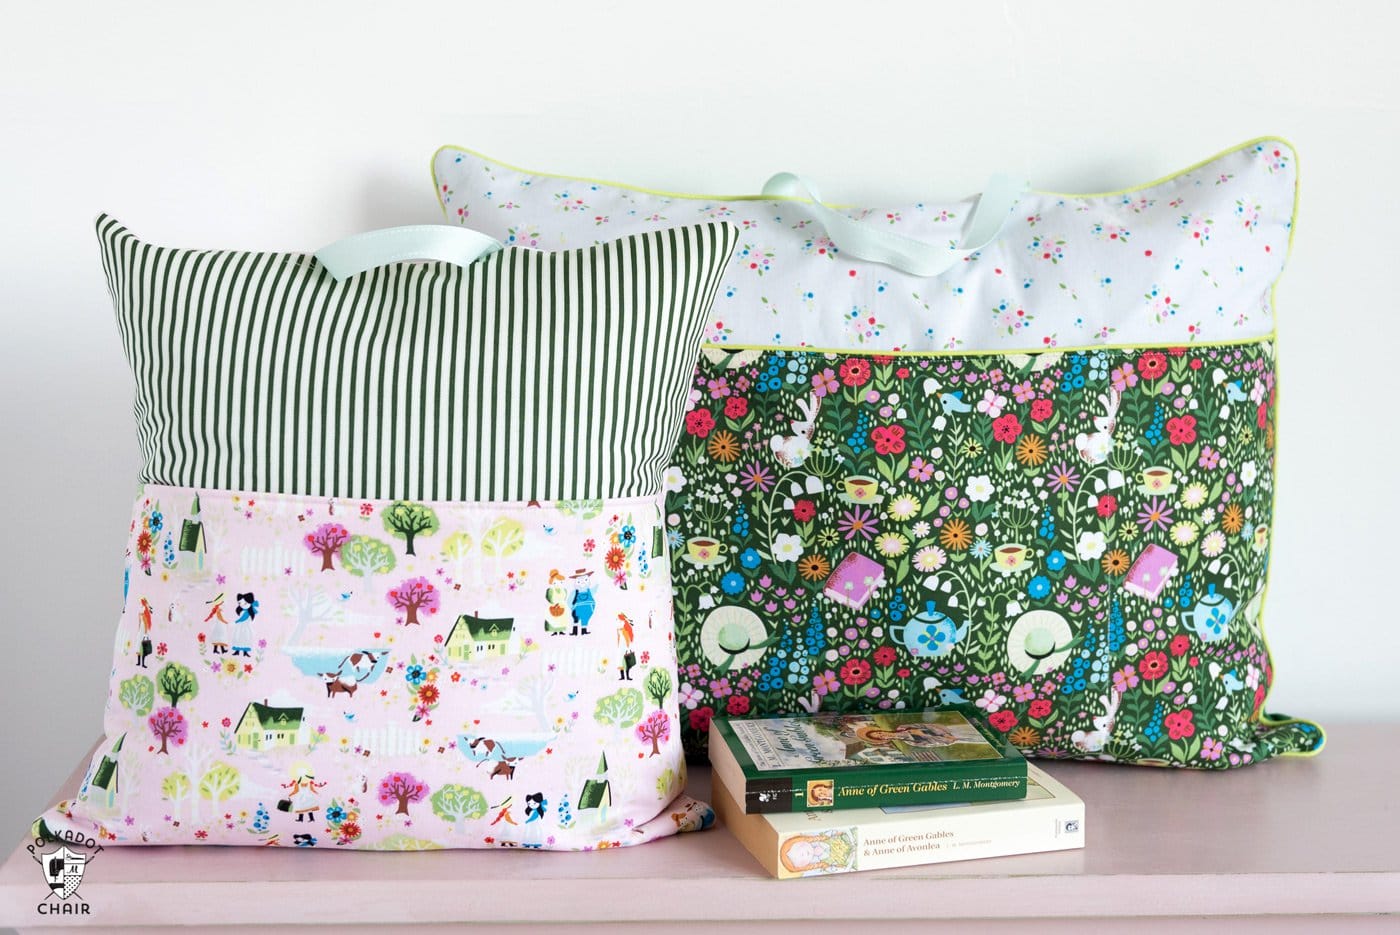
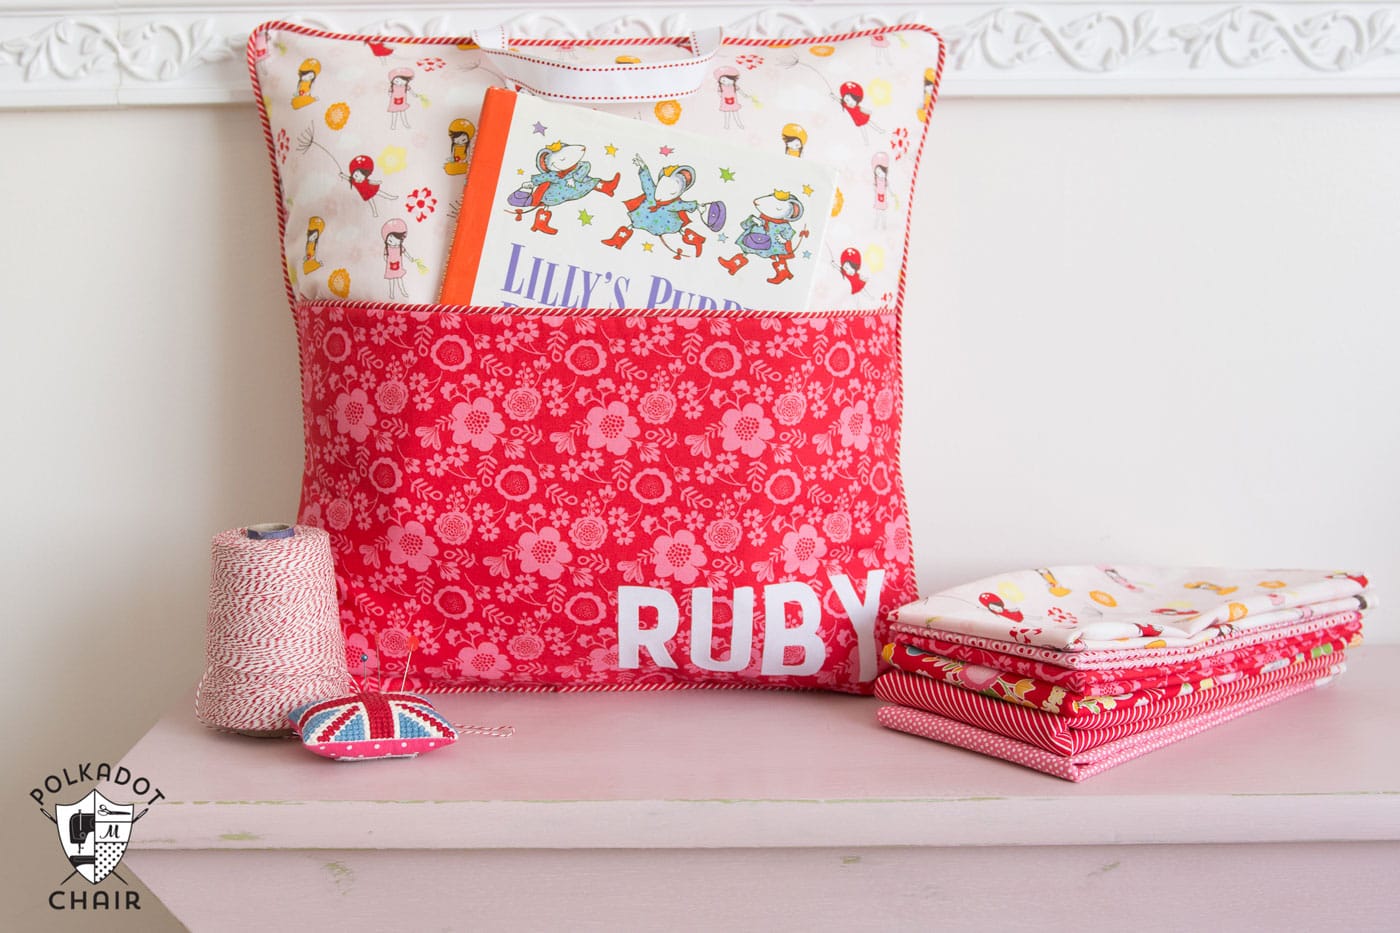
If you like this pillow, then you may also like my Reading PIllow pattern. It also features a pocket and a small handle. It’s just the right size for holding kids’ treasures. The pattern is available in two sizes.
If you’re worried about adding piping to the pillow, then you can leave it off!
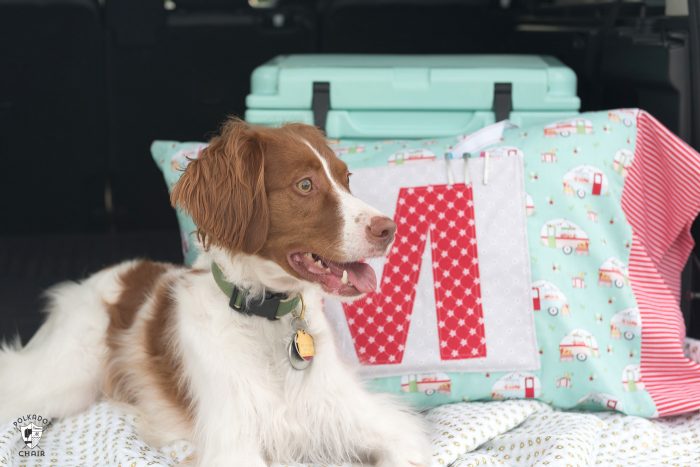
My Version of the Pillowcases
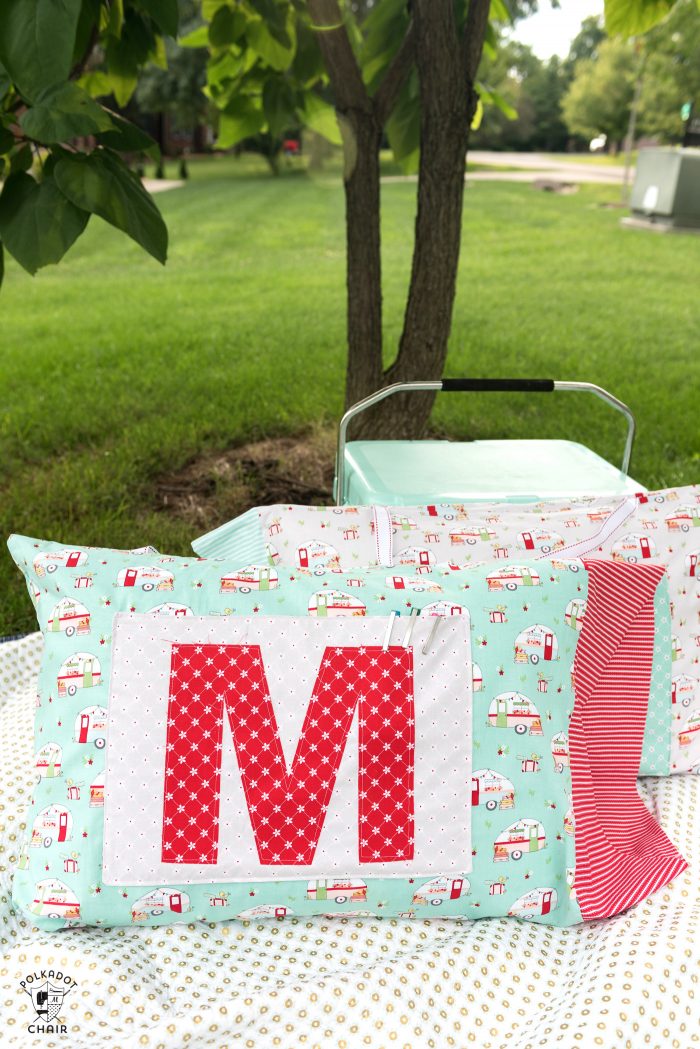
I followed her tutorial but made a couple of minor changes. Since my fabric was directional and I wanted the campers to be right-side up all the time, I added an extra seam. I also added a contrast band to the side of the pillowcase.
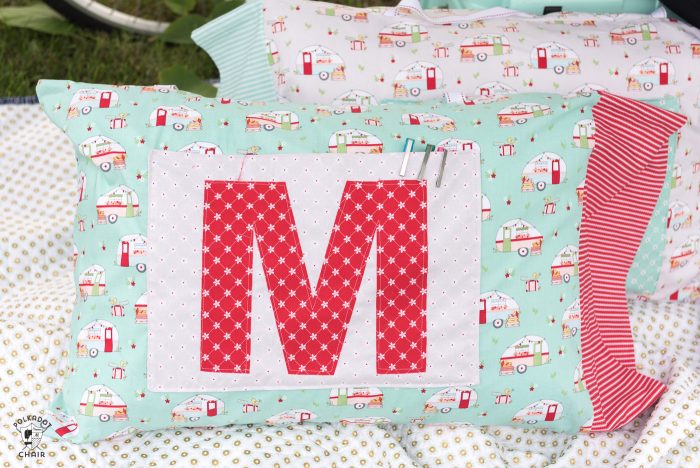
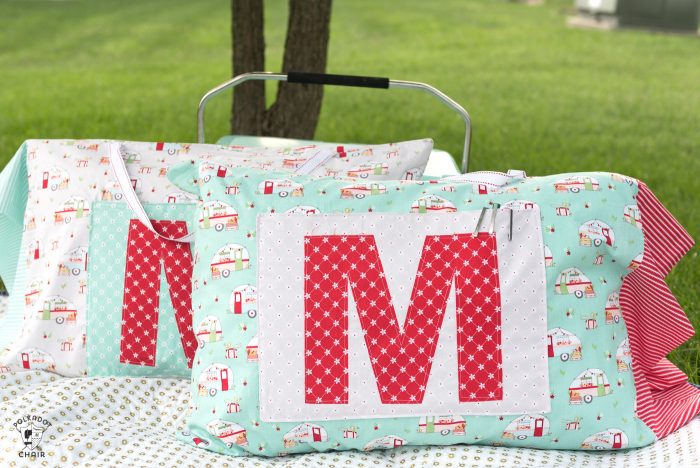
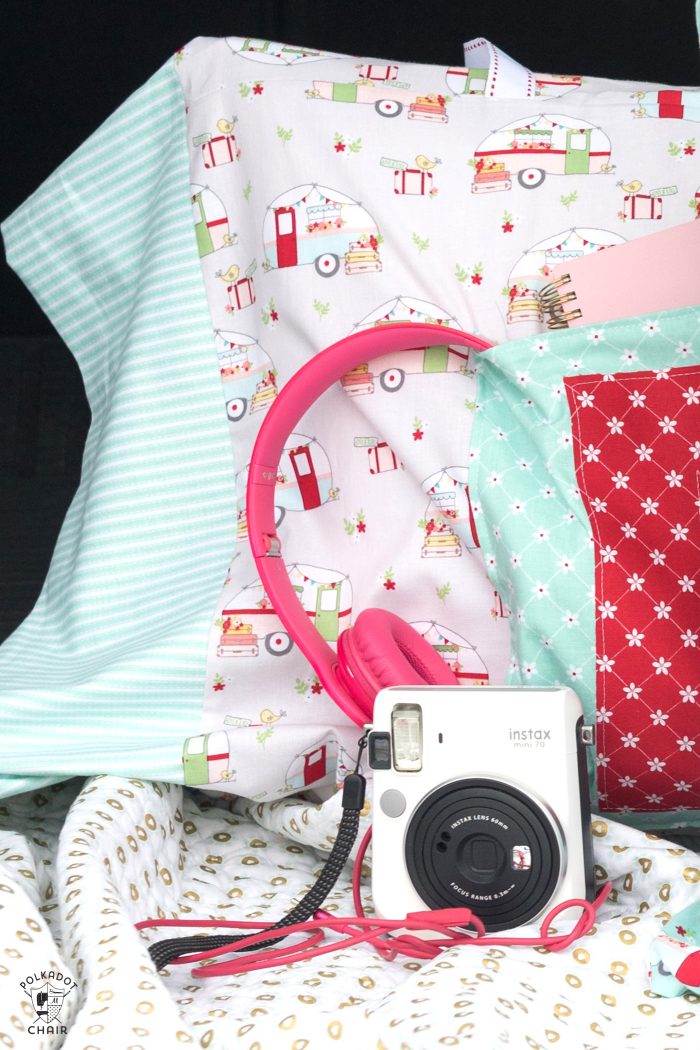
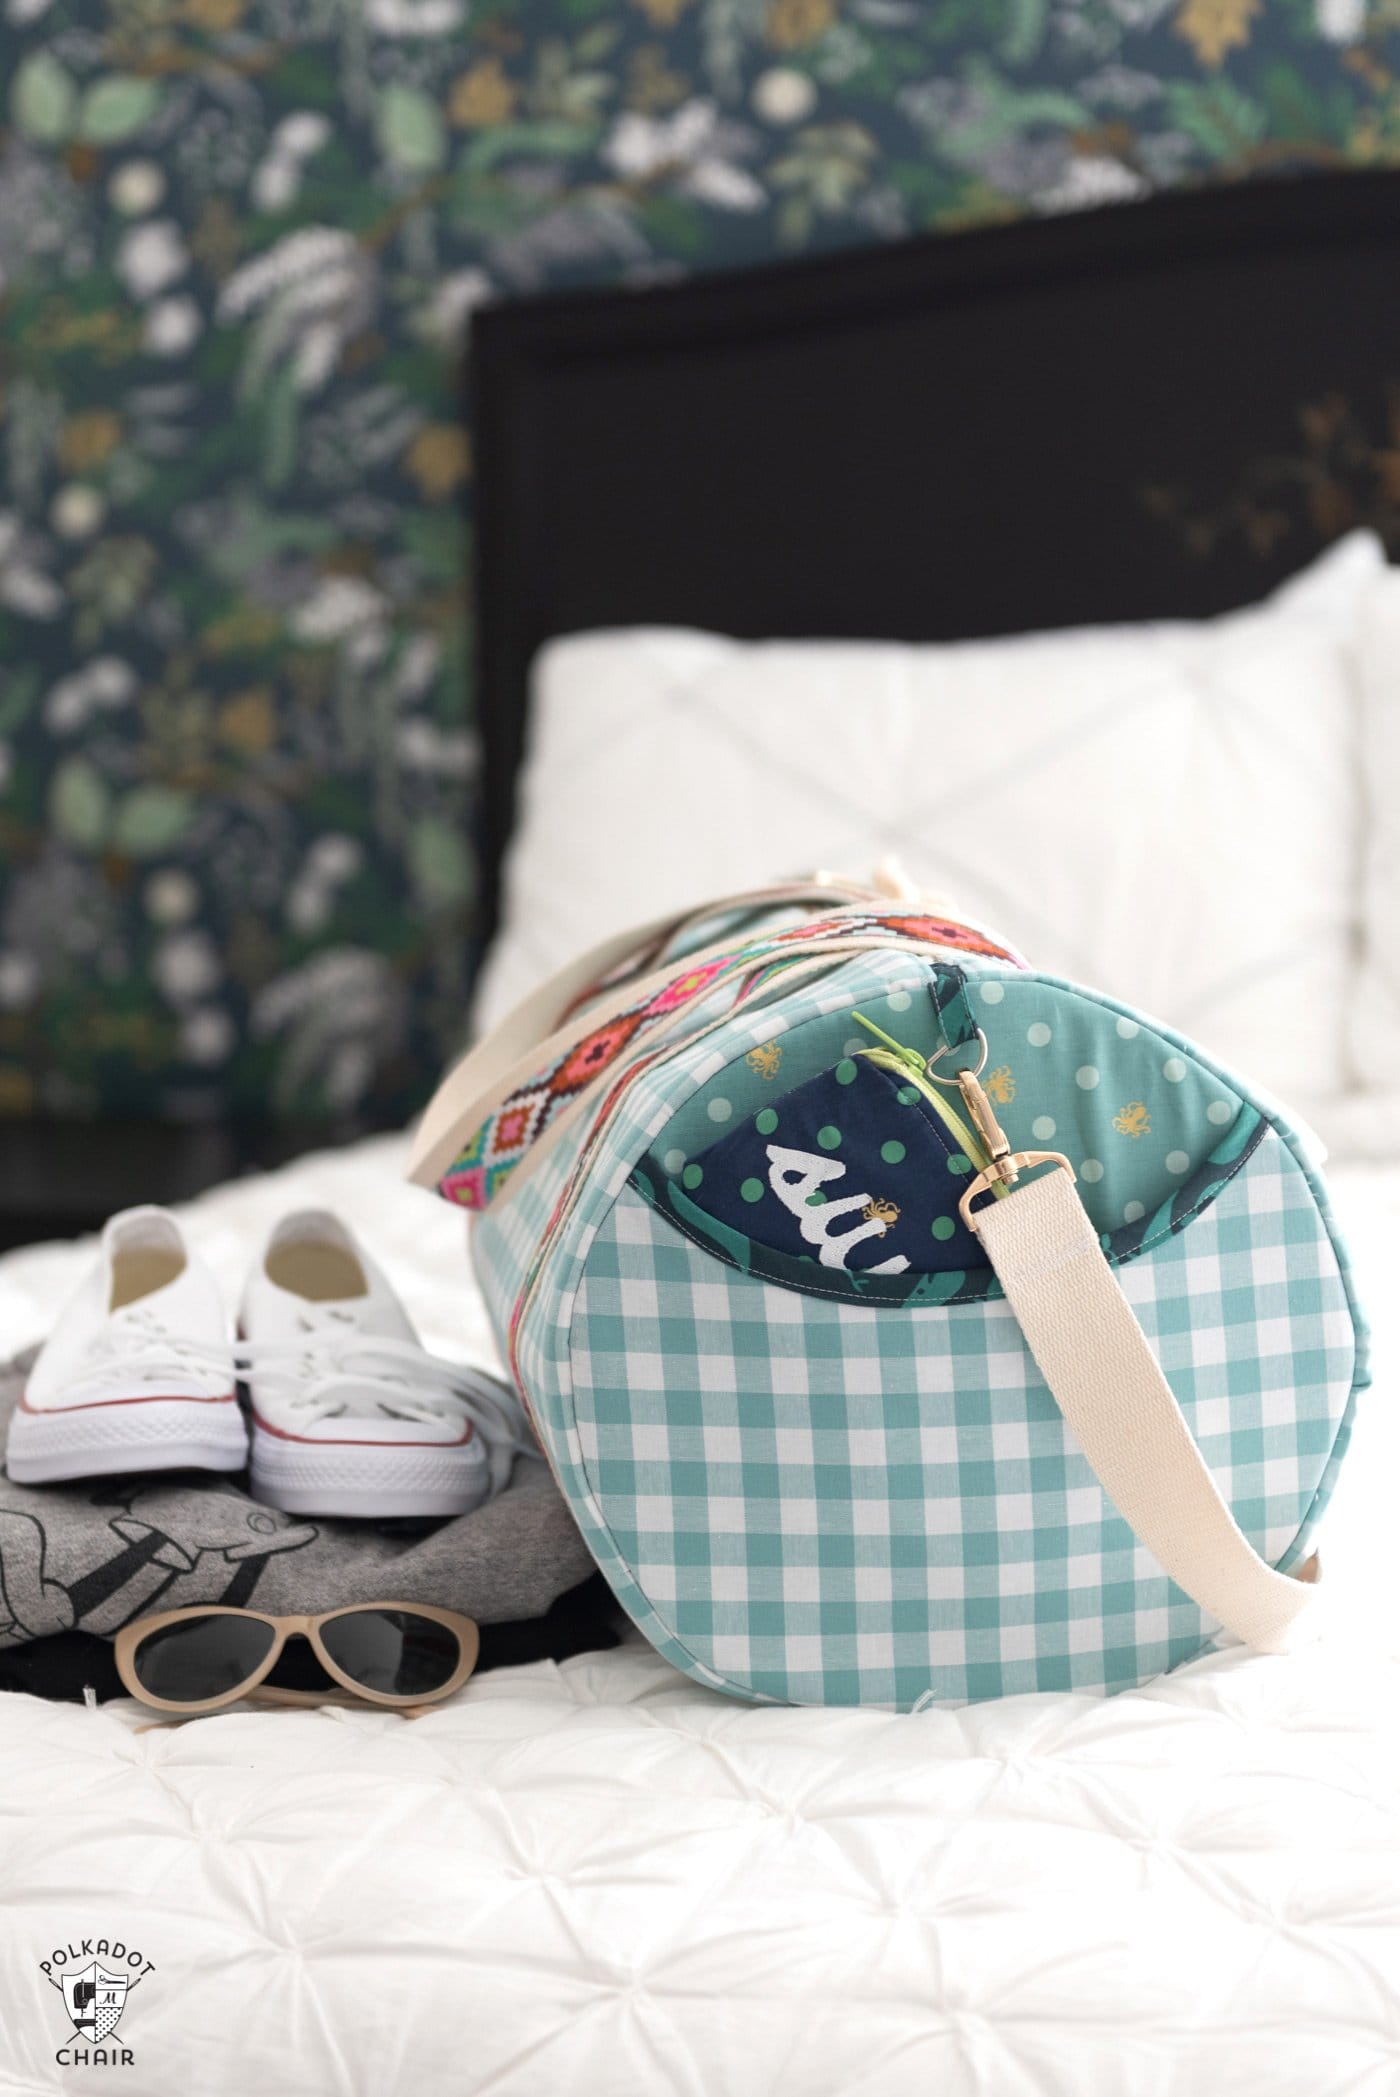
I added M’s to my pillowcases since we will use them in our RV. My idea is to have one side with a giant pocket to hold things while we travel and the other side to be plain so we can use them for sleeping if we want to as well.
We have a large mattress in our RV, and I wanted my road trip pillowcases to sit next to each other on the bed, “mirroring” each other. So I added the contrast band to the right on one pillowcase and to the left on another pillowcase.

How to Make a Road Trip Pillowcase
Pillowcase Directions: To download directions for Traci’s Original Pillowcase, fill out the form on this page, and we will email it to you.
Supplies for one Pillowcase
- 1 1/2 Yards of Fabric for Pillowcase
- 1 Fat Quarter of Fabric for Monogram
- 1/2 Yard of Fabric for Contrast Band
- Heat N Bond Lite
- 1 Yard of 1″ wide Ribbon or Webbing for Handle (leave off if you’re making this for children as it can pose a choking hazard)
- 2 Fat Quarters of Fabric for Pocket – or 1/2 Yard
Updated Road Trip Pillowcase Directions
{accounts for directional fabric and adds contrast band}
Road Trip Pillowcase Pattern
Equipment
supplies
- 1 1/2 Yards Fabric for pillowcase
- 1/2 Yard Fabric for contrast band
- 2 Fat Quarters Fabric for pillow
- 1 Fat Quarter Fabric for monogram
- 1 package Heat n Bond Lite
- 1 yard 1" wide ribbon
Instructions
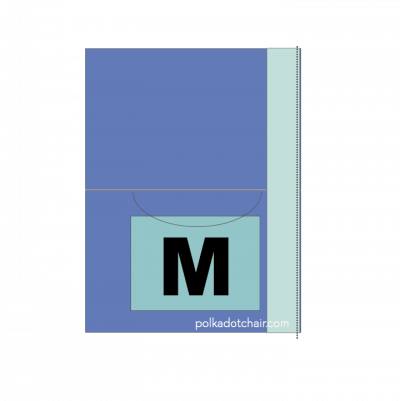
Cutting Directions:
- From Pillowcase Fabric Cut: 2 pieces each 28″ x 20 1/2″
- From Pillowcase Band Fabric Cut: 1 piece 11″ x 41″
- From Pocket Fabric Cut: 2 pieces each 12″ x 16″
- From Ribbon Cut: 1 piece 15" long (you may need to lenghten or shorten depending on your pillow. Make sure it is kept short since this is for a pillow)
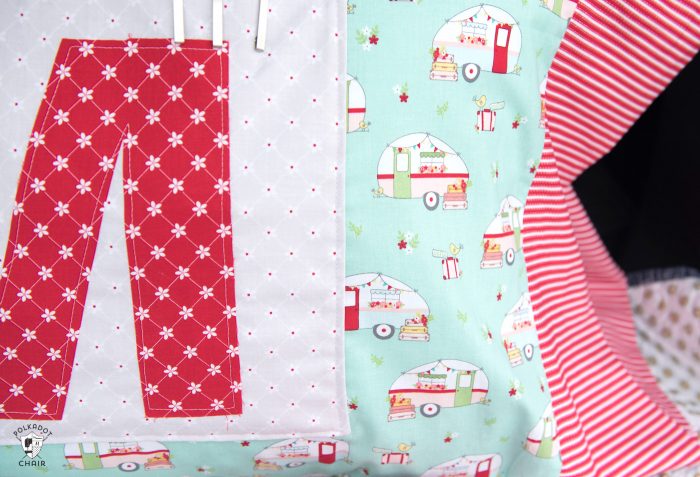
Step One: Create the Applique
- On your computer type the initial that you'd like. Size it to be 10" tall. Print it out on plain paper. Trace the letter image onto a piece of heat n bond lite. If the letter is directional, make sure you mirror the image when you trace it.
- Cut it out loosely. Iron it onto the wrong side of your letter fabric. Cut it out with scissors precisely. Peel off the paper backing and iron onto the right side of one of your pillow pocket pieces.
- Stitch around it with a straight stitch to secure it. You can see a better-illustrated tutorial for making a custom applique by CLICKING HERE.
Step Two: Attach the Pocket:
- Pin the two pocket pieces together, right sides facing. Stitch around the edge of the pocket leaving a 6″ opening in the bottom of the pocket. Turn the pocket right side out and press it well.

- Top stitch along the top of the pocket. Pin the pocket to the pillowcase front piece so that it is centered in the pillowcase piece. Stitch around the 3 sides of the pocket to secure it in place.

- Pin the ends of the ribbon onto the top of the pillowcase front fabric piece so that they are in the same position as the edges of the pocket. Stitch in place. You will also probably want to finish the ends of the ribbon with a bit of fray check so that the handle doesn't pull out when it's carried.


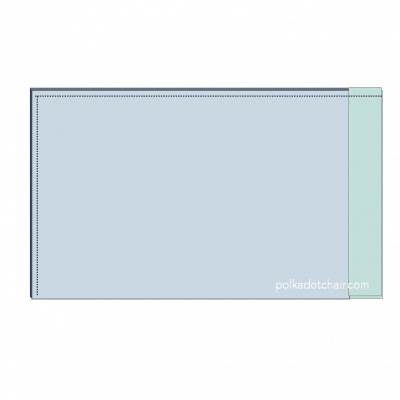
Step Three: Assemble the Pillowcase
- Pin the pillowcase front and back pieces together, right sides facing. Stitch along the top seam only with either a serger or using a French seam. If you don't know what a French seam is or how to sew one, you can use this tutorial. Since the seams on the inside of the pillowcase will show, it's important to make sure your seams are properly finished.
- Open up the pillowcase and press the seam.
- Fold the band piece in half lengthwise and press it well. Pin it to either the right or left side of the pillowcase (your choice). It may be a bit longer than the pillowcase piece, but that’s ok. Just trim it down if you have to.
- You are going to pin the right side of the band to the right side of the pillowcase with the raw edges even.
- Serge in place.
- Fold the seam out and press it well.
Step Four: Finishing
- To finish the pillowcase, simply fold it in half with the right sides facing and having the raw edges of the pillowcase even. Stitch (serge) around the remaining two sides of the pillowcase to finish.
- That’s it! Now just turn it right side out and give it a good pressing.
More Sewing Tutorials:
Waterproof Patchwork Picnic Blanket Tutorial
A very good tutorial. I like reading such posts very much, because I’m just learning so any knowledge is helpful to me. Thanks for sharing these tips I hope my projects will be just as good as yours.
I thought of the strap maybe choking someone when I first read the article. Then I thought that this decorative cover could hold a pillow with a everyday case on it to remove and use just for sleeping. Take the outer travel cover off at bedtime and it continues to hold all the personal goodies; in the morning, put cover back on the pillow and be ready to go.
Just leave the ribbon off then. They are not meant to be sleeping pillows. Just “tote around” pillows
These are adorable but I would be concerned for kids to use these at night with the strap attached. They could be a choking hazard.