Five Simple Things I’ve Done to Drastically Improve my Quilt Piecing Accuracy
I’ve been quilting actively for over 10 years. During that time, I “figured out” a few things to improve my quilt piecing accuracy. Today I’m sharing five of my best “learned the hard way” quilting tips with you!
Before we start with the tips, I want to reiterate something. For years, I quilted, but I occasionally had mismatched corners, wonky binding, and bulky seams. I still LOVE all of those quilts! When you quilt, it doesn’t have to be perfect to be beautiful!
However, if you notice that you are feeling more frustration than joy when you quilt, there are a few things you can do to help reduce that frustration. Here are some of my favorite quilting tips that I’ve picked up over the years!
One: Measure and Cut with a Ruler; Not the Mat
I spent my first 10 years as a quilter using the measurements on the cutting mat to cut my fabric pieces.
Over time, I noticed that the lines on my cutting mat were blurring, and I wondered if my cuts were still accurate. So I tried switching to cutting with the measurements on the ruler.
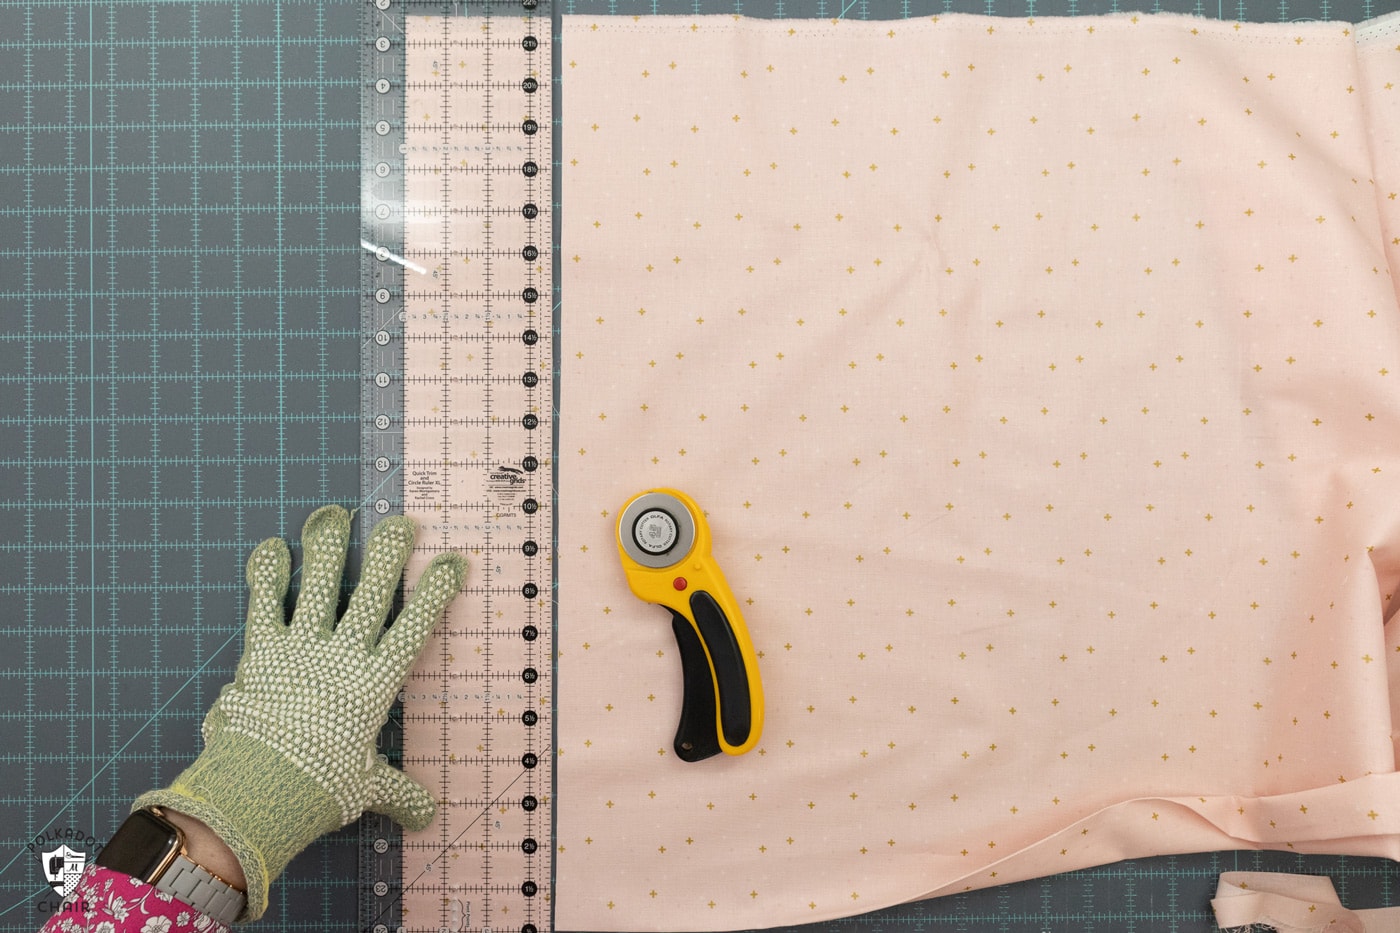
I can not believe what a big difference it has made in my cutting accuracy! (Remember, cutting accuracy leads right into piecing accuracy.) Since this discovery, I’ve purchased a wider ruler (6 1/2″ wide) so that I only occasionally need to use the lines on the cutting mat as guides when I cut.
If you want to see a breakdown of how I cut fabric for my sewing projects, check out our step-by-step article on rotary cutting.
Two: Starch My Fabric Before Cutting
One of the things that makes piecing difficult is that since fabric is woven, it can stretch and distort as you work with it. Adding starch to fabric helps stiffen the fibers, reducing distortion when working with the fabric.

I use Faultless Premium Spray Starch. I spray my fabric before cutting it, letting the starch “soak in” a bit. Then I press the fabric (with steam) and continue constructing my quilt as usual.
Three: Use Seam Tape on My Machine
Using seam tape on your sewing machine is a simple way to improve quilt piecing accuracy. The tape acts as a visual guide for maintaining a consistent 1/4″ seam allowance without relying solely on the edge of your presser foot.
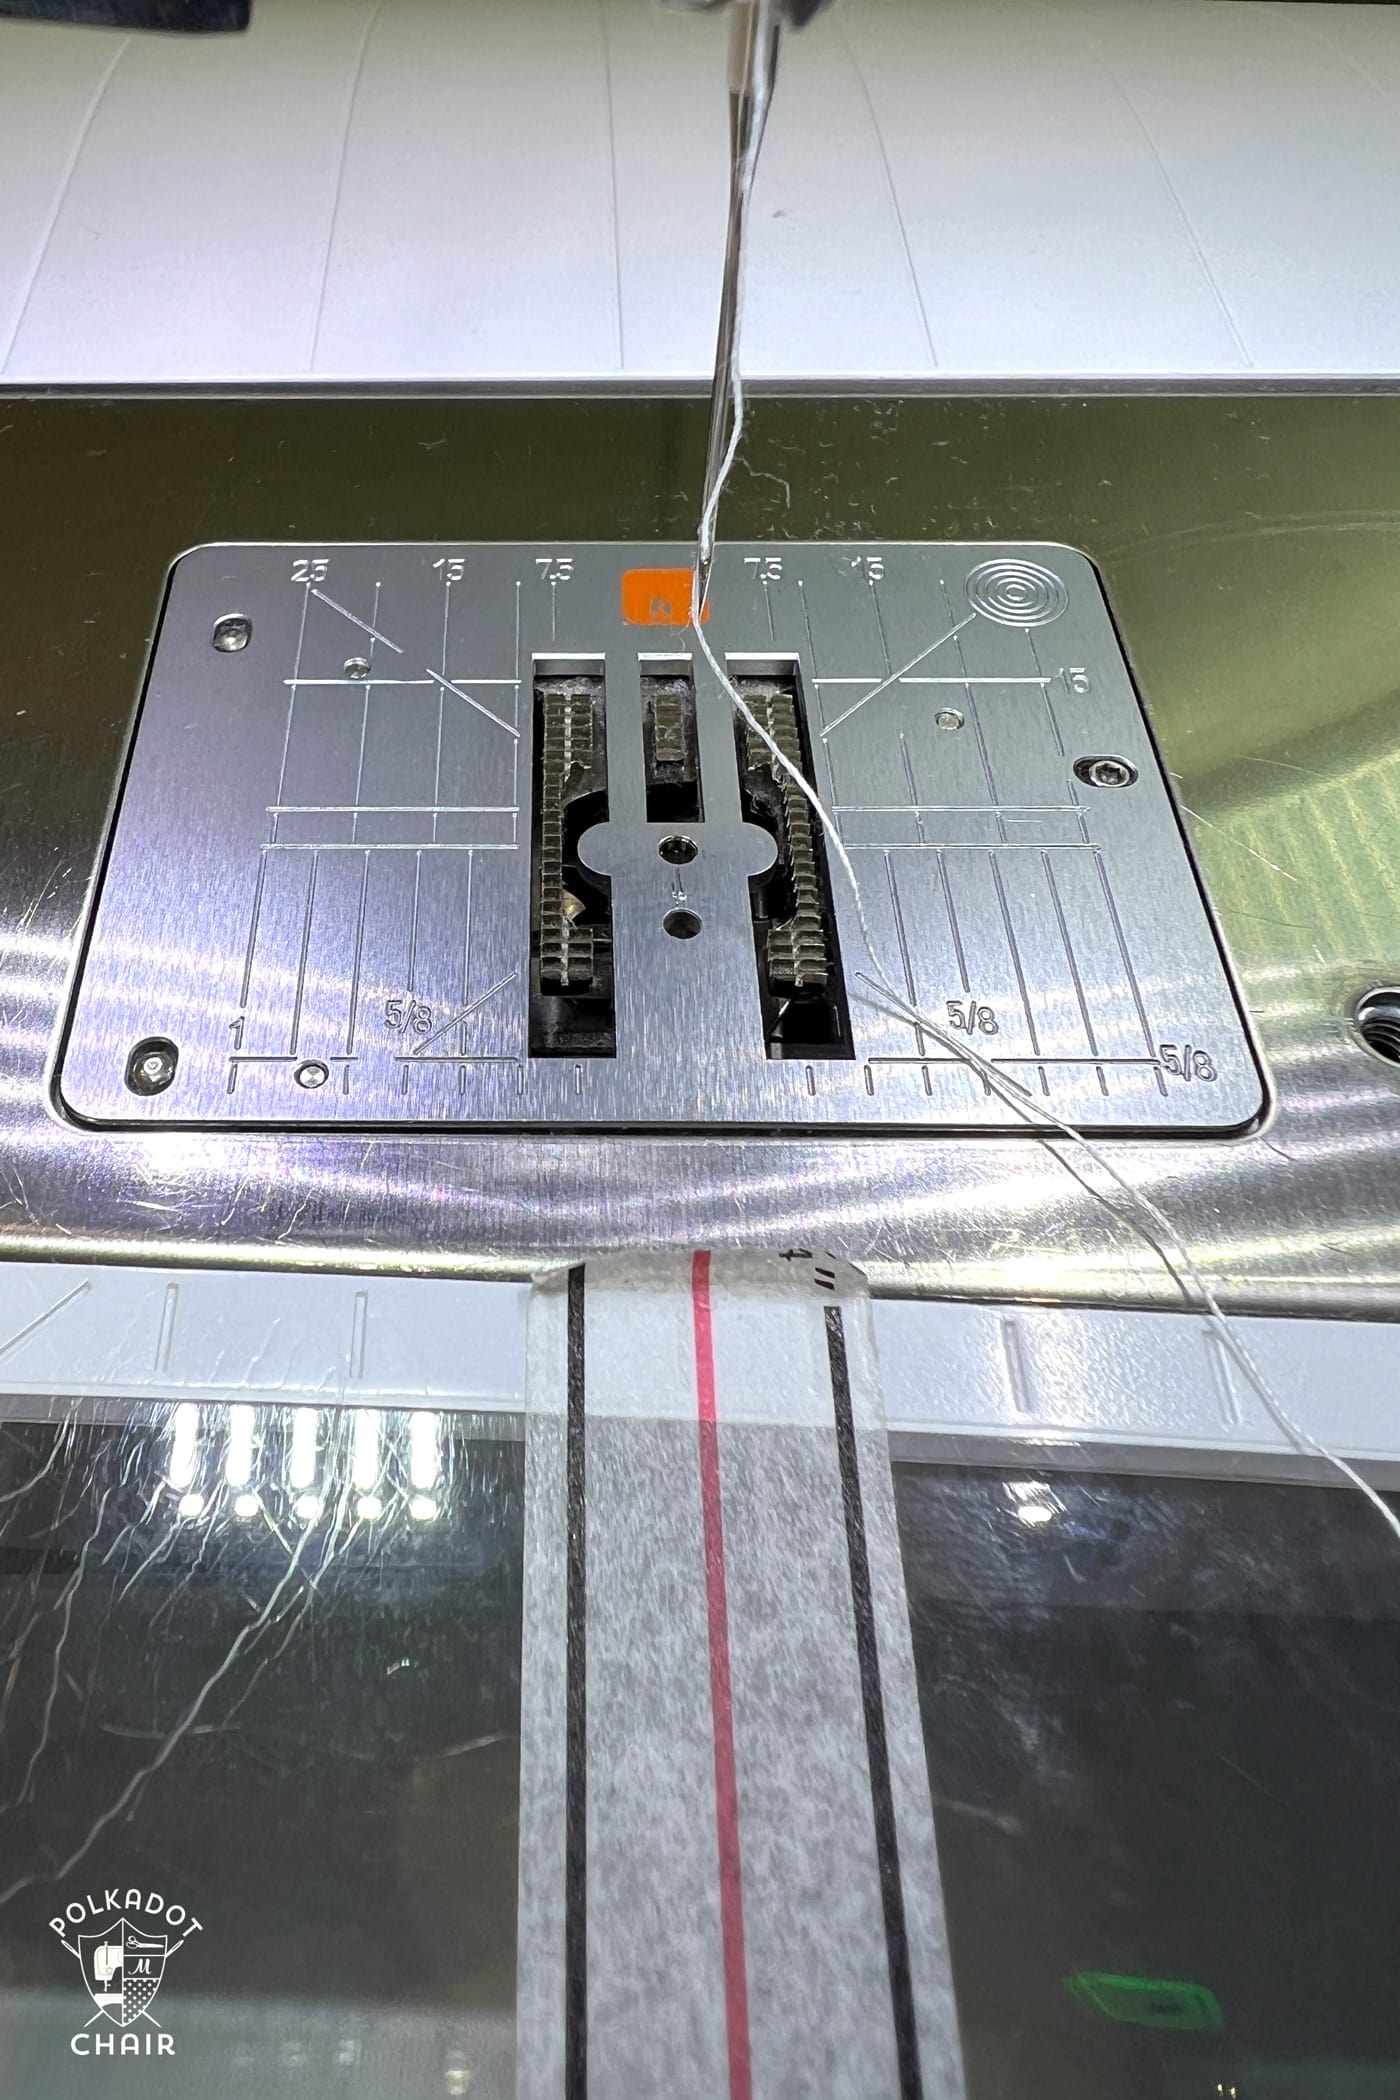
By aligning fabric edges with the tape instead of watching the needle, you can keep seams straighter and more precise. This helps reduce trimming and correcting later, ensuring that blocks line up correctly and your quilt top lies flat.
My favorite seam tape is by Alison of Cluck Cluck Sew (if you purchase it, make sure you buy it from a quilt shop – as there have been knock-offs that have shown up on Amazon that do not have an accurate 1/4″ seam allowance).
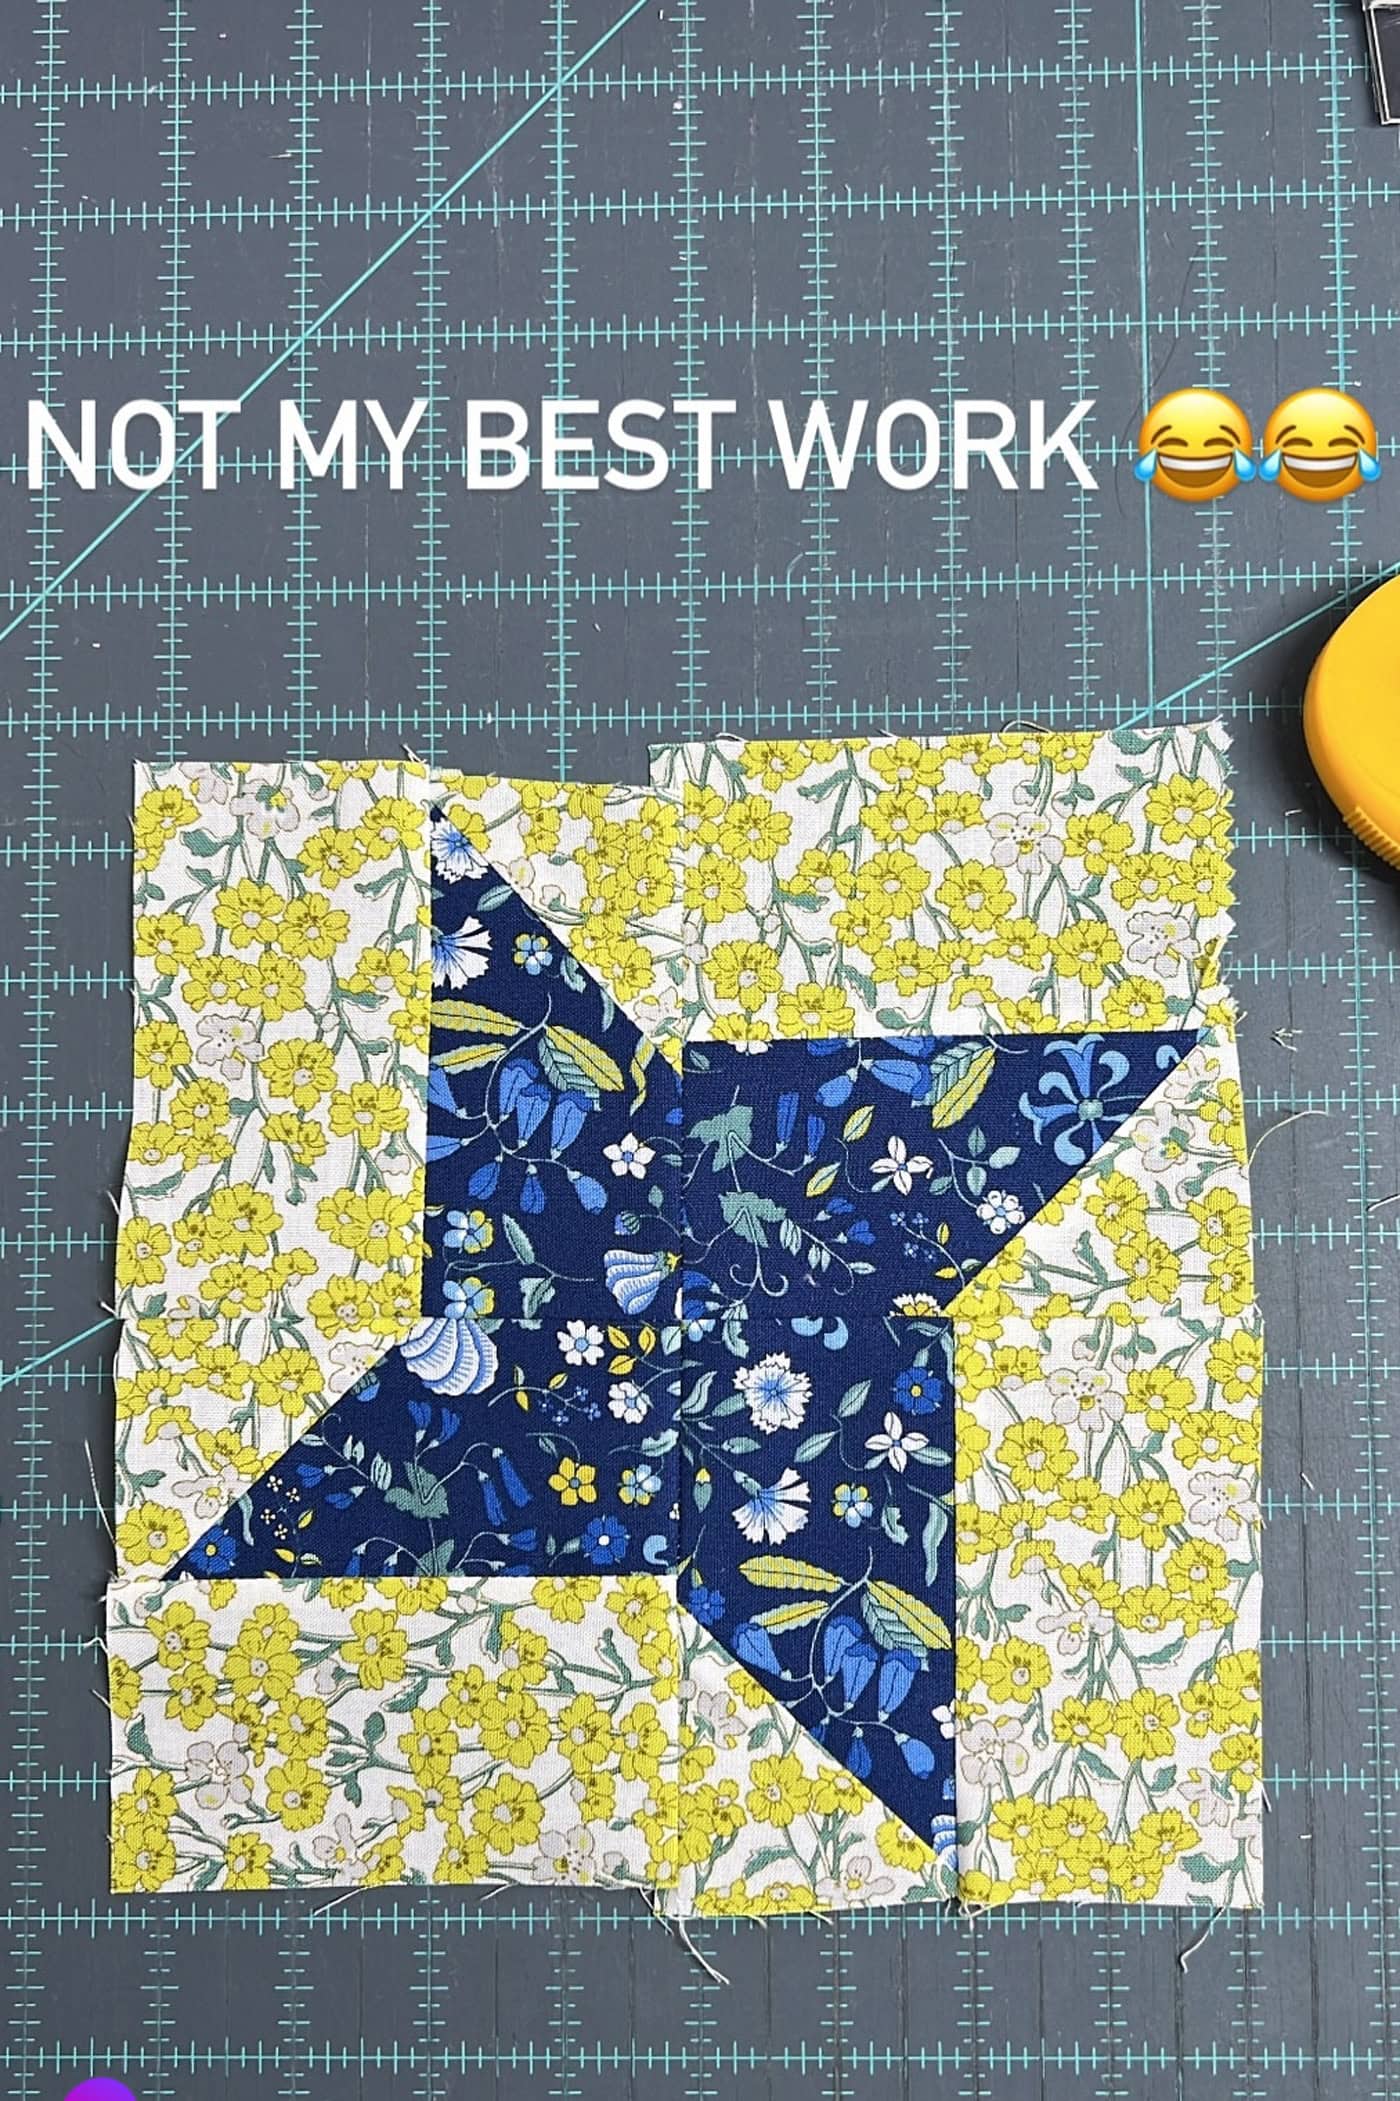
Four: Stitch the Entire Seam; Correctly
Recently, I was noticing that my quilt blocks were all “off”. I couldn’t figure out what was going on until I realized that I was not stitching a “straight seam”.
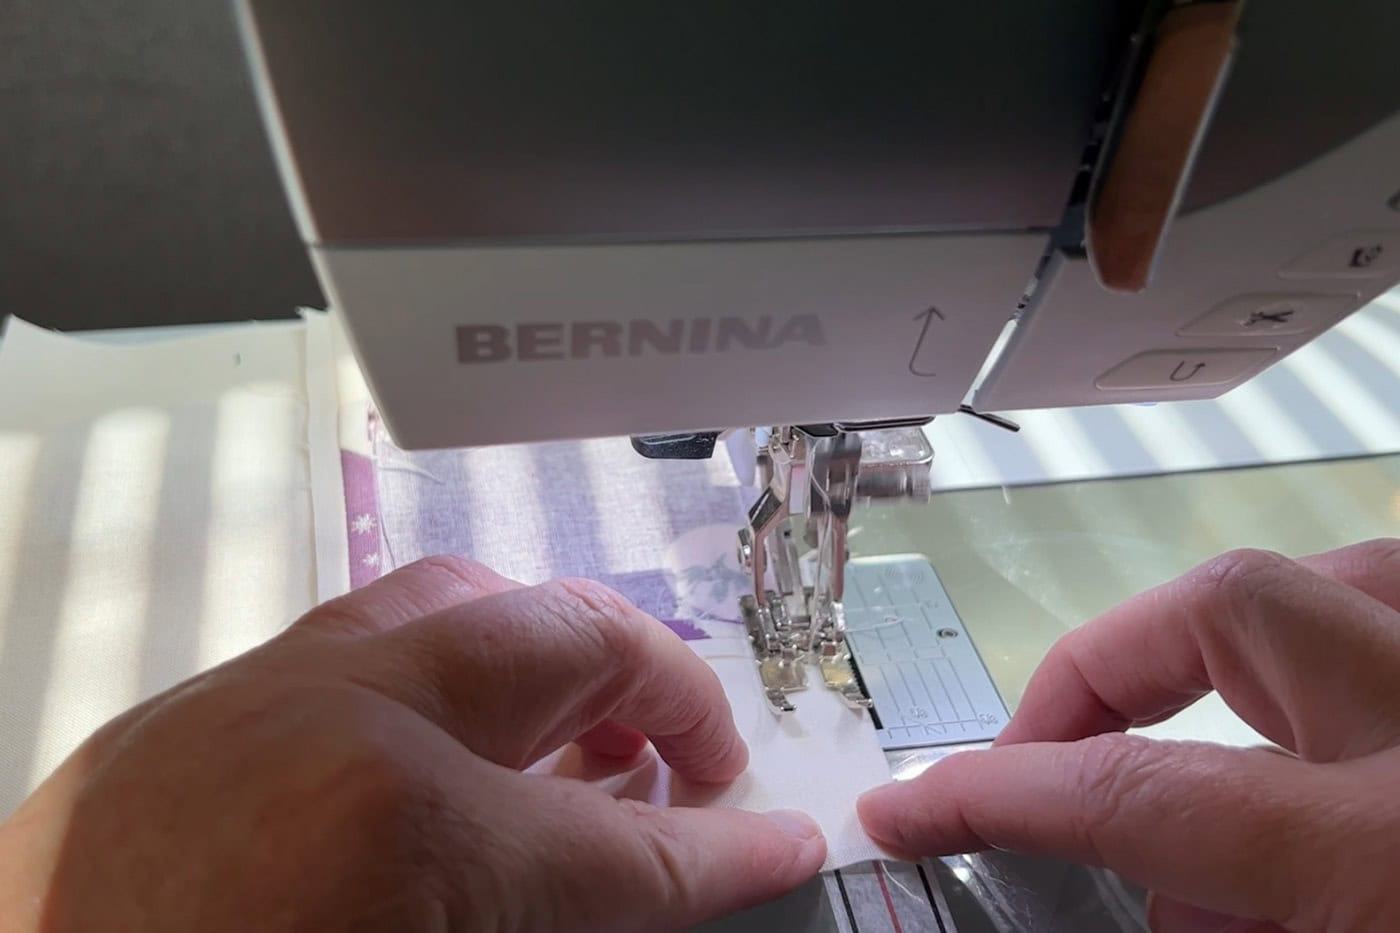
This is hard to demonstrate without a video, but you can see it a bit with these three images.
I would begin my seam at the correct 1/4″ mark on my sewing machine, then, as I stitched the seam, I would move my fabric slightly when I neared the end of the seam to prepare for removing it from under the sewing machine foot.
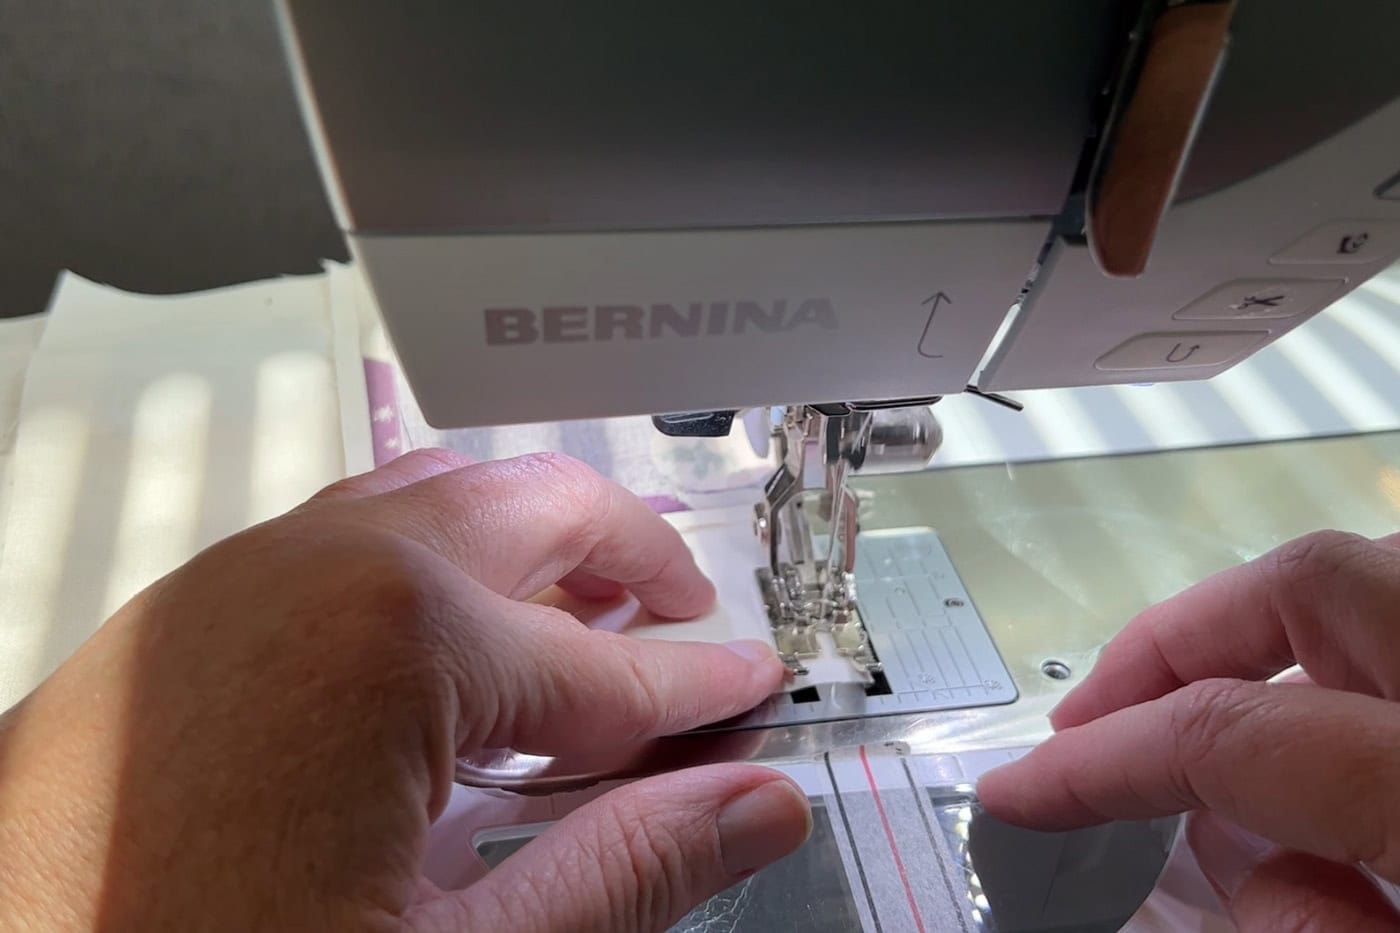
This was leading to several seams that were 1/4″ to start, but then ended too small.
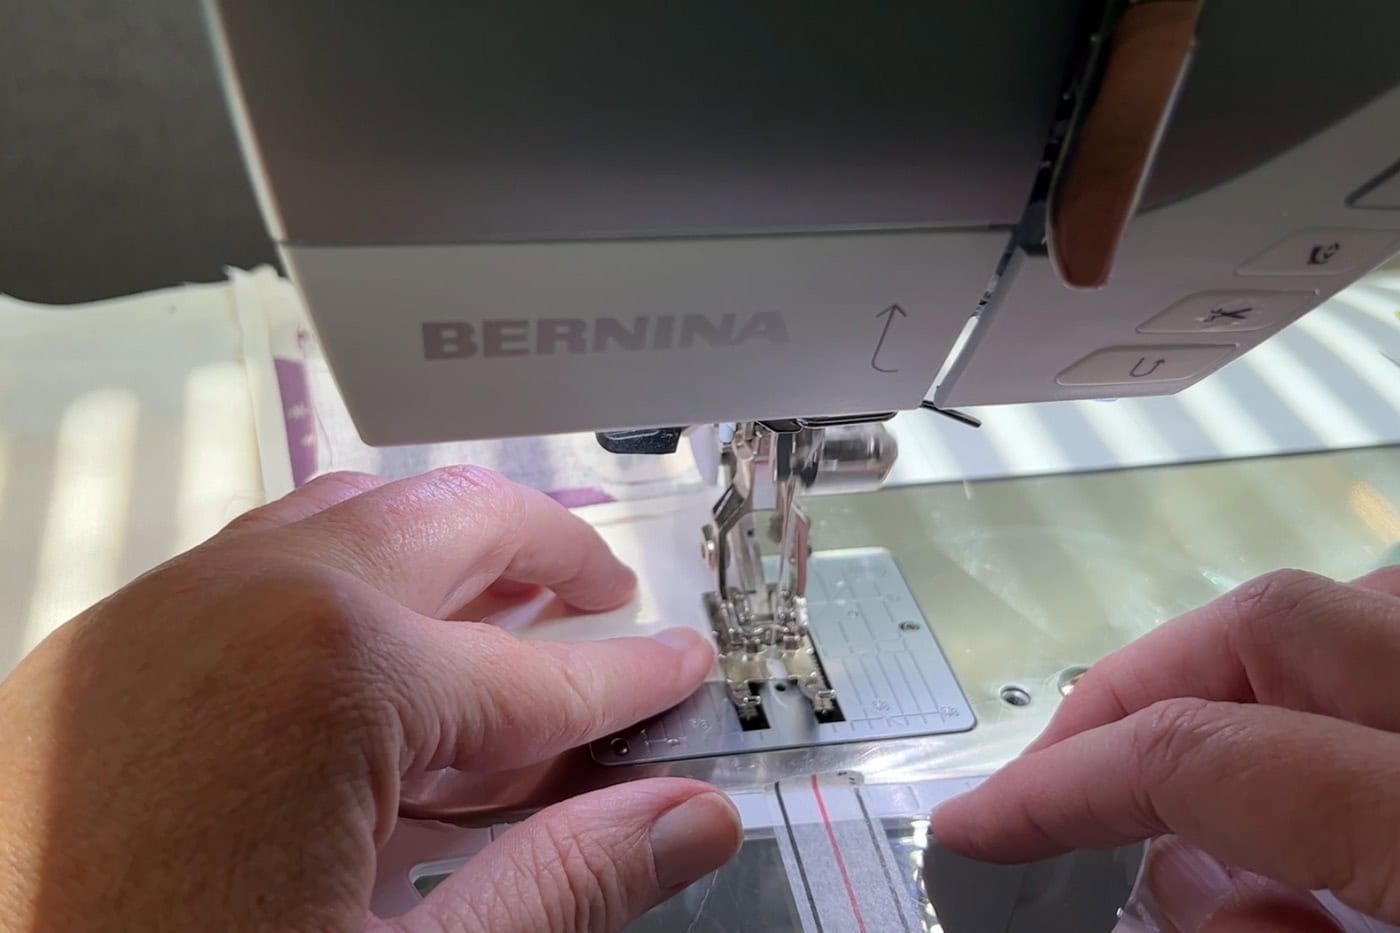
With this 3rd photo, you can kind of see where I’ve angled the end of the seam. I honestly didn’t notice this until I started filming myself for YouTube videos. I noticed I’d get a bit “ahead” of myself and begin angling the fabric away from the presser foot too soon.
Now I make sure to stitch the ENITRE seam before I begin to move the fabric out of the way.
Five: Slowed Down & Took More Breaks
Since quilting is my job, I tend to want to do things quickly. I feel like I’m always a few steps behind and constantly working on a crazy deadline. Sometimes I sew too fast and don’t take breaks frequently enough.
Slowing down while quilting gives you more control over your fabric and stitching, which leads to greater accuracy. It helps prevent shifting, crooked seams, and uneven stitches, especially when piecing small or intricate blocks. A steady pace allows you to focus on alignment and seam allowance, reducing mistakes and the need for ripping out stitches.
I’ve also noticed that I get “sloppy” when I’m tired or nearing the end of the project. Now I try harder to recognize when it’s time to take a break. Stopping when I’m too tired, I’ve realized, actually saves time as it prevents me from redoing mistakes that I make when I’m “sew” tired.
What about you? I’d love to hear some of the things you’ve done to improve your quilt piecing accuracy!


Great tips! I didn’t let the needle go down into the fabric before moving on. I now let the needle go down into the fabric to hold it in place, before I move on. I too was very impatient!!!
Thanks for the reminders. Love your blog!
I definitely have the problem of not sewing accurately at the end of the seam. My tip is to always pin at the end. No matter how small the piece, I always pin the end. If the pieces are more than 4 inches, I’ll add a pin near the beginning. If I don’t pin at the end, my fabric doesn’t end up even at the bottom.
The seam skewing to the side at it’s end is due to to not having your hand guiding the fabric from the opposite side.
Lol, let me explain better – when you’re starting the seam you’re probably guiding it with both hands while it’s on the near side of the needle, close to you, but as the seam progresses there’s more fabric on the far side of the needle, away from you…where you’re hands aren’t and there’s nothing keeping it straight except for a small portion that’s not yet under the needle.
I’ve found using angled fine-tipped weeding tweezers to be perfect to help prevent this problem. I use the Sizzix tweezers and the tips are thin enough to actually fit under the presser foot. It’s basically a two-pronged stiletto. I just put each point on either side of the needle to have control to the very end of the seam.
That’s a great tip thank you!
What great insight, thank you for sharing! I always love reading your columns.
I’m rather new to quilting, but since I learned the 2 ruler method of cutting, I almost always cut fabric on the reverse side of my mat. It works well for me and saves grid markings on the front for when I really need to use them.
That’s a great idea! My mat definitely gets worn down at certain markings and this would help alleviate that.
And square up your blocks!!!
Yes! I should have included that one!
Hello ,
I just want to thank you for these tips, I come from a family that made quilts my Ima(Mom) & Doda Miriam,made gorgeous quilts. They’re both gone so I can’t call them anymore.
I’m so glad they were helpful for you. What a wonderful family legacy!
I third the lighting issue. Thank goodness the sewing machine designers are listening. My newest machines have great lighting.
I noticed the seam ‘steering’ issue with my last two machines. I sewed millions of pieces on a Sears Kenmore (bought it on lay away when I was 21) and never had that problem. I think technology of ‘auto adjusting foot pressures’ on the newer machines contributes to the seam skewing as well. I really have to pay attention when I reach the end of the seam.
I second Barbara on good lighting. Overhead lighting and good task lighting will not only help you see what you’re working on better but also reduces eye strain. I have also purchased LED strip lights through Amazon that can be attached to the neck of your machine. Wow! What a difference it made to have a strip of lights instead of the one dinky bulb that comes with the machine! I’ve put one of the strips on all of my machines from my Bernina to my Featherweight and all of my vintage Singers.
Thankyou, these tips are really helpful
I need my pins to keep seams accurate. I make mistakes when I am tired and I know that is my cue to turn the machine off. Lastly, I bought a sewing table to drop my machine down so that my sewing machine is flush with the table. I can’t explain why, but my sewing is more accurate.
Thank you for the tips! I made every mistake you mentioned on my first quilt and started it over three times. Put it away and did a different, simpler design. I will go back to the first with your tips!
All great tips. Thank you! I tend to do that same thing at the end of my seam. I would add: make sure you have really good lighting and if needed, put on your reading glasses.
I’ve set a rule for myself. If I make 3 mistakes in a row, it’s time to stop😂. I probably should change that to 2 mistakes, as I have noticed if I make 2 in a row, there will inevitably be a third 🙄.
Thanks for the tips!
That’s a great rule!
Lol. Sounds like me
I’m with you 100%, Barbara! These ideas have all helped me a lot.
Thanks to you and to Melissa.