Padded iPad case tutorial
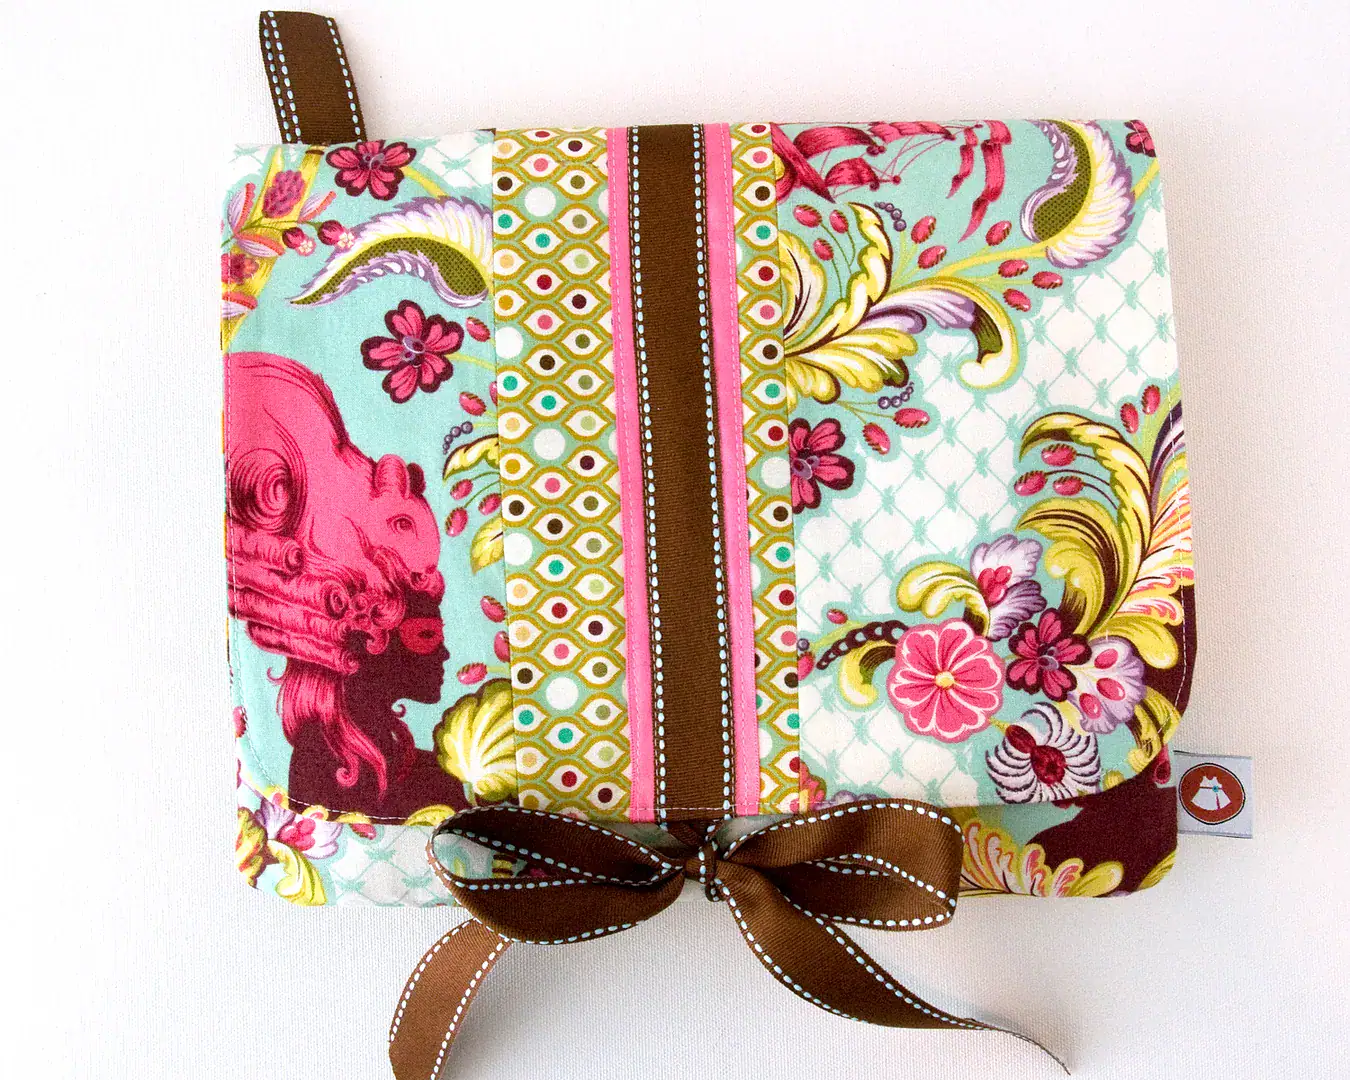
I broke down and got myself an iPad 2. I wasn’t sure I wanted one until I saw all of the great magazines you can get on it now. I have a bit of a “paper clutter” problem, and I thought this might cut it down a bit. I also wanted to check out the new sketching apps to see if they would be a good “idea notebook,” and so far, so good… (if you are curious, I’m using the penultimate app and a Griffin stylus to sketch).
I got the new swanky cover from apple (thats fold up) but soon realized that I could not be trusted with JUST this cover.. I’m way too clumsy. I needed something padded. Plus I wanted a cover that I could store my stylus, headphones and a few other things in.
 |
| Too small |
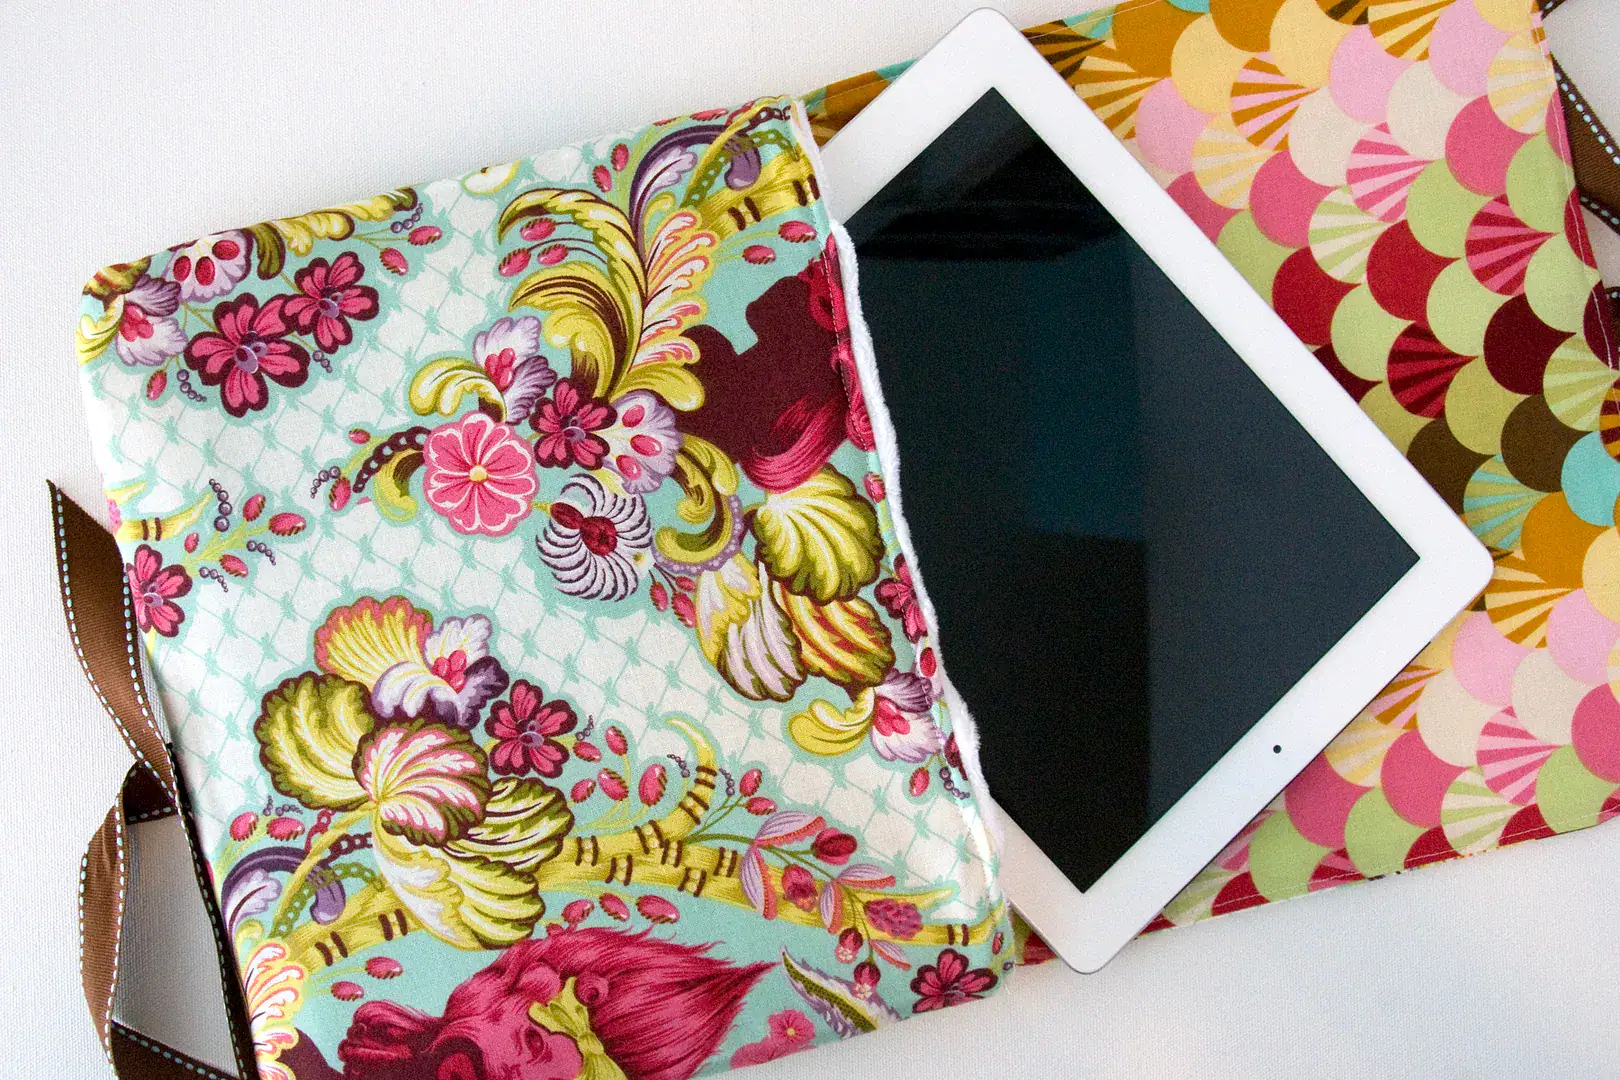
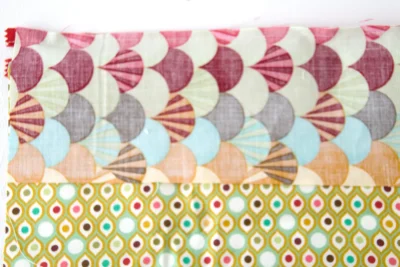
If you follow me on Facebook, you know this isn’t the first case I’ve made! I measured my iPad the first time, made the cover, then realized that the iPad would NOT FIT!! So now I am the proud owner of an oversized Kindle case or a padded jewelry pouch- whichever you want to think of it as.
So back to the drawing board, and I came up with this one.
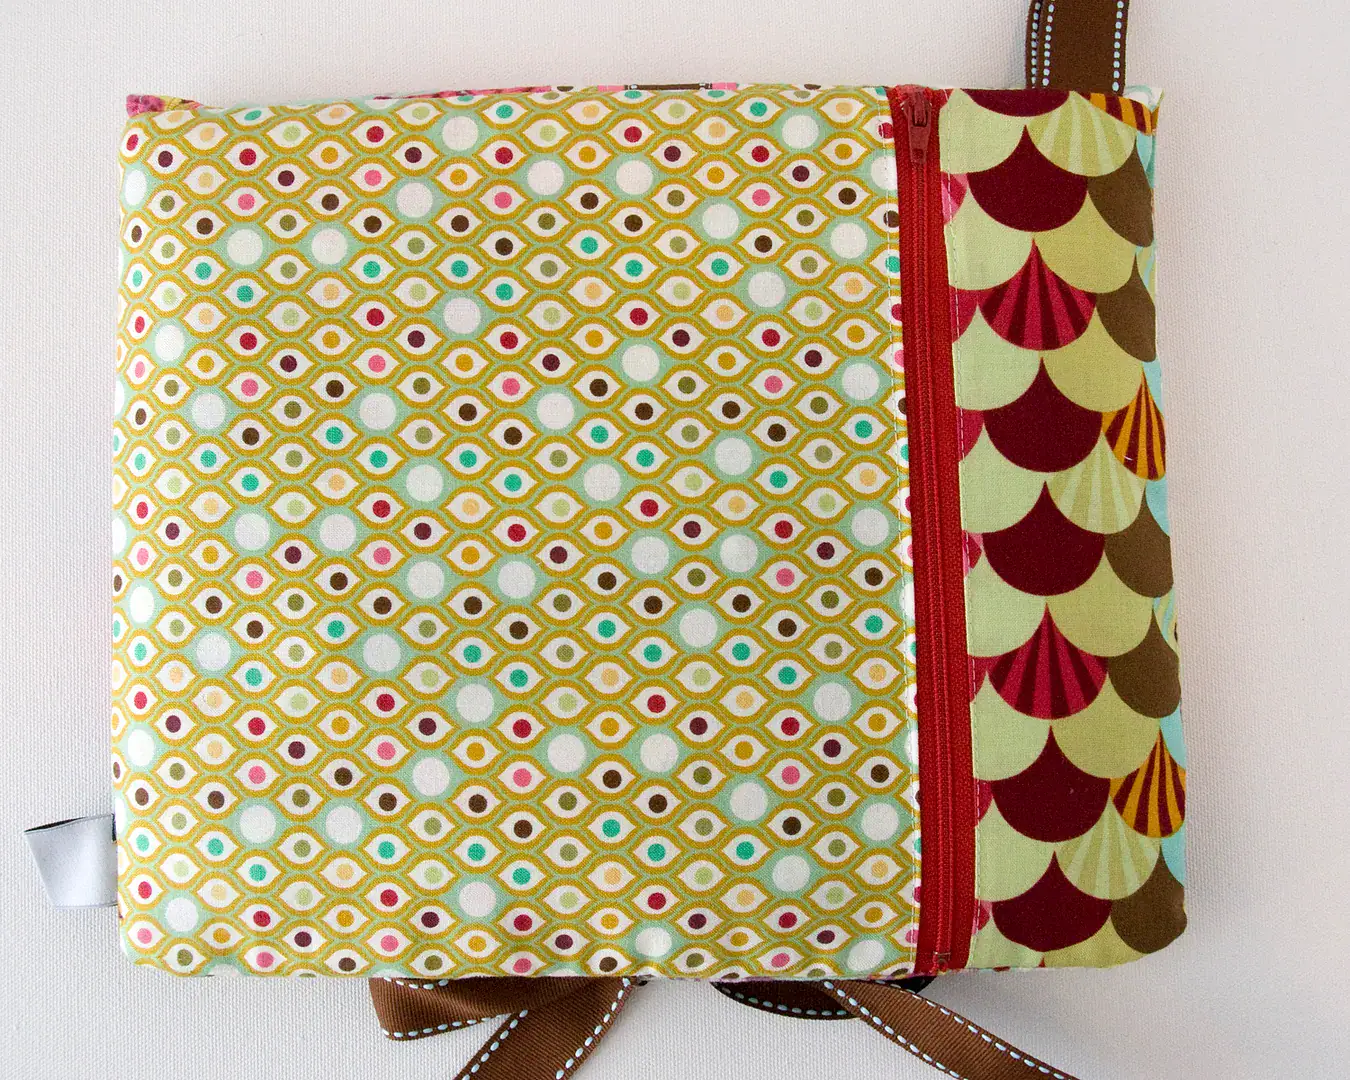
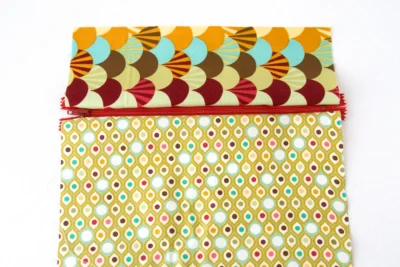
I added a zipper to the back- so I can stash my stuff in it- It actually works out quite well, as I have been putting my phone in the zip pouch too-
And just a note:
The pattern provided in this tutorial is NOT for commercial use or production. It is for personal use only by home sewers.
iPad Case Tutorial

Padded iPad case tutorial
Equipment
supplies
- 10″ x 12″ fabric for front
- 10″ x 12″ fabric for zippered pocket lining
- 10″ x 12″ fabric for flap lining
- 4″ x 10″ fabric for zipper panel
- 10″ x 10″ fabric for zipper panel
- 24″ x 10″ fabric for front flap and ALSO -1, 6″ x 10″ for front flap (you have three pieces total making up the front flap)
- 10″ x 12″ piece of Decor Bond Fusible interfacing
- 9″ zipper
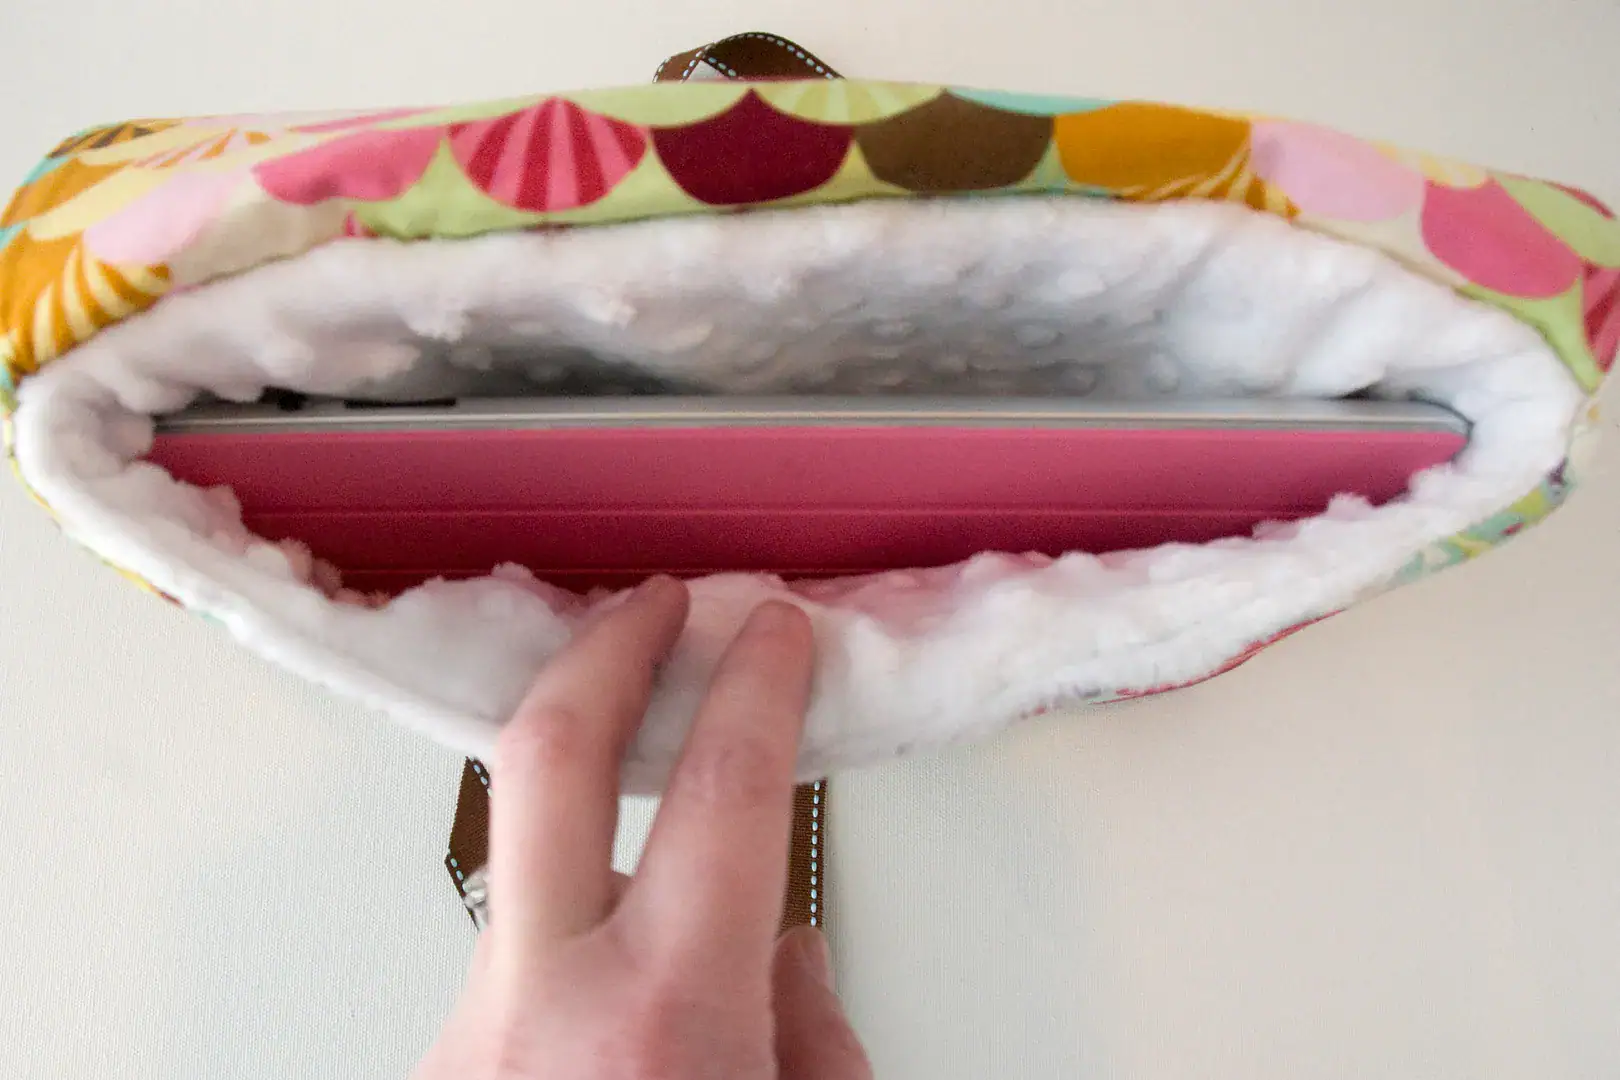
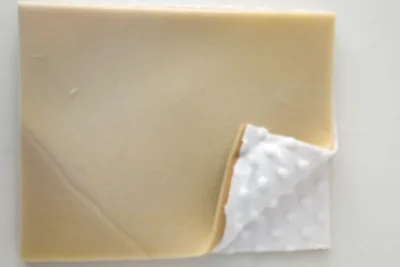
- 2 pieces of auto liner 1/4″ foam cut to 10″ x 12″ you can buy this at Hancocks, it’s the stuff they line roofs of cars with
- 2 pieces of Minke or Snuggles cut to 10″ x 12″
- Misc. ribbons at least 2 yards
Instructions
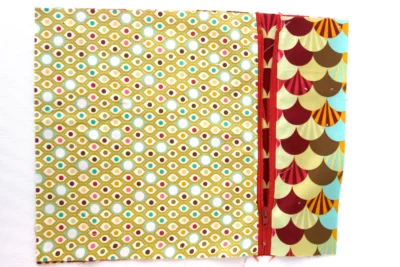
- Attach your zipper to your two zipper panel pieces along the 10″ edge- the zipper will be a bit longer, that is ok. (a 9″ zipper is actually almost 11″ long) …. You are attaching one 10″ side of each piece to the zipper, right sides together (use a zipper foot).
- It will look like this when you are done.
- Press and topstitch along each side seam of the zipper. With the zipper closed, trim the piece down to 10″ x 12″.
- Place the wrong side of the zippered piece on top of the right side of the pocket lining piece. Baste.
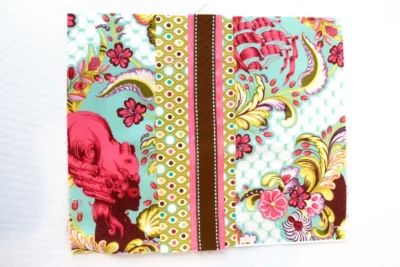
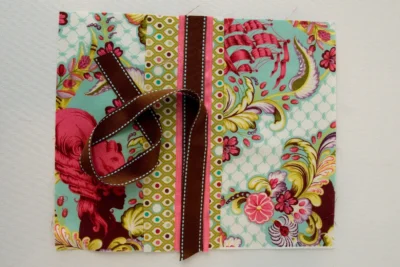
- Cut a piece of ribbon to 5″, fold it in half, and stitch it to the upper left corner. Cut another piece of ribbon about 12″ long and stitch it to the center of the right side (make sure it’s centered).

- Stitch your iPad case front piece to your zippered piece (that you just created) with right sides together. Stitch around three sides, leaving the side with the ribbon loop open. As you stitch around the corners, sew in a curved line—clip corners. Set aside.

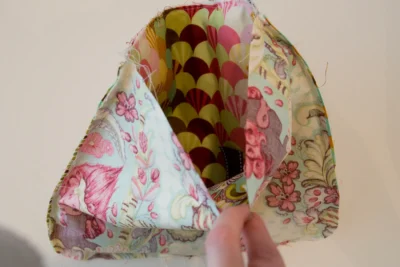
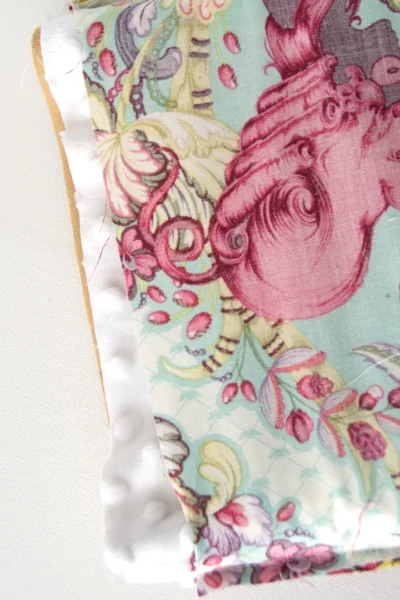
- Make a “sandwich” with your auto liner foam and minke. You want the “non-fabric” side of your foam to face out, with the wrong side of the minke facing the “fabric” side of the foam. (If your foam doesn’t have fabric on one side, don’t worry. Stitch around three sides as you did for the case outside, and curve the corners. This will NOT be a fun step, but go slow, and if you have a telfon foot, it will help you immensely! Trim seam allowances down to 1/4″.
- Turn the right side out.
For the outside flap:
- Stitch your three pieces together as desired, then trim down to 10″ x 12″. (Your pieces are deliberately cut too large, so that you can “offset” the center panel if you wish).
- Apply a 10″ x 12″ piece of Decor Bond fusible interfacing to the wrong side.
- I sewed two ribbons, one 2″ wide and one 1″ wide, to the center strip of the flap, just to add some interest- if you do this, make sure you sew the smaller ribbon in the CENTER of the flap so that it lines up with the other ribbon you placed on the cover.
- Cut a 12″ piece of ribbon and stitch it to the center of the flap.
- Place the flap outside and the flap lining right sides together, and sew around three sides (leave the side with OUT the extra ribbon open). Curve corners as you sew. Turn right side out and PRESS.
- Slip the flap into the case, with the RIGHT side of the flap matching the RIGHT side of the back of the cover and the raw edges matching. The raw edge of the case back (the part with the zipper) will be flush with the raw edge of the flap – Baste in place.
- Slip your padded lining piece into your cover, right sides together. Your padded piece will be right-side out, and your cover will be wrong-side out.
- Stitch raw edge of case, starting about 2 ” from center front, around to the back, then back around to the front- leaving a 4″ opening to turn case right side out.
- Turn the right side out.
- Machine stitch opening closed. (Just turn it under, press it down, and pin well and top stitch to close the seam.)

Thank you for the tutorial! I’ll have to try it when I can find some time. 🙂
Hi
I am a beginner and need a piece of paper to constantly refer to while I am sewing. Can you send me a step by step .pdf of this if you have one?
Thank you
Bonnie
My Mother In Law made me one for Christmas from this tutorial and it turned out awesome! Thanks for the inspiration!
perfect! great to have this tutorial.
I linked to your tutorial on my blog – thanks for sharing!
doro K.
Thank You for sharing the tutorial for this stylish iPad sleeve! I wanted to make one for a friend of mine but didn;t want the same ol’ plain sleeve so this was PERFECT! I don’t know if you will be able to see it, but here is the link to the pic of my version. https://www.facebook.com/photo.php?fbid=4315392119800&l=6911c57b4e Thank You again
Oh it looks fabulous!! I love love love the buckle on the front!
How much would you charge to make me one just like the one you did for yourself? Its sooooo cute! I can sew but not nearly as talented as you are so it would be easier to pay you. Let me know. Can email me at samanthascott24@yahoo.com
Hi, I found your tutorial over on Pinterest! And I love your choice of fabrics and the easy-to-follow tutorial! I just finished my iPad case with some turquoise prints and minky and love how it turned out. I’ll be going to the big sity on Thursday this week to pick up my iPad2. SO EXCITED!
Hola!
Magnifico tutorial!!
Me he atrevido a postearlos en mi blog, espero sea de su agrado.
Saludos y gracias
Wonderful tutorial!
I have dared to post them on my blog, I hope you enjoy it.
Greetings and thanks
Melissa,
Thanks for the tutorial. I combined yours with a few others to make one just for me. Turned out great!
Laura
Thanks for this! Saw it on Pinterest, then made one last night! You can see it here:
http://ktquilts4fun.blogspot.com/2012/01/fast-finish.html
Maybe I am missing it but I don’t see mention of a seam allowance aside from trimming it down to to a quarter inch. Am I missing something? Aside from that, love, love, love this ipad case.
I just love your padded i-Pad case. I’m visiting from the blog “Lilac Lane”. She mentioned your really nice tuturial, so I thought I’d stop on by and say hello 🙂 🙂 Happy New Year to you and your family. Love and hugs from the ocean shores of California, Heather 😉
My mom made me one that holds an ipad, mac and my iphone..:) it rocks
I think there might still be a problem in the new measurements – for the pieced front flap, the dimensions of the pieces given add up to the final, sewed dimension, which leaves no room for seam allowances.
Thanks for posting this. I just made one for my SIL. I changed it up a bit using D-rings and a strap, ruffles rather than ribbon on the center part and a snap rather than ribbon to secure it, etc.
I belong to a little sewing group and I’m so excited to add this to my project list as I just got an ipad and like you … I’m very clumsy (you should see my cell phone). Thanks for sharing!
Thank you for the tutorial! My daughter and I just finished one. It turned out fabulous, we added brass d rings and a strap. Thank you again for the wonderful instructions.
Lisa,
I know it seems counter intuitive, but the pattern is correct. You do put the flap inside the case… You will sew the lining of the case to the outside of the case (with right sides together) then turn it right side out. As soon as you turn the case right side out the flap will then be on the OUTSIDE of the case…
Feel free to email me if you are still stuck!
I hope this helps
Melissa