• Skip to primary navigation
  • Skip to main content
  • Skip to primary sidebar

The Polka Dot Chair logo

  • SEWING
    • Free Sewing Patterns
    • Bag Patterns
    • Costumes
    • Apparel
    • Learn to Sew
    • Beginner Friendly
    • Embroidery Projects
    • Tips & Techniques
    • All Sewing
  • QUILTING
    • Quilt Blocks
    • Learn to Quilt
    • Free Patterns
    • Quilt Patterns
    • All Quilting
  • CRAFTS
    • Disney
    • Cricut
    • Printables
    • All Crafts
  • HOLIDAYS
    • Seasonal Projects
    • Valentine’s Day
    • Easter
    • 4th of July
    • Halloween
    • Thanksgiving
    • Christmas
    • All Holidays
  • TUTORIALS
  • ABOUT
    • About Me
    • My Fabric Collections
    • Published Books
    • Press
    • FAQ’s
    • Contact
  • SUBSCRIBE
  • SHOP
menu icon
go to homepage
subscribe
search icon
Homepage link
  • SHOP
  • ALL PROJECTS
  • SEWING
  • QUILTING
  • CRAFTS
  • HOLIDAY PROJECTS
  • ABOUT
    • Published Books
    • My Fabric Collections
    • Facebook
    • Instagram
    • Pinterest
    • YouTube
  • ×

    Home » Quilts

    Seasonal Safari Row Along; Finishing

    Updated: Oct 31, 2021 by Melissa Mortenson · This post may contain affiliate links · This blog generates income via ads · 2 Comments

    Seasonal Safari Quilt Pattern - offered as a free quilt along this Fall from the polkadotchair.com blog!

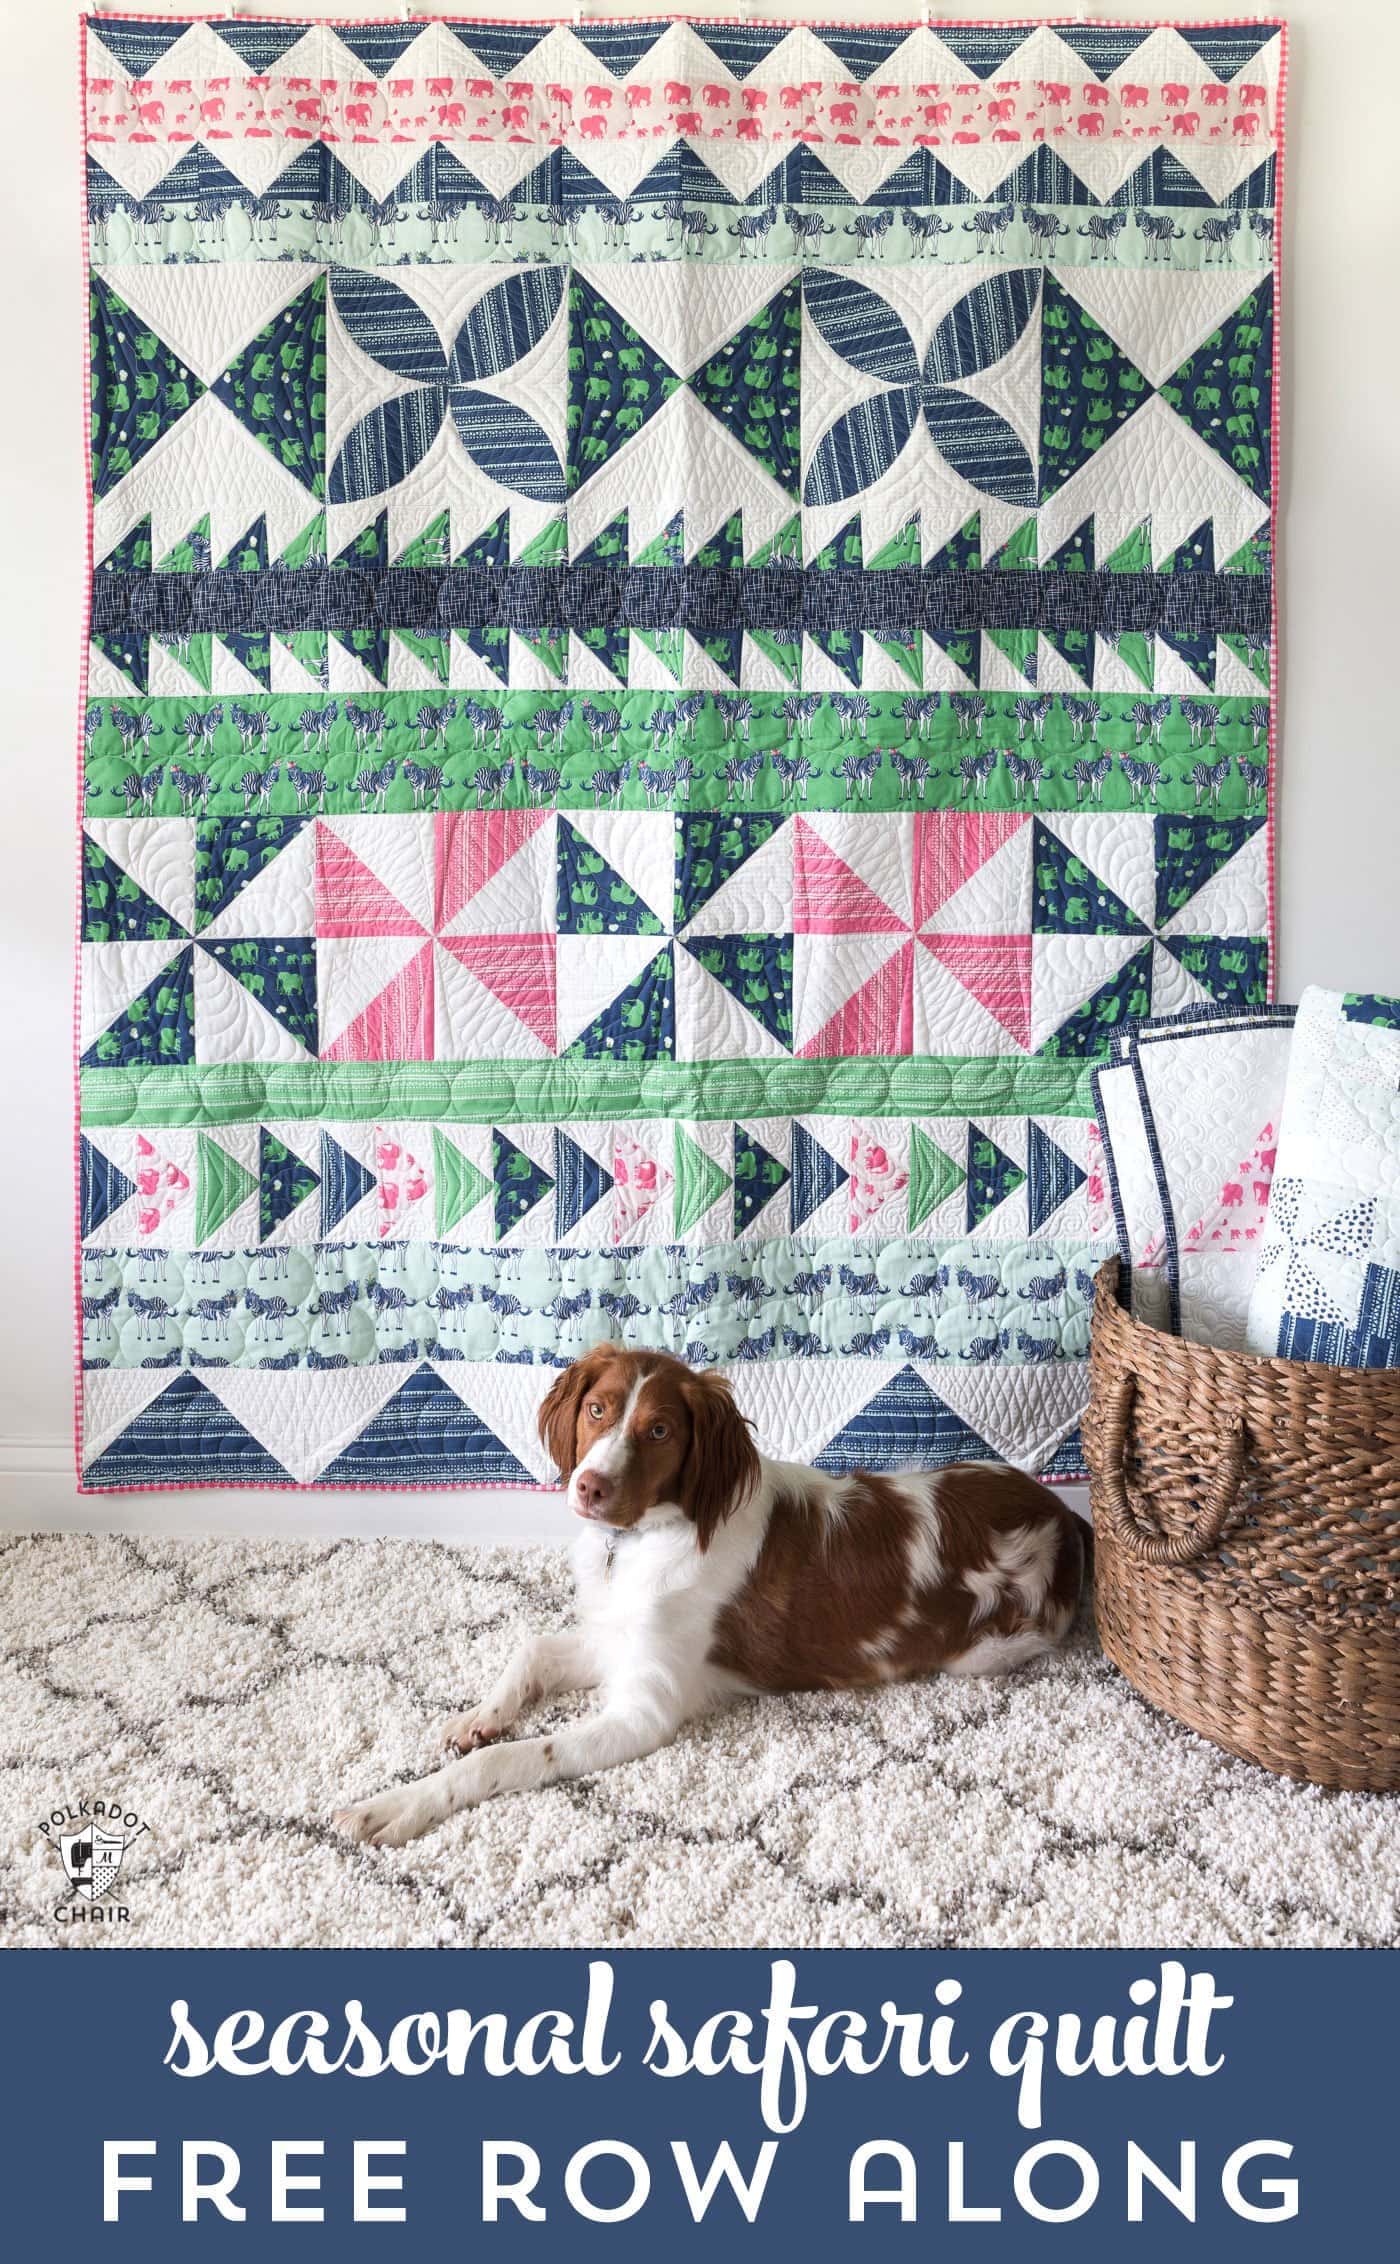
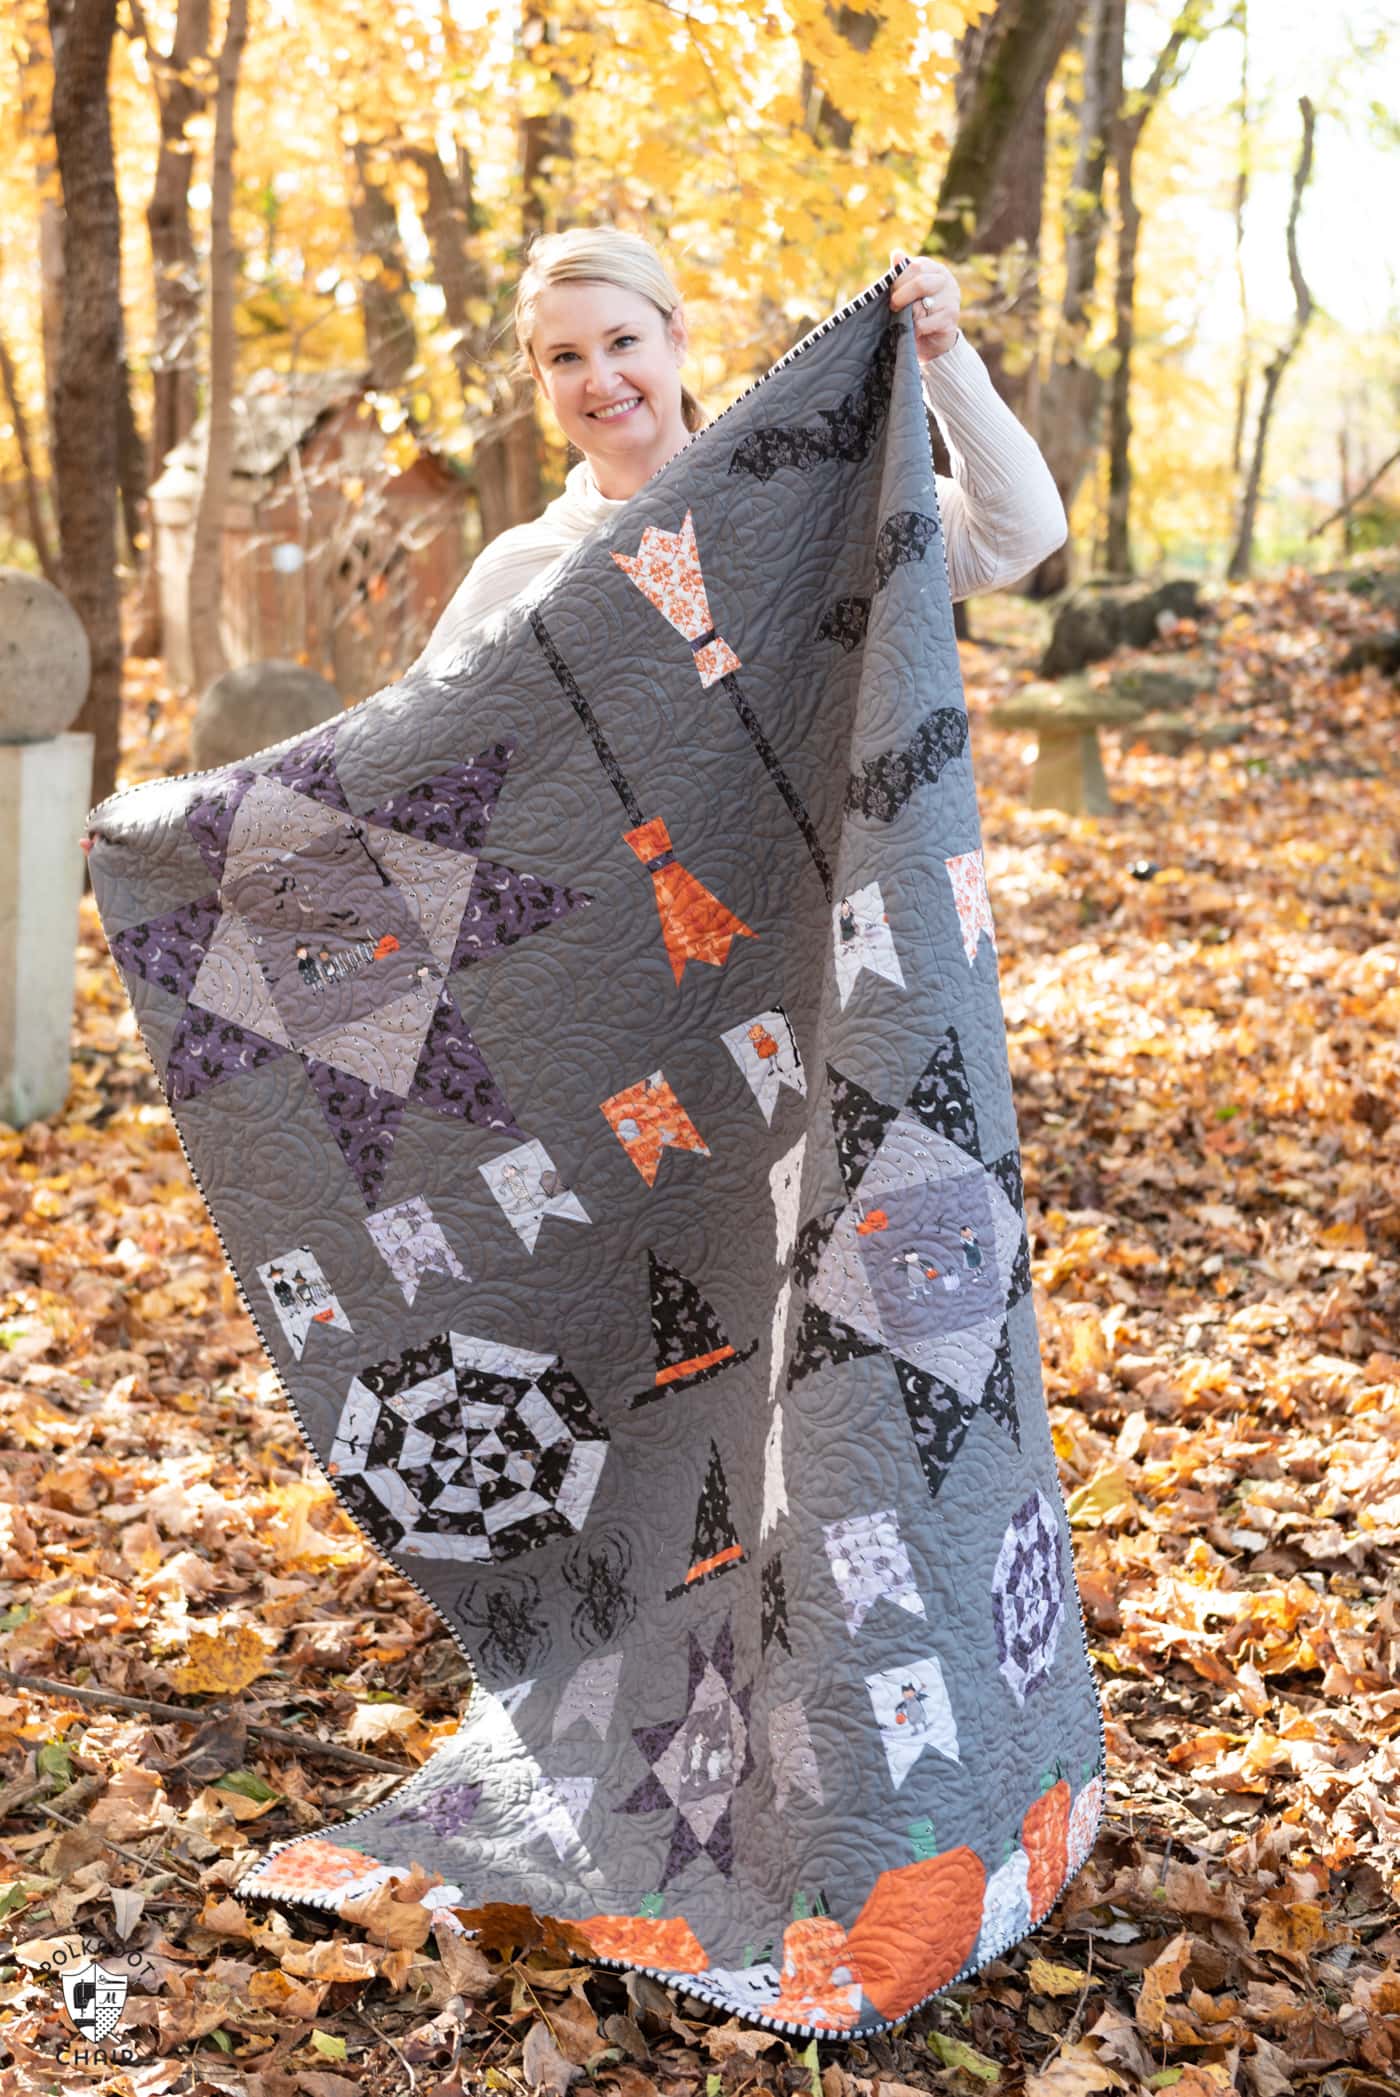
    We have come to the end of our Seasonal Safari Quilt row along! Today we are going to talk about how to finish our quilt by stitching the rows together. To see all of the posts in this series you can CLICK HERE.


    Seasonal Safari Quilt Pattern - offered as a free quilt along this Fall from the polkadotchair.com blog!

    Can you believe it? We’ve made it to the END of our row along. I have to say that I’ve enjoyed this format for a quilt along. I hosted did a 12 month-long block of the month program a year ago (you can see it HERE) and I think like the more condensed version that we did for this quilt.

    I’m sure there will be more “quilt alongs” in the future. Keep an eye out for them. I’ve also got a FUN new “sew along” planned for 2018 that I think you’ll love!

    So let’s get to it, and finish this quilt!

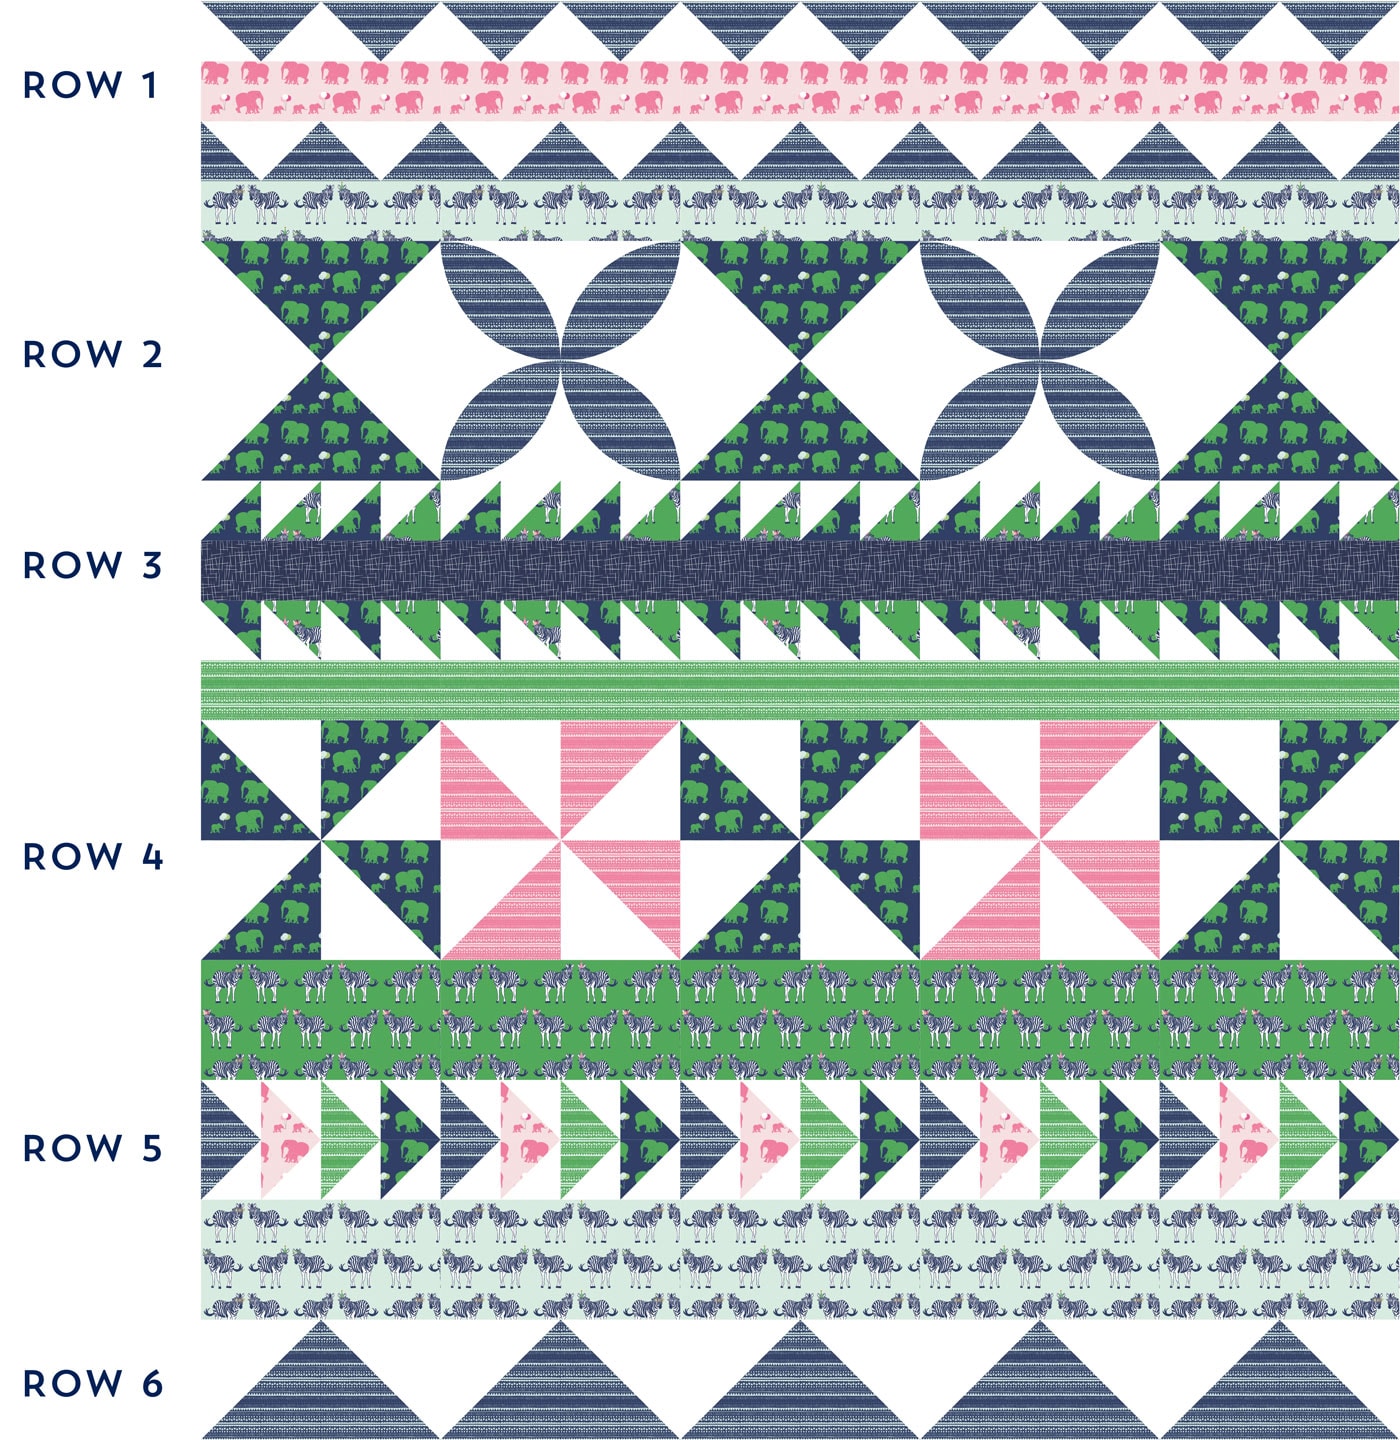
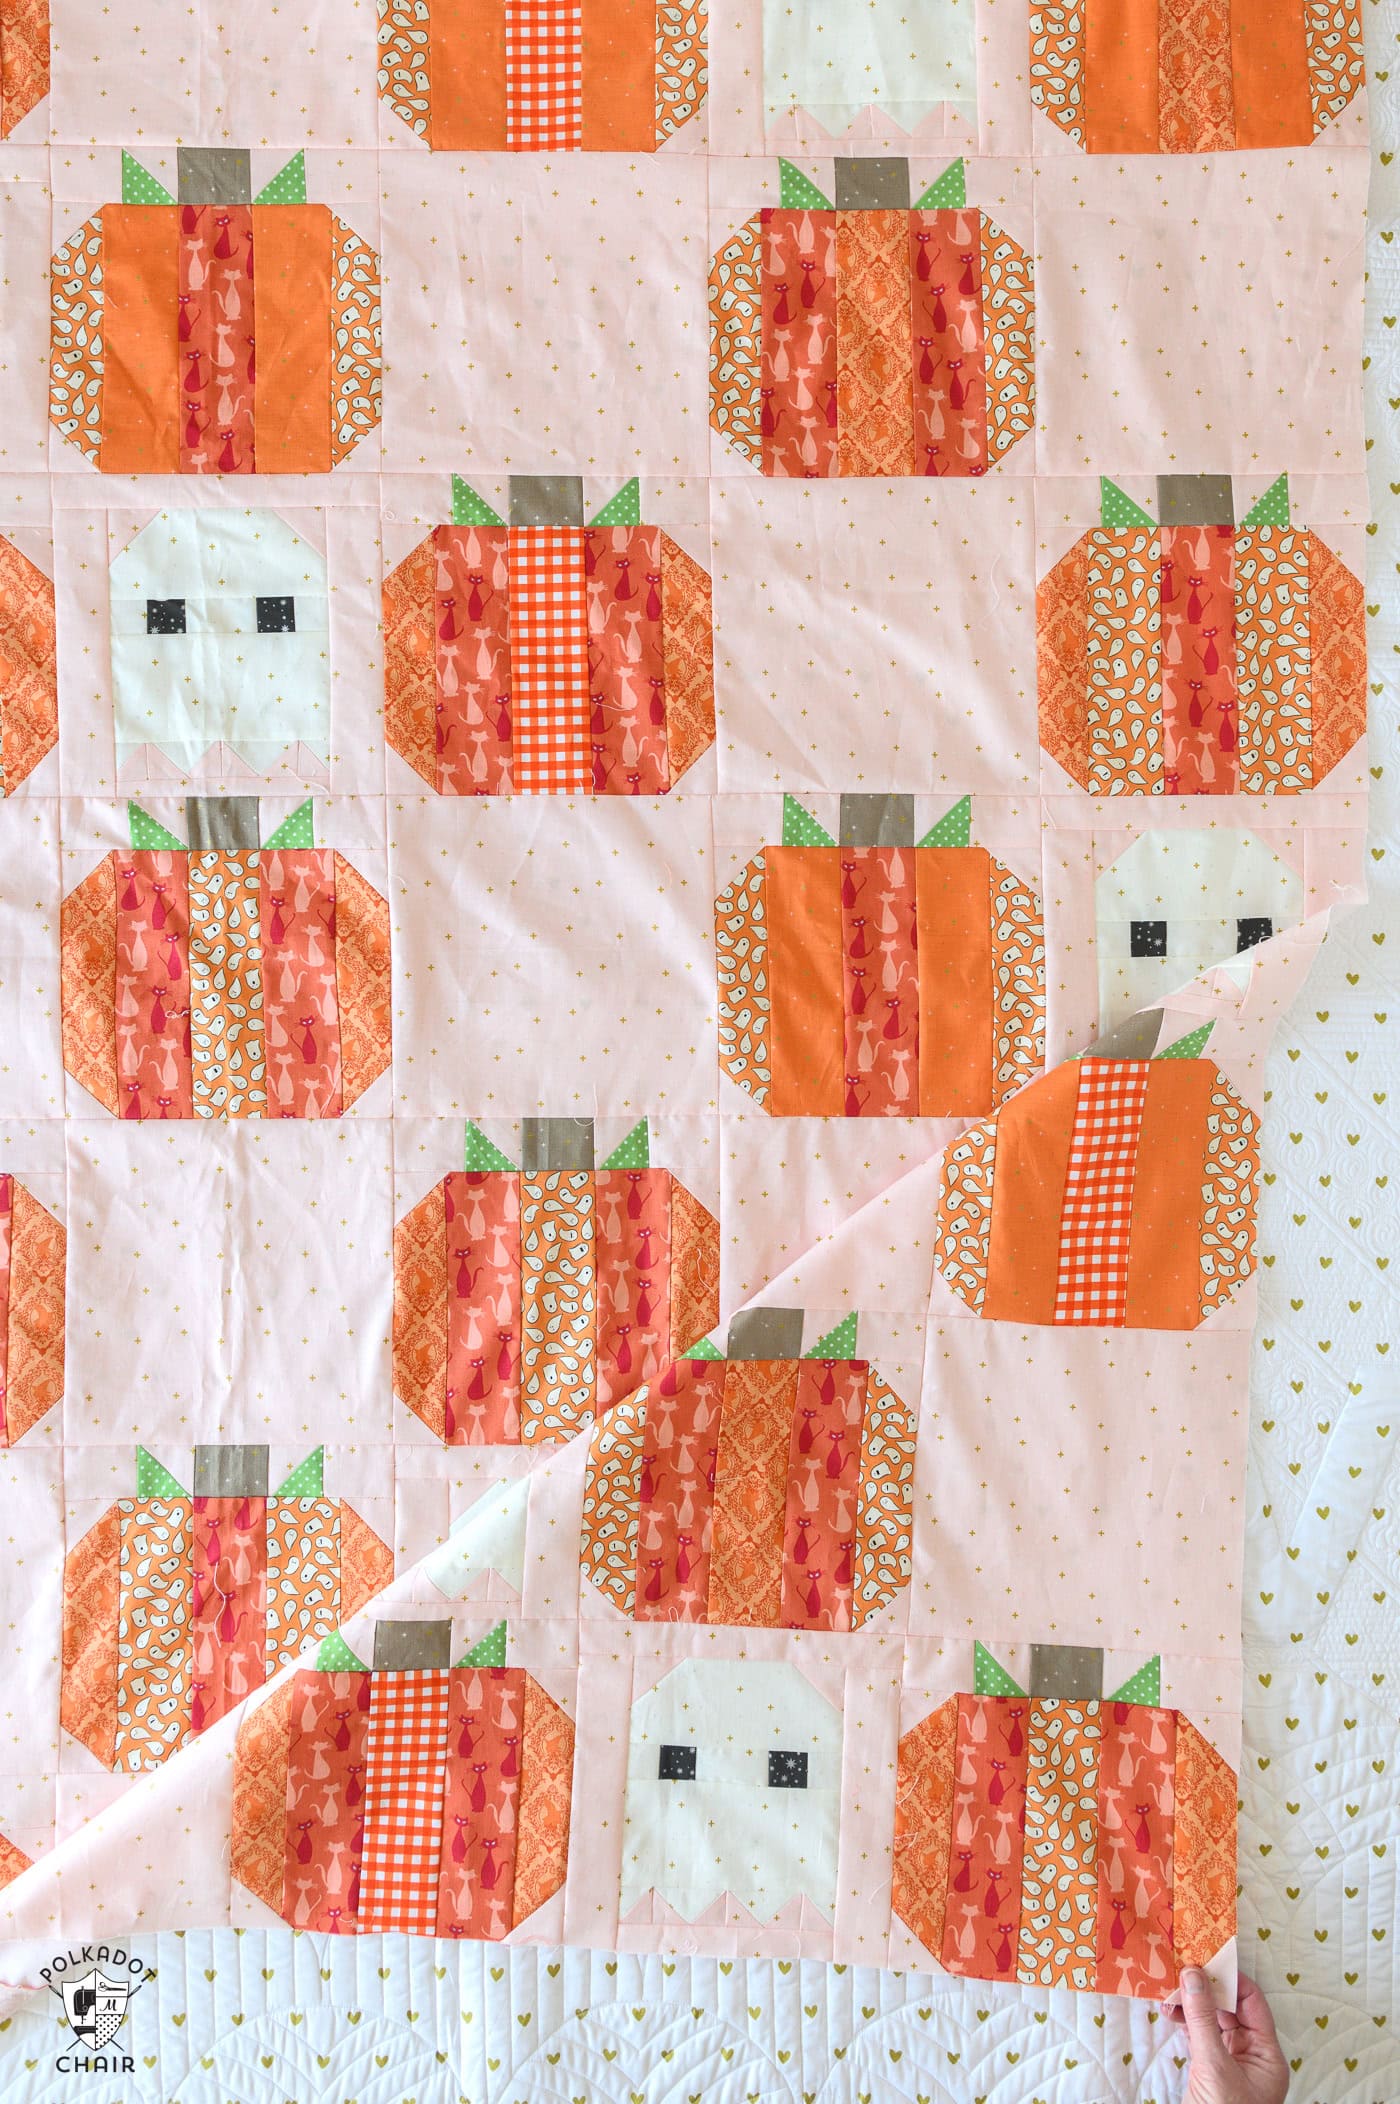
    As a reminder, here is what the quilt layout looks like, the fabrics are all from my Safari Party line with Riley Blake Designs.

    Seasonal Safari Quilt Pattern - offered as a free quilt along this Fall from the polkadotchair.com blog!

    Before we sew the rows together we need to create some of the “sashing” between the rows.

    There are 2 way to add the sashing in between the rows. If you are new to quilting I recommend method #1.

    Method #1:

    Cut:

    For Sashing row between rows 1 & 2:

    5 pieces each 3 ½″ x 12 ½″

    For Sashing row between rows 3 & 4:

    5 pieces each 3 ½″ x 12 ½″

    For sashing row between rows 4 & 5:

    5 pieces each 6 ½″ x 12 ½″

    For sashing row between rows 5 & 6:

    5 pieces each 6 ½″ x 12 ½″

    Stitch:

    For each sashing row, stitch together along short sides with ¼″ seam allowance and press seams to one side, you will have one strip 60 ½″ long when finished.

    Method #2

    Cut:

    For Sashing row between rows 1 & 2:

    10 pieces each 3 ½″ x 30 ½″

    For Sashing row between rows 3 & 4:

    10 pieces each 3 ½″ x 30 ½″

    For sashing row between rows 4 & 5:

    10 pieces each 6 ½″ x 30 ½″

    For sashing row between rows 5 & 6:

    10 pieces each 6 ½″ x 30 ½″

    Stitch:

    For each sashing row, stitch together along short sides with ¼″ seam allowance and press seam, you will have one strip 60 ½″ long.

    NOTE:

    If you choose method 2 which involves longer strips of fabric, just be careful. If you’re not lining each row up on top of each other perfectly you may find when you are finished that your blocks do not line up on top of each other correctly. This is why I think it’s best to use method #1. With method #1 there is more cutting and sewing but it is easier to make sure that as you sew all of those long rows together that the blocks all lineup.

    Just think of the quilt as being made up of 5 columns with 10 elements in each column. The 10 elements are the blocks in the rows and the sashing pieces. You want all of the columns to “stack” up on top of each other perfectly.

    If you’re worried about matching a pattern across the entire width of the quilt (like the zebras) you can use method #2 as it is easier to match patterns using that method (since there are fewer seams).

    A few other customization options:

    If you want your quilt to be taller (it’s 72 tall as is) then you can make your sashing strips fatter, so instead of 3 ½″ tall you can make them 7 ½″ or 10 ½″ tall, it’s up to you, just make them each 12 ½″ wide.

    You can also add a sashing row to the top or bottom of the quilt.

    If you want your quilt to be wider (it’s 60″ wide) then add borders down the sides. Again, you can make them any size that you’d like. Just think of this quilt top like a big puzzle.

    Assembling the rows:

    Begin by stitching row 1 to the sashing row between rows 1 & 2. Pin well. Make sure the seams between each block line up with each other perfectly. Also, make sure you are stitching the bottom of row 1 to the top of the sashing, otherwise the row or the sashing will be upside down (don’t ask me how I know that LOL!!!)

    I like to press my seam allowances in opposite directions when I’m stitching rows together, that way they can “nest” into each other. This helps you to keep your seam lines straight.

    Here is a photo of “nested” seams:

    September Quilt Block of the Month: a tutorial for a Plus Block on polkadotchair.com

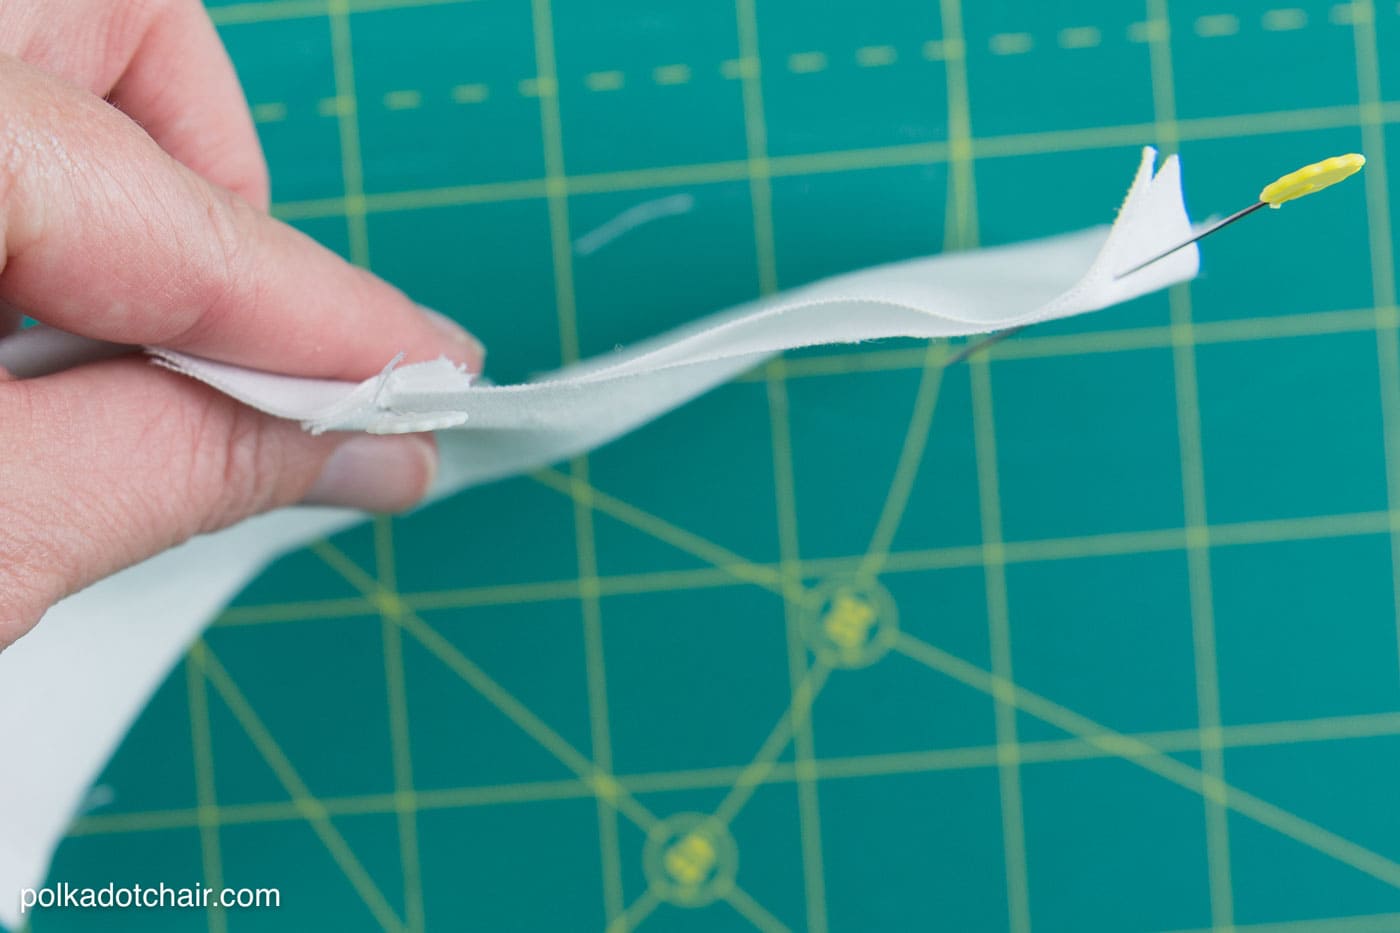
    You can see that the seam allowances are pressed in opposite directions allowing the seams to lie flat on top of each other.

    After you have pinned it well, stitch row 1 to the sashing row.

    Keep stitching rows and sashing rows together until you are done with your quilt top!

    Seasonal Safari Quilt Pattern - offered as a free quilt along this Fall from the polkadotchair.com blog!

    That’s it! Now give yourself a BIG pat on the back! You did it!!!

    I am working right now on compiling all of the rows into ONE PDF to sell in my shop. These free block tutorials are not going anywhere, so don’t worry. It will just be for convenience if you’d prefer a printable version. Also, just to answer a few FAQ’s in advance.

    The pages from this blog are not printable by design. I have learned the hard way that people want to take advantage of your “free” stuff. I have had SO many problems with brick and mortar and online stores printing out and SELLING pages from my blog and passing them off as their own patterns. One store didn’t even change the formatting, left all of my links on there, I don’t know what they were thinking! Having the pages in a nonprintable format usually slows them down a bit. It’s just rotten that some people have to ruin it for everyone.

    Also, if you’re a store don’t do that. Your customers EMAIL ME and tell me what is happening. It will just make you lose credibility with your customers. They see what is online and know where stuff comes from. If you have a store and you want to kit this quilt or teach a class from it just email me. We can work out a simple program that benefits us both, it’s better just to ask.

    Okay, now on to sharing your stuff!!!

    I’d LOVE to see your completed tops.

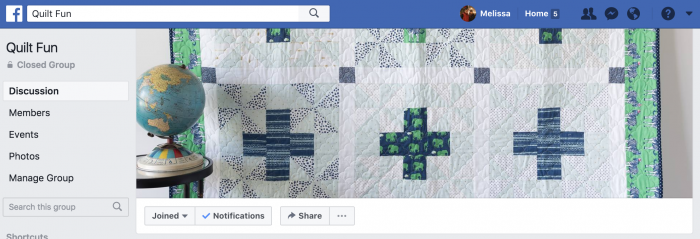
    You can upload them to our private Facebook Group:

    Upload them to my Public Facebook Page:

    Or TAG me on Instagram @polkadotchair – you can also use the #polkadotchair hashtag!


    More Projects You'll Love!

    • Seasonal Safari Quilt Pattern - offered as a free quilt along this Fall from the polkadotchair.com blog! #quiltalong #freequiltpatterns #rowquilt #quiltingtutorials #quilts #safariparty #rileyblake #melissamortenson #polkadotchair #howtoquilt #learntoquilt
      Seasonal Safari Row Along; Row 2
    • Seasonal Safari Quilt Pattern - offered as a free quilt along this Fall from the polkadotchair.com blog! #quiltalong #freequiltpatterns #rowquilt #quiltingtutorials #quilts #safariparty #rileyblake #melissamortenson #polkadotchair #howtoquilt #learntoquilt
      Seasonal Safari Row Along; Row 3
    • Seasonal Safari Quilt Pattern - offered as a free quilt along this Fall from the polkadotchair.com blog! #quiltalong #freequiltpatterns #rowquilt #quiltingtutorials #quilts #safariparty #rileyblake #melissamortenson #polkadotchair #howtoquilt #learntoquilt
      Seasonal Safari Quilt Row Along; Row 5
    • Seasonal Safari Quilt Pattern - offered as a free quilt along this Fall from the polkadotchair.com blog!
      Seasonal Safari; a Free Quilt Row Along
    « How to Add a Zipper to a Pillow Back
    Pom Pom Patchwork Pillow Pattern »

    • Share
    • Email

    About Author

    Melissa Mortenson

    Melissa Mortenson is a blogger, designer, and content creator. She is the Polka Dot Chair blog founder and has been sharing fresh and creative ideas with readers since 2008. She is the author of “Project Teen, Handmade Gifts your Teen will Actually Love.” Her work and designs have been featured on HuffPost, TODAY, Pioneer Woman, HGTV, BuzzFeed, Better Homes & Gardens, and many other established publications. Her first fabric line, “Derby Style,” debuted in January 2015 through Riley Blake Designs.  Additional fabric collections have followed it in subsequent years. A mom of 3, she considers herself lucky to be living in Kentucky.

    Reader Interactions

    Comments

    1. Ivory says

      November 29, 2017 at 7:11 pm

      Like all your quilts, I love this one to, and would love to own at least one of these fabulous quilts of yours.

      Reply
    2. Jill Davies says

      June 16, 2019 at 1:49 am

      Hi. I just wanted to say how lovely this quilt is. I’m not sure which version that I would like to make as I love them all. Thank you for sharing this pattern.

      Reply

    Leave a Reply Cancel reply

    Your email address will not be published. Required fields are marked *

    This site uses Akismet to reduce spam. Learn how your comment data is processed.

    Primary Sidebar

    Hello! It’s nice to meet you.

    I’m Melissa. I like to design things, like fabric, printables, and projects.

    I’m also a Mom and a Maker. I am like most of you, just trying to do my best every day. Some days I succeed, many days I fail.  I find joy in creating, if you do too, then I hope that you find something here bring a little “happy” to your life.  Find out more about me here.

    COPYRIGHT POLICY

    All my images and text are copyrighted. You may NOT use any images from this site in any kind of Video (this includes YouTube). If you would like to feature my work, you may use ONE (1) NON-COLLAGED image and must “follow” link back to my original blog post. You may NOT edit, crop, or change my images in any way without written permission. You MAY NOT print out or copy and distribute any text, images or patterns from this site. All patterns, content, instructions, and templates are for personal use ONLY! Thank you! Violators will be reported.

    Footer

    ↑ back to top

    About

    • Privacy Policy
    • Disclaimers
    • About Melissa

    Newsletter

    • Sign Up! for emails and updates

    Contact

    • Contact
    • FAQ
    • Press
    • Fabric Collections

    Welcome to the Polka Dot Chair! Here you’ll find easy, step-by-step, sewing, quilting, and crafting projects. We design projects for Makers of all skill levels. Beginners are welcome!

    DISCLAIMER:

    While every effort has been made to ensure the accuracy of the content on this website, the information is made available without warranty of any kind. The Polka Dot Chair accepts no responsibility or liability, whether direct or indirect, as to the currency or accuracy of the information, nor any consequence of its uses. This website is not intended to substitute the advice of a professional.

    Copyright © 2020 Polka Dot Chair

    [ Placeholder content for popup link ] WordPress Download Manager - Best Download Management Plugin