How to: DIY Disney Monogram for a Yeti Tumbler
A few weeks ago, I posted (here and shared on Instagram) about a personalized Yeti Tumbler that I monogrammed to take with me on our Disney Cruise. Since then, MANY of you have emailed me asking me how to make a DIY Disney Monogram at Yeti (or another stainless steel tumbler). Today I’m going to show you how I did it (it’s easier than you think).
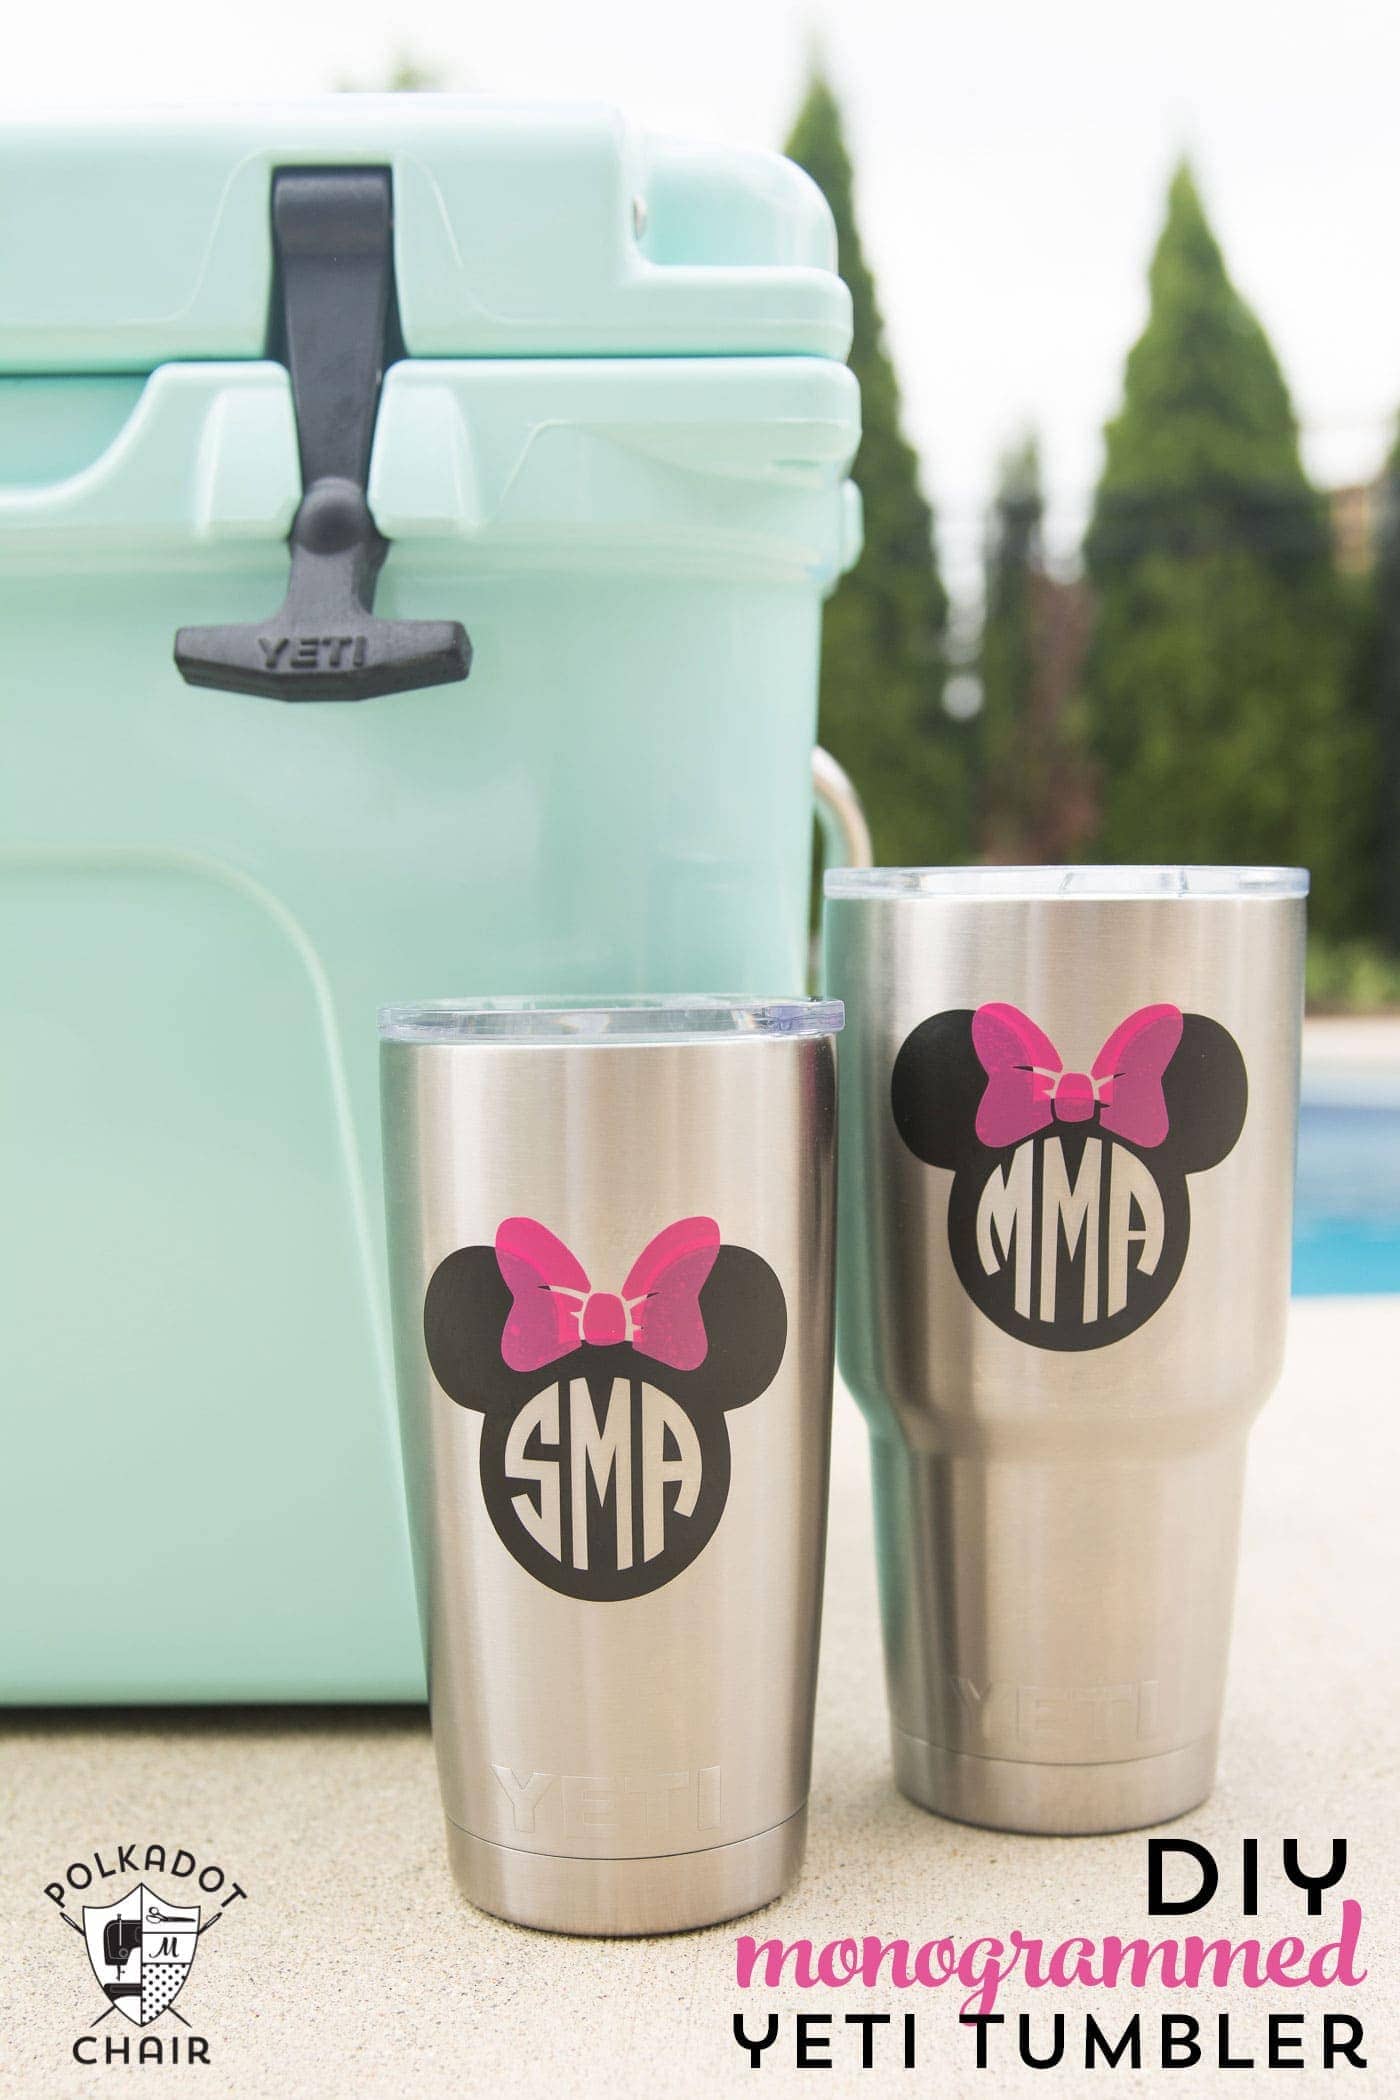
We went on a Disney Cruise for Spring Break, and I thought it would be fun to make a little something “Disney” for me to take along with me.
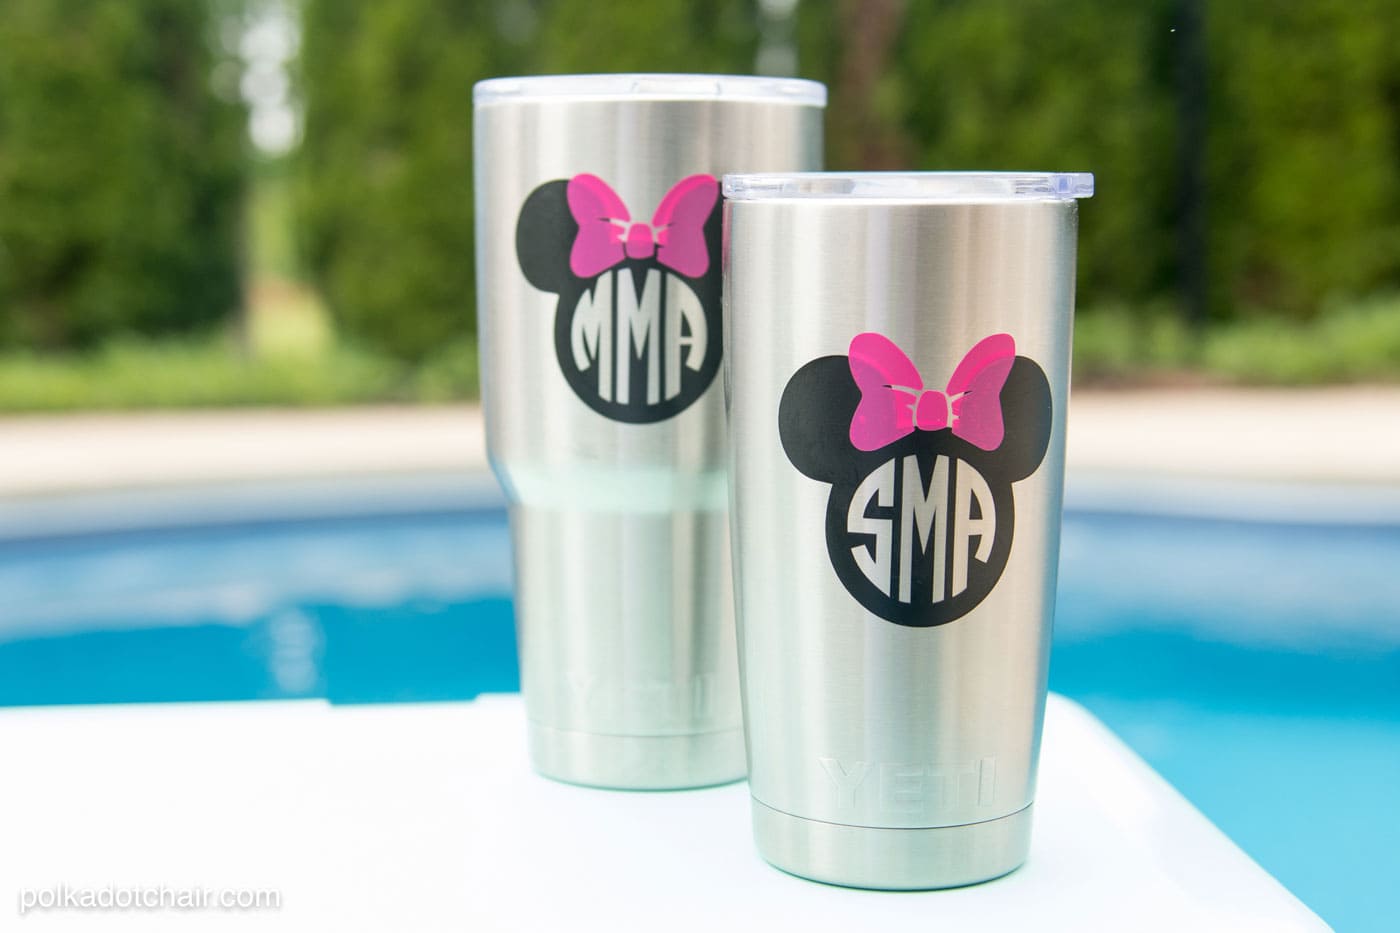
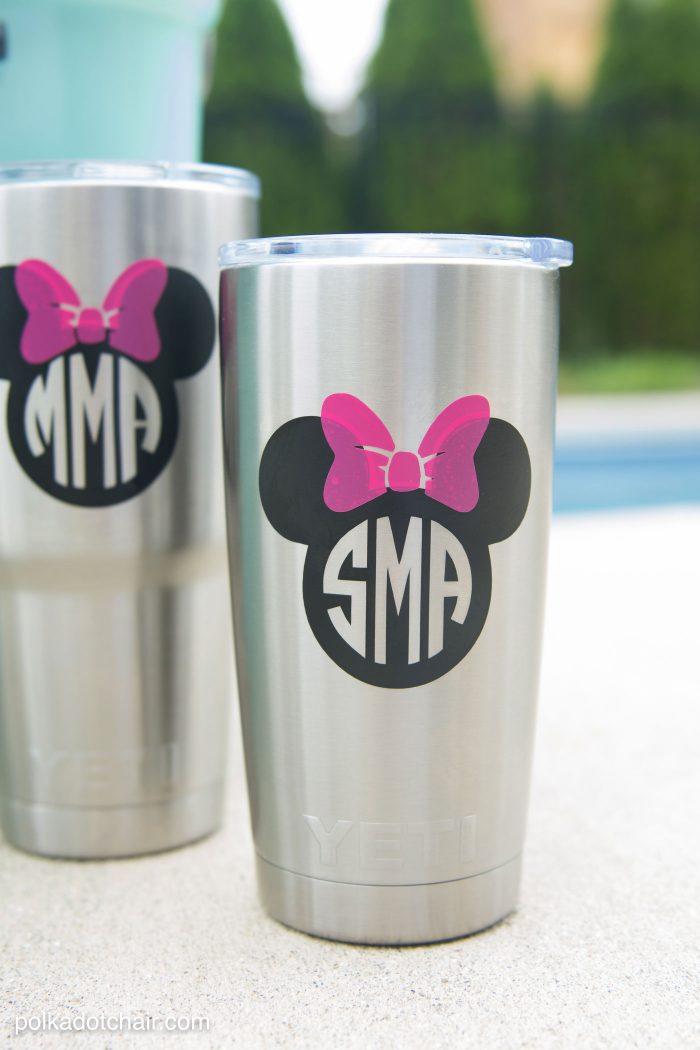
I’d seen the Disney monograms before and decided to take a crack at making one. I ended up making a tumbler both for myself and my daughter, both of which turned out to be very useful on our trip (cold drink = more time sitting in beach chair).
To do this project, you will need a Cricut machine. Cricut has an official license for Disney images. You can buy the Disney images one at a time in the Cricut “store” online. In their store, they have more than just Mickey Mouse they also have LOTS of other Disney images and characters. For this project, you’ll need to buy 2 images (if you have a subscription you don’t need to buy anything).
You could do this project with a Silhouette, but you’ll have to figure out how to draw your own Mickey Head and Minnie Bow.
Also, if you don’t want to buy a Yeti (they are a bit pricey), Walmart has an option for only $10 (you can buy them online) and I’m told they work just as well.
You can find the Yeti brand tumblers on Amazon or in some of your local Outdoor stores. If you buy them on Amazon, be sure to double-check the price, as many sellers are marking up the price… a lot.
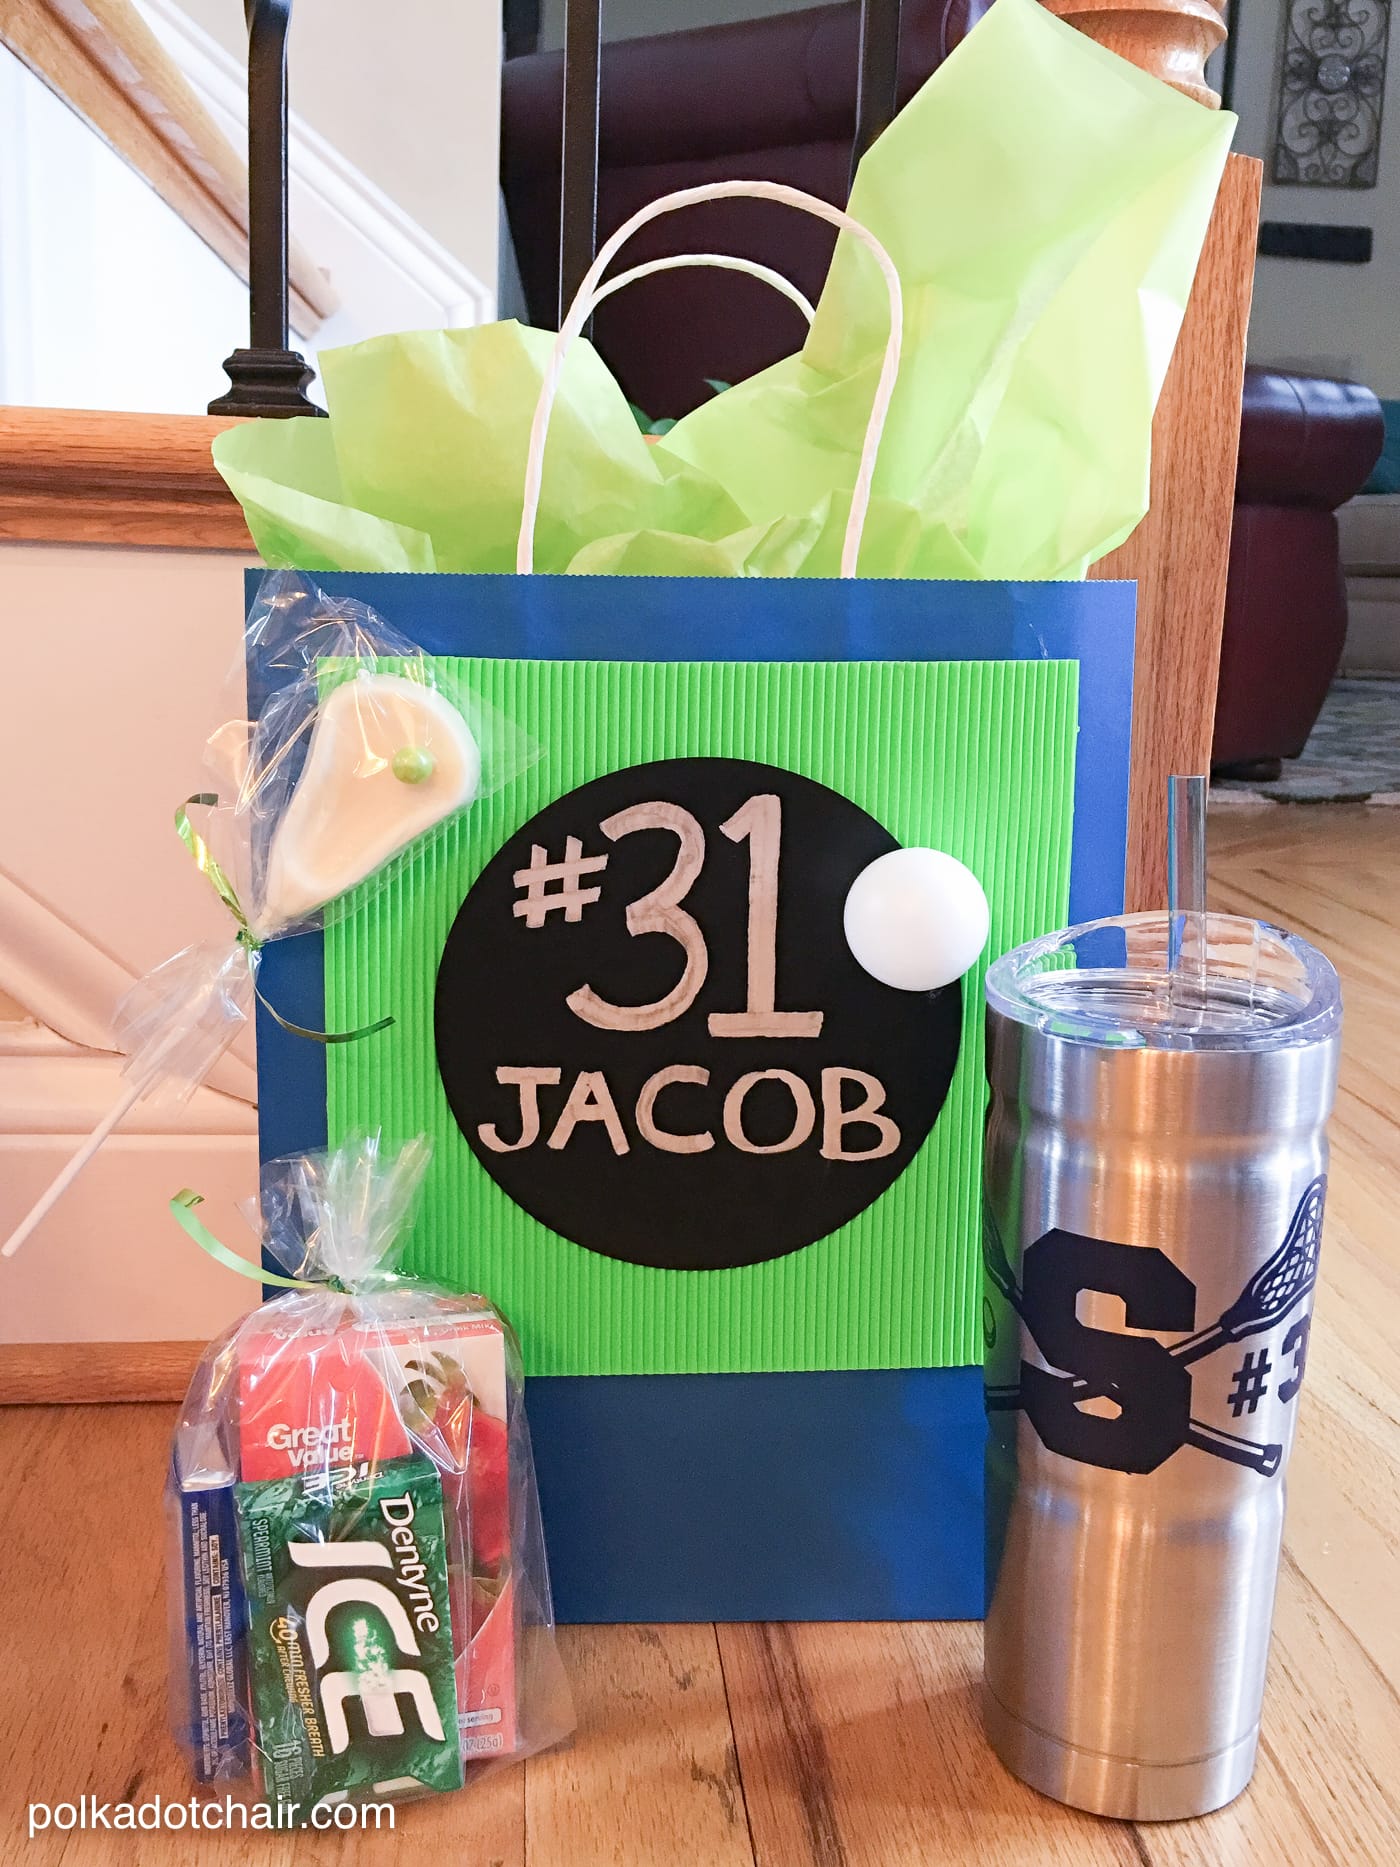
Also, if you don’t want a Disney monogram but still want to personalize your tumbler, here’s another idea for you. I helped a friend make some personalized tumblers for her son’s lacrosse team. We just used an image from the Cricut Library along with an “S” for their school an added their jersey # to the side.

She packaged them up with some goodies and gave them to the team on Senior Night… what a clever idea!!
How to Personalize a Yeti Tumbler with a Disney Monogram
You’re going to need (includes affiliate links)
Cricut Explore Machine hooked up to the Cricut Design Space
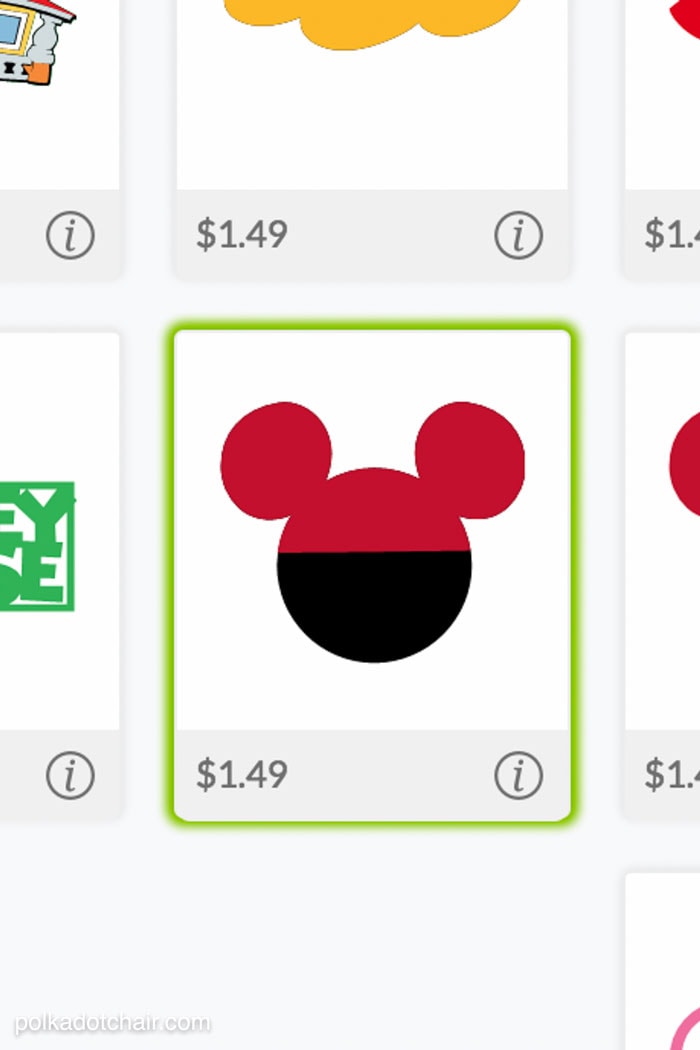
Mickey Head Cricut File
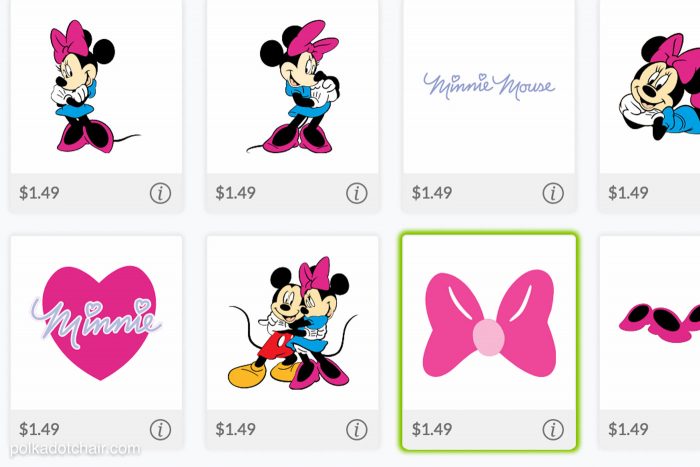
Minne Bow Cricut File
Circle Monogram Font
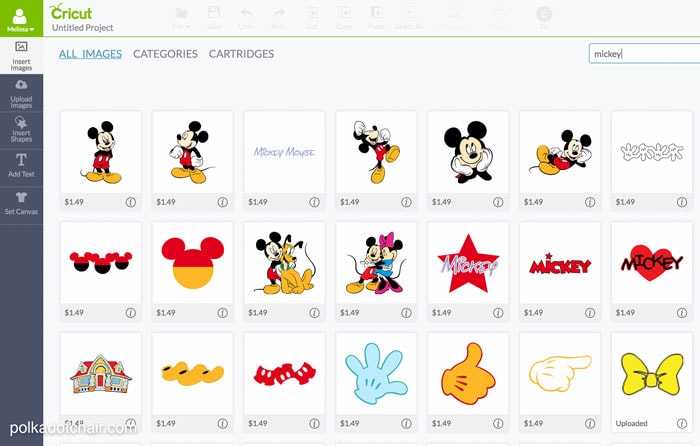
Open up the Cricut design space and click “insert images”. Type MICKEY into the search box. You’ll find the bow and Mickey’s head in there.
Insert them into your document.

Click on the LAYERS palette on the side.
Click the eyeball next to the red Mickey head top. This will hide the image so that you ONLY cut the black silhouette.
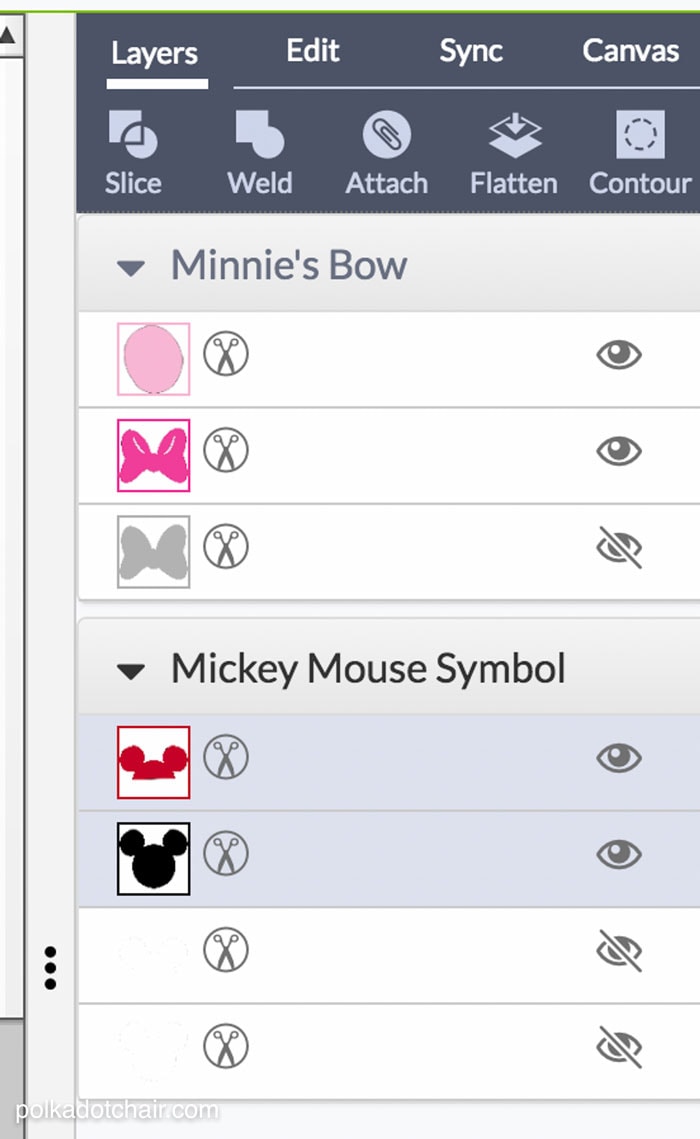
Do the same with the Minnie bow. You only want to cut one piece.
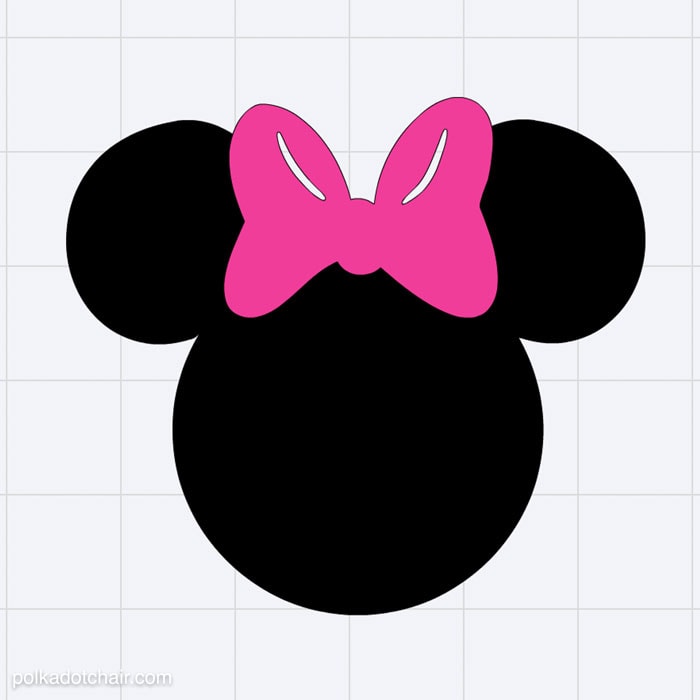
Change the Mickey head to the size you want. Drag the bow to the top of the Mickey head and resize it. It will be cut into two separate pieces, but this step will help you to get both pieces the right size.
For the next part, you’ll need a Circle Monogram Font. I bought mine (at Howard’s Fonts) and use it always so I didn’t mind. If you want a free option, there is a font called Monogram. It’s a “swirly” monogram font, but it would also be cute.
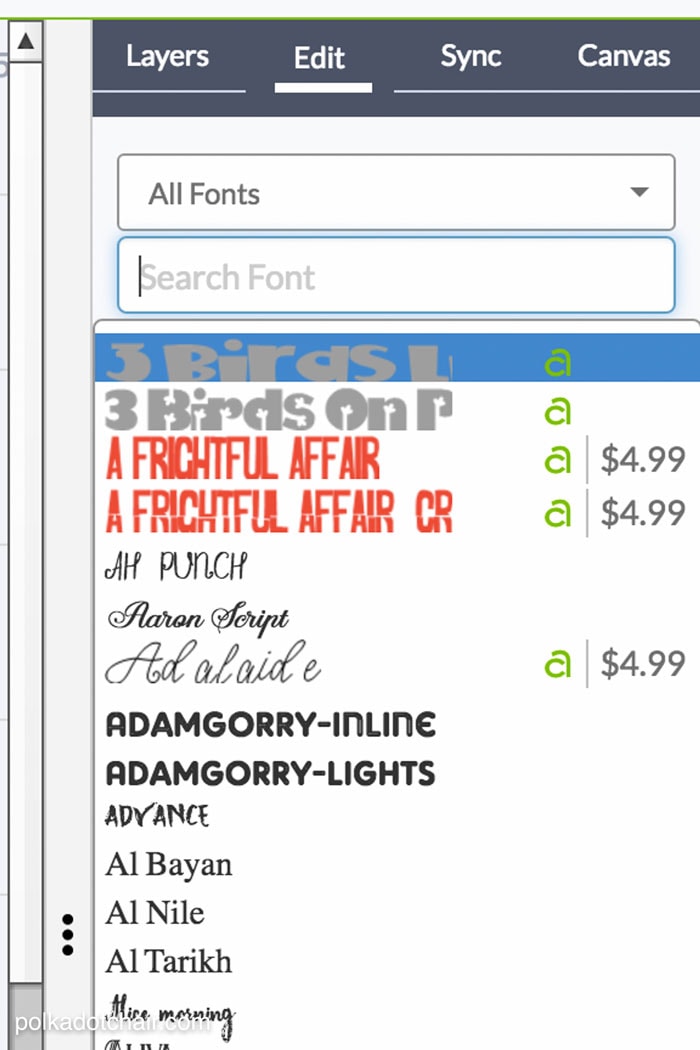
Type your first letter, then pick the font that you want from the EDIT panel.
If you are using the Circle Monogram font, you’ll notice that the center letter is too skinny.
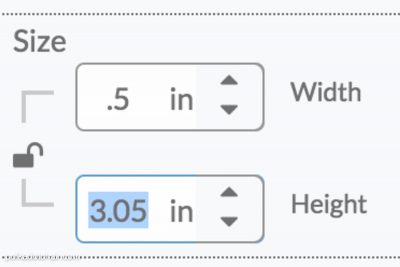
In the EDIT panel, click on the lock to unlock the “proportions” then click the up arrow on the width until it’s a size that you like.
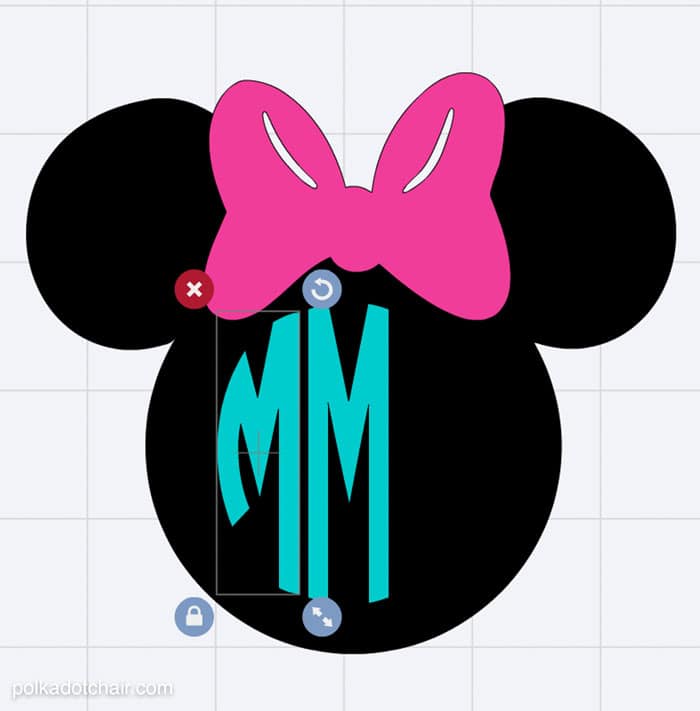
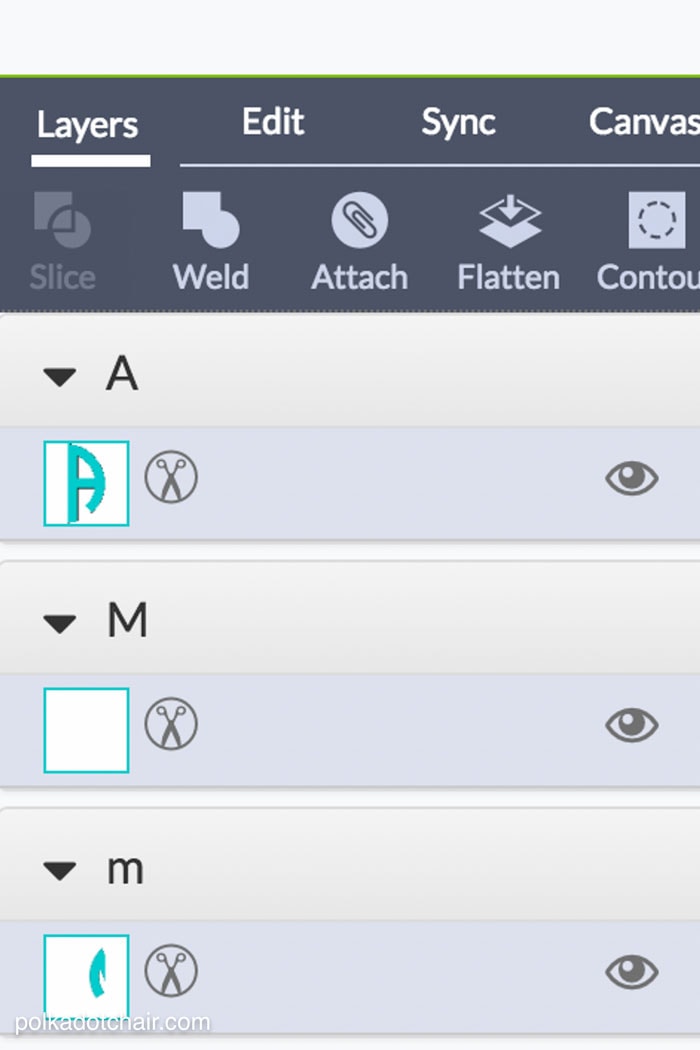
Insert the rest of the letters. You’ll need to use the “key” for the font to figure out what to click to get the right, left and center letters.
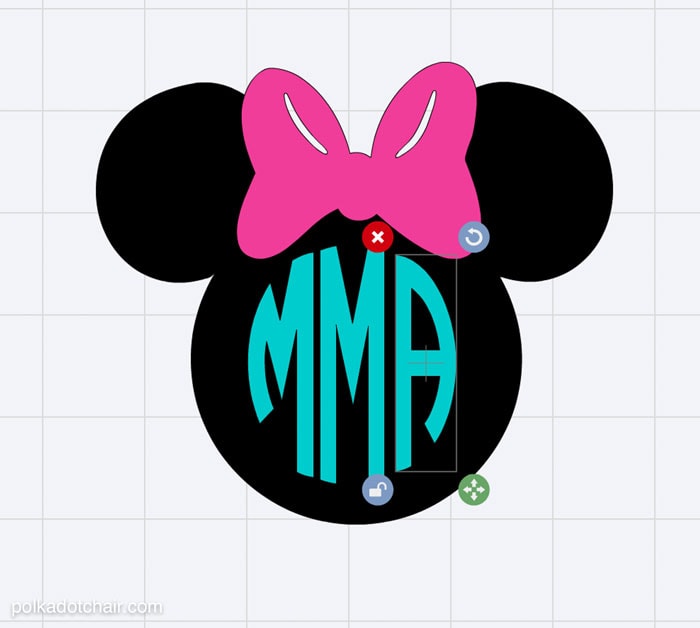
After you’ve got it the way that you like it, go to the layers panel and change the color of all of the letters to black. Keep in mind that the Cricut sees each color on the project as a different color of vinyl and will prompt you to change the mat each time there is a color change. You want the letters and the Mickey head to be cut all at the same time, so make them black.
Next, click on each letter and the Mickey head in the layers pallet. Hold down the shift key so that you select all of them, then click ATTACH.
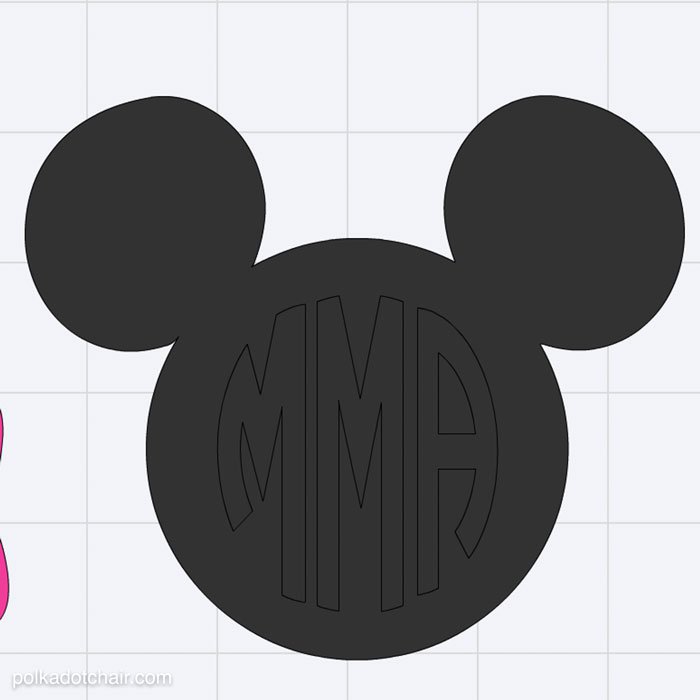
The file will look like this: don’t attach the bow.
Send the file to the Cricut. You will follow the prompts and make one cut from the black vinyl and one from the pink.
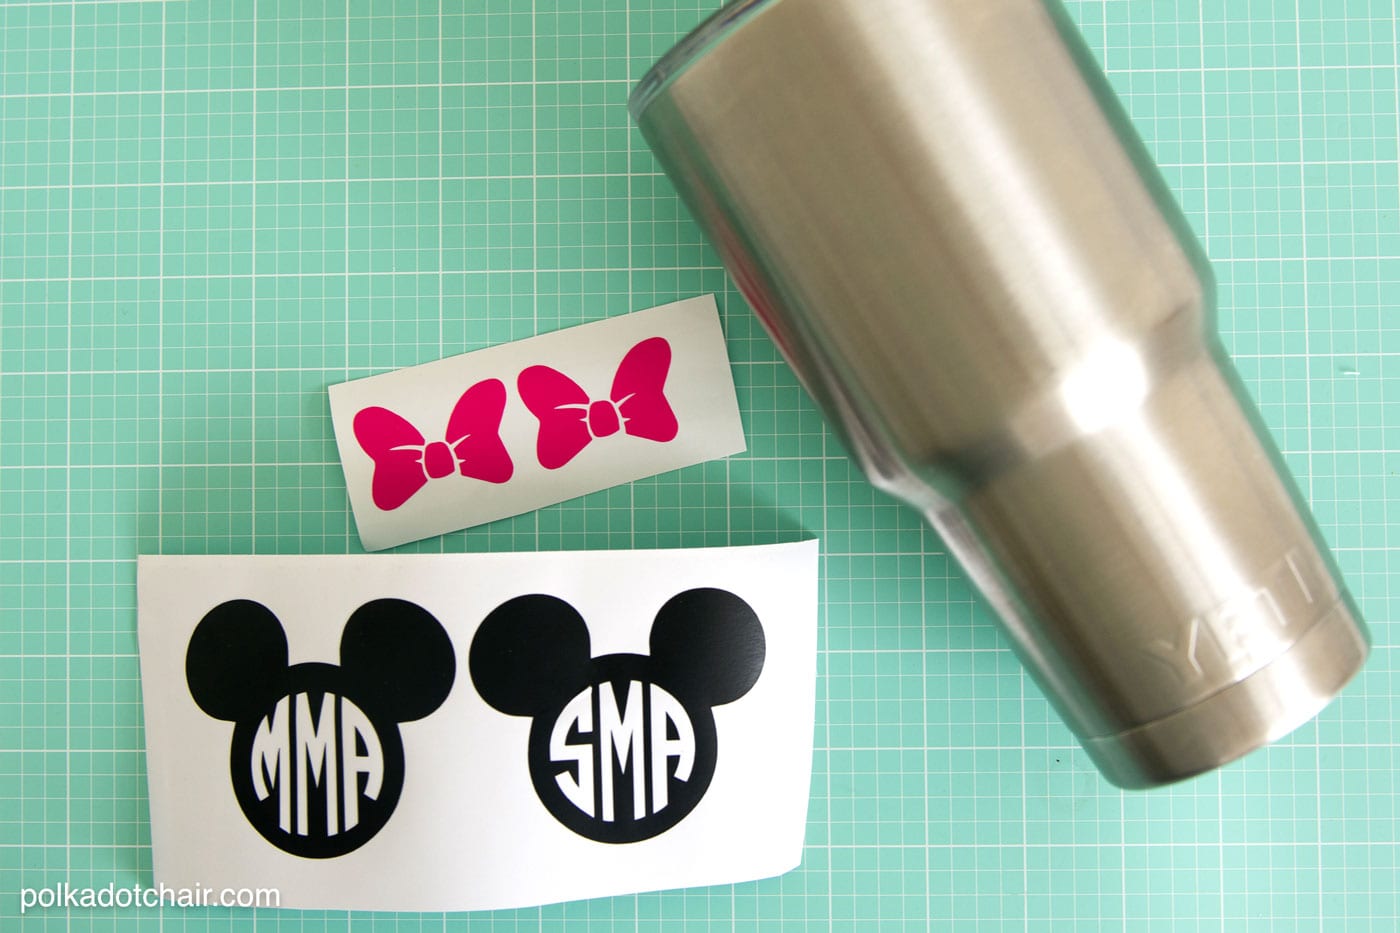
Cut out around the design, and peel way the excess vinyl to reveal the decal.
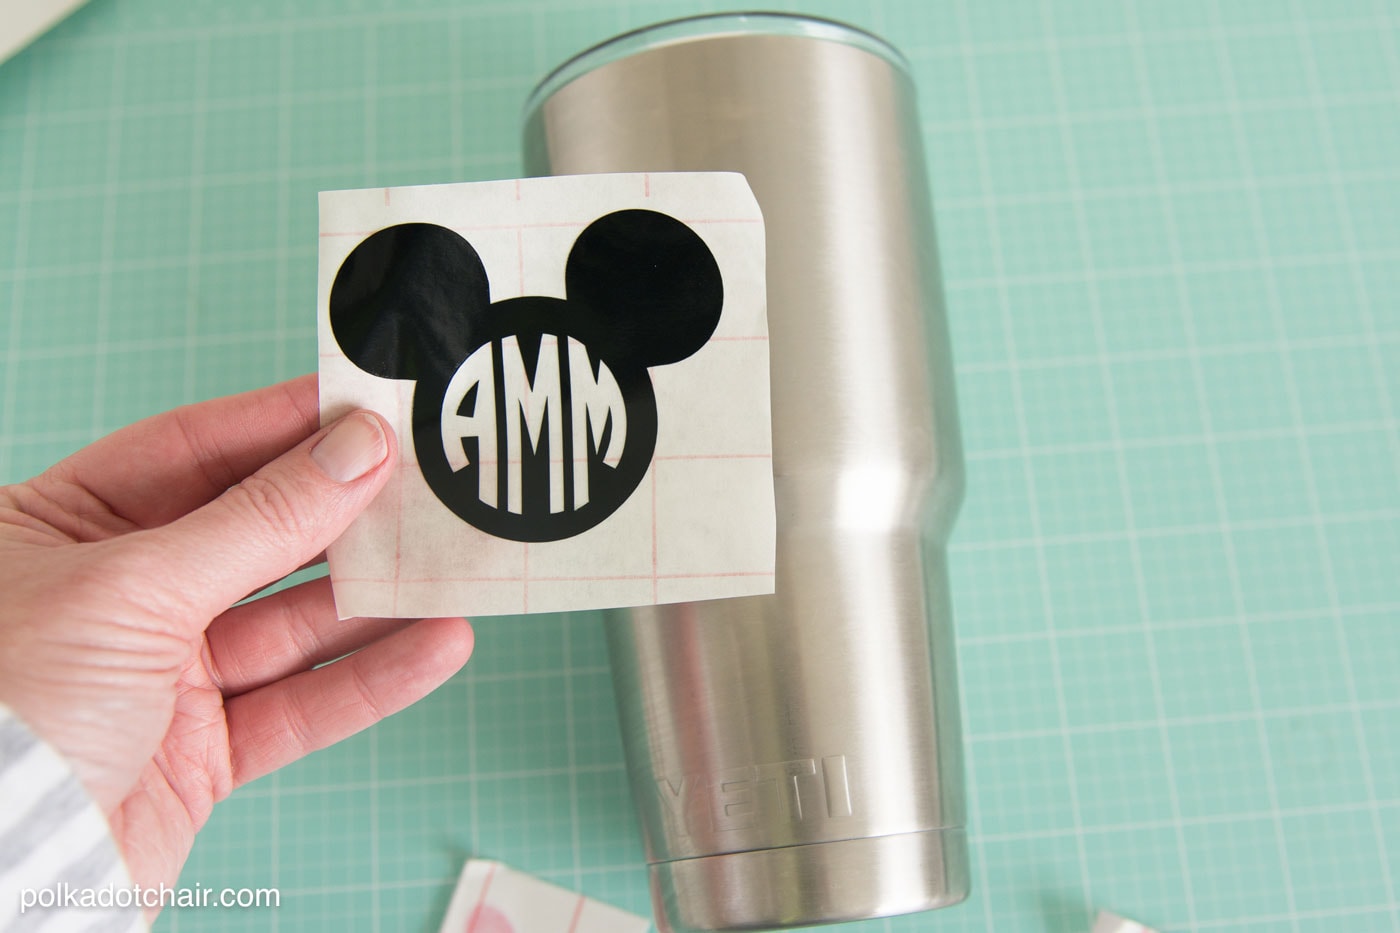
Cut a piece of transfer tape to the same size as the decal.
Apply the transfer tape so that the sticky side of the tape is on the right side of the decal. Then peel the decal away from the backing using the transfer tape.
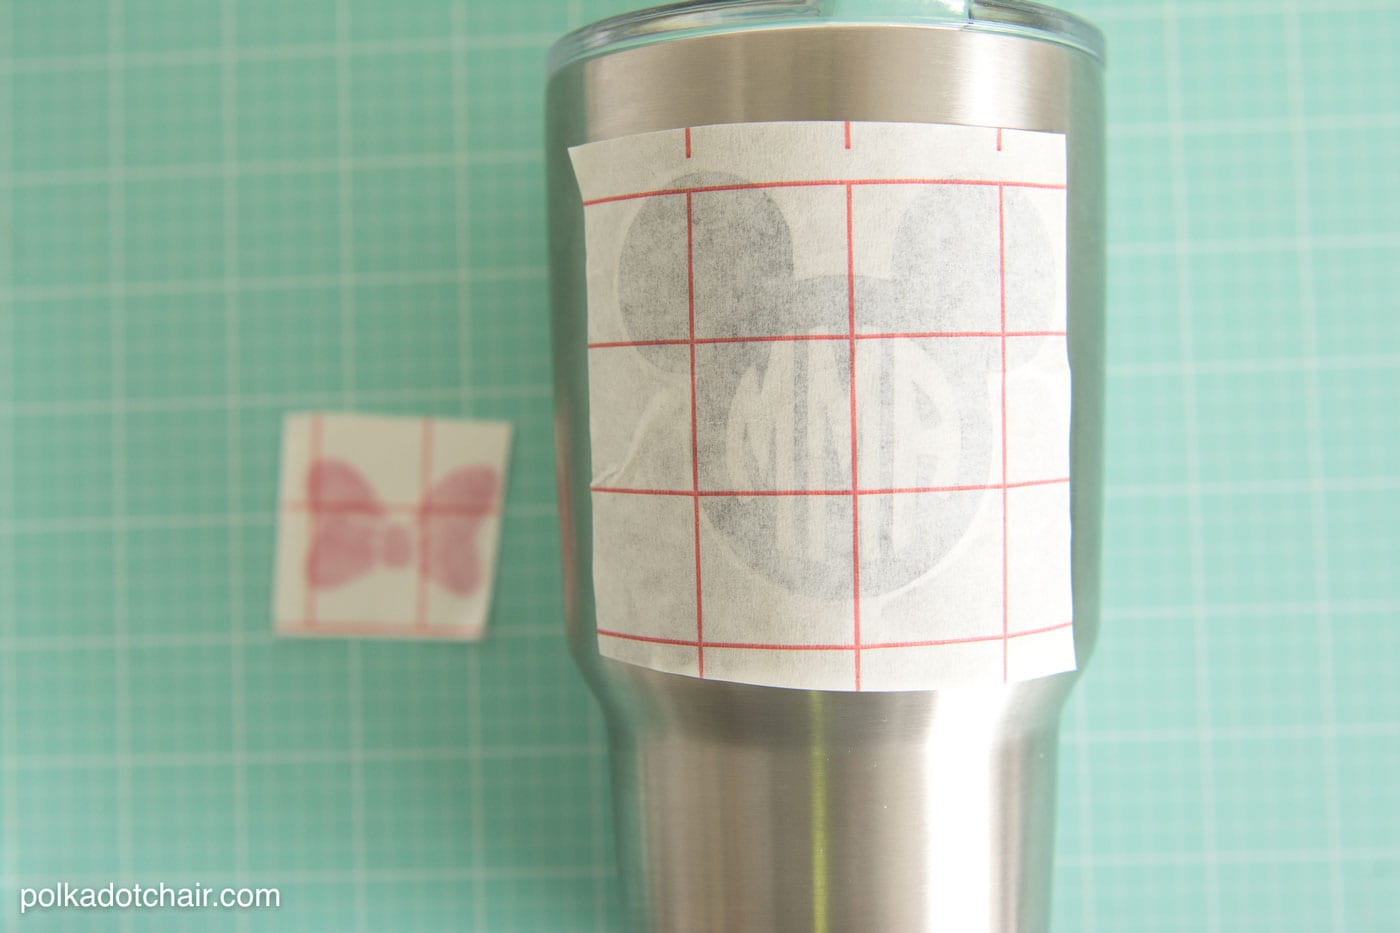
Place image on the cup in the desired location. Use an old credit card to smooth out the design and adhere it to the cup.
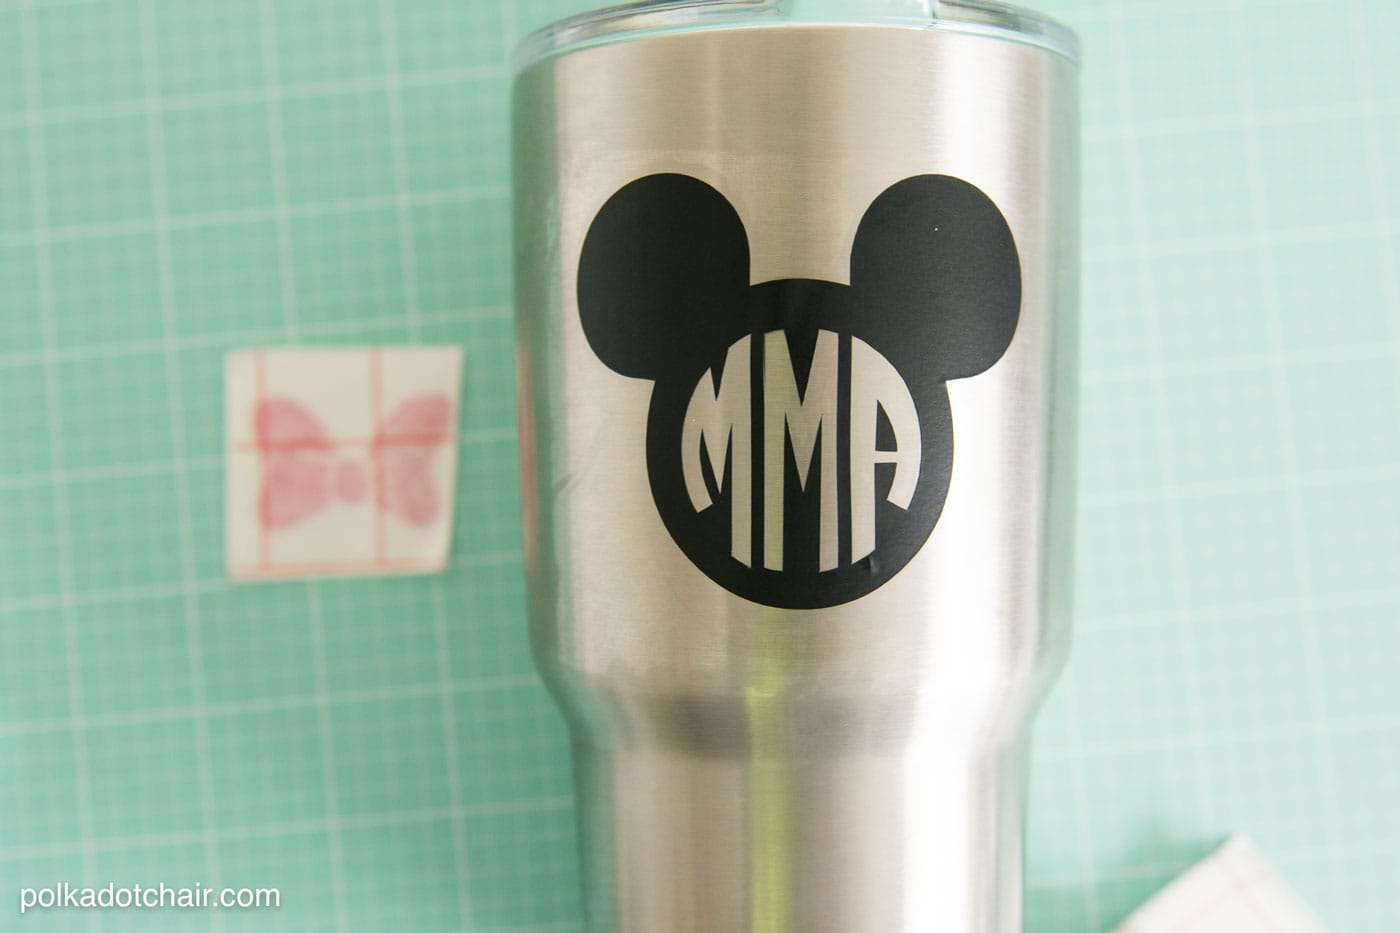
Peel off the transfer tape. Repeat with the bow decal.
If you don’t have a Cricut, you can pick one up on Amazon or from Cricut. I LOVE mine and use it for so many things, from crafts to home decor to sewing projects!!


I using this post to make my own, what sizes is then image on the tumbler? Mine came out bigger then the example. Thank you.
I know this is an old post, but I tried to find the images in Cricut and wasn’t able to find any of them at all. Does Cricut remove images?
Possibly, I’ve had a few others ask me about that. Which ones are missing?
I love this design and am trying to use it. I downloaded a Circle font and installed the left, middle and right fonts, but my font file only shows one circle font. How do I get the 3 versions?
This tutorial http://www.dreamalittlebigger.com/post/hug-in-a-mug.html Talks about using HTV on a mug and it being diswasher safe. I haven’t tried it yet, but I am sure thinking about it.
I’ve heard about using HTV on dishes. However the Yeti tumblers themselves are not dishwasher safe. So I think it still wouldn’t work. It might however help the monogram hold up better to repeated hand washings.
Thanks for the tip!
Not trying to be rude, but the Yeti tumblers are actually dishwasher safe. That’s another one of the amazing things about them! I love my Yeti and can’t wait to try out my new Cricut for customizing my mug. Thanks for the walk through.
Hi! From what I’ve read the ones that have a plastic coating are dishwasher safe (the colorful ones) but the plain stainless are not. We hand wash our stainless and put the others (with the colorful outsides) in the dishwasher.
Just wondering- are you using heat transfer vinyl or just regular vinyl. I thought I read somewhere that if you use heat transfer vinyl they are dishwasher safe but I feel like I could peel my vinyl off. Any tips?? Thanks!
I used regular vinyl. I’ve never heard that about heat transfer before, but I guess it makes sense. If you try it let me know, I’m curious if it works
I love this cup, and this version of the minnie bow but I can’t find the files anywhere! Can you link the bow file? The one in the cricut files looks a little bit different? Thanks!
My vinyl comes of when I wash the tumbler. should I use oracal 651 instead of 631?
These are adorable! We recently bought a Cricut Explore Air and can’t figure it out! Lol Any suggestions for classes/tutorials on them?
I’ve done this myself with a Silhouette cutter. My husband and I have “party cups” for just about every holiday. I’ve even made a set for one of my sister’s to take on her vacation to the Bahamas with a group of friends with the Bahamian flag on them. (That one scored me some beach glass!)
These really are simple to do and help you remember some great times.