Leather-Trimmed Zippered Pouch Tutorial
Learn how to make an elegant yet simple clutch with this leather-trimmed zippered pouch tutorial.

Zip pouches are one of my all-time favorite gifts to sew. They sew up quickly and you can easily personalize them to match the style of the recipient. To add a professional touch to this pouch I added a little leather trim to the corners.
Supplies
To make it you’ll need:
- 2 pieces of fabric cut to 12″ x 8″ for the pouch front and back
- 2 pieces of fabric cut to 12″ x 8″ for the pouch lining
- 2 pieces of shape flex interfacing cut to 12″ x 8″
- 2 pieces of fusible fleece cut to 12″ x 8″
- 1 piece of lightweight leather 3″ x 3″ (tip, cut your leather with a rotary cutter)
- glue stick
- binding clips
- 12″ zipper
- leather needle for sewing machine
- heavy duty thread
- regular thread
Construction Steps
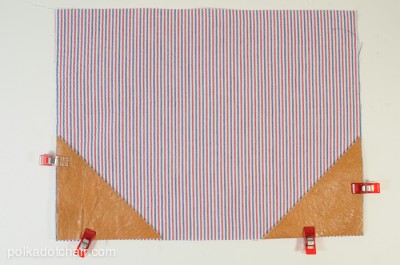
Begin by pressing the shape flex to the wrong side of the pouch front and back pieces and the fusible fleece to the wrong side of the lining pieces. Cut the leather square in half along the diagonal.
Apply a little bit of glue to the wrong sides of the leather pieces, glue to the pouch front and hold in place with binding clips.
If you’ve never sewn with leather before, make sure you check out our must know tips for sewing with leather.
(note I make a lot of these zip pouches, here it’s shown in another fabric variation)
Insert the leather needle into your machine and stitch along the edge of the leather using the heavy-duty thread. Do not backstitch.
Install a regular needle and thread in your sewing machine.
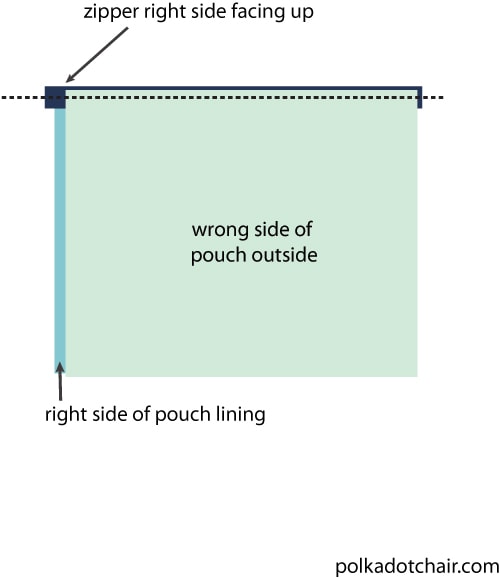
Now you will begin assembling your pouch. Pin the right side of the zipper to the right side of the pouch front piece.
Pin the wrong side of the zipper to the right side of one of the lining pieces. Stitch using a zipper foot. Repeat for the other side of the zipper.
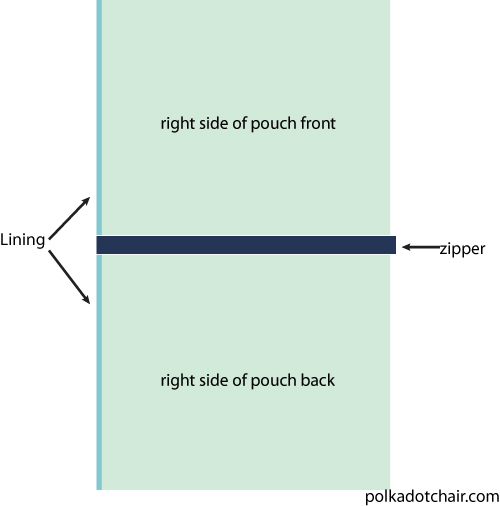
Press the pouch pieces away from the zipper and top stitch along both sides of the zipper (this will keep the lining from getting caught in the zipper). Be careful not to press over the parts of the pouch with the leather.
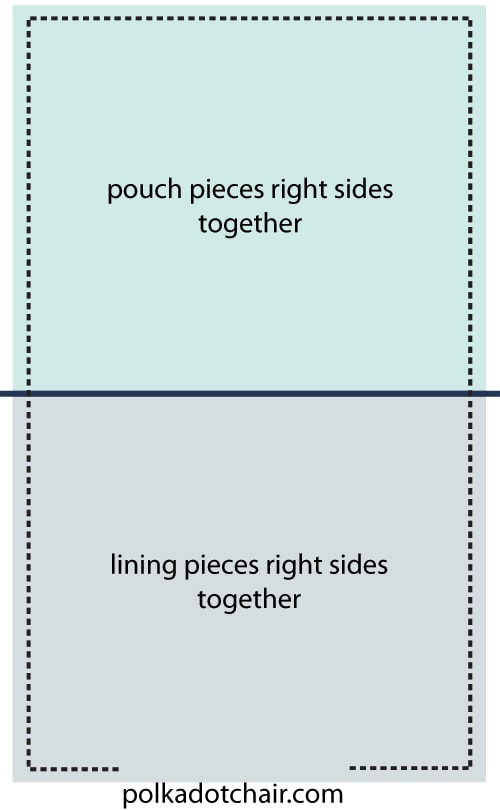
Unzip the zipper. Pin the pouch lining right sides together and pouch front and back pieces are right sides together. Pin the zipper towards the lining pieces.
Stitch around the perimeter of the pouch leaving a 3″ opening in the bottom of the pouch to turn it right side out. Be sure to go slow and take special care when stitching over the parts of the pouch where the leather is.

Clip the corners and turn right side out. Stitch the opening in the lining closed.
I hope you enjoyed this post, if you’d like here are some other handmade gift ideas that you may like:
I’m so Fancy Make Up Clutch with free printable
Zippered Pouches perfect for Dad made from upcycled neckties


