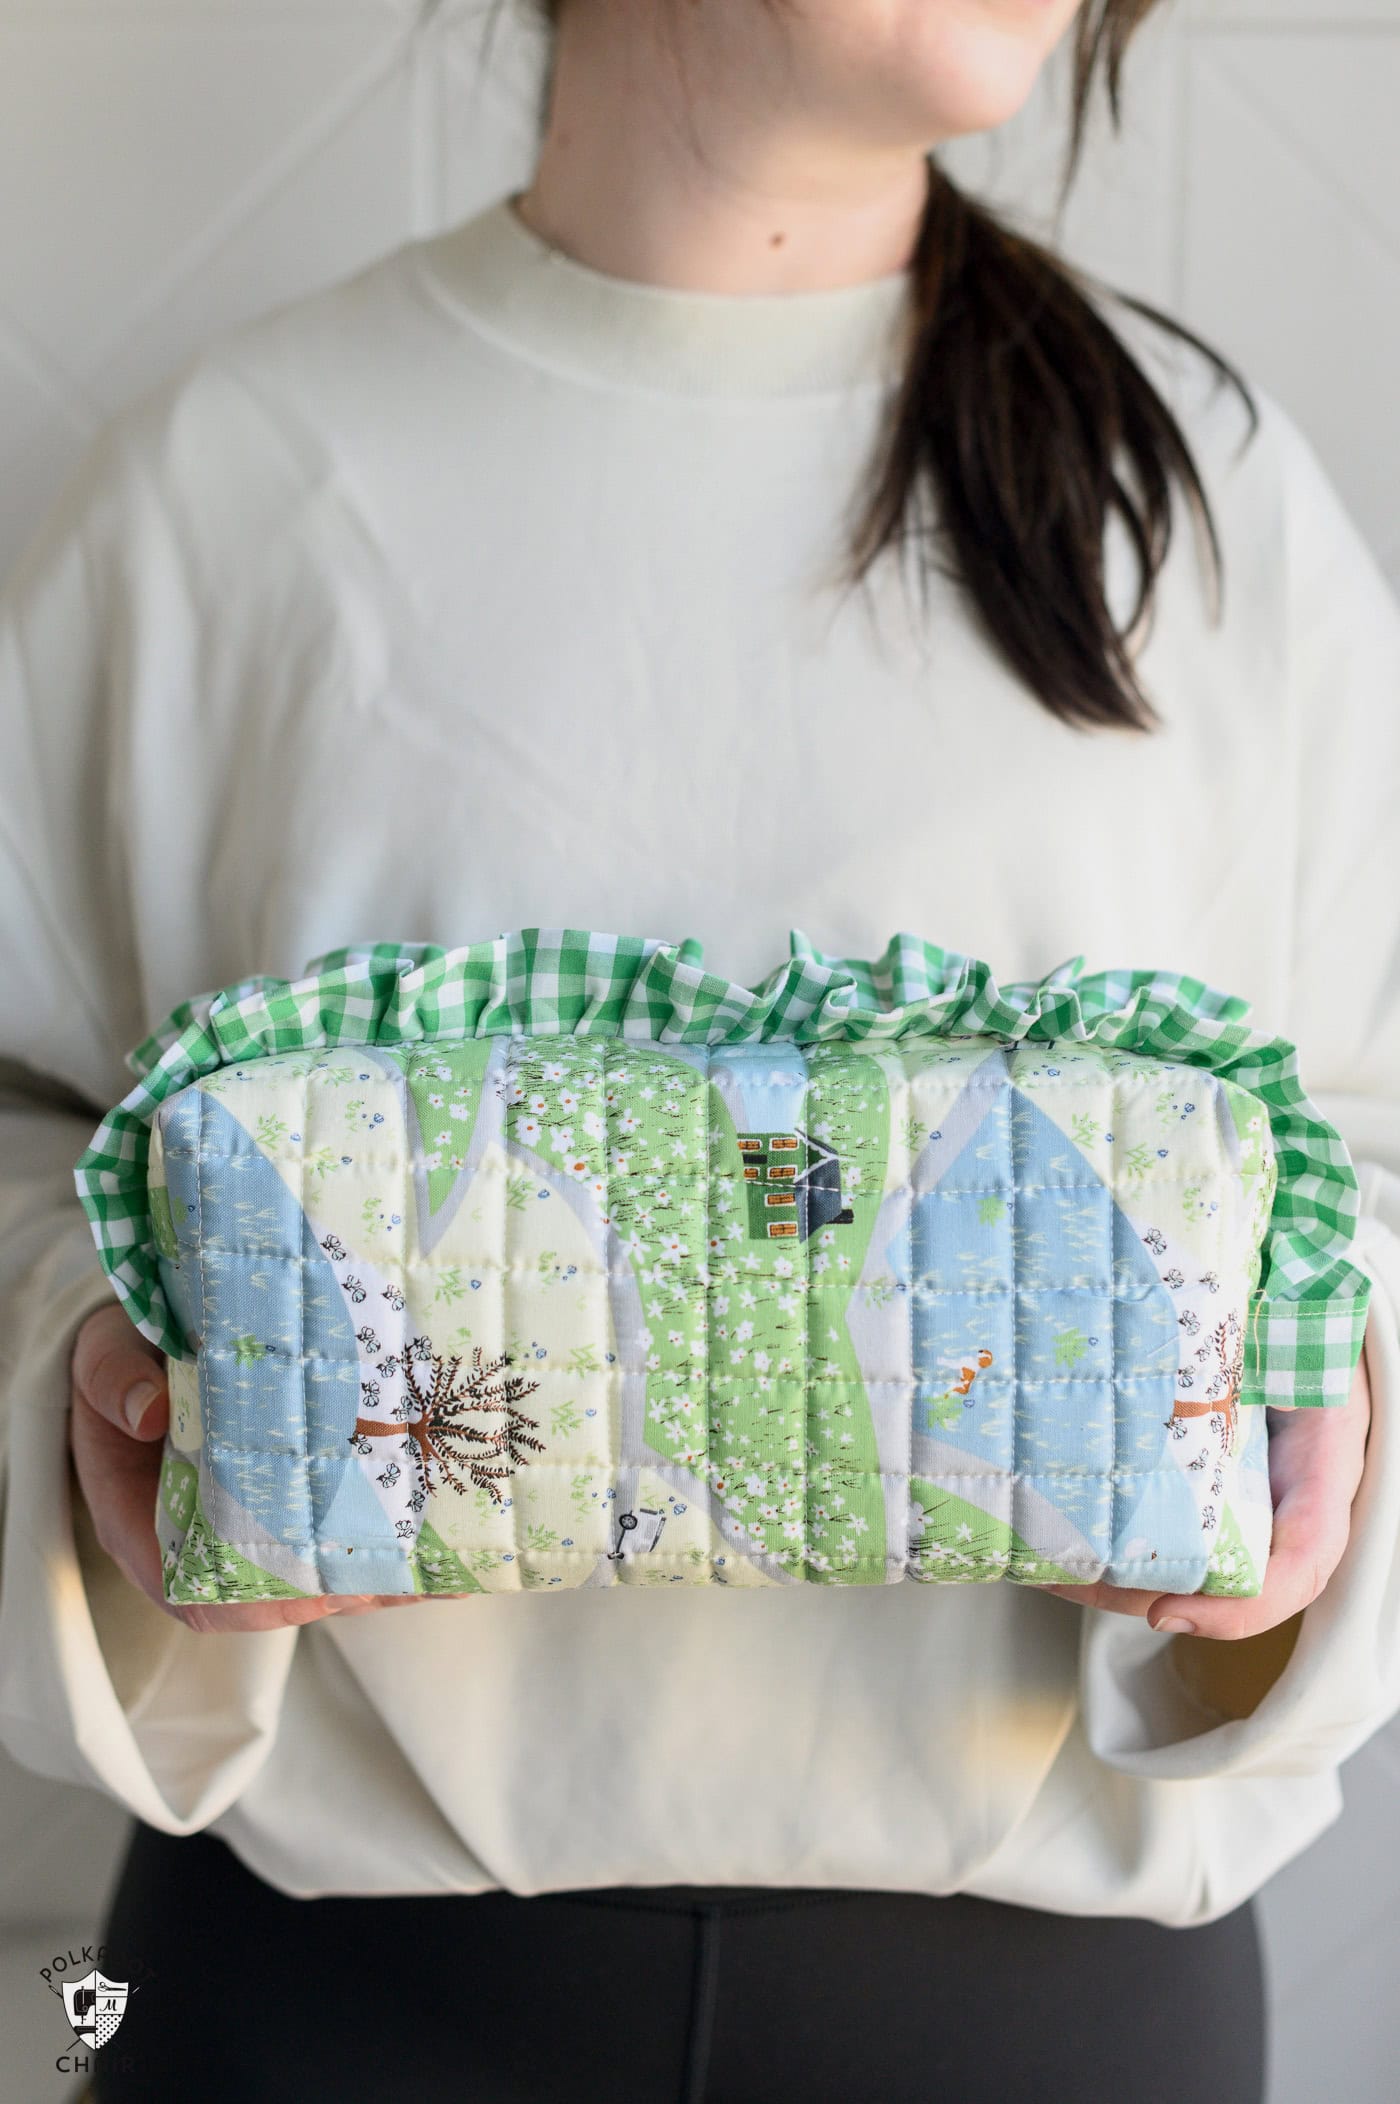
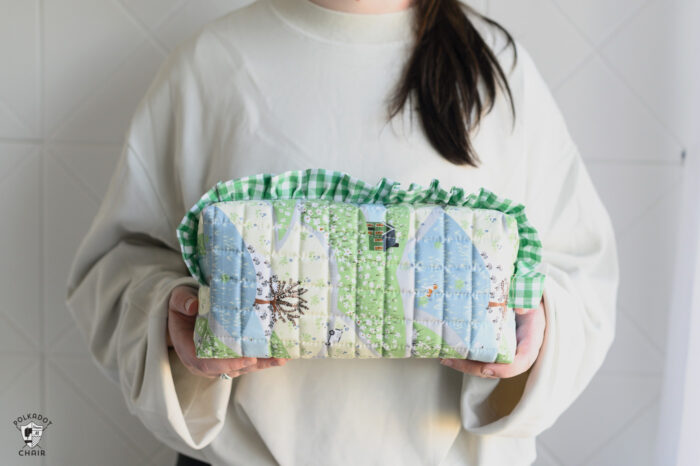
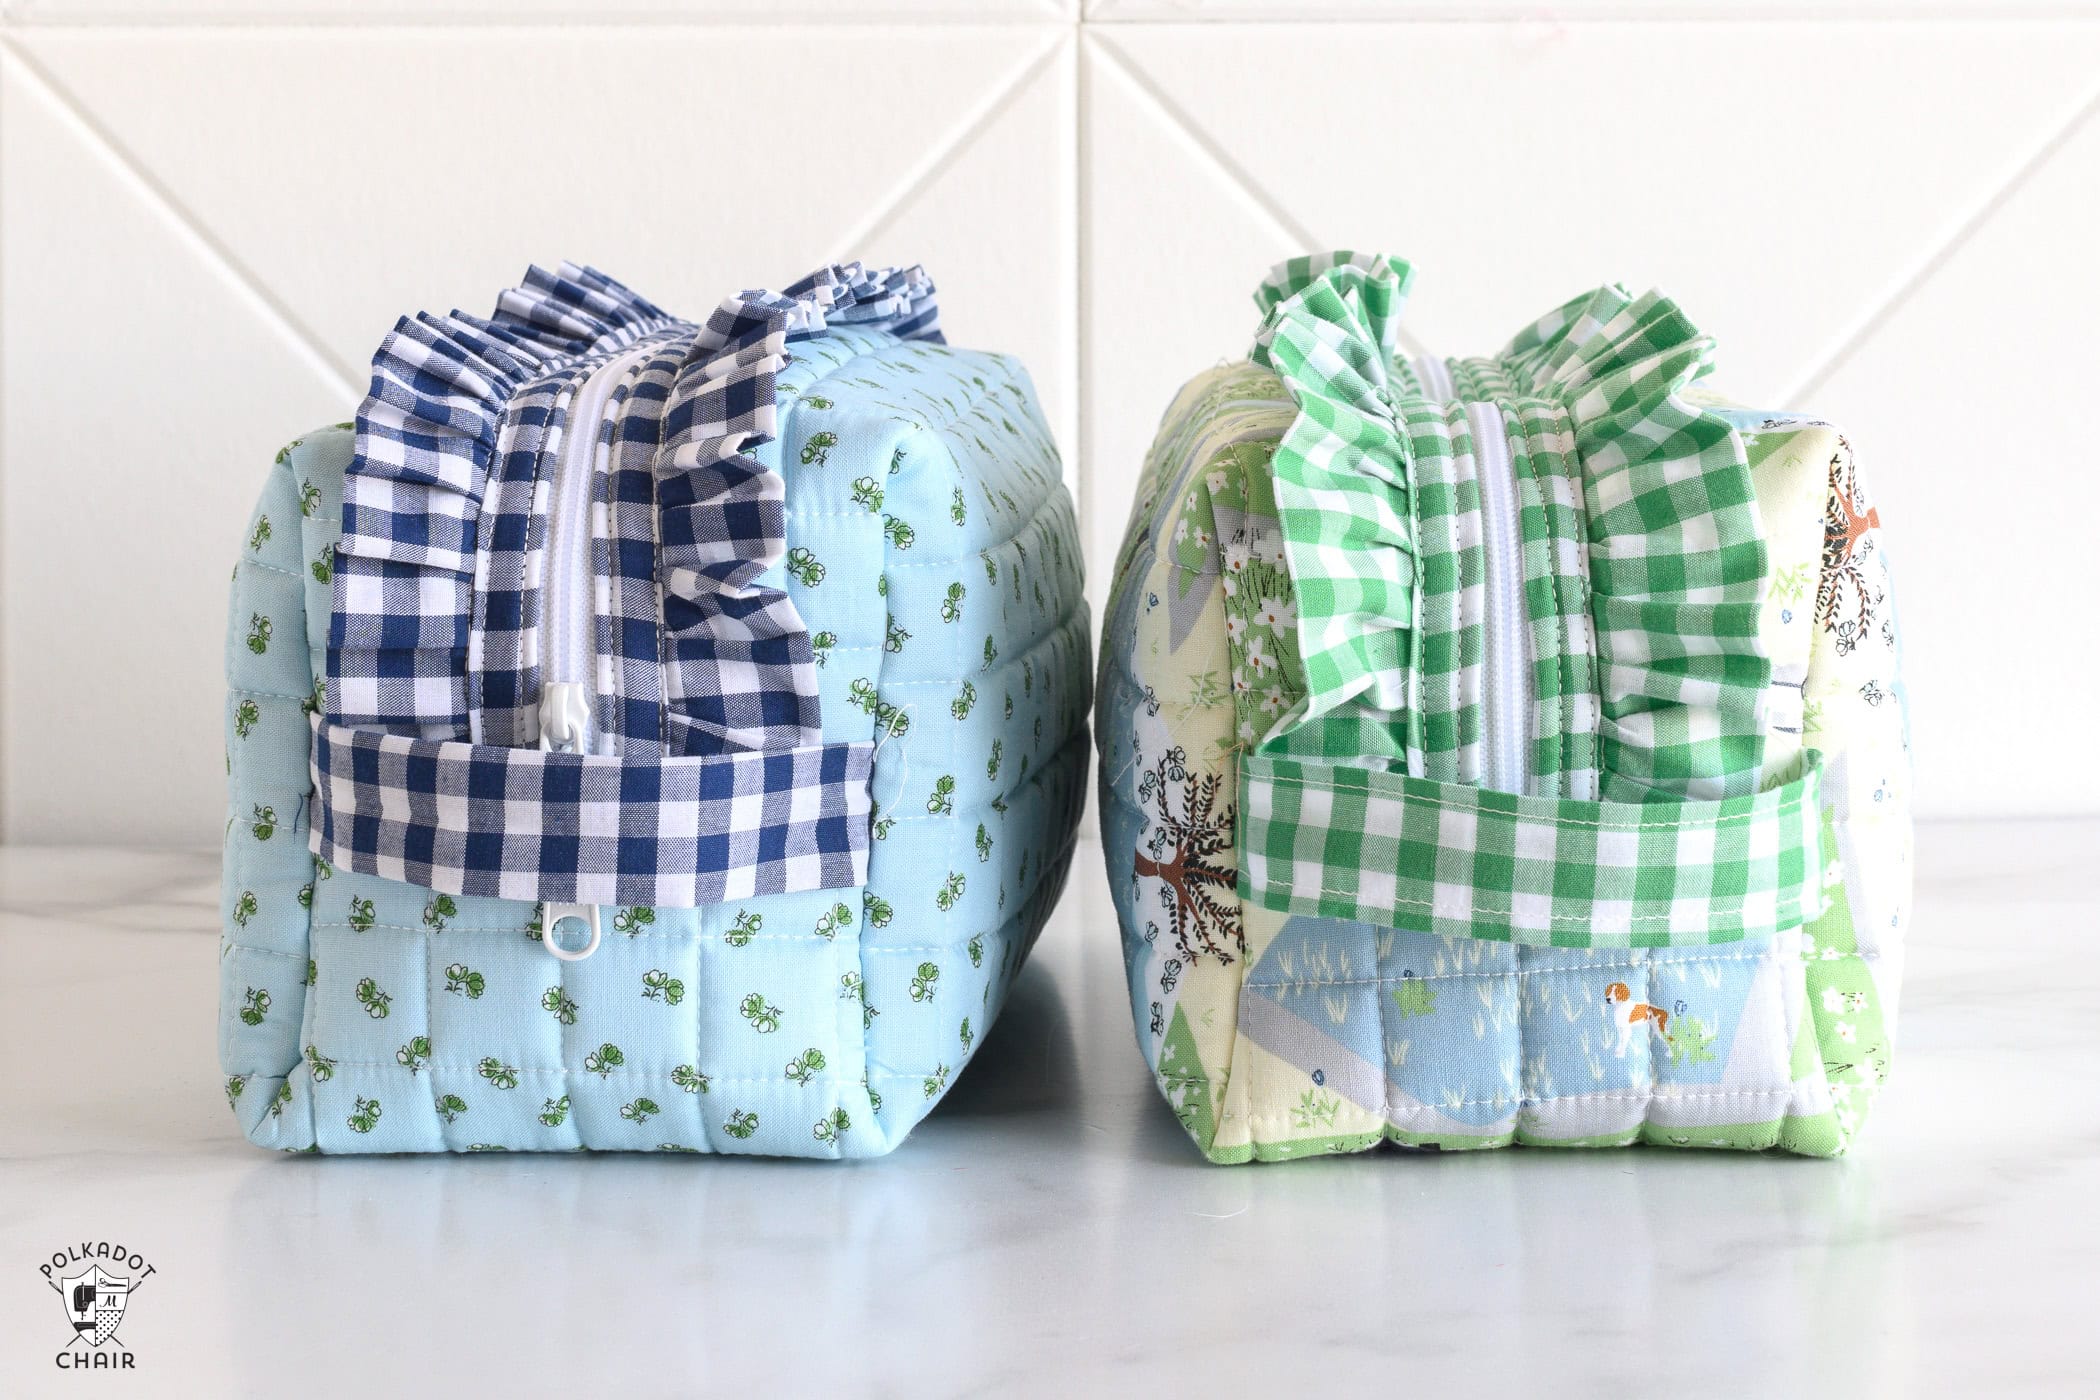
How to Sew a Quilted Box Zip Pouch with Ruffle Details
In this tutorial, you’ll learn how to sew a quilted box zip pouch with a charming ruffle accent.
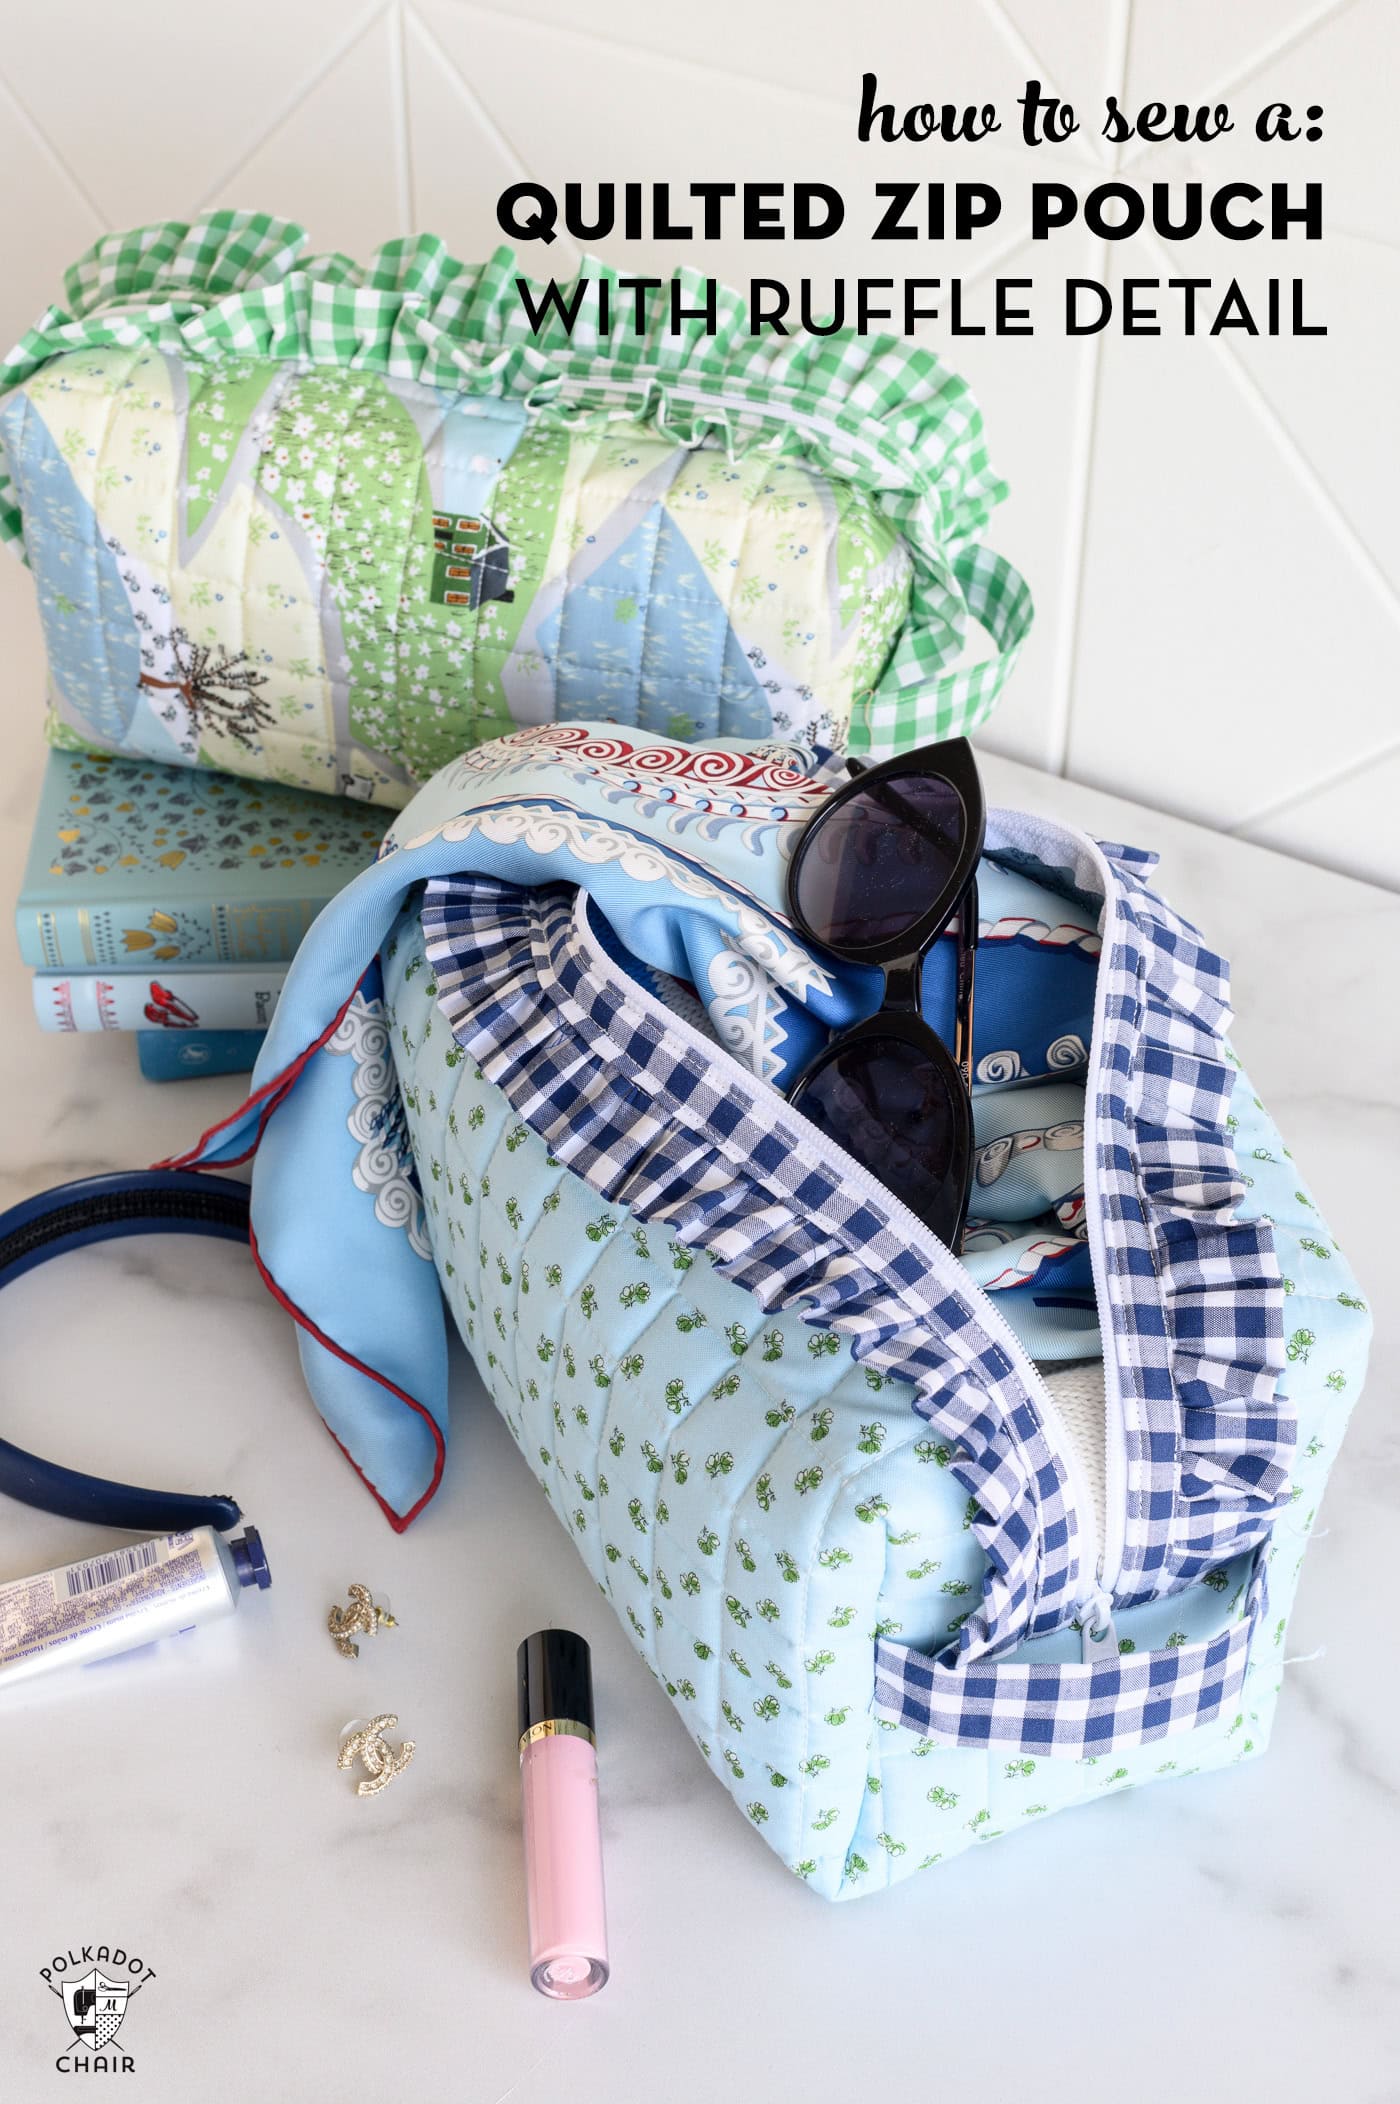
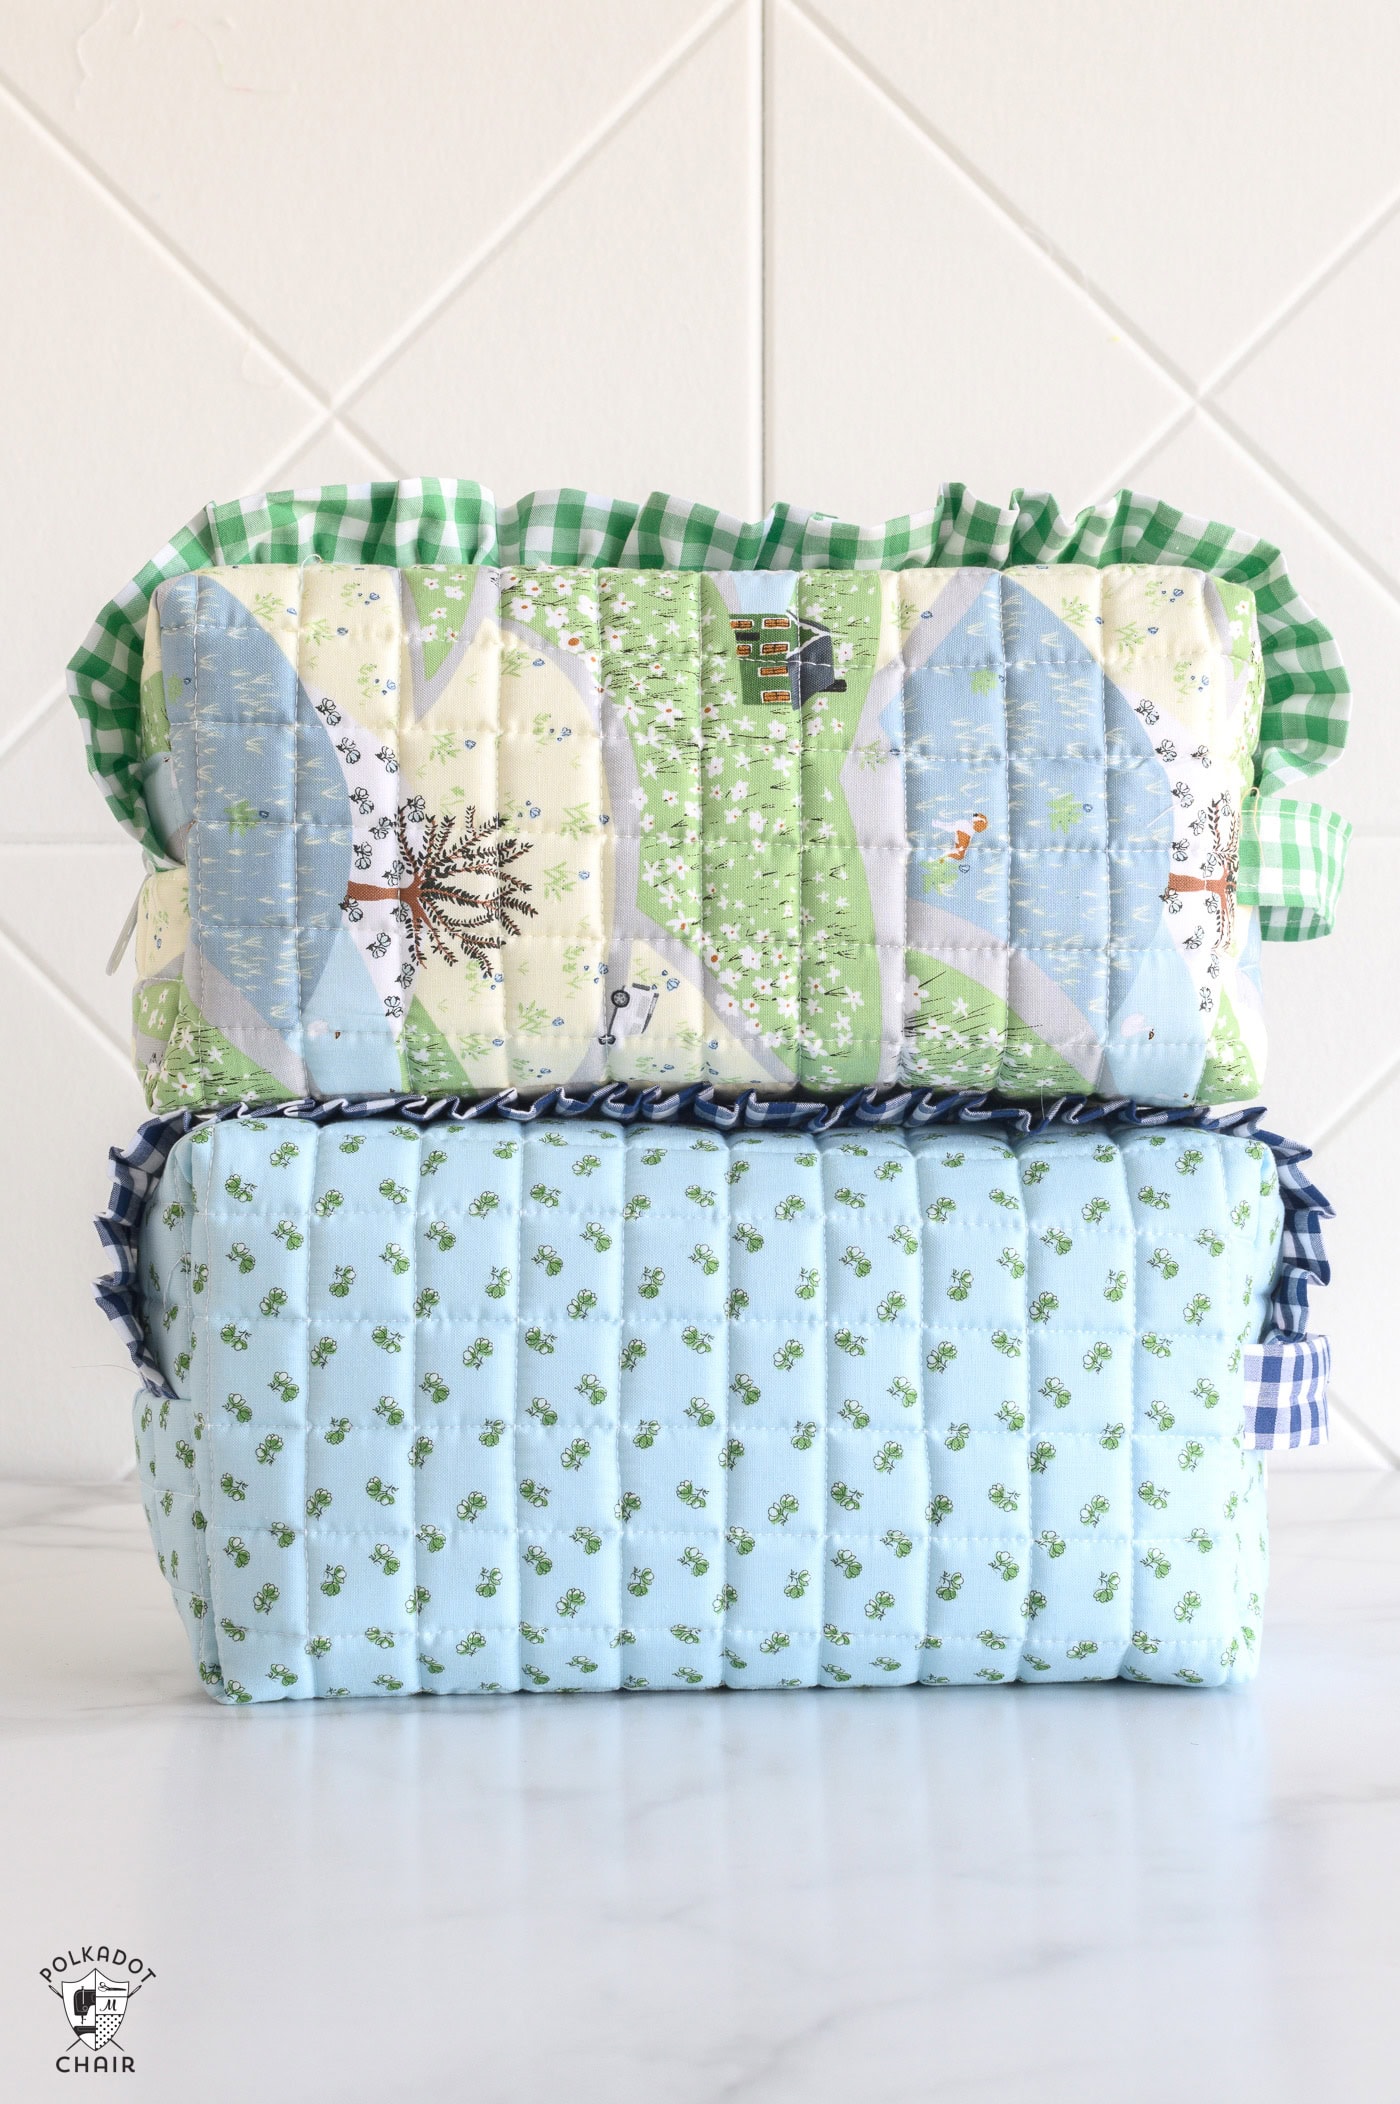
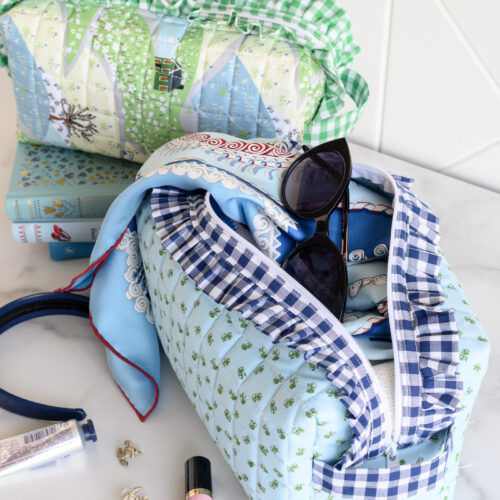
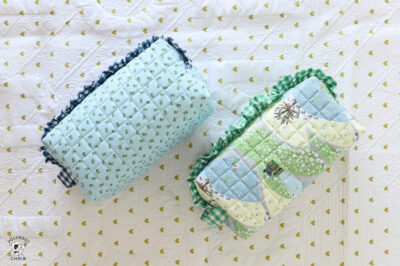
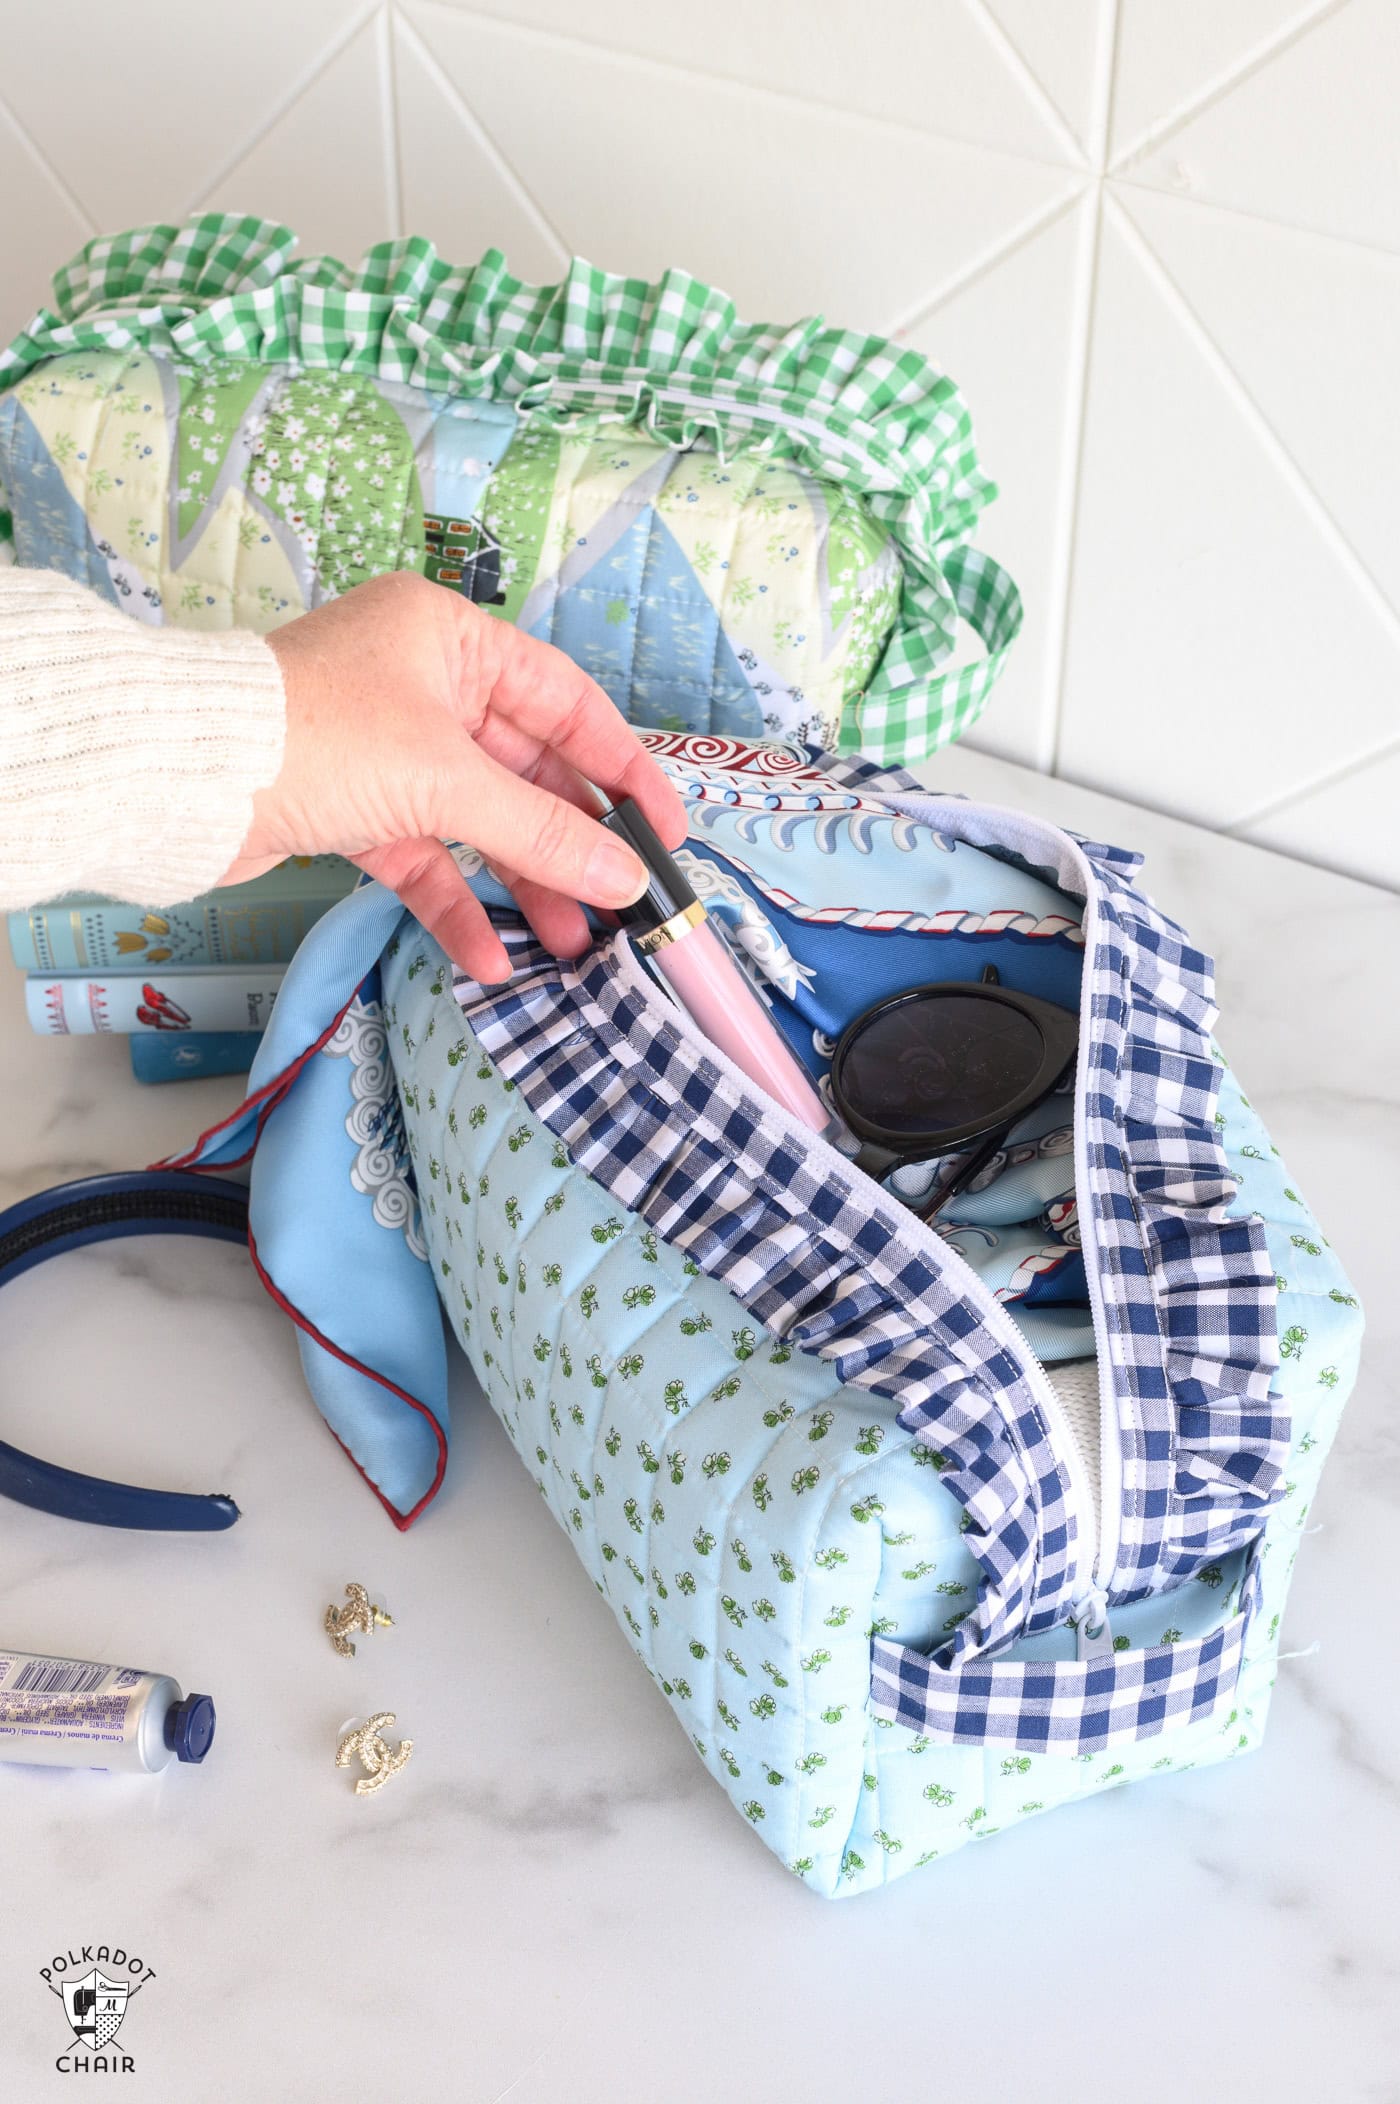
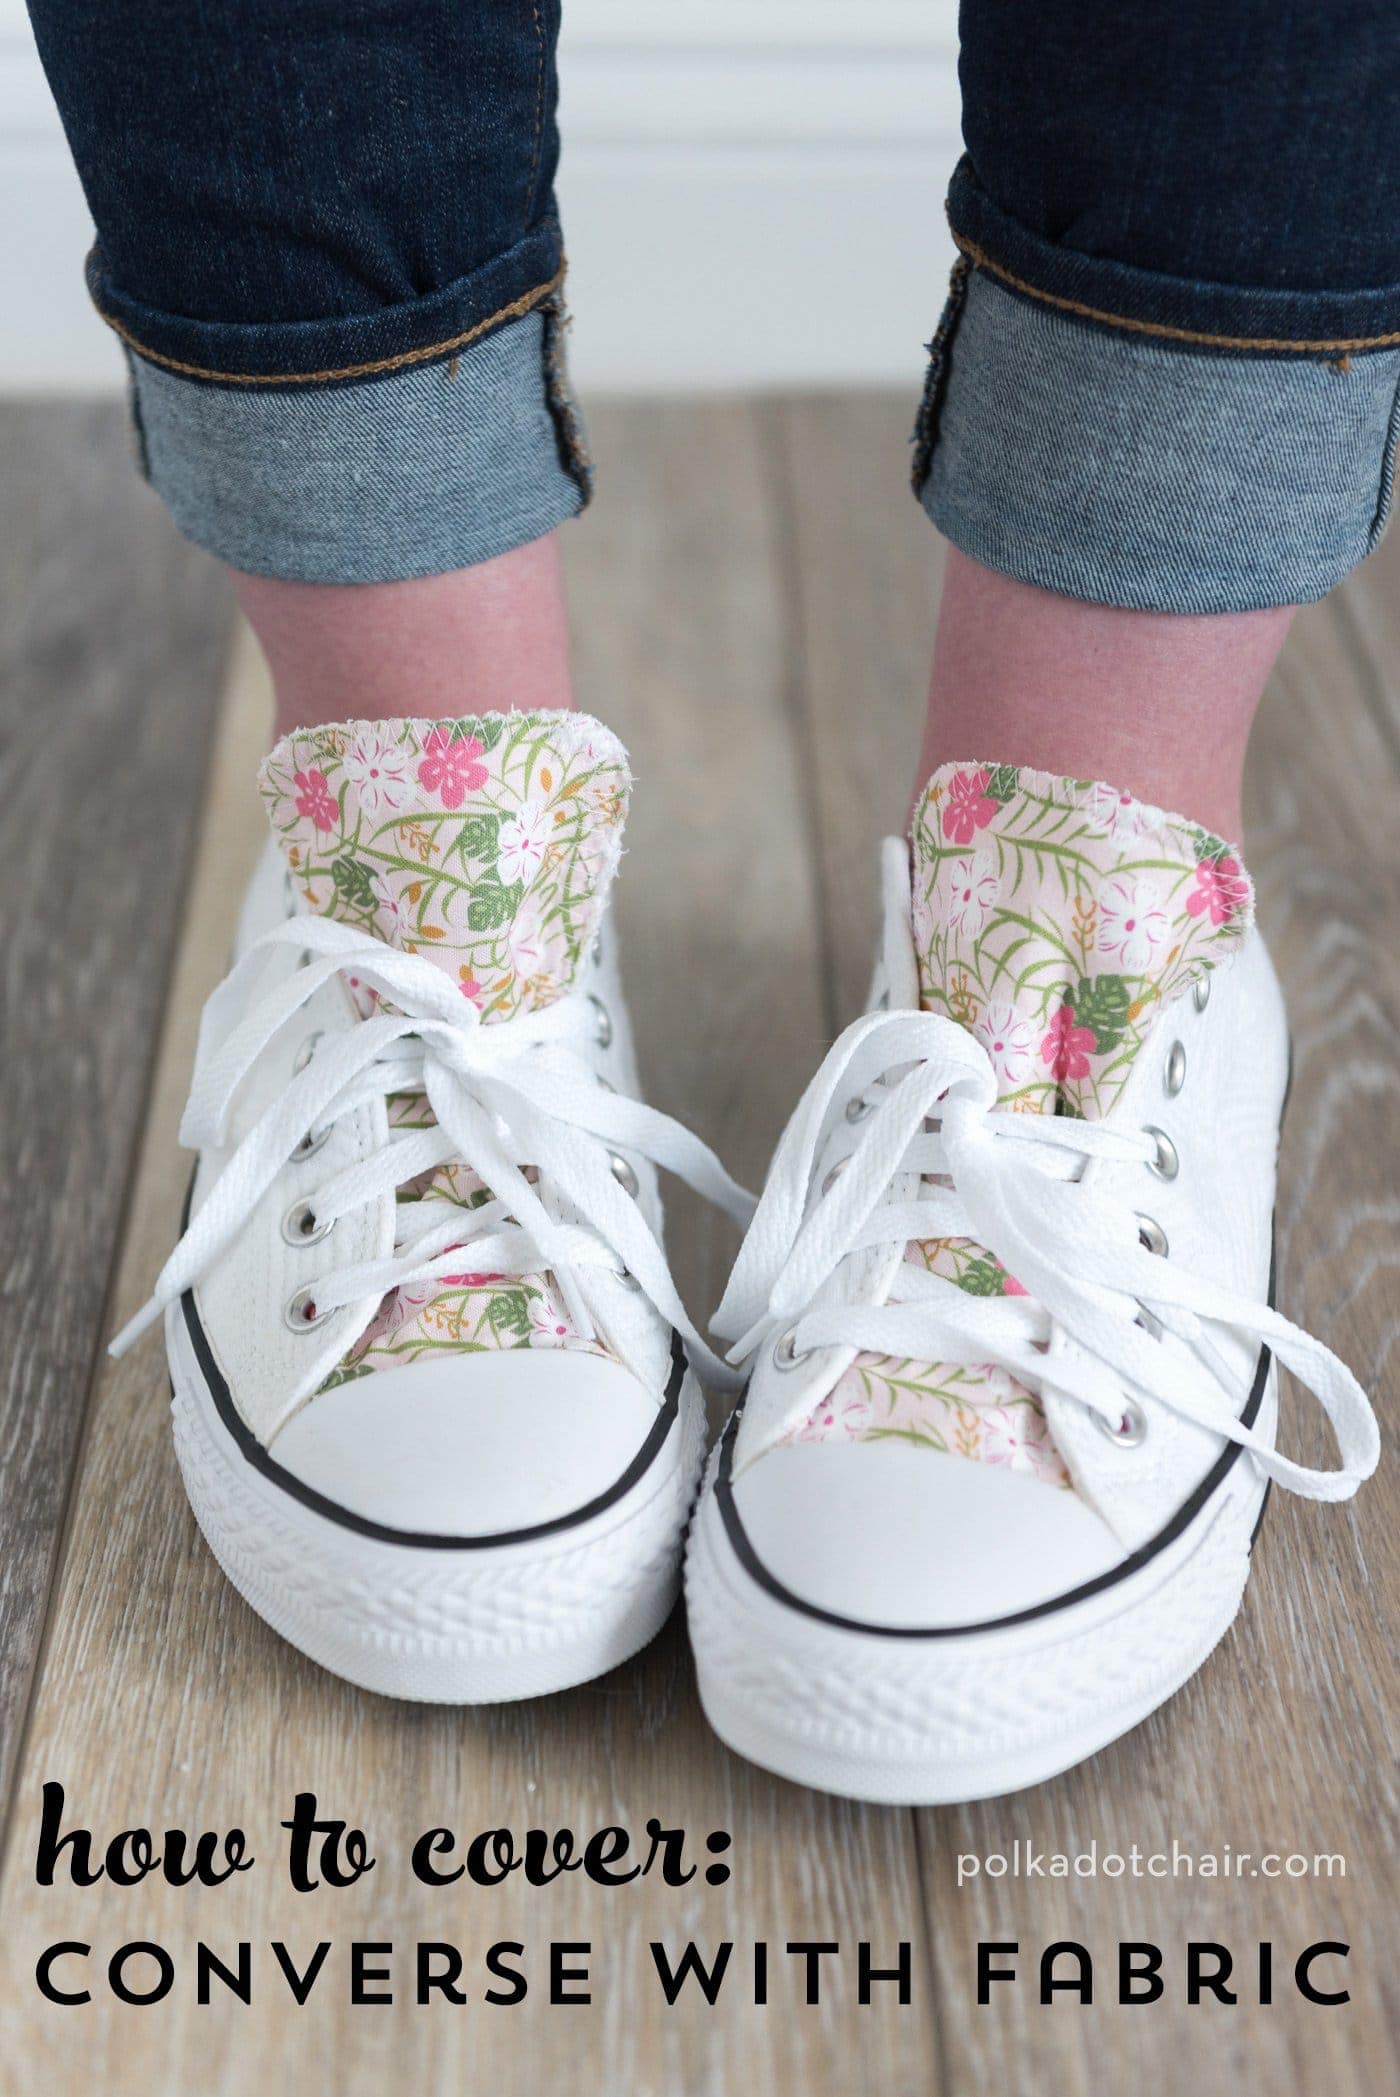
This quilted ruffled zip pouch sewing pattern is perfect for travel and makes a beautiful handmade gift! Adding a ruffle detail around the zipper gives the pouch a charming, feminine touch.
The box is constructed with 1/4″ quilted foam, Which gives the bag a lot of “spring” and bounces back and holds its shape well, even with repeated use!
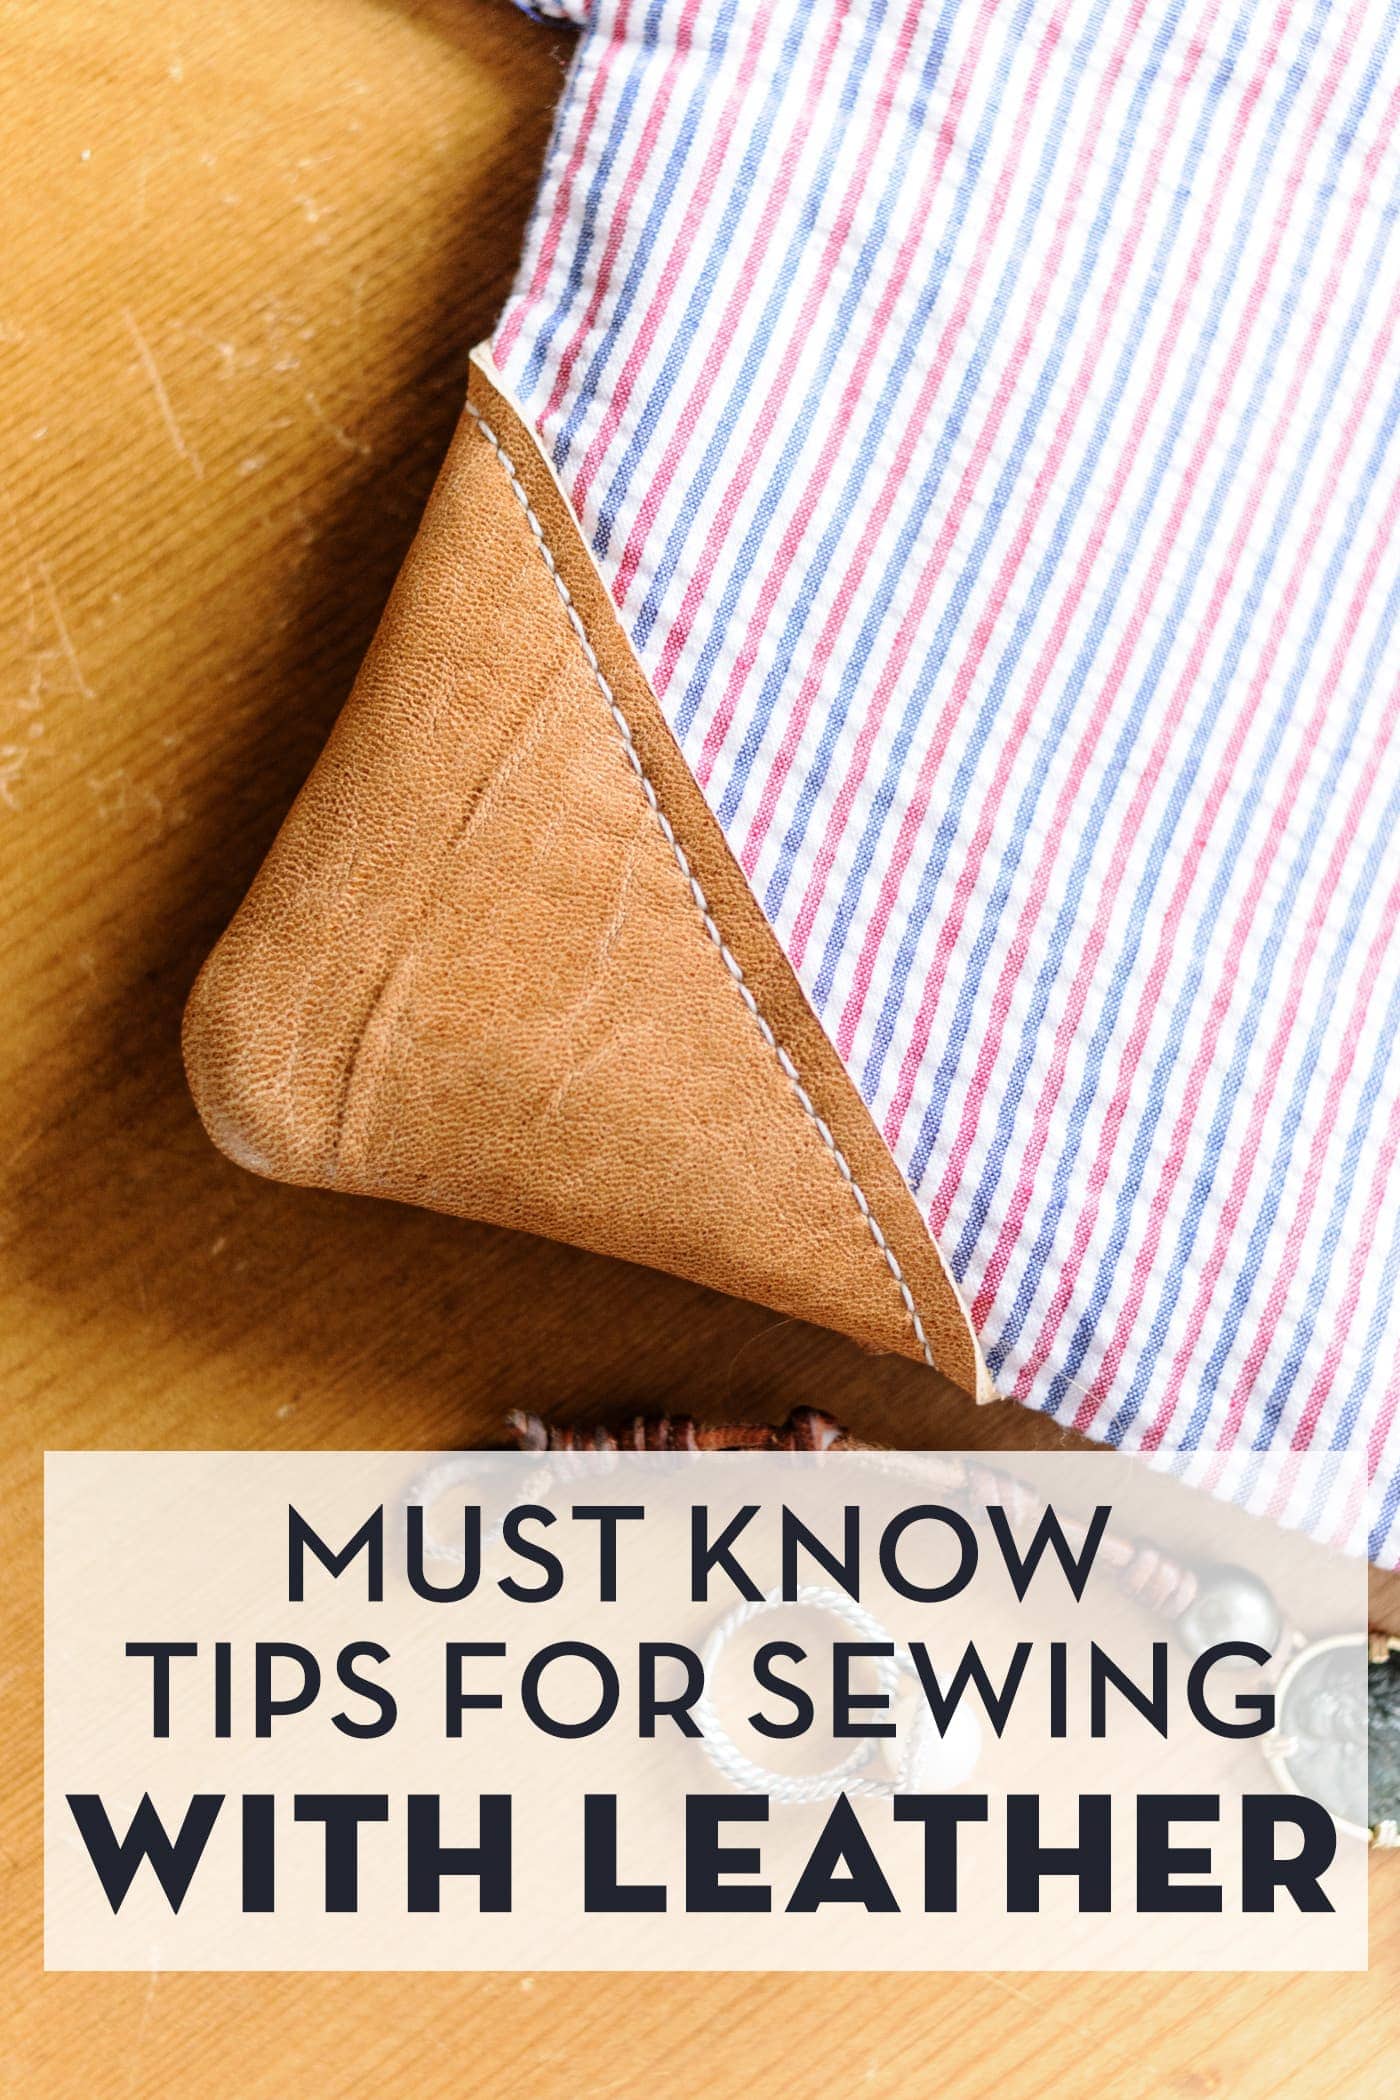
If you’ve been a long-time reader, then you know I love to sew zip bags! This is similar to a bag I designed and created for my husband years ago. That box zip pouch was made with canvas and leather. This tutorial’s zip bag (or dopp bag) features quilting cotton and a charming ruffle detail!
About the Box Zip Pouch
Pattern Details
- SIZE: Approx. 11″ x 5″ x 5″
- INTERFACING: Pellon Flex Foam
- FEATURES: Fully lined with bound finished seams.
- TECHNIQUES COVERED: Quilting Foam, Zipper Insertion, Ruffle Creation.
- SKILL LEVEL: Confident Beginner
Whether you’re an experienced sewist or just getting started, this step-by-step guide will help you create a beautiful and practical pouch you’ll love to use or share. Let’s get started!
Supply List
- 2 Fat Quarters Fabric 1 for Bag Outside and 1 for Bag Lining. Fabric is Tulip Cottage Collection by Riley Blake Designs
- 1/2 Yard Fabric for Ruffles & Binding
- 1/2 Yard 20” Wide Flex Foam
- 1 Zipper at least 18” polyester, with dual zips
- Sewing Machine (I recommend BERNINA or Bernette)
- Basic Sewing Tools
- Rotary Cutter
- Quilt Ruler
- Small Sharp Scissors
- Walking foot for Sewing Machine (to quilt the fabric)
- Ruffle foot for Sewing Machine optional- I use BERNINA Foot #86
- Fabric Glue Pen
- Marking Pencil
Video Instructions
Our YouTube channel has a series of videos that walk you through the construction steps of this bag. This is a multi-part video series. Part 1 was posted today, and Part 2 will be posted next Friday.
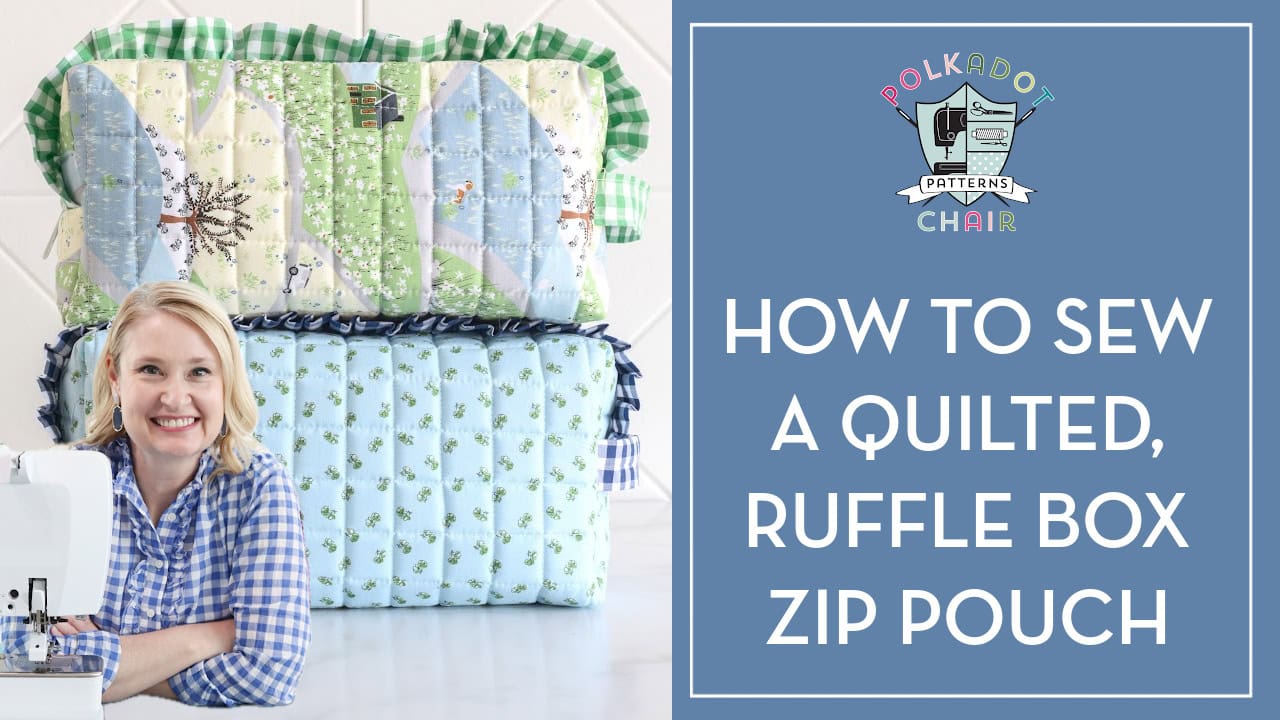
Quilted Ruffle Box Zip Pouch Sewing Pattern
Equipment
- Ruffle foot for Sewing Machine optional- I use BERNINA Foot #86
supplies
- 2 Fat Quarters Fabric 1 for Bag Outside and 1 for Bag Lining. Fabric is Tulip Cottage Collection by Riley Blake Designs
- 1/2 Yard Fabric for Ruffles & Binding
- 1/2 Yard 20” Wide Flex Foam
- 1 Zipper at least 18” polyester, with dual zips
Instructions
Preparation
- Create a quilt sandwich with your flex foam and two fat quarters. The fabrics should have the right sides facing out, and the foam should be in the center. Quilt lines 1” apart. If you need additional help or instructions, follow our “How to quilt foam” tutorial.
Cutting
- Cut the Quilted Foam Piece to 17” x 20”

- Cut for Ruffles: 2 pieces 3” x Width of Fabric (WOF)
- Cut for Bindings: 4 pieces 2 1/2” x Width of Fabric

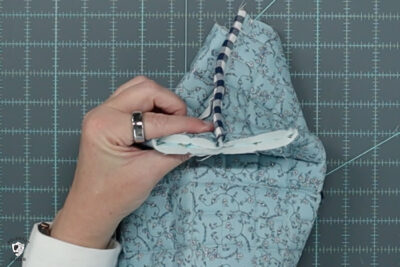
Step One: Ruffles
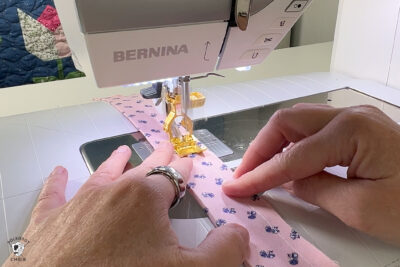
- Fold one of the 3” x WOF strips in half lengthwise with the right sides facing out.
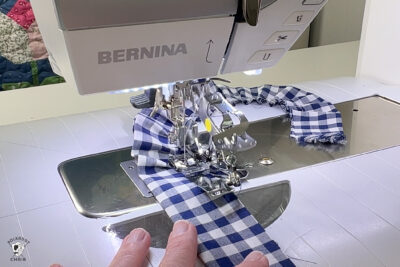
Using a Ruffling Foot:
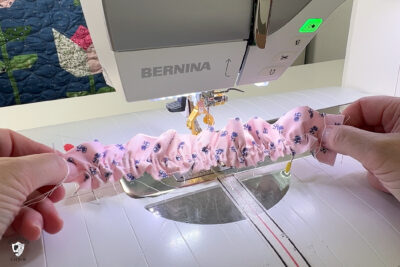
- With the Ruffling foot installed on the sewing machine and the setting at 6, sew the folded strip of fabric. The stitching line will be 1/4” in from the folded raw edges.
Using a Standard Foot:
- Set your sewing machine on the longest stitch length possible (usually 5 or 6). Sew two lines of stitching (basting stitches) close to the raw edge of the folded fabric.
- After sewing, pull up on the bobbin threads to gather the fabric. Gather the fabric to your liking. Note that you don’t need to use the entire length of fabric on the bag; just gather it to the point that you like it.
- Repeat for the other 3” wide ruffle fabric strip.
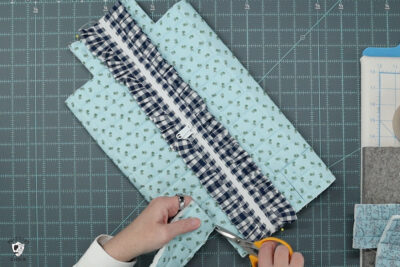
Step Two: Attach Ruffle
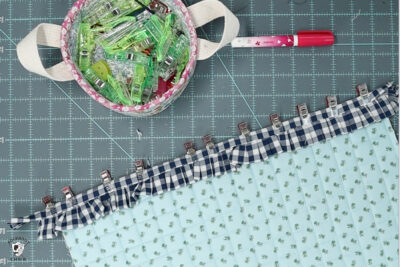
- Pin the ruffled fabric to the bag front along the 17” side. The ruffle’s raw edge will be even with the bag’s raw edge.
- Sew the ruffle to the bag with a 1/4” seam allowance. Trim off the excess ruffle fabric at ends. TIP: if you have the ruffled fabric facing down the feed dogs of the sewing machine will help feed it evenly as you sew!
- Repeat with the second ruffle piece on the other 17” side of the bag.

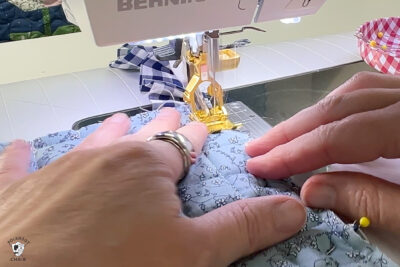
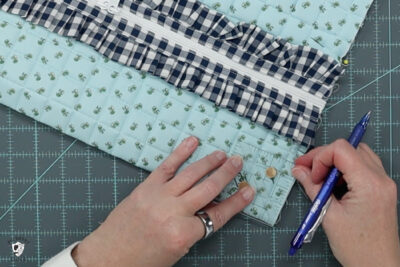
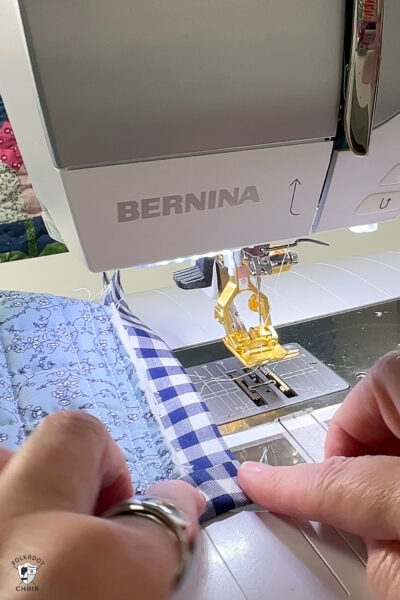
Step Three: Bind
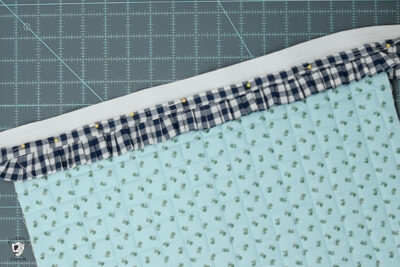
- Fold one of your 2 1/2” wide binding strips in half lengthwise and press. The right sides of the fabric will face out.
- Pin the folded binding piece to the LINING side of the bag (the ruffle was pinned to the outside of the bag) along the same edge as the ruffle. The raw edge of the binding will be flush with the raw edge of the bag.
- Sew in place with a 1/4” seam allowance.
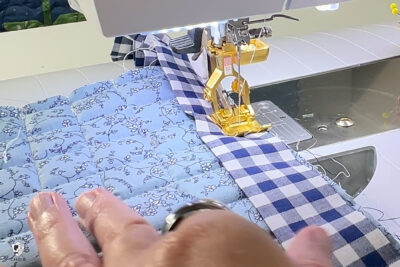
- Press the binding fabric away from the bag, then pull it around to the front of the pouch.
- Use glue and binding clips to hold it in place.
- On the machine, topstitch the binding close to the folded edge of the binding. Remove any visible basting stitches.
- Repeat with the other binding piece on the other side of the bag.

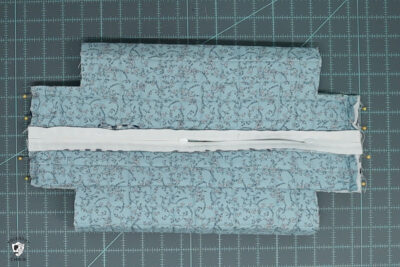
Step Four: Zipper
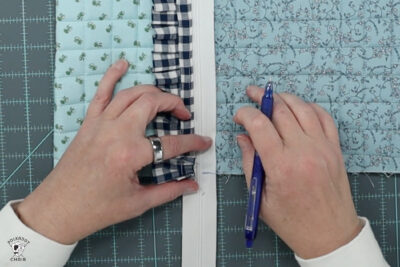
- Pin the ruffle/bound edge of the bag to the right side of the zipper. Make sure you don’t pin it too close to the edge of the zipper teeth.
- Use a marking pen to draw a line across the zipper where the fabric meets the zipper at both ends, so that you can make sure that you pin the other side of the bag to the same spot on the zipper.
- You are only working on one side of the zipper at a time.
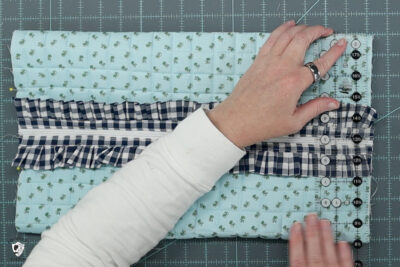
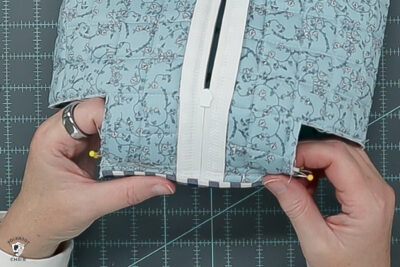
- With a zipper foot on your sewing machine, sew the zipper to the bag, close to the edge of the binding on the right side of the bag.
- Repeat with the other side of the bag on the other side of the zipper. At this point, you may find it helpful to unzip the zipper.
- After the other side of the zipper is sewn, test the zipper to make sure your fabric is not too close to the teeth and that the bag fabric is lined up properly on both sides.
- Center the zipper on the pouch. At this point, you should have a big tube. You want to make sure that the zipper is at the center point of that tube.
- When you find the center, mark it with pins or a pencil on the other side of the bag.
- Trim the excess zipper ends (only do this if you’ve purchased a polyester zipper).
Step Five:
- With the bag lying flat and the zipper in the center, draw a 2 1/2” square in each of the bag’s four corners.
- Cut out the square with sharp scissors.
- Zip the zipper and turn the bag wrong side out. Make sure the zipper is on top of the center marks you noted on the bag.
- Sew the two end seams with a 1/2” seam allowance.
- Bind the raw edges using the same method used in Step Three.
- Unzip the zipper about halfway.
Step Six: Corners
- Cut a piece of binding fabric 6” long. Turn it so that the right sides of the fabric are facing and sew with a 1/4” seam allowance.
- Turn right side out and press.
- Top stitch along both sides of this piece. This is now your handle.
- Feed the handle into the pouch at one end through the cut corner and pin just under the zipper. The handle’s raw edges will be even with the pouch’s cut corner’s raw edges.
- Pinch the cut corner on the four corners of the piece to create the “box” shape. Sew with a 1/2” seam allowance and bind.
- When you bind, fold under the raw ends of the binding so you have a clean finish on the inside of your bag.

Finishing
- Turn the bag right side out. If you don’t feel like the bag is your desired shape, use an iron with steam to “crease” the top and bottom edges to reinforce the box shape.

You May Also Like:

Good morning! Is there a printable version of the pattern pieces? I am looking and can’t find. But it’s quite possible it’s my eyes and adhd brain. My daughter asked me last night for a toiletry pouch and asked if I could use some of my dad’s old shirts to make it, and I love the ruffle to give it a little feminine flair with the plaids from his shirts.
(It’s also Christmas Eve- I am not expecting a reply today)
I’m excited to try to make this- and nervous – but your bag is DARLING and I love it a lot so I’m going to try!
Hi,
You don’t need pattern pieces, you cut the pattern yourself as you sew the box pouch – just print the tutorial using the print button on the page.
Going to make a couple for Christmas gift, your look beautiful fabric choice was so pretty. Thanks for all you share with us
I look forward to making this beautiful zippered pouch. The ruffle is a nice touch! – Thank you Melissa.