Tuesday Tutorial, Patchwork Skirt
It’s been a while since we’ve had a Tuesday Tutorial here, I think it’s about time for another one!

I’m excited to share with you this patchwork skirt I made for my daughter. She had outgrown the last patchwork skirtI made her, and I thought this pattern was in need of an update for an older girl. So I came up with this new *updated* version of my Patchwork skirt!!
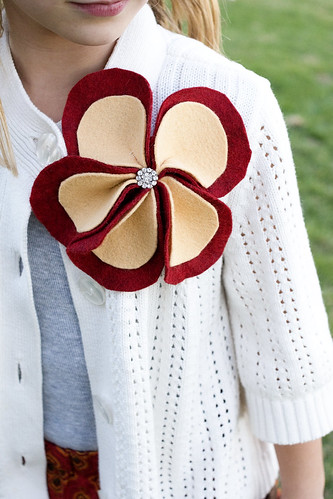
I made her this cute flower brooch to go with her skirt, you’ll have to wait a week or two for this tutorial, but it’s coming soon!

This is a diagram of how this skirt is constructed. Each side (front and back) of the skirt will look like this when finished. The dotted lines indicate gathering stitches.
Okay to begin:
1- Sew 6 charm squares together to make skirt front row one. Press seams to one side. Repeat for skirt back row one. Set aside
2- Sew 9 charm squares together for skirt front row 2. Press seams to one side.
3- Sew 9 charm squares together for skirt front row 3. Press seams to one side, the opposite way to pressed row 2.
4- Sew row 2 to row 3. Press.
Repeat steps 2-4 for skirt back.

5- Sew skirt band to row 3 of skirt. Match right sides together and place skirt band over the top of row 3. After stitching fold down and press seam towards skirt band. Repeat for skirt back.
6- Run 2 rows of gathering stitches in the top of row 2. Pull up on gathering stitches and sew so that the top of row 2 matches the bottom of row 1. Stitch together row 1 to row 2, right sides together. You do NOT want any puckers or gathers in the bottom of row 1, only the top of row 2.
7- Matching side seams, sew skirt front to skirt back. Make some kind of mark so that you know which seams are your side seams, this will be important later.
8- Sew your 2 waistband pieces together at short sides. Press seams open.

10- Run 2 rows of gathering stitches on the top of row 1. Pull up on gathering stitches until row 1 matches up with your waistband piece. Pin skirt to waistband, right sides together and matching side seams. Stitch.
11- On your waistband piece, fold the top down 1 1/4″. You are folding with wrong sides together. Stitch in place leaving a 1″ opening to feed your elastic through.
12- Cut your elastic to size and feed through the casing you just made. When finished stitch elastic together and close the opening in the casing.


Hi. I used your tutorial to make a skirt for myself, larger squares, and right to the floor. Your instructions were perfect. I had no trouble following along and it turned out beautifully. Thank you!
do you have a pattern similar to this for a child jumper dress? I saw one it was cute would love to try and make for summer. I can’t find one anywhere. I do love this skirt! The colors are fabulous.
@Claire – In the US a child size 10 fits a girl around 10 years old – I think!
Yes, Thanks for clearing that up! Somehow I missed that question!
Did you mean a womens size 8-10?
That skirt is precious!
That was quite a lot of work for one afternoon 🙂
Someday when I grow up, I wanna be just.like.you.
Thanks for linking up to my Pity Party Melissa! xo
What a pretty skirt! Thanks so much for the how-to, I’ll be linking.
Hi, I have a question: do you prewash your charms? Thanks!
How gorgeous! I just love your fabric selection, such a beautiful warm feel to it!
Thanks for adding yet another project to my list ( two more sydney skirts to finish first though!)
I love the colors of the skirt! So beautiful!
So pretty! Thanks for sharing such a great idea for charms.
Lovely! The brooch just sets it all off.
This is such a pretty skirt! I love the patchwork!! I linked to your tutorial on Craft Gossip Sewing:
http://sewing.craftgossip.com/tutorial-patchwork-skirt-for-girls/2010/11/30/
–Anne
I love the skirt! Great tutorial, thank you!
I love this skirt! Is it possible to get an explanation of how to resize? My daughter is about to be a year old so this would be way too big! Thank you bunches!