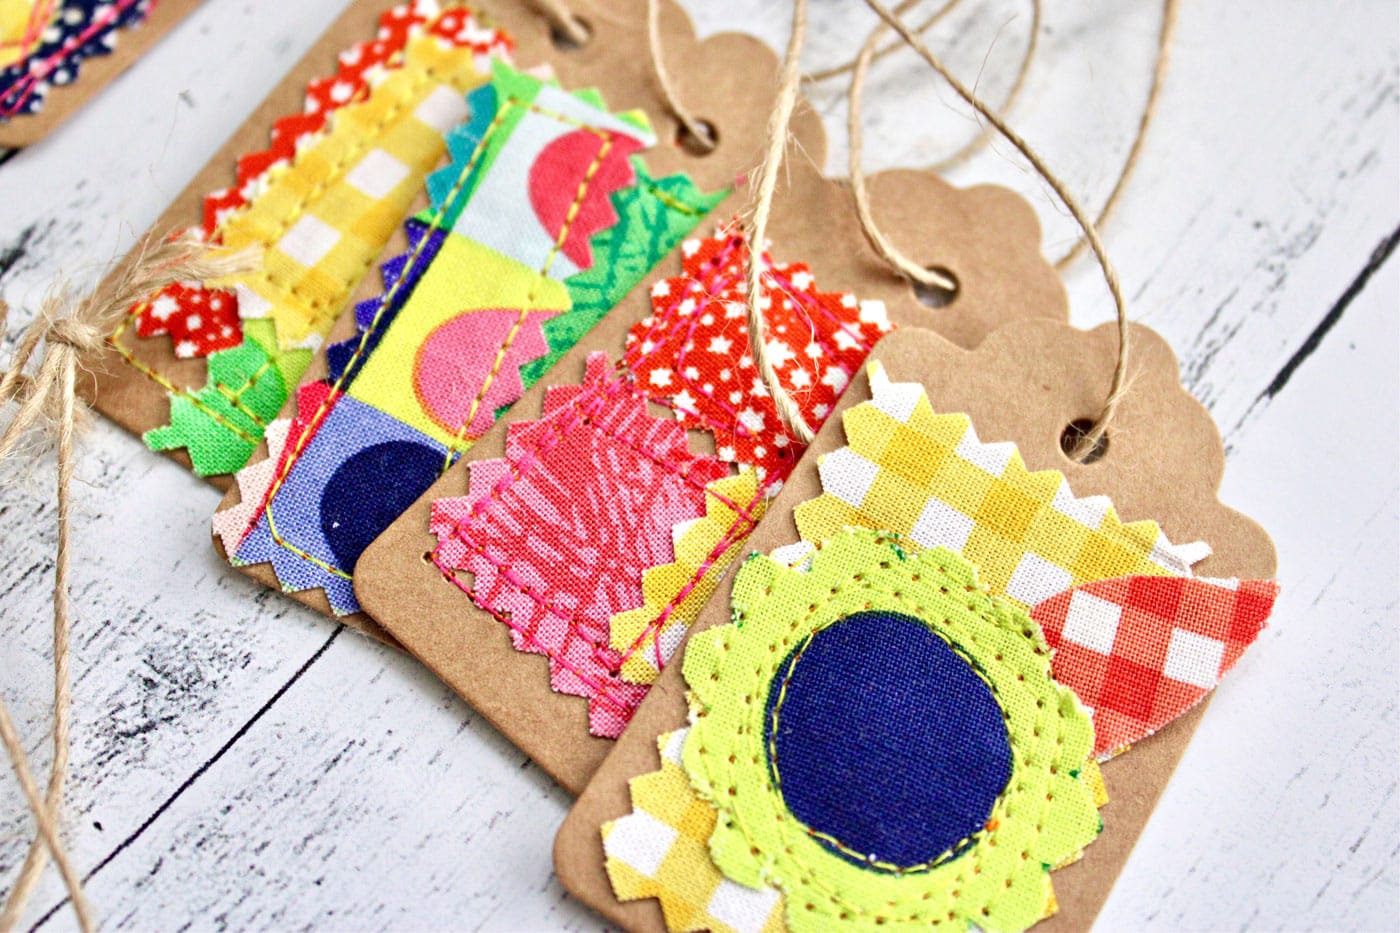
Simple Scrappy Fabric Gift Tags
Turn some of your cherished fabric scraps into colorful and creative fabric gift tags! In this step-by-step tutorial, we will show you how to do it!

Hello, friends! It’s Julia from Bayhill Studio. Are you looking for ways to use up those teeny tiny fabric scraps you just can’t bring yourself to throw away?
We all know what I’m talking about – those tiny pieces left over from your favorite fabrics. They’re too small to work into a quilt but way too cute to toss in the garbage. So we hoard save them for some future project or until we decide our sewing room needs a deep clean.
I am happy to tell you that the day has come to use up those scraps! Today, I’ll show you how to turn scraps as small as ½” into adorable, one-of-a-kind gift tags.
For this project, I use bits of strike-off fabric from my upcoming “Copacetic” collection with Riley Blake Designs, scheduled to arrive on store shelves in March.
A strikeoff is a rough sample used to communicate with the manufacturer about color changes and printing errors that may occur in manufacturing. The dye isn’t set on these pieces of fabric, so it can’t be used for quilting, but I can’t help myself; I was so excited about these bits of fabric that I knew I could dream up some tiny projects with it!
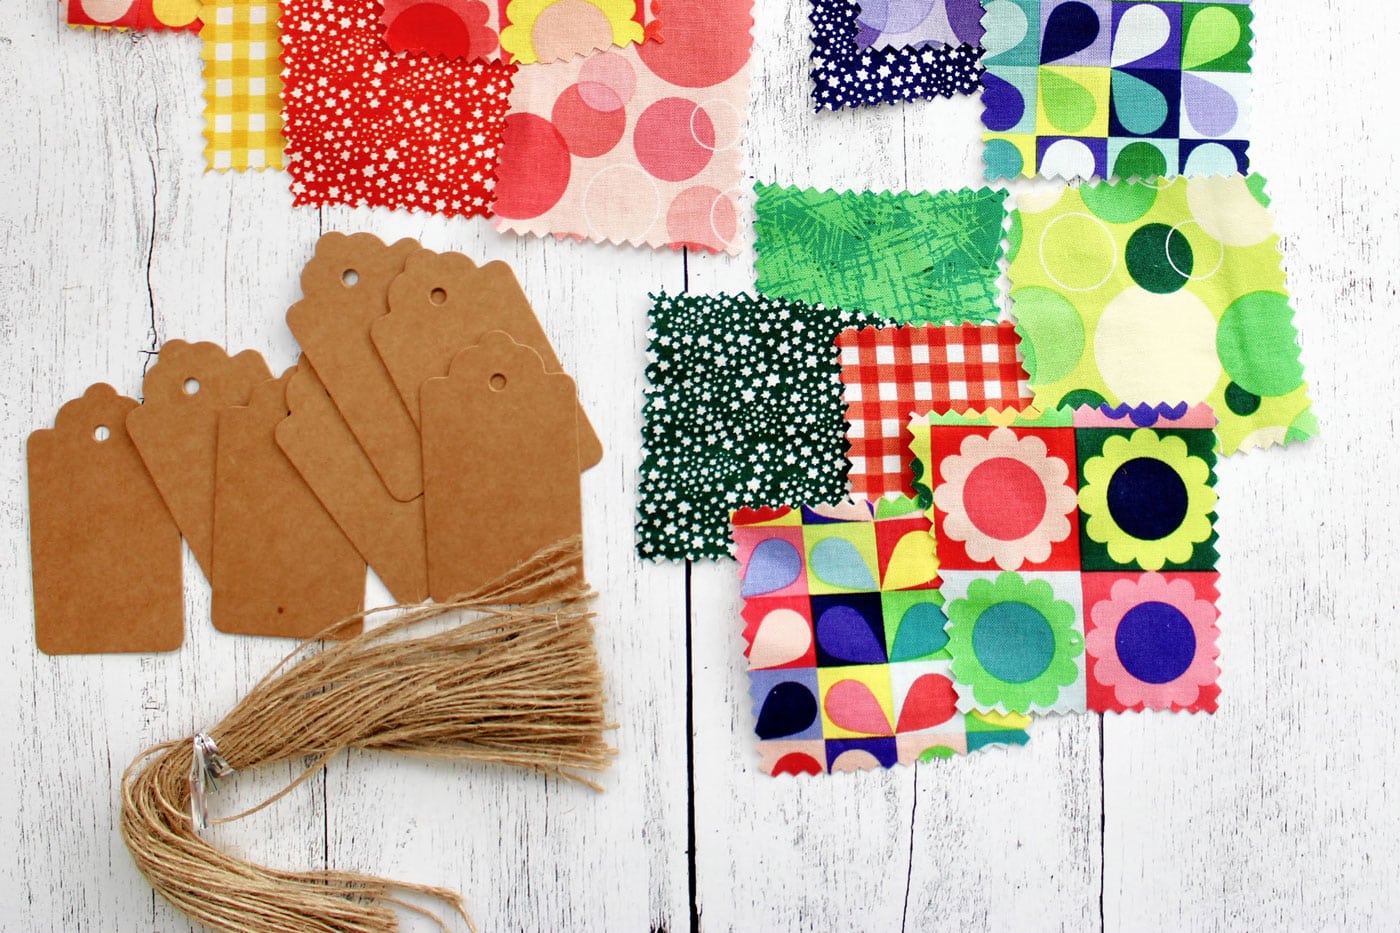
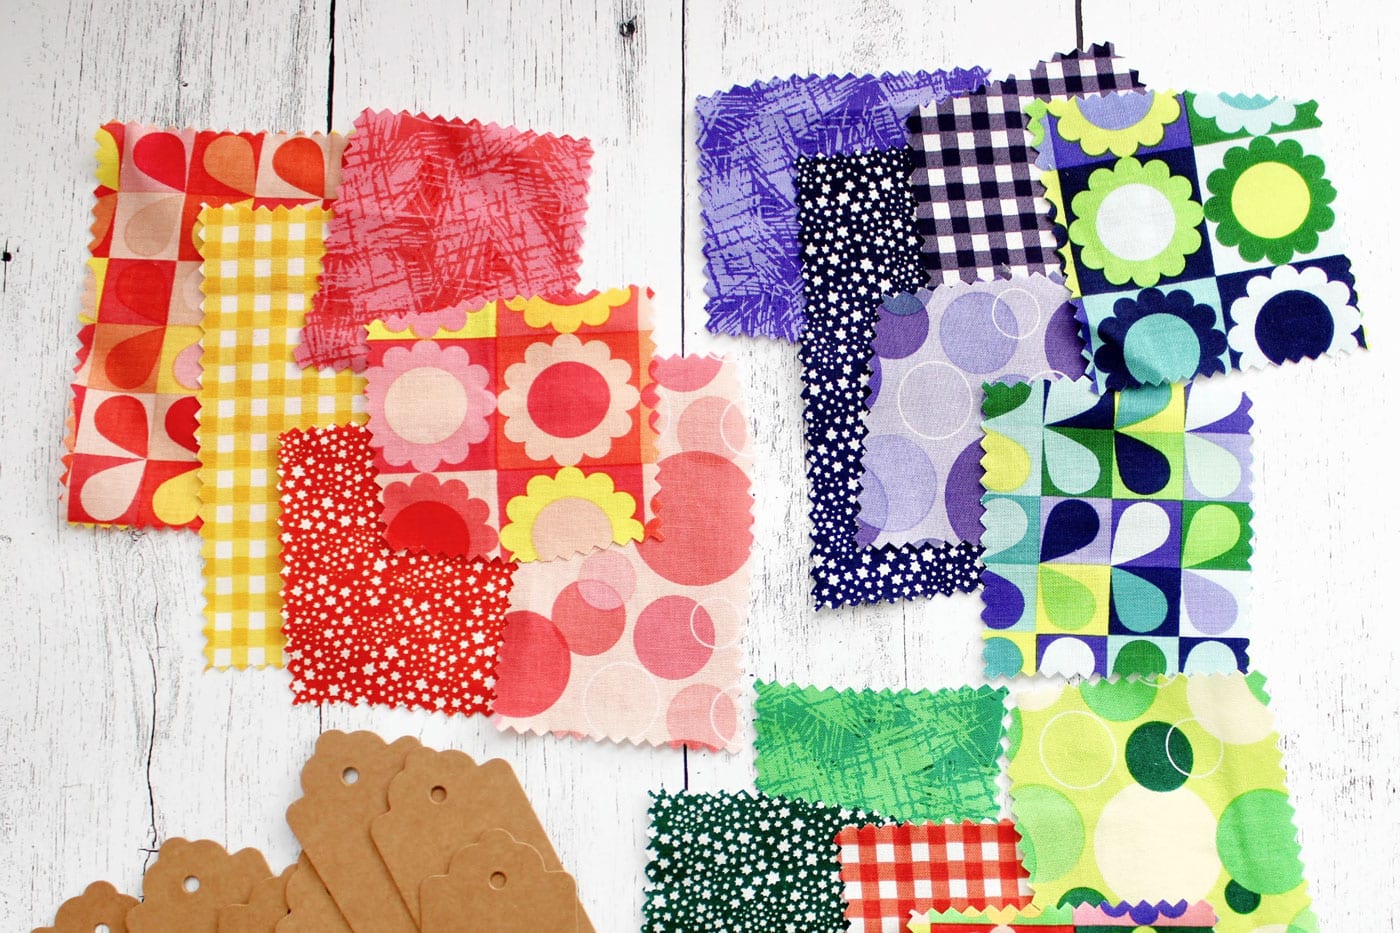
Fabric Scrap Gift Tag Supplies
To make the gift tags, you will need:
- Kraft paper or white gift tags. I used THESE
- Tiny scraps of fabric
- All-purpose thread in a contrasting color
- Glue stick or basting glue (optional)
- Cardstock for writing on the back of the tag (optional)
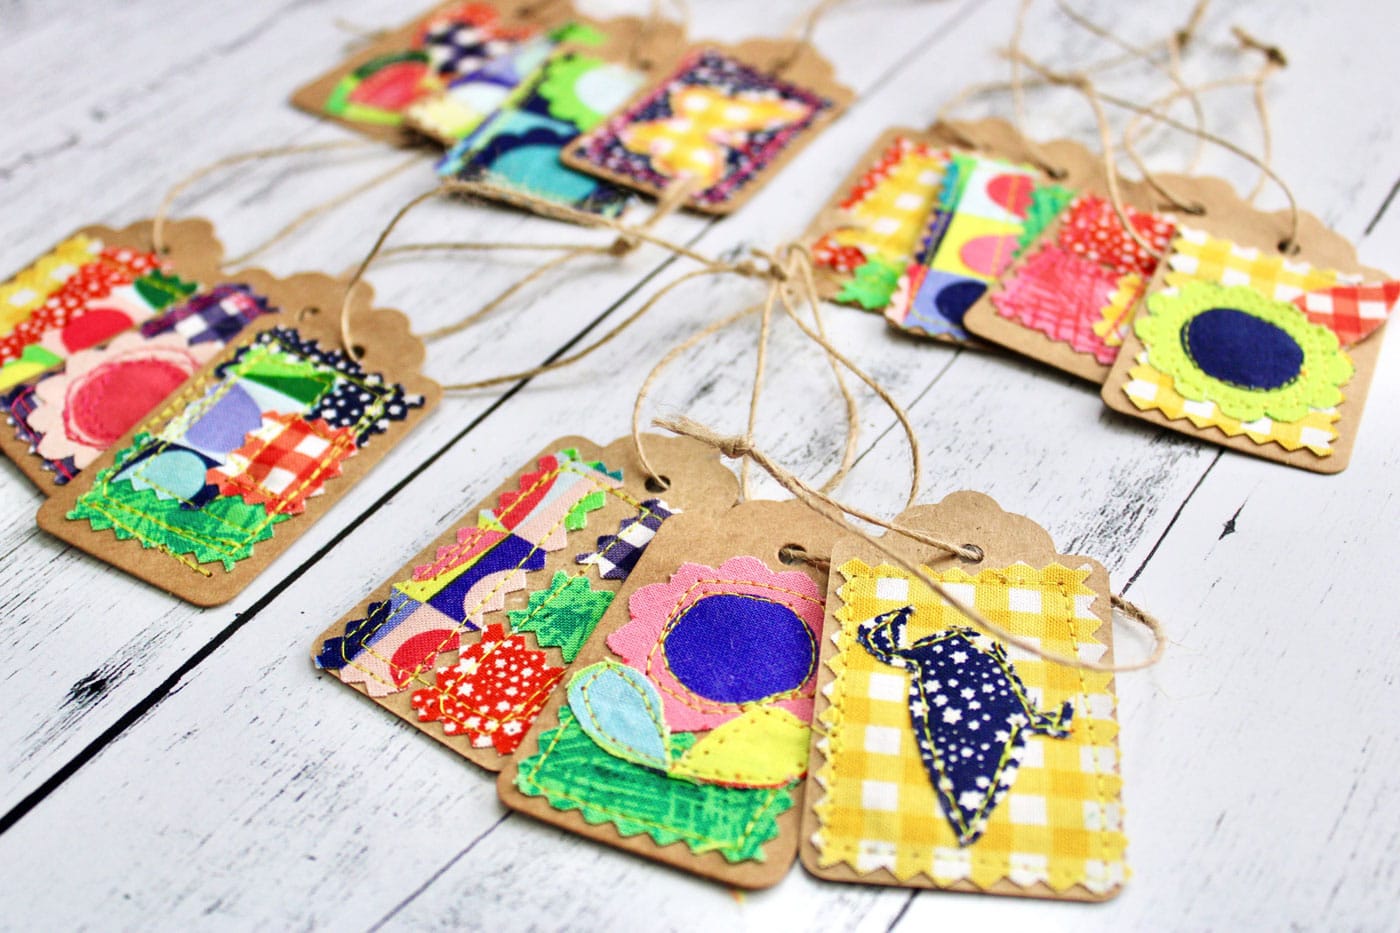
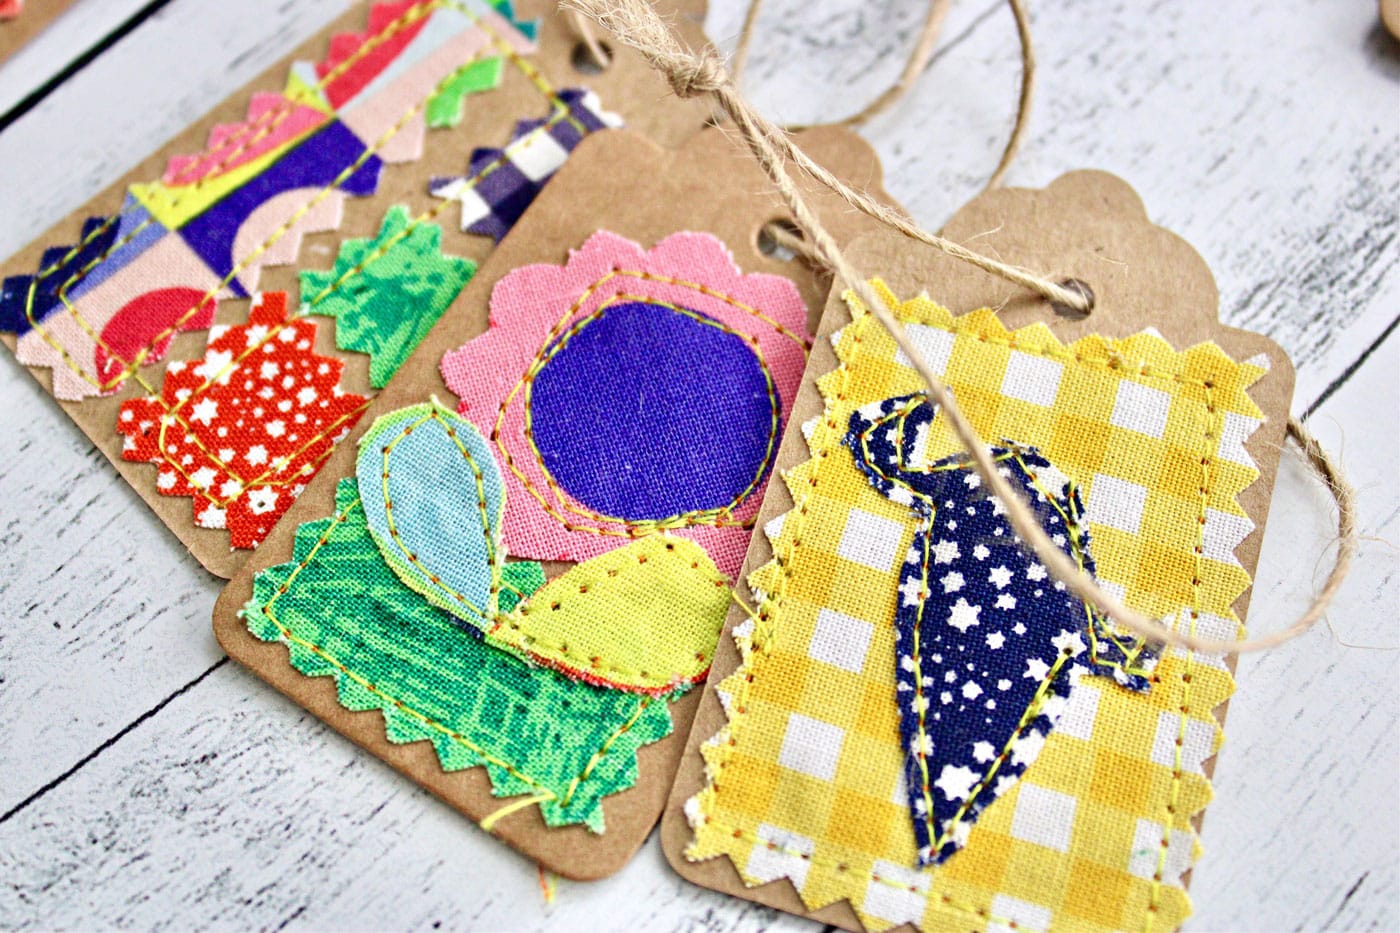
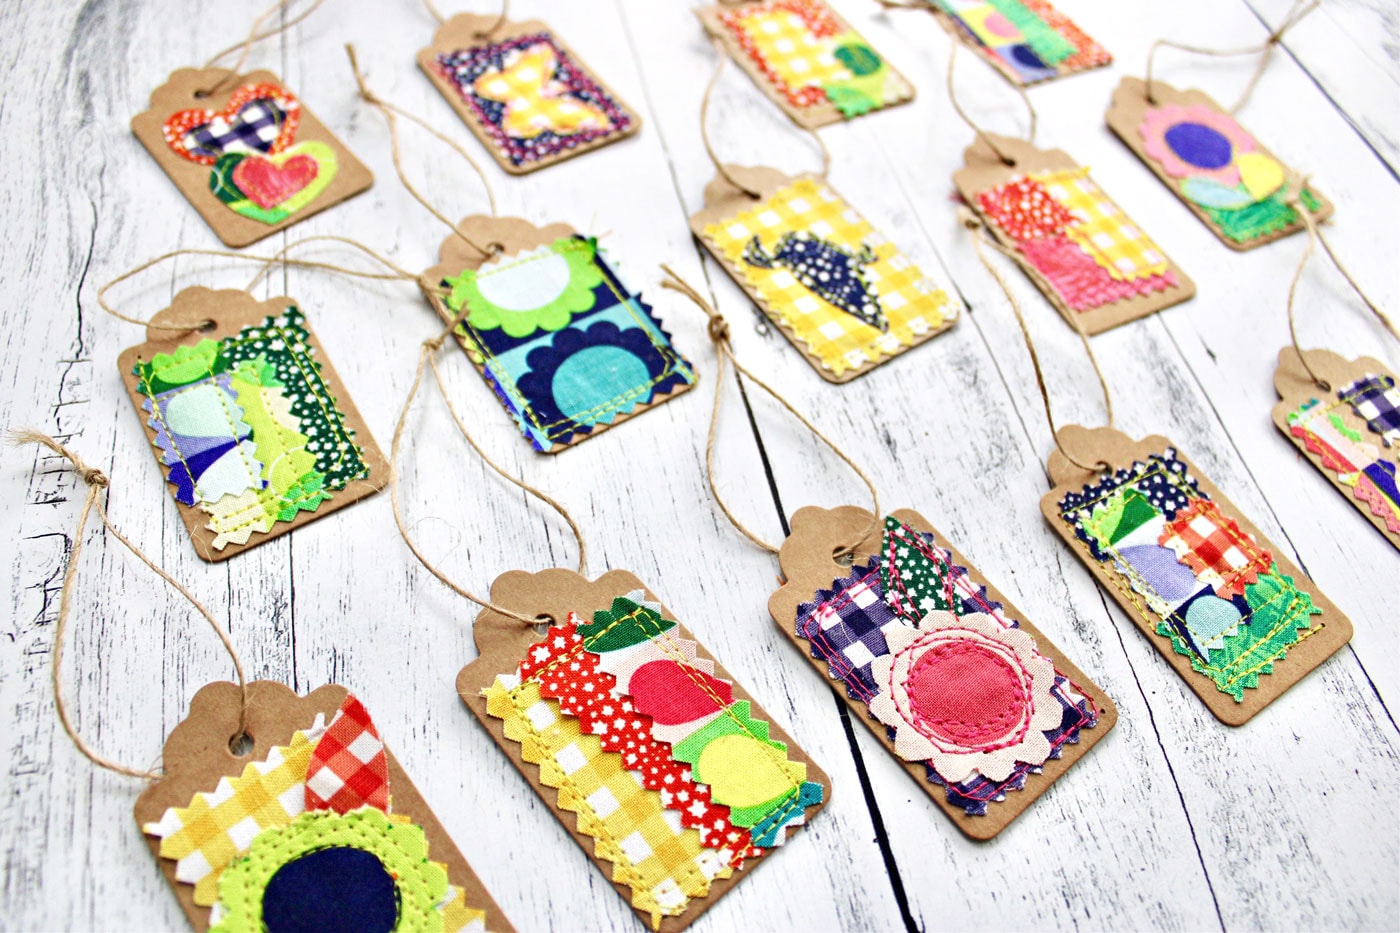
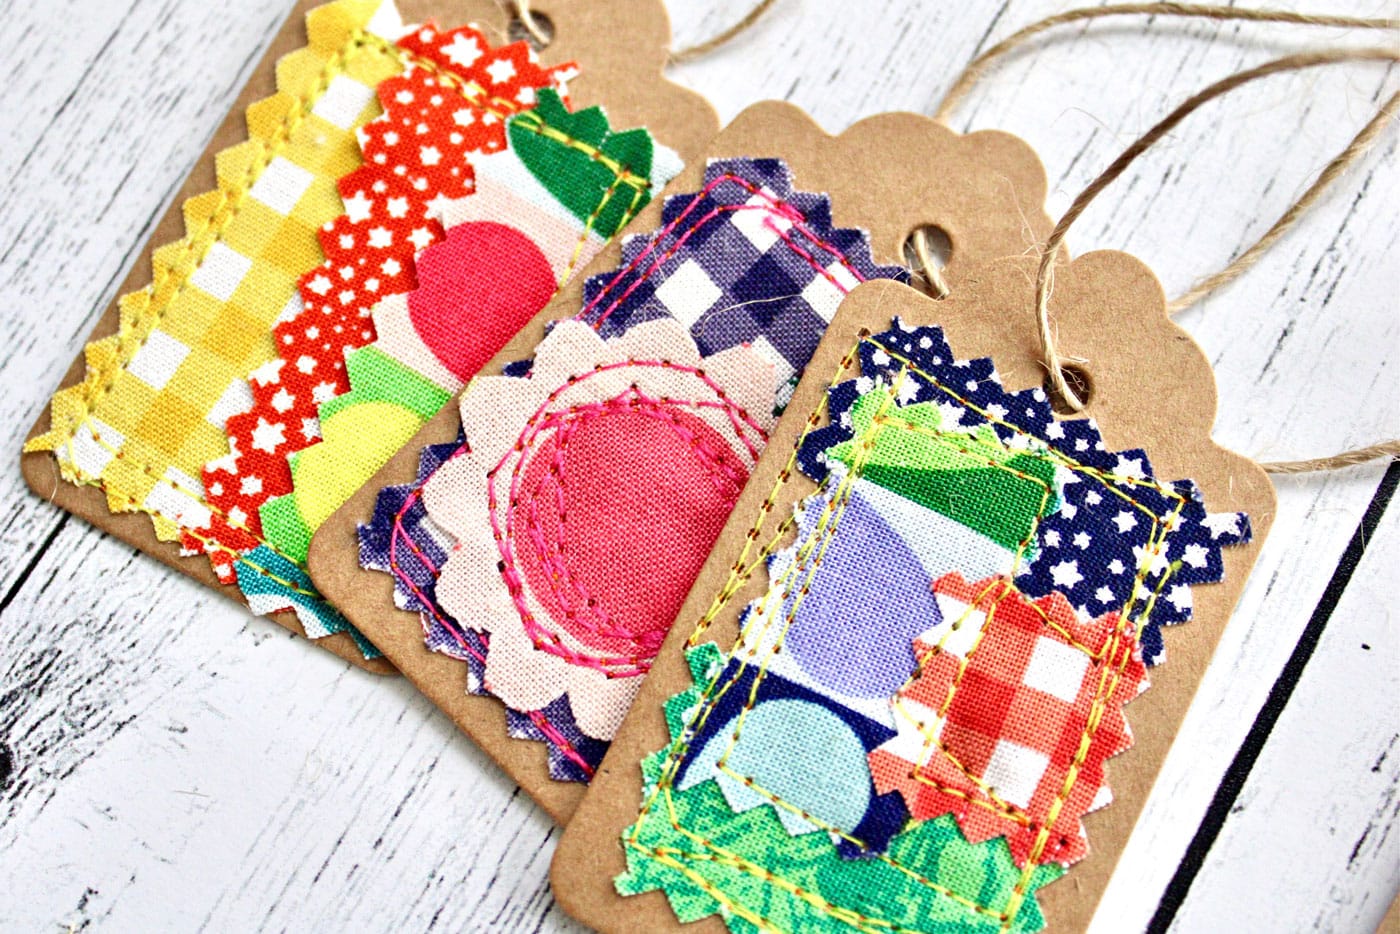
I will show you a few different designs, and I hope you’ll see that there is no right or wrong way to design your tag. I like to make these in big batches, with each tag being completely unique. You can be abstract or literal, use coordinating colors or clashing colors, cover all of the space, or leave some background exposed. The options are endless.
Fabric Gift Tag Option 1; Use a Shape from the Fabric
I cut out a flower from one of my fabrics for my first tag. This flower was already printed on the fabric. If you aren’t feeling very creative, use one of the designs printed on your fabric as your focal point.
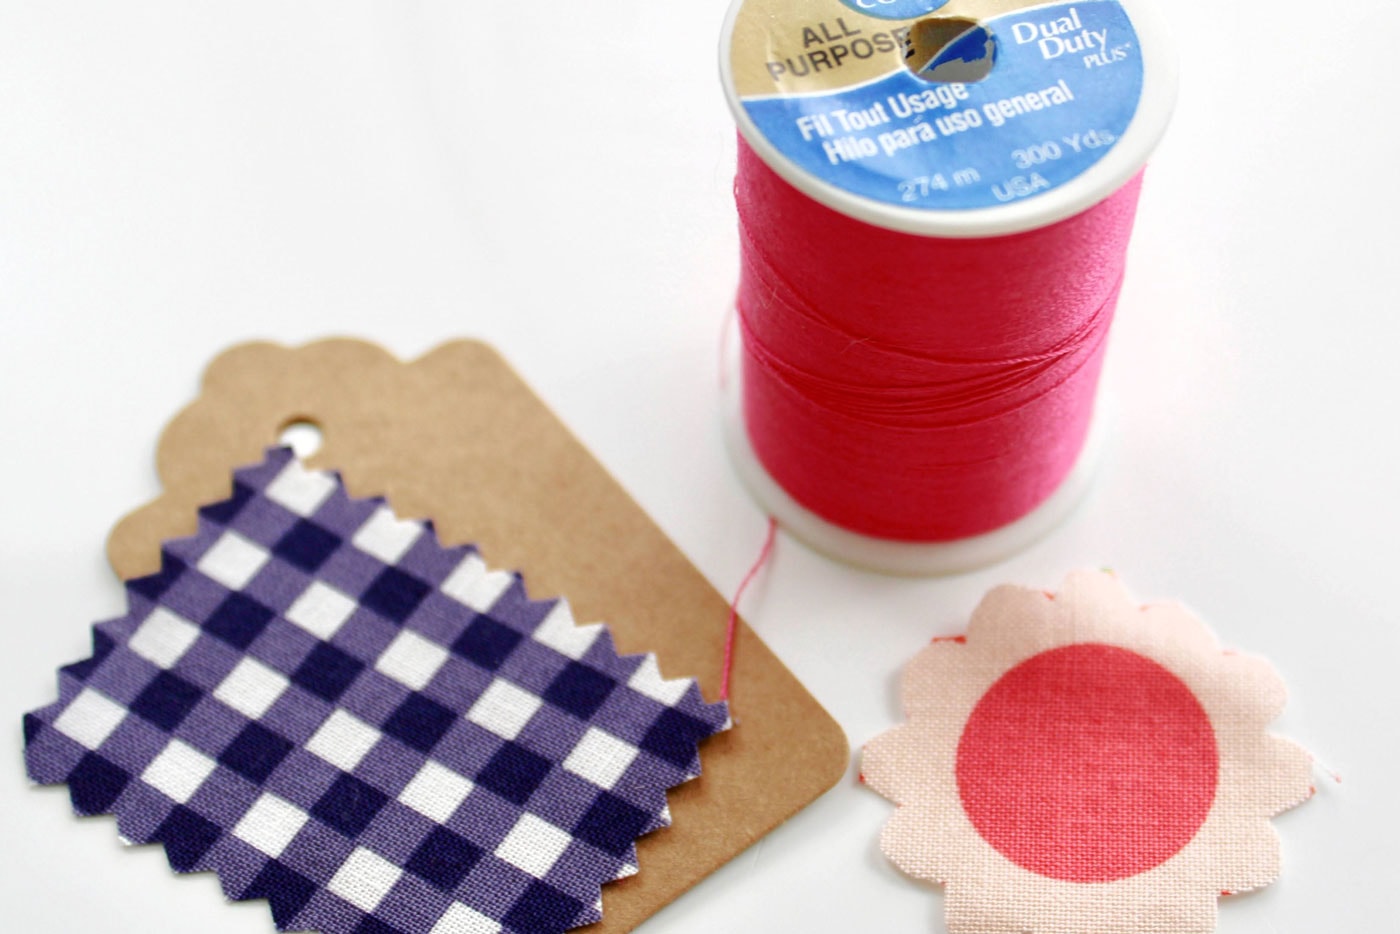
I am also using a hot pink all-purpose thread. I prefer all-purpose thread to quilting thread for this project because it is thicker and will show up more clearly. The thread is part of the design. This is why I chose hot pink – it will contrast nicely with the navy blue gingham.
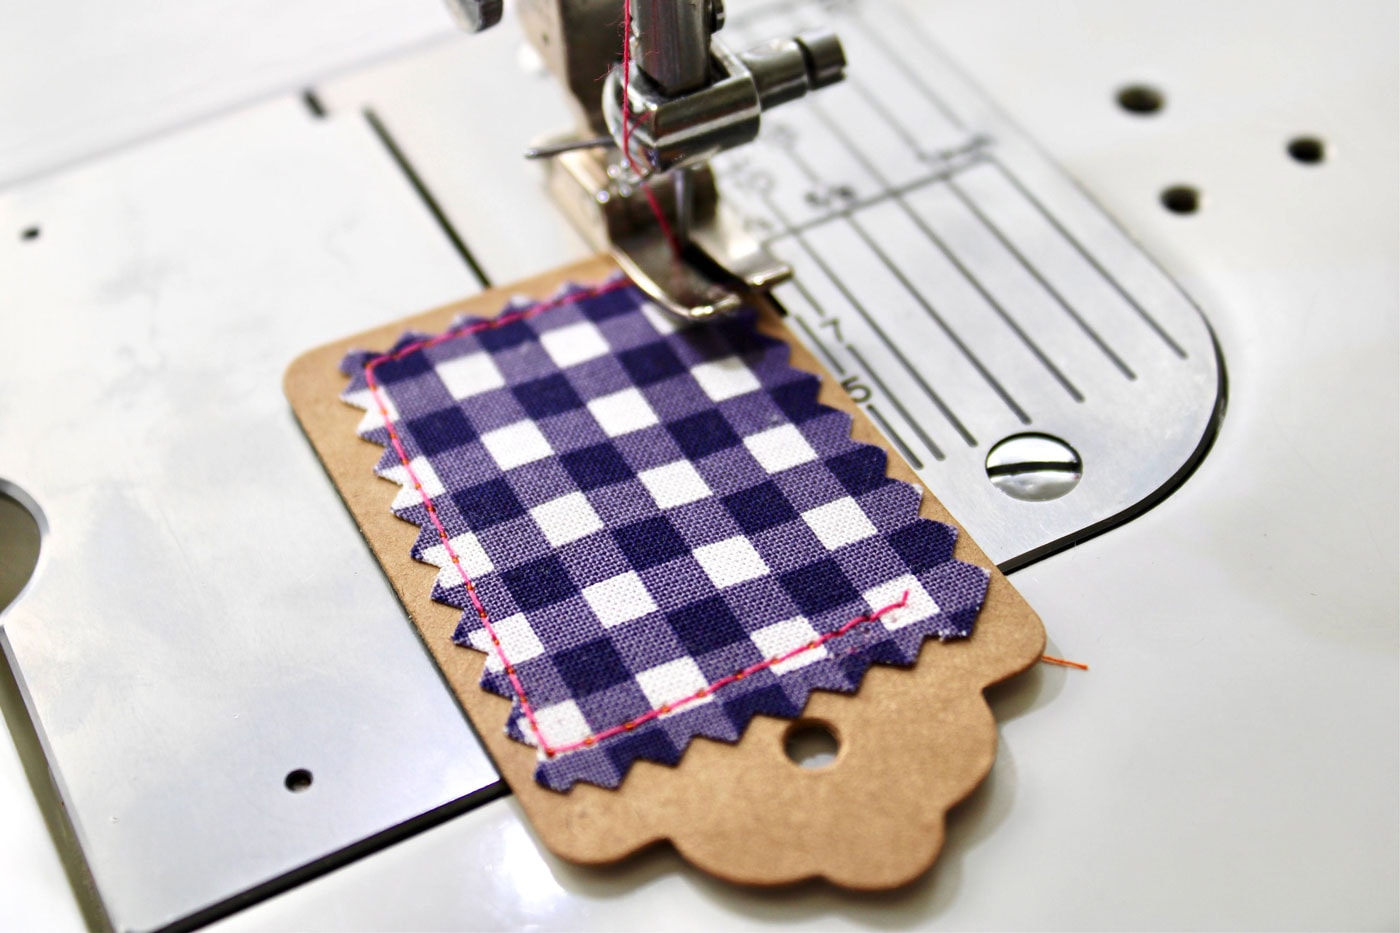
Now for the fun part! Cut the background fabric so it is just smaller than the gift tag. You can use pinking shears like I did here for a fun zig-zag edge, but they are totally optional.
Stitch around the rectangle 1-2 times. The lines don’t need to be straight; I intentionally make them a little crooked to create a scribble effect.
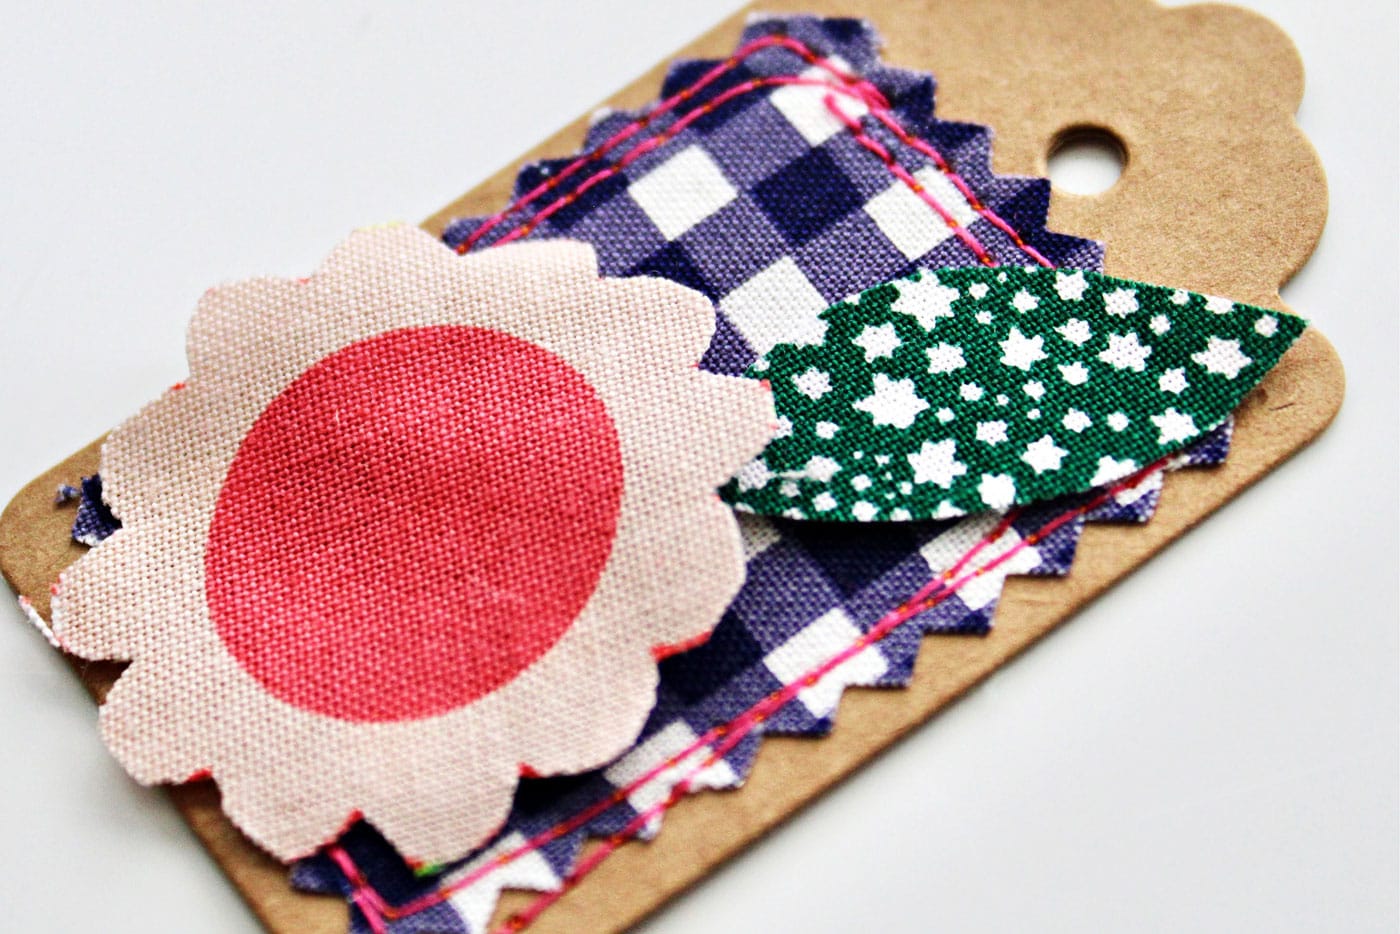
Next, arrange the flower. I decided I wanted to add a little leaf, so I layered that with the flower.
With the leaf positioned where I wanted it, I stitched right over it. Notice the stitching is “scribbled.” I did a few simple back-and-forth motions to create that look intentionally.
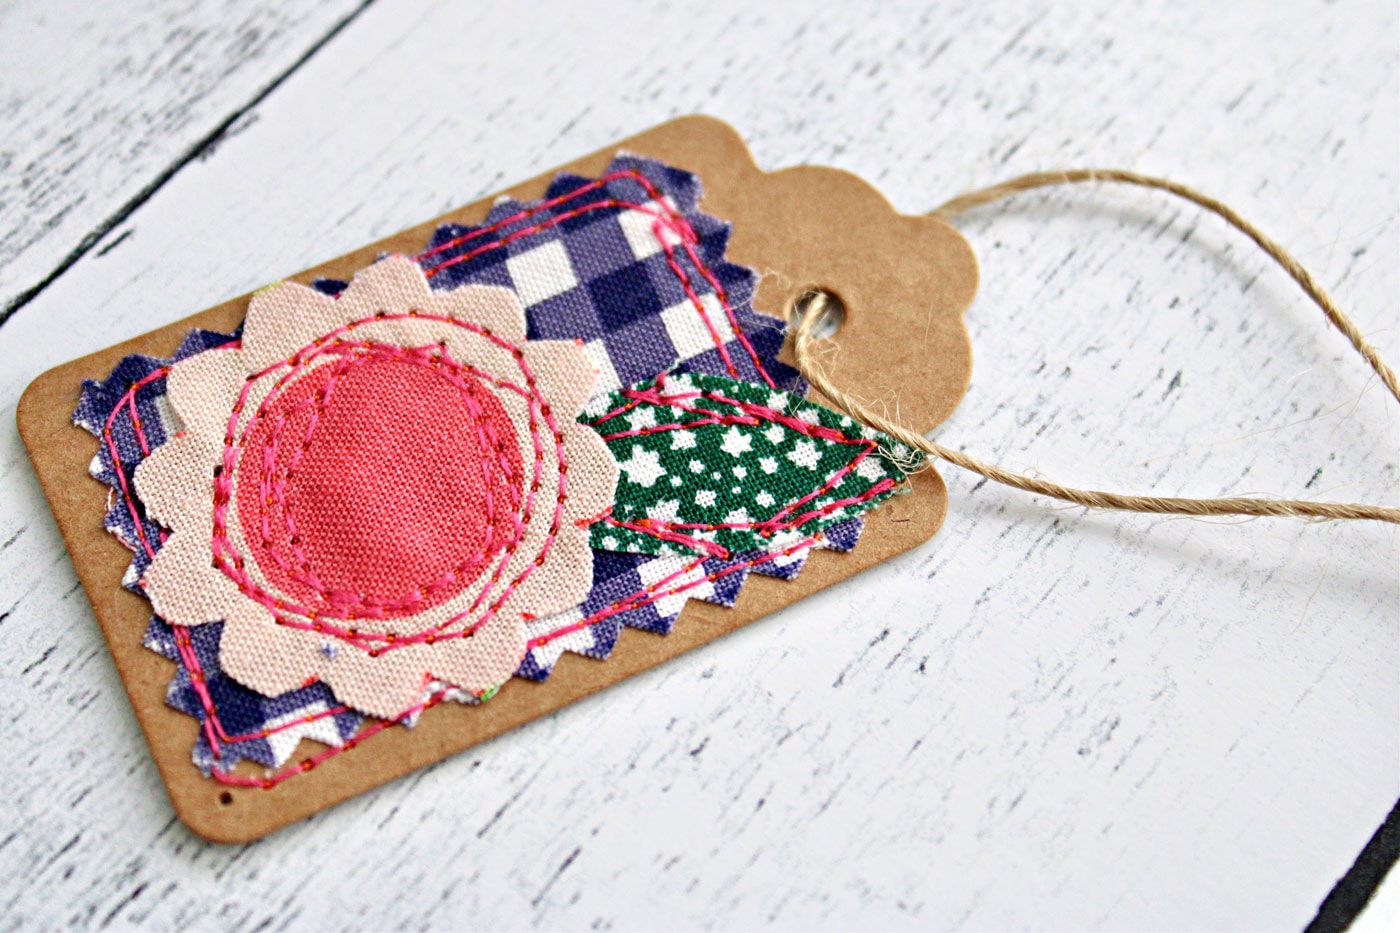
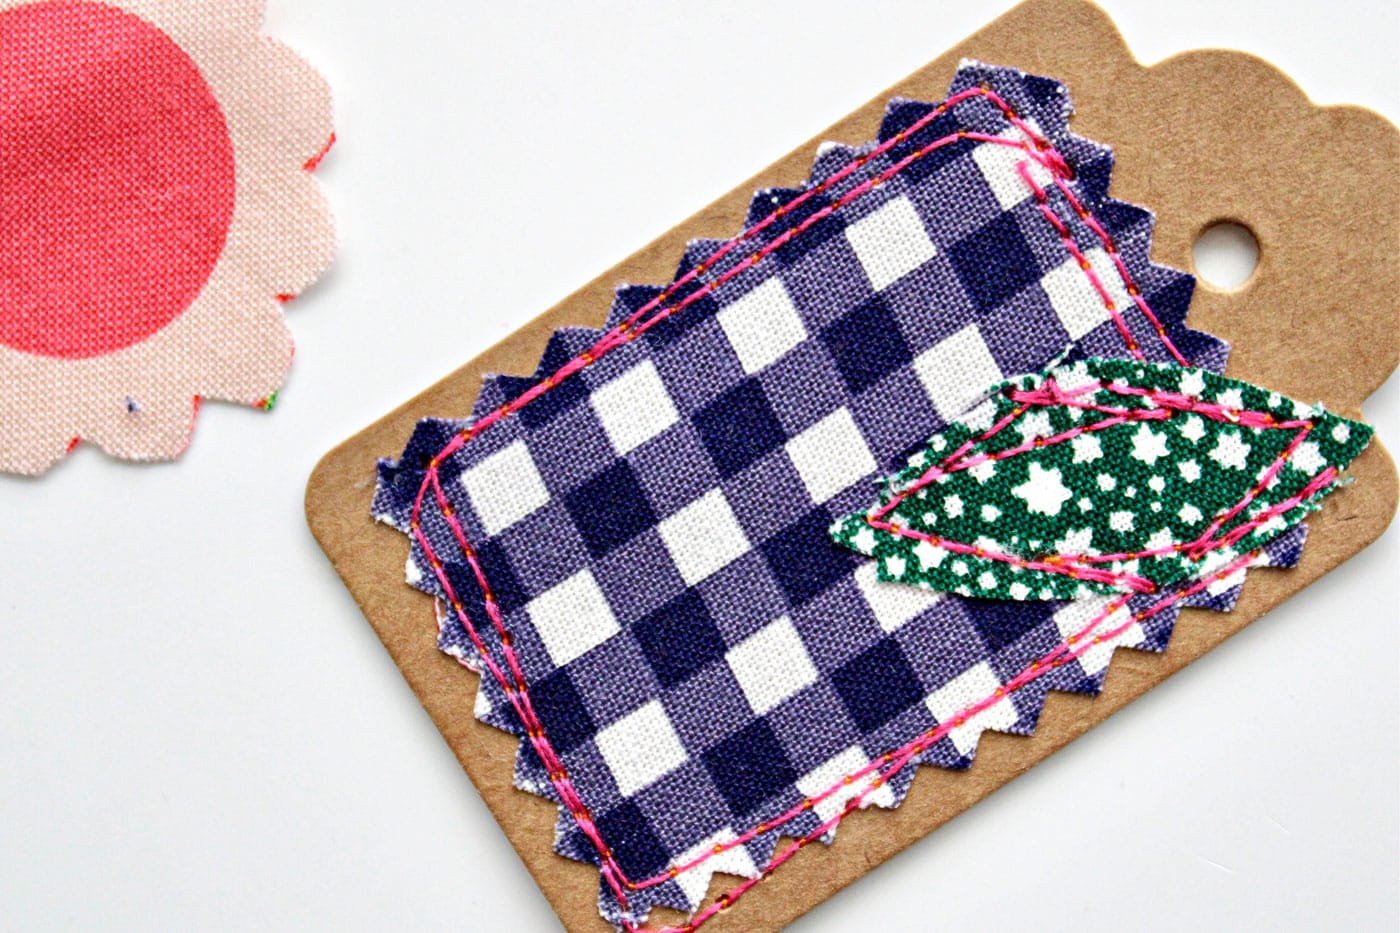
And finally, I added the flower. I opted to stitch around the center, leaving the petals free.
The back of your gift tag will look something like this.

Fabric Gift Tag Option 2; Custom Shape
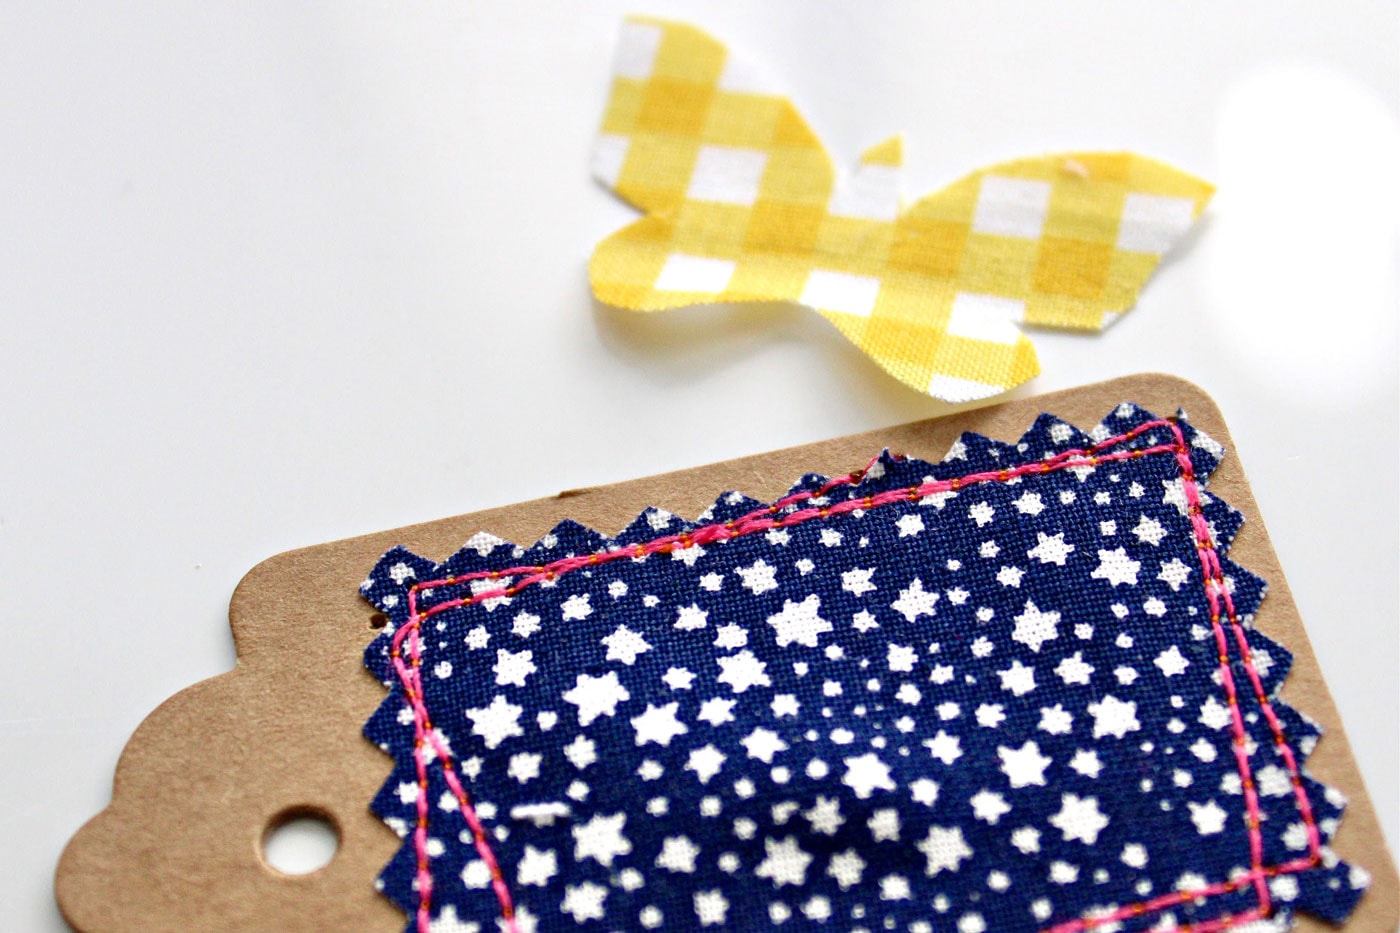
Another option is to print out a shape and use that for your guide. Here, you can see I cut out a tiny butterfly. You can search for any shape you want (online or even within whatever document program you use). Just be sure to size it so it is smaller than the area of your gift tag.
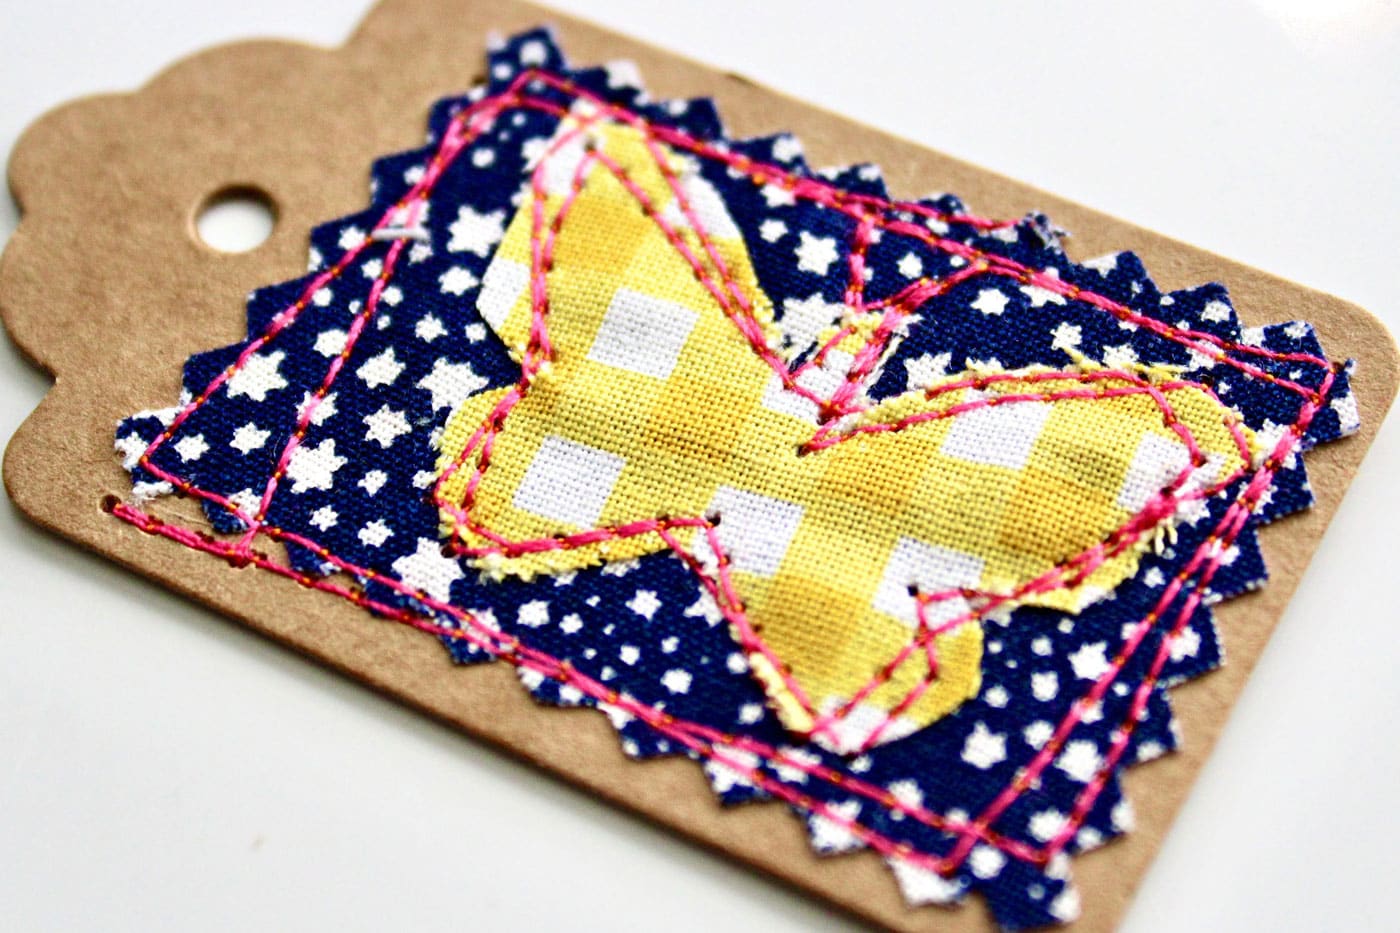
Simple stitching around the edges, and it’s done!
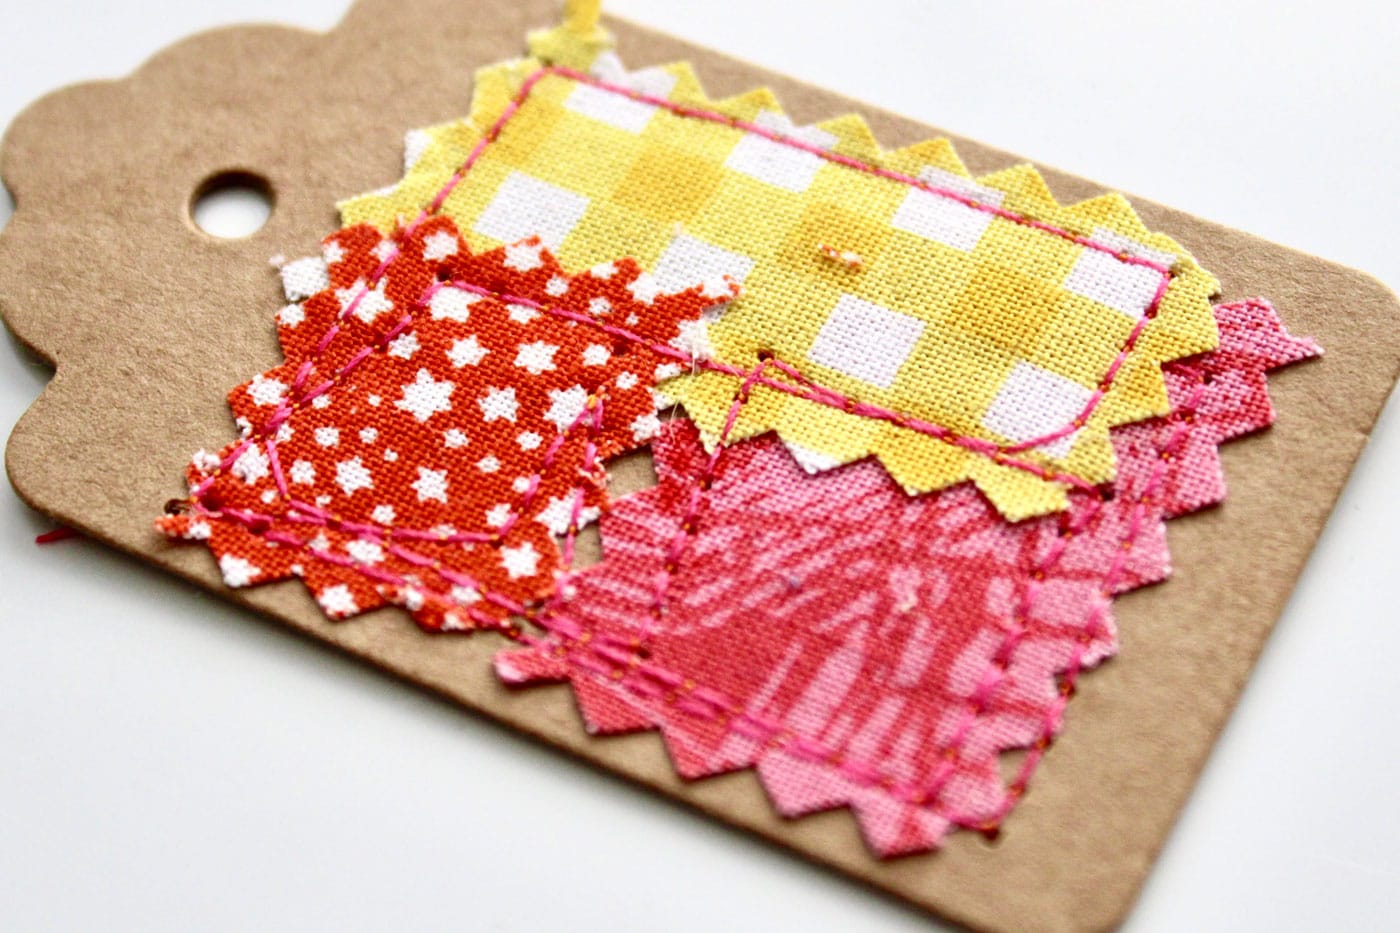
Fabric Gift Tag Option 3; Patchwork Shapes
A third option is to keep it abstract, using only random rectangles, squares, or other shapes. Layer them, or lay them out individually. Anything goes!
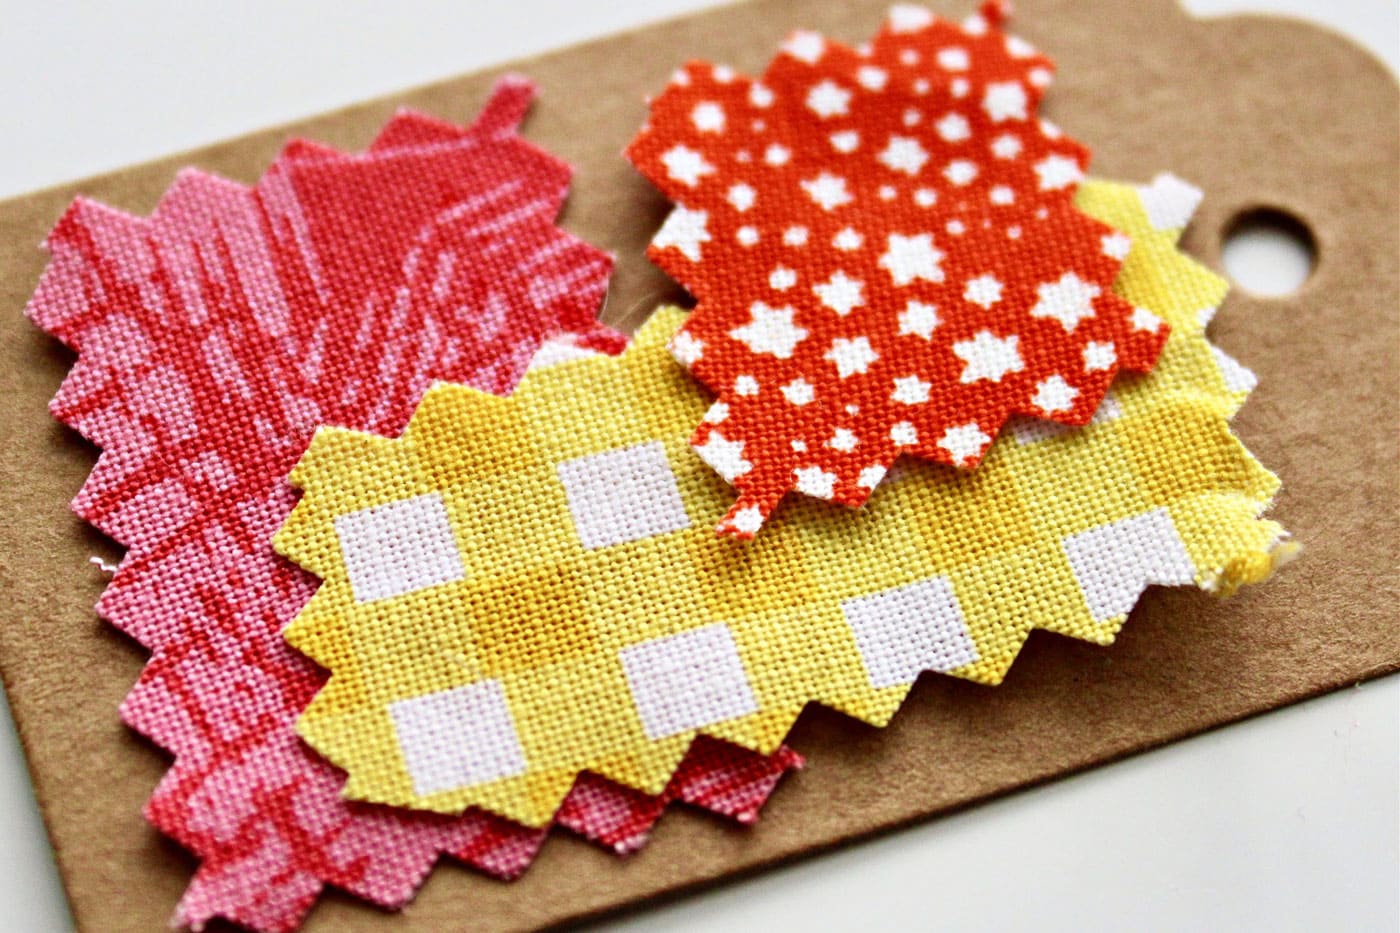
When I do the abstract design, I don’t bother to stitch one layer at a time. I lay everything out and stitch right through all of the layers. Again, anything goes, so play around with it and find the right style for you.
How to Finish the Back
Remember the back of the tag from earlier? The stitching on the back presents a problem – where do we indicate who the gift is to and from? To resolve this, grab a piece of cardstock and cut a rectangle slightly smaller than the gift tag. I cut mine to measure 1 ½” x 2”.
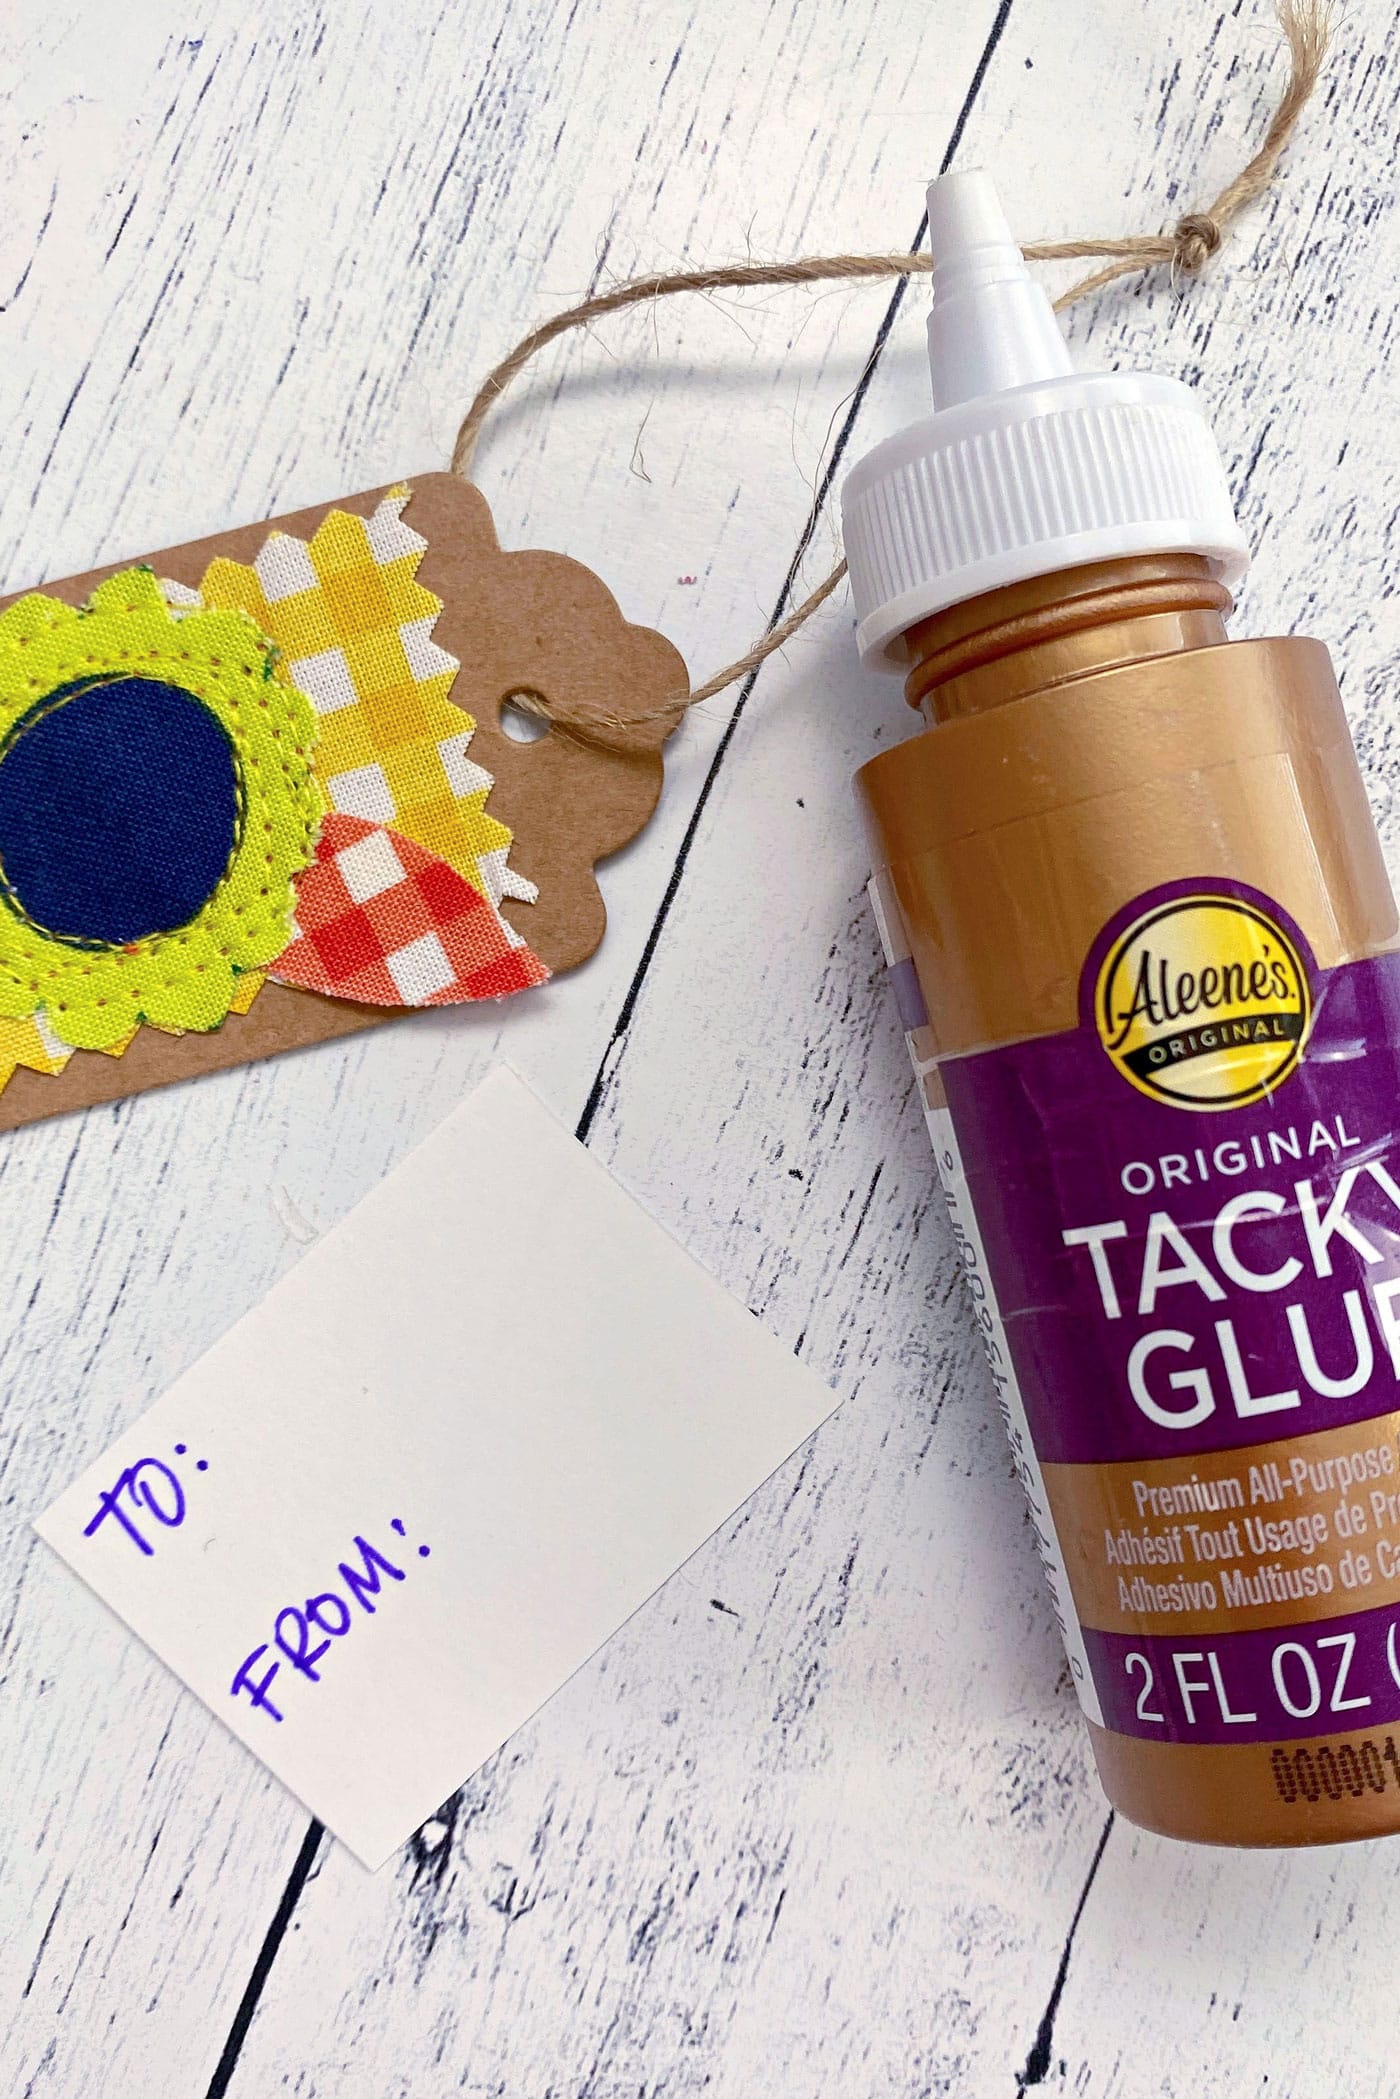
Now glue the cardstock to the back of the tag – problem solved!

Design Ideas
Here is a look at some of the fabric combinations I created. As I mentioned before, I like to make a big stack of these in one sitting, so I try not to overthink it. I arrange the fabric scraps quickly and go for it.
I love making these because they add a handmade, personal touch to any gift.
You can customize them for birthdays, baby showers, bridal showers, holidays, and more!
And best of all, they give you a good reason to keep those scraps!
For extra inspiration, I created a short YouTube Video where I make several different gift tags. In the video, you’ll see just how quick and easy these are to make!
Thank you for stopping by! I hope you enjoyed this project. Be sure to follow me on Instagram and subscribe to my YouTube Channel for more creative content and project inspiration. Have a blessed day!
About the Designer

Julia Frazier is the founder of Bayhill Studio. Julia designs quilts and projects geared toward beginner quilters and crafters. You’ll usually find her at her sewing machine or hiking in the nearby mountains. Follow Julia on Instagram @bayhillstudio, and subscribe to her YouTube channel for new and exciting projects and tutorials. Be sure to check out her Bayhill Studio website for a growing list of tutorials and patterns.
Also by Julia

Great Granny Square Quilt Pattern
Twinkle Boat Baby Quilt Pattern
Hi Julia,
Thanks for making so much content available. What size needle do you use when sewing these cute gift tags?
Just the one I keep on my machine all the time, you don’t need a special needle.
Looks like fun and scrap reduction idea.
The scrappy tags are genius! I loved the idea. I have one question, where do I get the card stock? Can I get at Walmart mart or Michael’s?
Thank you