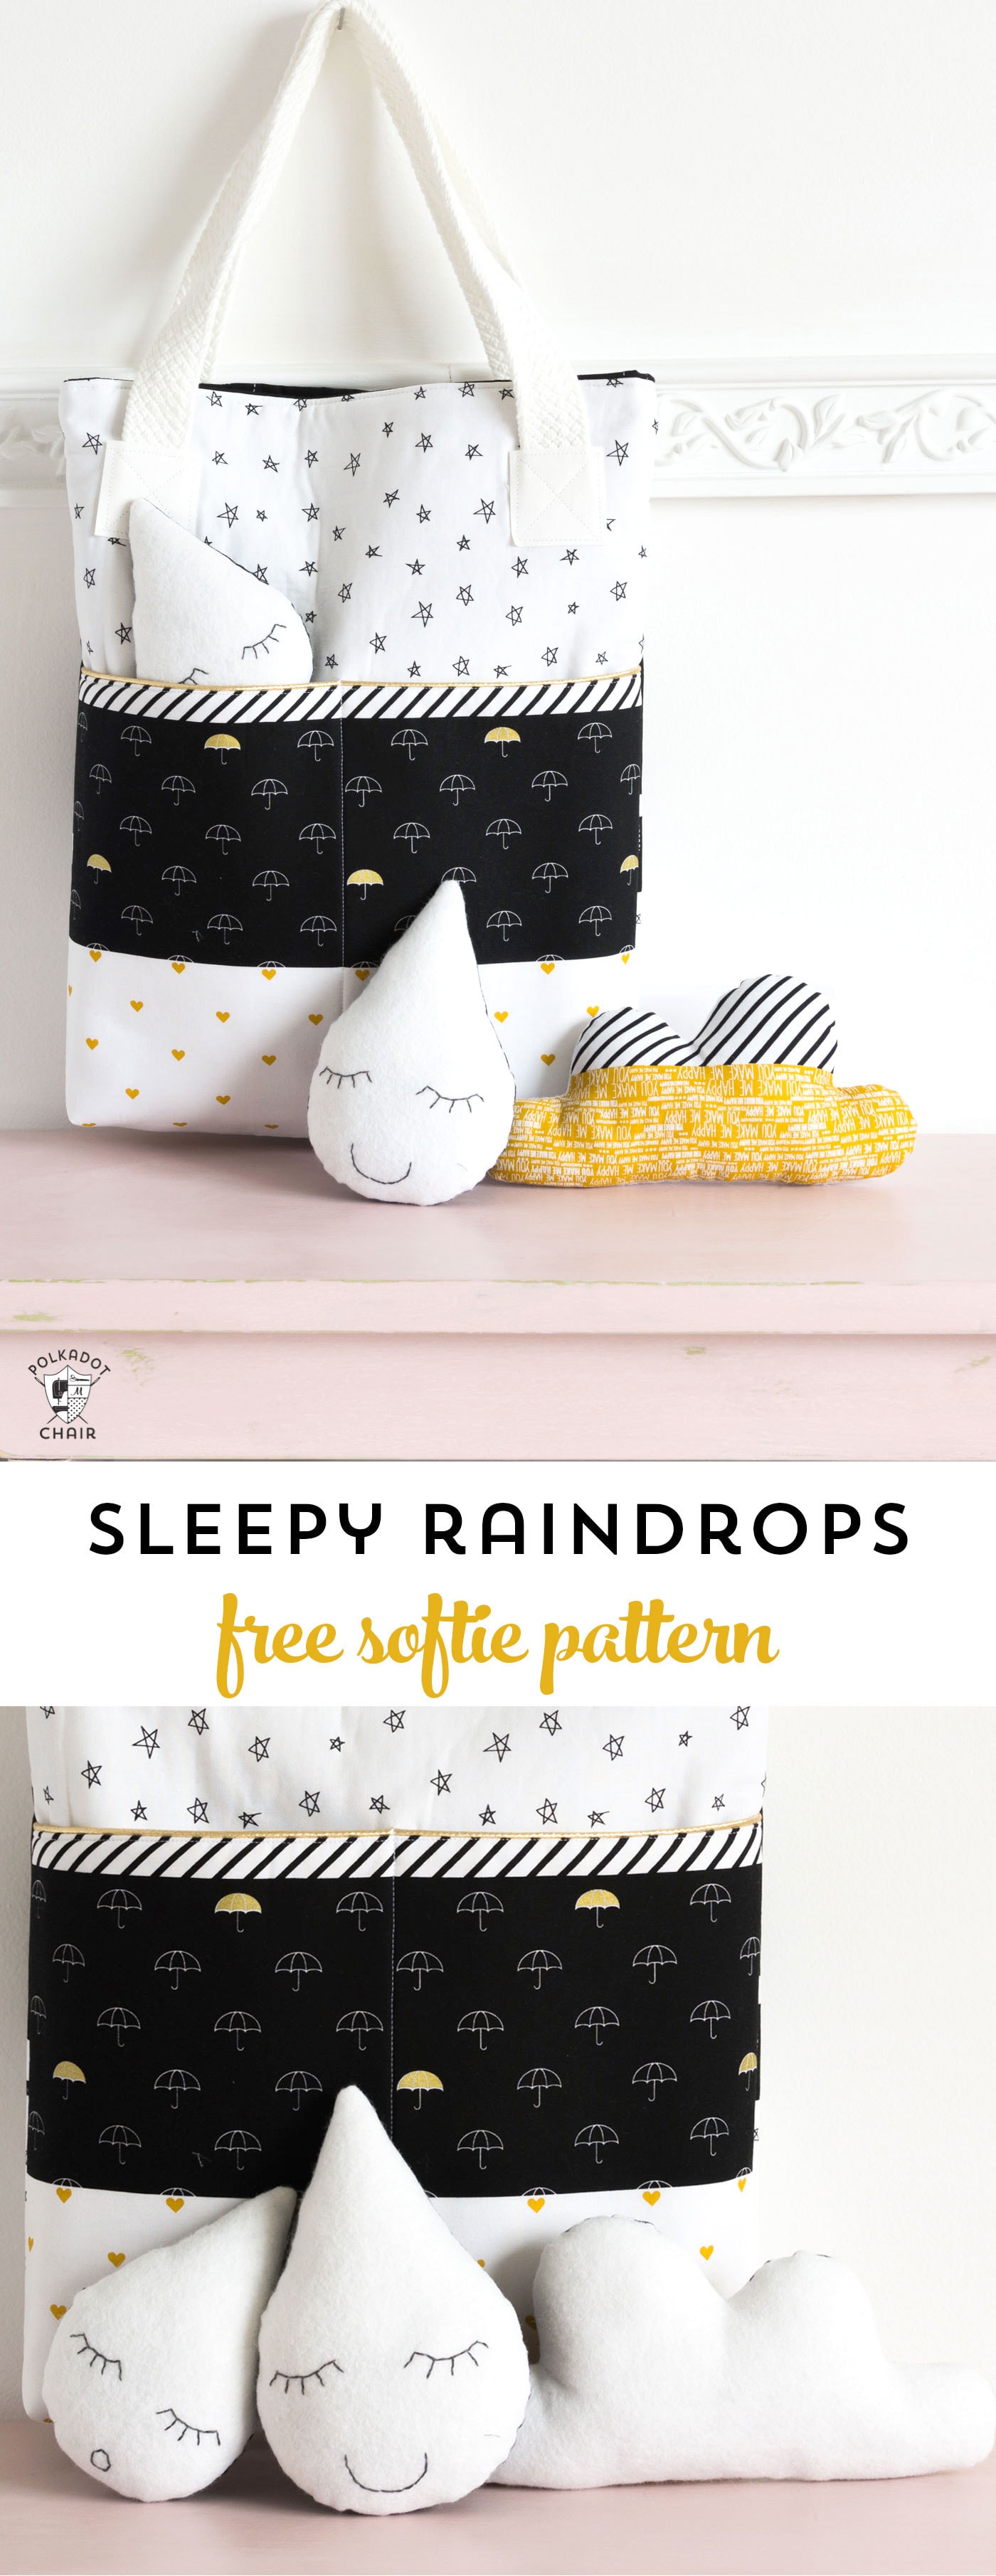
Sleepy Raindrops: A Free Softie Toy Sewing Pattern
Looking for a fun and easy sewing project? Try making Sleepy Raindrops, a softie toy perfect for little ones. These adorable cloud and raindrop toys make great gifts and are simple to sew. Keep reading for free step-by-step instructions!
The Fabric Collection Used in the Projects
Things have changed so much since my kids were babies; there are so many more options for “kids’ stuff” than there were back then. I adore the modern vibe and variety of designs that you can now find in stores.
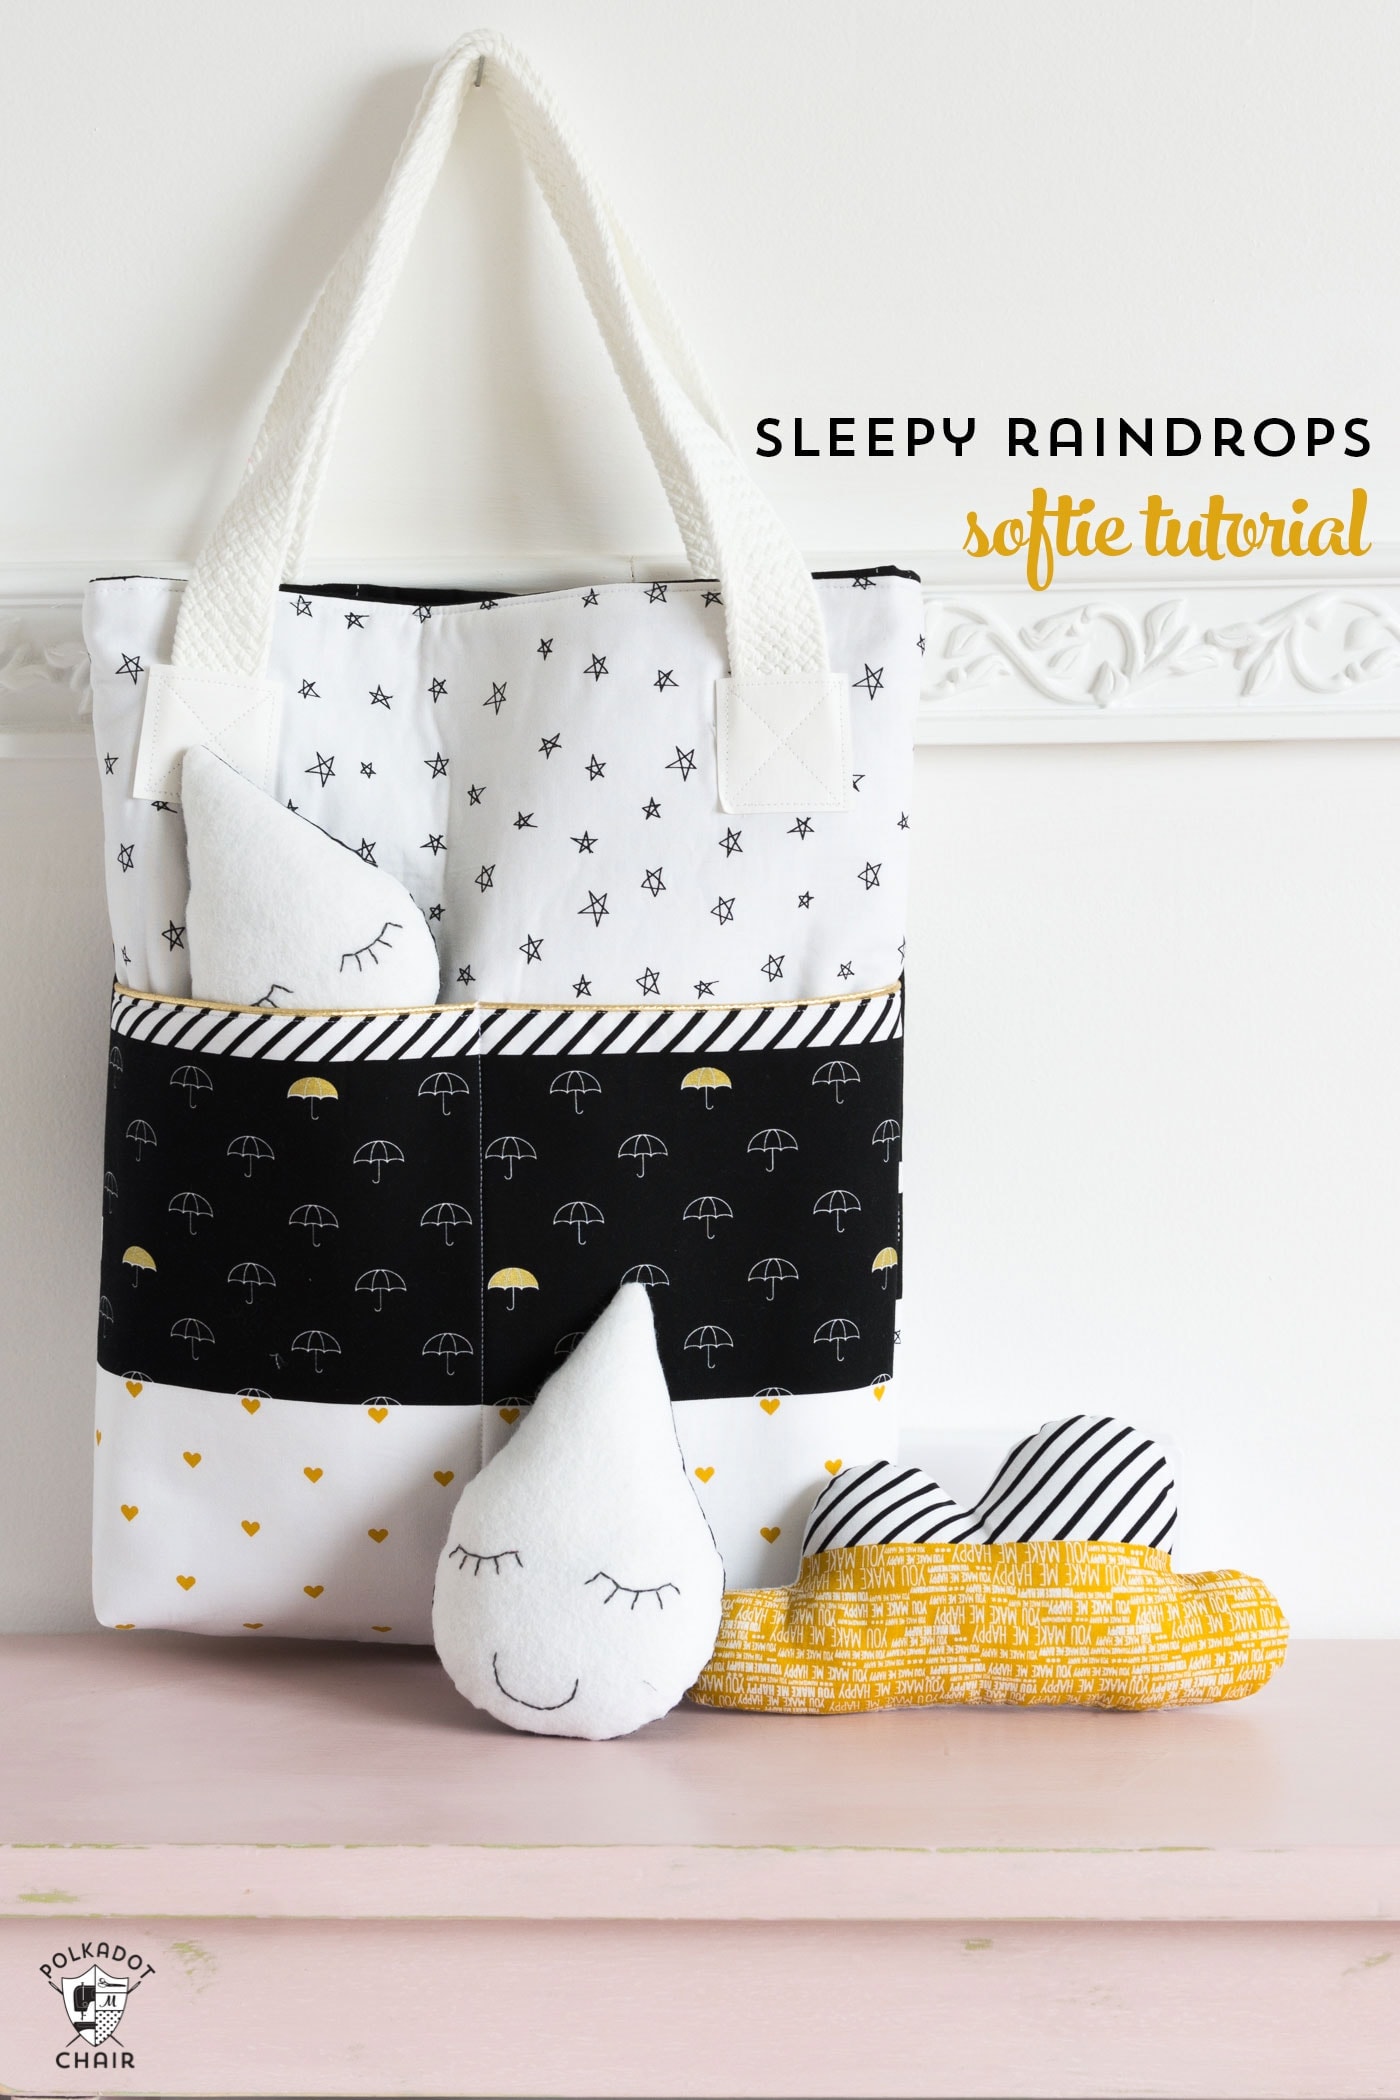
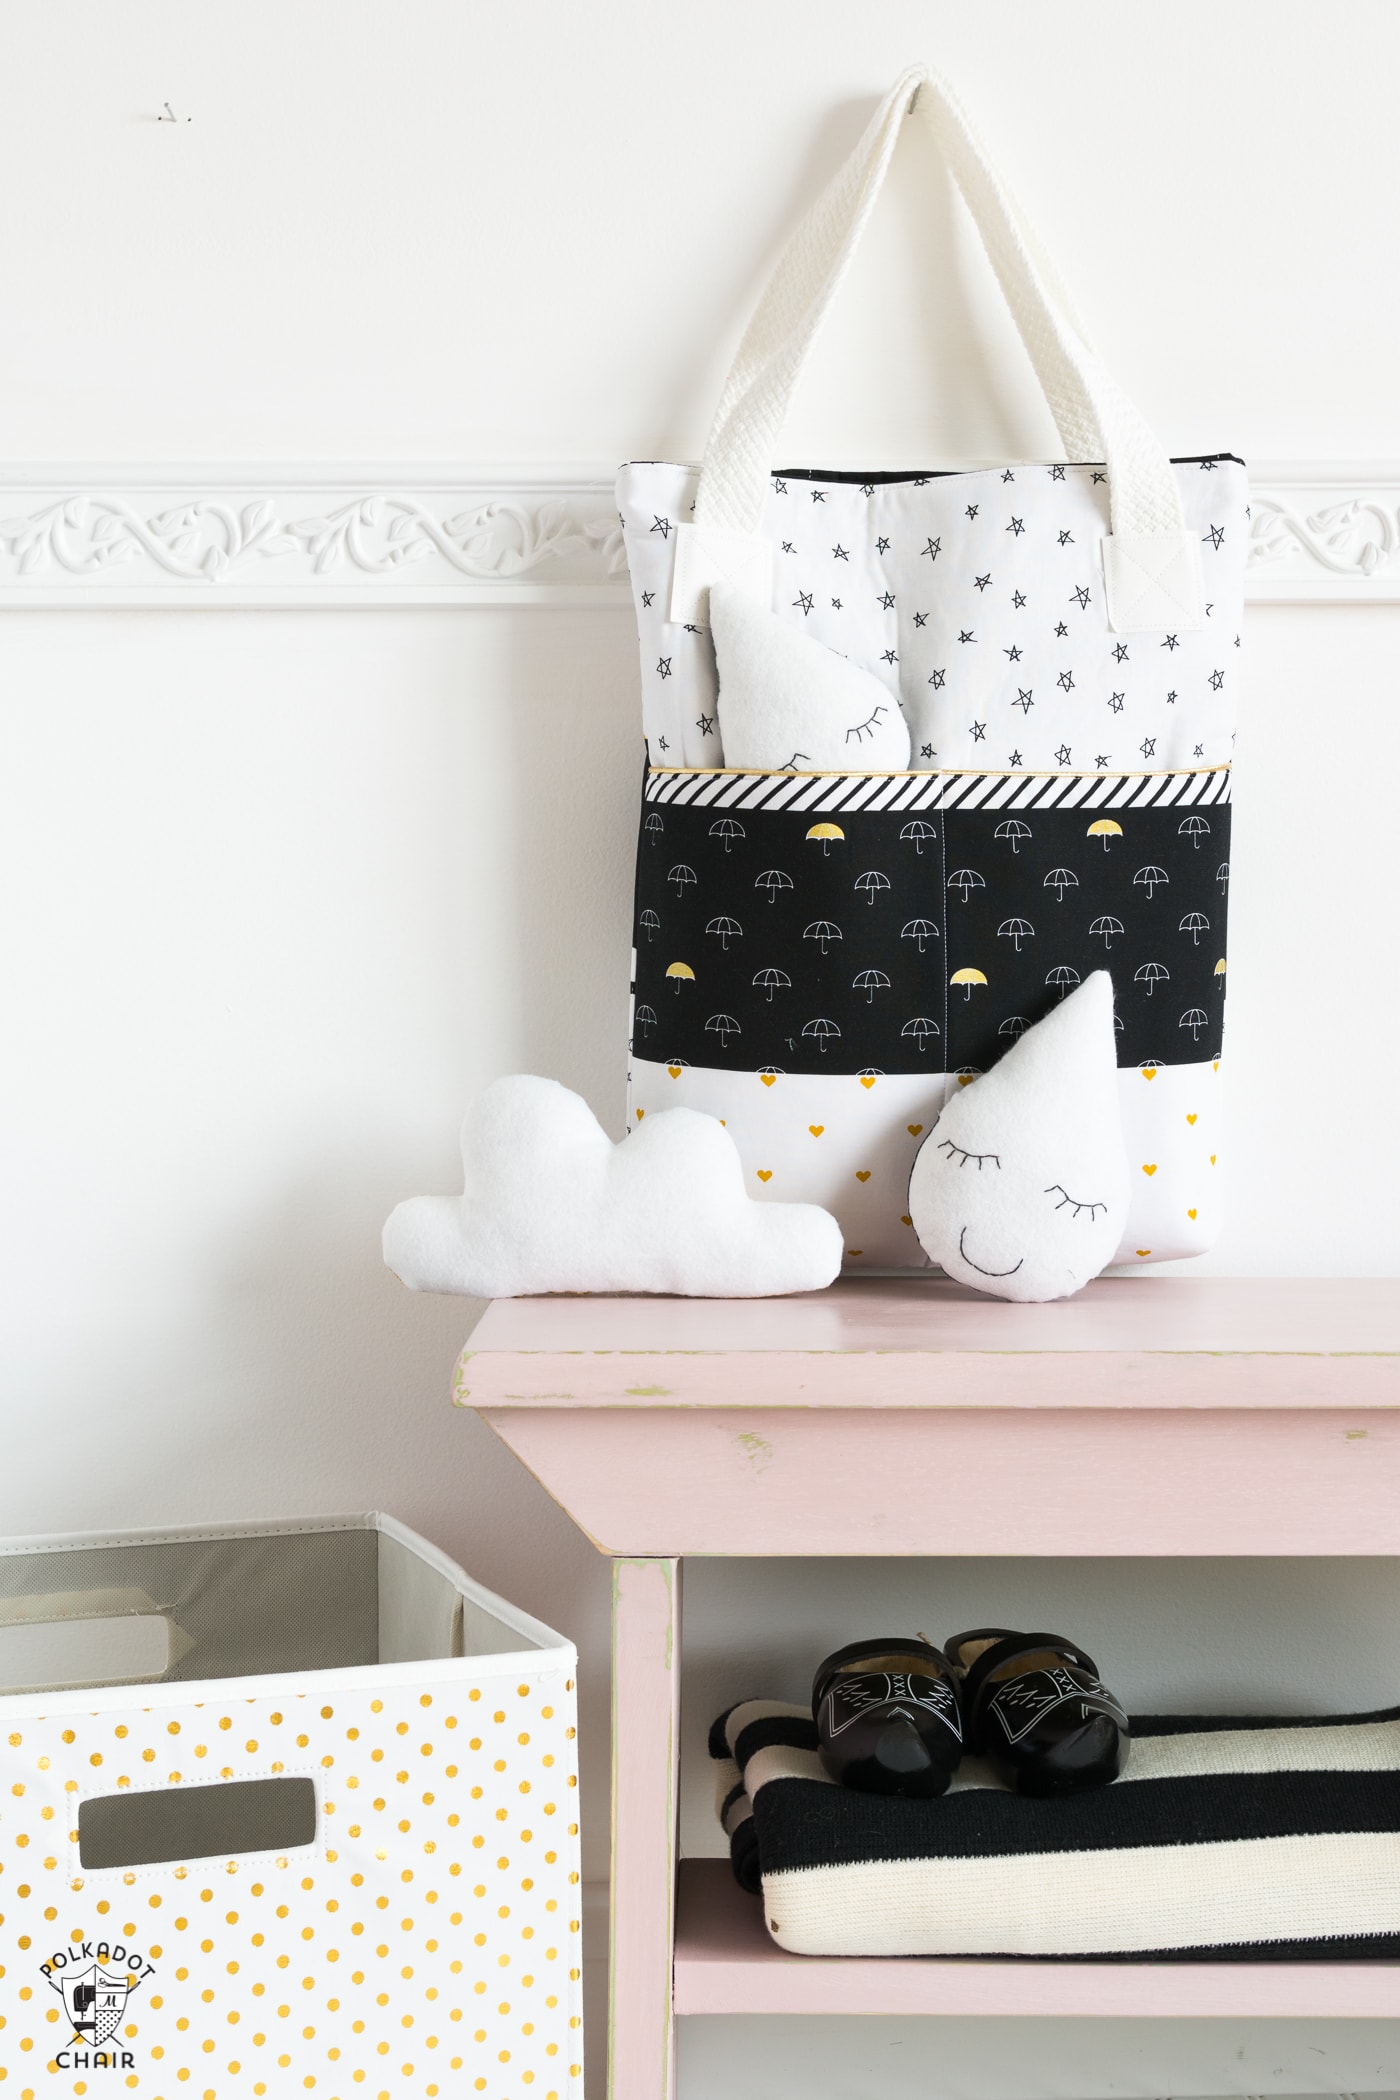
I was lucky enough to get my hands on some When Skies are Gray fabric this month, so I sat down and stitched up a tote bag with matching softies to fit in the pockets.
Tote Bag Details

The bag in the photos is my Derby Tote bag pattern. When I designed the bag, I always pictured little toys or dolls poking out of the pockets. It seemed like such a good bag for kids to tote to church or school.
I imagined it filled up with coloring books and crayons and a floppy teddy bear poking out of the top.

The girls at Simple Simon & Company asked me to participate in the blog tour for their new “When Skies are Gray” fabric line.
The fabric collection was designed as a “modern nursery” line. The fabric could be used for so many other things besides just a nursery, but I thought it would be a fun challenge to make something suitable for a modern baby quilt in a nursery.
Inspired by the fabric’s designs, I made a few softies to coordinate with my tote bag. This post includes a free printable pattern for the raindrops and cloud softies. The tote bag pattern can be found in my shop.
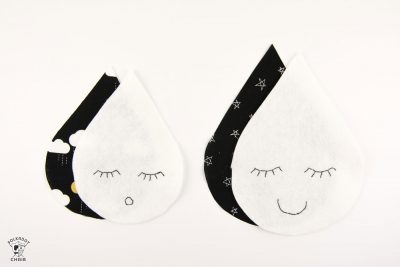
Raindrop & Cloud Free Softie Sewing Pattern
These softies are just the right size to stuff into a tote bag and feature embroidered faces.

Do you want to make some?
How to Get the Pattern Templates
Fill out this form, and we will email you a PDF copy of the cloud and raindrop soft toys templates.

Sleepy Raindrop Softie Toy Sewing Pattern
Equipment
- Needle & thread
- Marking Pen – I use Frixion Pens
supplies
- 1/2 yard of felt – I prefer to use wool or bamboo felt
- 3 fat quarters Fabric for the back of the softies.
- 1 package Polyester Fiberfill
Instructions
Instructions
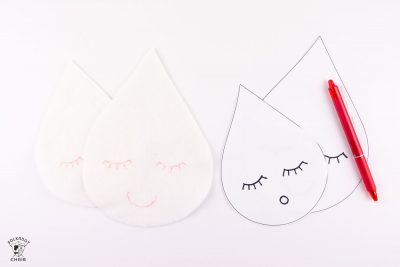
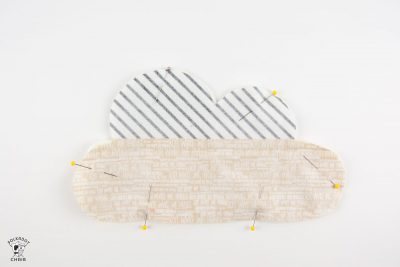
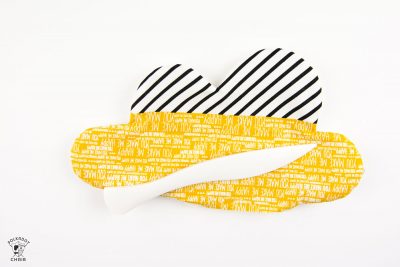
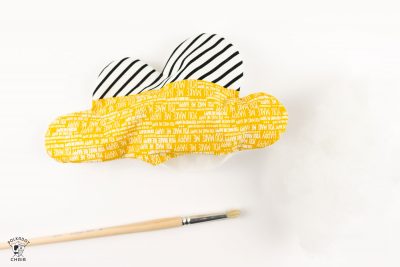
- Begin by cutting out from the pattern pieces one piece of felt for the front and one piece of fabric for the back.

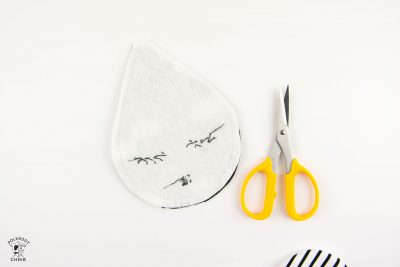
- On the felt piece, trace (use a lightbox) the face onto the front of the fabric using a fabric-safe marking pen.
- Stitch the face onto the raindrop pieces using a simple backstitch and three strands of embroidery thread.
- After you’ve finished the embroidery, stitch the felt piece to the fabric piece, right sides facing. Stitch around the perimeter with a 1/4″ seam allowance, leaving a 3″ opening.
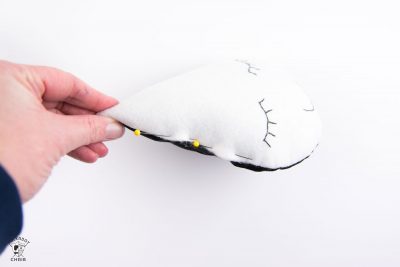
- Clip the curves and turn the piece right side out.
- For this step, I find it helpful to use this Clover 2 point turner (you can pick it up on Amazon); it helps me smooth all of my curves.
- After you’ve smoothed out your curves, begin stuffing the pieces.
- Melly (a softie-making expert) taught me this trick when I saw her last May. Use a paintbrush with the bristles trimmed to get the stuffing into the little corners.
- After you’ve stuffed the pieces, close the opening using a simple ladder stitch.
- Clip your strings, remove your markings, and that is it!

Melissa — what a great interpretation for a beautiful fabric. No babies in my life but sure love the idea for future reference. Thanks to you and the girls from “Simon”
Thank you kindly Melissa for these patterns… Do you have any printables for a star ???
How sweet are those little raindrops, and that bag is awesome. Am I seeing you’ve used a shiny metallic of some kind for piping on that pocket? It really stands out. Love it.
I had lost track of who it was with the two sisters-in law who had the same names. I remember reading a blog post about all of you a long while back with pictures; possibly in a wedding post maybe?
Funny story about same names; one of my twins has finally met someone although how serious I’m not sure. He attended law school and then further education for a higher law degree after the usual 4 yr degree at a university, so his face had been in the books since high school and he was very good at sticking to getting through what he’s done now. Well, now he’s met a woman and funny enough is that she has the same name as mine. I started laughing when I heard this; mostly because of what I was told after learning that fact. He just cannot call her by her full first name, or the shortened name we both also use as it reminds him of Mom too much. That’s probably not a good thing to always see your Mom in your head when you’re with your ‘girl’. LOL
Thank you for the cute little raindrops.