Christmas Tree Quilt Block for Santa’s Sampler Quilt Along
Our next stop in the Santa’s Sampler Quilt-Along brings us to a classic shape with fresh fabrics, the Christmas Tree Quilt Block. This is block 4 of the quilt-along.

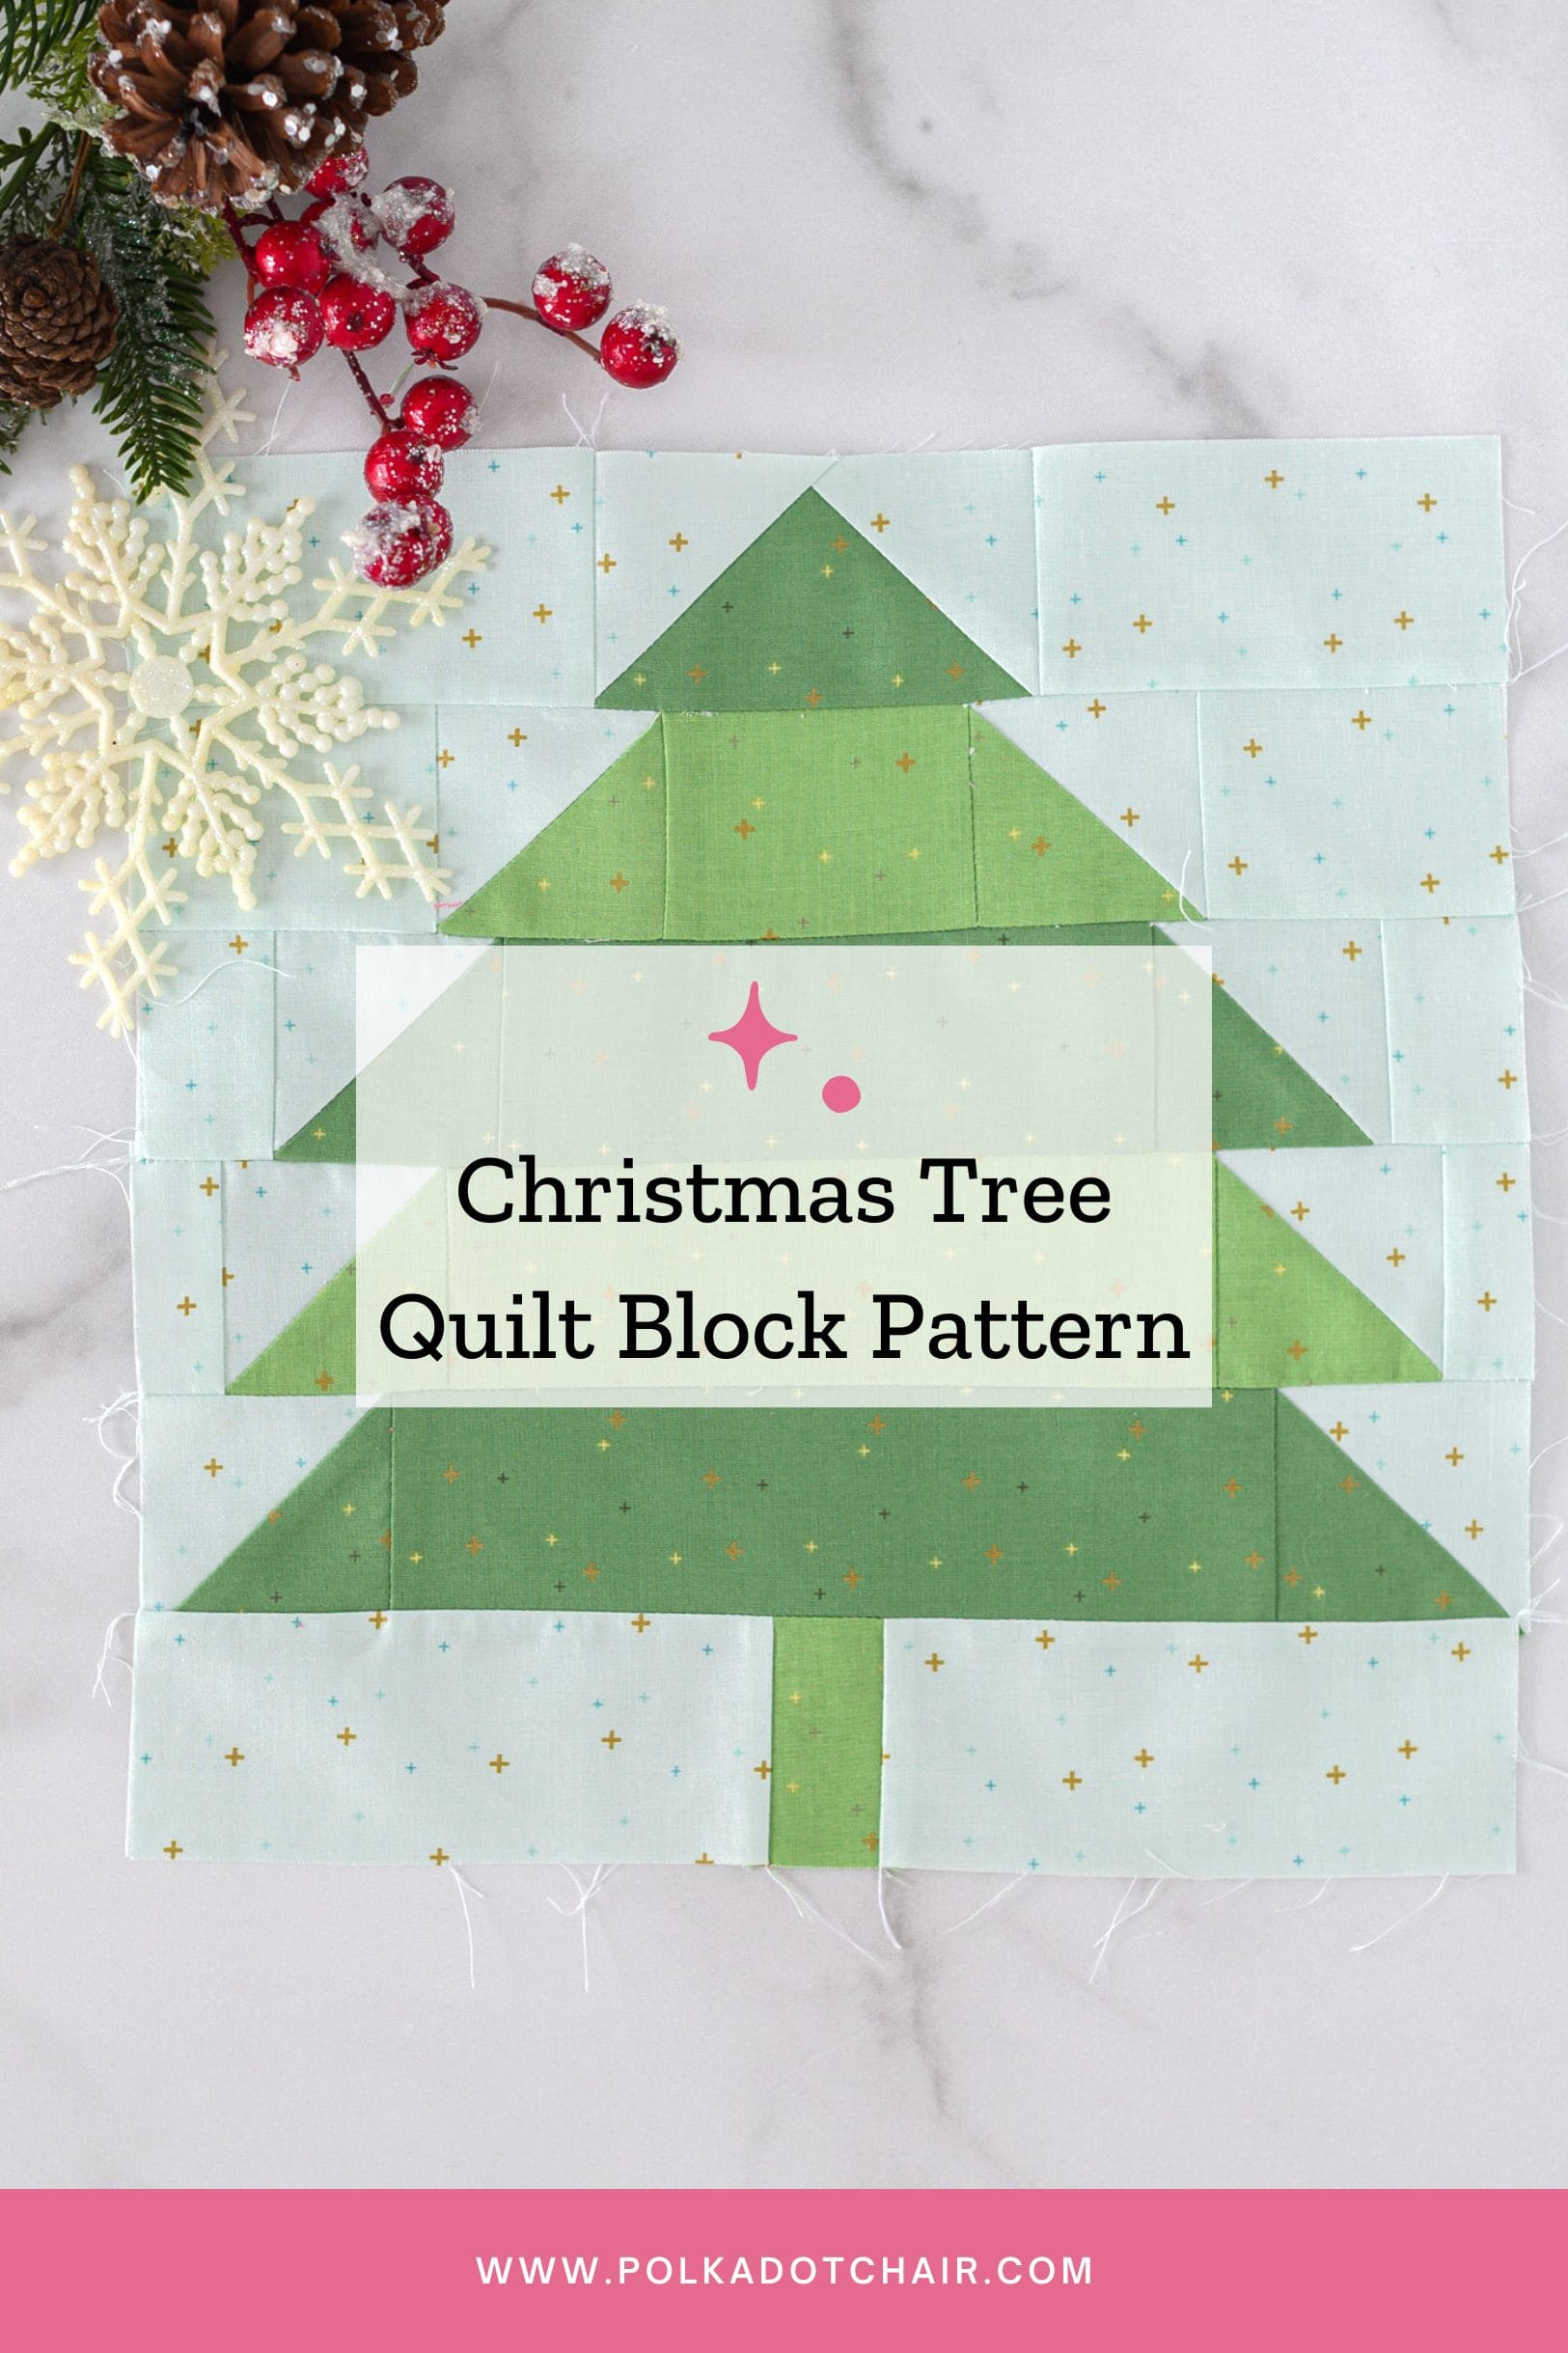
With crisp angles and simple construction, this tree block adds a beautiful bit of holiday forest charm to your quilt. Whether you use deep greens, tonal prints, or something a little unexpected, this block is an excellent opportunity to play with texture and contrast. Let’s get stitching and grow a whole patchwork forest together!
About the Quilt Along
Between December 1st and 17th, visit our site to PRINT one of the adorable Christmas quilt blocks (blocks will be posted throughout the month; full schedule below). Even if you don’t want to sew the blocks right now, take a few minutes to print the patterns because, like Cinderella, the patterns will disappear at midnight on December 31st, 2025, and will be moved to our shop.


Christmas Tree Quilt Block Pattern
Equipment
supplies
- Please refer to the Santa's Sampler Intro post for Fabric Requirements
Instructions
Cutting:
- Fabric A: Bleached Denim: 4 pieces 3” x 3”, 2 pieces 2 1/2” x 6”, 2 pieces 2 1/2” x 4 1/2”, 2 pieces 2 1/2” x 3”, 2 pieces 2 1/2” x 2 1/2”, 2 pieces 1 1/2” x 2 1/2”, 2 pieces 1” x 1 1/2”
- Fabric E: Clover: 2 pieces 3” x 3”, 1 piece 2 1/2” x 8 1/2”, 1 piece 2 1/2” x 6 1/2”, 1 piece 2 1/2” x 4 1/2”
- Fabric F: Riley Green: 2 pieces 3” x 3”, 1 piece 2 1/2” x 7 1/2”, 1 piece 2 1/2” x 3 1/2”
- Additional Fabrics: From a Scrap of Brown Fabric, OR you can use Riley Gree,n 1 piece, 1 1/2” x 2 1/2”
Step One: Create Flying Geese
- Draw a diagonal line on the wrong side of two of the 2 1/2” x 2 1/2” pieces of Fabric A.
- Layer one 2 1/2” x 2 1/2” piece of Fabric A on top of one 2 1/2” x 4 1/2” piece of Fabric E, right sides facing as shown in the diagram.
- Sew along the drawn line. Trim 1/4” on the outside of the drawn line. Flip the fabric up and press in place.
- Repeat with the second 2 1/2” x 2 1/2” piece of Fabric A on the other side of the unit.
Step Two: Fabric E Half Square Triangles (HST)
- Draw a diagonal line on the wrong side of the two 3” x 3” pieces of Fabric E. Layer one 3” x 3” piece of Fabric E with one 3” x 3” piece of Fabric A, right sides facing.
- Sew 1/4” on each side of the drawn line. Cut the pieces apart along the drawn line. Open up and press. Trim and square up to 2 1/2” x 2 1/2”.
- Repeat one more time to have four sewn units.
Step Three: Fabric F Half Square Triangles (HST)
- Draw a diagonal line on the wrong side of the two 3” x 3” pieces of Fabric F. Layer one 3” x 3” piece of Fabric F with one 3” x 3” piece of Fabric A, right sides facing.
- Sew 1/4” on each side of the drawn line. Cut the pieces apart along the drawn line. Open up and press. Trim and square up to 2 1/2” x 2 1/2”.
- Repeat one more time to have two sewn units.
Assembly:
- Sew the following pieces together in order.
- Row 1: 2 1/2” x 4 1/2” Fabric A; Flying Geese Unit from Step One; 2 1/2” x 4 1/2” Fabric A
- Row 2: 2 1/2” x 3” Fabric A; HST unit from Step Three; 2 1/2” x 3 1/2” Fabric F; HST unit from Step Three; 2 1/2” x 3” Fabric A.
- Row 3: 1 1/2” x 2 1/2” Fabric A; HST unit from Step Two; 2 1/2” x 6 1/2” Fabric E; HST unit from Step Two; 1 1/2” x 2 1/2” Fabric A.
- Row 4: 1” x 2 1/2” Fabric A; HST unit from Step Three; 2 1/2” x 7 1/2” Fabric F; HST unit from Step Three; 1” x 2 1/2” Fabric A.
- Row 5: HST unit from Step Two; 2 1/2” x 8 1/2” Fabric E; HST unit from Step Two.
- Row 6: 2 1/2” x 6” Fabric A; 1 1/2” x 2 1/2” Brown Fabric; 2 1/2” x 6” Fabric A.
- After each row is assembled, sew the rows together to complete the block.
- Please note: Since the illustration includes seam allowances and each row has a different number of seams, it may appear that the rows of the block will not line up; however, they will when the seam allowances are sewn.
Notes
Fabric A: Bleached Denim
Fabric B: White
Fabric C: Red
Fabric D: Raspberry
Fabric E: Clover
Fabric F: Riley Green
Your Evergreen Tree block is now ready to join the growing forest in your Santa’s Sampler quilt! I hope you enjoyed stitching this simple, cheerful design. Don’t forget to show off your progress—and watch for the next block coming soon in our quilt-along.

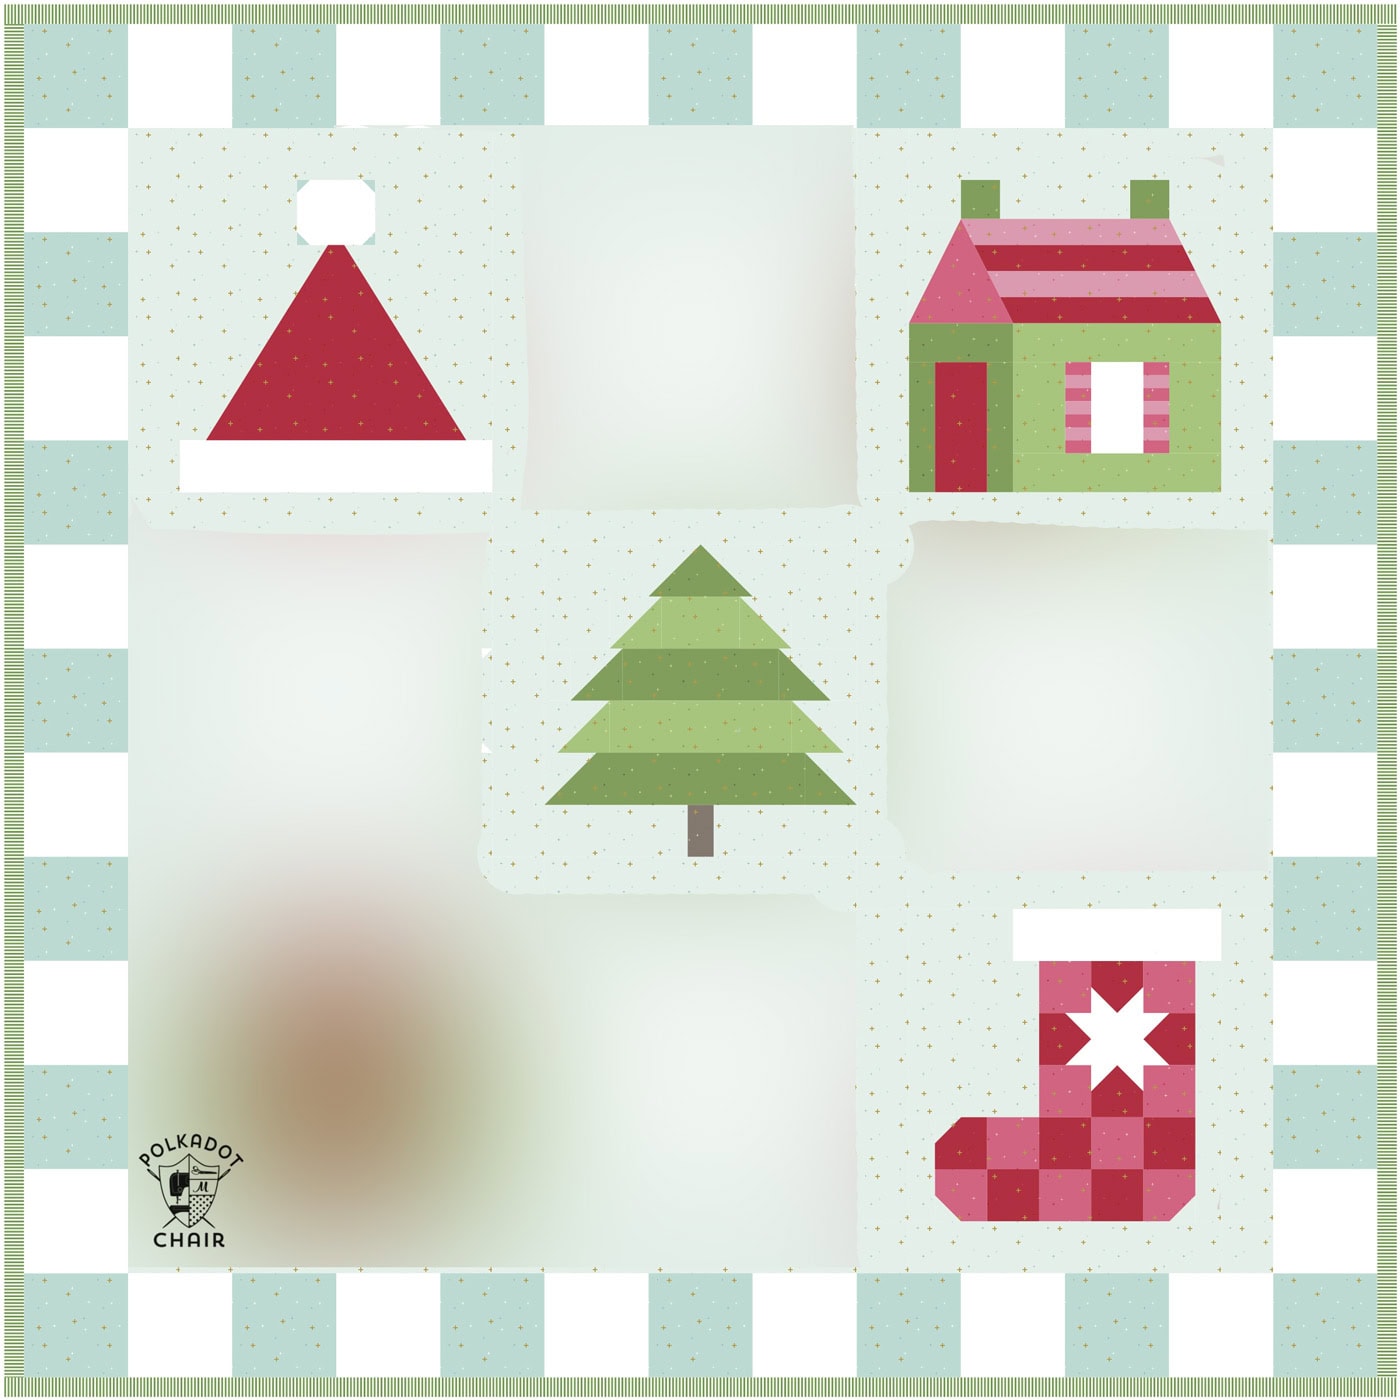
Quilt Along Schedule
- December 1: Intro & Fabric Requirements
- December 3: Block 1 Santa’s Hat
- December 5: Block 2 Santa’s House
- December 8: Block 3 Santa’s Stocking
- December 10: Block 4 Christmas Tree
- December 12: Block 5 Christmas Gift
- December 15: Block 6 Santa’s Star
- December 17: Finishing


