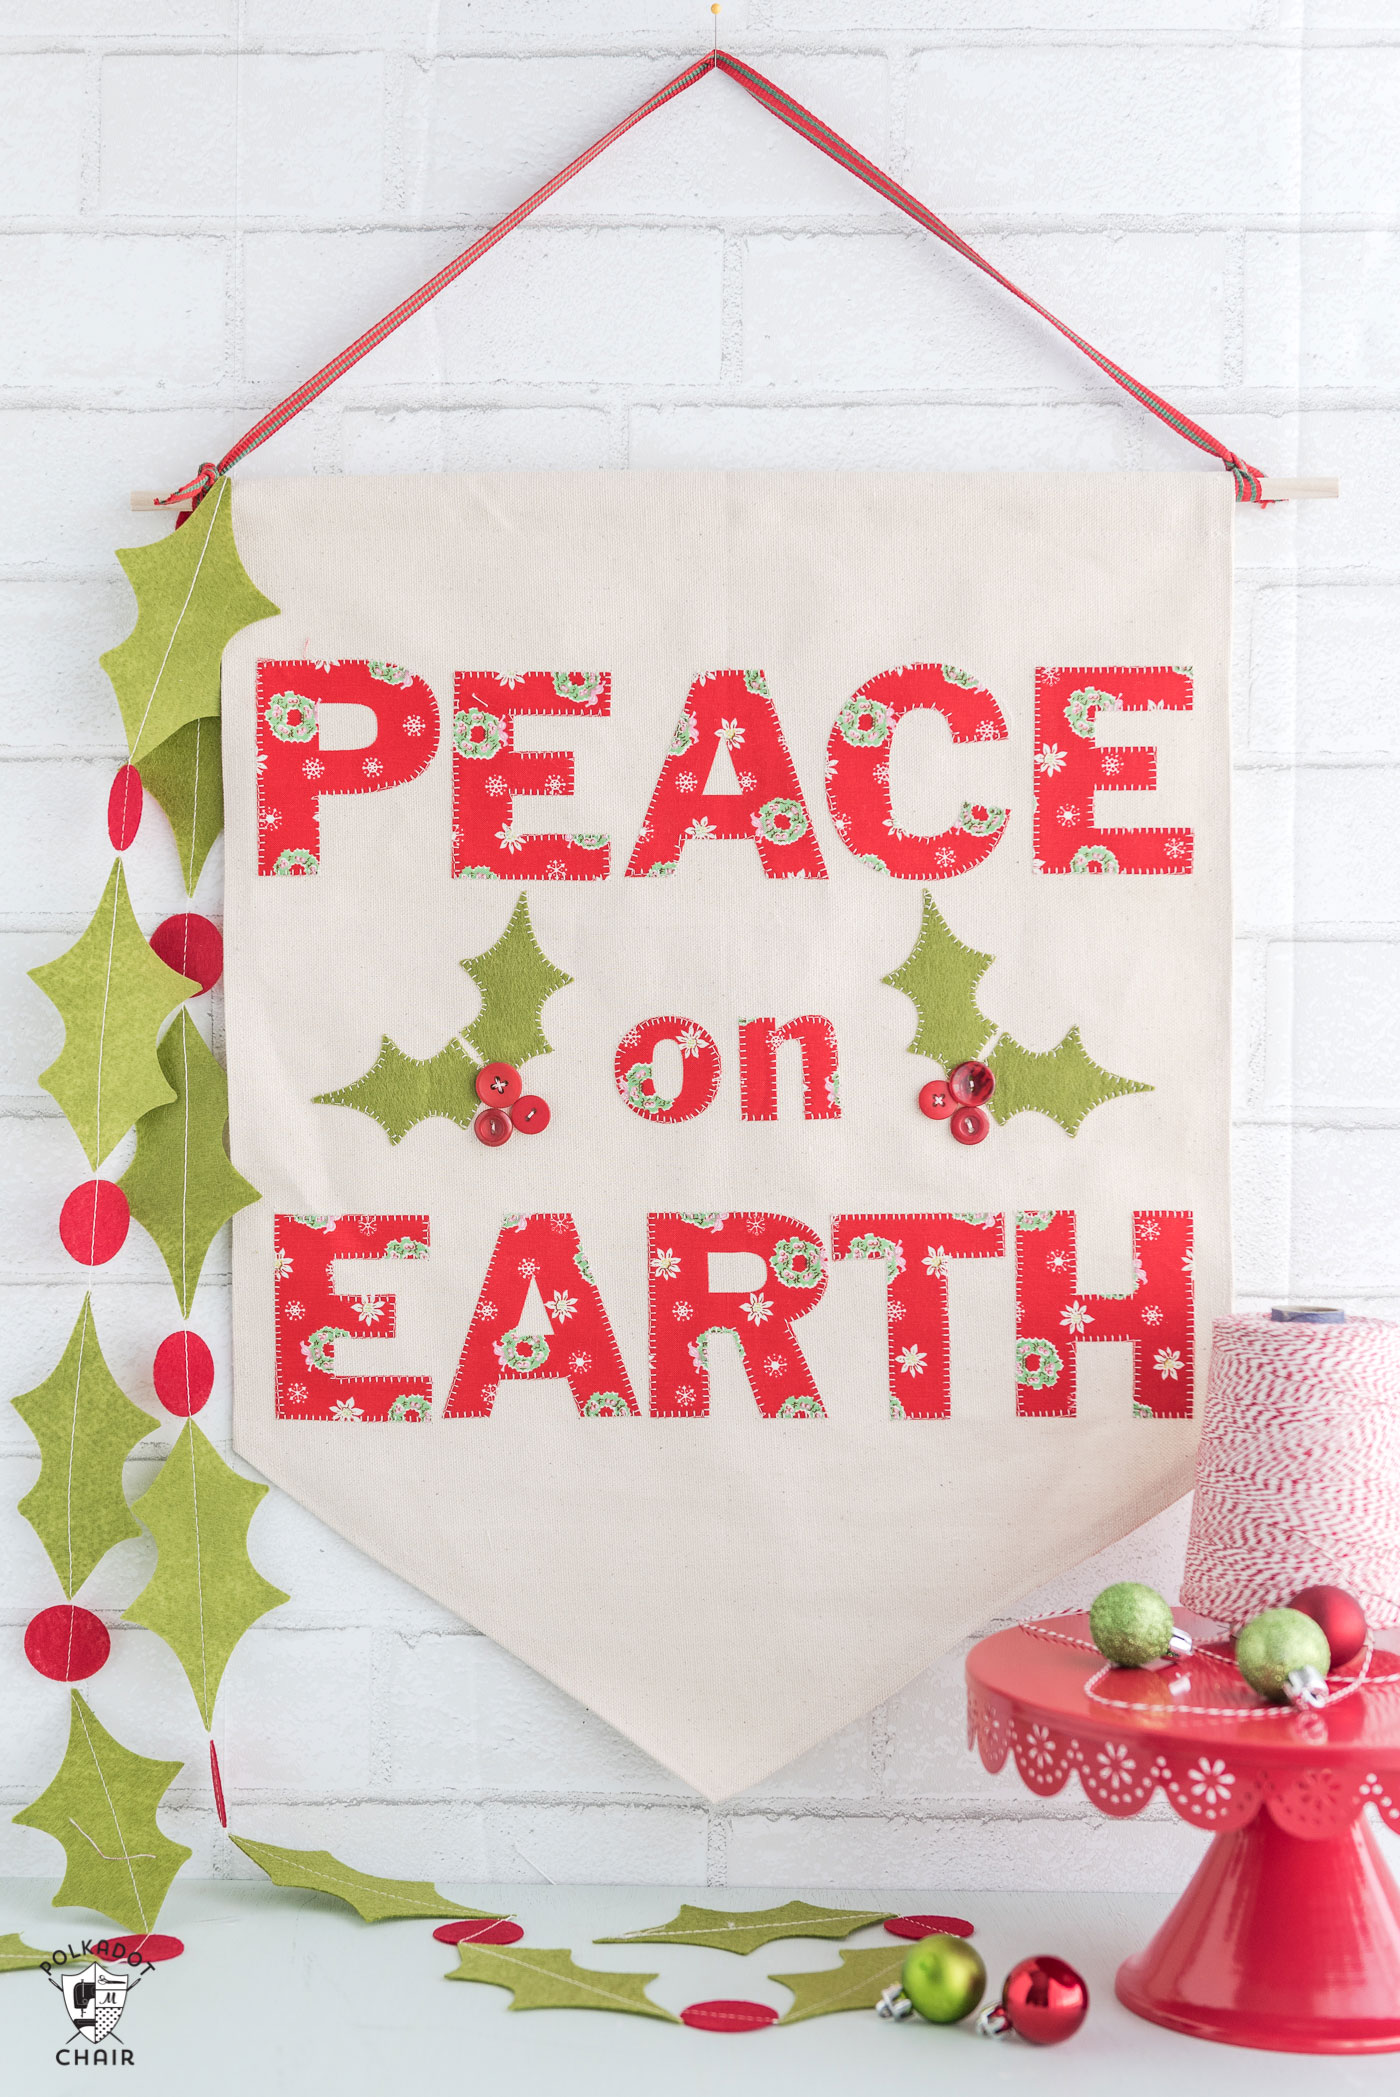
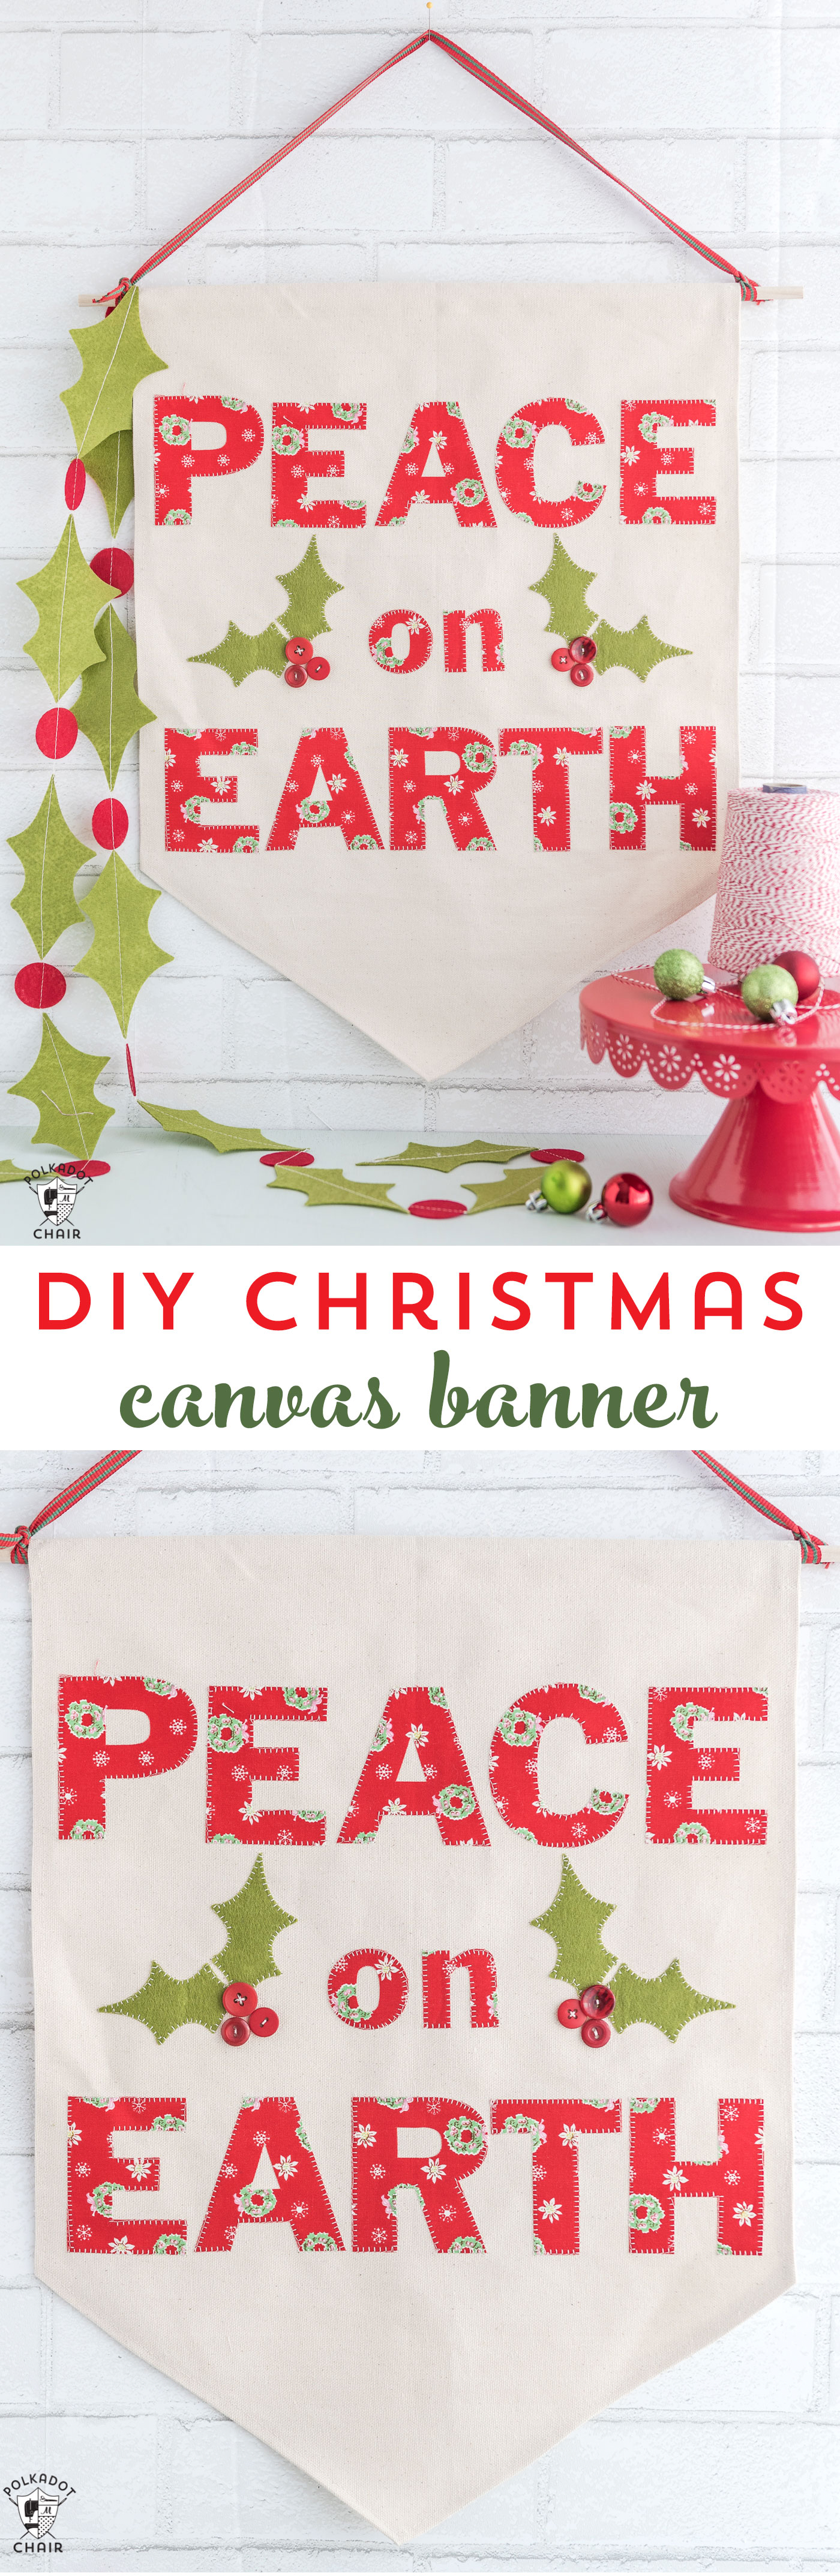
Christmas DIY Canvas Banner
This fun Christmas DIY Canvas Banner can be customized a million different ways and makes a cute gift! If you like this project, you may also like this pattern for Mini Christmas Stockings.
I work as a brand Ambassador for Cricut, this is sponsored content #CricutPartner.
Each year, I like to add one “handmade” item to my Christmas decor. Recently, I decided to make a simple DIY Canvas banner. I love these banners and have made quite a few in the past (you can see my Halloween version HERE).
This year, I knew I wanted to make one for Christmas. I struggled a bit with what I wanted it to say, then settled on “Peace on Earth.”
DIY “Peace on Earth” Christmas Banner Tutorial
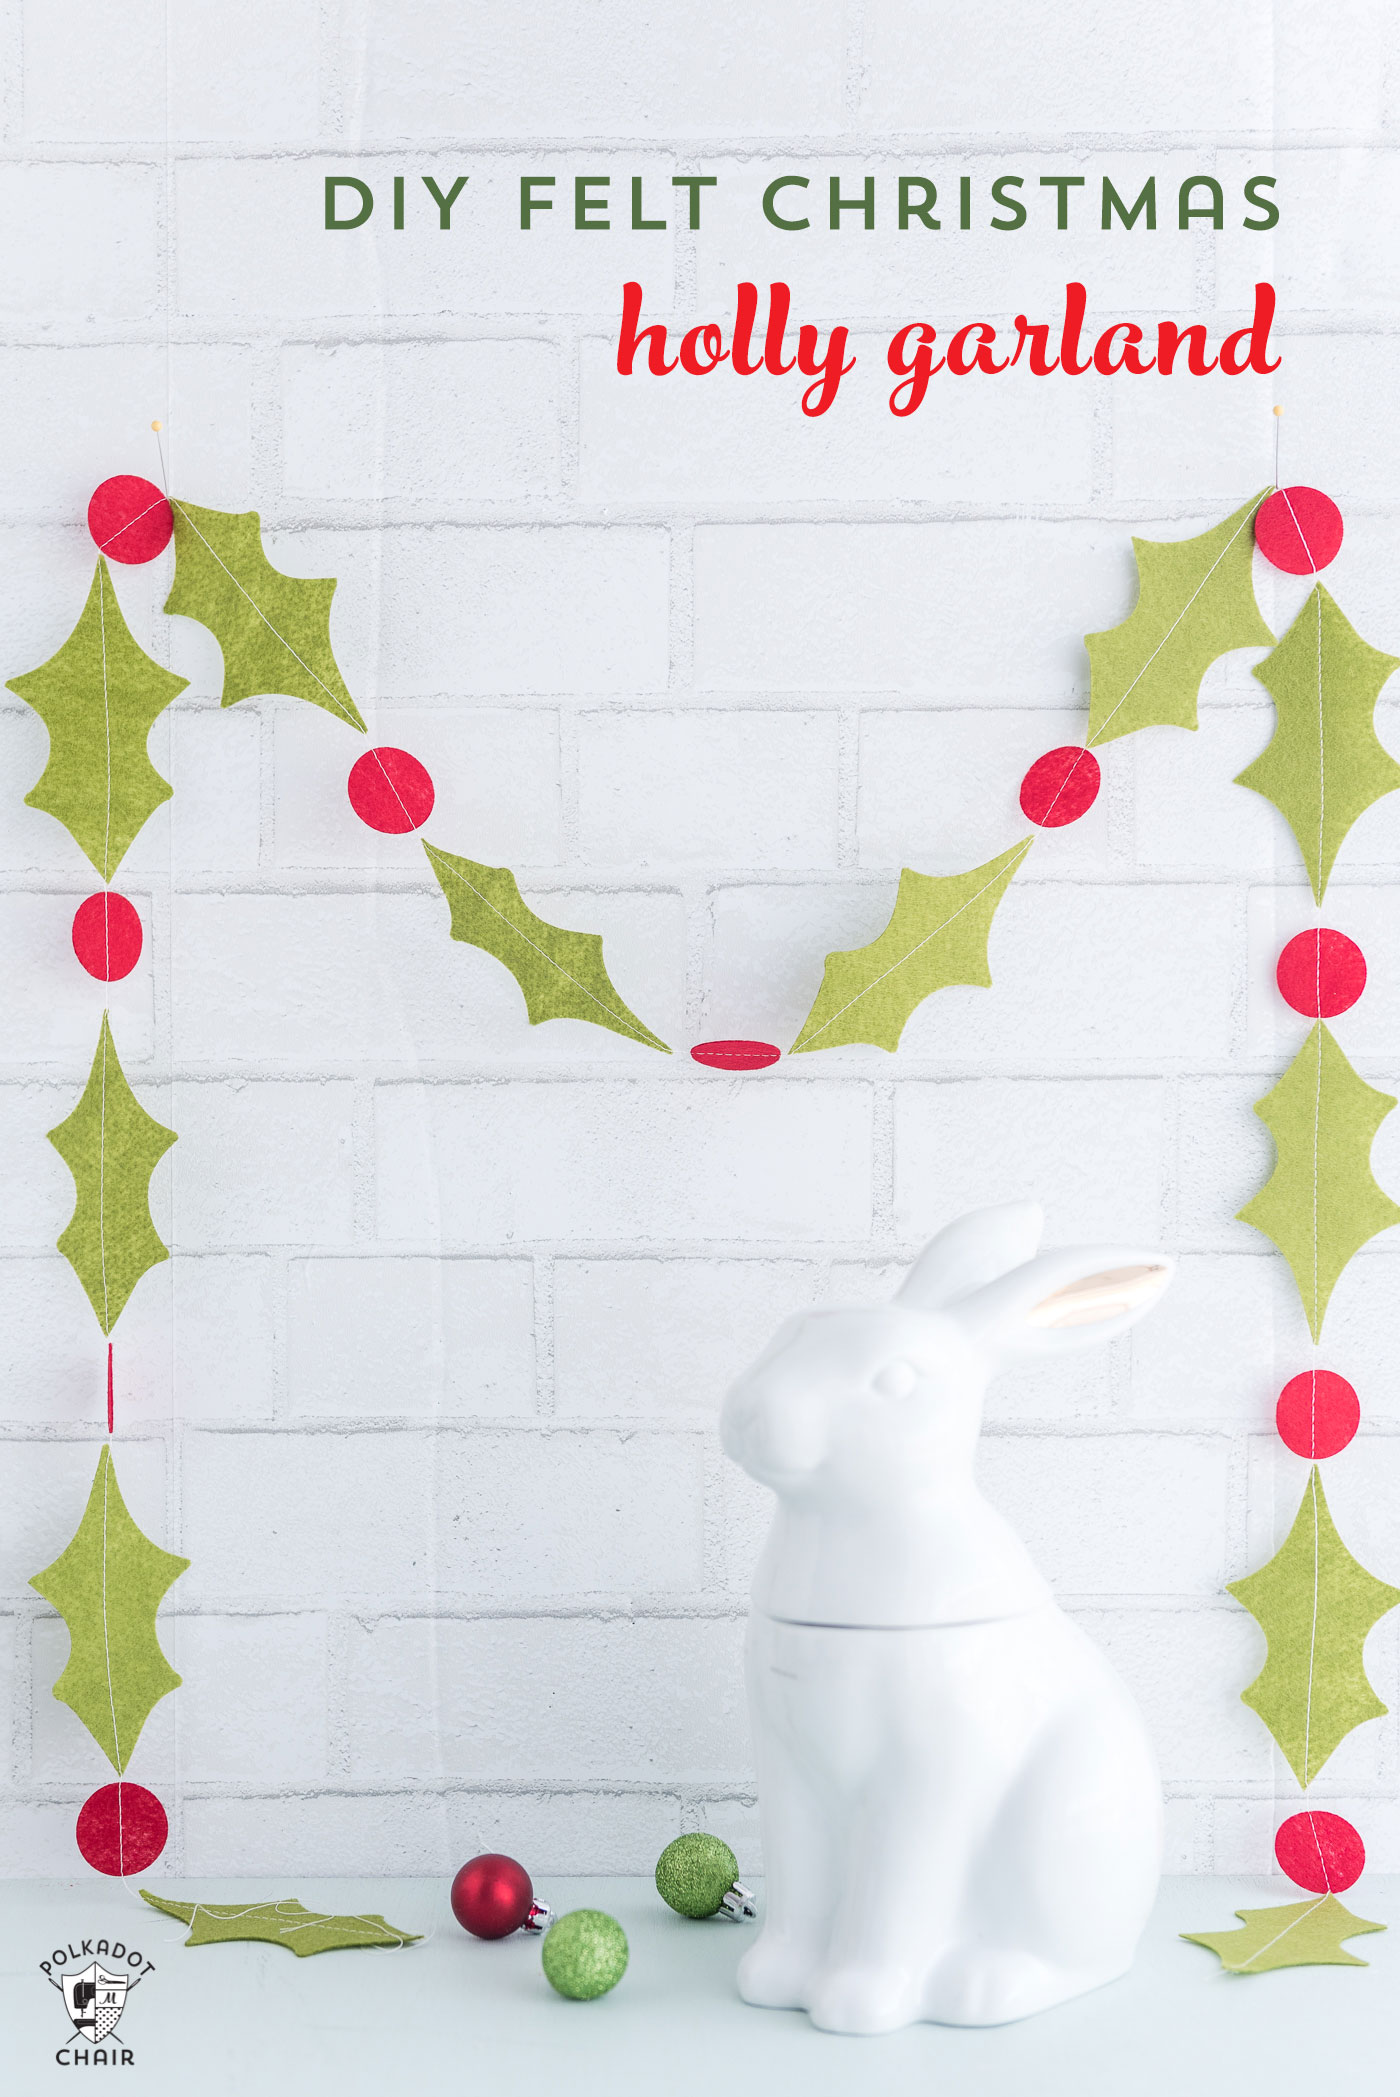
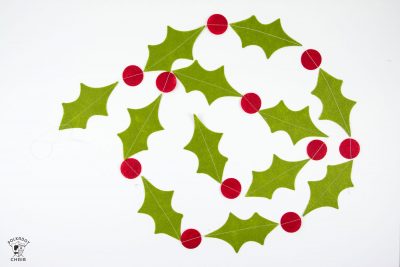
I also created a simple felt Holly Berry garland to go along with the banner. I’ll tell you quickly how to make it in the tutorial, but may plan a more detailed “how to” for it later this month.
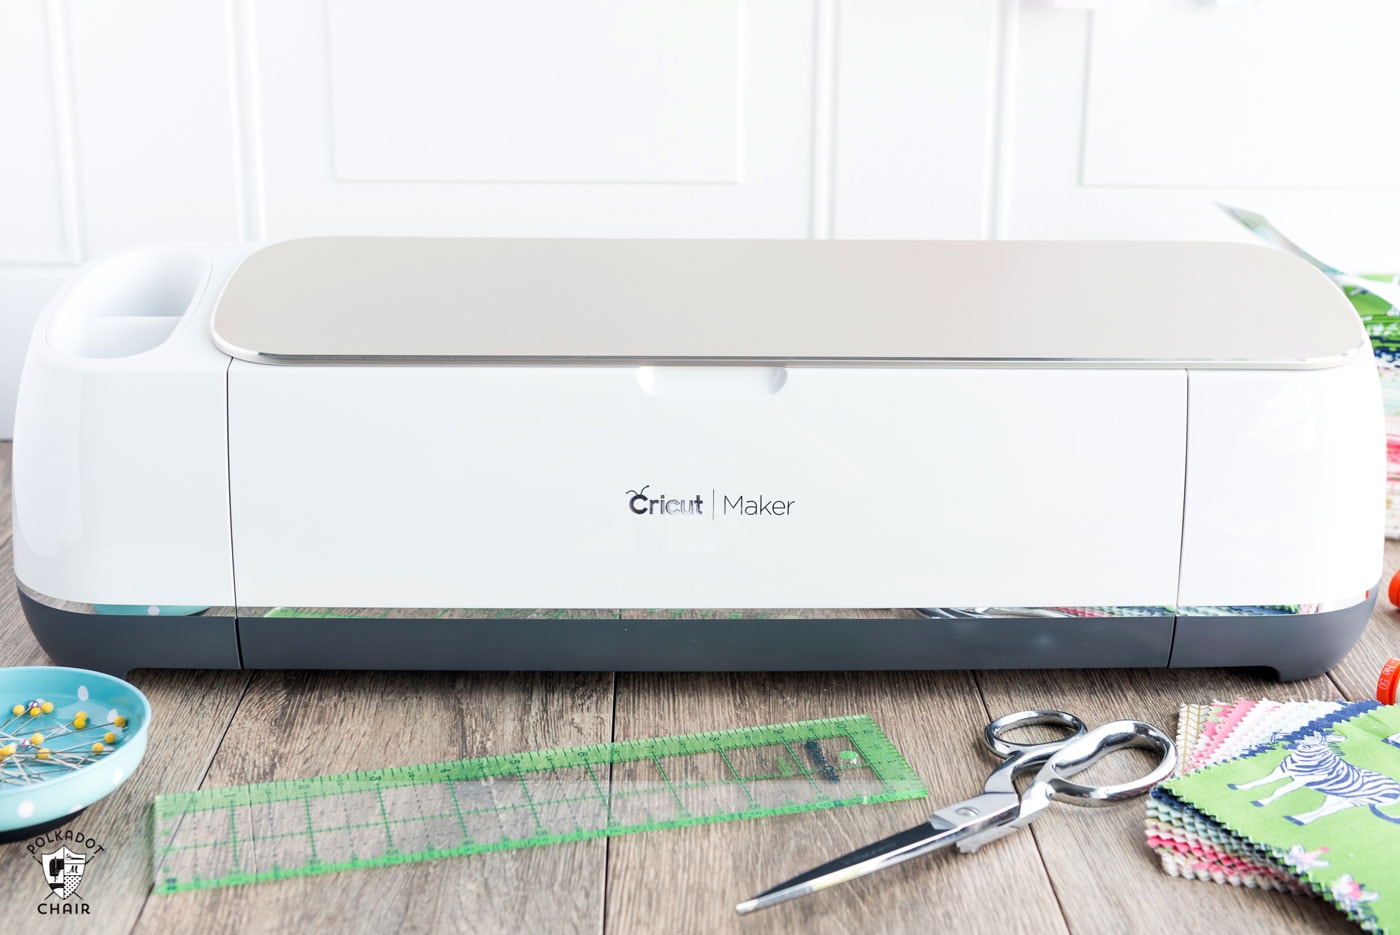
This project was created almost entirely with my Cricut Maker! If you’re wondering just what that is, you can read my review of the Maker, along with a brief outline of what it can do and answers to a lot of frequently asked questions.
What is a Cricut? A Cricut Machine is an electronic cutting machine. It hooks up to your computer via USB or Bluetooth and cuts images you send to it, much like a printer. It just cuts instead of prints. It can cut vinyl, paper, fabric, and much more. The images are all digital; you can upload your own images or buy images in the Cricut Design space individually. You can read my full review of the Cricut Maker Machine HERE.
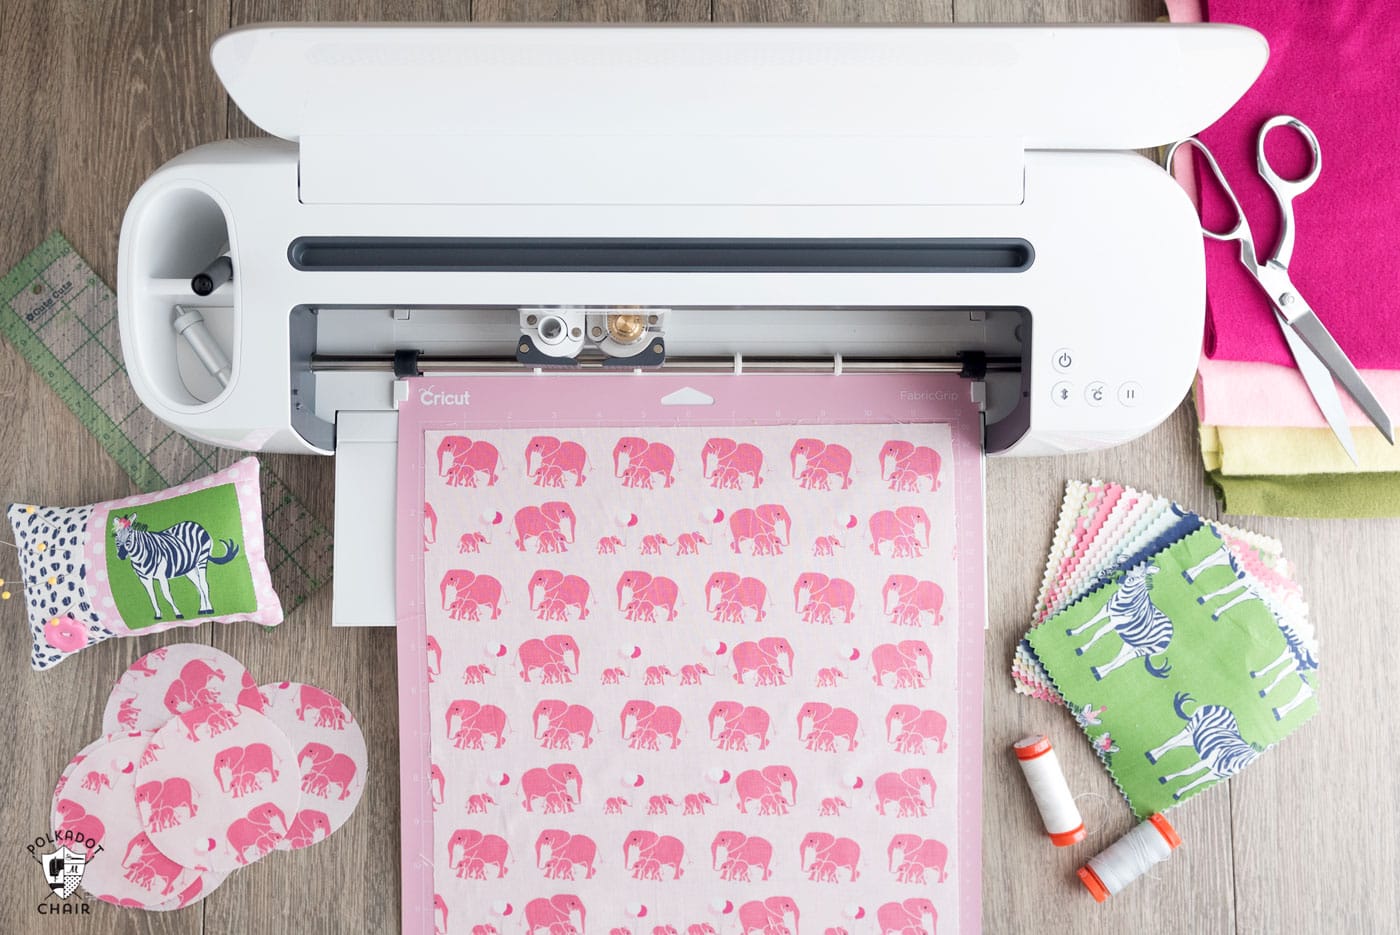
Cutting Fabric with the Cricut Maker
When I found out the Cricut Maker could cut fabric, I immediately knew I wanted to make a million appliques with it! I’ve also wanted to delve more into felt crafting, and the idea of having a machine that can cut the felt for me makes that even more appealing.
I spent most of October figuring out how to cut appliques with the Maker. I made a quilt for my booth at Quilt Market and cut most of the appliques for that quilt with the Maker. So are you ready to make something?
How to Make the Project Without a Cricut
If you don’t want to have a Cricut and would like to make this canvas banner, you can cut out the letters by using our raw edge applique tutorial and the PDF of the applique pattern included below.

Canvas Banner Instructions

Christmas DIY Canvas Banner
Equipment
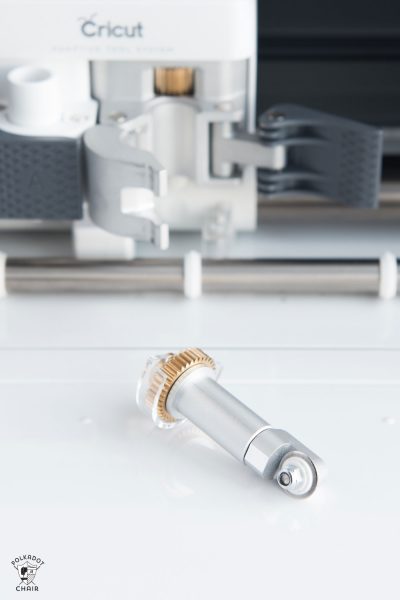
- Cricut Maker 3 (you can get great deals on machine bundles on Cricut.com) with Rotary Blade and Fabric Mat.
- Roll Holder for Maker 3
- Cricut EasyPress Be sure also to get the EasyPress mat.
- Cricut Weeding Tools (I use the small hook tool ALL the time, making weeding vinyl so much easier.).
- Cricut BrightPad A cordless, flat, bright lightbox. I use it to weed Cricut vinyl and use it all the time to trace appliqué shapes for sewing & quilting.
supplies
- 1/2 yard of Canvas
- 18 inch Dowel Rod
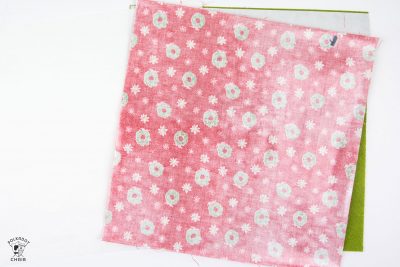
- 12″ x 12″ piece of fabric for letters
- 1 piece of red felt 12″ x 12″ – I used Cricut Felt in the Sky Sampler
- 2 pieces of green felt 12″ x 12″
- Heat N Bond Lite
- 6 red buttons
- Ribbon for the top of the banner
- Cricut Iron On Vinyl
- Cricut Permanent Vinyl
Instructions
Step One: Create the Banner
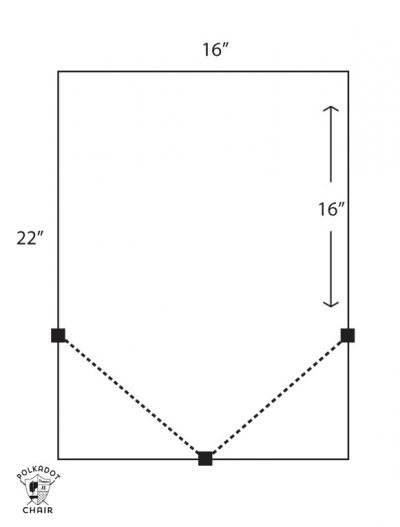
- First, you need to make your canvas shape. Begin by cutting your canvas to 16 inches x 22 inches. Find the center of the 16″ side and mark it. Then, measure down 16 inches from the top of the banner on the 22-inch side. Place a mark.

- Draw a line connecting the center marks with the 16″ marks. Cut along this line. Repeat for the other side.
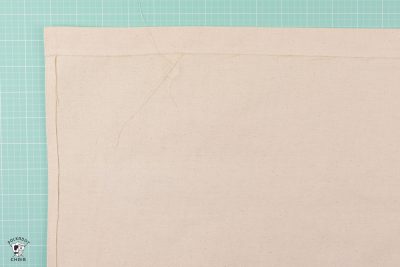
- Next, fold the top of the banner over about 1 inch and press. Then, fold in all the sides of the banner 1/4 inch and press.

- Stitch the top of the banner along the edge of the seam to create a pocket for the dowel rod. If you would rather, you can steam a seam and “glue” the seam in place. Stitch down the sides of the banner (or glue) as shown.
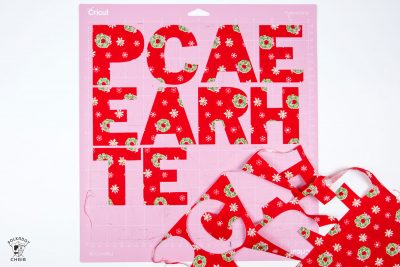
Step Two: Cut out the Letters with your Cricut
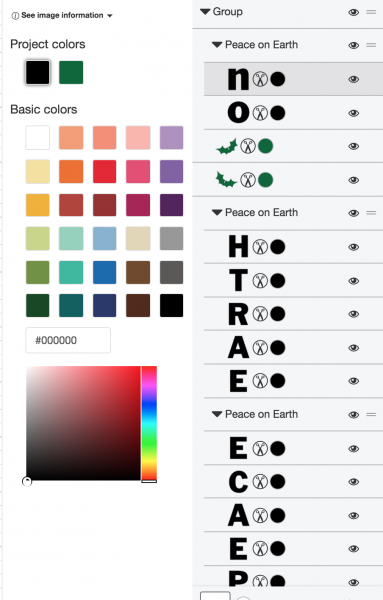
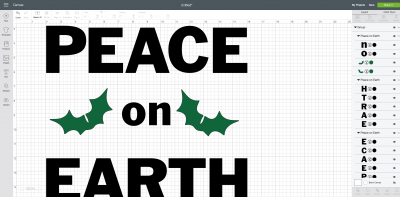
- Now, you are ready to make the letters for your banner. Download the SVG files and upload them into the Cricut Design Space.
- Let’s start with the PEACE ON EARTH.
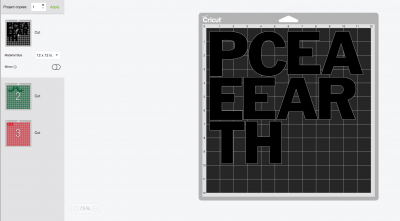
- This design is set to cut the letters individually and all from the same mat. If you want the letters cut on different mats (you are using more than one fabric), then simply change the element you wish to on another mat to a different color. The color indicates to the machine that it should proceed to a new mat. It also helps you to preview what your design will look like after you are done.

- When you have the mat laid out the way you like, size the entire image to approximately 14 inches across.

- Since we don’t care if the letters cut next to each other (like we would if it were an iron-on), you do not need to attach the layers. Simply click ‘MAKE IT,’ and the software will arrange the letters on the mat in the most efficient way.

- You will notice that the holly leaves are in the same file. That is OK. I’m going to show you how to cut it all at once. Additionally, in the image above, I highlighted the word “on” in red to illustrate how you can move it to another mat.
- Iron the Heat n Bond line to the WRONG side of your fabric. Make sure it is well-attached, and REMOVE the paper backing.
- Place the fabric bonded side down onto your fabric mat.
- Inform the machine that you are using cotton-bonded fabric, and adjust the blade to the Rotary Blade setting (both physically on the machine and in the software).

- Then, load the mat when prompted and click the Cricut icon when it blinks.
- It will cut your first mat, in this case, the letters.
- Peel away the extra fabric and remove the letters.
- The machine will now prompt you to load the next mat, which, in my case, was felt.
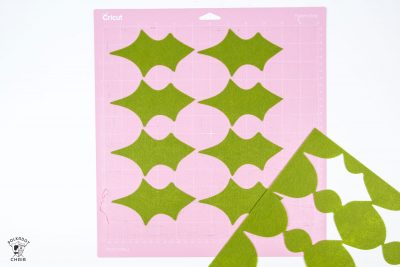
Cutting Out the Felt Holly & Berries
- Take note of the SIZE of the holly leaves on your preview screen. Cut a piece of felt about 1 inch larger than the desired size and iron the Heat N Bond Lite onto the wrong side. Peel away the paper. Place the bonded side down on the fabric mat.
- Change the material setting to FELT. Change the blade to “rotary”. Load the mat when prompted, then click the icon and let it cut.
- You should now have letters from fabric, and holly leaves cut from felt.

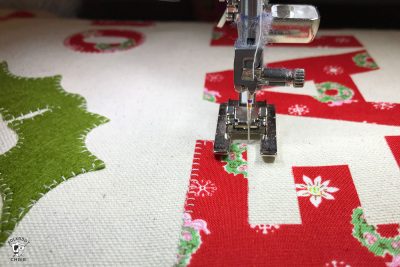
Step Three: Appliqué
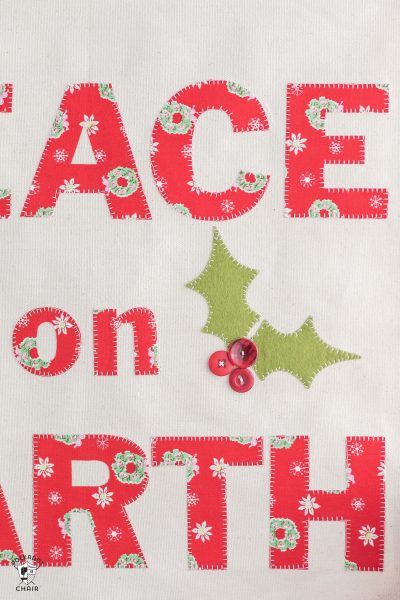
- Center the letters and felt on the canvas banner. When you get them in the correct spot, use your iron to attach them to the canvas.
- If desired, go around each letter with a blanket stitch. You don’t have to do this; it will stick down fine without it. It is to add a bit of extra detail.
- To finish the banner, sew on six red buttons on top of the Holly leaves. Feed the dowel rod through the top pocket and tie the ribbon to it.
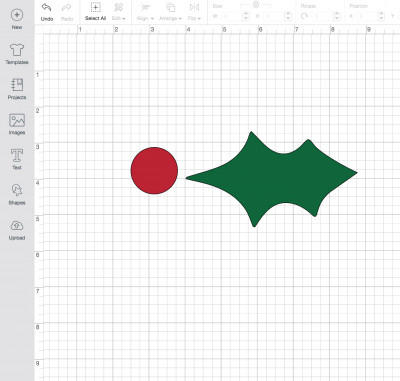
Step Four: Garland
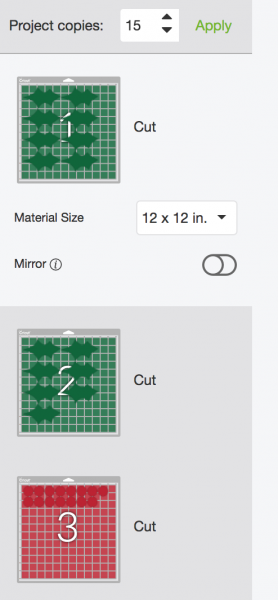
- To create the Holly garland. Open the Holly Berry file in Design Space. Size it to the desired size. Take note: The Maker cannot cut curves/circles smaller than 3/4 with the rotary blade. So don’t make it too small!

- Click MAKE IT.

- In the upper left corner, change the project copies to the desired number.
- It will automatically space the berry centers on different mats from the holly leaves.
- Select FELT as your material, and change the blade to the Rotary Blade.
- Load the mat and cut.
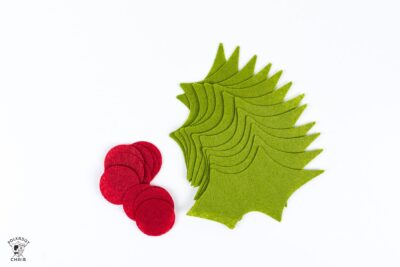
- After you are done, peel the pieces off of the mat and put them into two piles: leaves and berries.
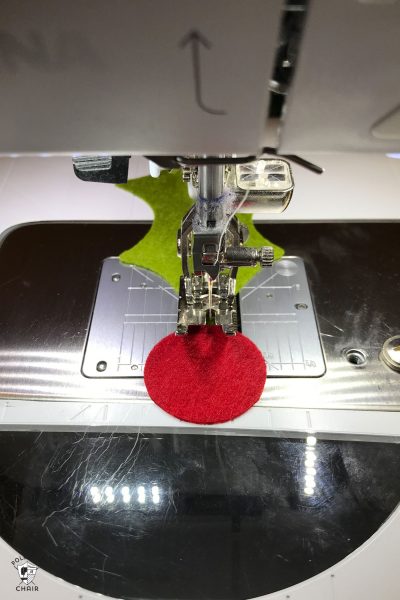
- Use your sewing machine to stitch the berries and leaves together in a garland. Just alternate between berries and leaves, leaving one stitch between each as you go.
- That’s it! You’re done!
Why I used the Rotary Blade for this Project
We will discuss cutting out appliques with the Maker in future projects. I have also cut more intricate designs with the Maker but have not used the rotary blade. I have found that even with bonded fabric, I prefer the rotary blade and fabric mat to the traditional blade. It cuts smoother. I use it any time the image is large enough (the Maker can’t cut circles smaller than 3/4″
If you want to pick up a Maker yourself or would like more information, Just click on over to Cricut!
This is a sponsored conversation written by me on behalf of Cricut. The opinions and text are all mine.