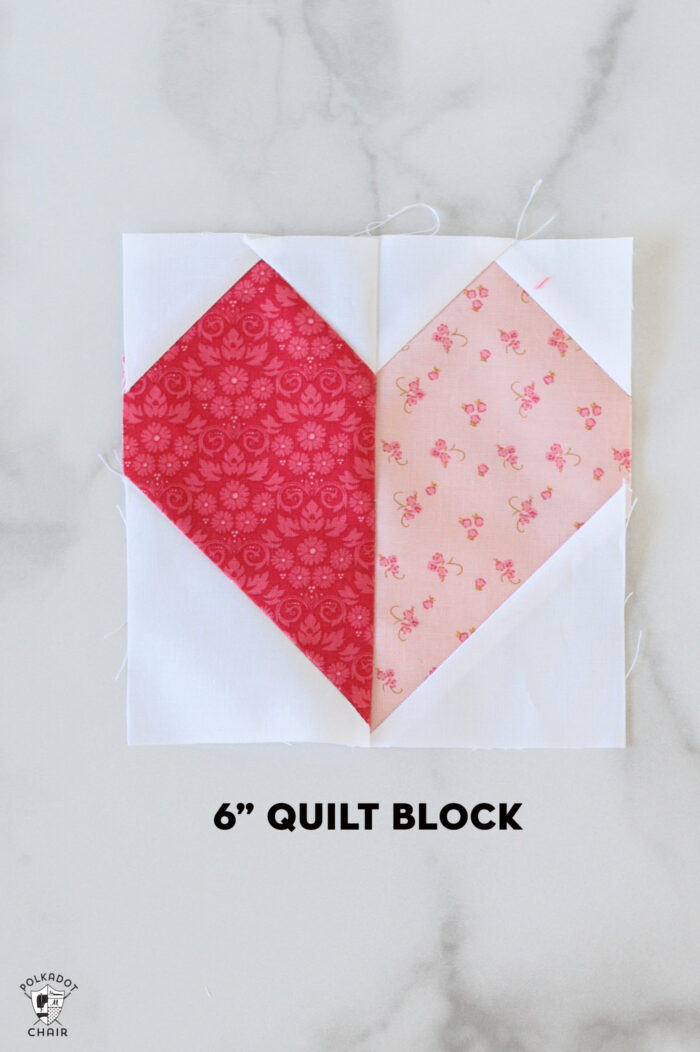
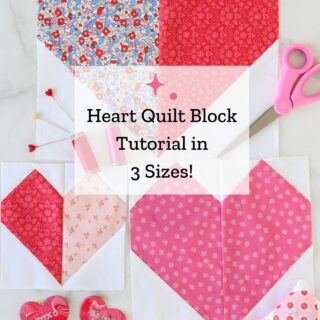
Simple Heart Quilt Block Tutorial (Beginner-Friendly + 3 Sizes!)
In this tutorial, I’ll walk you through how to sew a Heart Quilt block in 6”, 9”, or 12” sizes, so you can easily mix and match blocks or choose the perfect scale for your project.
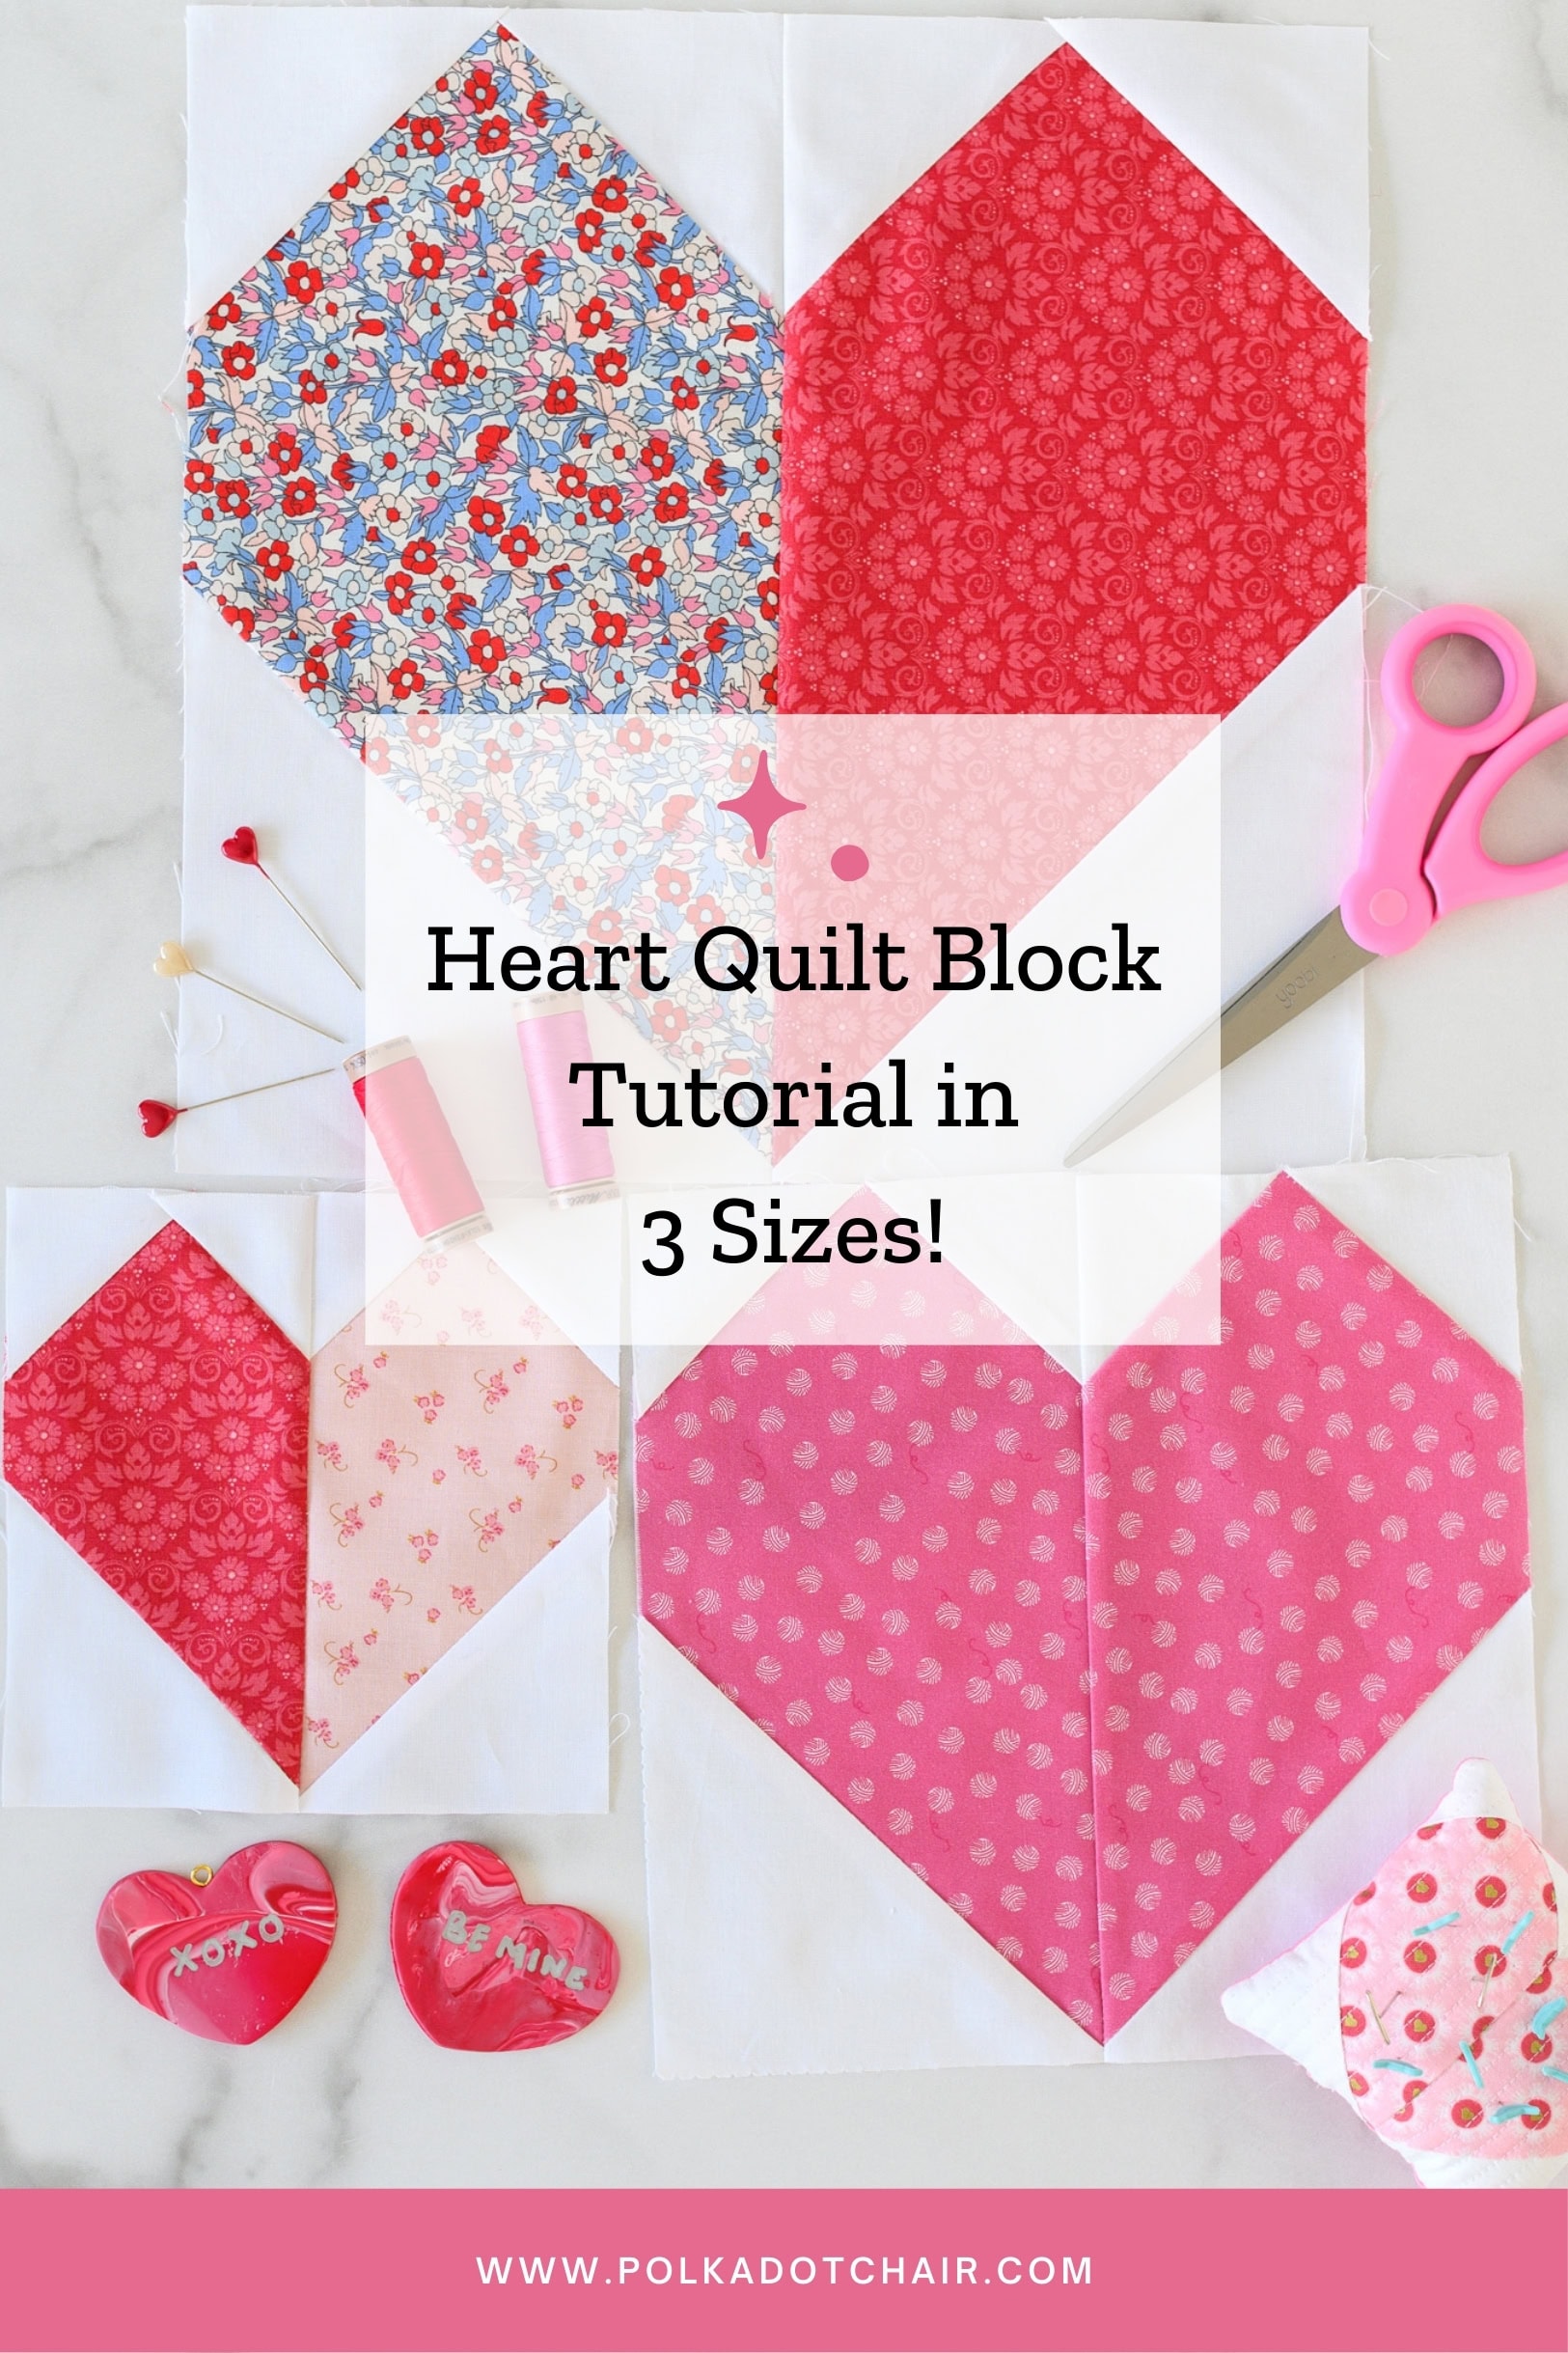
Nothing says handmade love like a quilt block with hearts! This Heart Quilt Block is one of those classic designs you’ll find yourself coming back to again and again, especially for Valentine’s Day sewing, baby quilts, and gift-worthy projects.
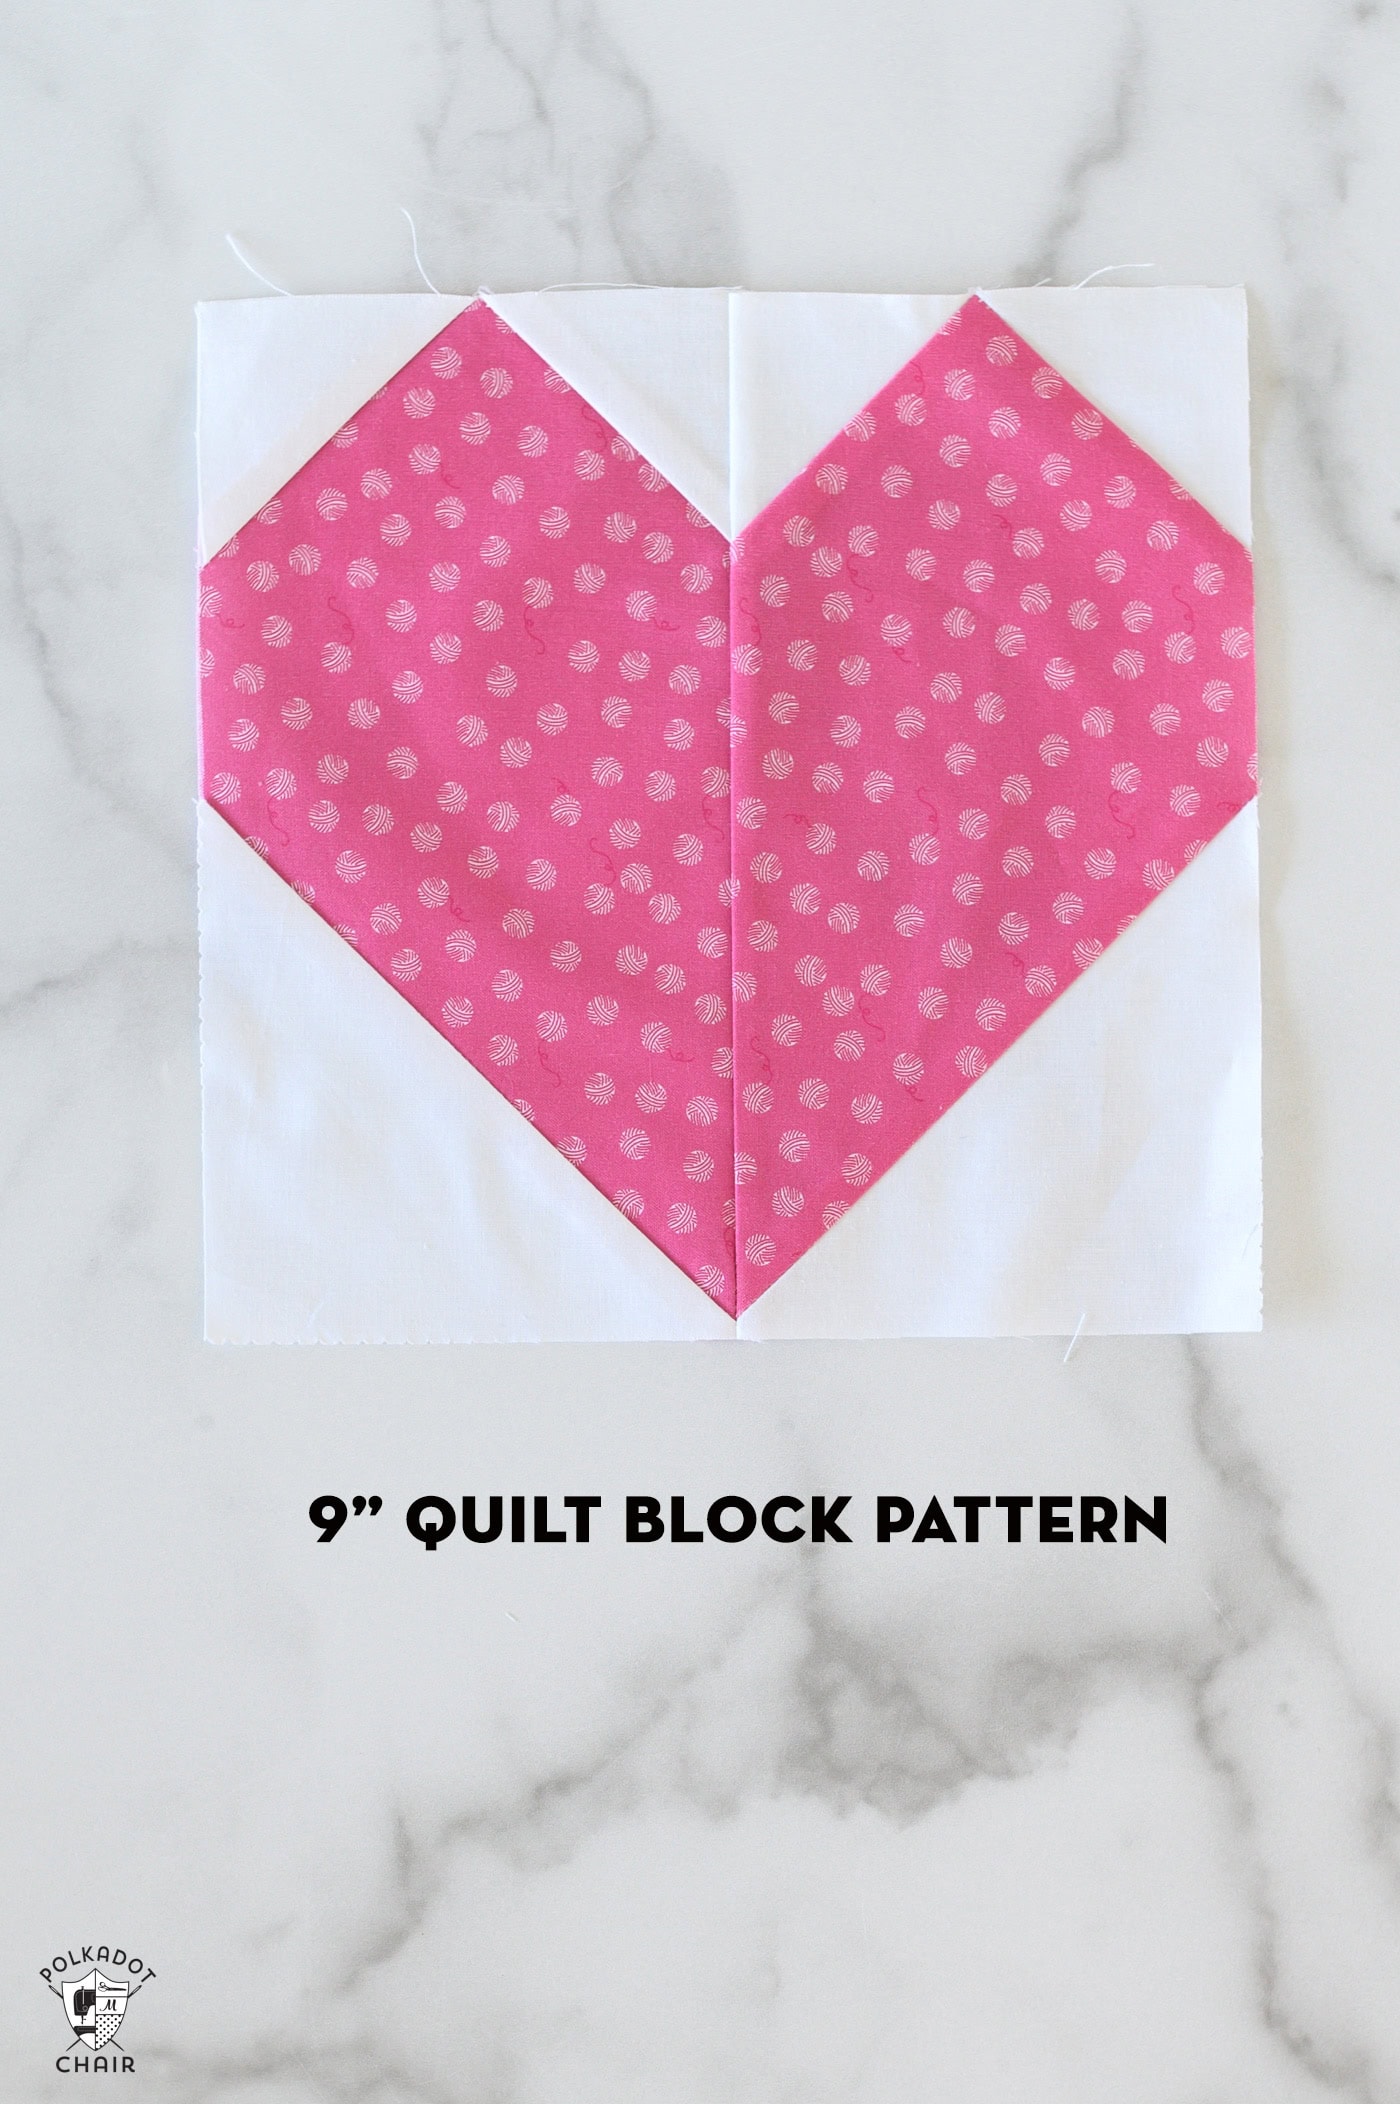
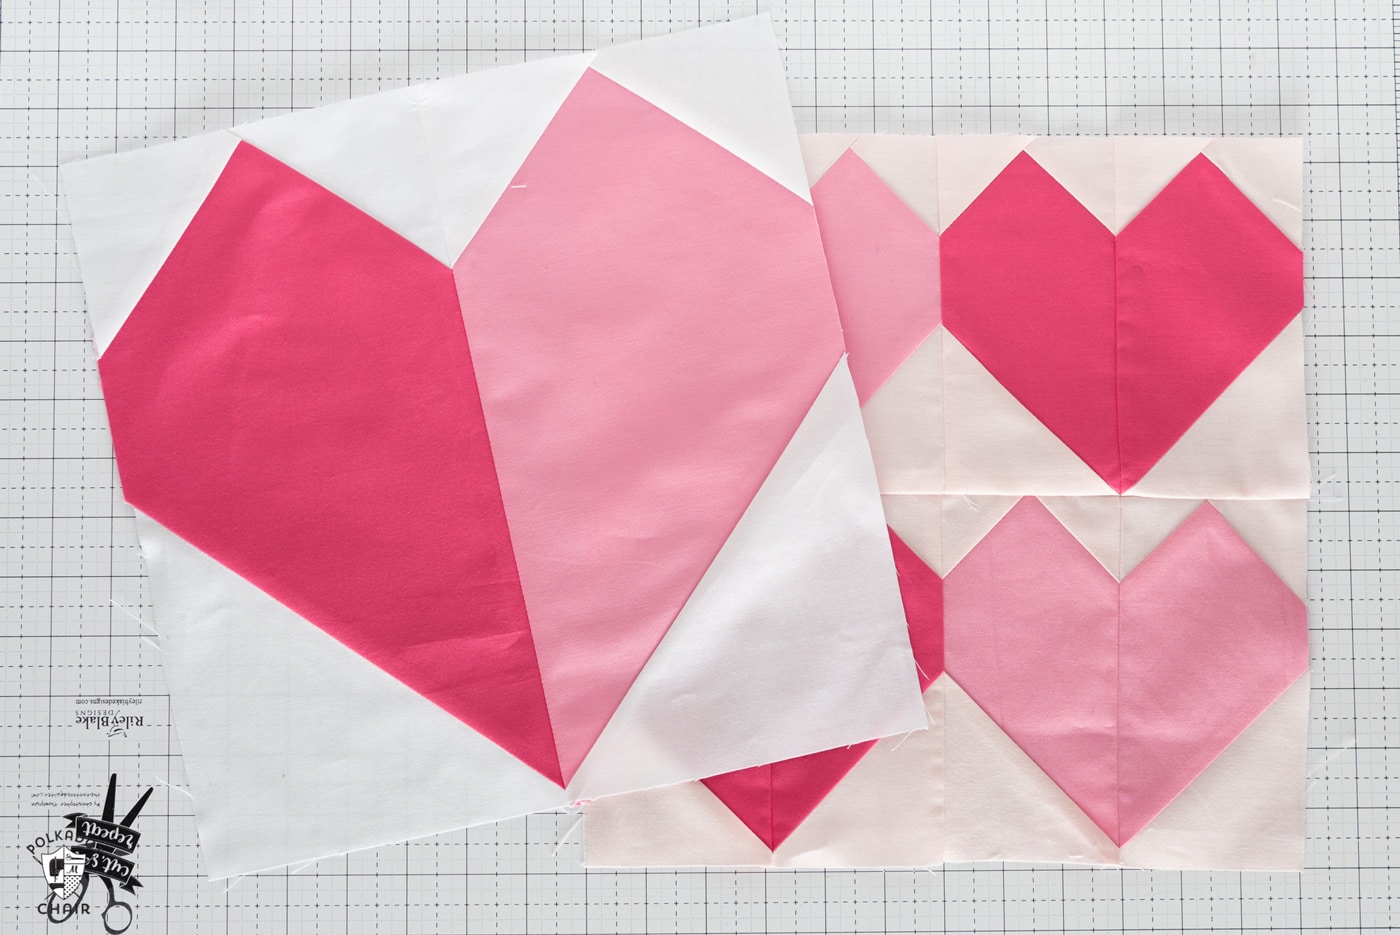
This quilt block is quite simple to construct, and there are a few ways to customize the block. You can sew both sides of the block from the same fabric (as with the 9″ block example).
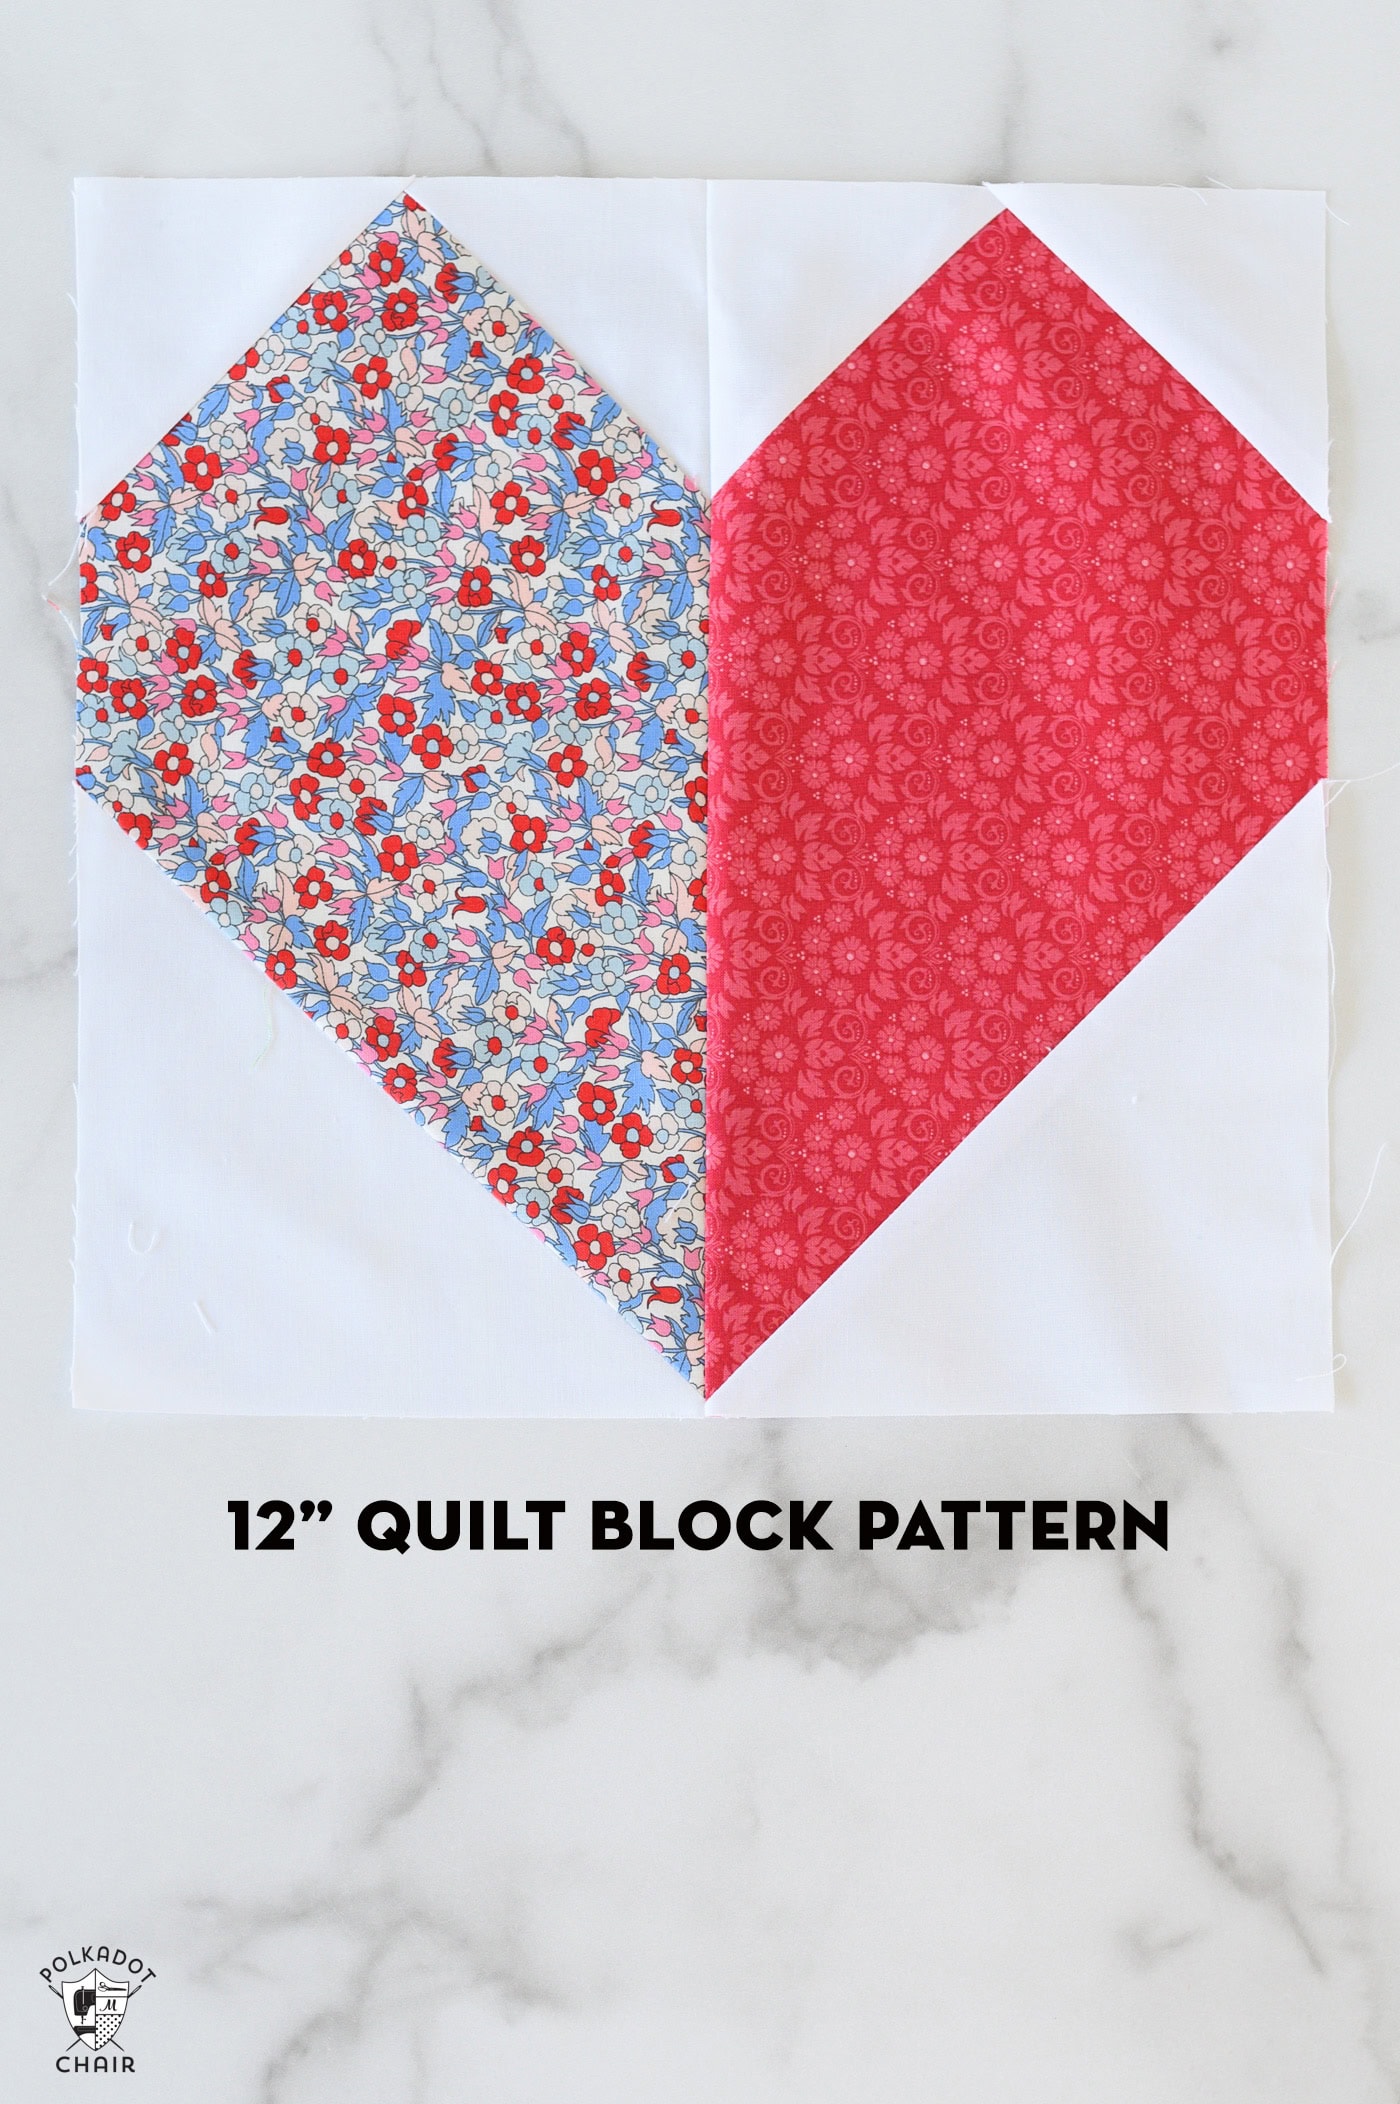
You can also vary the fabrics on each side of the block (as shown on the 12″ block example).
If you sew four of the 6″ blocks and sew them together into two rows of two, you’ll end up with a 12″ block.
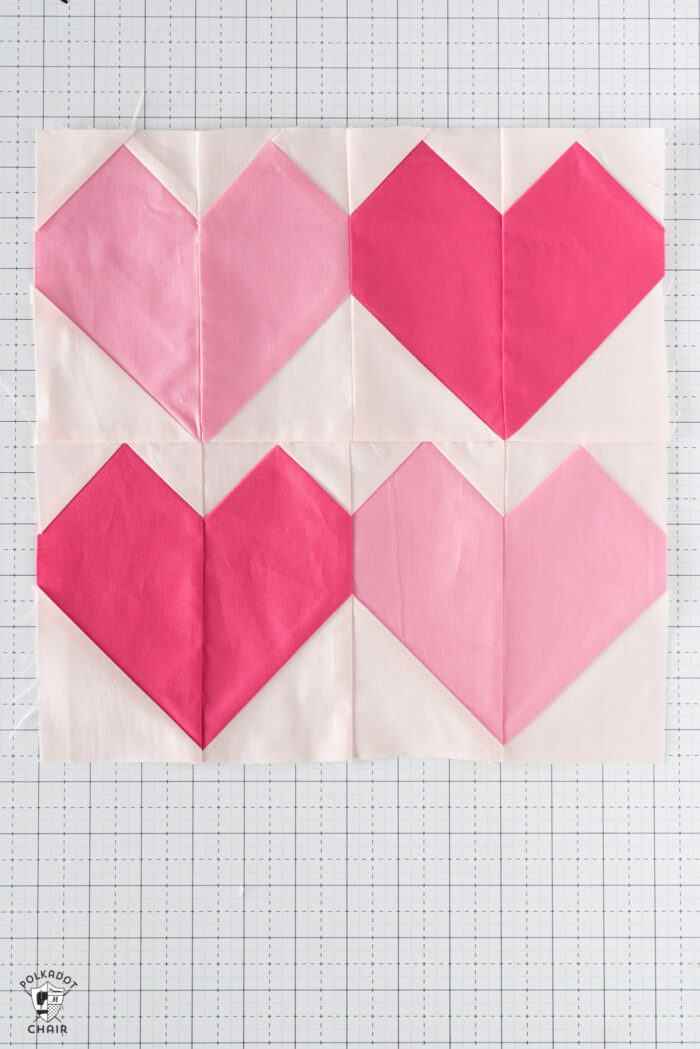
which you can mix and match with the 12″ blocks with the larger heart!
There are so many ways to use these blocks! If you need some suggetsions be sure to check out our Sampler quilt layout ideas article.
Heart Quilt Pattern
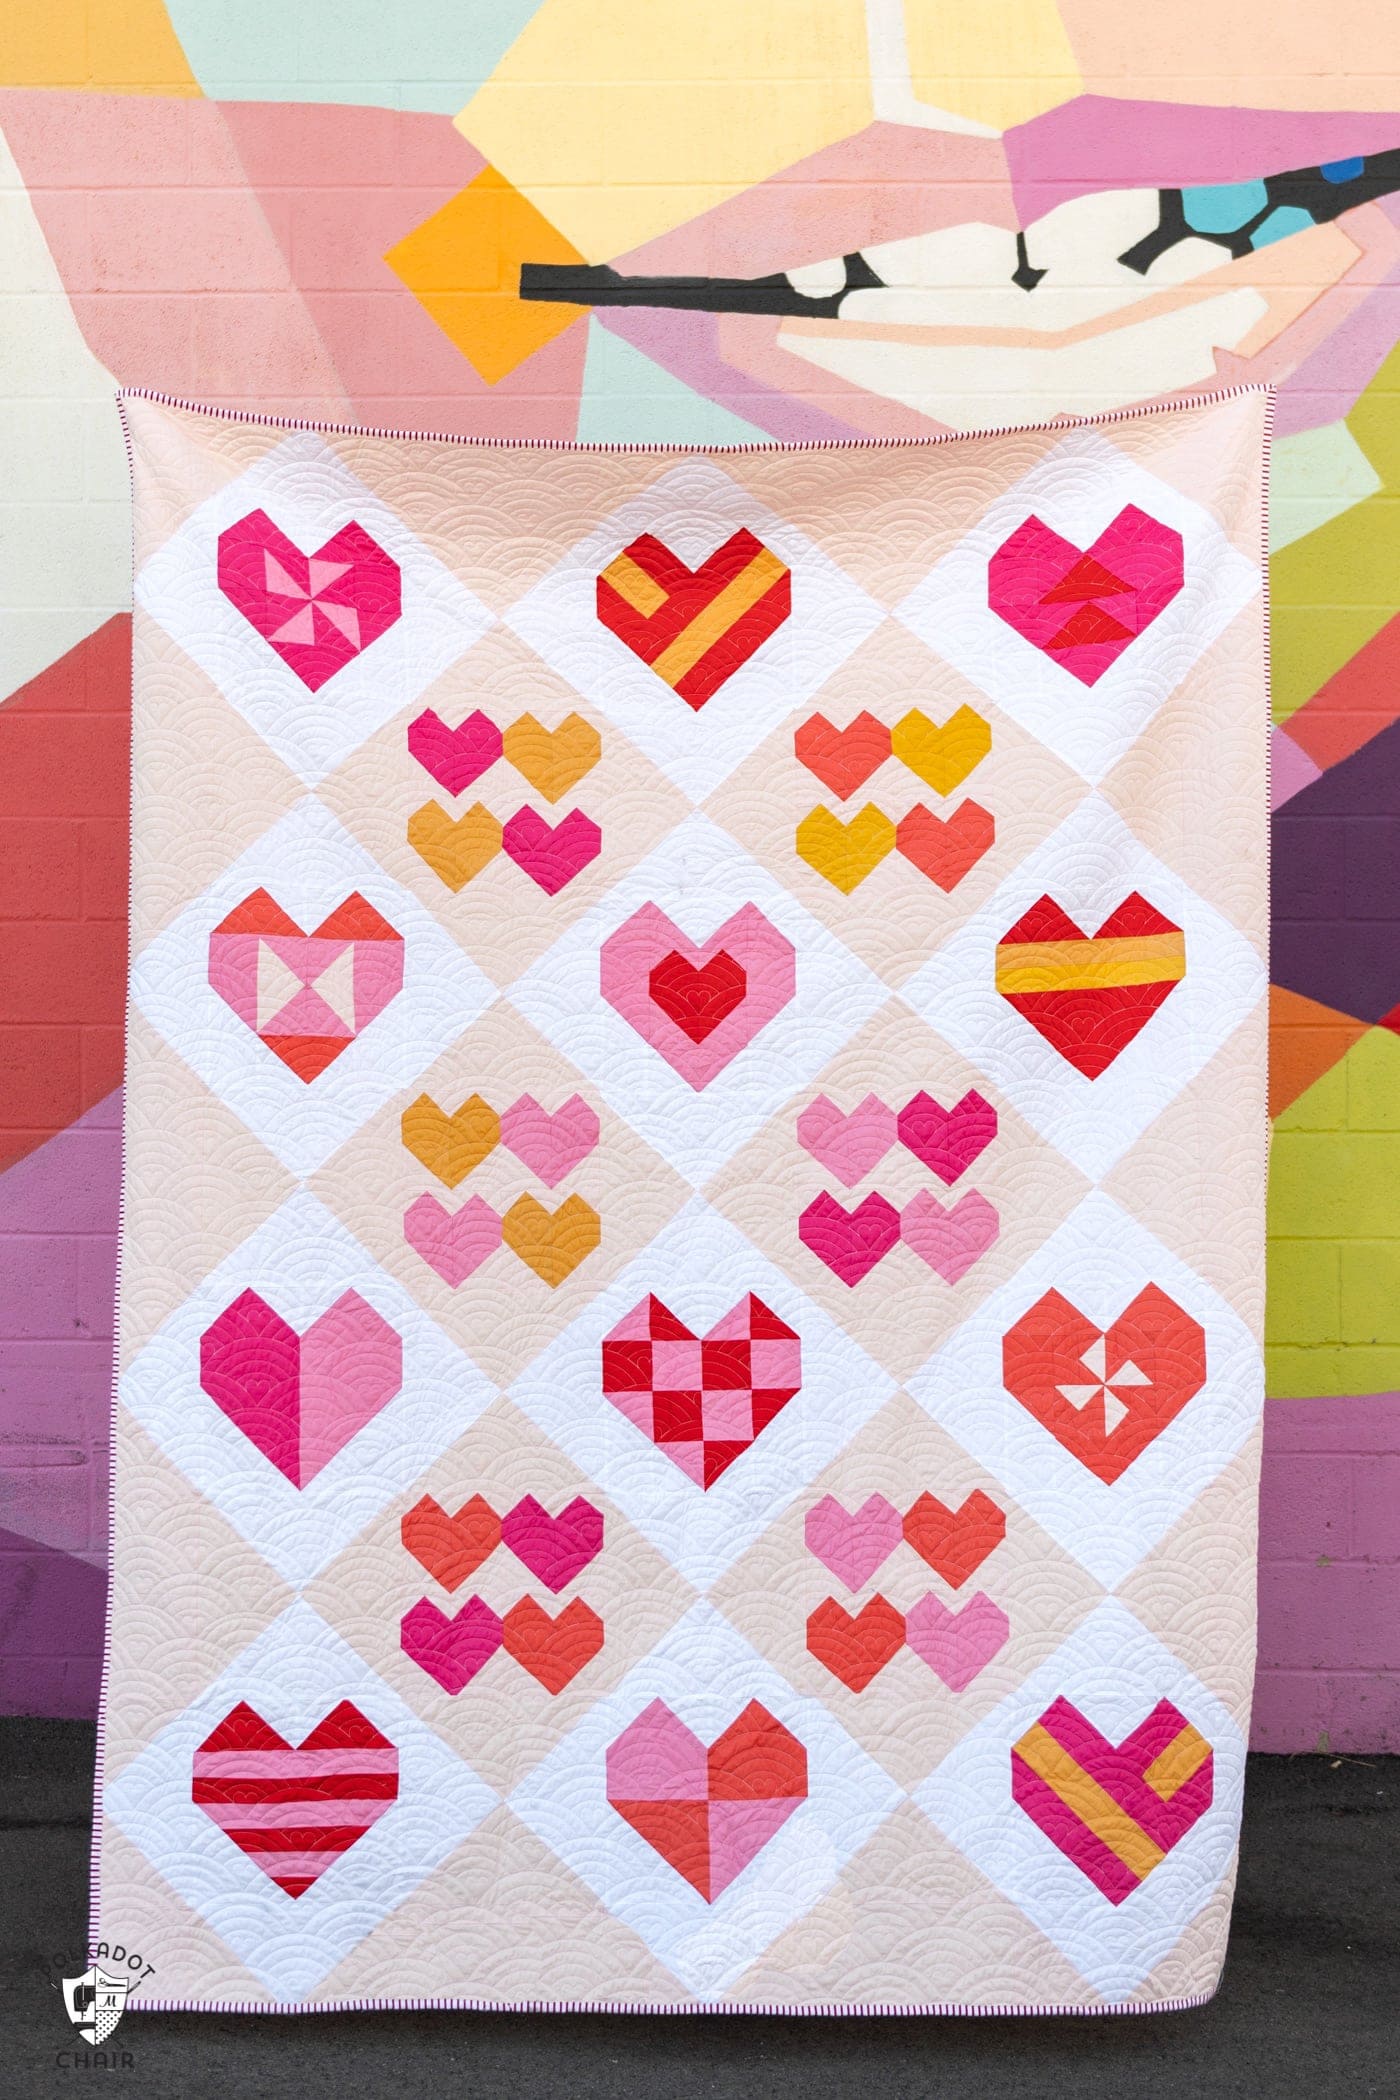
If you like these heart blocks, then you may like our All the Hearts quilt pattern! It features twelve variations of a simple heart quilt block to make a unique and fun heart quilt!
Stitch and Flip Method
The Heart Quilt blocks are constructed using the Stitch and Flip quilting technique.
The stitch-and-flip method (sometimes called snowball corners) is a quick quilting technique that adds a triangular corner to a larger piece of fabric without cutting and sewing a separate triangle.
To do it, you place a smaller square right-sides-together on the corner of a larger square or rectangle, stitch along a diagonal line across the small square, then trim away the excess fabric and “flip” the corner open to create a neat, angled edge. This method is commonly used for quilt blocks like stars, flying geese, and heart blocks because it’s fast, accurate, and easy to repeat when making multiple units.
Tips for Using the Stitch and Flip Method
- Draw a clean diagonal line. Mark from corner to corner with a pencil or fabric pen so your stitching stays accurate.
- Double-check the direction before sewing. Ensure the square is in the correct corner and the diagonal line is oriented correctly.
- Pin if it shifts. A single pin (or a tiny dab of glue stick) keeps the small square from sliding while you sew.
- Stitch slightly outside the line. Sewing just a hair off the line helps the corner flip out perfectly without shrinking the unit.
- Flip to check before trimming. Open the corner to ensure it fully covers the area, and check that it is straight before cutting anything.
- Trim to a consistent seam allowance. After sewing, trim the excess fabric, leaving a ¼” seam allowance for clean results.
- Press, don’t drag the iron. Press the corner open to avoid stretching the bias edge on the diagonal seam.
- Watch the bulk. If layers get thick, press seams open or use lighter fabrics to keep blocks flatter.
- Use diagonal seam tape for speed. A seam guide helps you sew straight without marking every piece.
- Cut accurately. This method works best when your squares are truly the correct size; small cutting errors add up fast.
- Chain piece in batches. Sew all your corners first, then trim and press assembly-line style to save time.
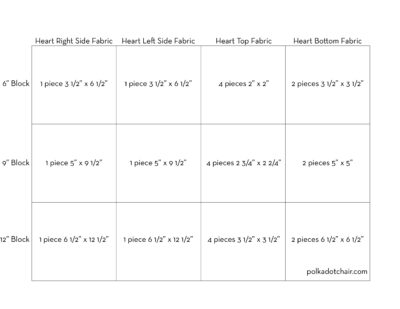
Cutting Diagram for All 3 Sizes

The construction steps are the same for all quilt block sizes. Use the diagram above to determine what pieces of fabric to cut in each size. It’s included in the pattern direction below as well. If you print the pattern from our site, make sure you select “include instruction images” in the print window.
Heart Quilt Block Pattern in 6″, 9″ & 12″
Equipment
supplies
- 1 Fat Quarter Background Fabric
- 1 Fat Quarter Heart Fabric can be all one print or two different prints
Instructions
Use the diagram to determine which pieces of fabric to cut and which sizes.
- Find the block size you want, then cut the pieces. The Heart Top and Heart Bottom fabrics are cut from the Background Fabric

- Draw a diagonal line on the wrong side of the following square pieces:Four Pieces of Heart Top FabricTwo pieces of Heart Bottom Fabric
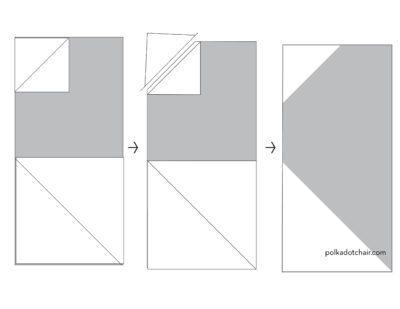
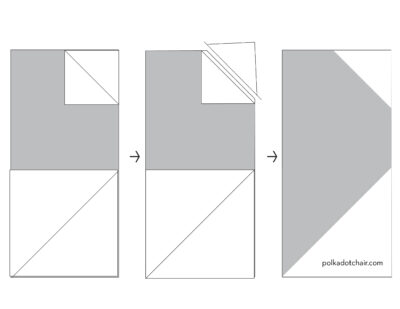
- Place one of the Heart Top Fabric squares on the Heart Left Side fabric according to the diagram.
- Place one of the Heart Bottom Fabric squares on the Heart Left Side fabric according to the diagram.
- Stitch each square along the line you drew.
- Using a rotary cutter and a ruler, trim the fabric 1/4” from the line you just drew towards the outside of the block. You will trim both the top square and the bottom square (trimming the bottom square is not shown on the illustration, but it is trimmed in the same manner).
- Flip the fabric up and press.
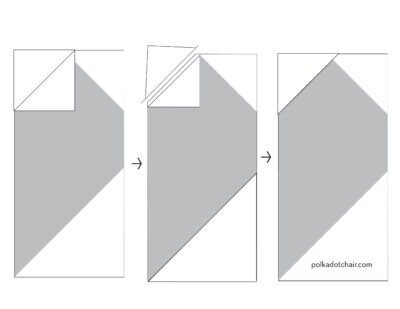
- Place a second Heart Top Fabric square on top of this unit on the other top corner.
- Stitch each square along the line you drew.
- Using a rotary cutter and a ruler, trim the fabric 1/4” from the line you just drew towards the outside of the block.
- Flip the fabric up and press.
- Repeat the process using the Heart Right Side fabric piece. Use the diagram below as a guide.
- Note: this piece is a mirror image of the piece you just stitched.
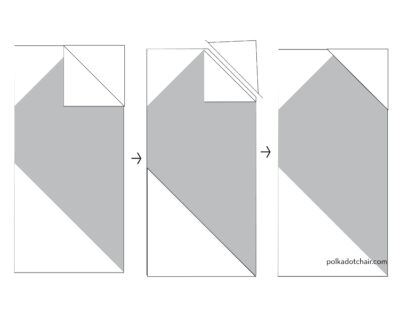
Pressing Tip: Press the seam allowances of one piece toward the lighter fabric and the other toward the darker fabric. This will allow you to nest the seams and achieve more accurate alignment of the heart’s center seam.
- Stitch the Heart Right Side Fabric and Left Heart Side Fabric pieces together to complete your block.
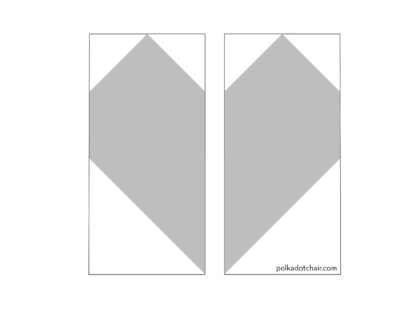
And that’s it, your heart quilt block is finished! Once you’ve made one, it’s hard to stop (they’re so fun to mix and match with different fabrics). You can use this block in a mini quilt, pillow, table runner, or even repeat it to create a full quilt top. If you make one, I’d love to see it, tag me on Instagram (@polkadotchair) or let me know in the comments so I can cheer you on!