• Skip to primary navigation
  • Skip to main content
  • Skip to primary sidebar

The Polka Dot Chair logo

  • SEWING
    • Free Sewing Patterns
    • Bag Sewing Patterns
    • Costume Sewing Tutorials
    • Apparel Sewing Patterns
    • Learn to Sew
    • Beginner Friendly Sewing Projects
    • Hand Embroidery Patterns
    • Sewing Tips
    • All Sewing
  • QUILTING
    • Quilt Block Patterns
    • Learn to Quilt
    • Free Quilt Patterns
    • Quilt Patterns
    • All Quilting
  • CRAFTS
    • Disney
    • Cricut
    • Printables
    • All Crafts
  • HOLIDAYS
    • Seasonal Projects
    • Valentine’s Day
    • Easter
    • 4th of July
    • Halloween
    • Thanksgiving
    • Christmas
    • All Holidays
  • TUTORIALS
  • ABOUT
    • About Me
    • My Fabric Collections
    • Published Books
    • Press
    • FAQ’s
    • Contact
  • SUBSCRIBE
  • SHOP
menu icon
go to homepage
  • SHOP
  • TUTORIALS
  • SEWING
  • QUILTING
  • SUBSCRIBE
  • CRAFTS
  • HOLIDAY PROJECTS
  • ABOUT
    • Published Books
    • My Fabric Collections
  • CONTACT
    • Facebook
    • Instagram
    • YouTube
  • subscribe
    search icon
    Homepage link
    • SHOP
    • TUTORIALS
    • SEWING
    • QUILTING
    • SUBSCRIBE
    • CRAFTS
    • HOLIDAY PROJECTS
    • ABOUT
      • Published Books
      • My Fabric Collections
    • CONTACT
    • Facebook
    • Instagram
    • YouTube
  • ×
    Home » Sewing

    Double-Sided Baby Changing Mat Tutorial Made with Laminated Fabric

    Last Updated: Mar 3, 2020 by Melissa Mortenson · This post may contain affiliate links · This blog generates income via ads · 5 Comments

    Please welcome Linsday who is sharing a tutorial for a Baby Double-Sided Changing Travel Mat made with Laminated Fabrics.
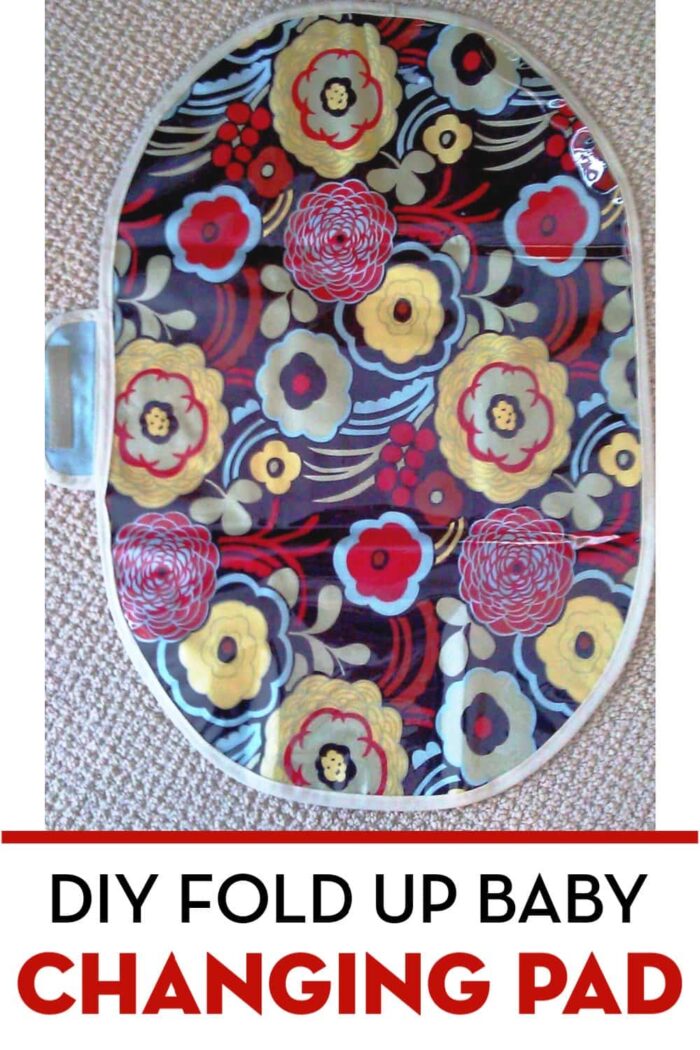
    I’m Lindsay, and I blog over at Lindsay Sews and Craft Buds. I’m so excited that Melissa has asked me to share this tutorial for readers of The Polkadot Chair. I hope it gets you all in the mood for a little travel and exploring (even if you have little ones in tow)

    Over MLK weekend, I flew to Minneapolis to visit Katie, my BFF from college. Katie is basically a rockstar of a mom. Not only does she have two kids in diapers, but she was getting ready to take them on a 9-hour flight across the Pacific. How does she do it?

    Baby Travel Tip:

    Katie says she packages separate Ziploc bags with everything she will need to feed her little ones, including food, a spoon and a wet wipe. That way, she can reach down with one hand and just get everything she needs, instead of digging in the carry-on. Dirty spoons and wipes just go back in the baggie, to be cleaned up later. Or better yet, use a plastic spoon!

    Snack time supplies in individual bags make traveling with tots more manageable. Reach down and grab with your free hand, and you’ve got everything you need

    Tutorial: Double-sided Vinyl Changing Mat

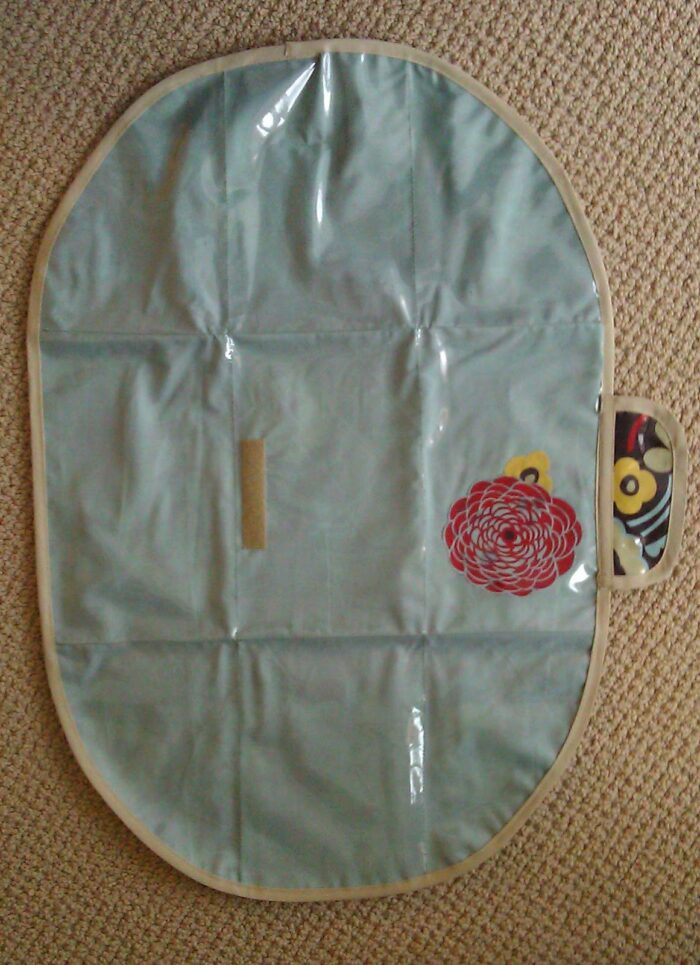
    Katie wanted a vinyl changing mat that wasn’t so bulky in her purse. A frequent traveler, she also wanted something that she could pull out in a public restroom and not worry about getting the fabric dirty on the backside, like most cute changing pads are prone to.

    This is what we came up with!
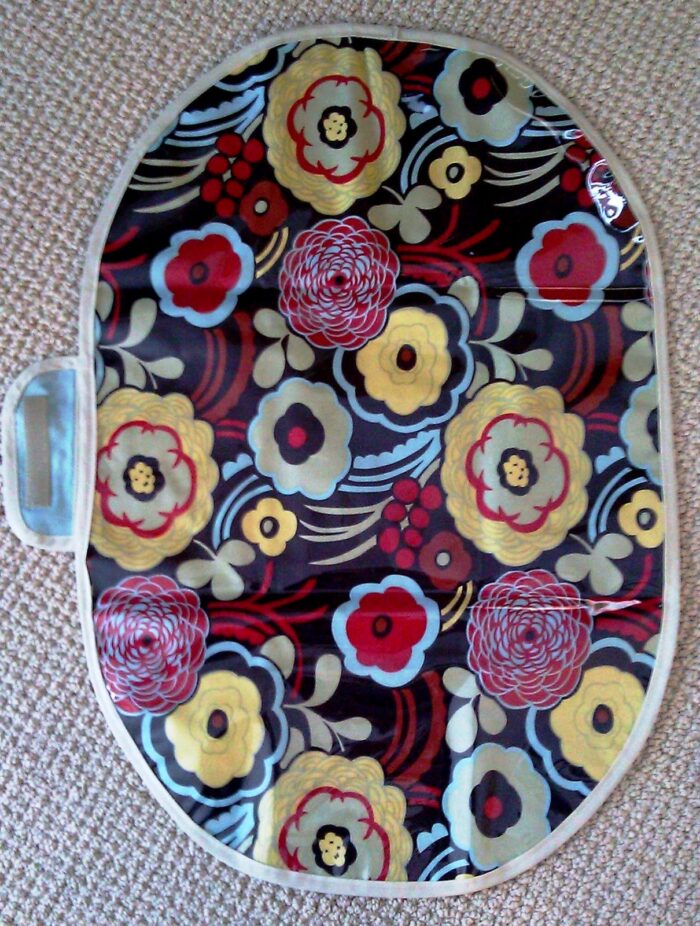
    Want to make your own?
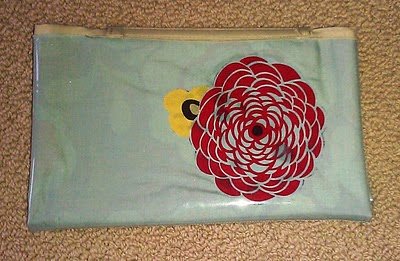
    Fold Up Baby Changing Mat Supplies

    • ½ yard patterned quilting fabric
    • ½ yard coordinating solid fabric
    • 1 yard 12-gauge vinyl from the craft store, or 1 heavy-duty shower curtain liner (clear). (When buying vinyl, measure the length of the roll to make sure two changing mats will fit. We bought 1.6 yards for two changing pads.)
    • Heavy-duty sewing needle
    • Coordinating thread
    • Velcro strip
    • 1 pack (3 yards) double-fold quilt binding

    Finished project size: Approximately 24″ x 16″ inches unfolded, 9.5″ x 7″ folded

    Step 1:

    We traced the shape of her existing diaper mat and borrowed the fold lines, making a paper bag pattern. (If you don’t have a model to copy, draw a rectangle that’s 2 feet long and use a dinner plate to trace rounded corners.)

    Step 2:

    Cut the oval shape once each from print and solid fabrics. Cut two ovals from vinyl, to make front and back panels. Use scraps of all materials to fashion a rounded handle, about 5 inches by 3 inches.

    Step 3:

    Play with your paper pattern, spacing the fold lines the way you want. You will later stitch along these lines on solid (light blue) layer to make the mat easier to fold. With your pattern piece taller than it is long:

    1. Fold top edge ⅔ down
    2. Fold bottom to overlap top
    3. Fold left edge ⅔ over
    4. Fold right piece to overlaps left

    Step 4: Layer one piece of solid fabric and one piece of vinyl. This will show on the outside of your folded mat (our outside is light blue). Lay the paper pattern on top of fabric/vinyl sandwich, and repeat the same fold lines. Mark fold lines with masking tape and stitch fabric and vinyl together along those lines.

    Step 5: Layer your materials in this order, to make a “materials sandwich”:

    • Bottom: vinyl stitched to solid fabric, with fabric facing up
    • Middle: patterned fabric (design face up)
    • Top: other pieces of vinyl

    Step 6: With your materials sandwich, practice using the fold lines you sewed earlier and determine where you want your outer velcro to go. Stitch velcro to vinyl/solid fabric layer only. Velcro will be positioned on the center square (see photo, above) of the solid side of your changing mat. The other velcro piece will attach to the flap, which is cut out but not yet sewn.

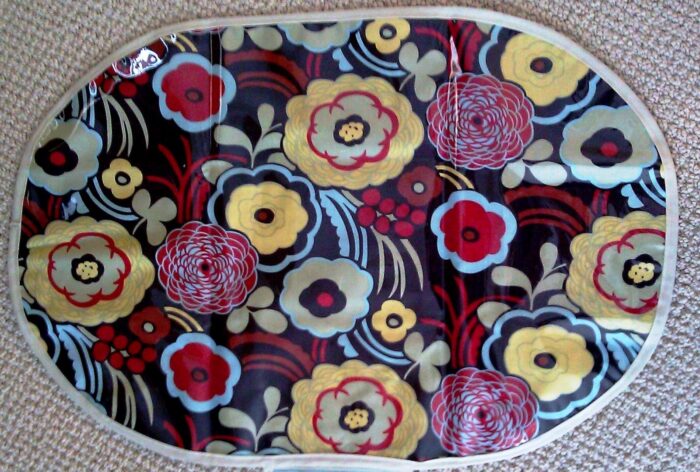
    Step 7: With one side of velcro now attached, sew binding all the way around the quilt sandwich, to create this:
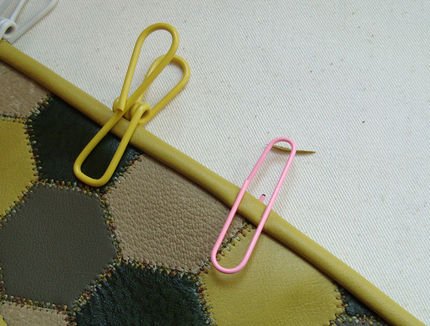
    Tip: I used paperclips to hold the layers together while I attached the binding. This is a great way to keep everything smooth when your fingers can’t get that close. Two large paperclips seem to be the perfect tools for dragging along an inch at a time to smooth the binding and secure the layers.
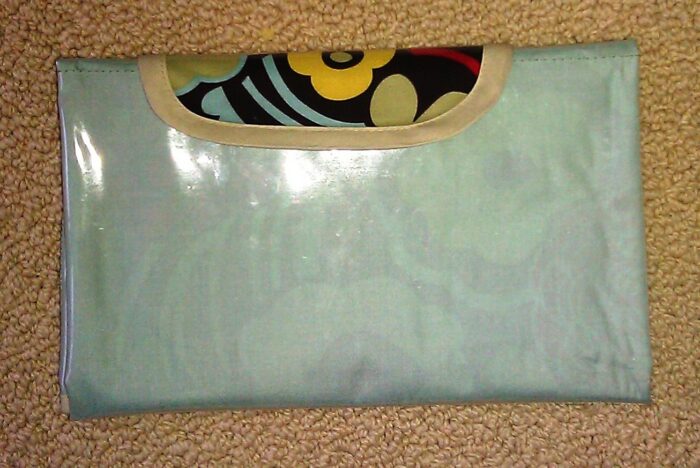
    Step 8: Now, it’s time for the flap. Attach velcro a half-inch from the long, straight edge of one vinyl flap piece. Assemble flap into the same type of materials sandwich you created earlier (see step 5) and secure edges with paperclips while you attach the binding.

    Step 9: Place the flap into position on the changing mat, close enough to the edge so that flap binding actually overlaps mat binding. Make sure velcro strips align, and sew flap to changing mat.

    You’re done! Fold up and stow away in your purse or diaper bag for a lightweight, totally portable changing mat that you won’t mind getting dirty.

    If you’ve never sewn with laminated fabrics before be sure to check out this post with tips and tricks for working with laminated fabrics.

    More Projects You May Enjoy

    • colorful fabric and paper gift tags on white wood table
      Simple Scrappy Fabric Gift Tags
    • blue quilt and sewing machine feet on cutting mat
      Sewing Machine Feet for Quilt Piecing
    • Sewing Machine Mat
      Stay Organized with this DIY Roll Up Sewing Machine Mat
    • triangle fabric flags on white table top
      How to Make a Fabric Bunting with Free Template

    • Share
    • Email

    About Author

    Melissa Mortenson

    Melissa Mortenson is a blogger, designer, and content creator. She is the Polka Dot Chair blog founder and has been sharing fresh and creative ideas with readers since 2008. She is the author of “Project Teen, Handmade Gifts your Teen will Actually Love.” Her work and designs have been featured on HuffPost, TODAY, Pioneer Woman, HGTV, BuzzFeed, Better Homes & Gardens, and many other established publications. Her first fabric line, “Derby Style,” debuted in January 2015 through Riley Blake Designs.  Additional fabric collections have followed it in subsequent years. A mom of 3, she considers herself lucky to be living in Kentucky.

    Reader Interactions

    Comments

    1. Rey says

      March 15, 2011 at 6:13 pm

      Thanks! My sister is having triplets and these would come in handy!
      Also, I’ll go check out Lindsey Sews & Craft Buds asap!

      Reply
    2. Lauren @ YoungNester says

      March 15, 2011 at 8:54 pm

      What a perfect gift for new moms! I would love for you to stop by and link up to my Ten Buck Tuesday link party!

      Reply
    3. CraftCrave says

      March 15, 2011 at 11:15 pm

      Just a quick note to let you know that a link to this post will be placed on CraftCrave today [16 Mar 01:00am GMT]. Thanks, Maria

      Reply
    4. angie says

      March 18, 2011 at 12:50 am

      I attempted attaching vinyl to fabric like this when I made this round changing pad using another pattern. I could never get it to feed through the machine properly. Did you stitch vinyl side up or down? Eventually I gave up, but I regret it. Easy to wipe material is a must when you’re making a changing pad. Well done. It looks great!

      Reply
    5. Lindsay Conner says

      March 18, 2011 at 10:15 am

      Angie–I actually stitched vinyl side up AND down. To keep all the layers together, binder clips or paper clips would work. With a heavy duty needle and thinner-gauge vinyl might work if you are worried about feeding through your machine. 🙂

      Reply

    Leave a Reply Cancel reply

    Your email address will not be published. Required fields are marked *

    This site uses Akismet to reduce spam. Learn how your comment data is processed.

    Primary Sidebar

    Hello! It’s nice to meet you.

    I’m Melissa. I like to design things, like fabric, printables, and projects.

    I’m also a Mom and a Maker. I am like most of you, just trying to do my best every day. Some days I succeed, many days I fail.  I find joy in creating, if you do too, then I hope that you find something here bring a little “happy” to your life.  Find out more about me here.

    COPYRIGHT POLICY

    All my images and text are copyrighted. You may NOT use any images from this site in any kind of Video (this includes YouTube). If you would like to feature my work, you may use ONE (1) NON-COLLAGED image and must “follow” link back to my original blog post. You may NOT edit, crop, or change my images in any way without written permission. You MAY NOT print out or copy and distribute any text, images or patterns from this site. All patterns, content, instructions, and templates are for personal use ONLY! Thank you! Violators will be reported.

    Footer

    ↑ back to top

    About

    • Privacy Policy
    • Disclaimers
    • About Melissa
    • Instagram
    • Facebook
    • YouTube
    • Pinterest

    Newsletter

    • Sign Up! for emails and updates

    Contact

    • Contact
    • FAQ
    • Press
    • Published Books
    • Fabric Collections

    Welcome to the Polka Dot Chair! Here you’ll find easy, step-by-step, sewing, quilting, and crafting projects. We design projects for Makers of all skill levels. Beginners are welcome!

    DISCLAIMER:

    While every effort has been made to ensure the accuracy of the content on this website, the information is made available without warranty of any kind. The Polka Dot Chair accepts no responsibility or liability, whether direct or indirect, as to the currency or accuracy of the information, nor any consequence of its uses. This website is not intended to substitute the advice of a professional.

    Copyright © 2022 Polka Dot Chair