• Skip to primary navigation
  • Skip to main content
  • Skip to primary sidebar

The Polka Dot Chair logo

  • SEWING
    • Free Sewing Patterns
    • Bag Patterns
    • Costumes
    • Apparel
    • Learn to Sew
    • Beginner Friendly
    • Embroidery Projects
    • Tips & Techniques
    • All Sewing
  • QUILTING
    • Quilt Blocks
    • Learn to Quilt
    • Free Patterns
    • Quilt Patterns
    • All Quilting
  • CRAFTS
    • Disney
    • Cricut
    • Printables
    • All Crafts
  • HOLIDAYS
    • Seasonal Projects
    • Valentine’s Day
    • Easter
    • 4th of July
    • Halloween
    • Thanksgiving
    • Christmas
    • All Holidays
  • TUTORIALS
  • ABOUT
    • About Me
    • My Fabric Collections
    • Published Books
    • Press
    • FAQ’s
    • Contact
  • SUBSCRIBE
  • SHOP
menu icon
go to homepage
  • SHOP
  • TUTORIALS
  • SEWING
  • QUILTING
  • SUBSCRIBE
  • CRAFTS
  • HOLIDAY PROJECTS
  • ABOUT
    • Published Books
    • My Fabric Collections
  • CONTACT
    • Facebook
    • Instagram
    • Pinterest
    • YouTube
  • subscribe
    search icon
    Homepage link
    • SHOP
    • TUTORIALS
    • SEWING
    • QUILTING
    • SUBSCRIBE
    • CRAFTS
    • HOLIDAY PROJECTS
    • ABOUT
      • Published Books
      • My Fabric Collections
    • CONTACT
    • Facebook
    • Instagram
    • Pinterest
    • YouTube
  • ×

    Home » Gift Ideas

    Crayon Folder Tutorial

    Updated: Dec 10, 2013 by Melissa Mortenson · This post may contain affiliate links · This blog generates income via ads · 2 Comments


    Kids Crayon Folder Tutorial

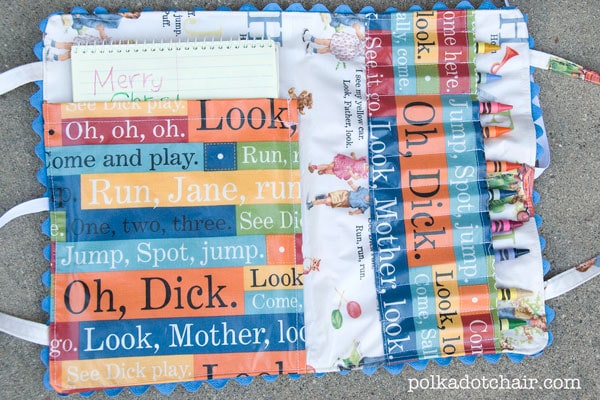
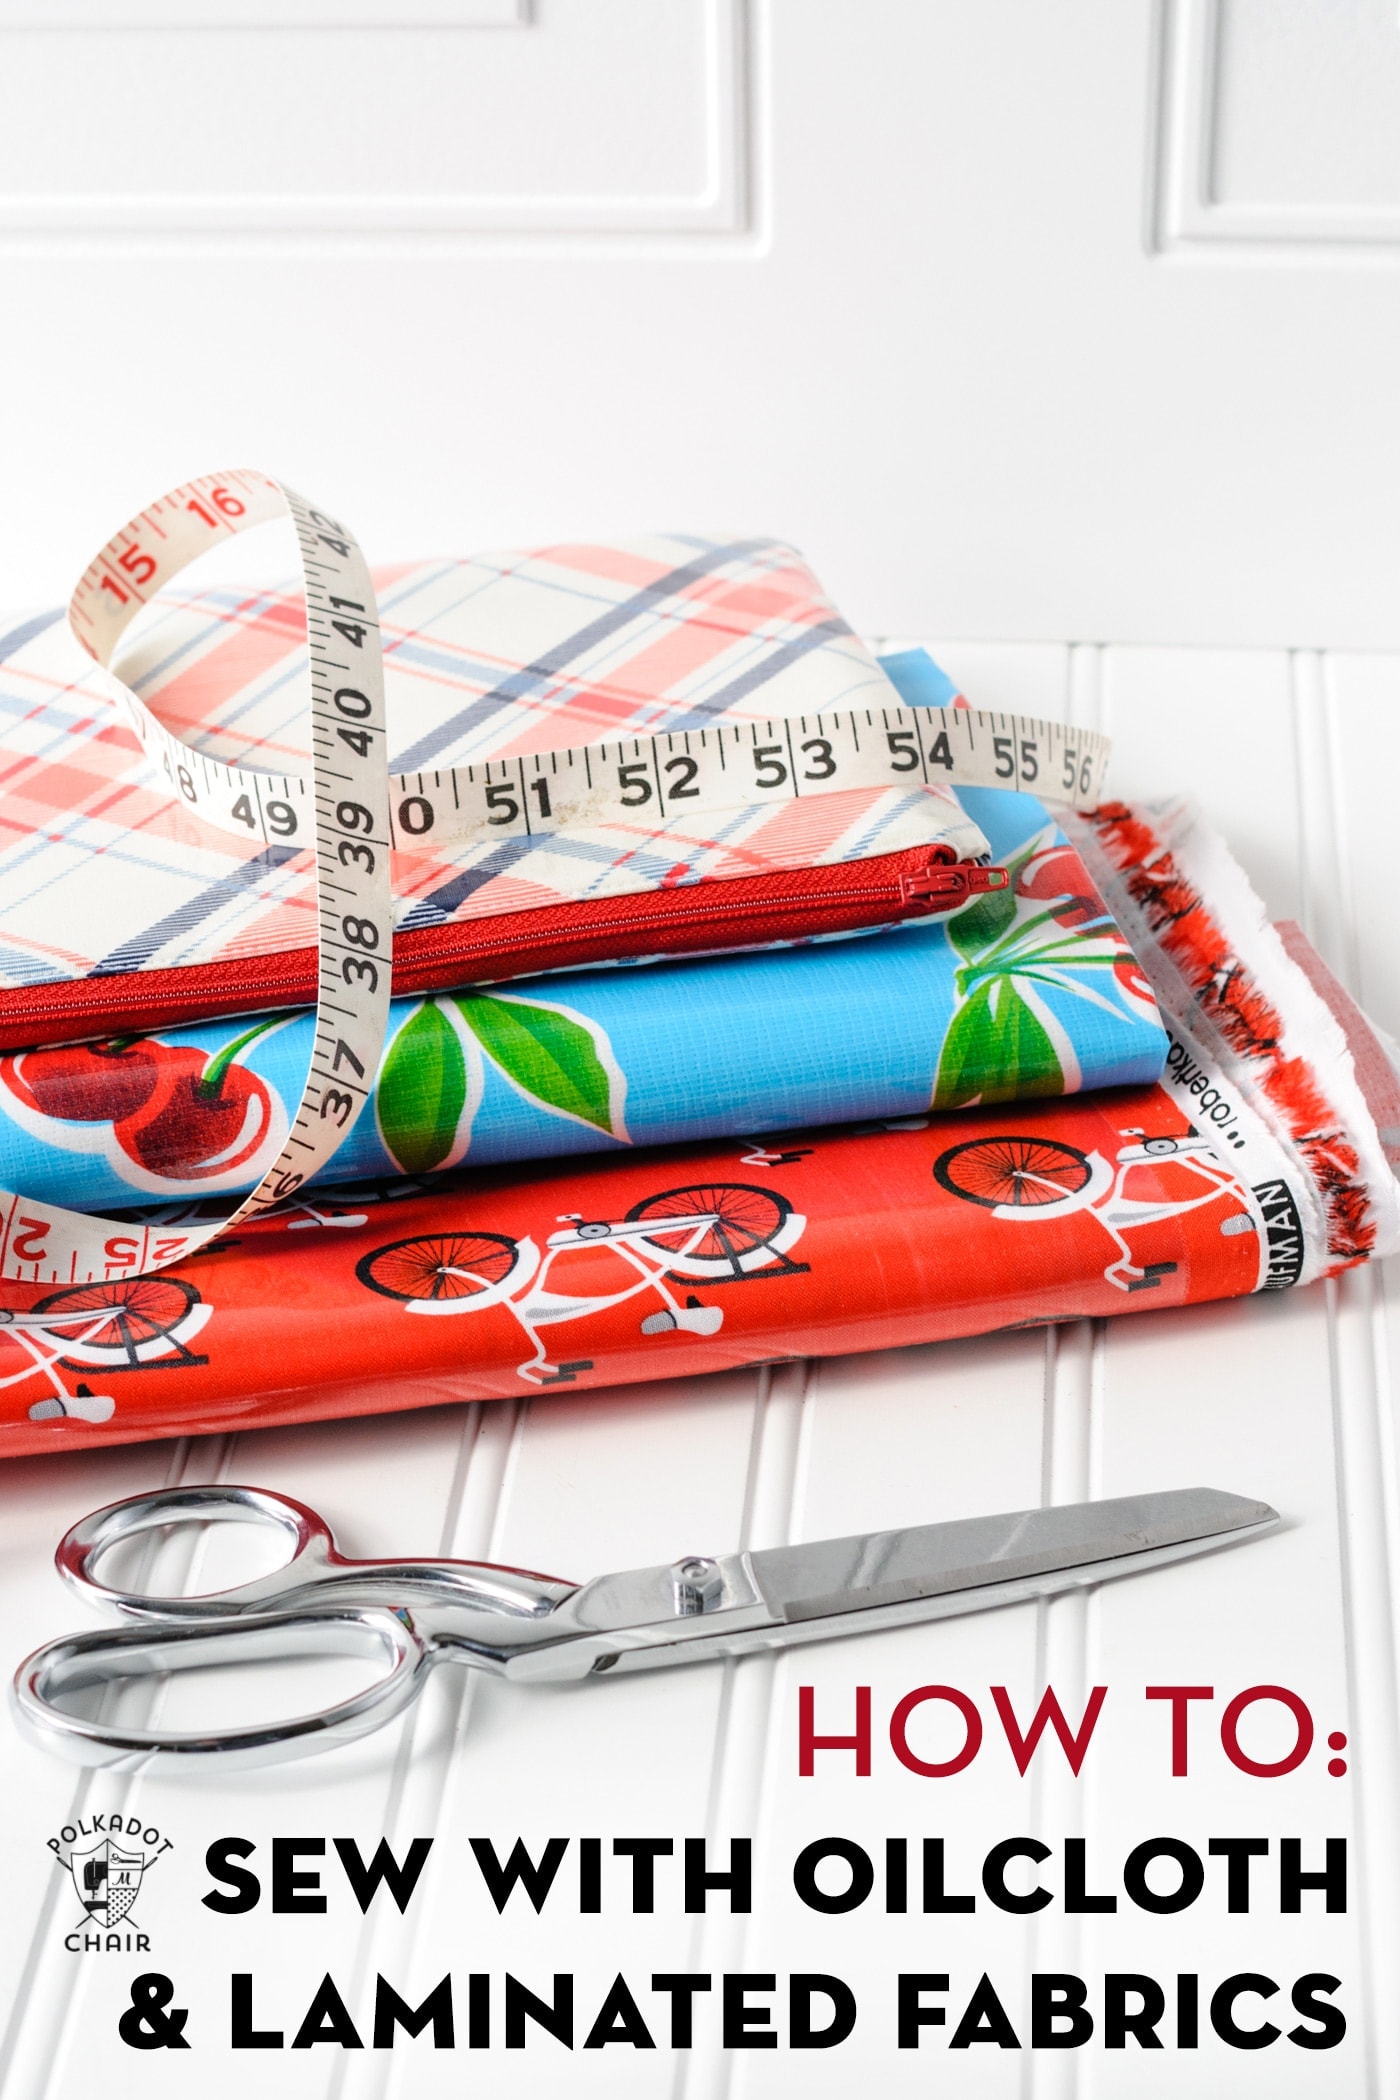
    Today I’m going to be sharing with you how to make this fun crayon folio for kids. It’s great “quiet” activity for kids and sews up quickly. It’s made from laminated cotton to make it sturdy and wipeable.


    Kids Crayon Folder Tutorial

    I actually made this a couple of years ago for my nephew and posted it here without a tutorial. I’ve received so many requests for a tutorial since then, so I finally decided to sit down and write one up.

    To make a crayon folder, you’ll need:

    ½ yard Laminated Cotton Fabric for folder

    ½ yard Laminated Cotton Fabric for pockets

    Teflon Foot for Sewing Machine (if you don’t have one, you can try putting scotch tape on the bottom of  your presser foot)

    1 package Ric Rac

    Ribbon

    Crayons

    Steno Notebook

    Cutting Guides

    12” x 17” for folder outside

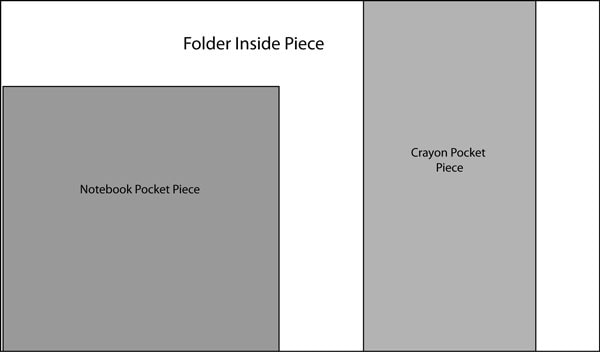
    12” x 16” for folder inside

    2 pieces, 2” x 15” for handles

    9 ½” tall x 8 ¾” wide for notebook pocket

    12” x 4” for crayon pocket

    Embroidery on the front is optional (if you don’t have an embroidery machine there may be a shop in your area that will add the detail to the front of your fabric for a very nominal fee).

    Assembly

    A few things to know about sewing with laminated fabric:

    -Use a Teflon foot

    -You can iron it just do NOT iron the laminated side of the fabric. Press on the wrong side or use a pressing cloth.


    crayon-folder-illustration

    Turn under the raw edge of the top of the notebook pocket ½” and stitch along the edge to hem.

    Turn under the right side seam ½” and finger press… tip: if you have quilt binding clips they are great to hold seams on laminated fabrics.

    Pin the pocket to the left side of the Folder inside piece. Lining up the raw edges on the left side and the bottom.

    Stitch along the right side of the pocket (the one that you turned under ½″) to attach the pocket to the folder inside piece.

    Turn under the two long edges of the crayon pocket piece ½”, finger press.  Stitch along the top edge of the pocket to hem it.

    Place the crayon pocket piece on the right side of the folder inside piece. Lining up the raw edges of the sides of the crayon pocket with the raw edges of the inside piece.

    Stitch along the bottom of the pocket to secure it to the folder inside piece.

    Kids Crayon Folder Tutorial

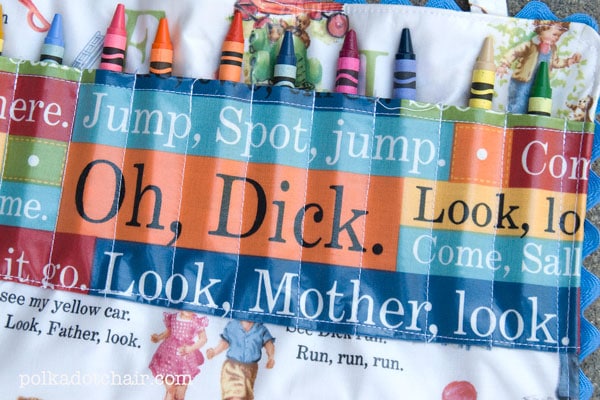
    Stitch every 1” to divide the pocket for the crayons.

    To make the handles:

    Fold the handles in half lengthwise. Use a pressing cloth and press (don’t put the iron right on the laminate fabric).  Unfold the handles and fold each raw edge into the center fold and press.  Fold the handle in half and top stitch along the edge of both sides of the handles.

    Attach the handles to the folder outside piece. 2” in from edge edge, stitch in place.

    Attach the 2 pieces of ribbon to the center of the folder (in between the handles).

    crayon-folder-how-to

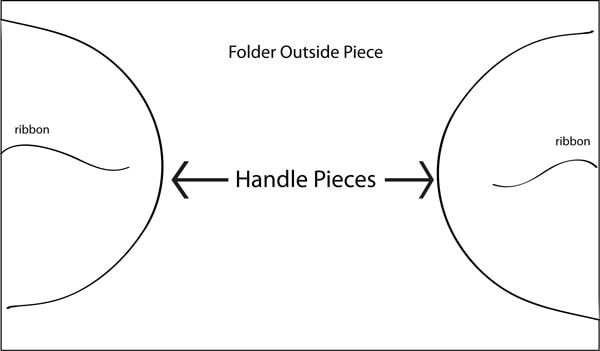
    Apply ric rac to the outer edge of the folder outside piece. Stitching right down the center of the ric rac.

    Pin the folder outside piece to the folder inside piece, right sides together. Stitch around the perimeter on top of the seam that you used to attach the ric rack. Leave a 2” opening in one side of the folder to turn it right side out.

    ‘Turn the folder right side out. Fold under the raw edges of the opening and top stitch around the entire perimeter, catching the opening as you sew.

    Other Projects that you might enjoy making this Holiday Season!

    Sunglasses Case to Sew

    “Sunnies” Sunglasses Case Tutorial

    pouchtutorial1

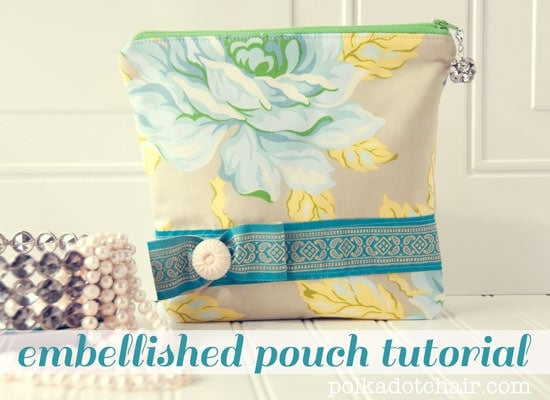
    Embellished Zip Pouch Tutorial

    DIY Necktie Zip Pouch Tutorial

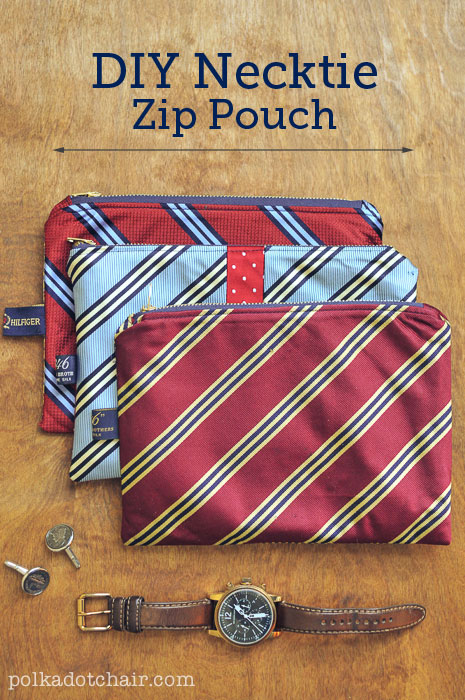
    Necktie Zip Pouch (would make a great gift for a guy!)

     This post first appeared on Skip to My Lou as part of their Holiday Sew Along
    Connect with me:

    follow-on-pinterest-button

    logo_facebook

    Follow on Bloglovin


    More Projects You May Enjoy

    • Hot Chocolate Christmas Neighbor Gift Idea
    • Gifts for Babies & Toddlers; Things to Make & Buy
    • 25+ Things to Make & Buy for Kids as Gifts
    • 25+ Gifts for Mom; Things to Make and Buy

    • Share
    • Email

    About Author

    Melissa Mortenson

    Melissa Mortenson is a blogger, designer, and content creator. She is the Polka Dot Chair blog founder and has been sharing fresh and creative ideas with readers since 2008. She is the author of “Project Teen, Handmade Gifts your Teen will Actually Love.” Her work and designs have been featured on HuffPost, TODAY, Pioneer Woman, HGTV, BuzzFeed, Better Homes & Gardens, and many other established publications. Her first fabric line, “Derby Style,” debuted in January 2015 through Riley Blake Designs.  Additional fabric collections have followed it in subsequent years. A mom of 3, she considers herself lucky to be living in Kentucky.

    Reader Interactions

    Comments

    1. Christine Sherman says

      January 24, 2014 at 10:36 pm

      This is great, thanks for sharing!

      Reply
    2. jessica says

      February 03, 2015 at 1:22 pm

      Thanks for the tutorial. I probably would have chosen another section of fabric that didn’t have Dick in big font for a child but otherwise it looks great!

      Reply

    Leave a Reply Cancel reply

    Your email address will not be published. Required fields are marked *

    This site uses Akismet to reduce spam. Learn how your comment data is processed.

    Primary Sidebar

    Hello! It’s nice to meet you.

    I’m Melissa. I like to design things, like fabric, printables, and projects.

    I’m also a Mom and a Maker. I am like most of you, just trying to do my best every day. Some days I succeed, many days I fail.  I find joy in creating, if you do too, then I hope that you find something here bring a little “happy” to your life.  Find out more about me here.

    COPYRIGHT POLICY

    All my images and text are copyrighted. You may NOT use any images from this site in any kind of Video (this includes YouTube). If you would like to feature my work, you may use ONE (1) NON-COLLAGED image and must “follow” link back to my original blog post. You may NOT edit, crop, or change my images in any way without written permission. You MAY NOT print out or copy and distribute any text, images or patterns from this site. All patterns, content, instructions, and templates are for personal use ONLY! Thank you! Violators will be reported.

    Footer

    ↑ back to top

    About

    • Privacy Policy
    • Disclaimers
    • About Melissa
    • Instagram
    • Facebook
    • YouTube
    • Pinterest

    Newsletter

    • Sign Up! for emails and updates

    Contact

    • Contact
    • FAQ
    • Press
    • Published Books
    • Fabric Collections

    Welcome to the Polka Dot Chair! Here you’ll find easy, step-by-step, sewing, quilting, and crafting projects. We design projects for Makers of all skill levels. Beginners are welcome!

    DISCLAIMER:

    While every effort has been made to ensure the accuracy of the content on this website, the information is made available without warranty of any kind. The Polka Dot Chair accepts no responsibility or liability, whether direct or indirect, as to the currency or accuracy of the information, nor any consequence of its uses. This website is not intended to substitute the advice of a professional.

    Copyright © 2022 Polka Dot Chair

    [ Placeholder content for popup link ] WordPress Download Manager - Best Download Management Plugin