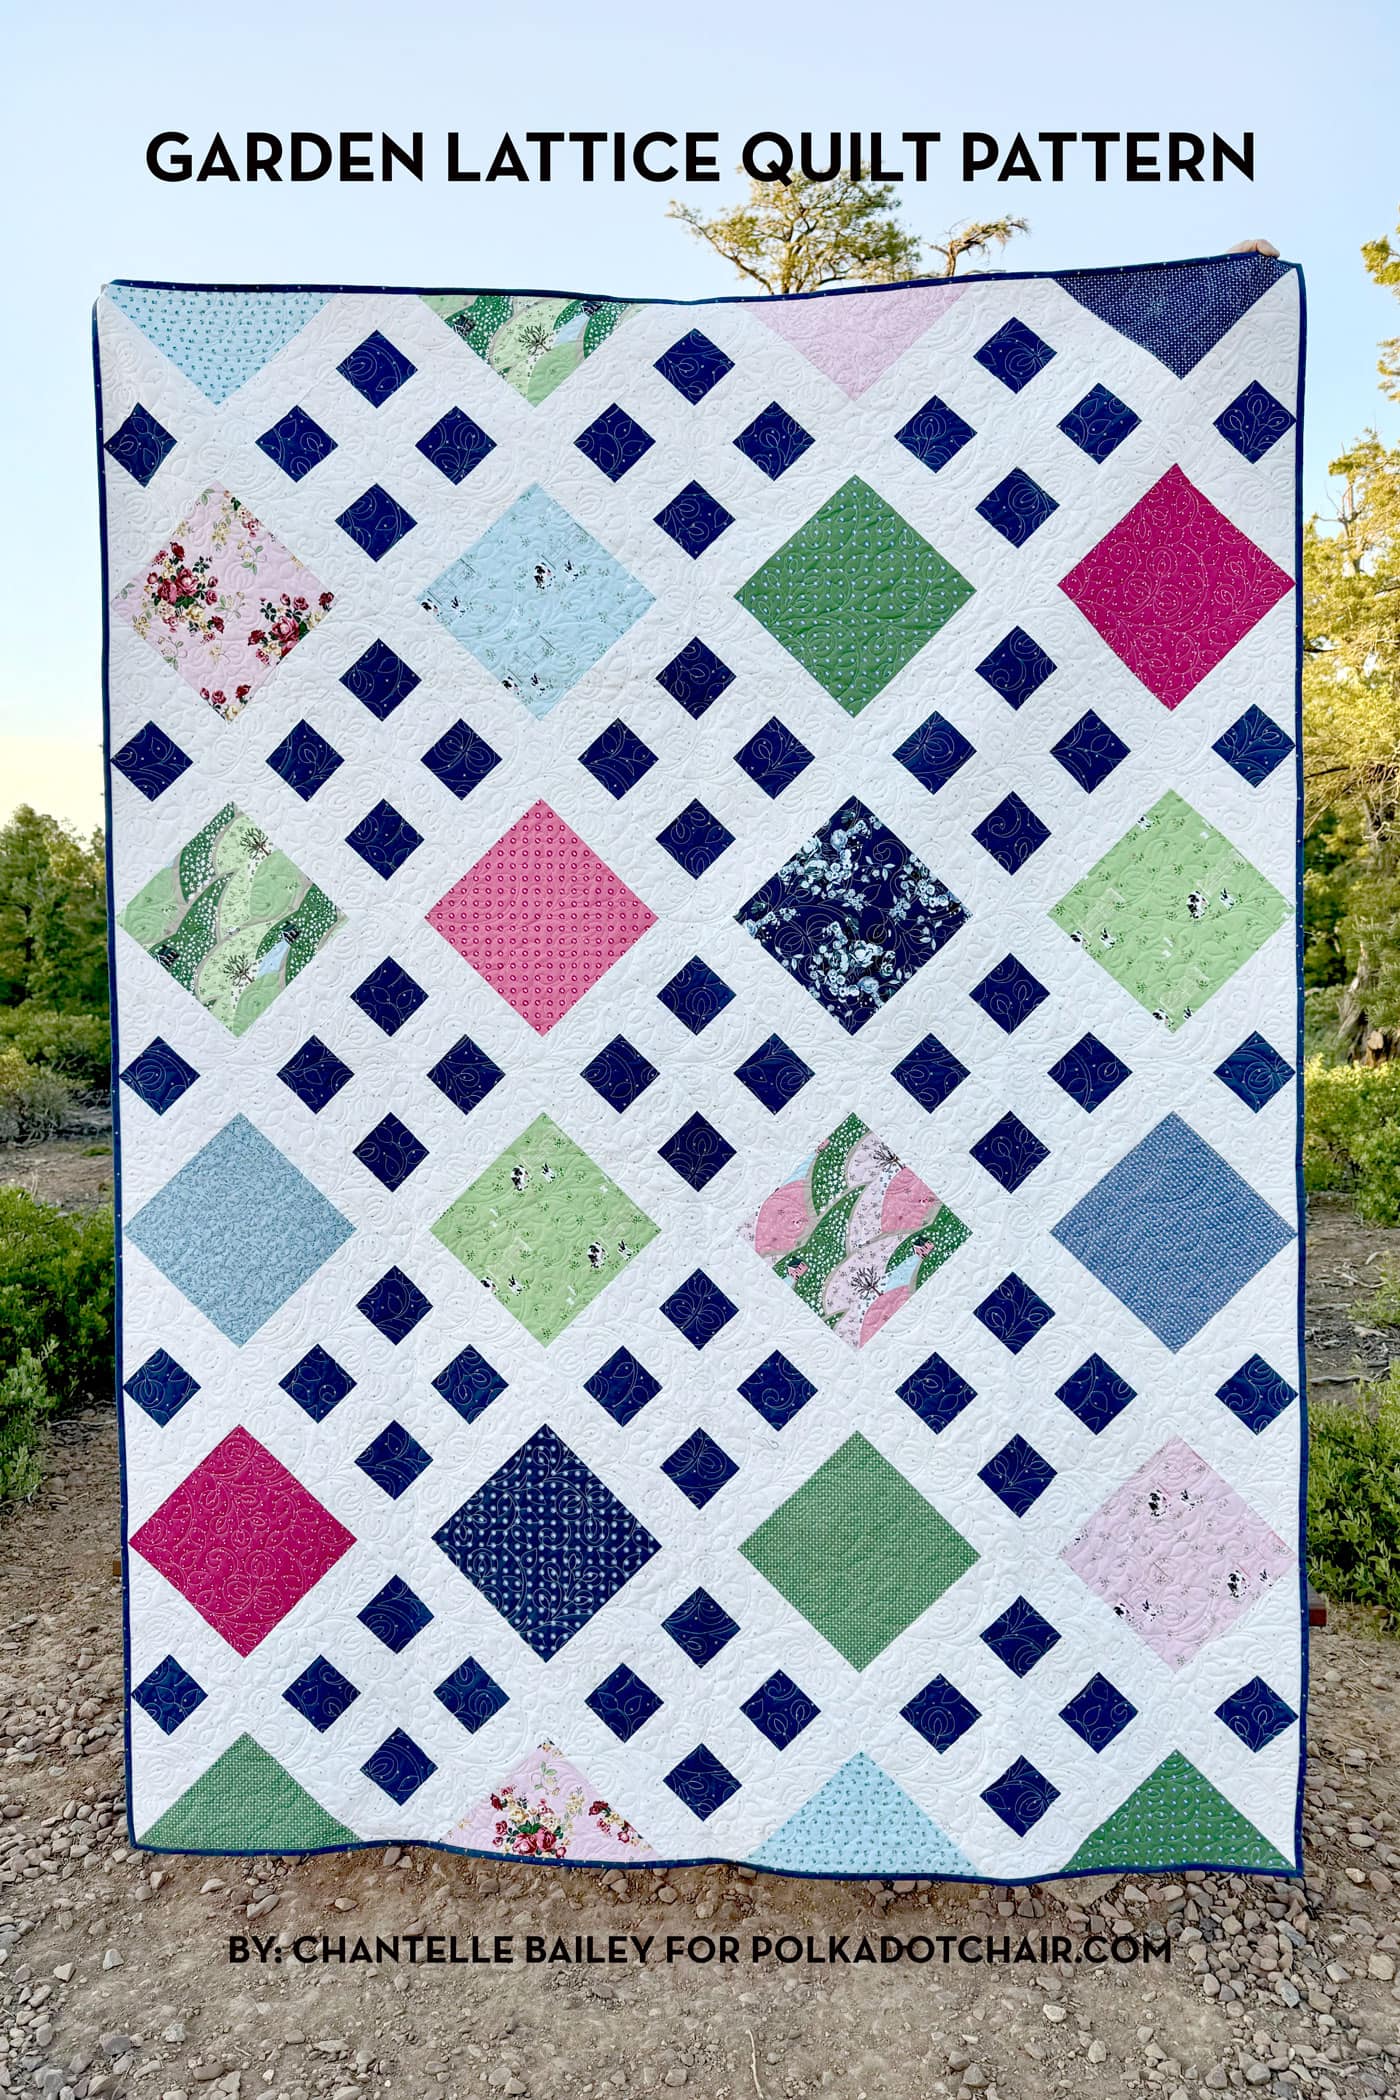
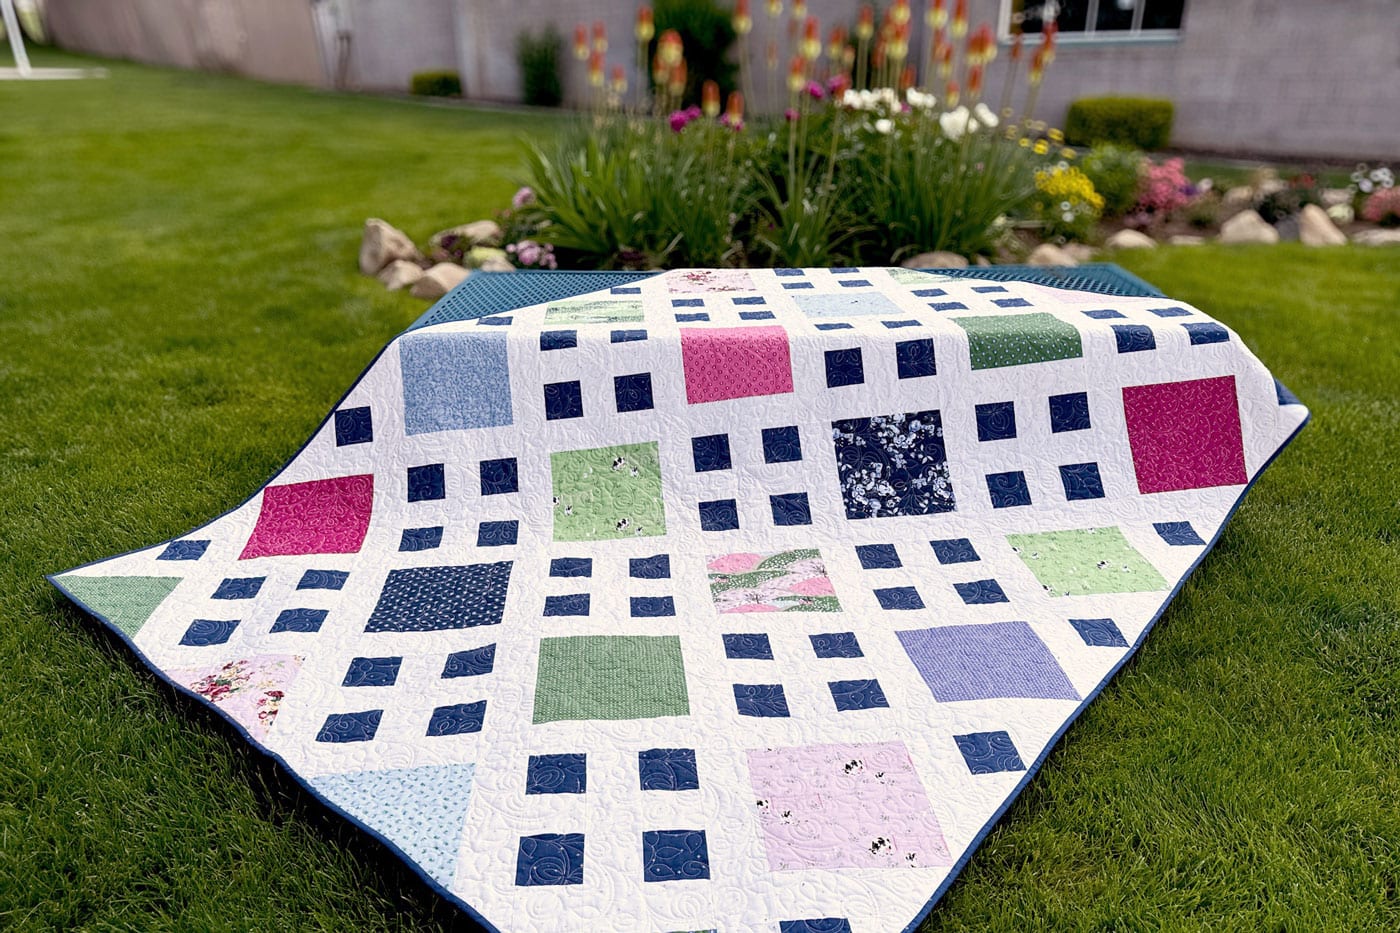
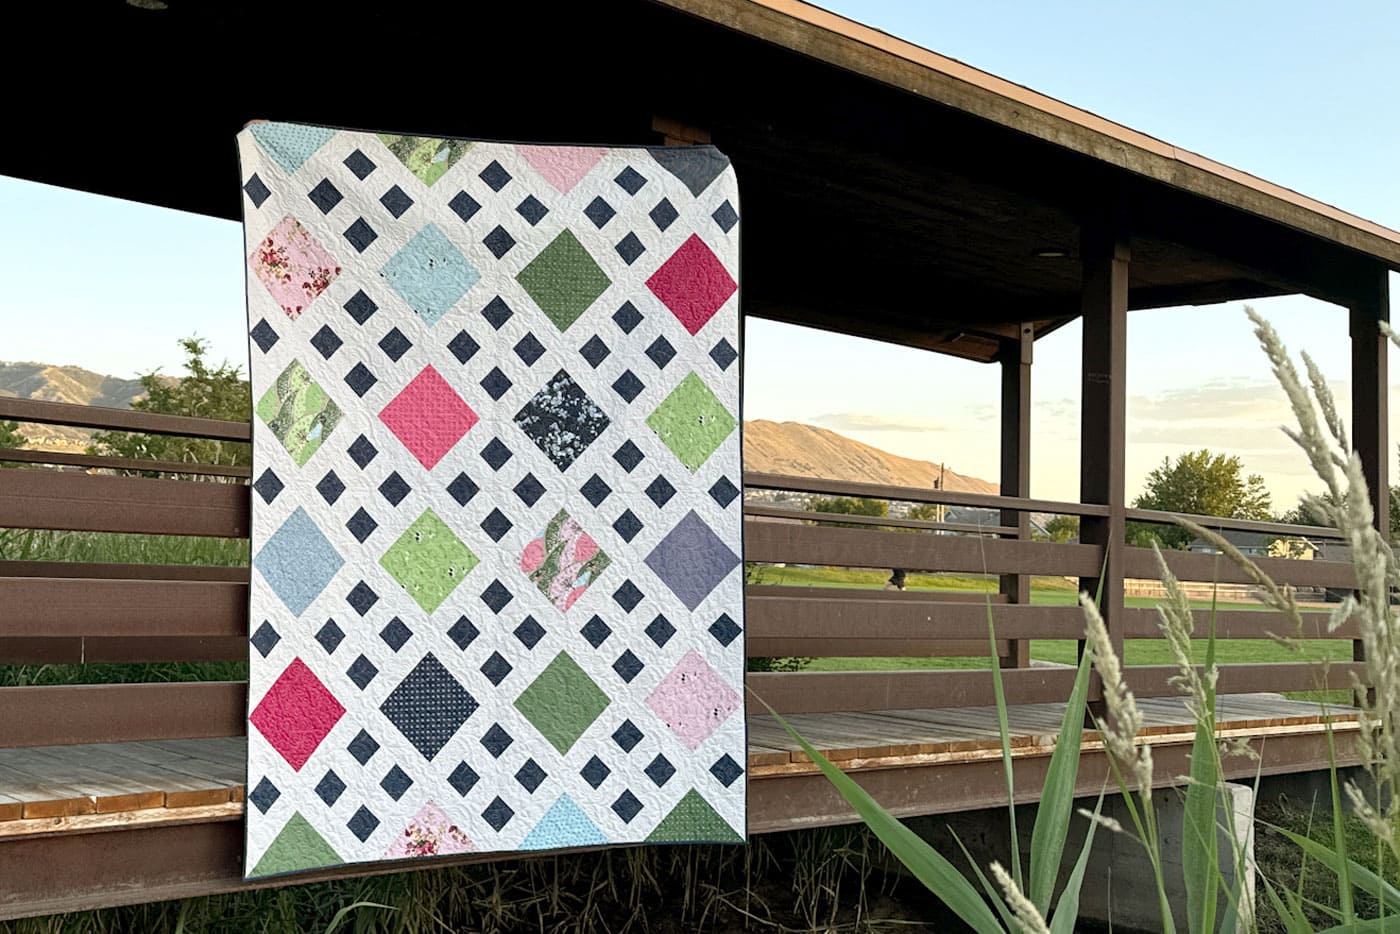
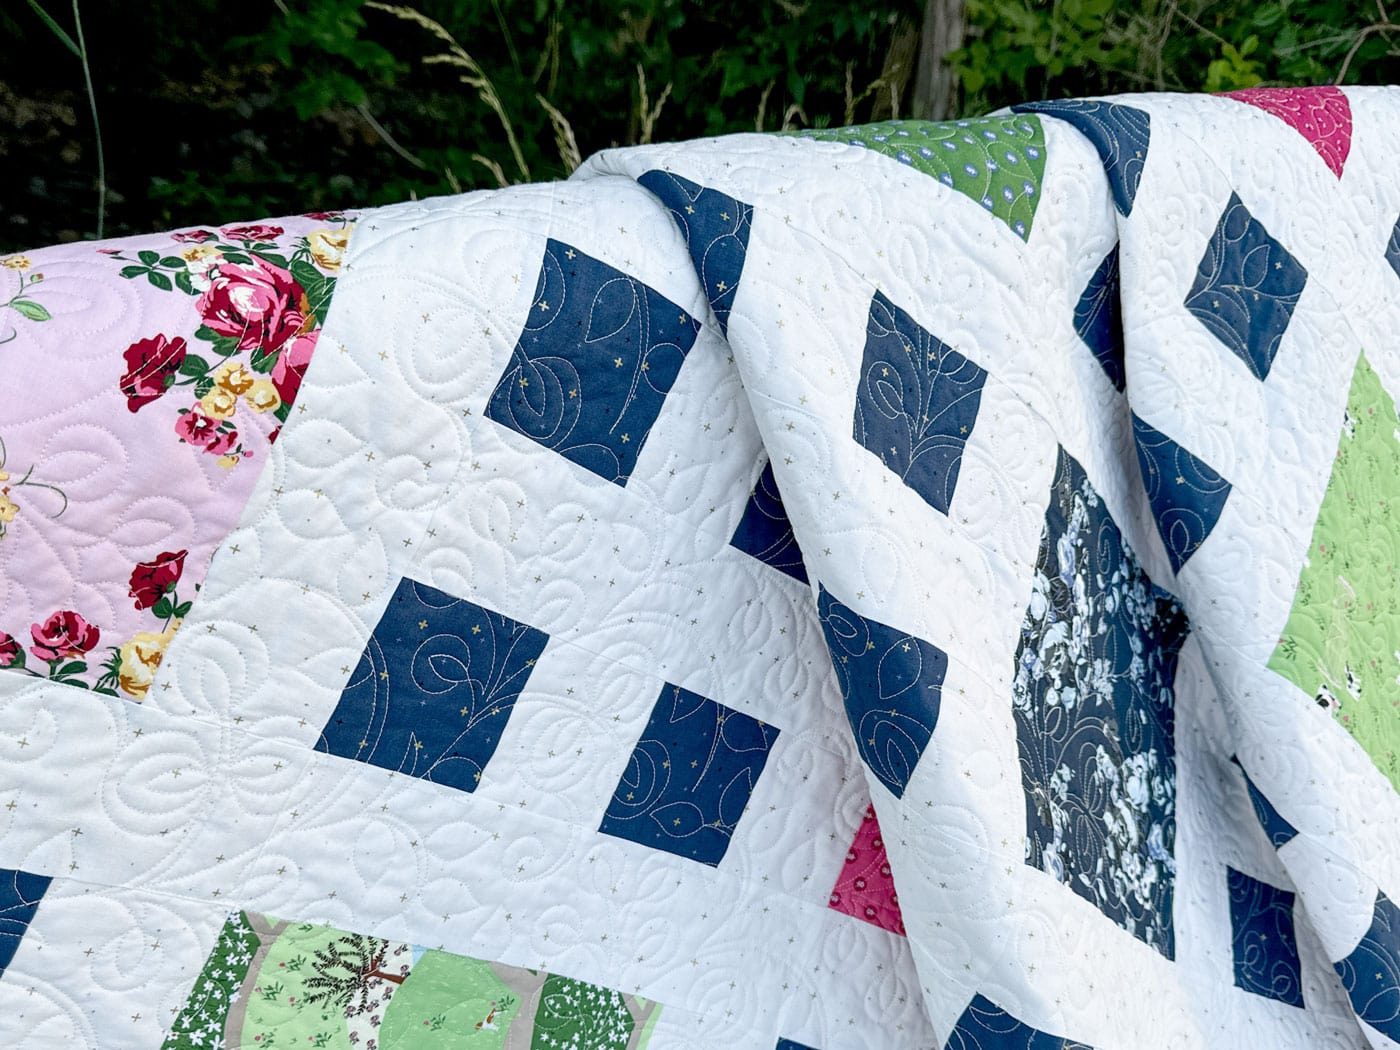
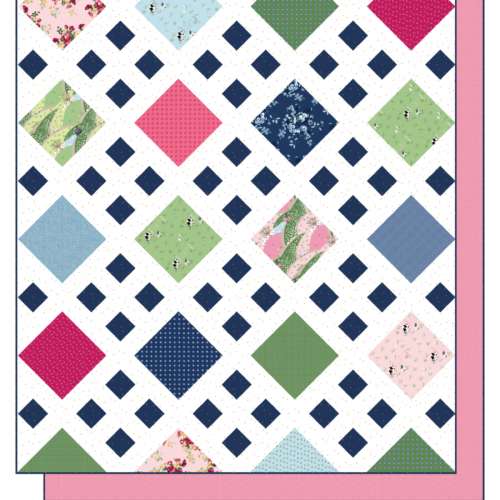
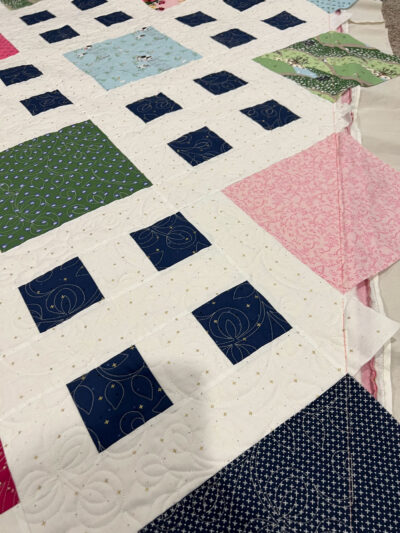
Create a Cheerful Quilt with a 10 inch Precut Stack!
With our free Garden Lattice Quilt Pattern, you can create a cheerful quilt out of a 10” stacker, 1 yard of accent fabric, and a little over 3 yards of background fabric!
A Pre-cut Friendly Lattice Quilt Pattern
Creating a beautiful quilt doesn’t have to be time-consuming or complex. With our Garden Lattice Quilt pattern, you can achieve a stunning design that’s both charming and easy to assemble, thanks to precut fabric.
Whether you’re a beginner or an experienced quilter looking for a quick project, this pattern is perfect for showcasing your favorite fabric collections.
Please welcome our newest site contributor, Chantelle Bailey!
ABOUT THE QUILT
Quilt Details & Supply List
- Size: 67″ x 89″
- One 10″ Precut Pack of Fabric with at least 24 Squares
- 1 Yard Fabric for Accent Squares
- 3 3/8 Fabric Background Fabric
- 5 1/2 yards Backing Fabric
- 5/8 yard Binding Fabric
- Fabric: Tulip Cottage by Riley Blake Designs
Garden Lattice Quilt Instructions
Equipment
supplies
- 24 10" Pre-Cut Squares Main Fabric OR you can use 12 Fat Quarters cut into 10" x 10" pieces
- 1 Yard Fabric for Accent Squares
- 3 3/8 Fabric Background Fabric
- 5 1/2 yards Backing Fabric
- 5/8 yard Binding Fabric
Instructions
- Finished Size 67” x 89”WOF= Width of Fabric
Cutting Instructions
- From the accent squares:Cut 7 strips 3¾" x WOFSubcut 1 strip into 10 squares 3¾" x 3¾"Set the remaining 6 strips of 3¾" x WOF aside.
- From the background fabric:Cut 30 strips 3½" x WOFSubcut 20 of the strips into 3½" x 13" rectangles for a total of 59Subcut 4 of the strips into 3½" x 10" rectangles for a total of 16Set the remaining 6 strips of 3½" x WOF asideCut 1 strips 6¾" x WOFSubcut into 6¾" x 6¾" squares for a total of 5Cut 2 strips 4½" x WOFSubcut into 3¾" x 4½" rectangles for a total of 15Cut 3¾" x 3½" rectangles for a total of 5 from the remaining 4½" strip
- Binding Fabric Cutting InstructionsCut 8 strips 2½” x WOF
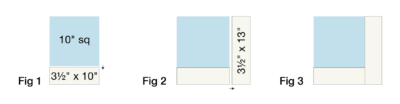
Center Main Block Construction
- You will be creating 16 main blocks. Start by taking a 10" square and sewing it to a 3½" x 10" background strip, Fig 1. Press the seam towards the 10"sq.

- Sew a 3½" x 13" strip to the right side of the unit, Fig 2.
- Press this seam towards the background fabric. Repeat until you have created 16 main blocks, Fig 3. All 16 blocks have the 3½" x 13" strip on the right side.
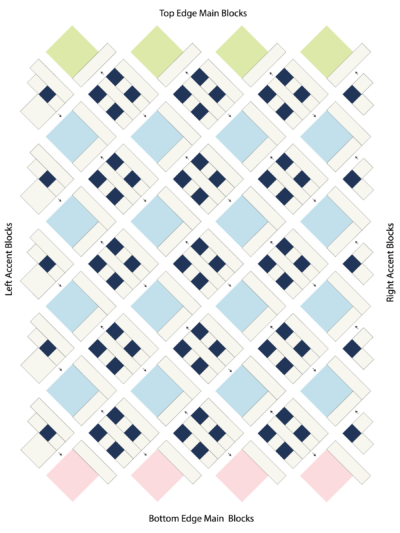
Top Edge Main Block Construction
- Start by sewing the following pieces together, one 10" square one 3 1/2" x 13" background fabric. Fig 4.

- Press seams towards the 10"sq. Repeat to create 4 top edge main blocks.

Bottom Edge Main Block Construction
- Start by sewing the following pieces together, one 10" square one 3 1/2" x 13" background fabric. Fig 6. Press seams towards the 10"sq.

- Repeat to create 4 bottom edge main blocks, Fig 7. Note: the background fabric pieces are intentionally longer than the print fabric.

Center Accent Block Construction
- You will be creating 15 accent blocks. Start by taking 2 strips of accent fabric and 2 strips of background fabric and sewing them together as shown in Fig 8. Press seams towards the dark fabric. Repeat 2 more times.

- Subcut into 3¾” wide units, cut a total of 30 striped units.

- Take 2 striped units 3¾" wide and 2 background strips 3½" x 13" and sew together as shown in Fig 9.

- Press seams toward the background fabric. Repeat to create 15 accent blocks, Fig 10.


Left-side Accent Unit Construction
- Start by sewing the pieces together, as shown in Fig 11. Press seams towards the dark fabric.

- Then sew the 6¾" sq to the left side and the 3½" x 13" strip to the right side as shown, Fig 12.
- Repeat to create 5 left-side accent units, Fig 13.

Right-side Accent Unit Construction
- Start by sewing the following pieces together, as shown in Fig 14. Press seams towards the background fabric.

- Sew the vertical pieces together first. Repeat to create 5 right-side accent units, Fig 15.

Quilt Top Assembly Instructions
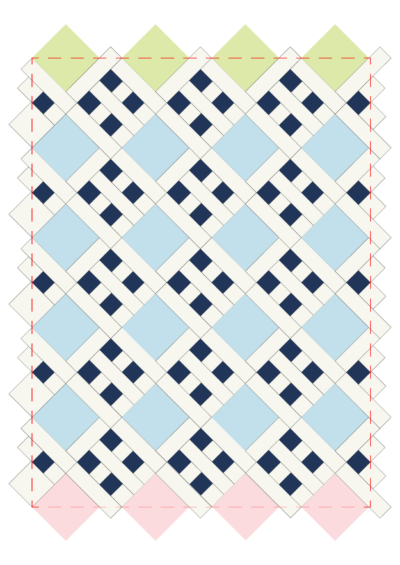
- Lay out your quilt blocks. Start by assembling each column. Starting at the bottom left corner of the quilt, sew each block in the left column together. Continue with all the columns. Press your seams in the direction of the arrows.

- Starting with the left column, sew five finished columns together. Press each seam as you go. Start from the right and sew the remaining four finished columns together. Finally, sew the two halves together.

- Once the quilt top is sewn together, stitch around the perimeter of your quilt top with a ¼" seam allowance from your points.

- This will keep the edges of your quilt from stretching. You can trim your quilt top before or after the quilting is finished. Note: I prefer to trim after the top is quilted.

Backing
- Cut the 5½ yards of backing fabric into two identical 2¾ yard (99") pieces. Trim selvage edge off one side of each piece and sew together on long cut edges using a ½" seam allowance. Press seam allowance open. This will create a back that is approximately 84" x 99".
About the Designer

Chantelle is an avid sewist, quilter, and pattern designer. She taught three of her children to sew and quilt. Each of them (even her 16 year old boy!) have completed quilts and entered them in local fairs and competitions. Chantelle has also taught youth quilting and sewing classes for nearly ten years, and is always looking for opportunities to share her knowledge and experience with the community.
Also by Chantelle


Sparkling Blossoms Quilt Pattern

I learned a lot about how to put a quilt together a different way.
Thank you for your and other designers’ free patterns. I have several Kaffe Fassett layer cakes and using my favorite will be perfect in the Lattice quilt pattern. Now I can hardly wait to get started! 🪡🧵
Beautiful quilts and thank you for the beautiful free pattern.
This looks like an easy pattern and fun to make. I happen to have a layer cake that has been begging to be sewn into a quilt. This may just be what I’m looking for! Thank you, Chantelle, for the free pattern.