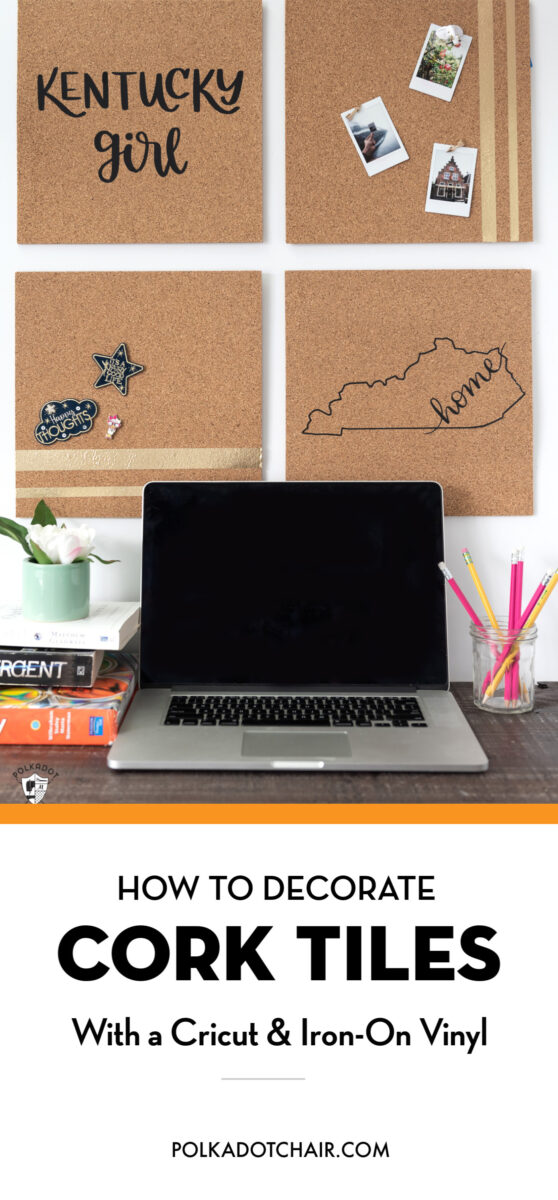
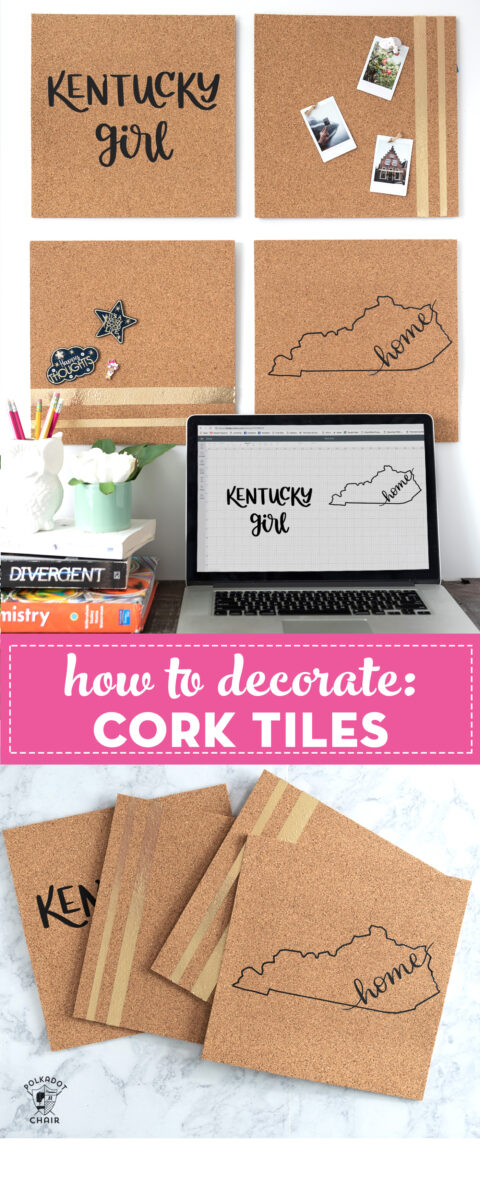
DIY Cork Board Made with Iron On Vinyl
Did you know you can apply Iron-On Vinyl to Cork Board? Yes, you can! Use your Cricut Machine and some Iron-On to make some super cute DIY Cork Boards! If you don’t have a Cricut you can still decorate your cork boards with Iron On Vinyl, keep reading to find out how.
This post contains affiliate links
My youngest daughter is headed off to college this summer, and we’ve already started DIY’ing some projects for her dorm room. I’m still waiting for her to tell me what colors she likes in a dorm quilt (I’ll make her one, of course), so in the meantime, I thought I’d tackle some fun Dorm Room DIYs to add to her dorm decor.
One thing I’ve learned from moving my oldest daughter from dorm to dorm is that you need lightweight decor items that are EASY to move. I’ve also noticed that most college apartments come with beds and dressers but little to no storage for other things (like photos and papers).
My oldest always loved having things in her dorm that reminded her of “home,” like a wall of postcards that she’d collected from places at home and on her travels. Since my kids attend college far from home, I thought I’d create a fun reminder of where they came from to hang on their wall.
DIY Cork Board Made with Cricut Iron-On Vinyl:
I’ve wanted to use Cricut Iron-On Vinyl on cork for a while now and thought it would be fun to try it out on a dorm room project.

Supplies:
Cricut Machine; Explore or later
Everyday Iron On Vinyl
Foil Iron On Vinyl
12″ x 12″ Cork Tiles
EasyPress Machine & Mat
It only took me 3 days to make another video! This time a “how to” video showing you how to apply heat transfer vinyl to cork. I swear, at some point, this video thing gets easier, right? I’m guessing that point is at about 20 videos, not 4 *wink*.
If you’d like to see how to apply Iron ON to a cork board, you can just watch the video below. (You can also view it on YouTube HERE). I’ve also outlined the steps below to help you out.
Step One: Pick the Image you want in Cricut Design Space
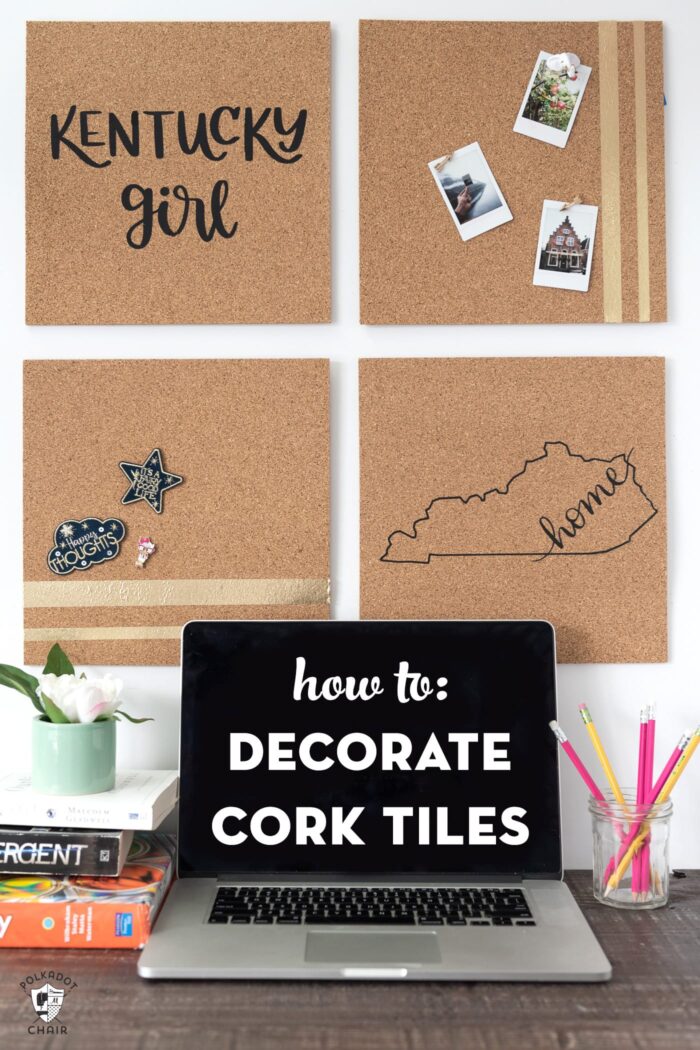
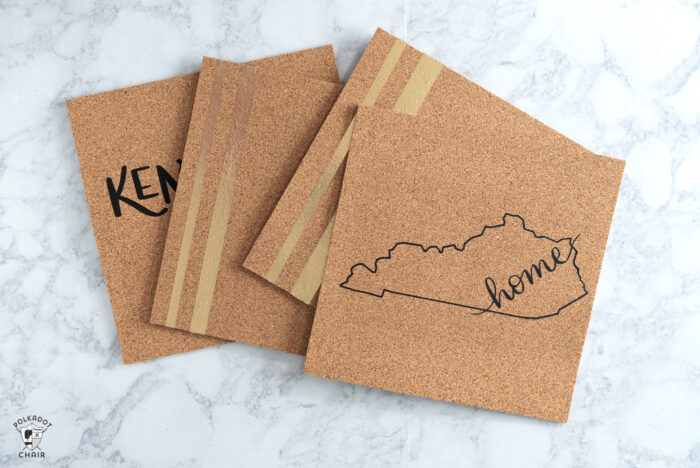
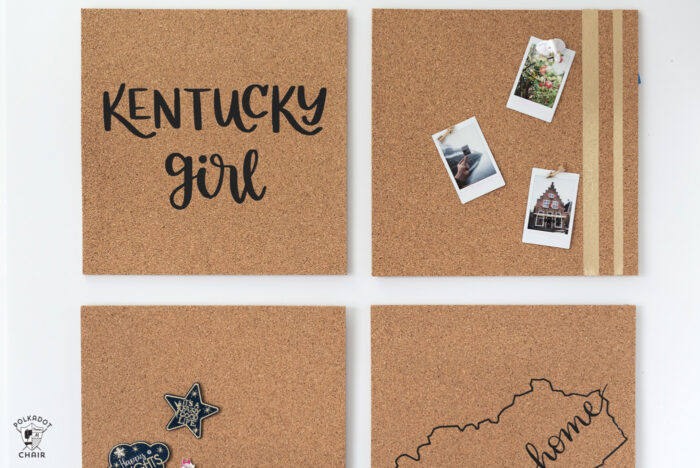
As I was searching Cricut Design Library I found so many cute “State” images. There is a set of images/files for each of the 50 states! To find your state just type the name into the search box. I picked my two favorite “Kentucky” images for my cork tiles. If you want to make the Kentucky cork boards, you can find my file in Design Space HERE.
There is also a FREE Kentucky State Silhouette shape available for download on the Cricut Downloads Page of this site.
My tiles are 12″ x 12″ so I cut my images to 11″ wide.
Step Two: Cut out the Image
Load the file you want into Design Space and click MAKE IT. Make sure you select “Mirror image” for iron on. Next, select your materials from the list. Then load the vinyl onto the mat, load the mat in the machine and click the Cricut button.
Let the machine cut out the image. When it’s done, remove it from the machine. You now need to “weed” the extra vinyl from the image. If you’re cutting out more than one image like I am, you’ll want to cut those two pieces apart with scissors first.
Step Three: Use the EasyPress to Apply the Vinyl
I looked up the settings for cork and Everyday Iron On. It’s 315 degrees for 15 seconds. I found that 15 seconds was not enough and ended up doing 30 seconds. I also heated up the back of the tiles (since they were thin) to make sure the iron on was really stuck.
After you’ve used the EasyPress let the project cool to the touch then peel away the plastic backing. Make sure before you peel that it’s well attached. I found the cork to be a bit tricky to work with. Some spots took a second pass with the EasyPress.
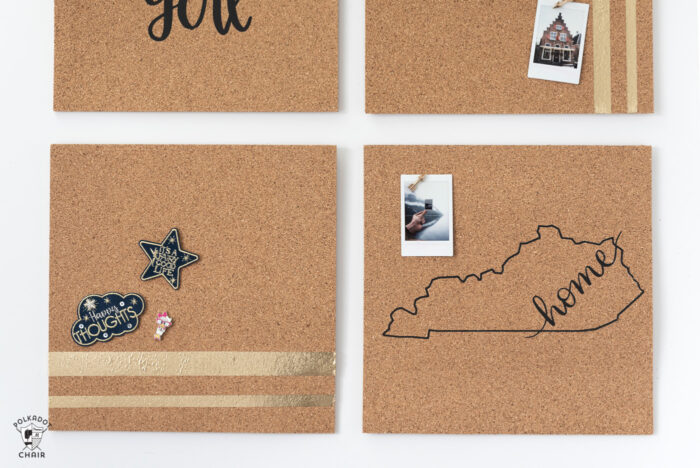
To Add Stripes to a Cork Tile:
In addition to adding images that you cut out with a Cricut to your tiles, you can also just cut the Iron On with scissors (or a paper trimmer) to decorate your tiles. I cut two pieces of vinyl 1/2″ to 1″ wide and adhered them to the tiles the same way as above.
I only added 2 stripes but you could add more if you’d like!
To Attach to the Wall:
If you’re attaching these to a dorm room wall, you’ll need to use command hooks. However, before you attach the command hooks, I recommend applying a piece of Scotch Hard To Stick Surface tape to the back of the tile. The tape will stick to the tile, and then you can stick the command hook to the smooth side of your tape. (Don’t tape the wall!) If you want your tiles to be a bit “beefier”, add a piece of foam core to the back. You can also adhere all 4 tiles to one piece of foam core and then hang that on the wall.
Tip: If your tiles have warped a bit from the heat of the EasyPress just put them under a stack of books for a little while. It will flatten them back out.
That’s it! You can even use a bunch of tiles to create an entire corkboard wall!
More Cricut Projects You May Like:
Sewing Room SVG Files & Craft Room Decor Ideas


Hello, thank you for your detailed instructions. I am a teacher and would like to be able to remove the vinyl once I am ready to teach a new subject. Do you know if the vinyl will remove without leaving remnants or an outline?