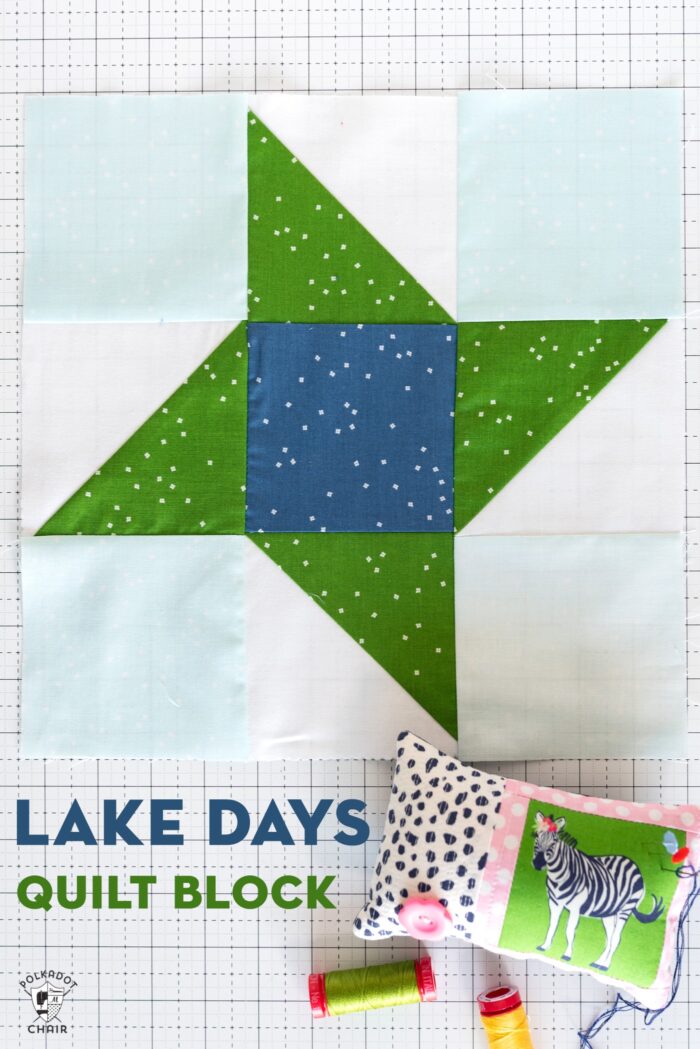
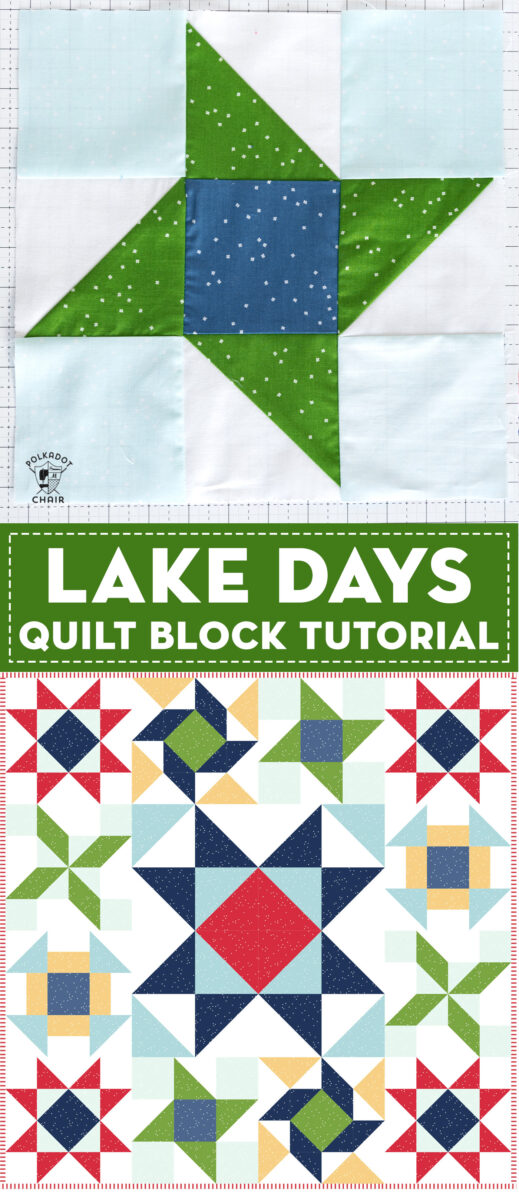
The Lake Days Quilt Block; Block Two in the Just For Fun Quilt Block Series
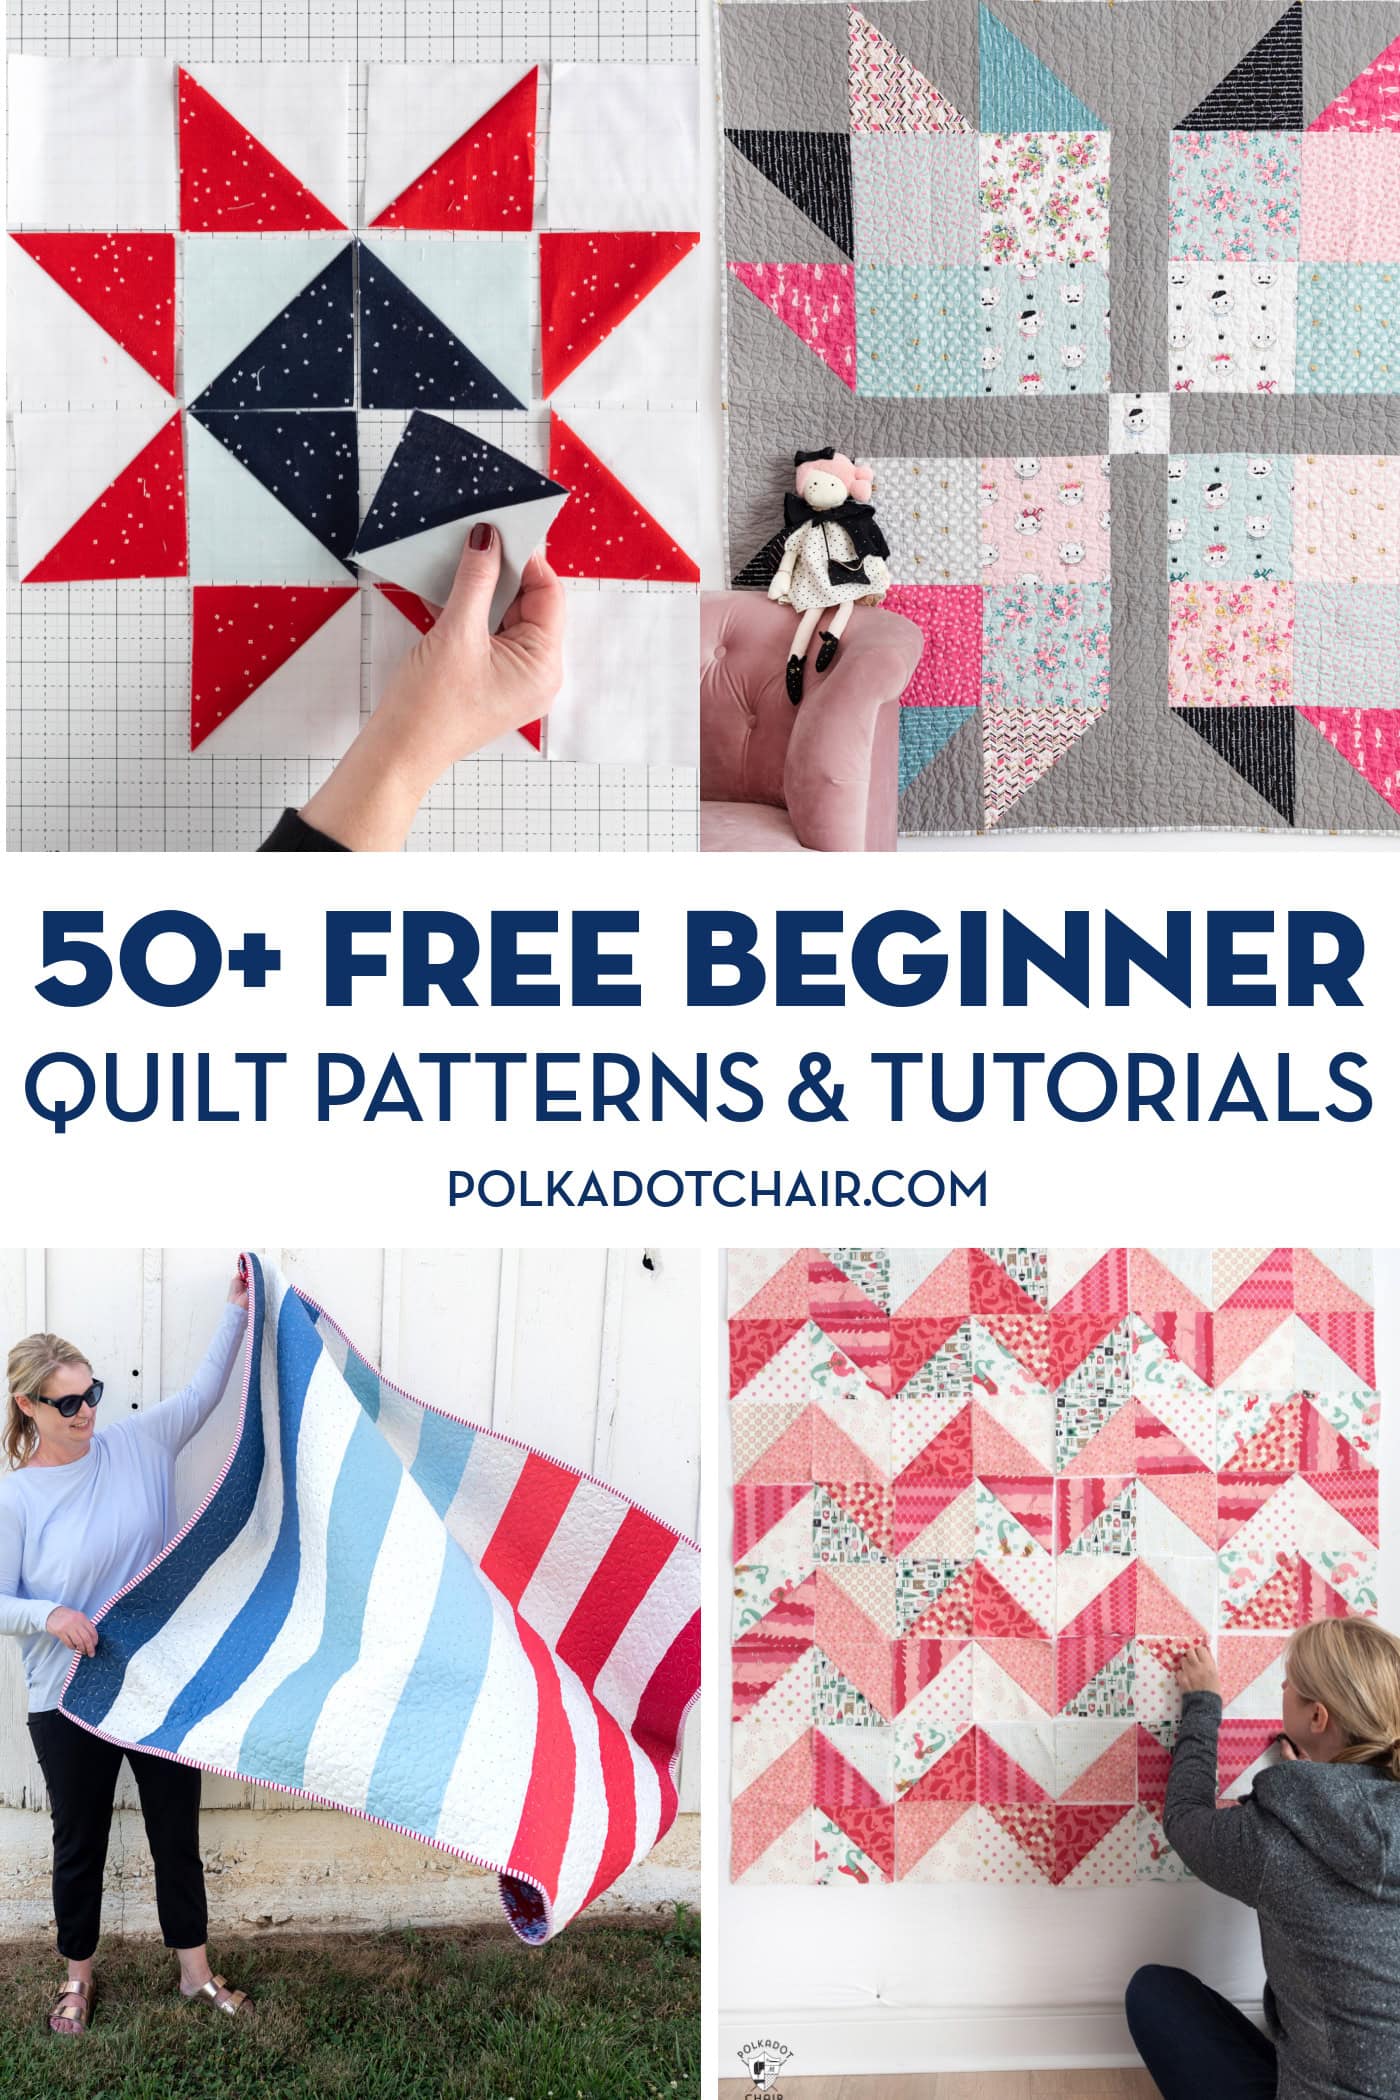
It’s quilt block day! I’m so excited to be sharing the 2nd quilt block tutorial in our Just For Fun Quilt Along with you. I hope that you will join us this year by making one quilt block a month. At the end of the year, you’ll have a completed project. Even if you’re a beginning quilter, I hope you’ll join us!
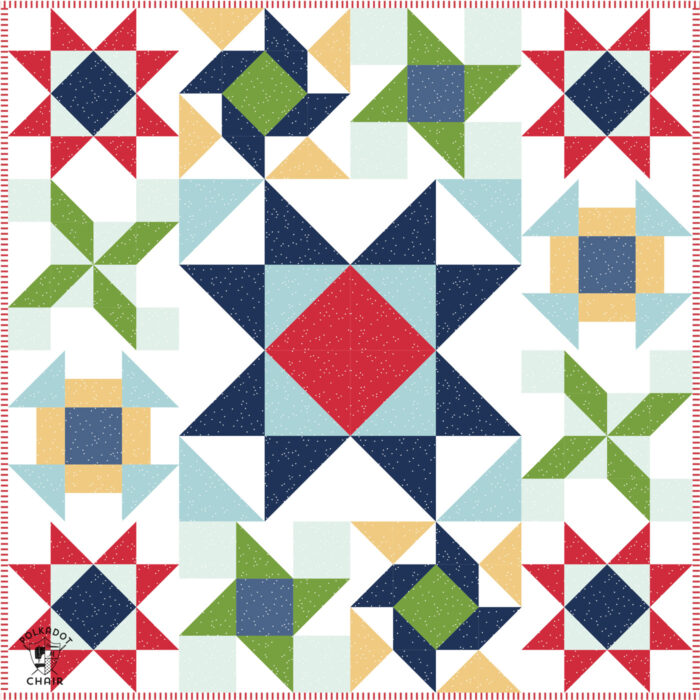
Are you ready for the next block in our quilt? If you’re new here, this is a block of the month program that is offered to Polka Dot Chair readers. The idea is that you make one block a month all year and at the end of the year you’ve got a completed quilt top. There are only 6 blocks in this series, but the blocks are repeated in the quilt. If you want to make a “block a month” just make one of the two blocks each month. You can also make them all today! I’m sure many of you will do that!!!
The Just For Fun Quilt Block Series
I named the quilt in this series “Just for Fun” because all of the blocks are inspired by things that I love to do for fun. I also wanted this just to be FUN. As a blogger, I find myself working on deadlines a lot and getting caught up on “work” stuff. I wanted to do something “just for fun”. Allowing myself to take a break from algorithms, blog analytics & Word Press programming.
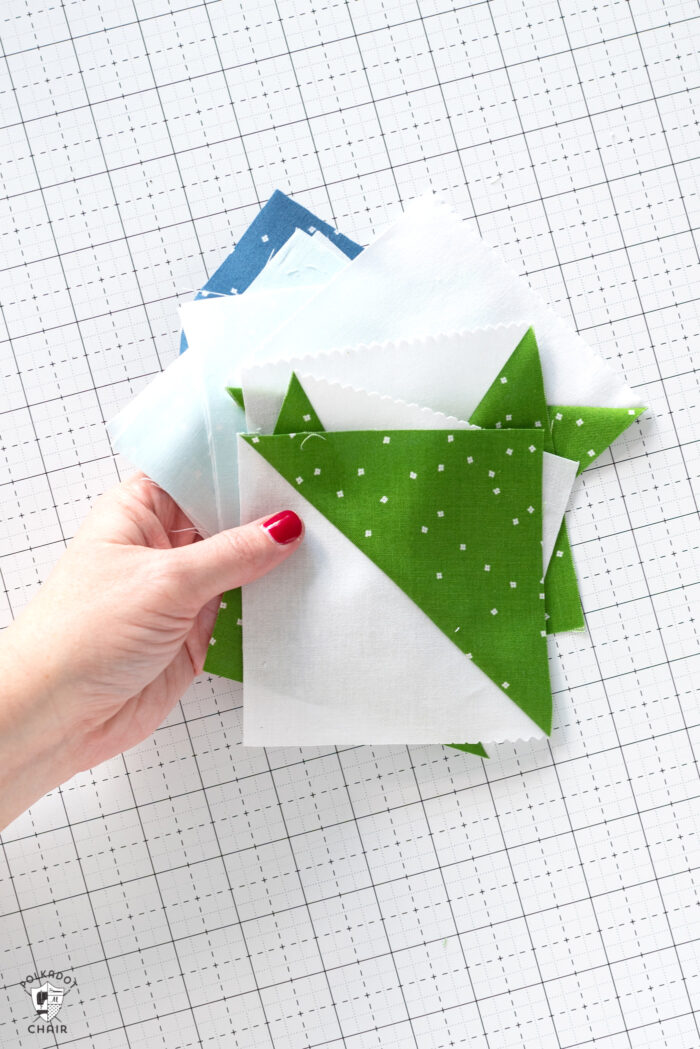
The first block in the series was called “Under the Stars”, which is inspired by my love of summer evenings. The second block in our series is called “Lake Days” because I love long summer days at the lake. We have a boat at Lake Cumberland and some of my favorite family memories have happened on that lake. The layout of the block reminds me of a boat propeller and the blues and greens in the block remind me of lake life.
UPDATE:
Now that the Quilt Along is over, you can purchase a PDF with all of the Quilt Block in ONE document. It includes all of the blocks shared in the series in an “easy to print” format.
- All of the Blocks in the Just for Fun Quilt Along:
- Block One: Under the Stars
- Block Two: Lake Days
- Block 3: Sunshine & Stars
- Block 4: Salt and Sand
- Block 5: Bike Ride
- Block 6: Road Trip
Lake Days Quilt Block Pattern:
There is a Facebook Group set up for the Quilt Along, called Quilt Fun (Find it HERE). It’s actually for all things “quilty”. Feel free to share your progress and projects there. I just ask that if you make something with another designers pattern that you don’t post external links in the group. Also if you don’t answer the question when joining the group you won’t be approved. So answer it! *wink*
You can also sign up for my weekly newsletter here. Which contains loads of free tutorials and projects. It’s sent to you each Sunday evening and is offered at no cost. It’s a great way to make sure you don’t miss any new projects (including the blocks in this series).
[optin-monster-shortcode id=”vrbmhxkz5qwzgg51″]
Supplies (for the ENTIRE Quilt) :
White Fabric: 1 1/2 Yards
Blossom Print Fabric Colors:
Red: 1/2 Yard
Bleached Denim: 1/2 Yard – this is a color, not a fabric type
Navy: 1/2 Yard
Holly: 1/4 Yard
Denim: 1/4 Yard – this is a color, not a fabric type
Aqua: 3/4 Yard
Honey: 1/2 Yard
Cutting directions for one block. You need to make two blocks for the quilt.
From Bleached Denim Fabric (that’s a color, not a fabric type) cut:
4 Pieces each 4 1/2″ x 4 1/2″
From Denim Color Fabric (again a color name, not a fabric type) cut:
1 piece 4 1/2″ x 4 1/2″
From White Fabric Cut:
2 pieces 5″ x 5″
From Holly Fabric Cut:
2 pieces 5″ x 5″
Step One Create Half Square Triangles:
Begin by creating 4 Half Square Triangles from your Holly and White fabric pieces. If you need help making a Half Square Triangle you can see a detailed tutorial for it HERE. Use your 5″ x 5″ pieces.
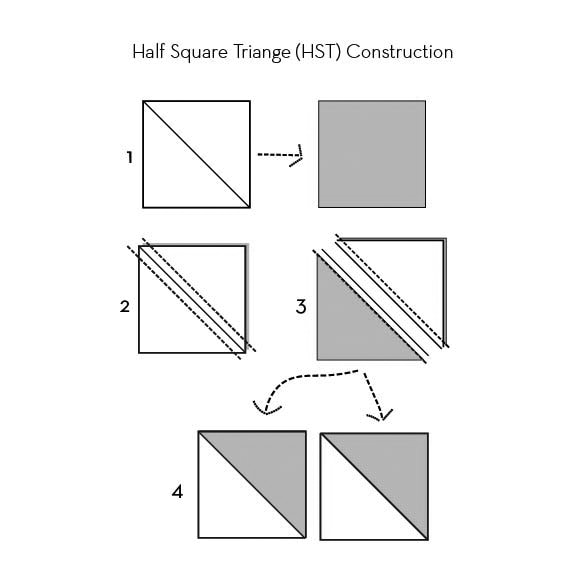
After you’ve sewn the HST’s, trim and square up each Half Square Triangle (HST) to 4 1/2″ x 4 1/2″.
Step Two Assemble the Block:
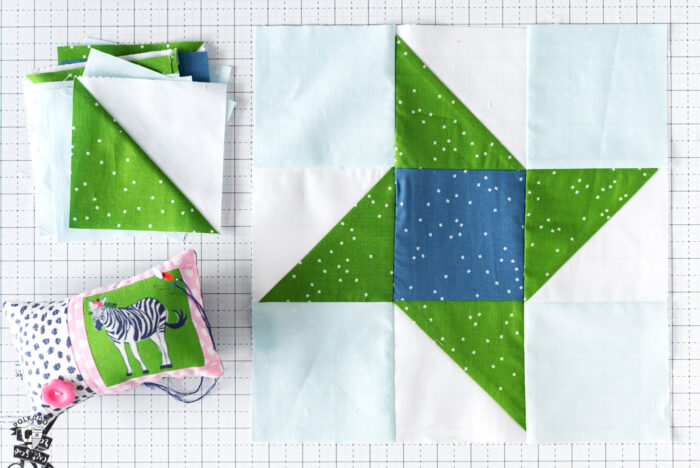
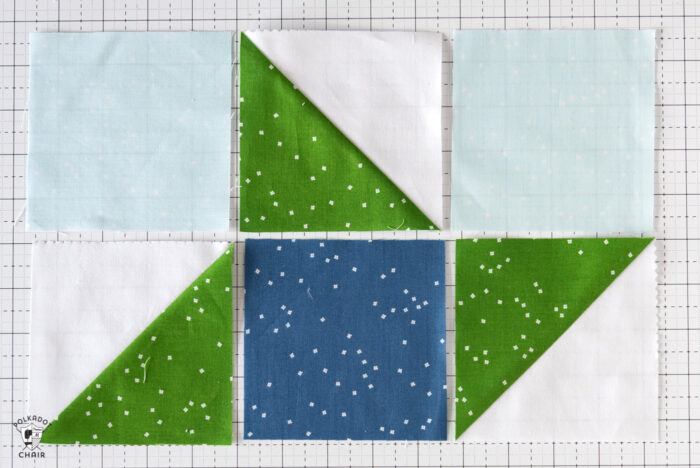
This block is made from 9 squares. It contains 3 rows with 3 squares in each row. Four of the squares are Half Square Triangles and five of the squares are simple squares.
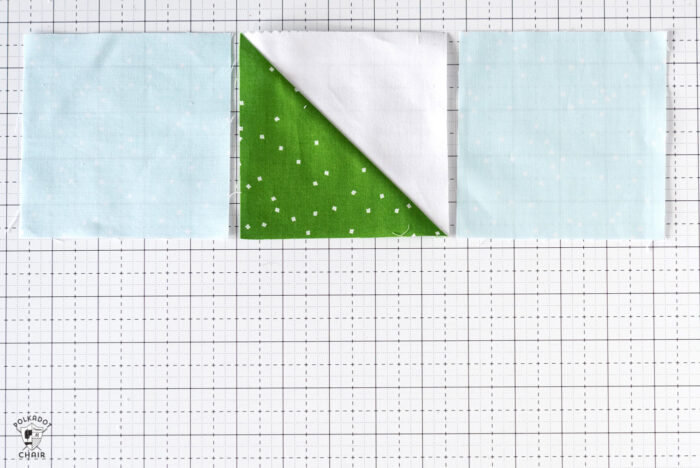
The photo above gives you the layout for row 1 of the block. Stitch the squares of row one together. Then stitch row, 2 & 3.
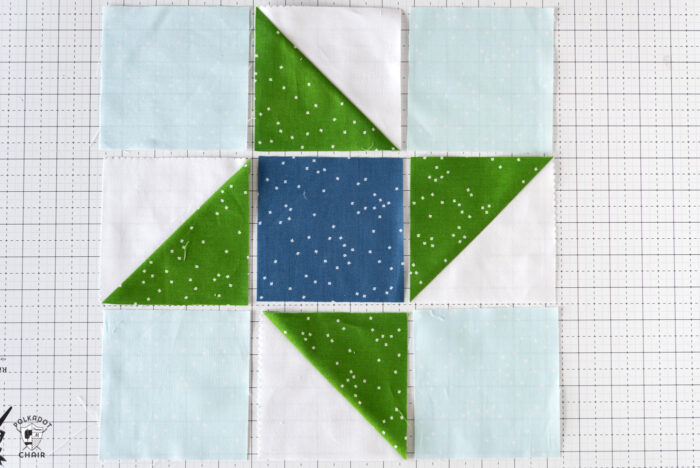
Normally I like to press the seams of my even rows to the right and odd rows to the left. However, given the layout of the block, I recommend another pressing method.
Press the seams of row 1 and 3 to the outside edges. Then press the seams of row two to the center of the row. This allows the blocks rows to “nest” with each other when sewn together. It also reduces the number of “pressed” edges on the half square triangle blocks.
Press the blocks then stitch row 1 to row 2 then row 3 to row 2. Give the Quilt Block a good pressing and you’re done!
As a reminder, here are the other posts in this series.
As of TODAY, this list is updated as of today’s date but if you’re visiting at a later date, there will be more blocks posted. To see those posts click HERE.
Just for Fun Quilt Block of the Month Series

I too cannot print 2nd block in series, I did not see a PDF for this block. I had no trouble with the first one and would like to continue I love the simplicity and your colors. thank you
Don’t hit print in your browser. Hit the “Print Friendly” button at the bottom of the post. It’s not a PDF. It just opens in a pop-up window then you print from there.
Also, everyone that has had issues has yahoo email addresses. My guess is that your browser has an extension causing problems. Yahoo has very aggressive blocking software. Try another browser or hit command shift R to force a fresh loading of the page.
When I click PRINT FRIENDLY for the Lake Block, a whole bunch of large dark black figures fill up several pages among the pattern pages. Any idea what is going on?
I’ve printed mine on 3 different computers and with my iphone and ipad. It comes out fine. My guess is that you have some type of pop up blocker installed that is blocking the page loading. You may also not be waiting long enough for the page to load. What browser are you using? I am using chrome and safari and it’s loading and printing fine. I don’t run Print Friendly it’s a 3rd party service, so that’s as much as I know. I’m sorry.
Could you post a picture of the backside of your block so that I can understand what you mean about the pressing? Thank you.
I will post back of block on Facebook group for you.
I am trying to print #2 block of the month Just For , and when I press print friendly it doesn’t print. I had no problem with #1 block 1 pattern.
It’s working for me and a few others. Just try it again. Sometimes it takes some time to load.