Cricut EasyPress Review & DIY Halloween T-Shirts
Since my kids were small, I’ve loved making holiday-themed t-shirts for them. This year was no exception. I designed a few different Halloween t-shirts for the kids (and myself) and used my new Cricut EasyPress to create them. Keep reading to find out what I think about the new Cricut EasyPress and a few helpful tips to help you learn how to use it. I work as a Brand Ambassador for Cricut.
I tend to go a little “creative crazy” at Halloween. Some people are Christmas people; I’m a Halloween person (the fun, colorful, spooky Halloween, not the gory, macabre one). My kids think I’m crazy, but over the years I, they have learned to appreciate the craziness, as it comes with its fair share of baked goods and Halloween parties *wink*.

Why You Need an EasyPress
Over the past five years, I’ve created Halloween t-shirts for myself and my kids. Usually, I make them with one of two methods: 1) Iron On or 2) Freezer Paper Stencil. I used the freezer paper stencil method for the last few years, mostly because I could not get the iron to stick on my t-shirts!
And if I did get them to stick, they came off after one wash. Once, one even came off the shirt while my daughter pulled it over her head *augh*.
Well, it turns out the method I was using to apply the iron-on was all wrong. There is a bit of a science to it. Manufactured iron-on material needs to be set at a specific heat for a specific amount of time. The heat and the time depend on which material you’re using and what you’re applying it to.

Most people who were “serious” about creating iron-on items purchased a Heat Press. I looked into getting a heat press last year. They are moderately priced, but honestly, the price was not what held me up. It was the size. They are BIG, and they are hot while they are being used.
My sewing/craft room is above our garage and, in the summer, is not as cool as the rest of the house. The thought of adding a giant heating element to that room was not appealing to me. Plus, I didn’t have anywhere to put it and didn’t think I’d use it enough to justify leaving it out on a table.
So, I kind of gave up on iron-on crafts.
Cricut EasyPress Review
Last summer, Cricut told me about a new product they were releasing (the EasyPress and asked me if I would try it out for them to see what I thought.
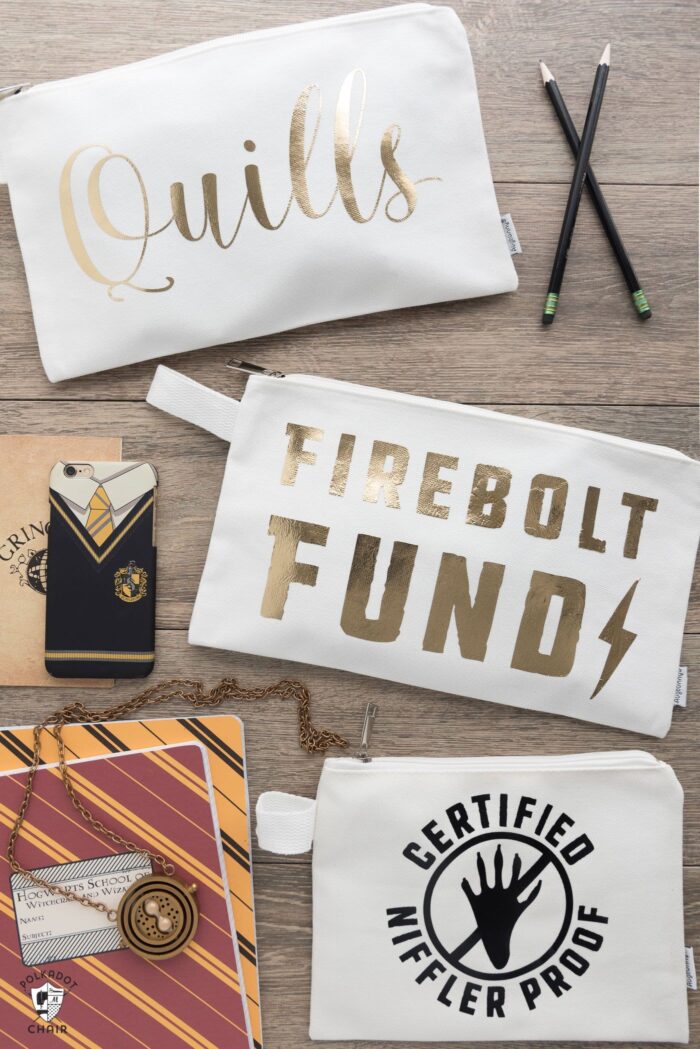
I did. I actually used it to create these Harry Potter-inspired pencil pouches last summer, and I just couldn’t tell you at the time that’s what I was using it for :).
The EasyPress turned out to be perfect for that project, and I was thrilled that the iron-on material stuck down the first time I tried it.
Since then, I’ve been playing with the machine quite a bit. I even invited a group of friends over to make Halloween t-shirts for their kids with it. I wanted to see how other people would use it and if they liked how it worked (which they did).
Why is the EasyPress Better Than an Iron?
An iron is designed to iron clothing. Most are equipped with the option for steam, and the shape is well-suited for clothing. However, they normally don’t have an even distribution of heat through the iron.
The graphic below shows the temperature variation of using an iron vs. the EasyPress.
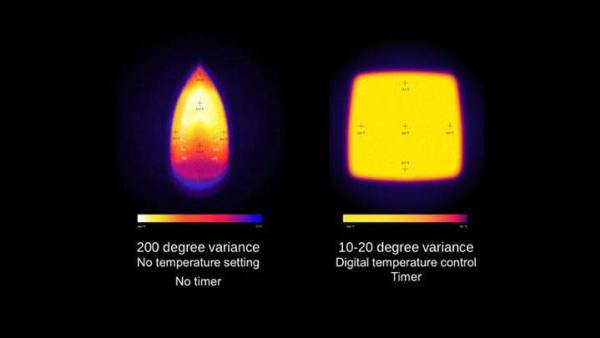
If you are trying to adhere something to fabric (or other material) and need an even heat, that iron is not your best choice. The temperature variation can be as much as 200 degrees.
For the most part, this is why iron-on (or heat transfer vinyl) has been done in the past with large heat presses.
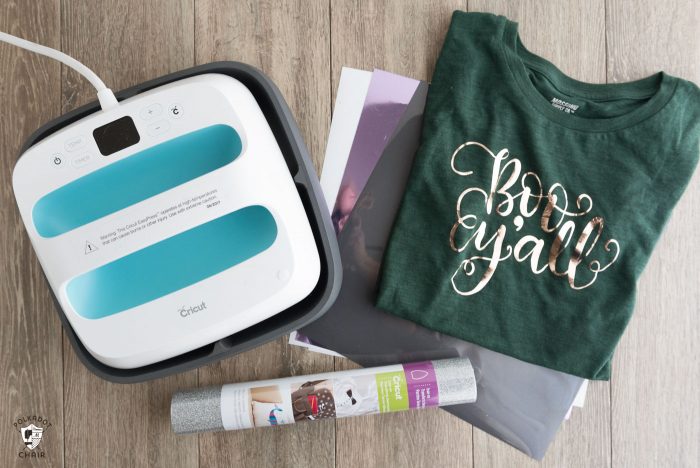
DIY Halloween Shirt Supplies
- Cricut Maker 3 (you can get great deals on machine bundles on Cricut.com)
- Roll Holder for Maker 3
- Cricut EasyPress (I like the large size the best): Make sure you get the EasyPress mat as well.
- Cricut Weeding Tools: (I use the small hook tool ALL the time, making weeding vinyl so much easier).
- Cricut BrightPad: A cordless, flat, bright lightbox. I use it to weed Cricut vinyl and use it all the time to trace applique shapes for sewing & quilting.
- Cricut Iron On Vinyl
- Cricut Permanent Vinyl
How to Make the Halloween Tees
There are three different styles of Halloween shirts that I’ll show you how to make. They are listed below.
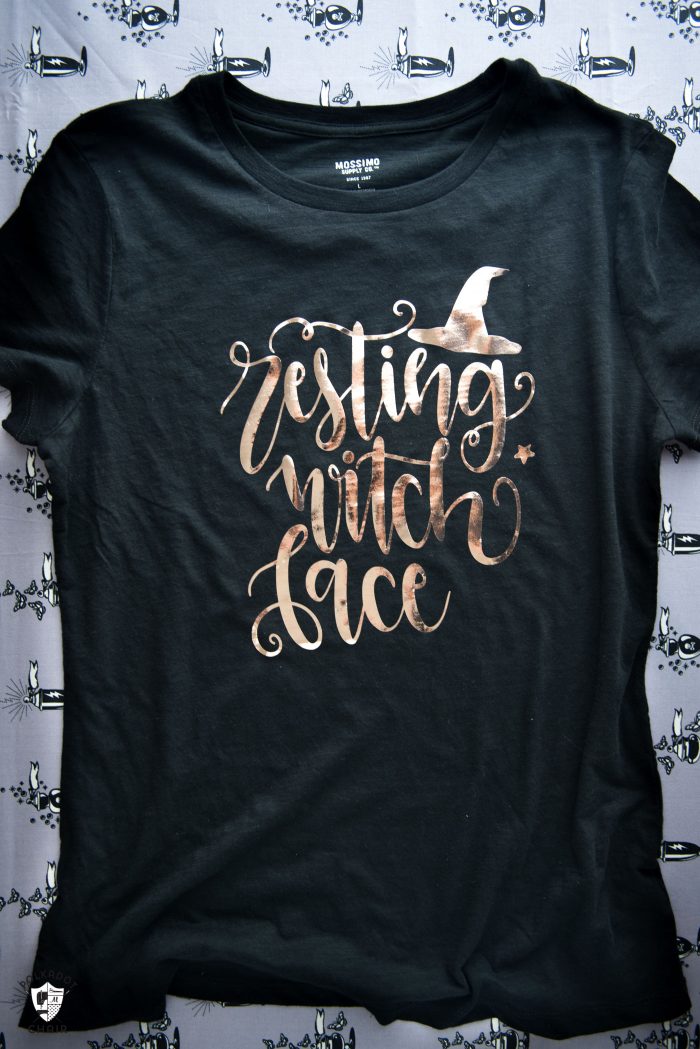
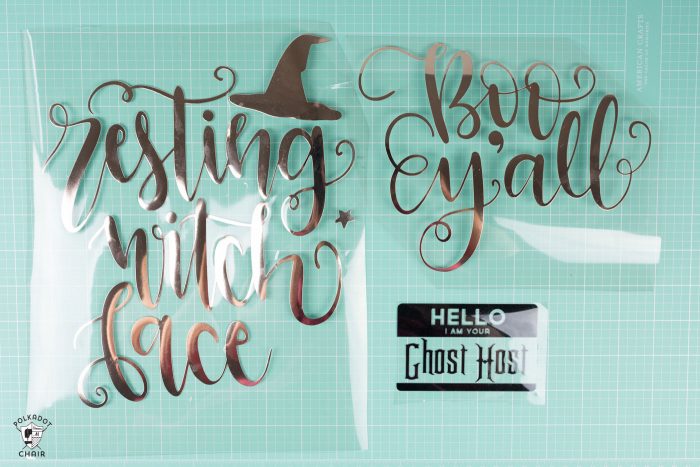
- Resting Witch Face T-Shirt
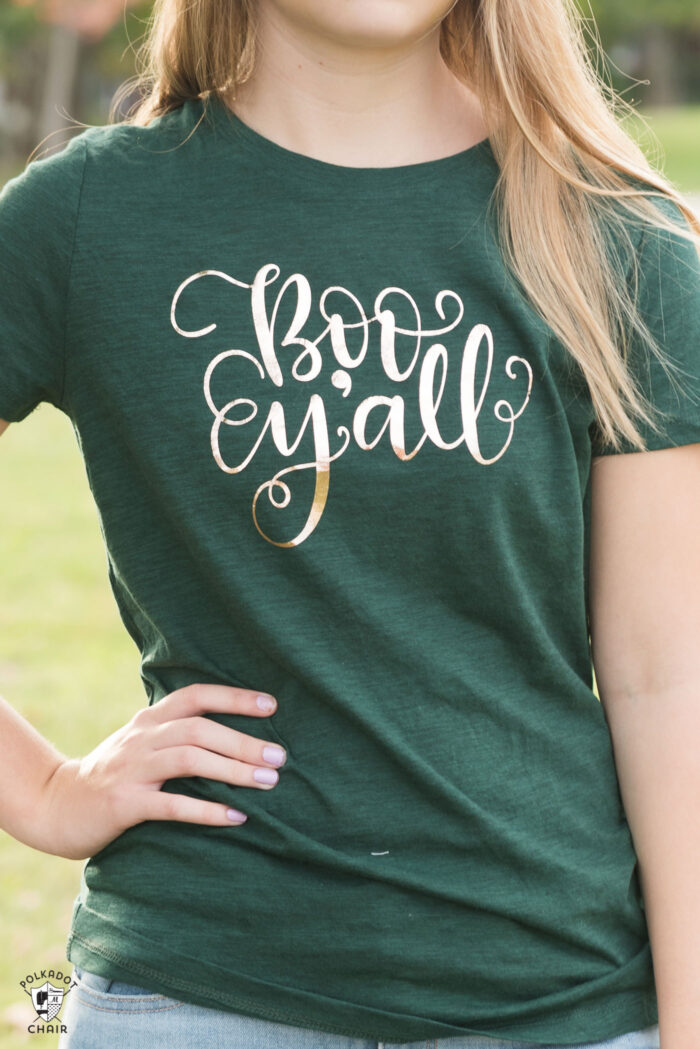
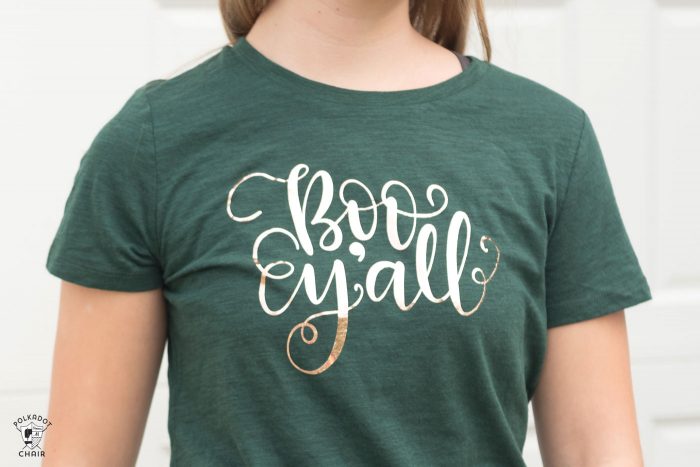
- Boo Y’all T-Shirt
- Disney Haunted Mansion-Inspired Halloween Shirts
Note: The Resting Witch Face and Boo Y’All SVG files are available exclusively in Cricut Design Space.
I spent most of the last weekend making LOADS of Halloween t-shirts. I made one for myself, my husband, and my kids. I will show you how I did it, but I thought you might like to see what I made first.
The “Resting Witch Face” shirt is for me. My kids always tease me about it; I’m not naturally a “smiley” person. I told them I couldn’t help it, “It’s just my face.” I figured I’d embrace it and fully plan on wearing this t-shirt this month. The material on the shirt is the Cricut Rose Gold Foil Iron-on, isn’t it dreamy???
I also used it to create this shirt for my daughter (both images are in the Cricut Design Space).
Haunted Mansion Inspired DIY Disney Halloween Shirts
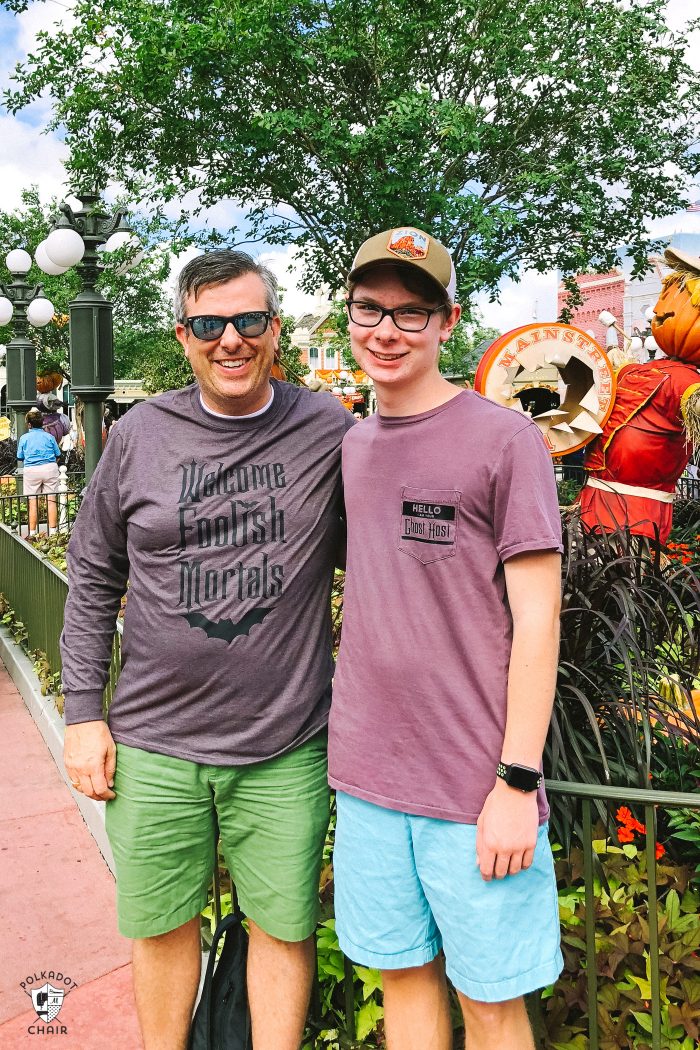
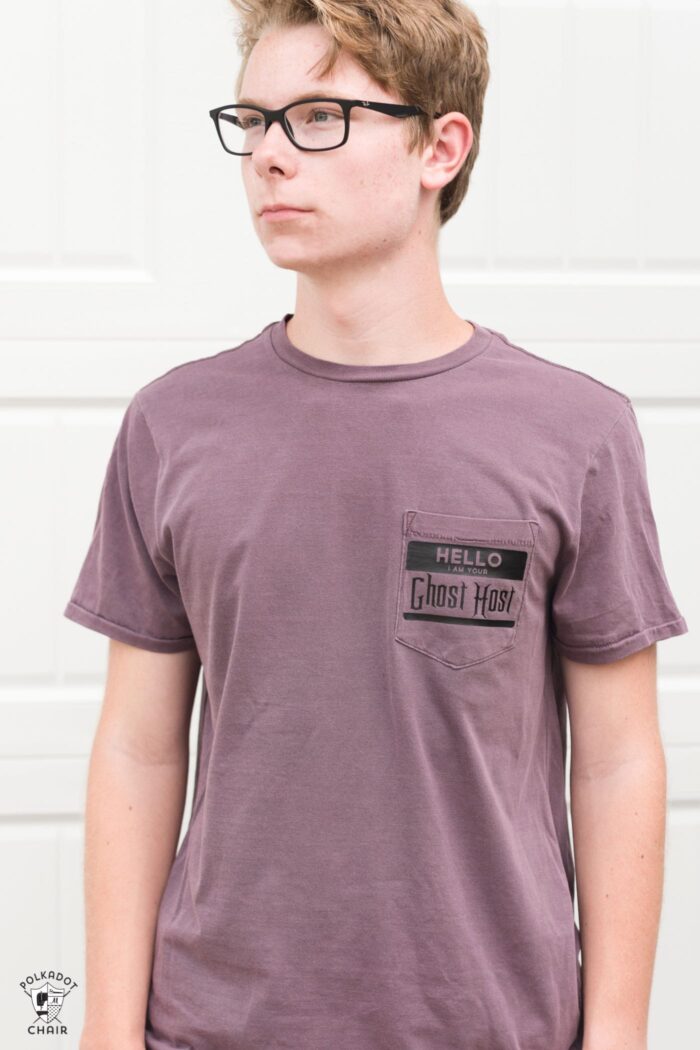
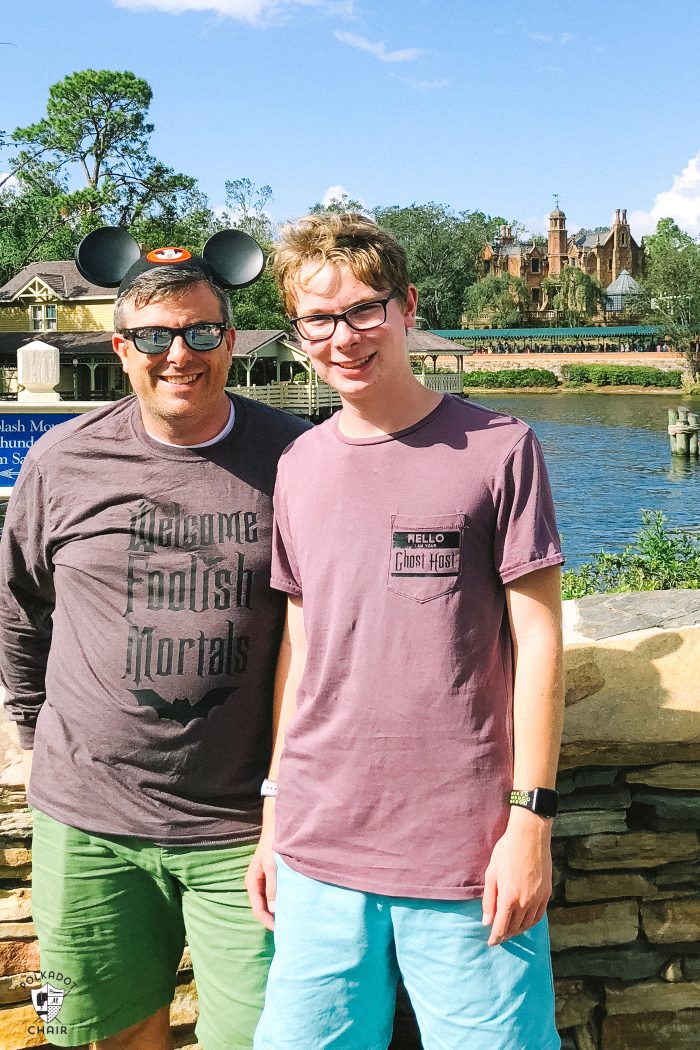
My husband and son are headed to Disney World recently. I didn’t go; I’m so jealous! Disney World in October is one of my all-time favorite trips! I can’t believe that when I asked my teenage son if I could make him a Haunted Mansion-inspired t-shirt, he said “Yes.” Then I asked him if he would actually wear it, and he said “yes” too.
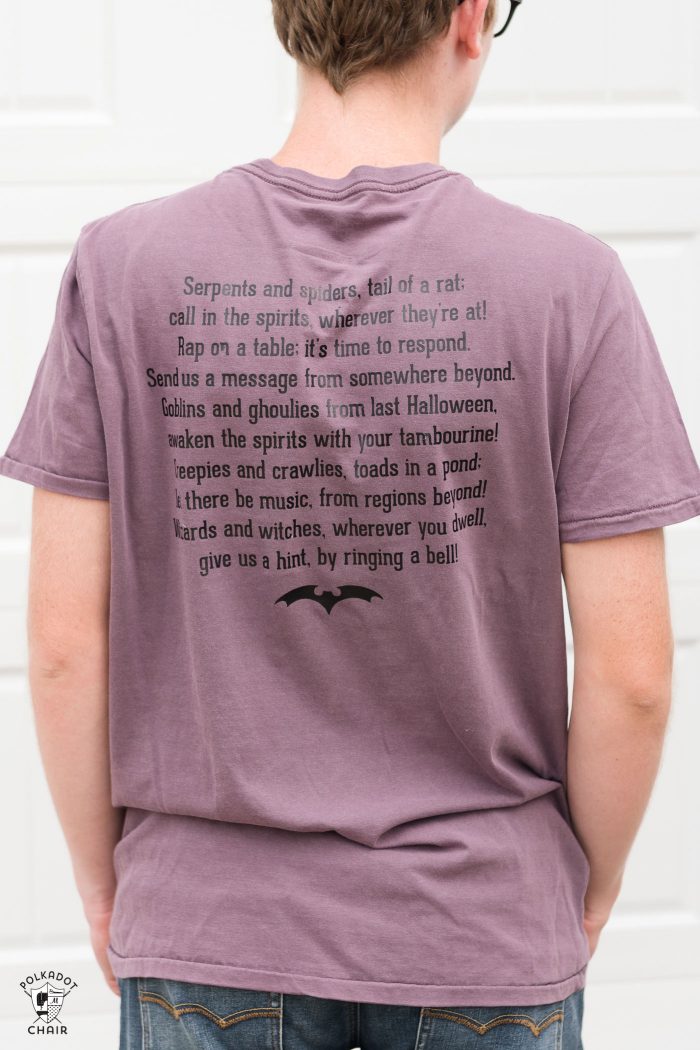
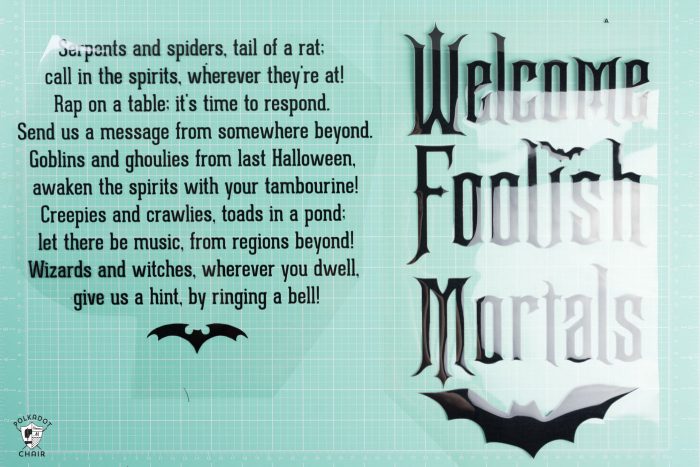
Together, we made this fun t-shirt inspired by Madame Leota in the Haunted Mansion.
We put her poem on the back, then, on the front, put a silly take on the Ghost Host that narrates the ride.
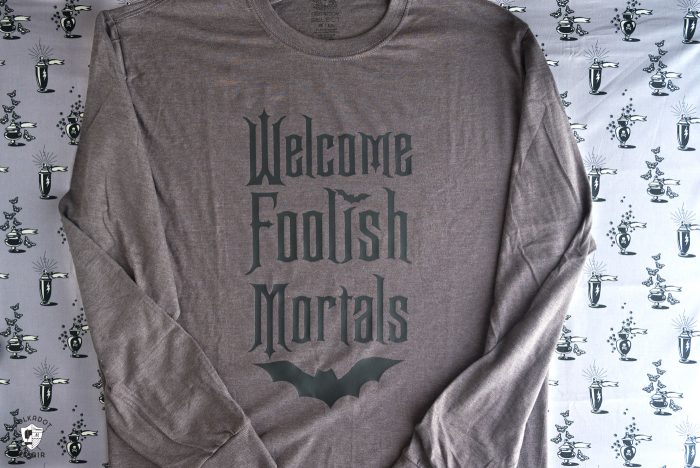
I used my Welcome Foolish Mortals (that I used for the lanterns in this post) and put them on a gray t-shirt.
Okay, so how do you make a t-shirt?
Step One:
First, you need to know what you want on your shirt. The Cricut Design space is FULL of lots of fun images that would be perfect for t-shirts.
You can also design your OWN shirt using any font on your computer.
I created the Ghost Host, Mortals, and Poem images and am happy to share them with you. Fill out this form and we will email you the SVG files.
You download and then pull it into the Cricut Design space. Before you cut, click all the layers and click ATTACH; that way, they all cut at the same time in their original place.
Two:
Decide what size you want your iron on to cut, and size your image accordingly. Then click the “Make it” button in the Cricut Design Space. If all looks good, click Next. You need to do two more things. 1- REVERSE your image, and 2- Tell the machine which material you are cutting.
After that, you load your mat into the machine and cut.
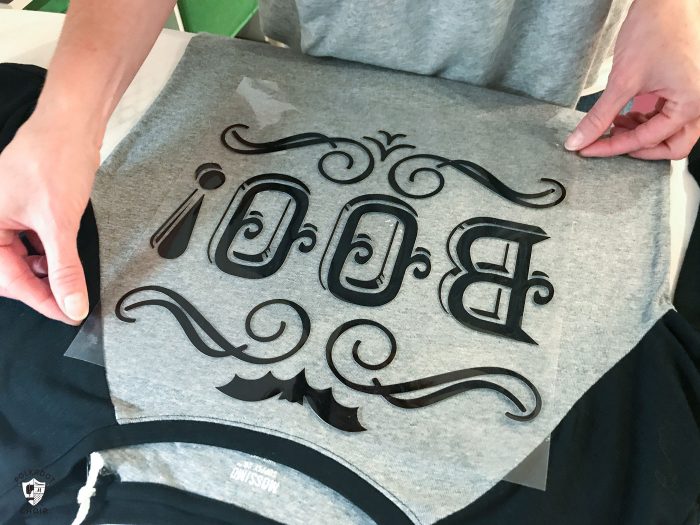
Three:
After your image is cut, you need to remove the negative space from around the image. This is called weeding. Once your image is weeded, you are ready to iron it on (or, in this case, PRESS it on).
Four:
Lay your t-shirt on a towel on a flat surface. I prefer to use the EasyPress Mat. Don’t use just an ironing board; it will absorb too much heat. I put a towel on the board, and it worked great for me. Be careful if you want to use a silicone pressing mat; if the heat transfers to the mat, it won’t work as well. I find that I have the best results when I use the Cricut pressing mats.
Five:
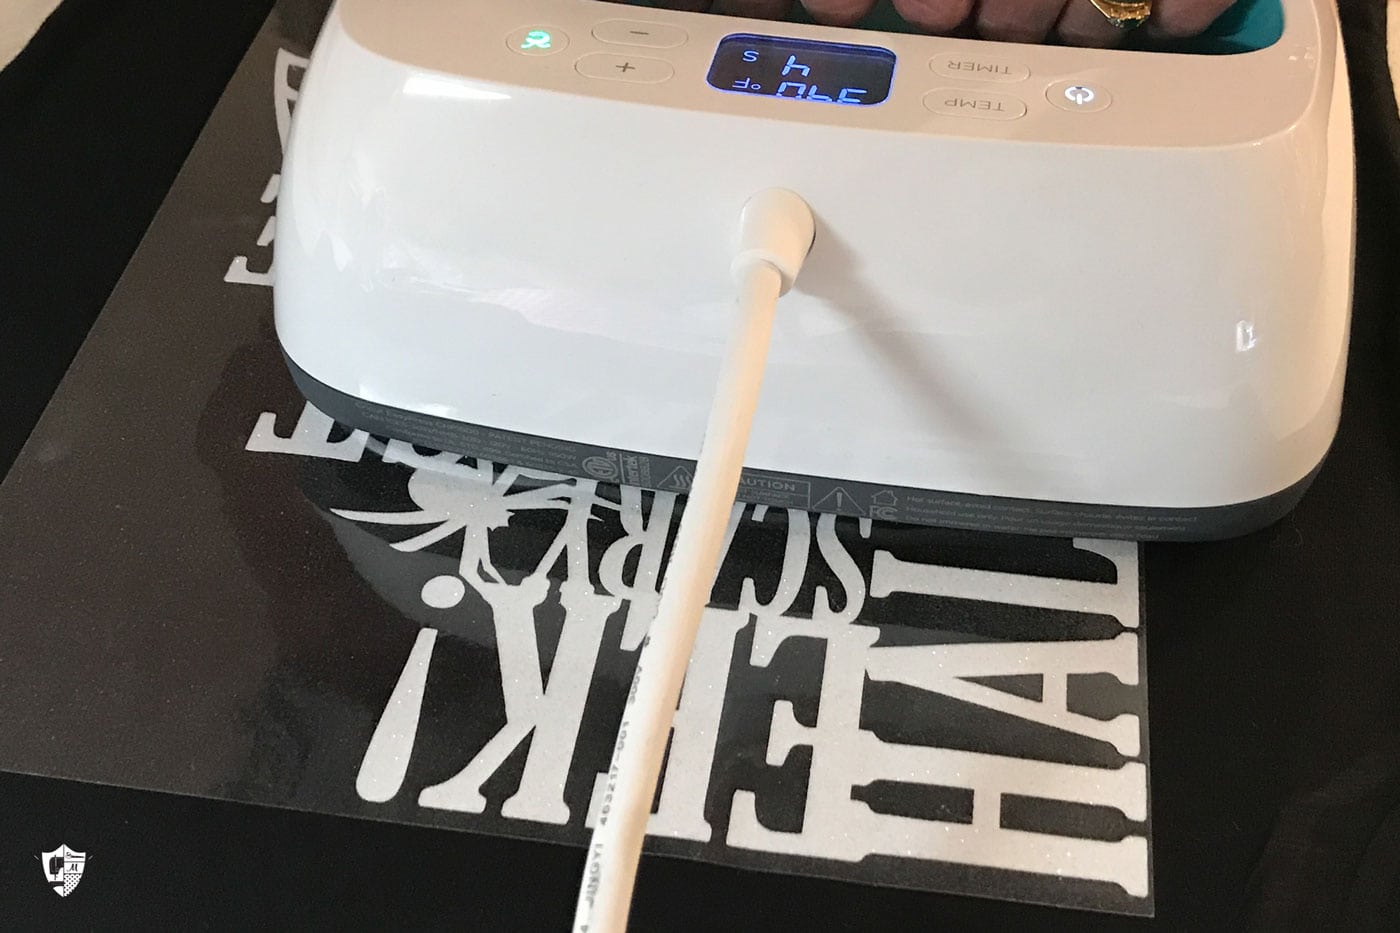
Using the chart that comes with your EasyPress, set the temperature and time on your machine. Please wait for it to heat up. The button will turn green when it’s ready to go.
Six:
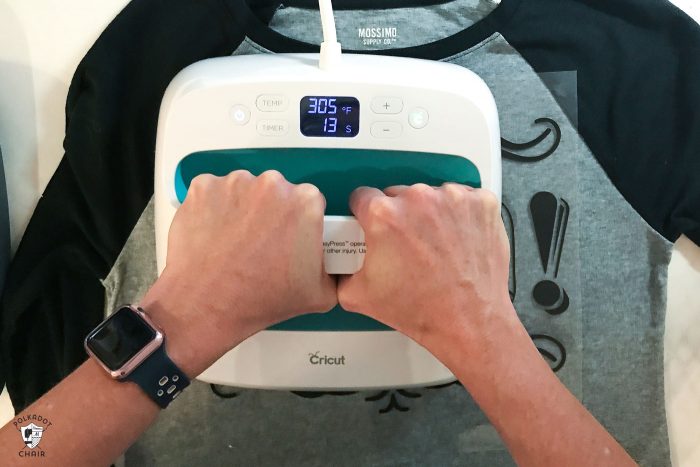
Apply firm pressure (but you don’t need to press REALLY hard) and place the EasyPress on your t-shirt. Don’t move it around like an iron; keep it in one place at a time.
Hit the Cricut button, and the timer will start counting down. Wait for it to finish counting down. When it beeps, move it off your image or to another spot on your shirt (if your image is larger than the EasyPress).
When you’re done, replace the EasyPress on its cradle.
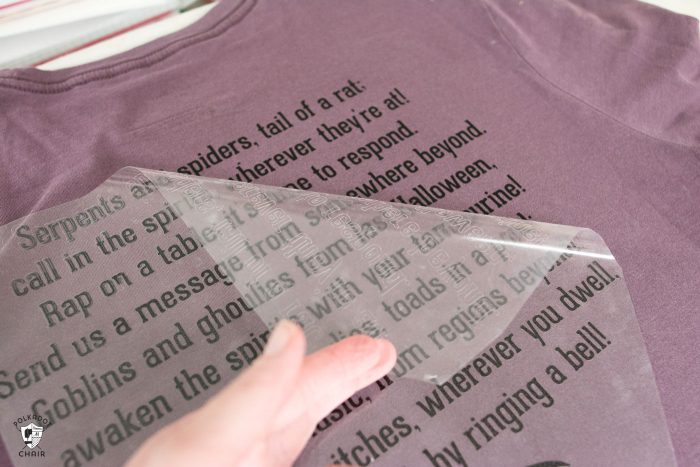
Lastly, peel the transfer sheet off of your image. I’ve tried this in many different ways but found that it peels better when it’s warm than after it cools. Peel slowly to make sure that all of your transfer is stuck. I like to peel at a diagonal. If you missed a spot, re-do it.
That’s it.
As far as caring for your shirts, you can wash them and dry them in the dryer. I’ve washed mine, and they came out just fine. The image stayed stuck!
Bottom line is that it works. It is a great alternative if you do not want to invest in a heat press (or have room for one). I keep joking now that “EVERYONE is getting t-shirts; just wait until Christmas, LOL!”
If you’d like to pick up an EasyPress, you can find them on the Cricut website. I placed an order for myself on their website a few weeks ago and was delighted when it showed up in just a couple of days.

This is a sponsored conversation written by me on behalf of Cricut. The opinions and text are all mine.