DIY Keychain Card Holder Tutorial
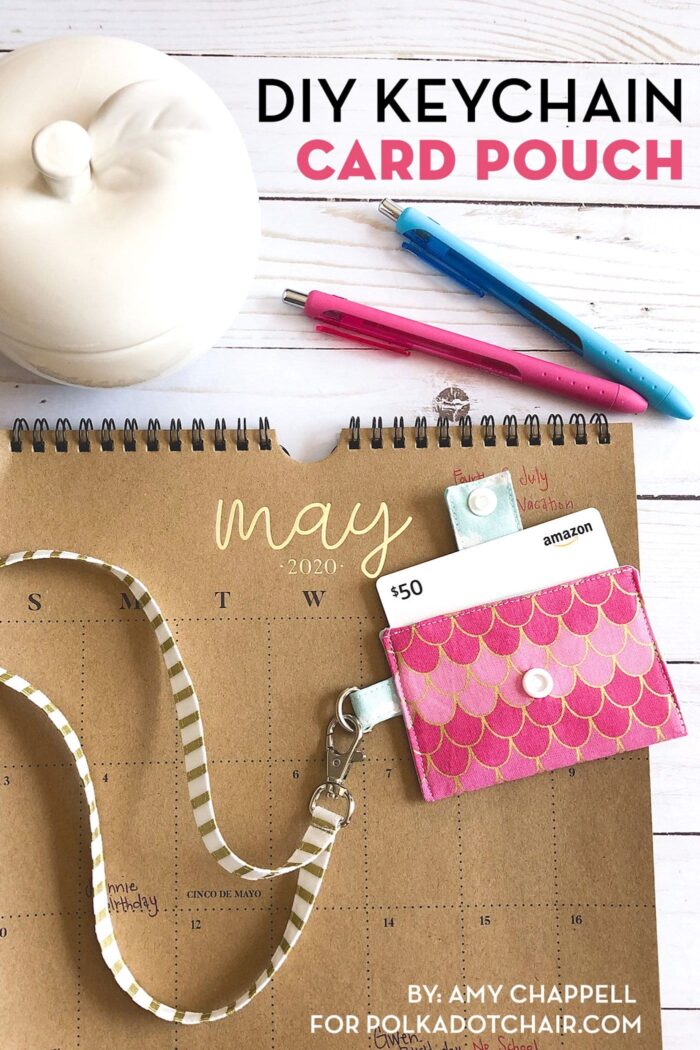
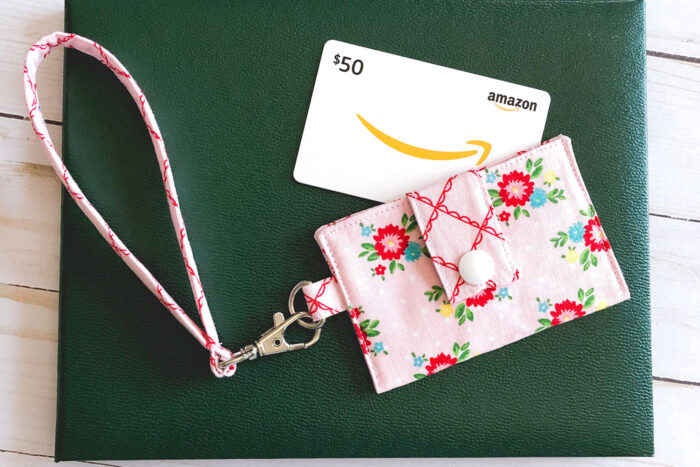
These DIY Keychain Card Holders make great gifts! Gift them to teachers or recent grads! Stuff a gift card in the pocket or use the card pouch as a little wallet! Best of all they only require small amounts of fabric, so they are great scrap busters!
Hi, there friends! It’s Amy from Ameroonie Designs here again. I always love the chance to come and hang out over here on Melissa’s blog.
Teacher & Grad Gift Ideas
With the end of the school year almost upon us, we have gifts for grads and teachers that need to be made and given. Today’s project would work for both.
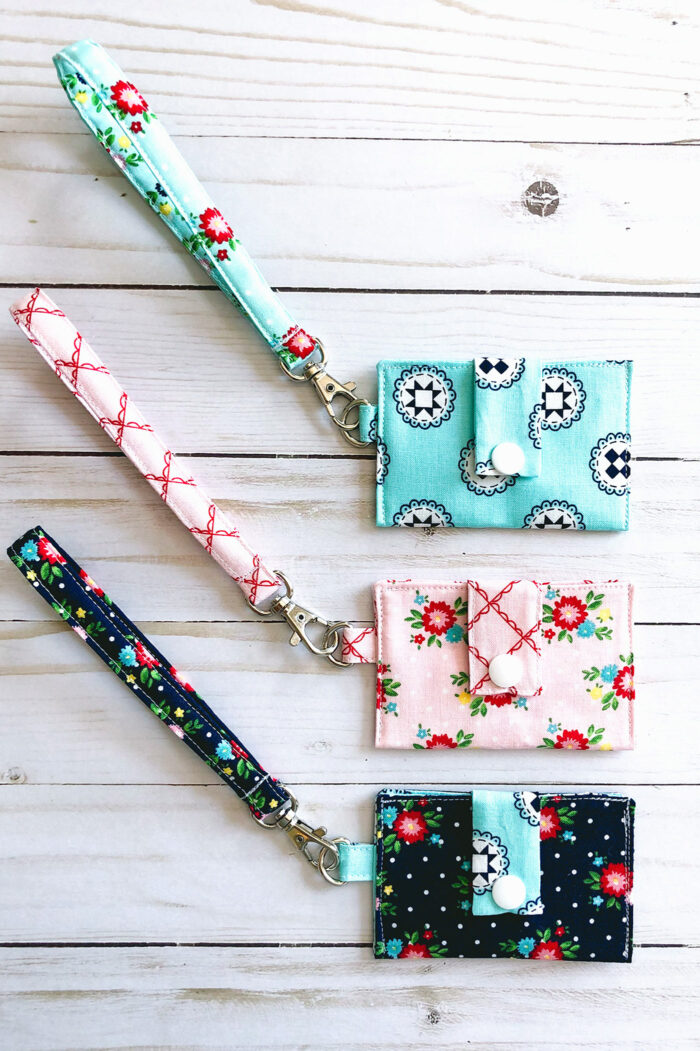
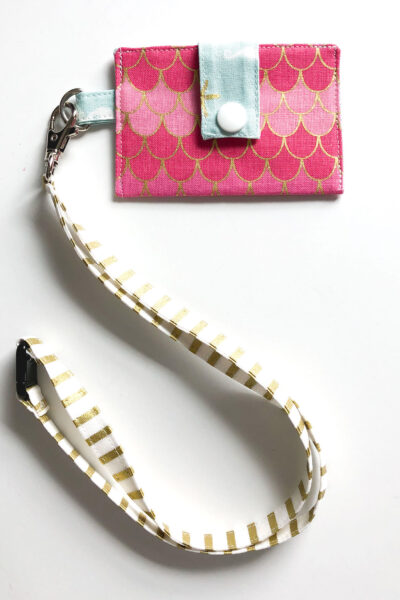
This gift card pouch is a quick sew and dresses up a gift card nicely but is also a gift itself as it can be used to hold the gift cards in a purse, attached to a lanyard, or used as an ID wallet when traveling light.
I also like to add these pouches to lanyards as well, they are so handy for holding IDs and credit or debit cards. I think either version would make a fabulous grad gift with a gift card for college supplies, food, or to celebrate this big milestone.
How to Make Keychain Card Holders
All you will need is some fabric scraps, a D-ring, and a snap- but I will also share other options if you don’t have the D-ring or snap. Ready to sew?
If you want to make a fancier pouch for your teacher, this color block zipper pouch is perfect for all those pens and pencils teachers need.
Instructions
Keychain Card Case Tutorial
Equipment
- KAM Snap Setter
supplies
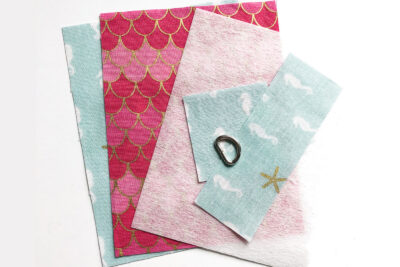
Fabric
- 2 pieces fabric 5 ½” X 4 ¼” – one lining fabric and one external fabric
- 1 piece fabric 1 ½” X 4 ¼” for snap closure tab
- 1 piece fabric 2” X 2” for d-ring strap
Interfacing
- 1 piece medium weight fusible interfacing- 5 ¼” X 4”
- 1 piece medium weight fusible interfacing ¾”x ¾” to insert in snap closure tab the fusible interfacing is optional but I like the way it looks and gives structure to the pouch
Notions
- ½" d-ring optional- here are a few other options: if you want to be able to attach this pouch to a wrist strap or lanyard you can replace the d-ring with a split ring or just leave the fabric loop plain to allow it to be attached. If you don’t want to attach the pouch to anything, just leave off the fabric loop completely.
- 1 Kam Snap or other snap (optional closures: if you don’t have a snap you can use Velcro or a loop of elastic and a button as alternatives. If you decide to use Velcro attach the Velcro to the exterior of the pouch before sewing the exterior and lining pieces together.)
- 1 Lanyard with Breakaway Clasp tutorial linked – OR
- 1 Handmade Wristlet Strap A tutorial for a wristlet is linked in the notes section.
Instructions
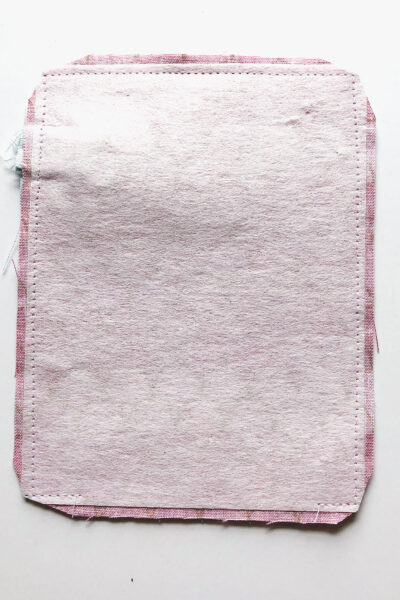
Prepare Fabric Pieces
- Cut out the pieces of fabric

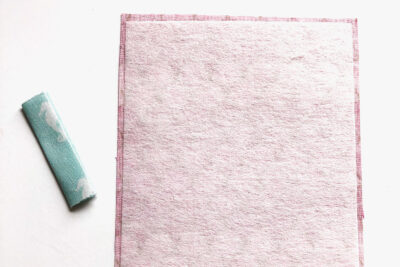
- Fuse the medium weight interfacing to the wrong side of the exterior fabric piece.
Create the D Ring Strap
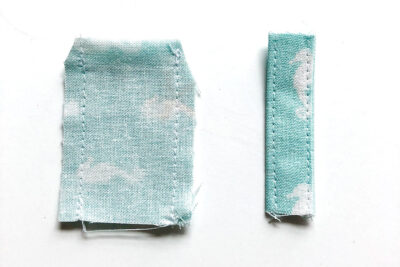
- To create your d-ring strap take your 2” X 2” fabric piece and press in half. Unfold the piece and bring the outer edges into the center pressed line. Press these sides. Refold the initial crease to enclose the edges into the middle. Press again.
- At your sewing machine, top stitch on both sides of the d-ring strap.
- Also, fold the 1 ½” X 4 ¼” strip of fabric for the snap closure, in half on the short side right sides together. You should have a piece that is now 1 ½” X 2 1/8”. Sew up both of the long sides of this piece, using a ¼” seam allowance. Clip the corners by the top fold. Turn this piece right side out and press. Insert the ¾” X 1 ¾” piece of interfacing and press. Finally, top stitch around the three closed sides (two sewn, one folded).
Assemble your Card Pouch
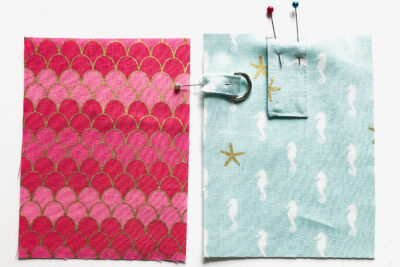
- Lay your lining fabric right side up.
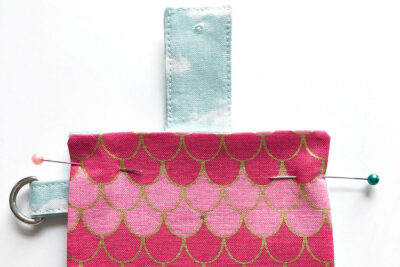
- Center your snap closure tab on the top short side, lining up the raw edge with the top of the lining piece. Pin into place.
- Fold your d-ring strap in half and slide the d-ring onto the loop you created. Position the loop 1” down from the top of the lining piece lining up the raw edges of the d-ring strap with the edge of the lining piece. Pin the loop in place.
- Place your exterior fabric right side down on top of the lining piece. *NOTE: if your exterior fabric is directional, the TOP of the exterior fabric should be at the BOTTOM of the lining piece. Pin around the pouch.
- Start at the bottom of the lining and sew around the entire pouch leaving a 2-3” opening on the bottom of the lining for turning. Clip all four corners. Turn the pouch right side out and press, turning under the seam allowance of the opening to create a straight line across the seam.

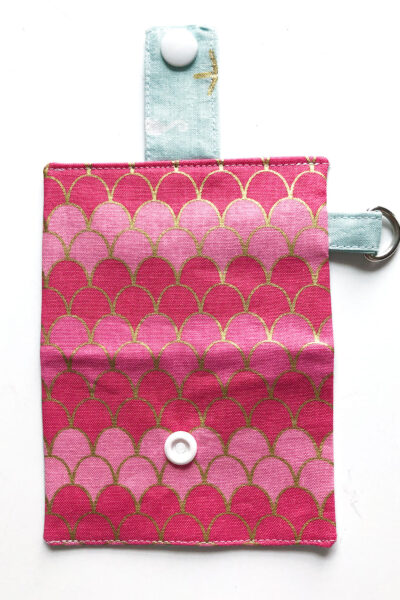
- Fold the pouch in half so the two short edges are lined up. Mark where your snap will go on the snap tab and then mark where the snap will be positioned on the pouch body.
- Attach both sides of the snap. Top stitch across both short sides of the pouch.
- Re-fold the pouch so the two short sides are lined up and top stitch on both sides to create the pouch. You are finished!
Notes
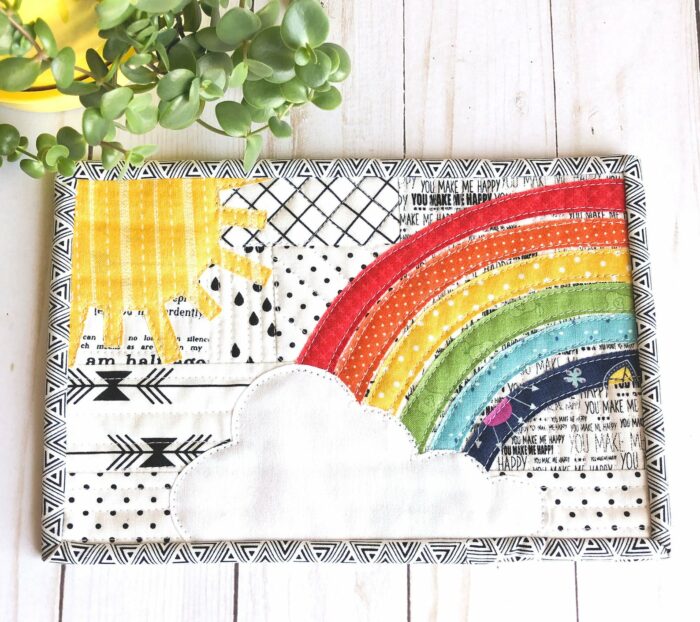
Looking for more gift ideas that are easy to mail? This Sunshine and Rainbow mug rug is a fun happy project that is also a fantastic use of scraps.
Happy sewing my friends! Xoxo, Amy
About the Maker:

Hello! I’m Amy Chappell, the person behind Ameroonie Designs. I’m a sewing and quilt pattern designer, and I’m proud to say that my work has been featured in several print publications and popular DIY websites.
I am the mom of six kids- which is a big reason I create and sew. I find that I am happiest when I am making things, and taking time to be happy makes me a better mom.
Join me in my exclusive Let’s Sew Friends membership, where you’ll find small, manageable monthly sewing patterns, live classes, and lots of video tutorials!
More DIY Projects that Make Great Teacher Gifts
Simple Zip Pouch Sewing Pattern
Round Trinket Basket Sewing Pattern
Scrappy Rainbow Bookmark Tutorial


Thank you! This is something I could use myself for the way we shop now during this shelter in place. All I take with me is a credit card, driver’s license and my health plan card. Of course after I try it out, I’ll be making them for my friends too!