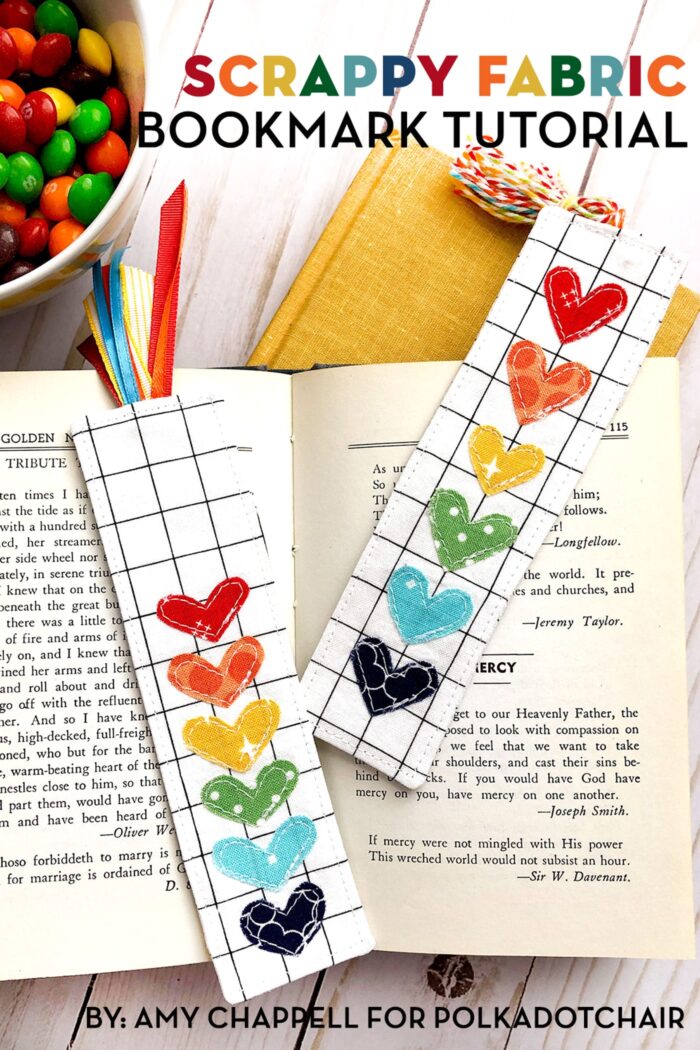
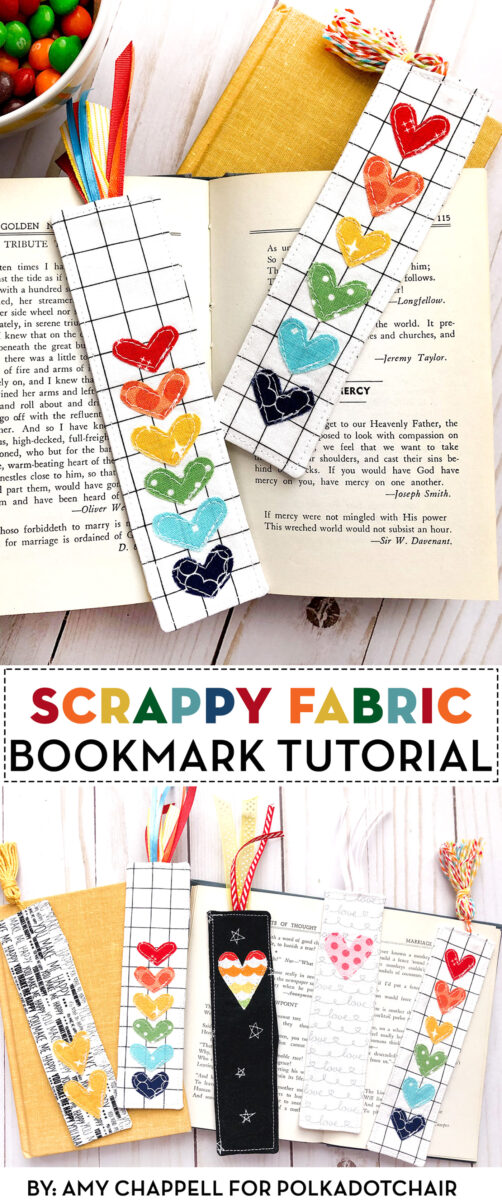
Scrappy Hearts Fabric Bookmark Tutorial
These bright and sunny fabric bookmarks are easy to make and a great scrap-busting project! If you have kids or teens at home who are looking for something to sew, this project is perfect for them! Amy Chappell guides you through the construction steps in the Scrappy Hearts fabric bookmark tutorial.
Hey there, sewing friends! It’s Amy from Ameroonie Designs here again with you to share a super fun and quick scrap project. These Fabric Scrap Bookmarks are simple to put together and would make great gifts to mail to those you love, as gifts for teachers, or just to spend a quick afternoon making something fun!
If you’d like to make yarn tassels to go on your fabric bookmarks, you can find a tutorial to make a yarn tassel HERE.
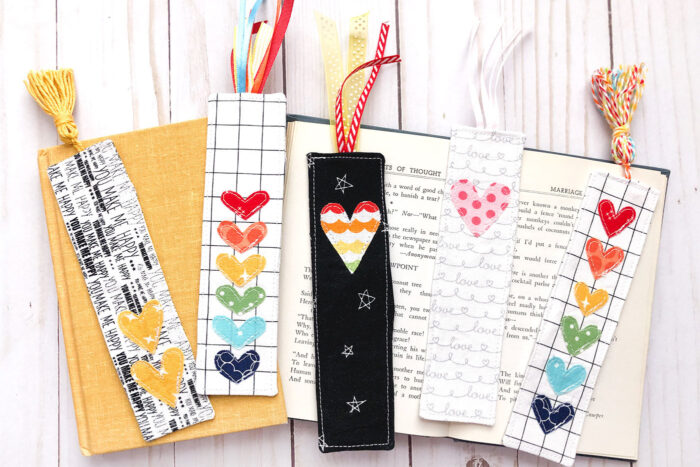
Making use of fabric and interfacing scraps is such a satisfying feeling. These bookmarks would also be a terrific service project, gift them to a nursing home or a children’s hospital. The possibilities are endless!
Instructions
Scrappy Hearts Fabric Bookmark Tutorial
supplies
- 2 pieces fabric cut to 2" x 6 1/2"
- 1 piece medium weight interfacing; 1 1/2" x 6"
- 3-4 scraps fabric for heart appliques
- 1 piece paper backed fusible webbing
- Tassels or Emboridery Floss to Embellish
Instructions
Cut out Pieces & Apply Fusible
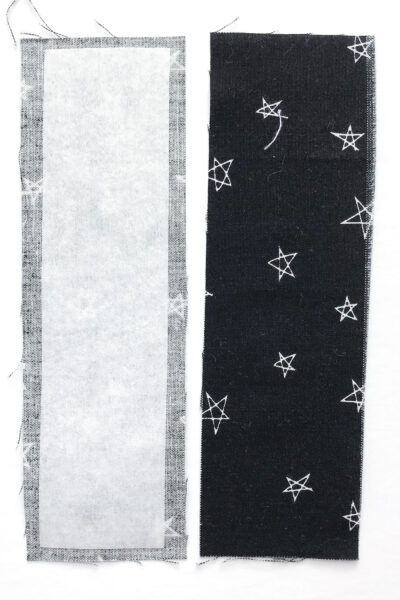
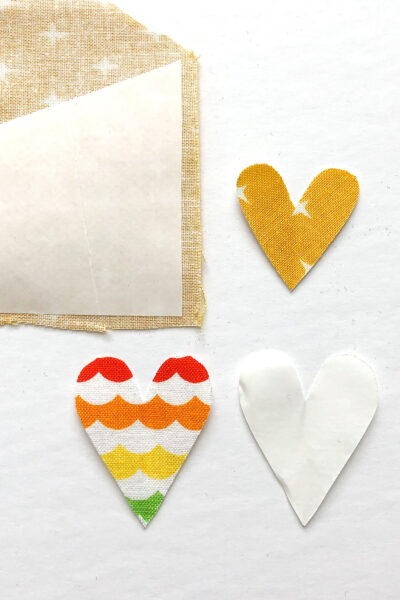
- To begin you will need to cut two pieces of fabric to your desired bookmark size. I cut mine 2” X 6 ½”.Cut one piece of light or medium weight interfacing ½” smaller than your fabric size. For reference: I cut mine 1 ½” X 6”Fuse the interfacing to the center of the wrong side of the front piece of fabric.

Create Heart Appliques
- If you would like to embellish your bookmark with some quick applique you will need a scrap of Heat n Bond Lite or some other stitchable, fusible adhesive. Fuse the adhesive to the wrong side of the scrap of fabric you would like to use for the heart. Cut out a heart shape the way you did in grade school, fold the square in half and cut up and around and down to a point. Remove the paper backing from the heart.
Bookmark Assembly
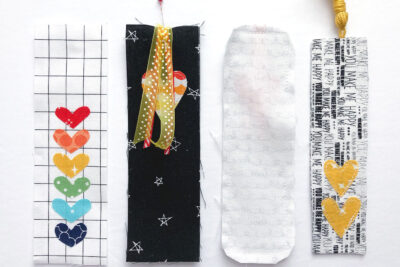
- Position the heart embellishments on the front fabric piece (the piece with interfacing) and fuse into place.Stitch around the heart with a straight stitch or a narrow zig zag stitch.IF you would like to add ribbon or a tassel to your bookmark pin it in place at the top center of the bookmark front.Place the back of the bookmark right sides together on the front of the bookmark and pin in place.

- Sew around the bookmark using a ¼” seam allowance. Leave a 2” opening on one long side for turning right side out. Back stitch at the beginning and ending of your sewing.Clip the seam allowance from the corners and turn the bookmark right side out.Push out the seams and press the bookmark well, turning under the seam allowance for the opening.Top stitch around the bookmark, closing the opening on the side.

I hope you enjoy sewing up these bookmarks, and I hope you will join me over on my Instagram page @amerooniedesigns. Happy Stitching! Xoxo, Amy
About the Maker:

Hello! I’m Amy Chappell, the person behind Ameroonie Designs. I’m a sewing and quilt pattern designer, and I’m proud to say that my work has been featured in several print publications and popular DIY websites.
I am the mom of six kids- which is a big reason I create and sew. I find that I am happiest when I am making things, and taking time to be happy makes me a better mom.
Join me in my exclusive Let’s Sew Friends membership, where you’ll find small, manageable monthly sewing patterns, live classes, and lots of video tutorials!
More Great Sewing Projects from Amy:
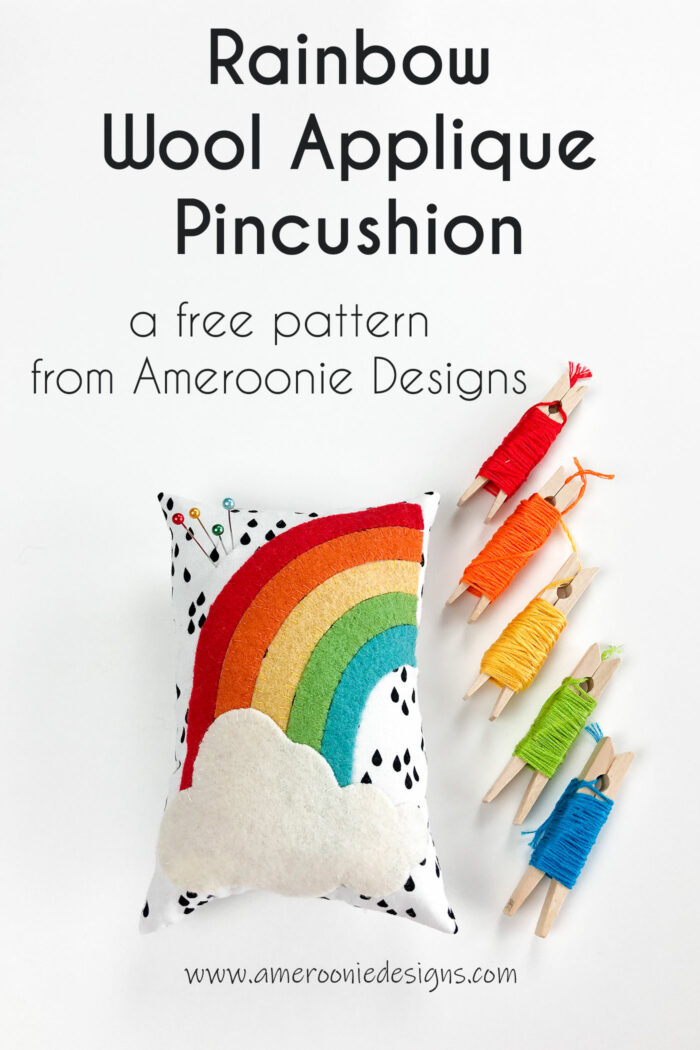
Rainbow Wool Applique Pincushion
Looking for Easy Sewing Projects for Kids? You might like these tutorials
Kids Applique Pillowcase Project
Easy Library Bag Sewing Tutorial
How to Make a BBQ Apron – Kid-Sized!
Thank you, Amy, for this awesome tutorial! You’ve got my mind spinning on how to add different appliques and stitches to these bookmarks. Such a great idea to use up those precious scraps!