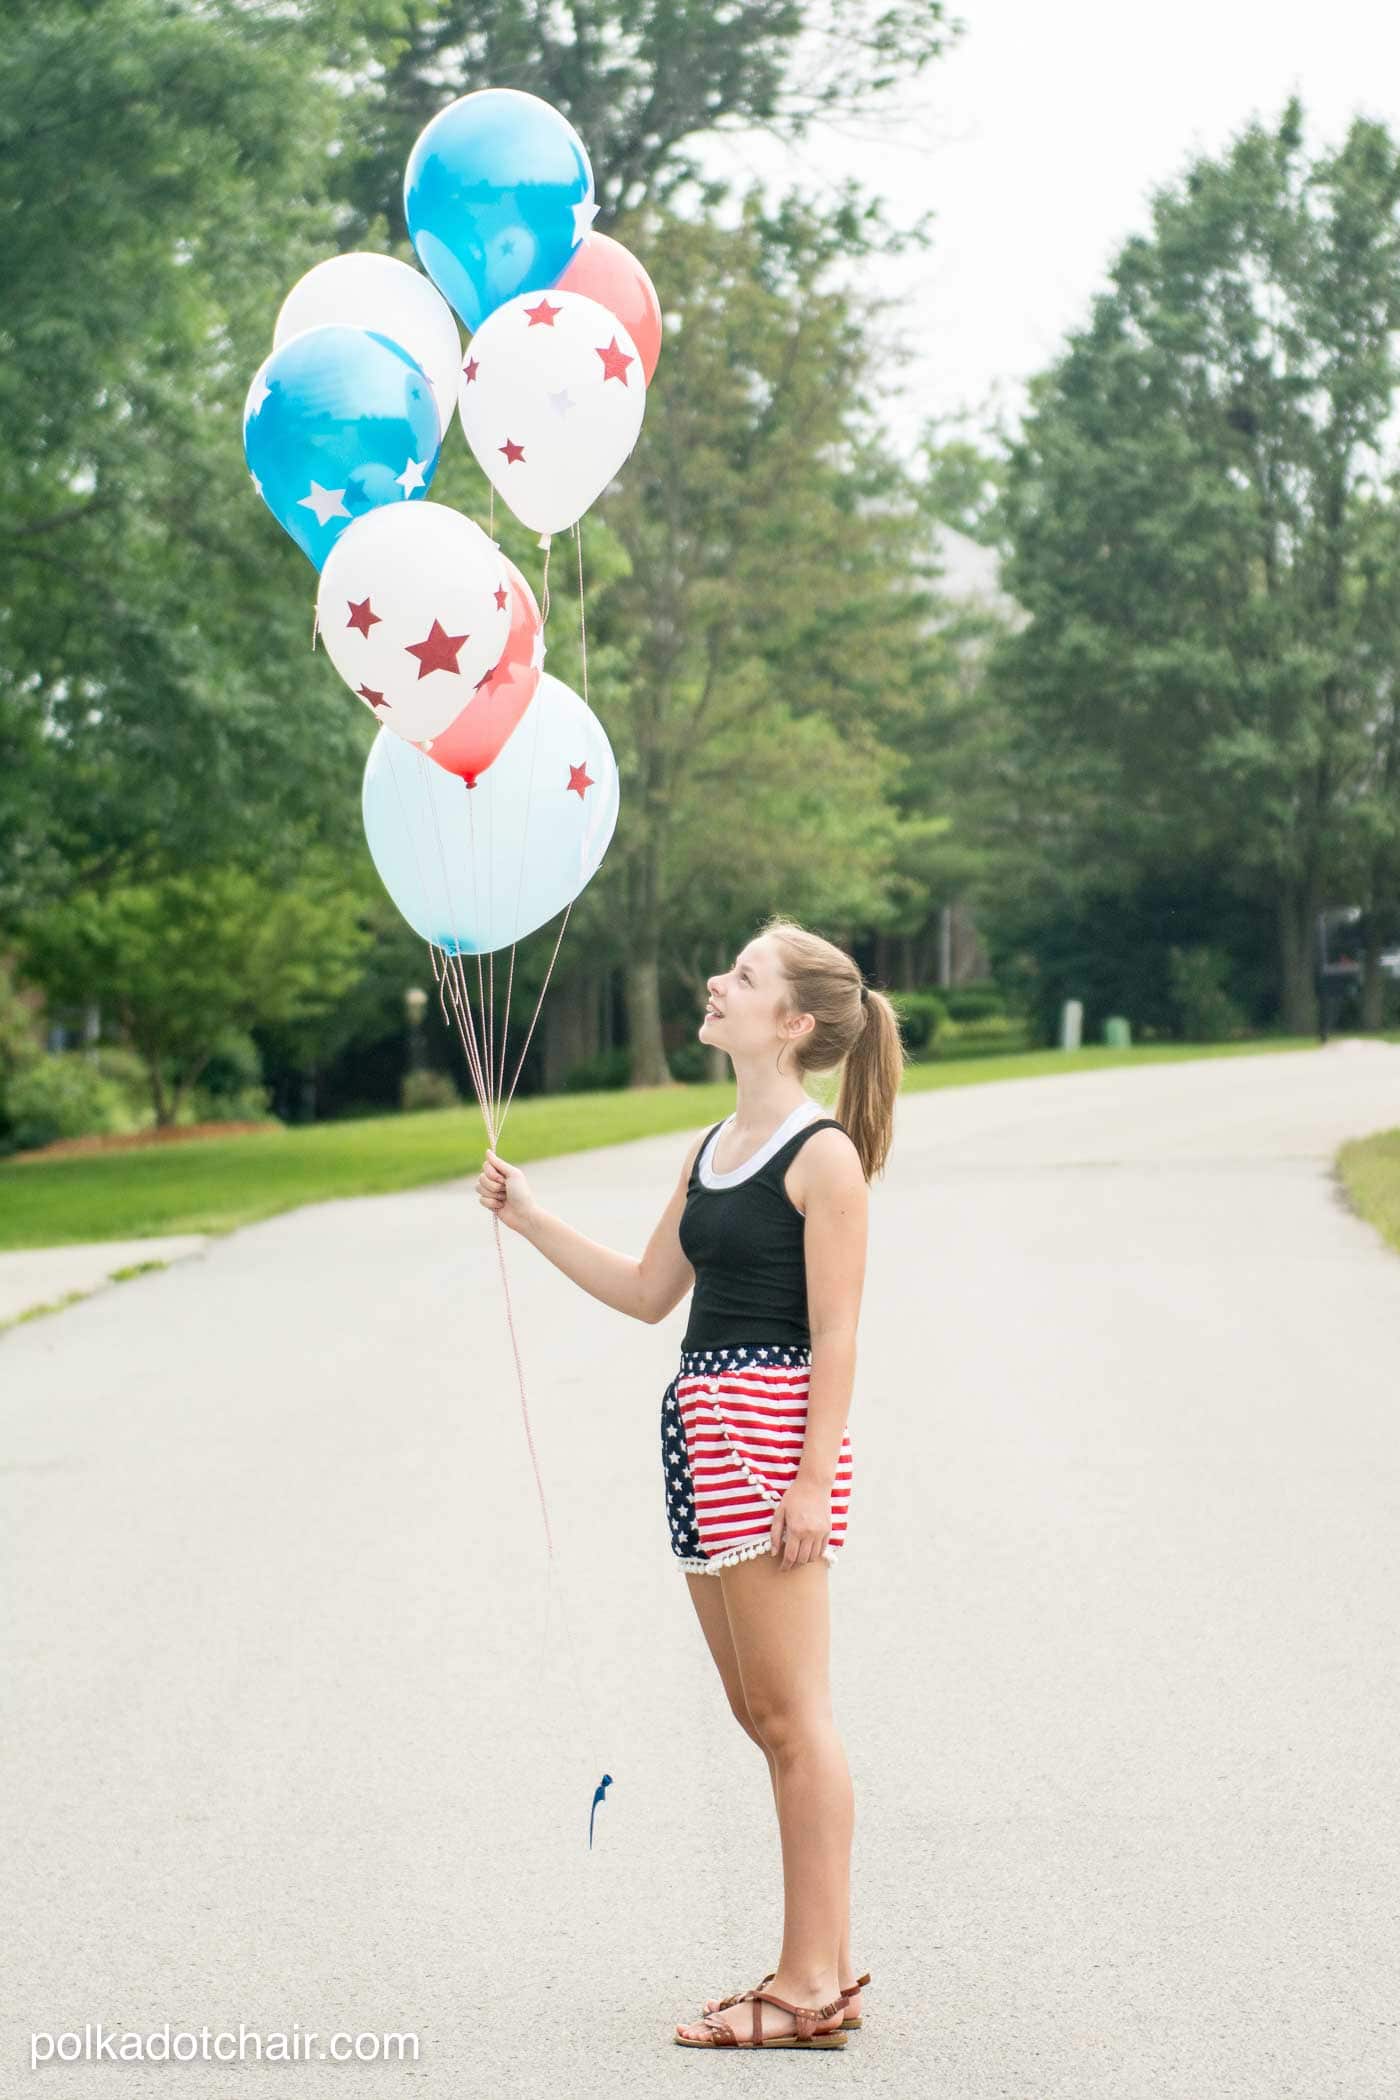
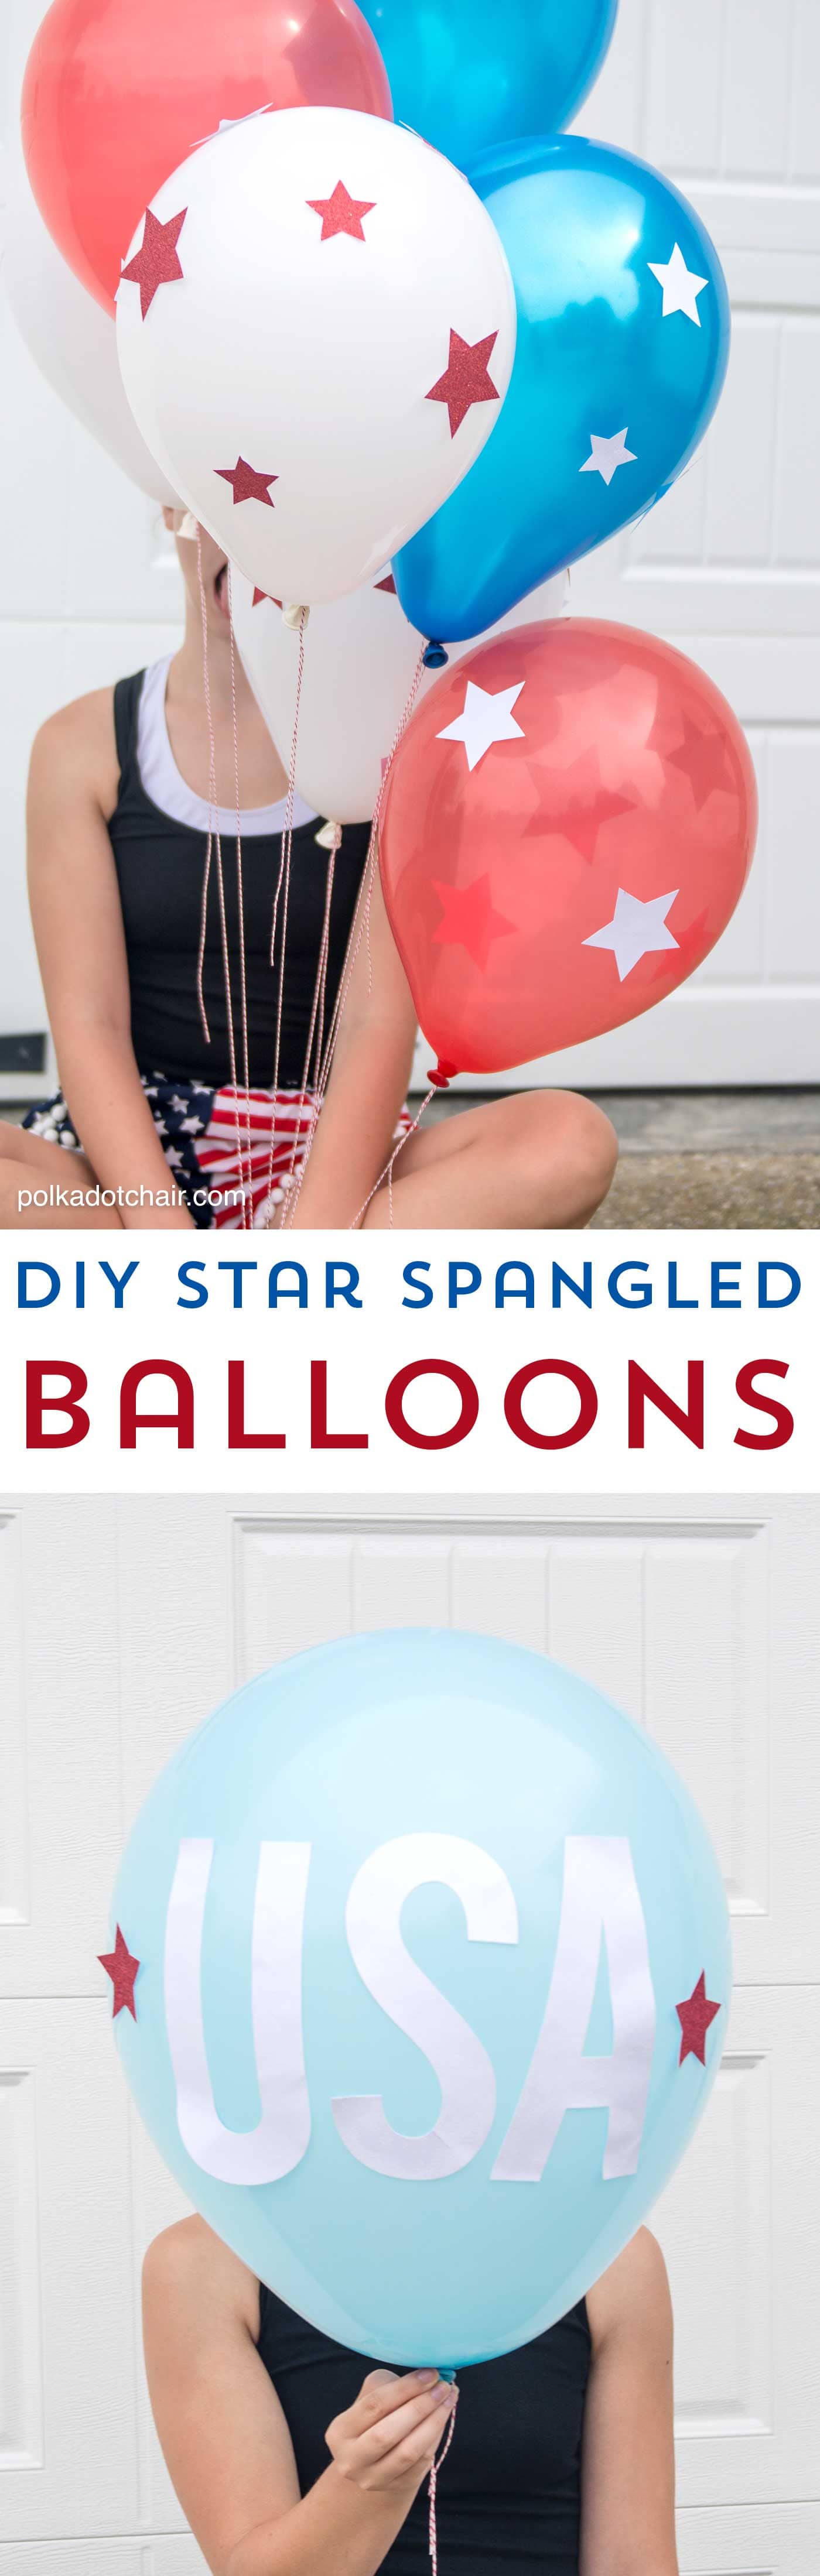
DIY Star Spangled 4th of July Balloons
Dress up your holiday BBQ with these DIY Star Spangled 4th of July Balloons. They are crazy simple to make and will add an extra bit of sparkle to your 4th of July celebration this year.
I always think it’s so interesting how we seem to make the passage of time by the events and traditions that occur our lives. For me the 4th of July is one of those traditions, it marks the “unofficial” start of summer and encompasses so many things that I love, good food, friends, family and a whole lot of red, white and blue.
We don’t have any set 4th of July traditions, many times we are out-of-town on the fourth because it’s a good time for my husband to be away from work. That makes it hard to have specific traditions, but no matter where we are we always try to find a way to celebrate. This year we will be home and I’m so excited about it! I can’t wait to fire up the BBQ, invite a bunch of friends over and spend the day soaking up the sun with an evening capped off by a great fireworks show.
When I have people over I love to find simple ways to “fancy up” our celebrations. I like to spend time with my guests when they are over, and I don’t like being too tired to enjoy their company because I’ve been “party prepping” all day.
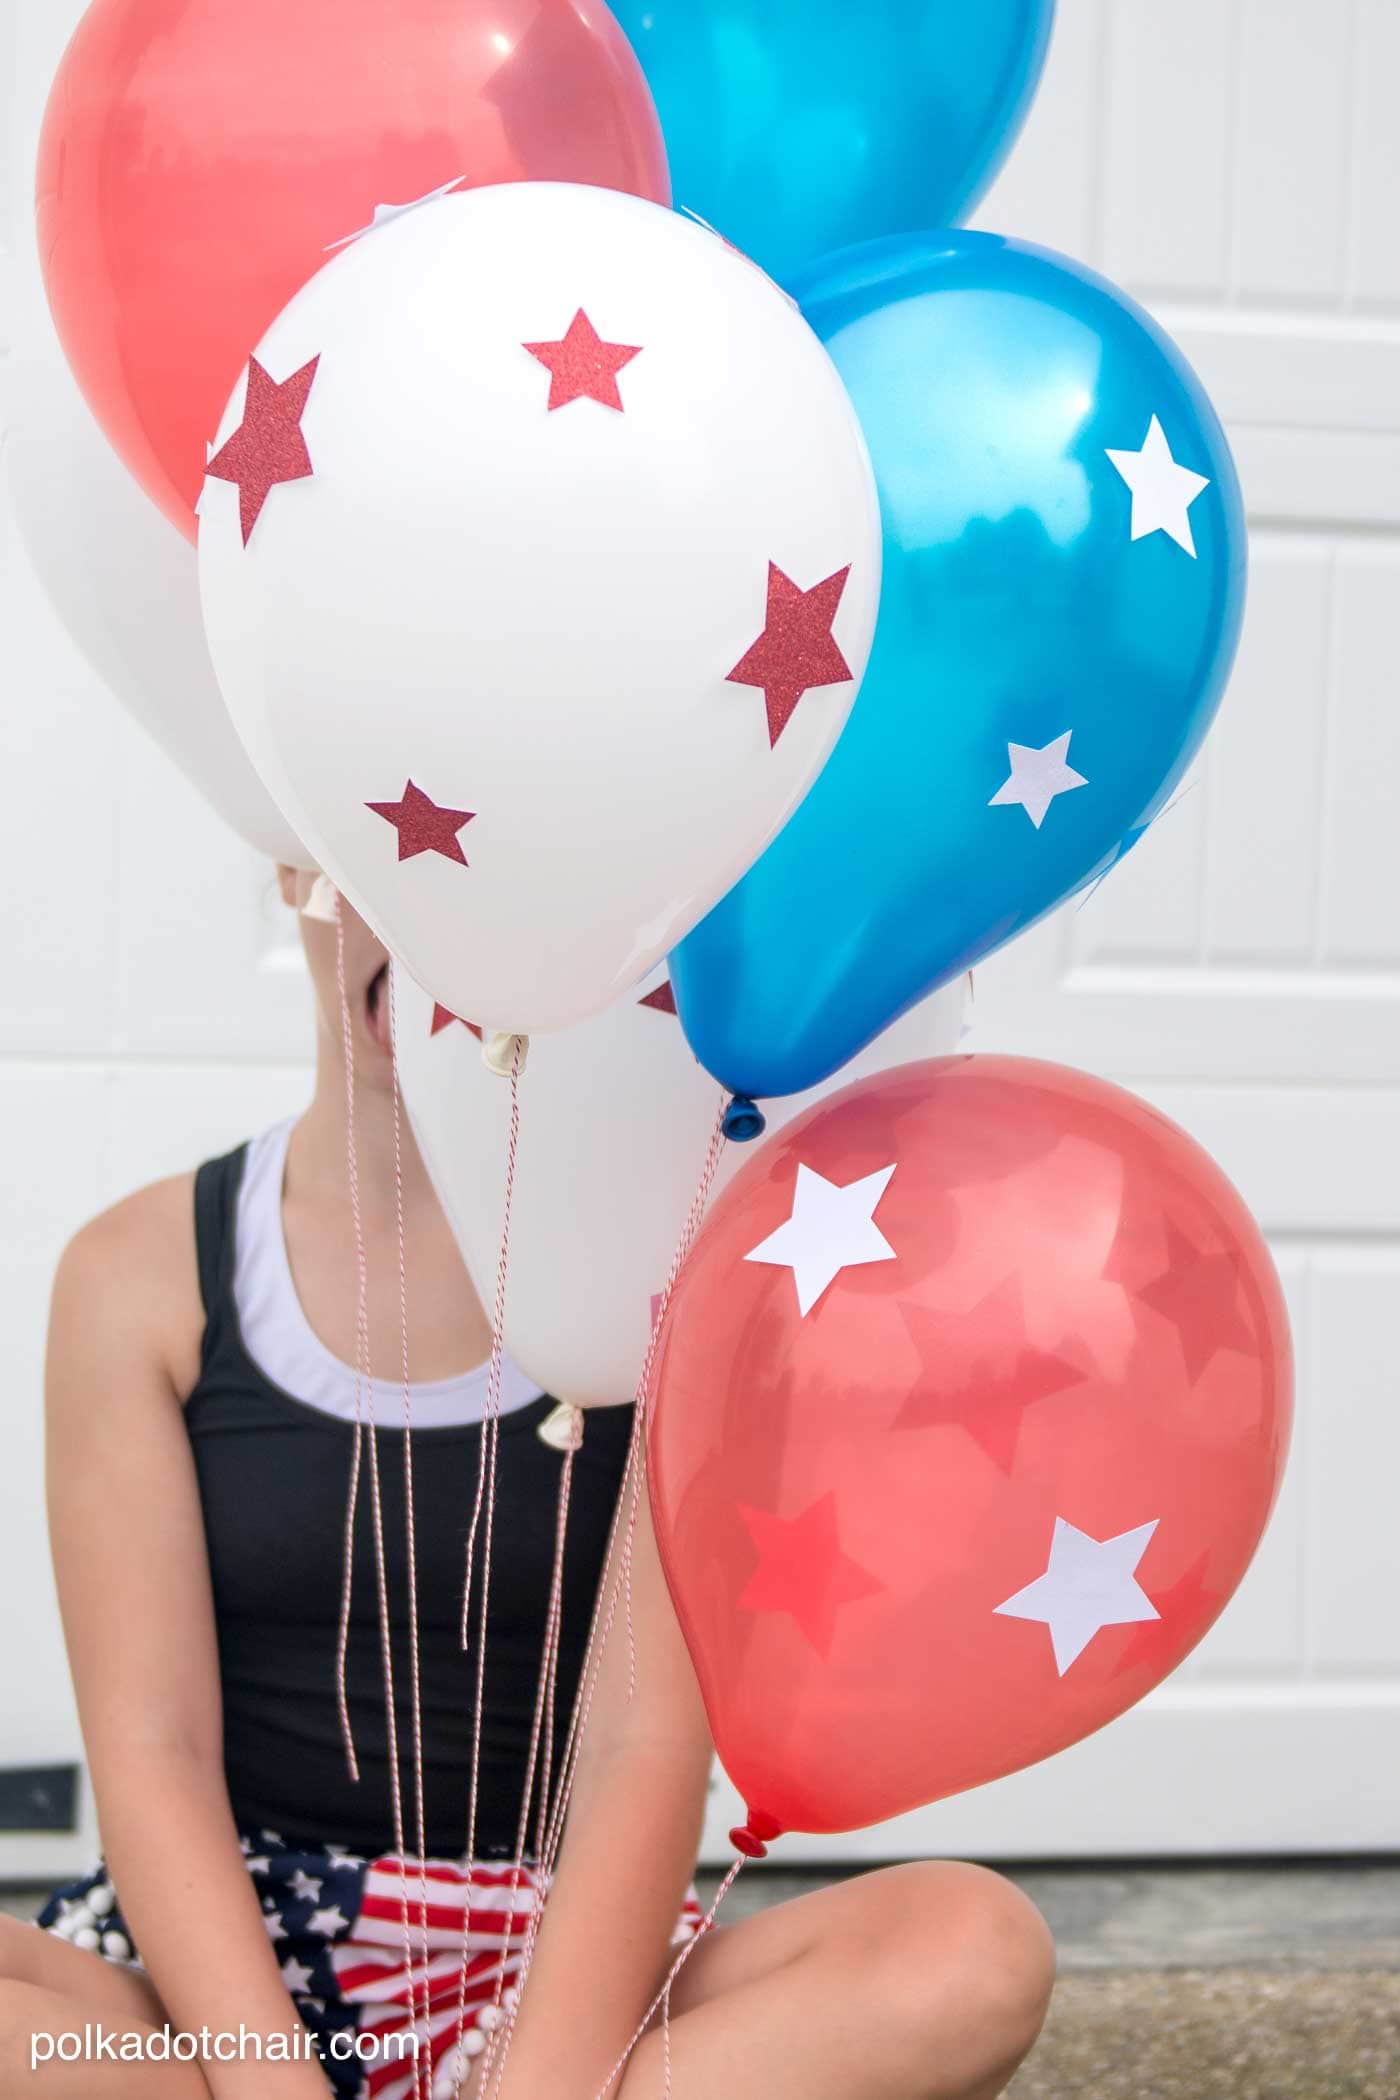
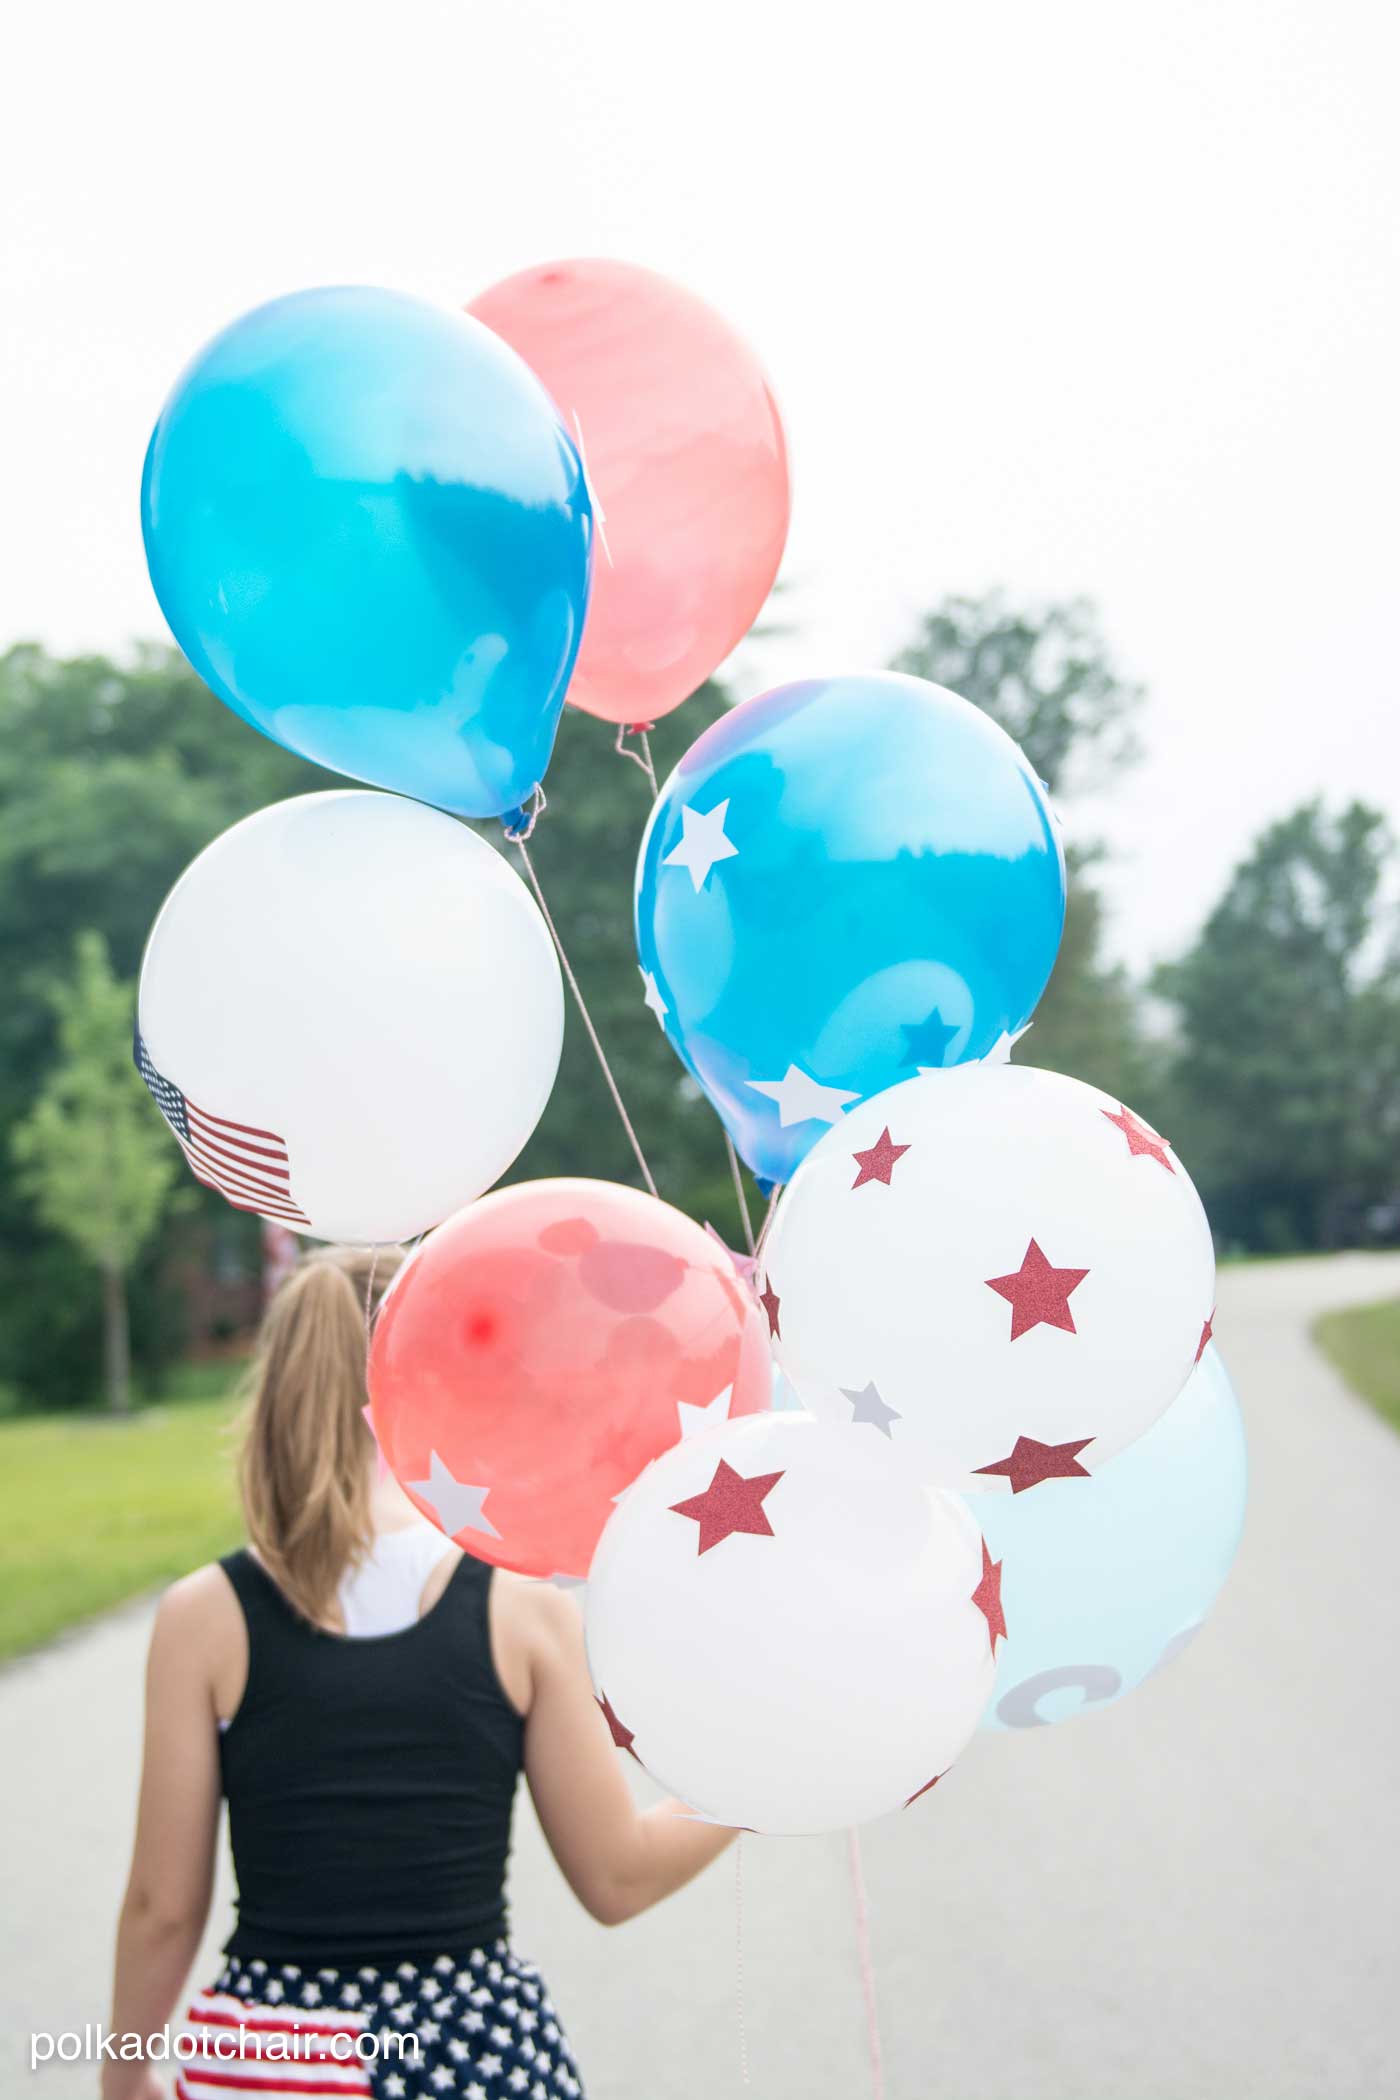
Today I’m going to share with you a simple and quick 4th of July Craft that will dress up your 4th of July BBQ or celebration, these Star Spangled Balloons.
You can make a bunch and pass them out to the kids at your BBQ or tie them all together and use them as a decoration on your food table.
They are crazy simple to make, you can do it all at home.
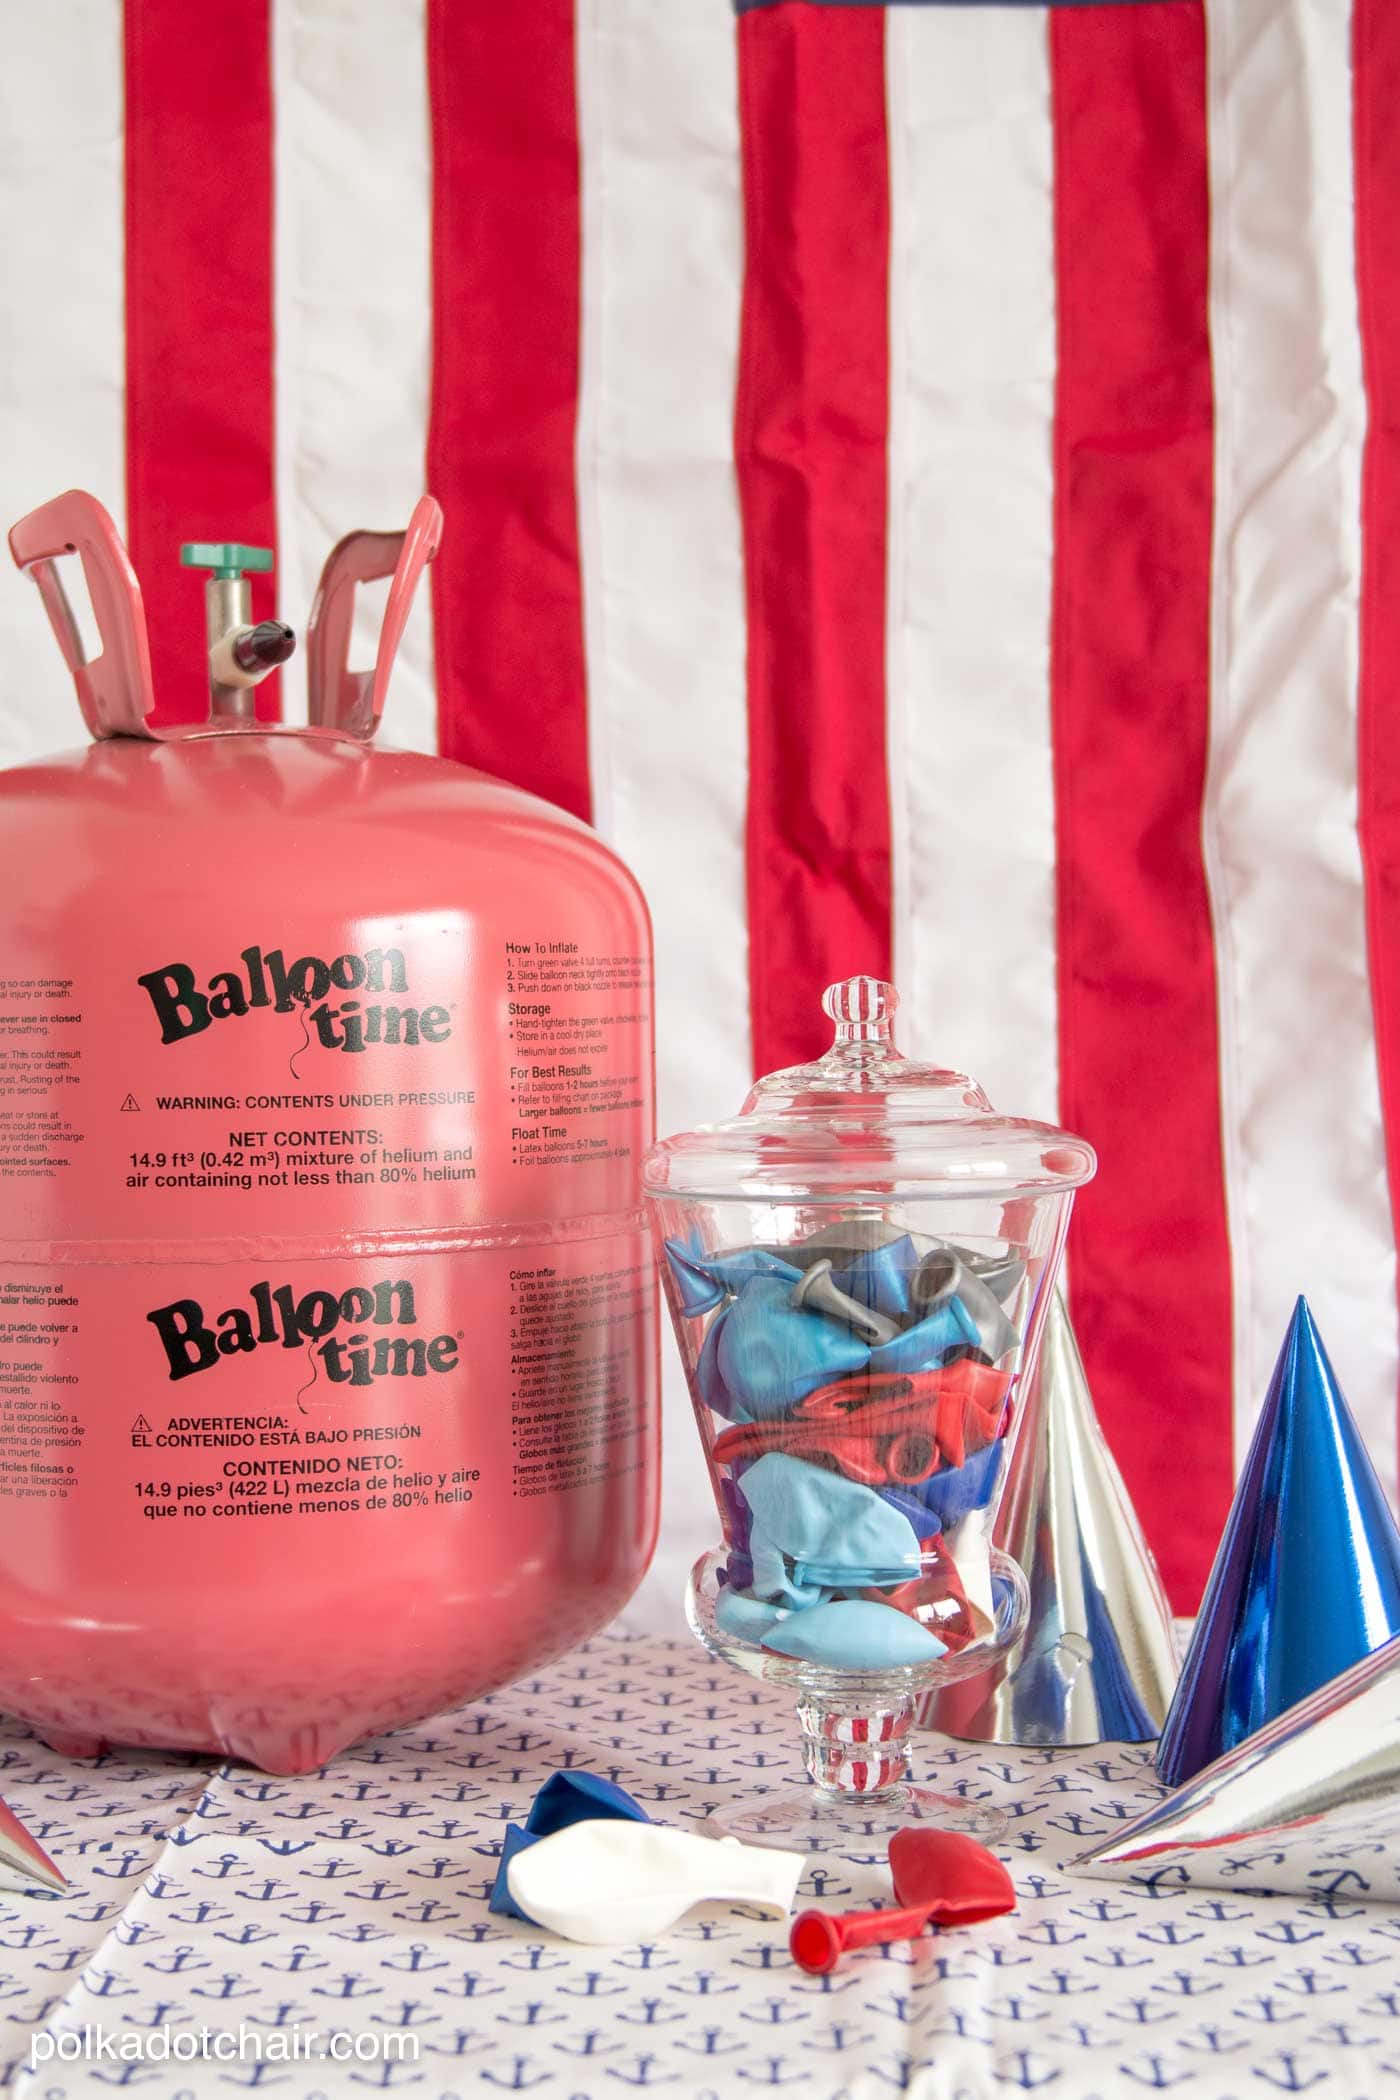
To make them you’re going to need:
-Balloon Time Helium Tank
-Red, White & Blue Balloons
-Glitter Paper
-Sticky Glue Dots
-Bakers Twine (buy the thin twine, the thick stuff will be too heavy for the balloons)
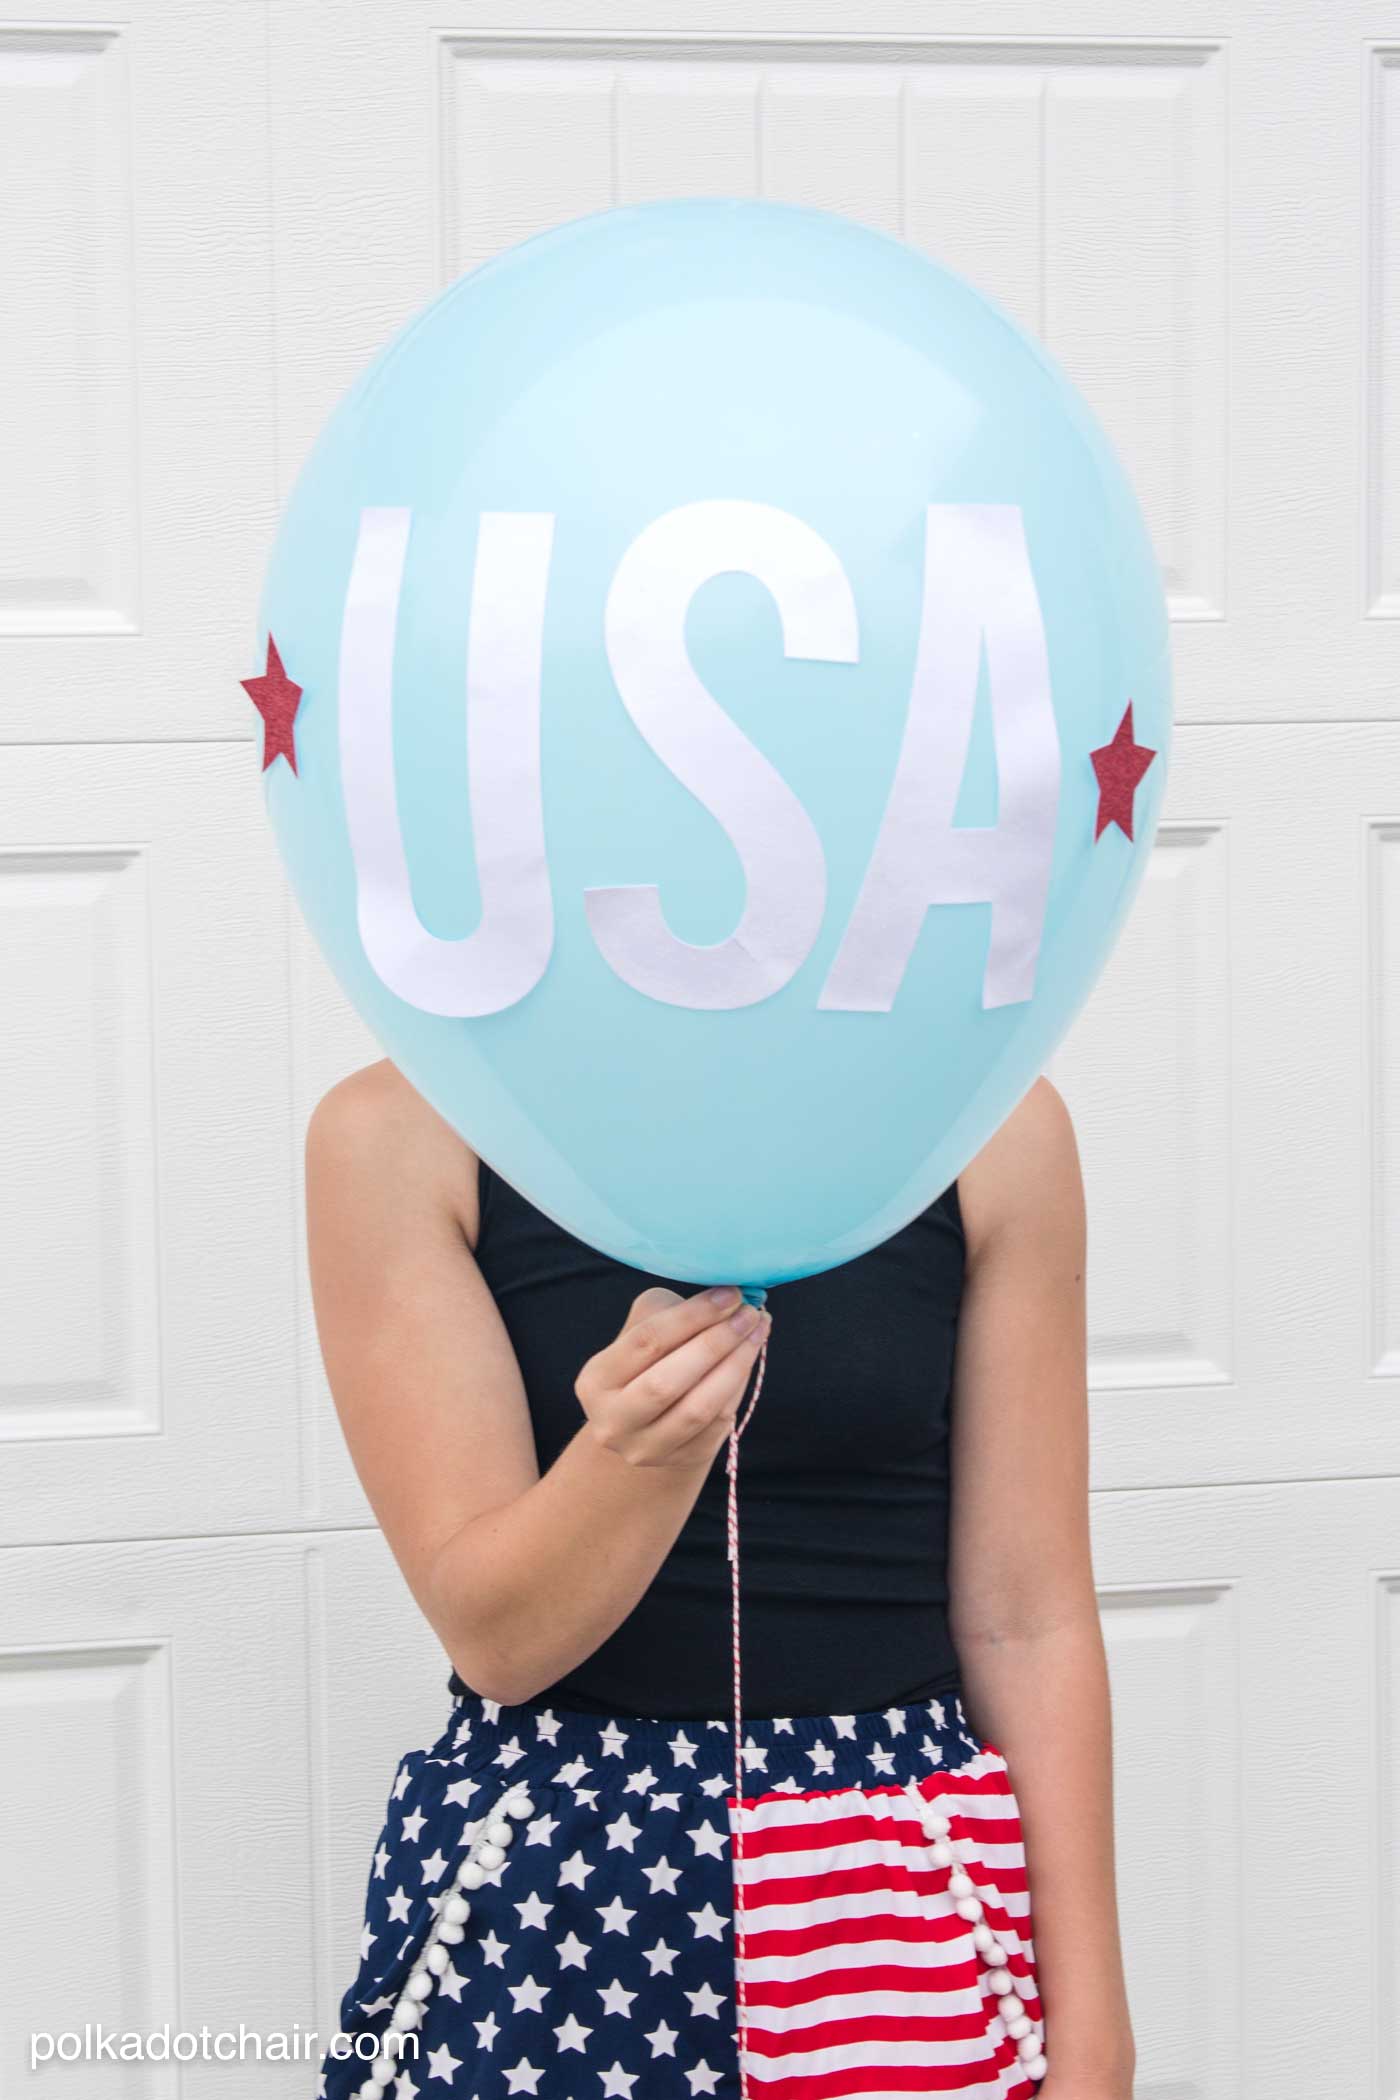
-Star Template in all different sizes
-USA letters printed out on your computer.
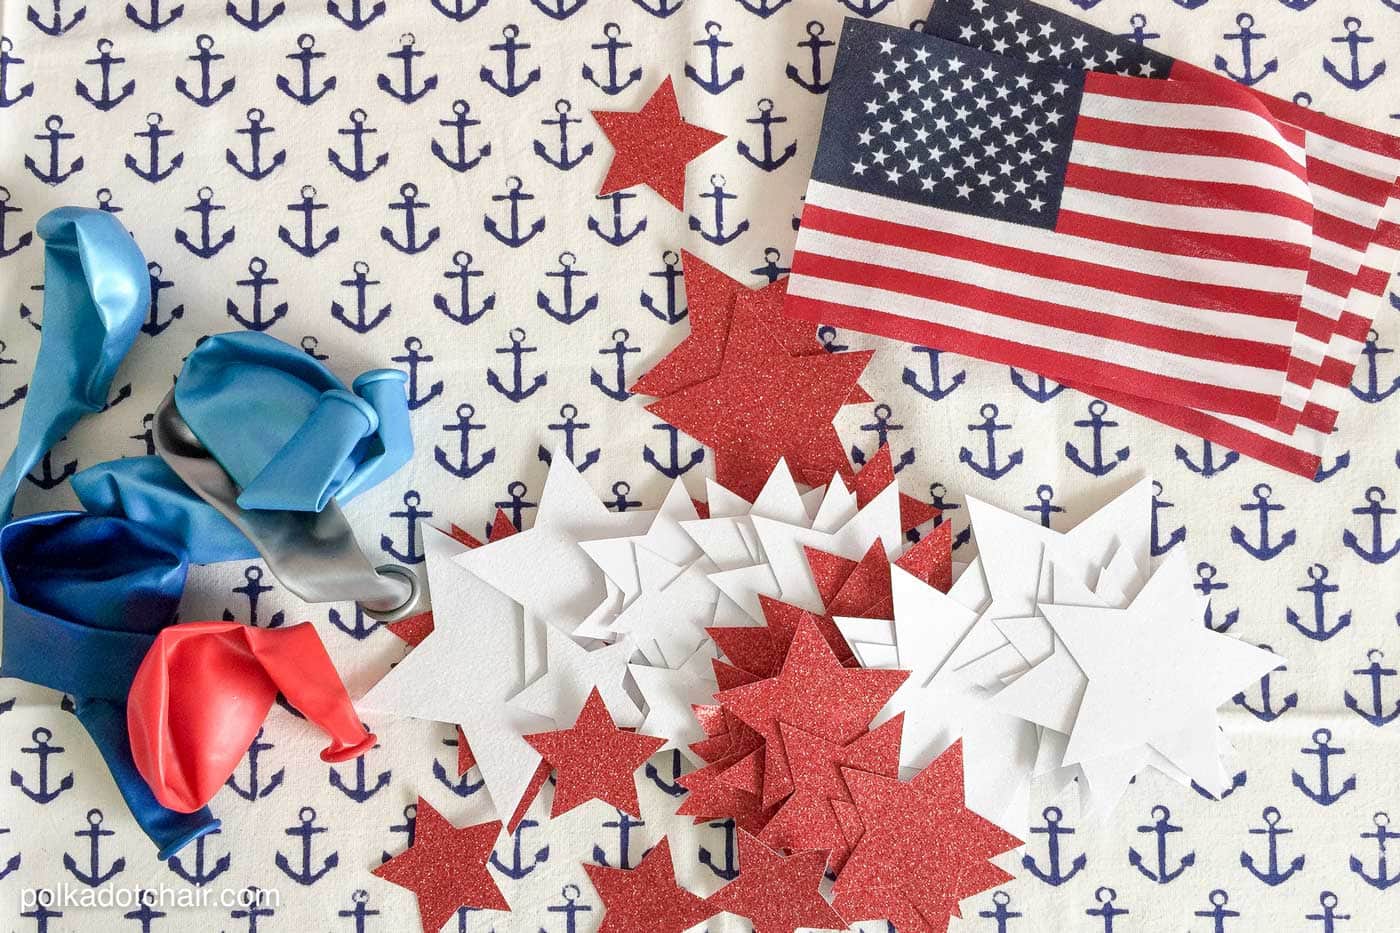
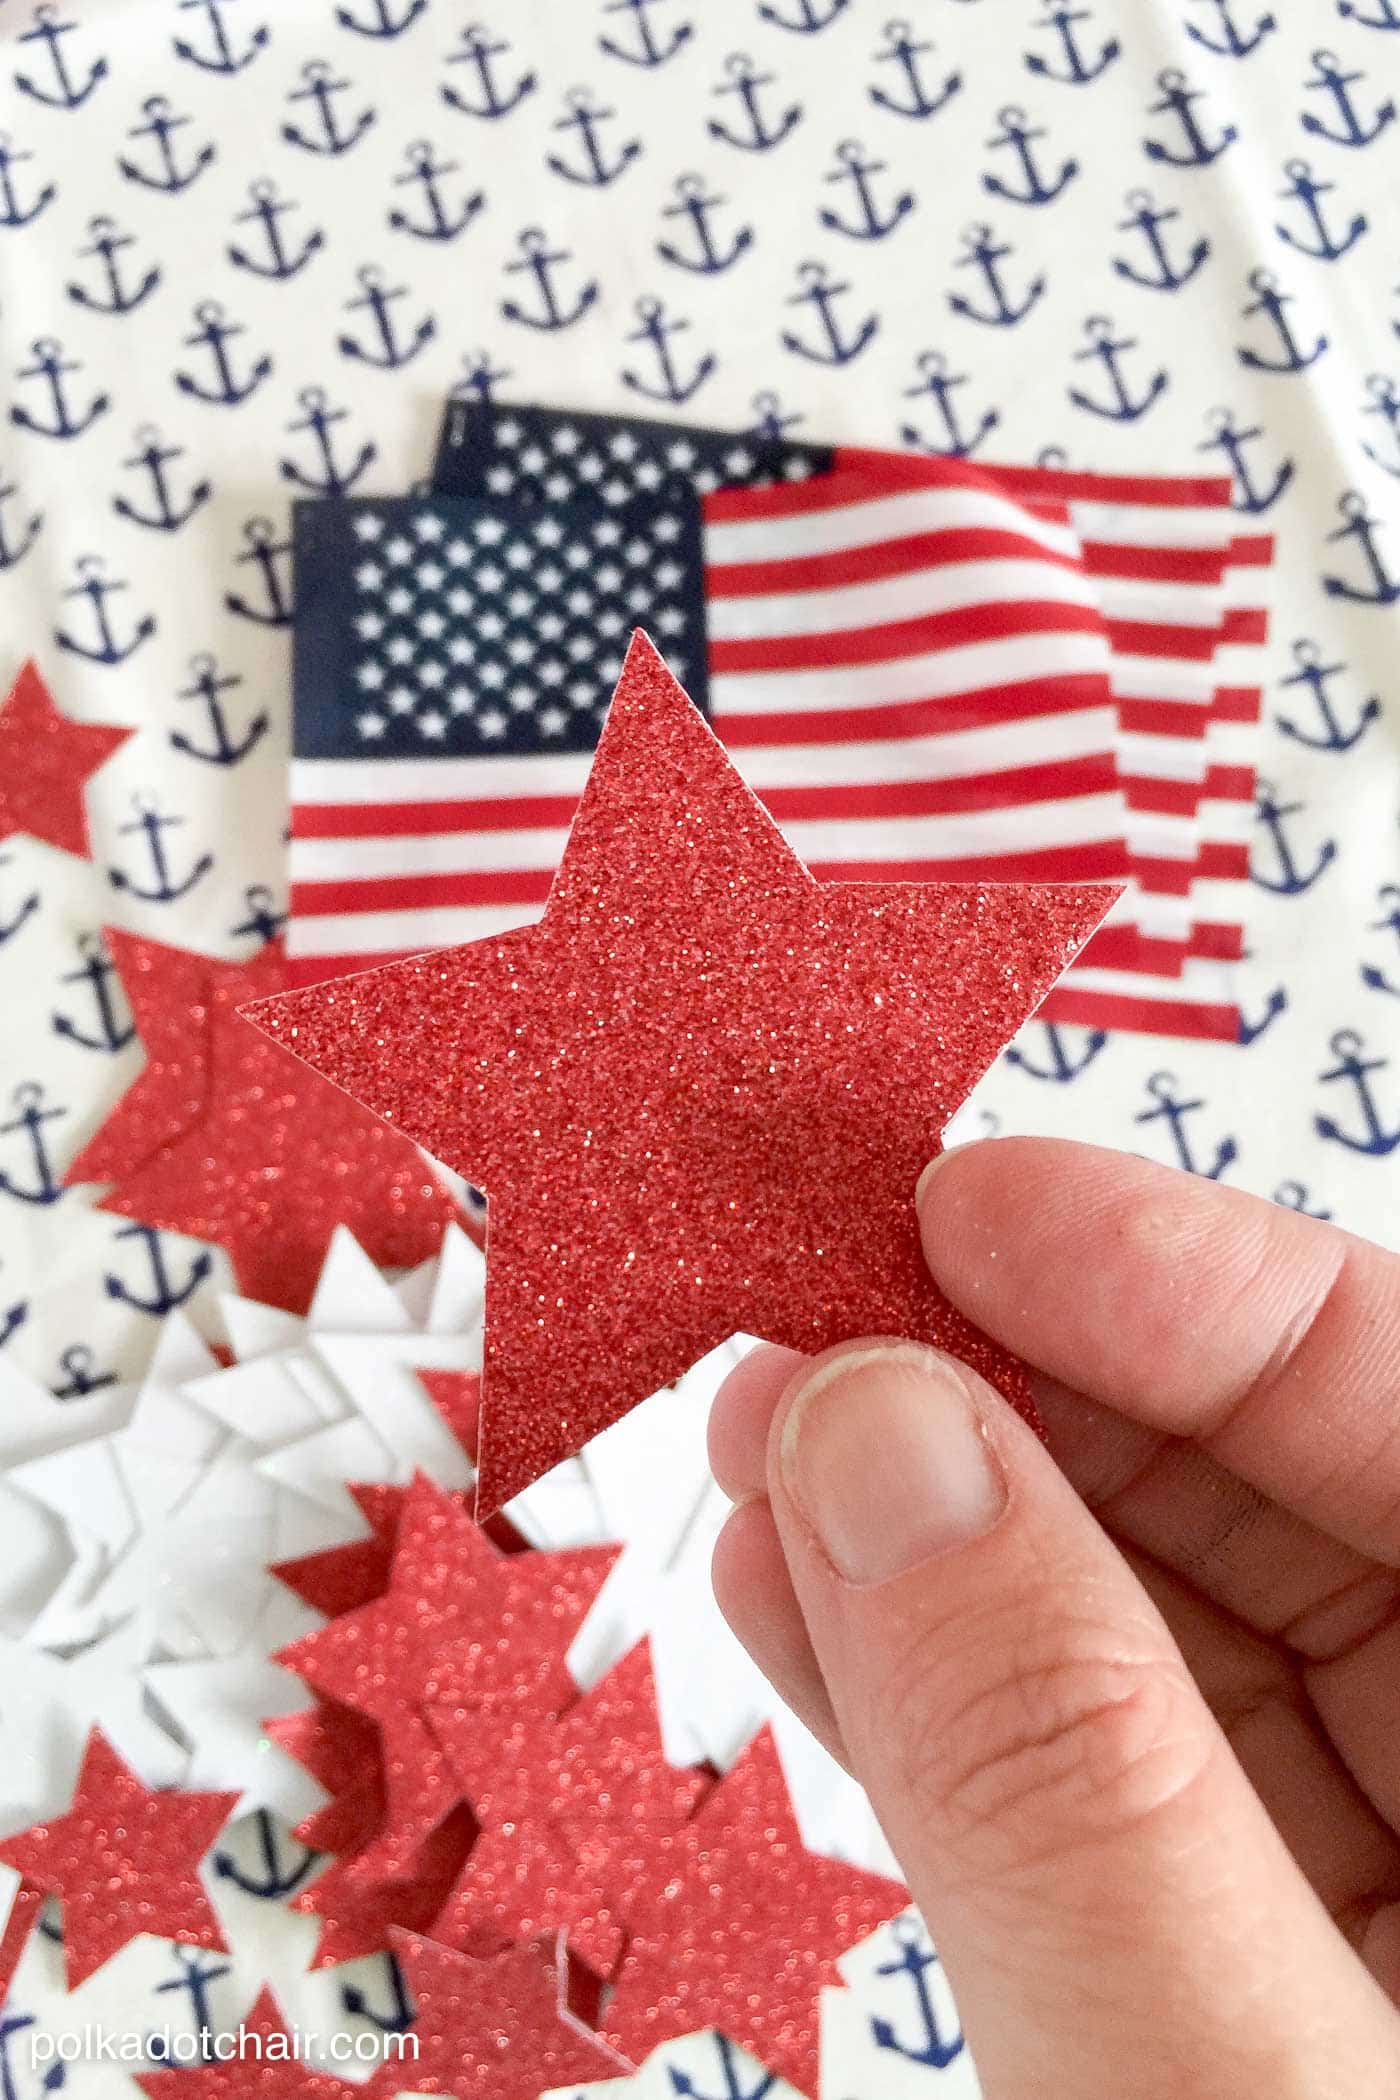
Begin by tracing your star template onto the glitter cardstock and cutting out the stars. If you have an “e-cutting” machine you can cut out a sheet at a time, if not, just enlist your kids to help you cut.
The number of stars you use is up to you, I used 7-9 on some balloons, and only used 1 large star on other balloons.
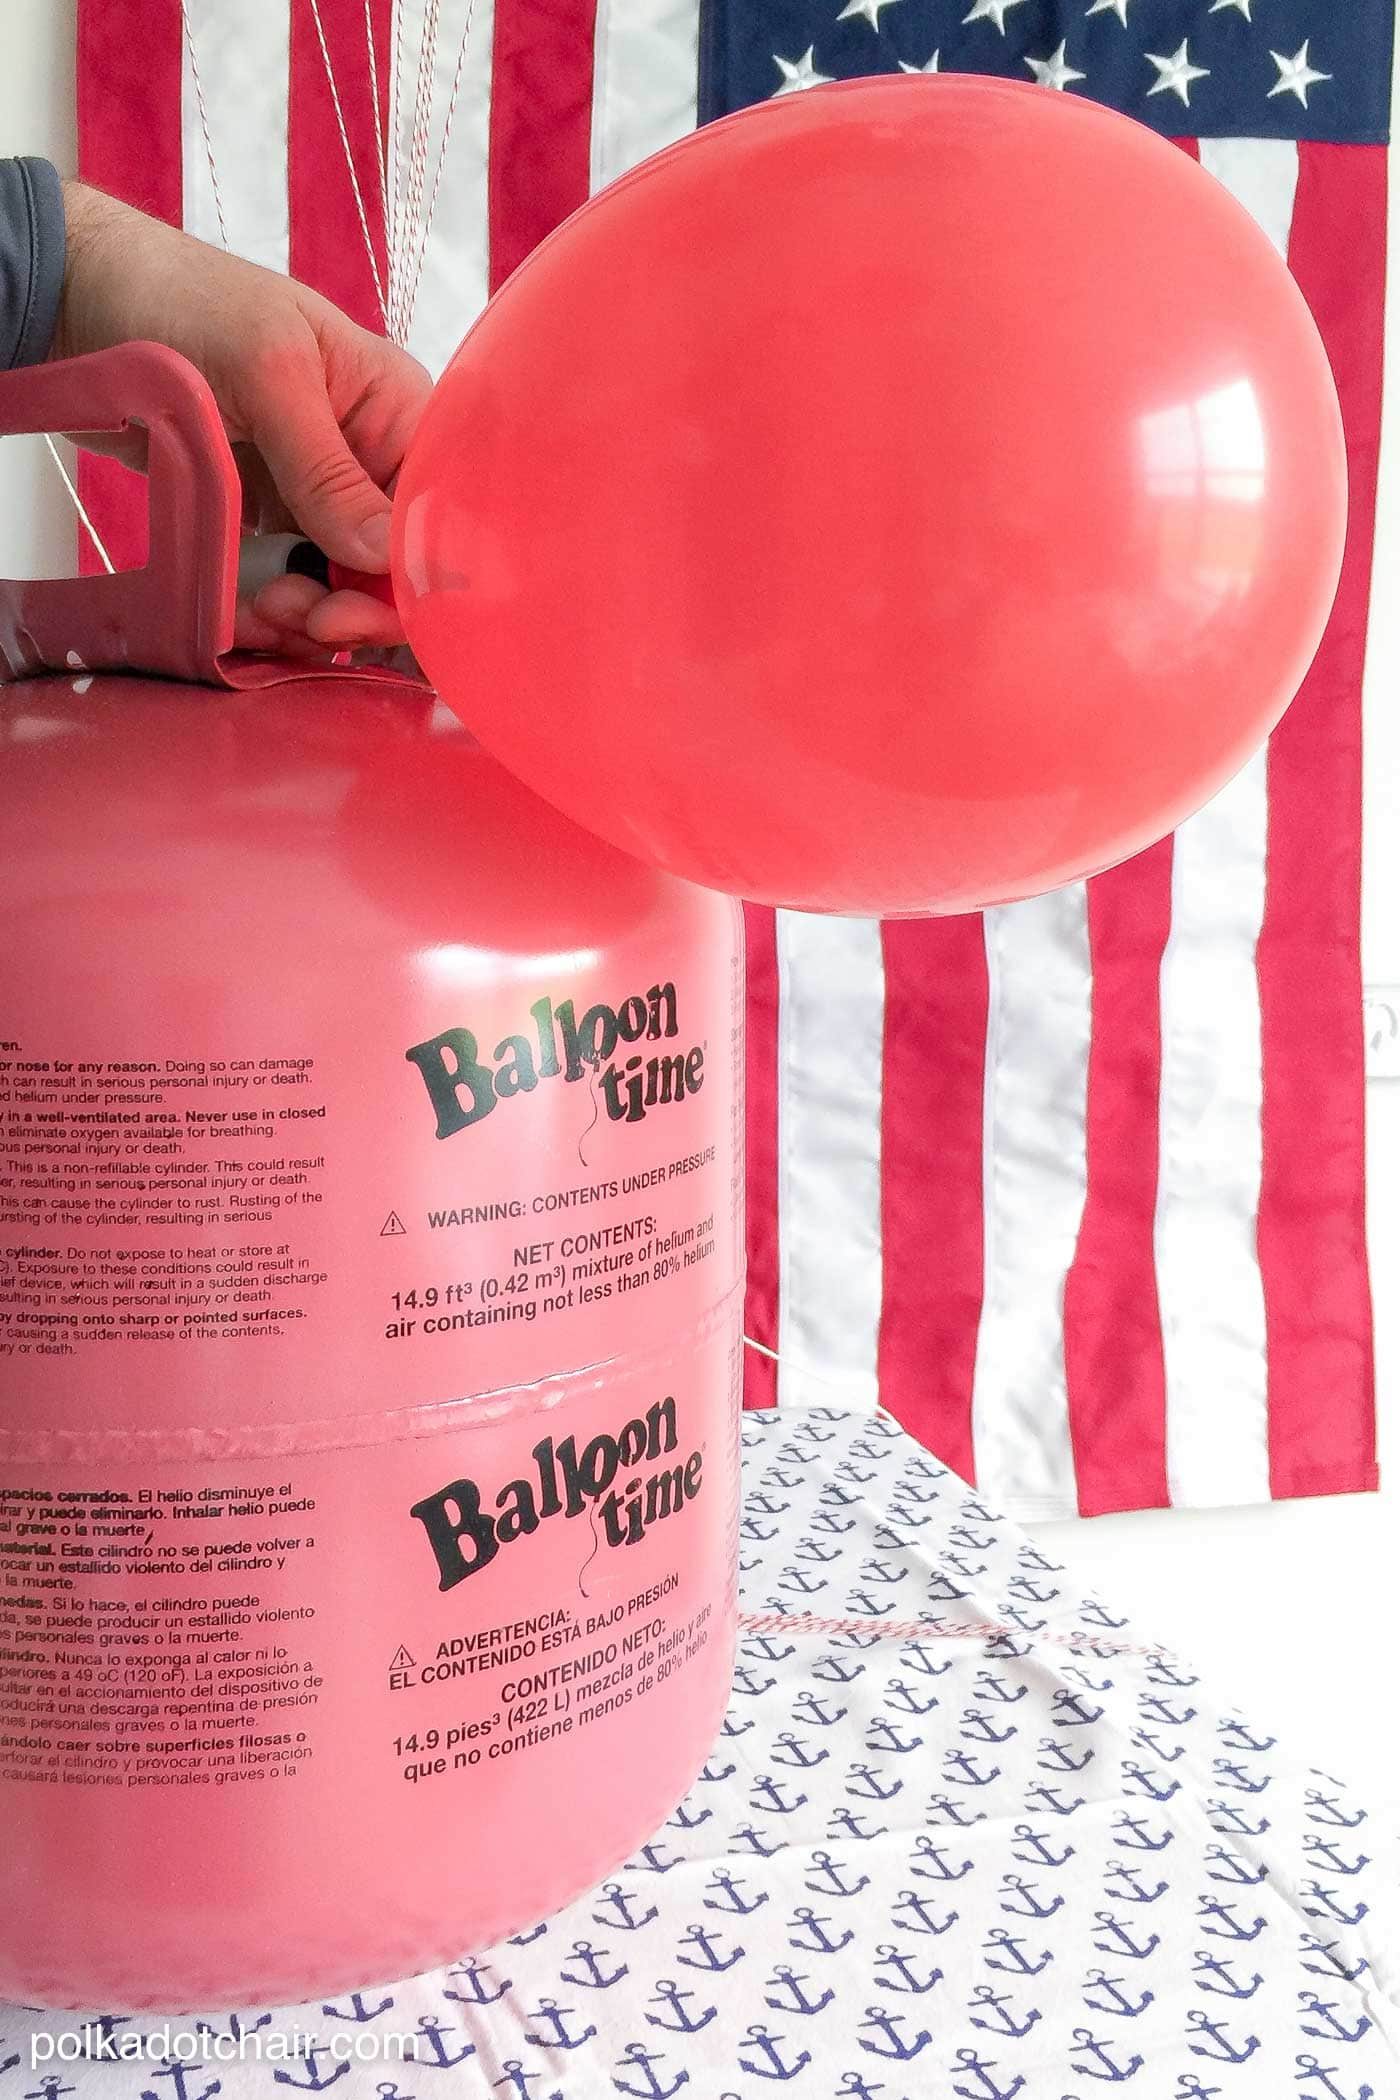
Next, using the directions on the Balloon Time tank, fill your Balloon. It’s super easy to use, just feed your balloon on to the valve stem and pull up. (I’m going to share with you a trick to tie them off, so blow up the balloon but don’t remove it from the valve stem yet).
Cut a piece of twine about 4-5 ft long.
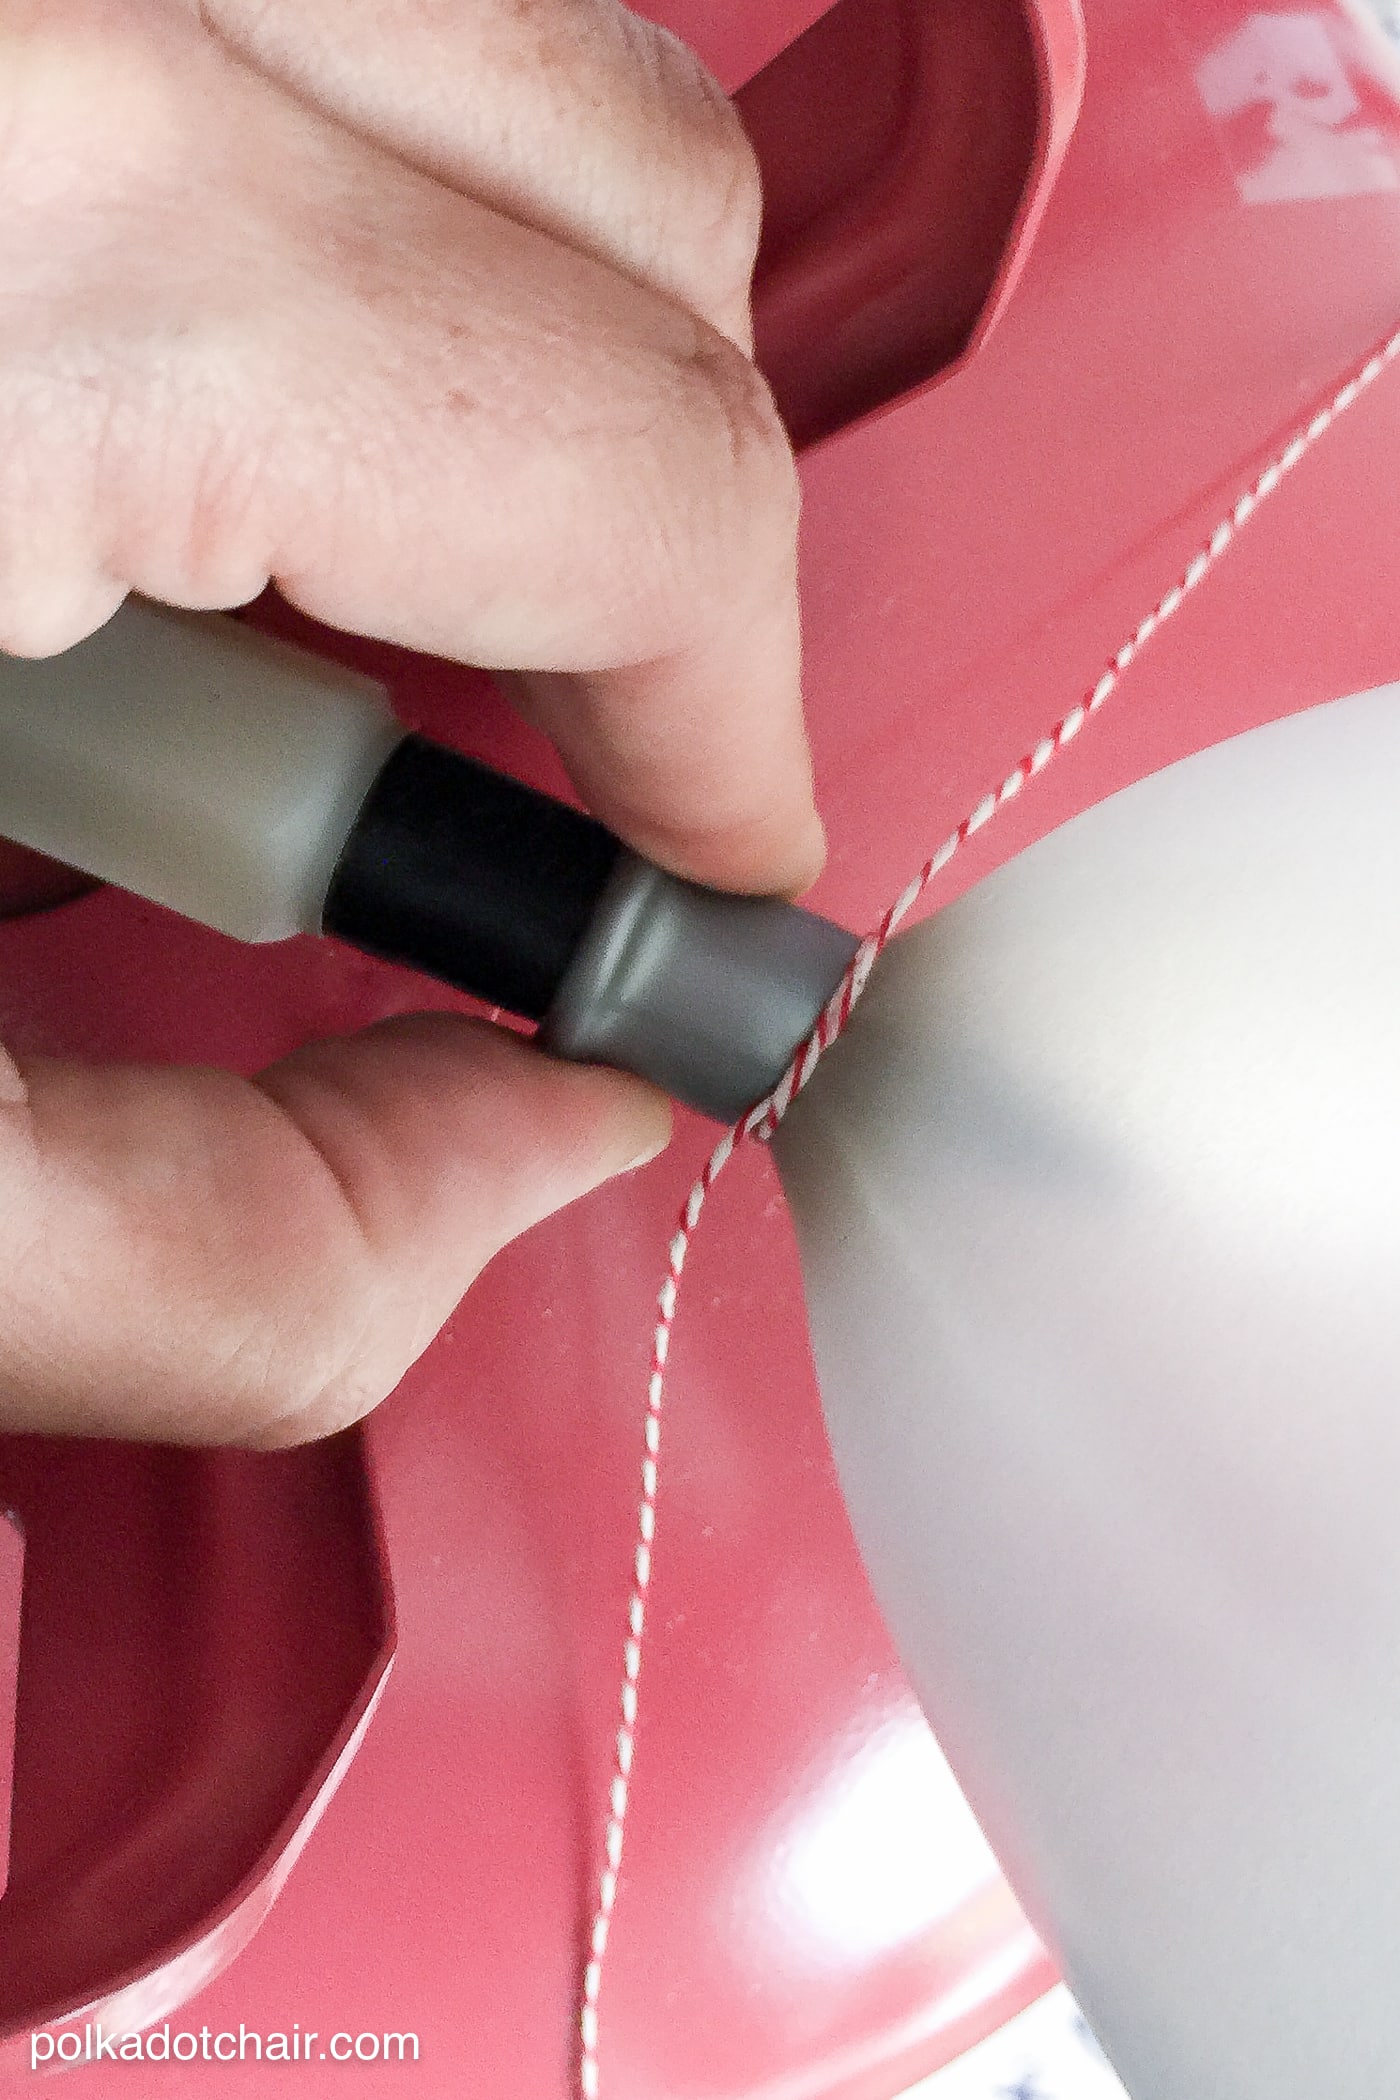
After the balloon is blown up, but before you pull it off of the stem, loop the twine around the stem and tie it once. Next pull on the strings until the string is tight and the balloon naturally slips off of the stem. Hold the string tight and tie a second knot! Super easy huh!? I was able to blow up and tie off a dozen or so balloons all by myself in a matter of a few minutes and my fingers were not sore at all!
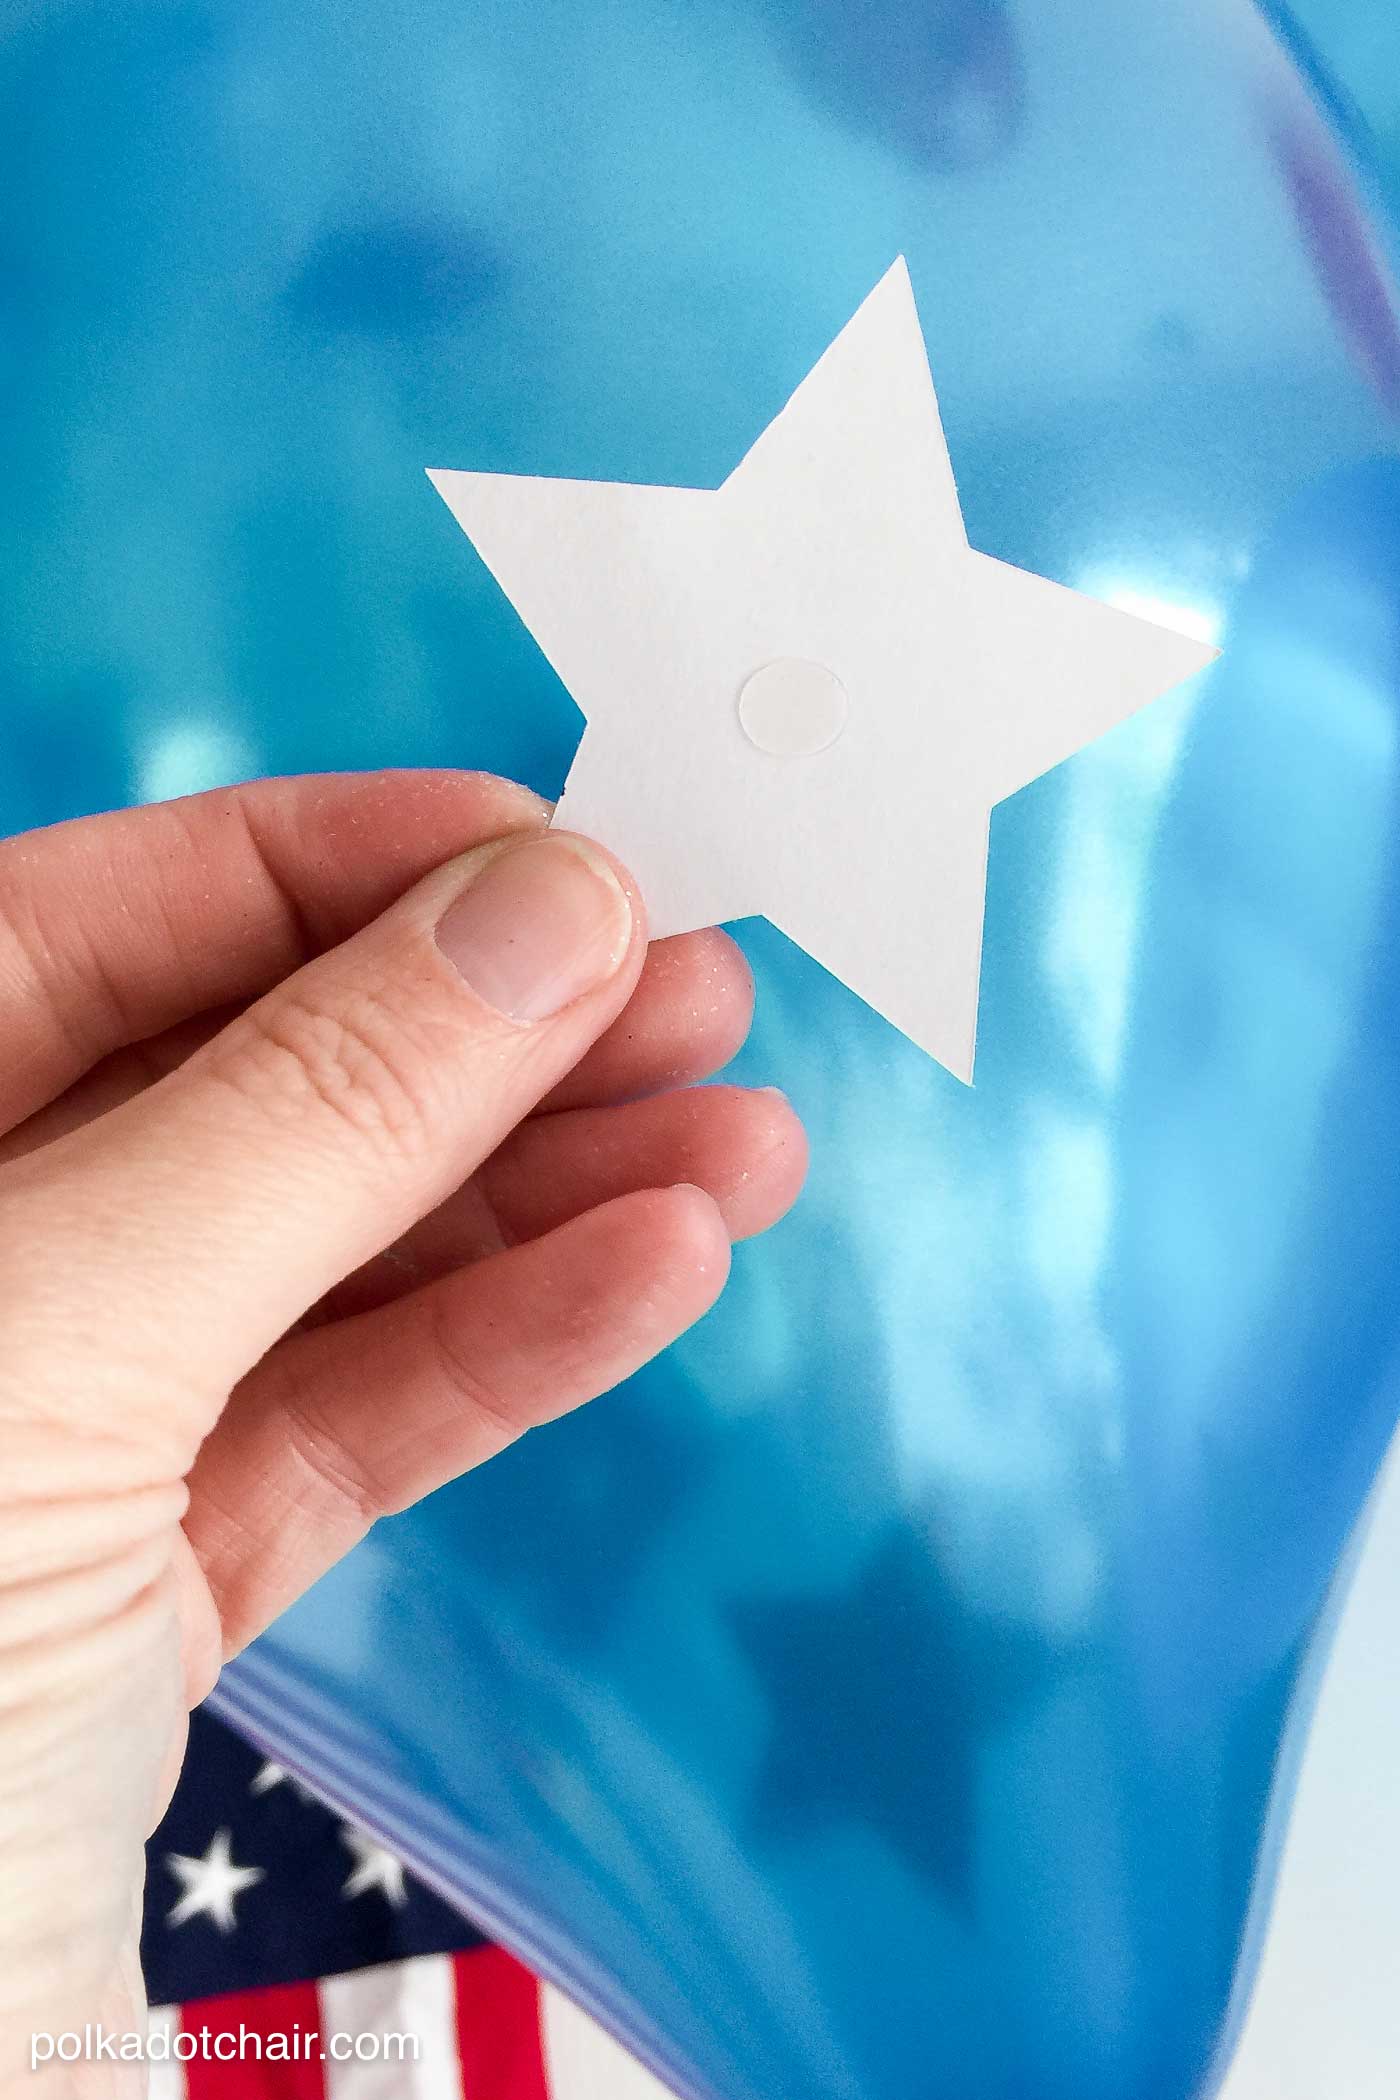
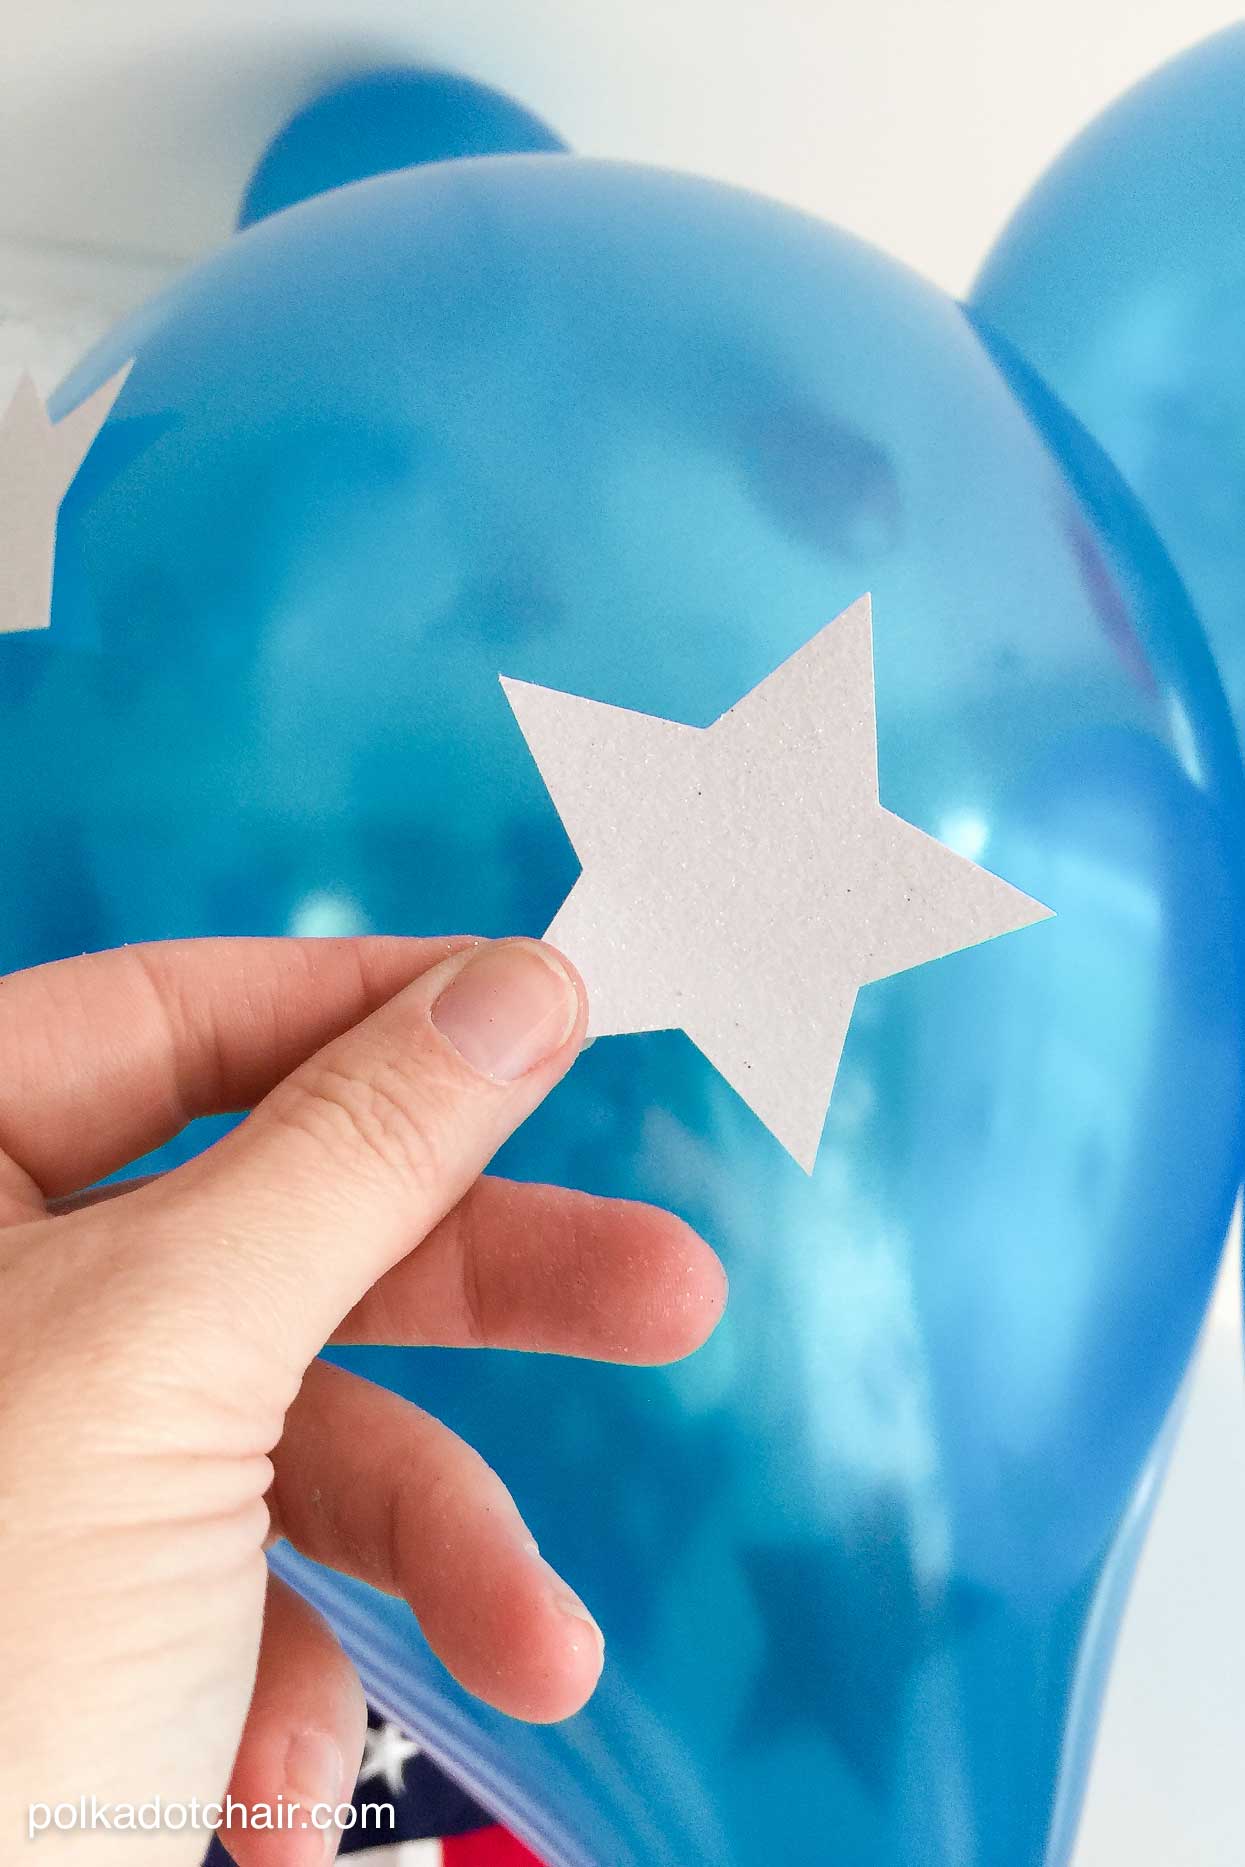
Next place one glue dot on the wrong side of the glitter star, peel off the backing and stick the star to the balloon.
Keep sticking stars to the balloons until you’ve got a look that you like.
You can make the USA Balloon using a similar method. Type USA into your word processing program on your computer, using a simple font (mine was Bebas) and print it out. Next trace the USA onto the glitter cardstock and cut it out. Use the glue dots to attach the letters to the front of the balloon.
That’s it! See simple huh!!
If you like this idea you may also like some of the other amazing Balloon Craft ideas over on the Balloon Time website, here are two of my favorites!
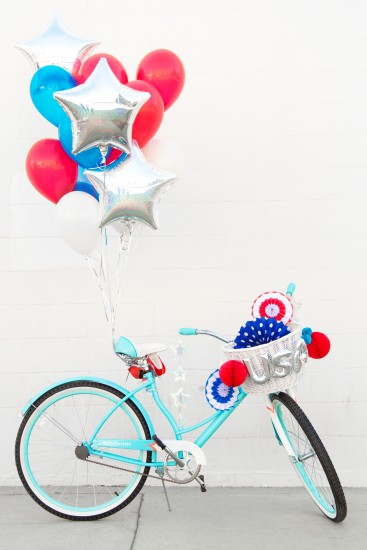
DIY 4th of July Bike Decorations (how PERFECT are these for a 4th of July parade???)
and
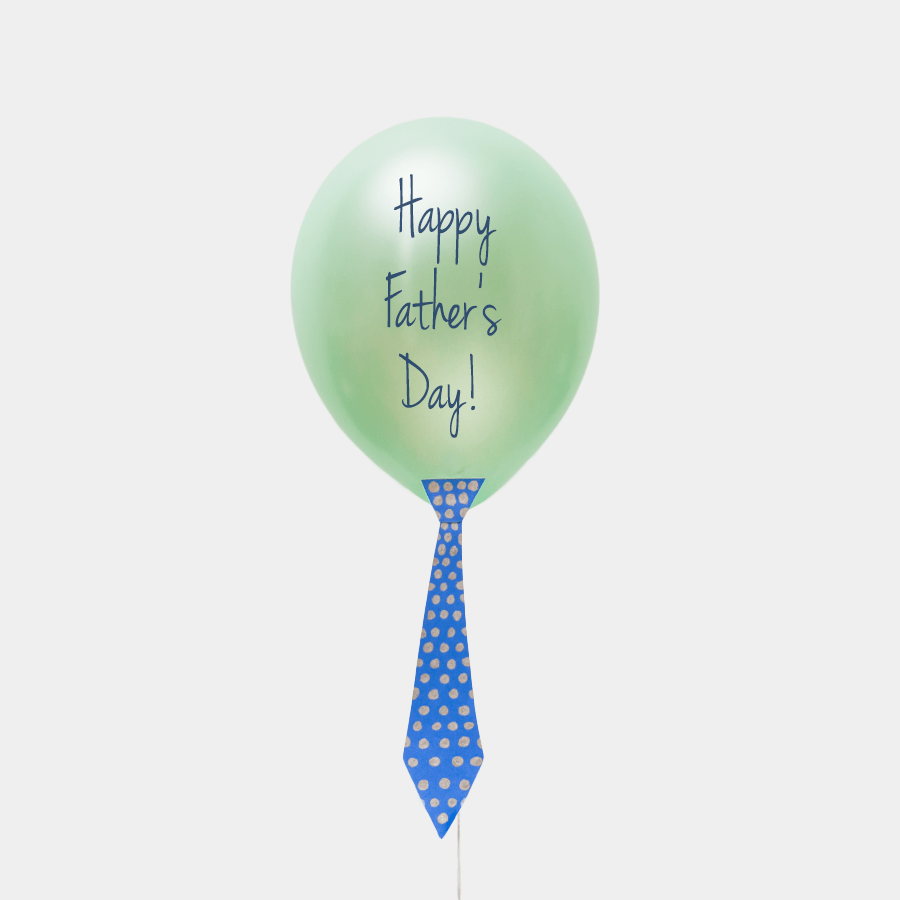
This ADORABLE DIY Father’s Day Tie Idea
This is a sponsored conversation written by me on behalf of Balloon Time. The opinions and text are all mine.