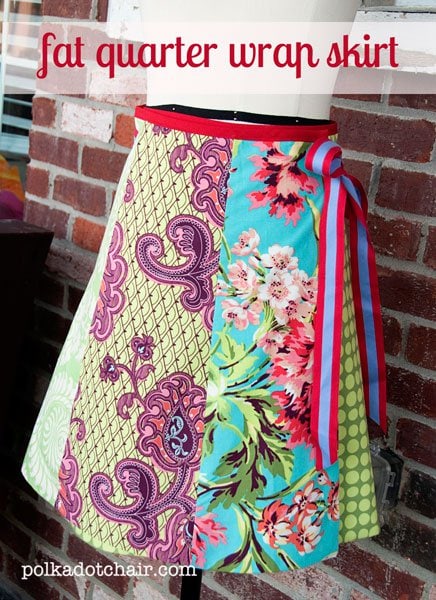
How to Sew a Fat Quarter Wrap Skirt; Easy Sewing Tutorial
Learn how to sew a Fat Quarter Skirt with this free step-by-step wrap skirt tutorial from Polka Dot Chair! This fun sewing project uses only fat quarters to create a versatile, adjustable wrap skirt, perfect for showcasing favorite cotton prints and mixing and matching patterns.
The tutorial walks you through cutting panels, assembling the skirt, adding bias tape, and attaching ribbon ties to finish a stylish summer skirt that’s flexible in fit and straightforward to customize. Whether you’re new to garment sewing or looking for a quick stash-busting project, this guide provides clear instructions and sizing tips so you can make a beautiful skirt with confidence.
This skirt tutorial was created as a part of the Skirting the Issue series at Simple Simon & Co.
When Liz from Simple Simon & Co. told me about the Skirting the Issue project, she noted the need for skirts for older girls.
Since most of my previous skirt tutorials have been for young girls, I challenged myself to make a skirt for an older girl.
Note: I’ve added suggestions at the bottom of the post for adjusting the skirt size for an adult.
I developed this wrap skirt because I thought it would be flexible and would adjust easily to fit a variety of girls (since it’s a wrap). This skirt is for a size 12-14 girl or a Woman’s size 2-4. However, it’s a wrap skirt and is not intended to be an exact size, as the width can be adjusted when worn.
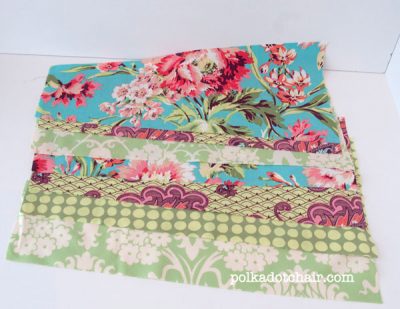
The skirt is made from 4 Fat Quarters and some lining yardage. Have fun mixing and matching fabric prints to create something that is entirely your own!
How to make a Wrap Skirt: a Fat Quarter Fabric Project
Equipment
supplies
- 4 Fat Quarters for the skirt
- 4 Fat Quarters or 1 yard of fabric for the lining
- 1 package double-wide bias tape
- 2 yards wide ribbon
Instructions
Step One: Cut your Fabric
- Cut each fat quarter into two pieces, each 9″ wide by 20″ tall. Before you cut, verify that you can cut two pieces from one fat quarter of fabric.

- Measure in 2″ from each upper corner of one of the 9″ sides of the piece, and place a mark at each 2″ spot.
- Draw a diagonal line from the 2″ mark on your piece to the bottom corner (on the other 9″ side). Cut along the diagonal line. Repeat on the other side. When you are done, you will have a trapezoidal piece that is 9″ across the bottom, 5″ across the top, and 20″ tall.
- Do this for all four fat quarters. At the end, you should have eight pieces.
- Using one cut piece as a guide, cut eight lining pieces from the lining fabric, then set them aside.
Step Two: Assemble the Skirt
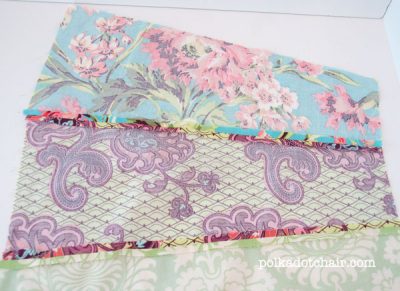
- Stitch the two skirt pieces together along the long sides, then press the seams open. Repeat until you’ve sewn all eight pieces together.

Step Three: Sew the Skirt Lining
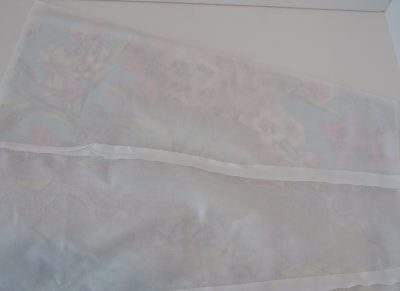
- Repeat the skirt construction step using the fabric lining pieces.
- Place the skirt lining and skirt, right sides together. Stitch along the two side seams and the bottom seam. Press the seams open, then turn the skirt right side out.

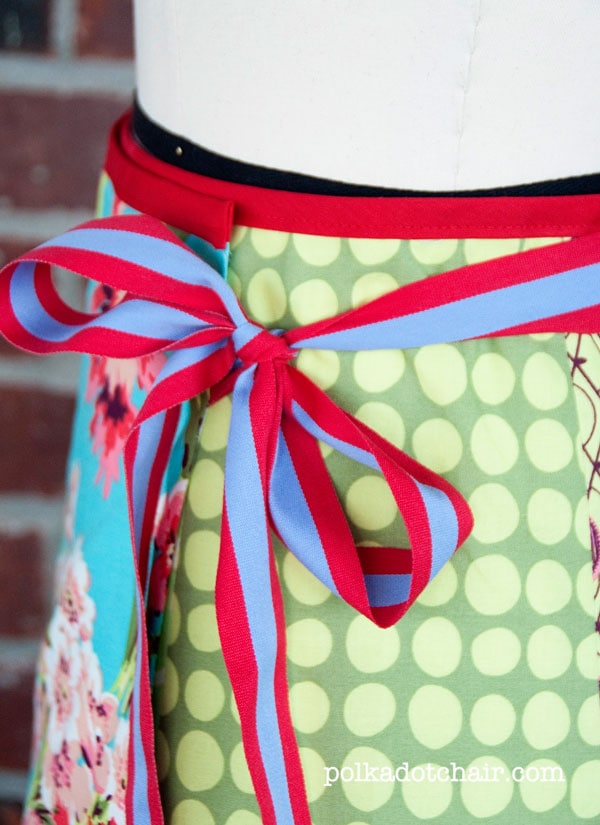
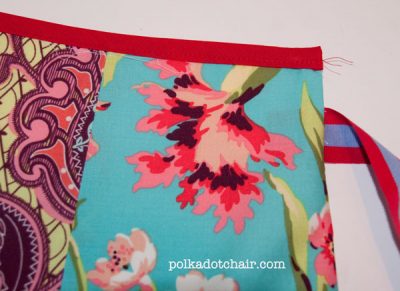
Step Four: Add the Ribbon Straps
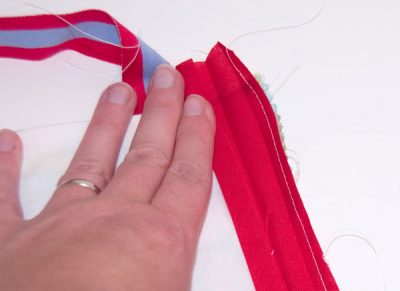
- Cut your ribbon into two pieces, 24″ and 48″. Unpick about 2″ down on your skirt side seams at the top, insert the ribbon piece, and then stitch the opening closed. The 24″ piece of ribbon will be stitched to the right-most panel (the one that will show on the front), and the 48″ ribbon will be stitched on the left-most panel.
- Baste the top seam of the skirt near the edge.
Step Five: Finish the Top Edge of the Skirt
- To finish the top edge of the skirt, attach double-fold bias tape. To attach, fold the bias tape open and stitch the raw edge of the bias tape to the raw edge of the skirt.
- Fold the bias tape over and top-stitch it in place.
- To finish, stitch a buttonhole close to the seam between the 2nd and 3rd skirt panels so that you can feed the strap around the back of the skirt.
- Press well, and you’re done!

Sizing Suggestions:
- Note: these are only suggestions. I’ve not made the skirt in a larger size. If you wish to make this skirt larger, you can do one of two things:
- If you only want to make it larger, you can increase the number of panels. Instead of 8, you could do 9 or 10. Since it’s a wrap skirt, it will just fold over itself until it fits.
- If you wish to make the skirt much larger, I would suggest using each fat quarter once (or buy 2 of the same if you want to repeat fabrics) and increasing the rectangle size from 9″ x 20″ to 12″ x 20″, while still using the 2″ mark on each corner to create your trapezoid.
- If you wish to make the skirt longer, use yardage, NOT fat quarters.


Have you won an award for this idea? I hereby nominate you for “Best Clothing Idea” in the “What in the World do I Make with this Crazy Fabric Gift.” Thank you. I like this skirt so much.
Hi. I would like to try this but with an elastic band at the top instead of a wrap. Can you tell me how to do this?
Thanks
I’m sorry, I’ve not done that before
I am excited to run across this skirt and pattern! I wore one of the same design in 1969 and everyone I worked with wanted the pattern for themselves. I purchased mine but one of the secretaries was a seamstress and so we were all made wrap-skirt rich.
Mine was a solid on one side and small checks of the same color on the other side so it was reversible.
I love your bright large print idea and can’t wait to make one for my granddaughter.
I made 2 of these skirts in the past couple of weeks and just bought more fabric quarters to make more! I love this idea and am so happy with my skirts! I’m 5’0″ tall and the length is good for me. I generally wear a size 4 and did 9 panels, which gives a good amount of wrap for me. Thank you so much for sharing this post! I’m so happy I found this on Pinterest!
I’m a bit confused about the measurements for cutting the trapezoid shape. If I mark 2 inches on the top (a 9 inch side) and cut from there …don’t I then have a 7 inch top? Tutorial says 5 inch.
I imagine I’m just missing something simple…..can you help?
Thanks, Sarah
It’s 2 inches from each side for a total of 4 inches.
Please help me to understand. I am a new sewist. I want to learn how to sew, especially how to measure fabric for cutting instead of using an already made pattern cutting.
My question is what is basic or standard way to follow for the sizes of fabric that I want to cut? e.g. making a skirt. 86cm waist, 103cm hips, 91cm length.
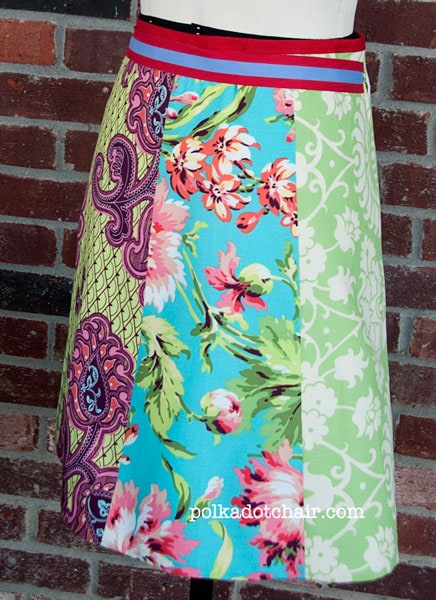
Hi, can you tell me what fabric you’ve used in the picture… Want to make this skirt exactly as per your photo..l its lovely!
They are all Amy Butler Fabrics. I’m not sure of the exact name of each print.
I’m using this to teach my daughter to sew. I’m probably not the best teacher as I got confused by the “measure 2″ on each side and get 5″ on the top.” Finally after talking it out, I got it. What a ditz I am! We’ll report back on her success!
I have to do that sometimes too!! I “talk” to myself a lot when I sew!
I am also having problems working out the 2 inch on each side and get 5 inch on top. I have drawn out a diagram on paper but still can’t figure it out. It looks like a trapezoid but the measurement isn’t 5″ across. It seems if I did it another way I would waste fabric and I don’t think you’re meant to do that! Could you provide a diagram, please? I love the idea and I know it should be easy!
I love this idea! And I love being able to make a skirt and not having to really measure for it 🙂 (this is extremely helpful when you are losing the baby weight) What about using extra fabric and making it into a sort of fat bias tape for the tie?
Hi, Love this skirt! Going to make one for my daughter today. I’m going to use 9 fat quarter pieces instead of 8, just to be on the safe side. She’s soon-to-be-twenty-one and a college student, and prefers her skirts mid-thigh. She’s 5’5′ and her waist is 27″. Would I just make the length shorter than 20? Say about 17 inches for the lengths of all the pieces and keep all the other cutting measurements the same? I’m kind of a newbie. 🙂
My fat quarters are in the washing machine on gentle cycle right now! So I’m in need of a quick reply! LOL
Thanks,
Kat~
Hi,
I would keep the length the same since it’s easy to shorten if it’s too long, but harder to lengthen if it’s too short. I can’t wait to see how it turns out! Good luck!
Great tutorial, love the skirt. Thanks for sharing. have pinned for later.
Thanks for this great tutorial Melissa – I made some adult ones for Christmas presents! http://a-fresh-page.blogspot.co.uk/2014/03/wrap-around-skirts.html
I just have to say, that i saw this and i ran to buy the fabric, i am size four and i did not 8 but 9 cuarters. Also as the first lady asking for her size 5.5 i’m that tall and what i did was to keep the measures sugested here and add a 2 inches hass instead of ribbon, it is awsome. I used diferent fabrics in wine red and it is in the lnee as i love……………
Thanks for the super idea
Thanks for the details you shared, I think they will help many people who are making the skirt!
so clever! i will do this as my next project.
l looove this skirt, and can’t wait for my pregnancy to be over so that I know what size I should make it in. Making sure it will fit around the “waist”. 🙂
Thanks for sharing.
Good idea!!!
How cute! I’m totally going to have to make one of these for myself. Thanks so much for sharing.
Debbie..(O:
>
Very lovely!!! Thank you for sharing! I can’t wait to make this. I prefer my skirts to hit below the knee. I’m 5’5″…do you think this will be long enough? Thanks!!
Probably not- I’m 5’9″ and it hits me about mid thigh. (not that I could wear it, as it’s tiny LOL!!)