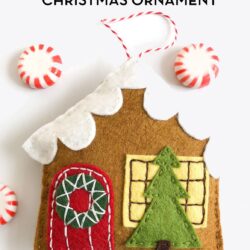
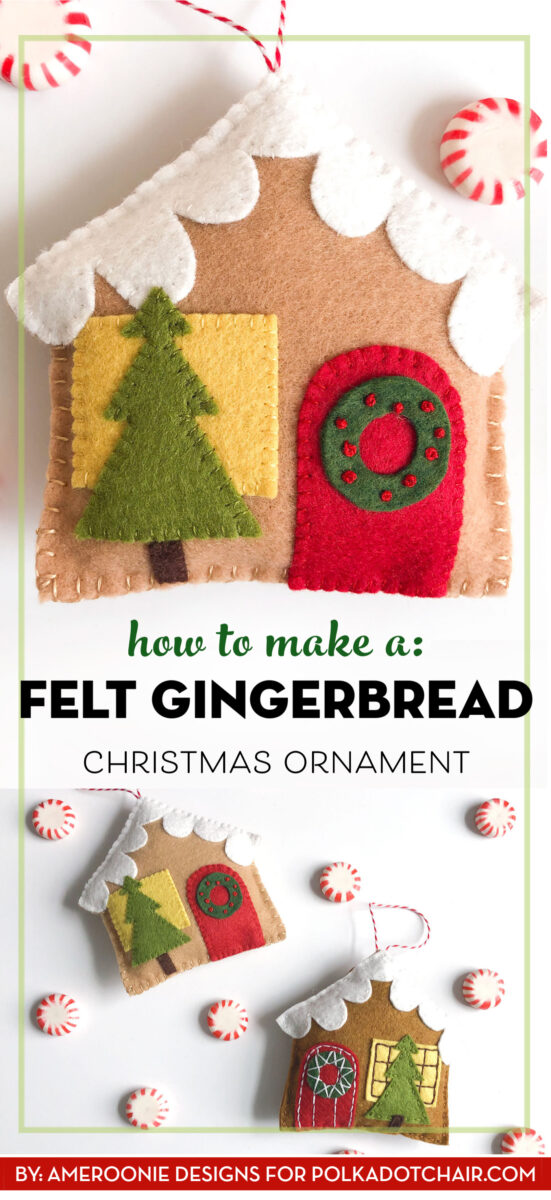
Felt Gingerbread House Christmas Ornament Pattern
Amy always brings us the cutest Holiday sewing projects. Today’s tutorial is no exception. She’s showing you how to make Gingerbread House Felt Christmas Ornaments! I can just imagine an entire Christmas tree covered with these adorable houses. Keep reading to find out how to make them.
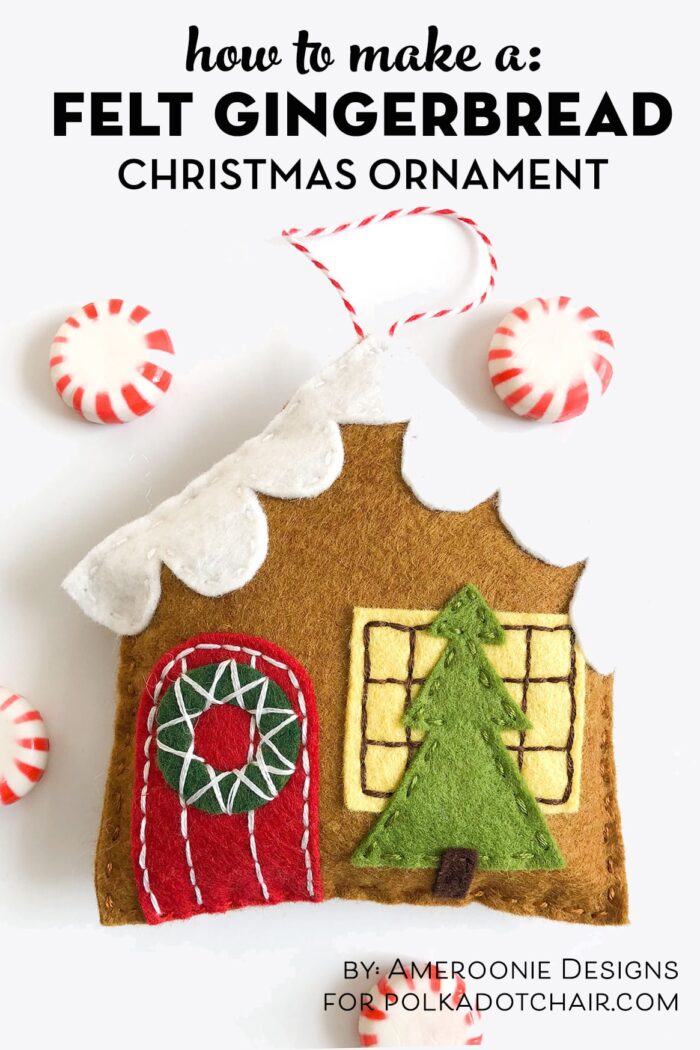
If you are looking to add a handmade touch to your tree this year, I have just the project for you. This gingerbread ornament is a fun and simple project. Some felt and thread is all you need to stitch up a treasure that will last for years.

How to Make Felt Gingerbread House Ornaments
Supplies
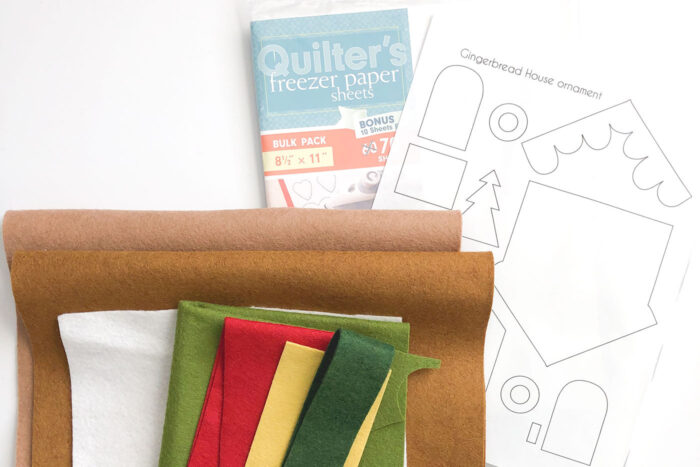
- Wool blend Felt- gingerbread color, brown for the tree trunk, white, red, green (2 shades), yellow
- Embroidery thread to match the felt
- Twine or ribbon for hanging
- Stuffing – just a small amount
- Freezer paper. I like these printable sheets, but you can trace the pattern onto regular freezer paper as well.
- Free Printable Felt Christmas Ornament Pattern
How to Get the Pattern
Fill out the form below and we will email you a copy of the pattern piece.
Follow the directions below.
Gingerbread House Felt Christmas Ornament Pattern
supplies
- 4 pieces Wool blend Felt- gingerbread color brown for the tree trunk, white, red, green (2 shades), yellow
- Embroidery thread to match the felt
- Twine or ribbon for hanging
- Stuffing – just a small amount
- 1 sheet Freezer paper I like these printable sheets, but you can trace the pattern onto regular freezer paper as well.
- 1 Printable Pattern Piece
Instructions
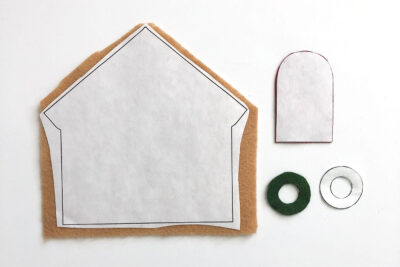
Prepare the Pattern Pieces
- Print or trace the pattern pieces onto the paper side of the freezer paper.

- Cut out the pattern pieces with a slight margin around each one.
- Use an iron set to medium heat with no steam to fuse the pattern pieces to the felt.
- Cut out the pattern pieces on the lines. Layout the pieces as desired.
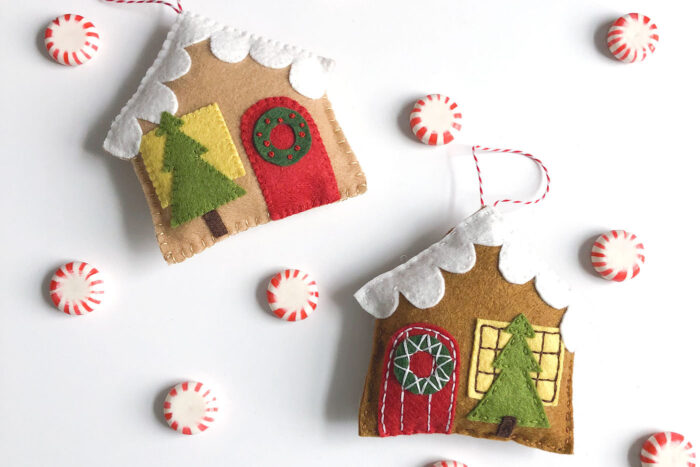
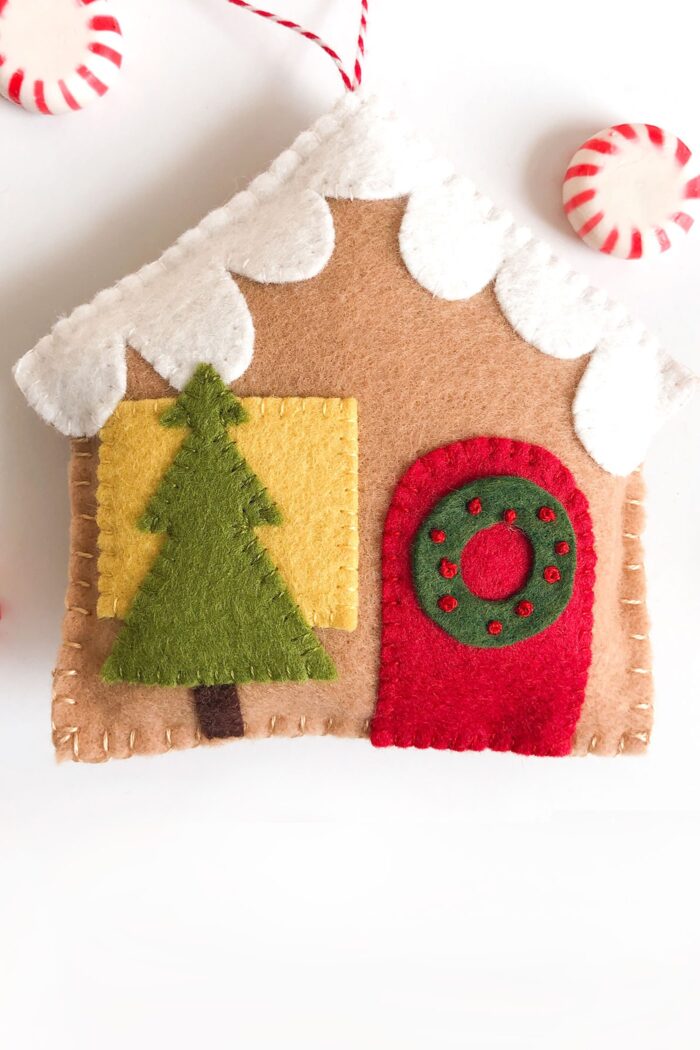
Embellish the Ornament with Embroidery Stitches
- Now comes the fun part. You can keep it simple and glue the pieces down in place, or you can use a single strand of coordinating floss to whip stitch the pieces down.
- Finally, you can use three strands of floss to embellish and attach the pieces in place.
Finish the Ornament
- Once the front is all stitched down and embellished it’s time to assemble the ornament. Lay the front on top of the back. Use a whip stitch or a blanket stitch to sew around the outside of the ornament.
- When you get to the peak of the roof, attach a loop of twine or ribbon for a hangar.
- When there are just 2 or 3 inches left open, add the stuffing to give the ornament some depth.
- Then finish stitching the ornament closed.
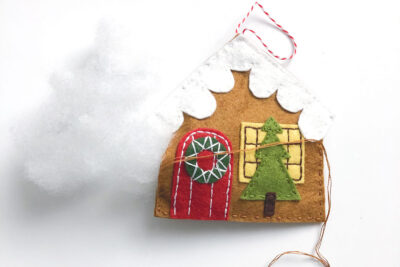
Now all that’s left is to hang your ornament and enjoy!
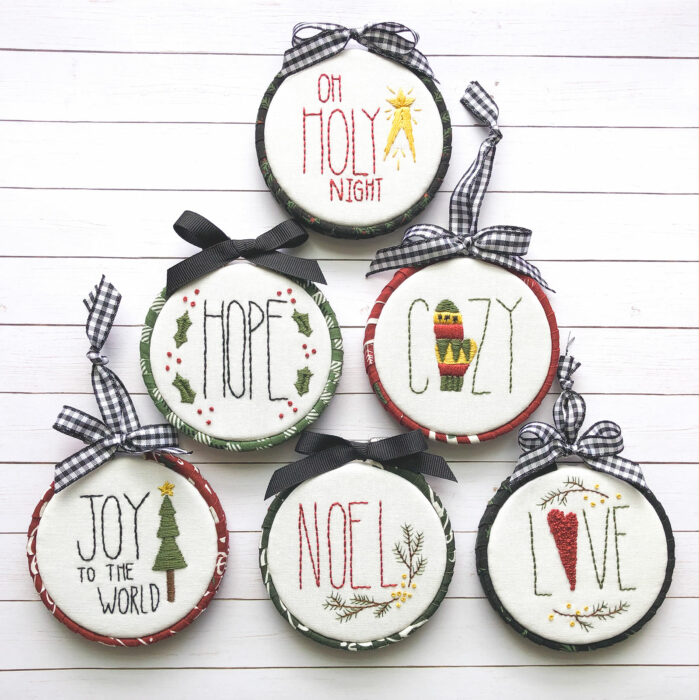
I have lots more fun holiday projects over on my blog, Ameroonie Designs. For instance, you might love these Embroidered word ornaments.
OR these floral crown ornaments let the fabric do the work and you just get to have fun stitching.
Have fun stitching up the holidays!
About the Maker:

Hello! I’m Amy Chappell, the person behind Ameroonie Designs. I’m a sewing and quilt pattern designer, and I’m proud to say that my work has been featured in several print publications and popular DIY websites.
I am the mom of six kids- which is a big reason I create and sew. I find that I am happiest when I am making things, and taking time to be happy makes me a better mom.
Join me in my exclusive Let’s Sew Friends membership, where you’ll find small, manageable monthly sewing patterns, live classes, and lots of video tutorials!
More Cute Things to Sew for Christmas:
DIY Christmas Stocking Advent Calendar
Merry & Bright Wool Felt Christmas Stocking Pattern
How to Make Quilted Christmas Stockings

Love this, have just finished my first one, 2 more half done.
Would like gingerbread pattern and or anything else!
I have tried twice to have this sent to my email and nothing ever comes. Can you please help me? This is SO cute!
Be sure to check your spam folder. I just did a “test” and I got the email. I bet it went to spam
Hi. I can’t find your felt gingerbread bread house pattern. Im a subscriber
It’s in the Sewing Library that is linked in this blog post. As it notes on the top of the library page, there is more than one page of templates, make sure you are using the numbered buttons at the bottom to scroll though the pages.
I love your ideas!
Thank you for offering great free items to make and create.
I am a retired teacher and grandmother of 5.
We are from the great state of Wyoming also, but now live in CO.
Thank you again!
Jackie