Halloween Quilted Table Topper Tutorial
Happy Halloween! I have a Halloween Sewing project to share with you: a Quilted Table Topper! It’s a strip-pieced hexagon table topper constructed similarly to my Mini Christmas Tree Skirt. If you like this Halloween Sewing project, you may also like this large hexagon quilt tutorial.

Kentucky has had the most beautiful Fall this year. Fall is almost always gorgeous here, which makes it such a shame that we usually go out of town for October break.
This year, my kids are in different schools with different Fall breaks, so no traveling for us, and it’s KILLING ME, I tell ya! Fall break is one of my favorite times to travel.
Usually, we try to head down to Disney World to catch everything all decked out for Halloween and attend Mickey’s Not So Scary Halloween party (even though last year the party ended with one of my kids on a stretcher and a bunch of paramedics gathered around us, It’s a LONG STORY, that you can read about here if you like).
Okay, back to my point. Since we knew we would not be traveling in October this year, I decided to stay home and tackle some much-needed projects around the house.
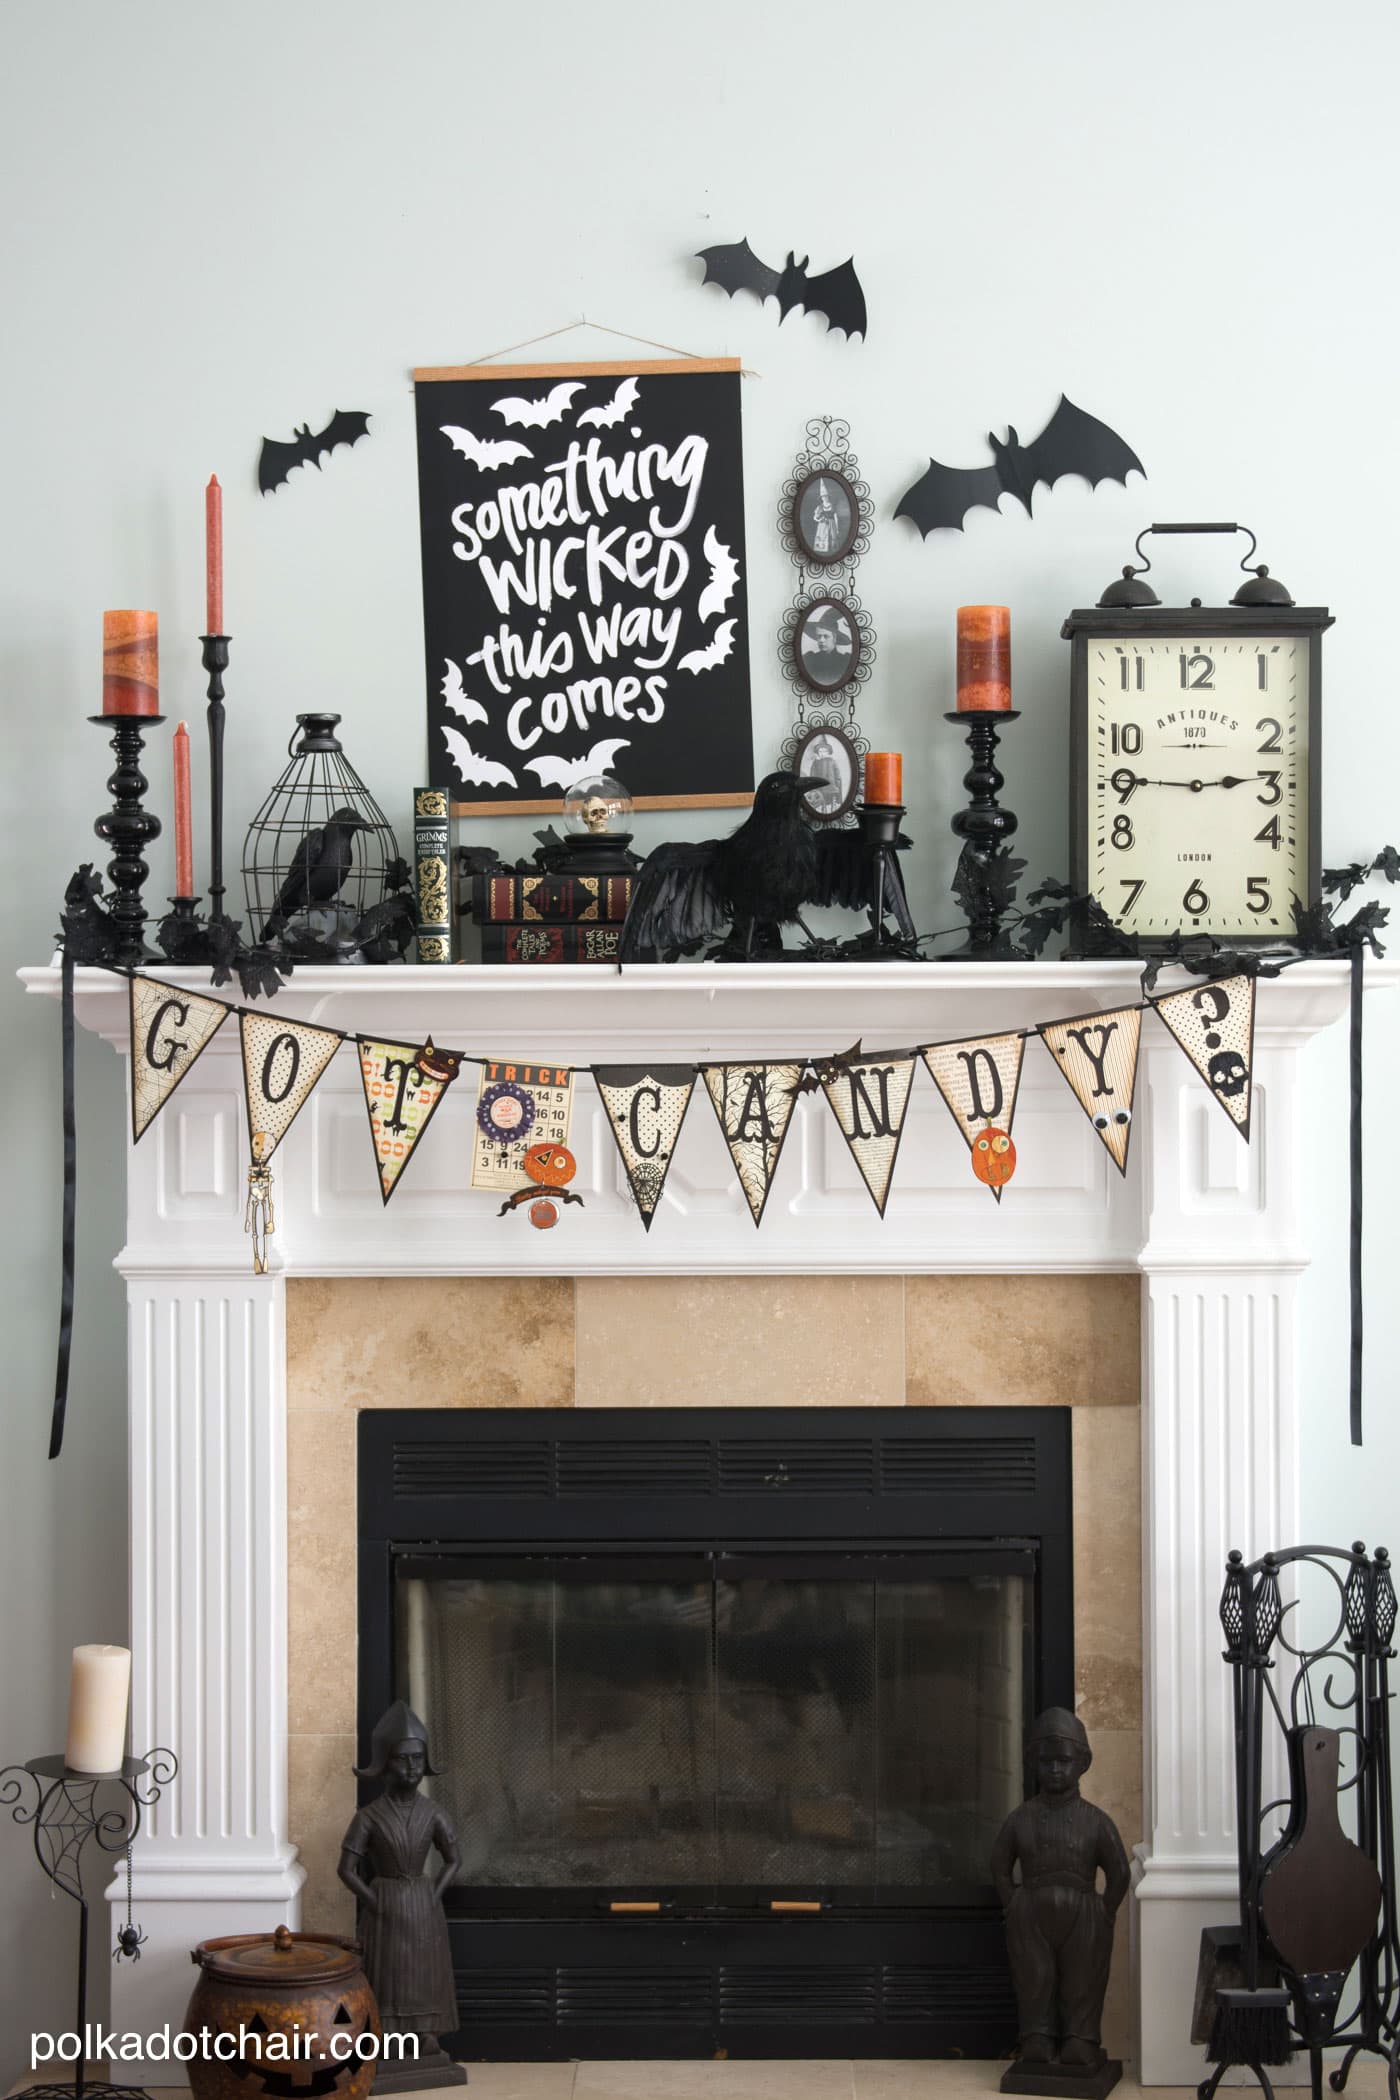
We spent most of the month repainting our Kitchen and First-Floor Family Room and finally got all of the Halloween decorations out a week or two ago (just in time to take them down, right?).
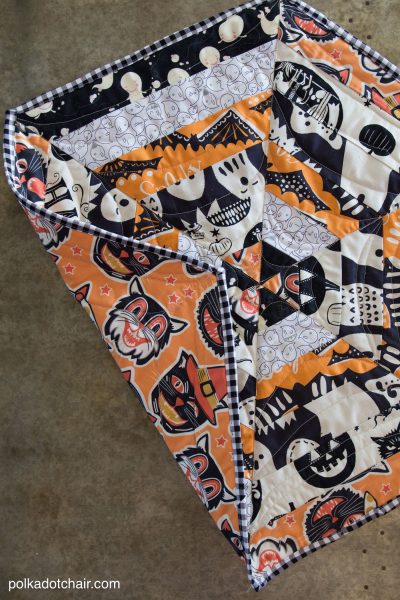
A quilted Halloween table topper has been on my “wish list” of projects for a couple of years. This year, I thought I’d tackle it. I try to add one sewn item to my Halloween decorations every year, and this table topper can now join my Halloween Quilt and Ghastly Pillows in my box of quilted decor.
If you’d like to make one, here is a quick tutorial.
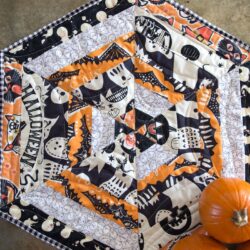
Halloween Quilted Table Topper Tutorial
Equipment
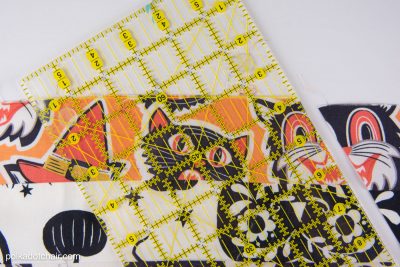
- quilting ruler with a 60-degree angle measurement
supplies
- 12 pieces Strips of fabric in various prints. each 2 1/2″ x 42″ You need 4 strips EACH in 3 different colors. (i.e., 4 orange, 4 black, 4 white)
- 1 yard Fabric for the back
- Quilt batting
Instructions
Step one:
- sew 6 strips along the long sides (all seams are 1/4″). They will be in a pattern: Orange, white, black,orange, white, black.
- Repeat for your 2nd set of strips.
- A few tips: When sewing long strips together, sew in opposite directions. Don’t always stitch in the same direction, as it can distort your strips. Also, make sure when you press, you only press, not iron. This will help you keep straight strips.

Step two:
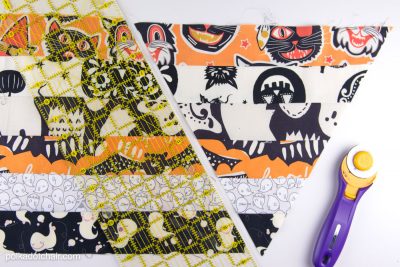
- After your strips are sewn and pressed, lay them out on your cutting mat. Take your ruler and line up the 60-degree angle mark with the top straight edge of the strips. Cut.
- Flip your ruler and cut again in the other direction, making a triangle.

- Repeat until you’ve cut 4 triangles. Discard the extra pieces at the ends that are not triangles.
- Cut more triangles from your 2nd set of strips.
Step three:
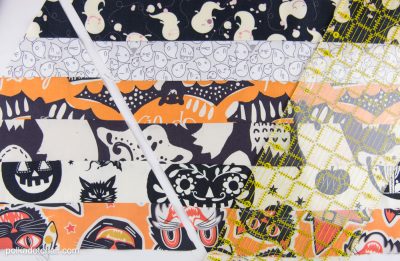
- After you have all 6 triangles cut, arrange them so that the long part of the triangle is colored alternately. In my case, I had one black and one orange.
- Press the seams in opposite directions. The orange triangles’ seams press towards the point, and the black triangles’ seams press towards the outside edge.
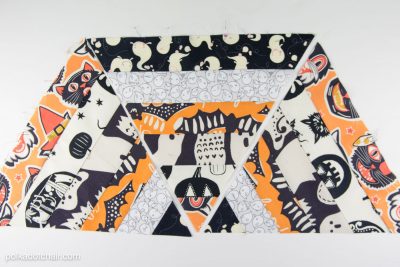
- Stitch two triangles together with 1/4″ seam allowance matching seams.
- Repeat until all 6 triangles are sewn together and form a hexagon shape.

Finishing:
- Do your best to match the center point. If you can’t get it just right, add a cute button or applique to cover that point.
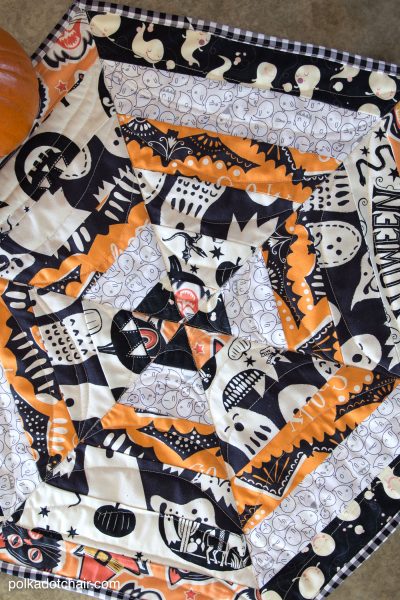
- Quilt and bind as desired. I just quilted a simple spiderweb pattern into mine. If you need help quilting a table runner, check out the tutorial in this post.
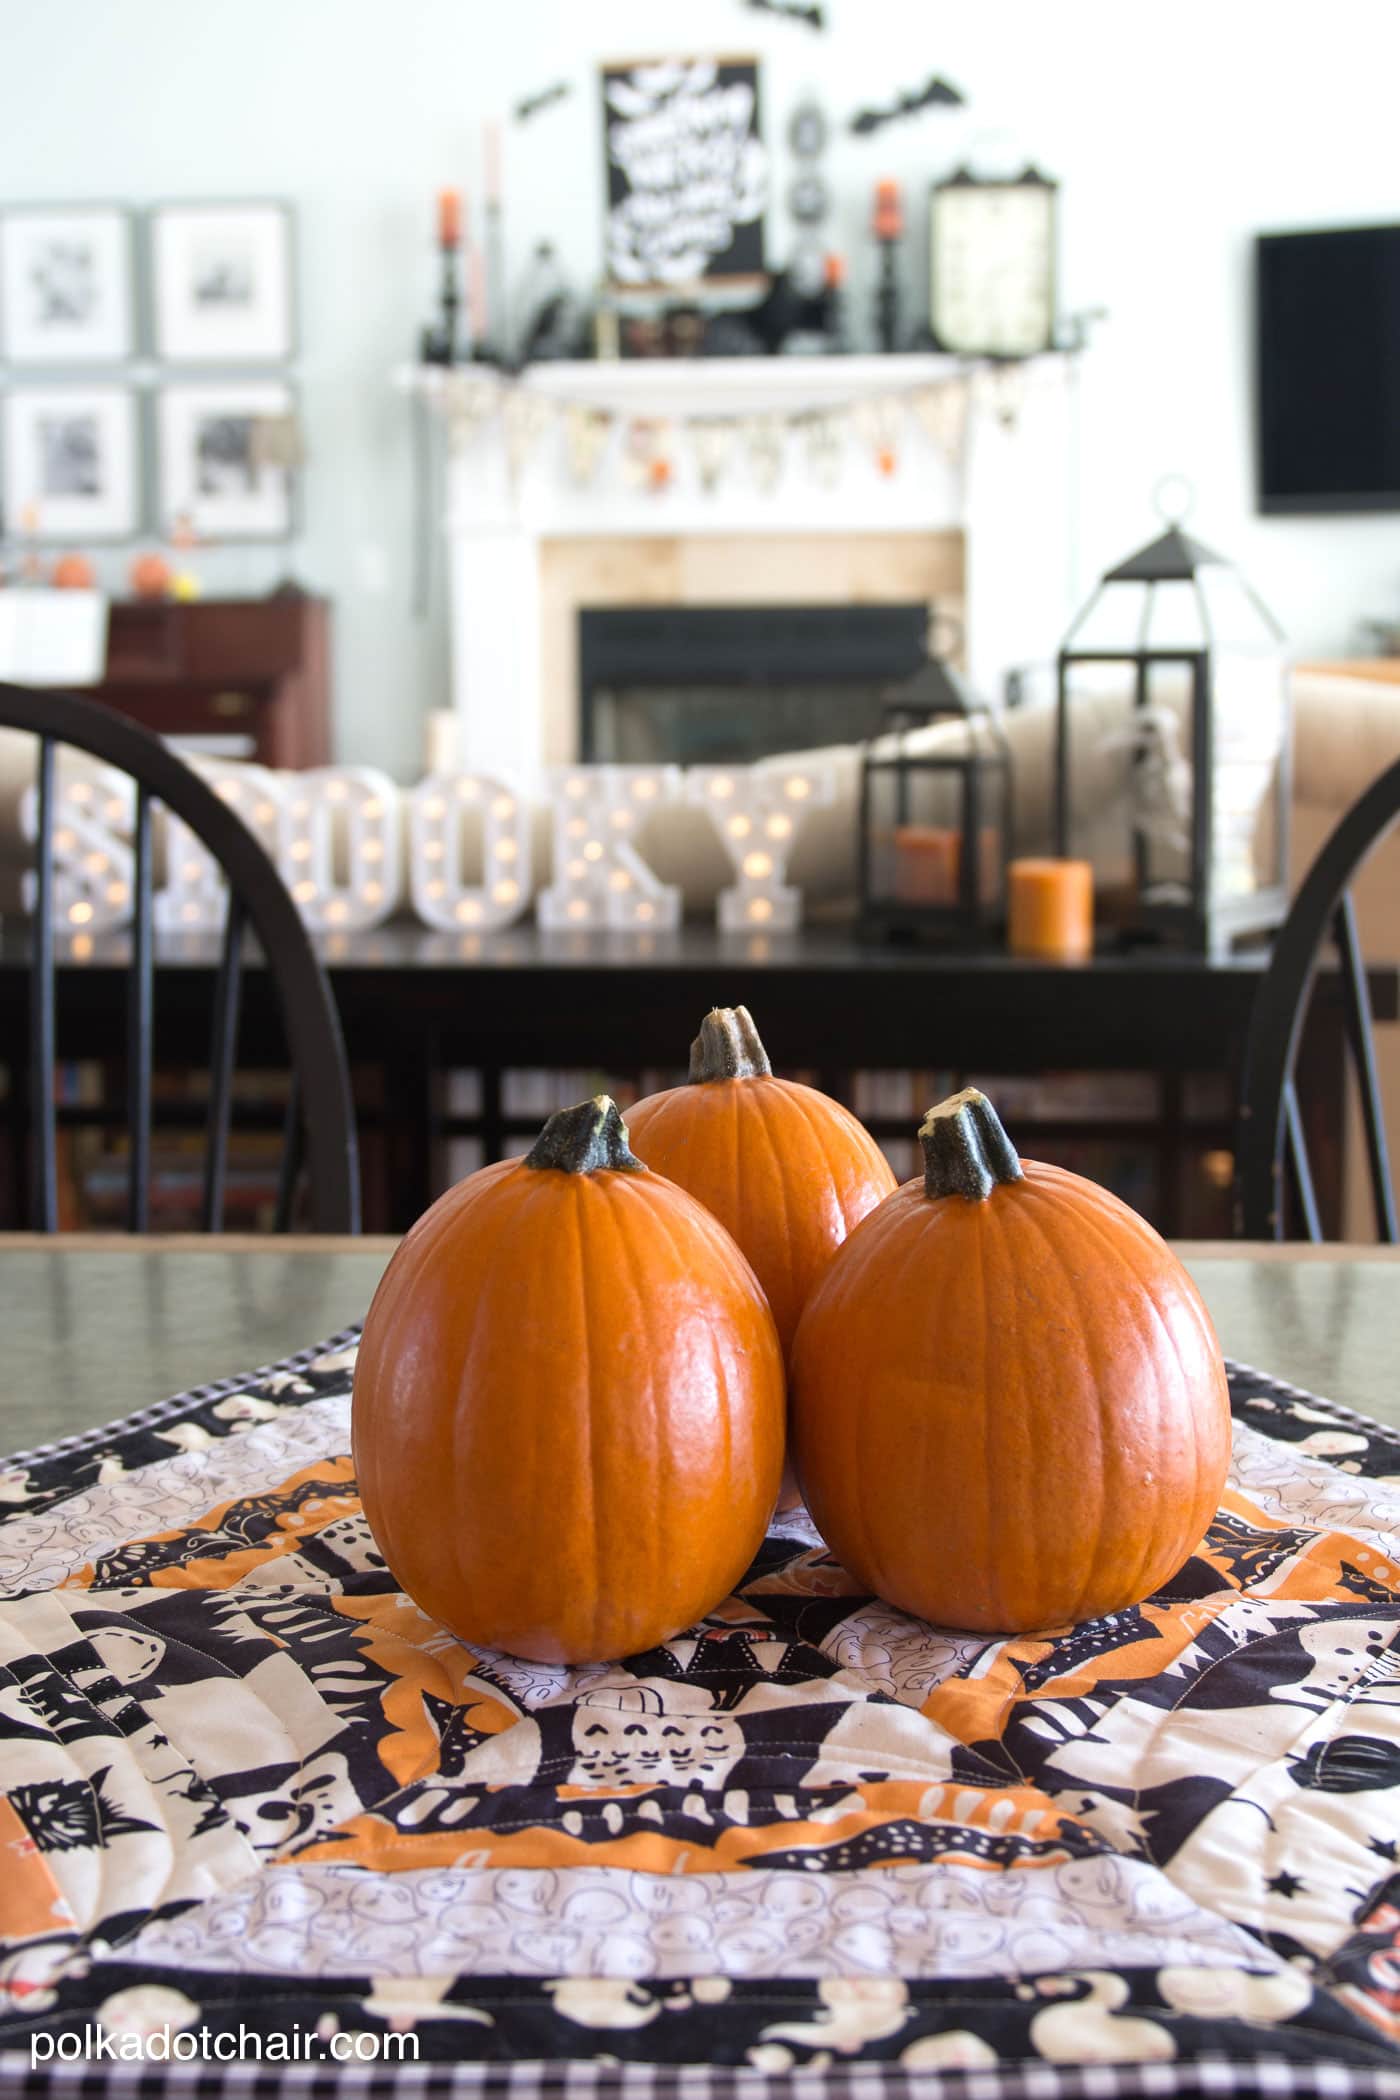
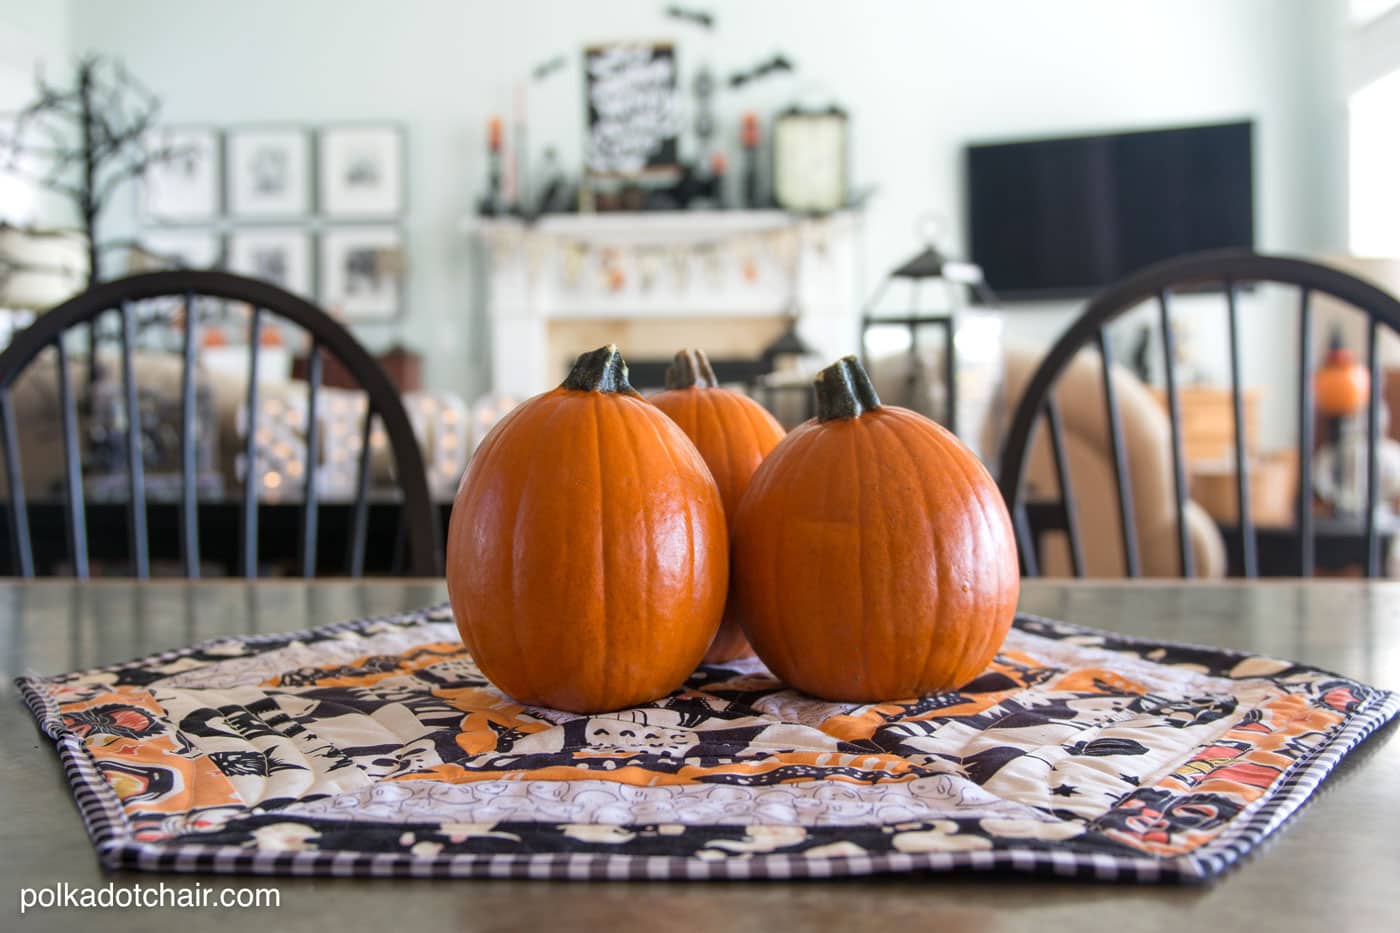
The table topper is now on my kitchen table. You can see a few of my other Halloween decorations peeking out from behind it!

After 3 incarnations this year, I think I finally settled on a mantle that I liked! Just in time to take it down tomorrow *grrrr*


I could have sworn that you made a spider tablecloth runner with black in between the wedges and it had purple in it also. Maybe I just thought you did. Anyway, if you did make this could you please run it again.
Thank you
Elaine
Thank you for showing how to make a hexigaon wedge quilt, without needing a specialty ruler. You see, my best friend and quilting buddy gave me a wedge quilt, very much like the one in this tutorial. i wondered how she had made it and thought she had probably used a specialty ruler to cut the wedges. I am excited to make one myself.
I made myself a halloween table runner this year….finished most of it last week…still have not put the binding on. It will be already to put pull out for next year!