How to make Pillow Wraps – Kentucky Derby Craft Ideas
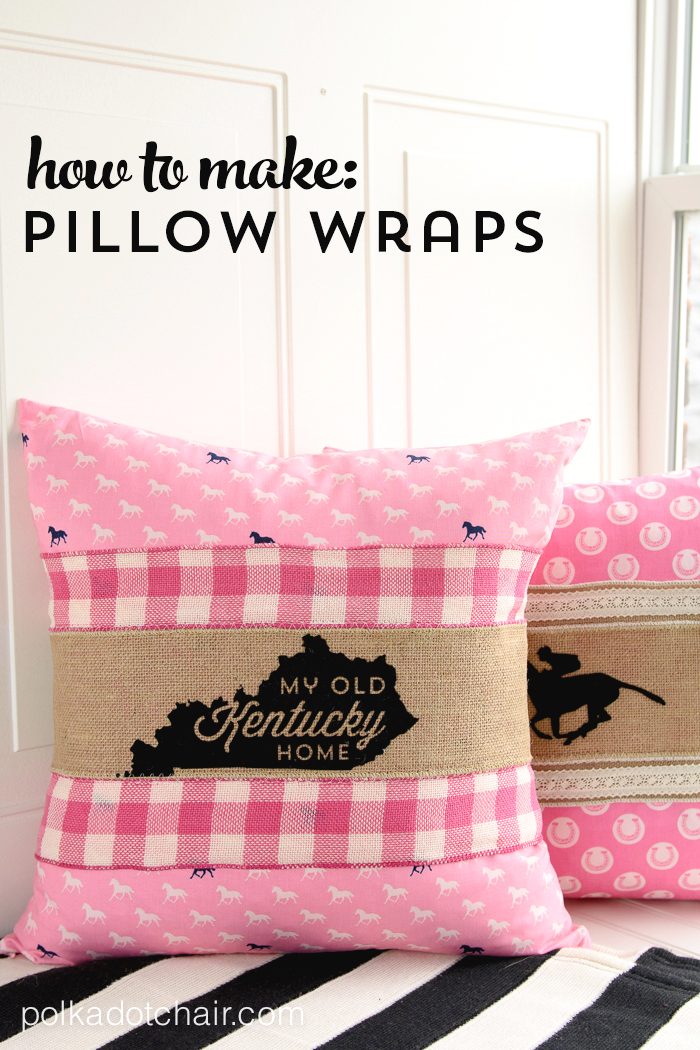
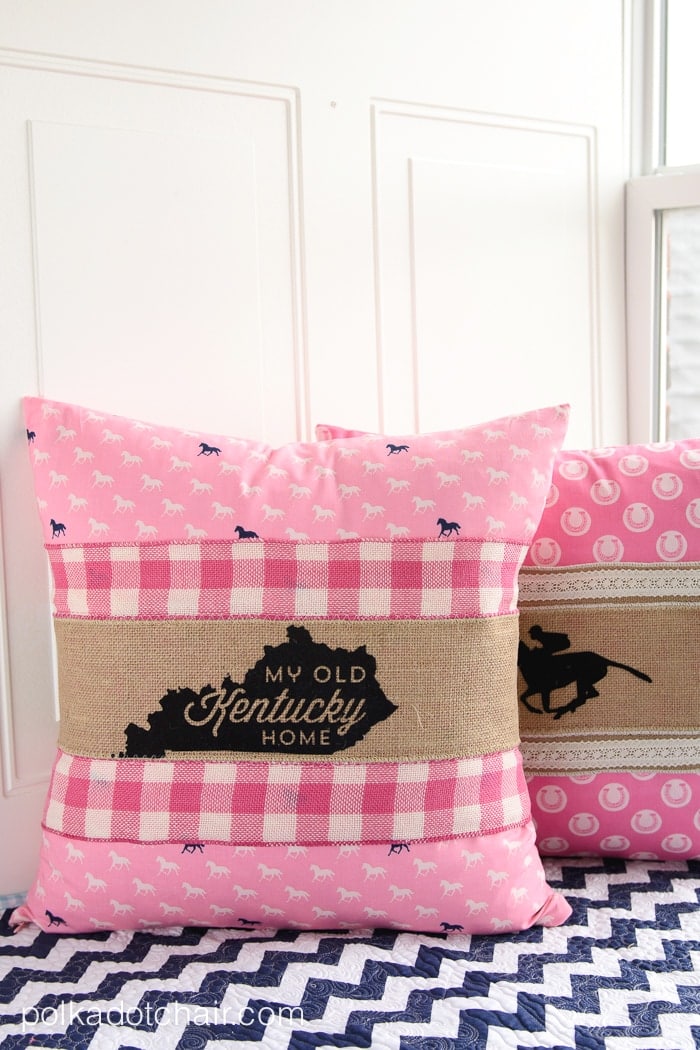
Pillow Wraps are a great way to “spruce up” an old set of pillows on your sofa! You can keep the pillow and then swap the wraps for the various seasons. Today I’m going to show you how to make a set of Burlap Pillow Wraps just for the Kentucky Derby! It’s a quick and simple Kentucky Derby Craft Idea!
I have a set of pillows on my couch that I love to swap out each season. I’ve got a set for Christmas, Halloween and the 4th of July.
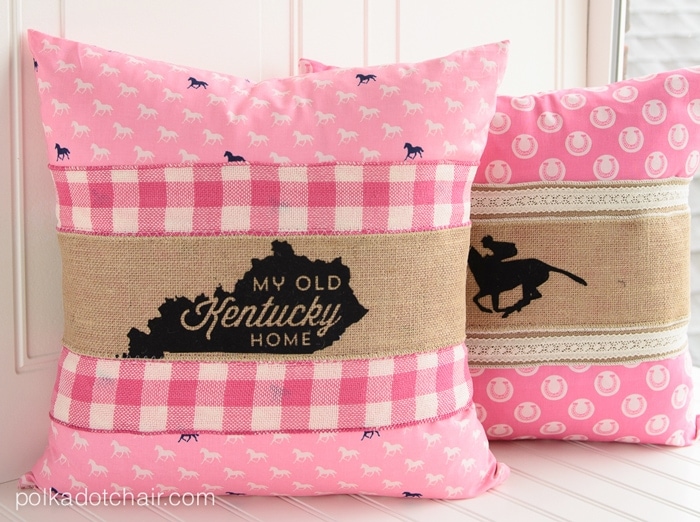
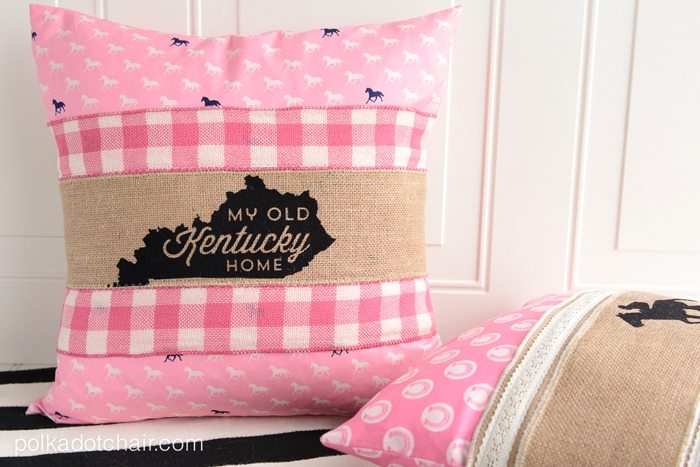
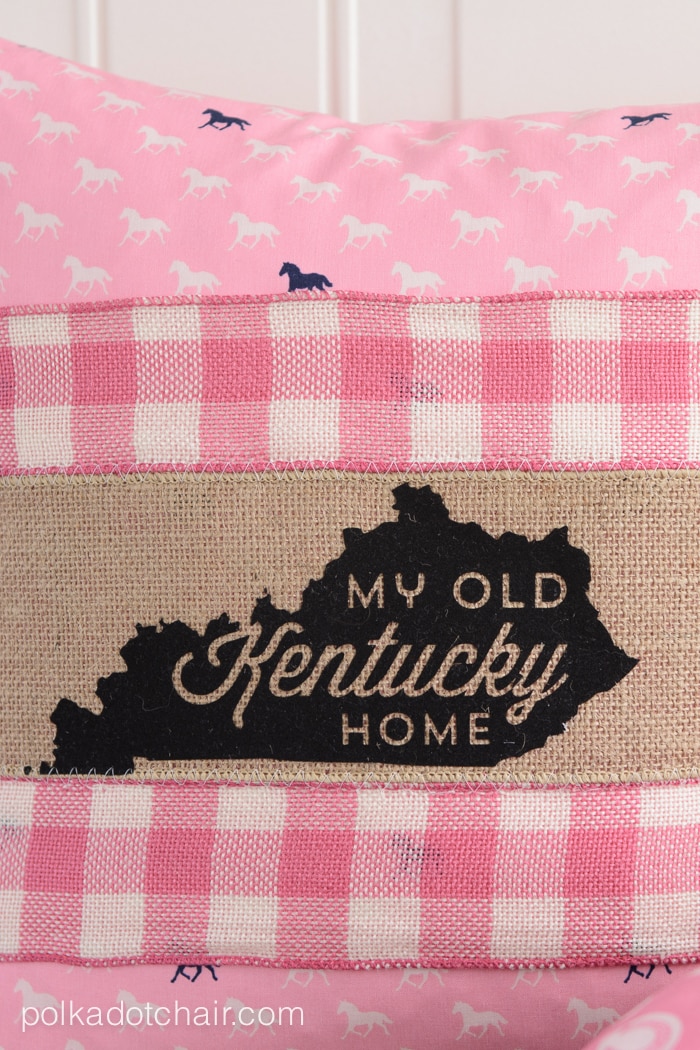
With Derby coming up I decided it was high time that I made a new set of pillows for the occasion. I’ve used my Derby Style fabric for the pillow covers and dressed up the outside of the pillows with some burlap ribbon pillow wraps.
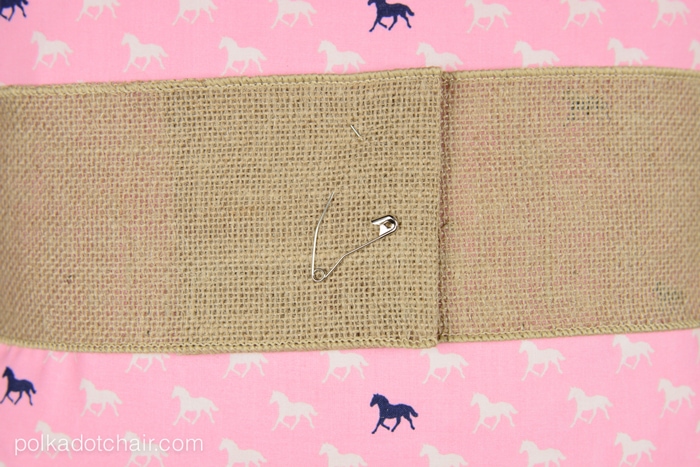
The wraps are simply pinned onto the pillow (with safety pins of course) and can be taken off later (I think I’ll move the pillows to my daughter’s room after Derby).
I ended up using a few different ribbons to make each pillow wrap. Today, I’m going to show you how I made the wraps, along with how I stitched the various ribbons together.
These pillow covers are just simple cases with an invisible zipper closure. Here’s a link to a tutorial to sew a pillow with an invisible zipper closure. Today, we’re just making the wraps.
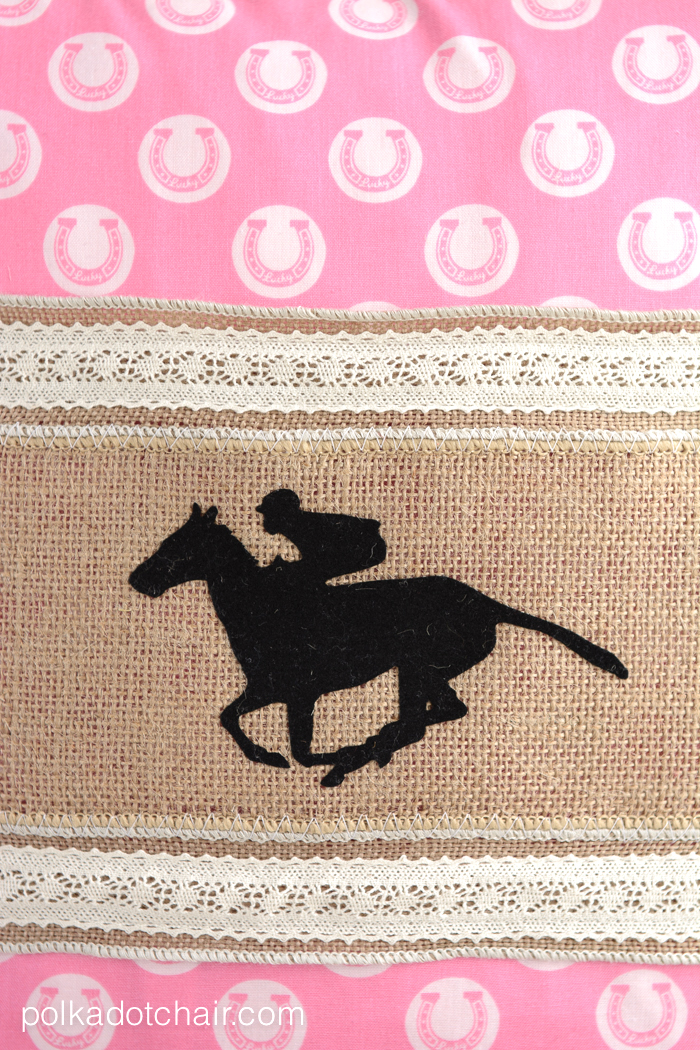
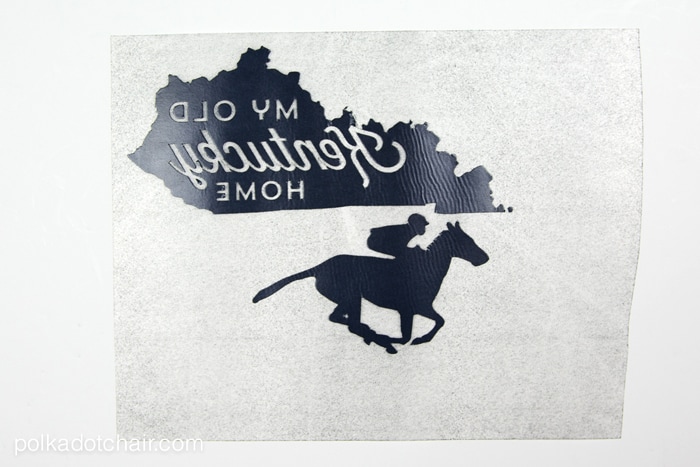
The images for the front of the pillow wraps were cut out of flocked iron-on material with my Cricut. I’m happy to share the .svg file with you for the “My Old Kentucky Home” & Jockey pillow.
If you do decide to make the pillows, just remember that when you pull the “Kentucky” file into your Cricut Design Space, you need to “attach” all of the layers together so that the letters cut out inside the state shape. It will look all black on your screen, but when you click the “go” button, you’ll see the outline of the letters.
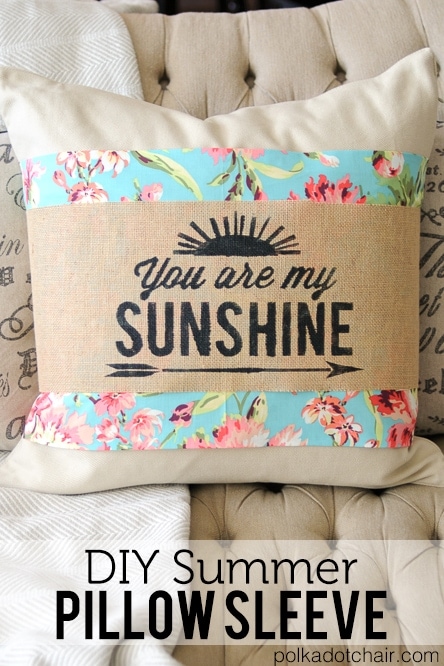
This method can be used to make pillow wraps for ANY occasion, it doesn’t have to be for the Derby. Last year I made a fun Summer Pillow wrap (click here for the tutorial) using a similar method.
DIY Pillow Wrap Tutorial:
Supplies to Make the Pillow Wraps
Okay, now onto the tutorial, to make these pillows, you’re going to need (contains affiliate links):
- One 18″ pillow form (I prefer down, but you can also use polyester).
- One 18″ pillow cover
- 1 1/2 yards 4″ wide wired burlap ribbon
- 3 yards of other wired ribbon (one pillow has gingham ribbon, and one has burlap/lace ribbon)
- Sewing Machine
- Cricut Machine
- Flocked Iron on Material – Black – you can also use non Flocked if you like
- Safety Pins
- SVG files to cut out (download in our Cricut Library)
My Favorite Cricut Supplies
- Cricut Maker 3 (you can get great deals on machine bundles on Cricut.com)
- Roll Holder for Maker 3
- Cricut EasyPress (I like the large size the best): Make sure you get the EasyPress mat as well.
- Cricut Weeding Tools: (I use the small hook tool ALL the time, making weeding vinyl so much easier).
- Cricut BrightPad: A cordless, flat, bright lightbox. I use it to weed Cricut vinyl and use it all the time to trace applique shapes for sewing & quilting.
- Cricut Iron On Vinyl
- Cricut Permanent Vinyl
Construction Instructions:
Step One:
Cut out your image with your Cricut and the iron-on material. Make sure you reverse your image before you cut it.
Step Two:
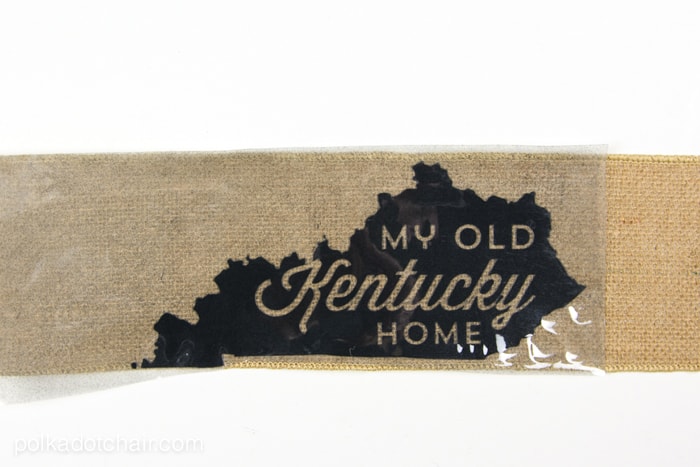
Cut the burlap ribbon to 40″ long. TEST your ribbon with your iron BEFORE you iron it; you may need to use a pressing cloth (many ribbons will melt when ironed; check first). Iron the image onto the center of the 4″ wide burlap ribbon
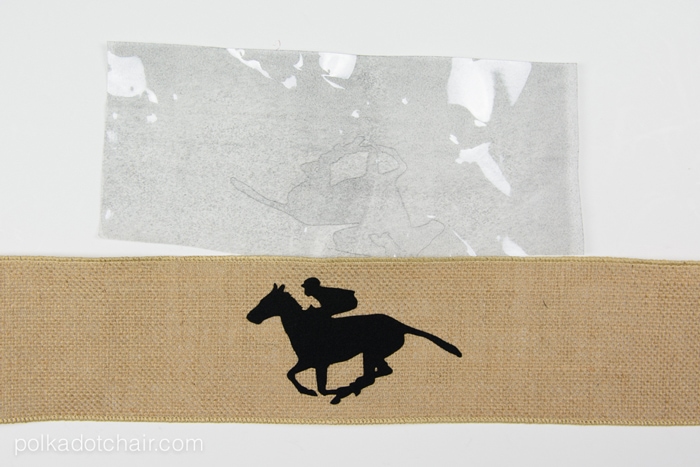
Peel off the plastic backing. Make sure it’s ironed on well.
Step 3:
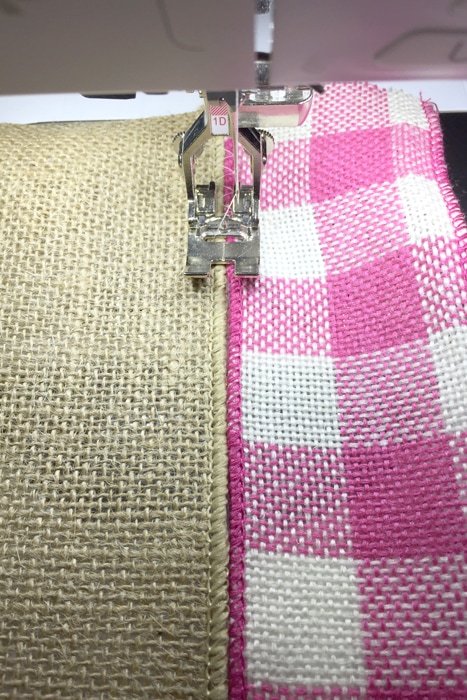
Cut two pieces of ribbon, each 40″ long.
Set your sewing machine to a zig zag stitch in the widest setting you have. Set your stitch length to 5.
Place the burlap ribbon and the other ribbon next to each other under the presser foot. Don’t overlap the two pieces. Zigzag stitch over the ribbon edges to join. One motion of the zigzag stitch will hit one ribbon; the next move will hit the other ribbon. Make sure to lock your stitch at the beginning and end.
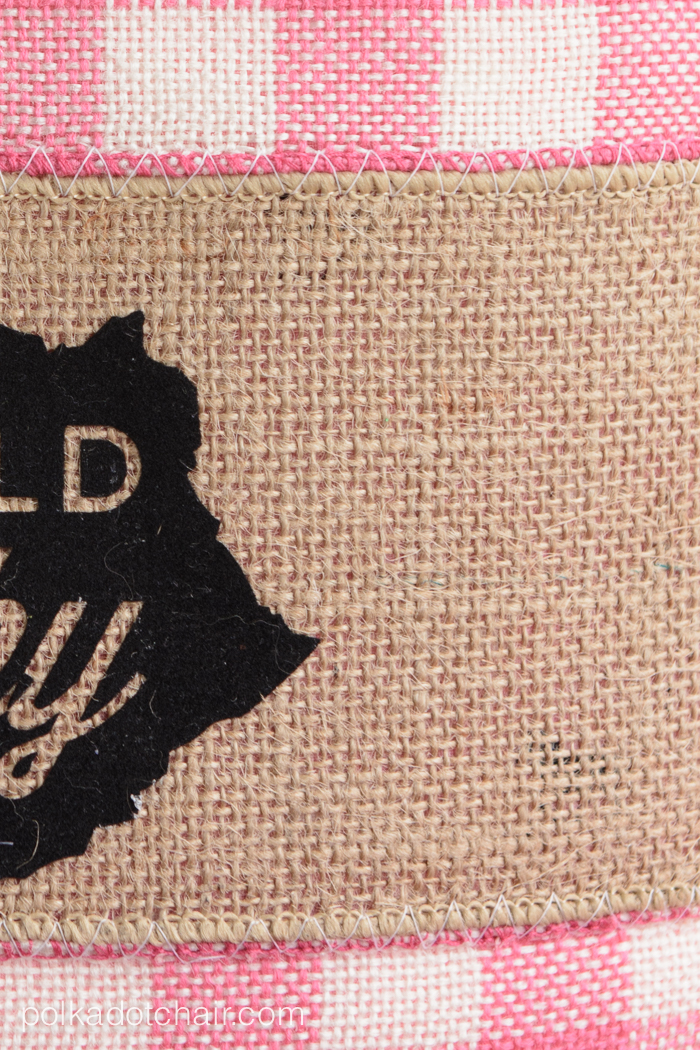
Repeat for the other side of the burlap.
Finishing:
Wrap the sewn pieces around the pillow, fold them under the raw edges, and put the safety pin in place (hide the safety pins).
That’s it!
You can easily make a bunch and swap them out as you like throughout the year!
I love this! What a great/easy way to change pillows without buying new ones, seasonal, holidays, pet silhouettes, even maybe Happy Birthday…? And, of course the patterns you’ve shown are charming. So, repeat – I love this!
These are so adorable