• Skip to primary navigation
  • Skip to main content
  • Skip to primary sidebar

The Polka Dot Chair logo

  • SEWING
    • Free Sewing Patterns
    • Bag Sewing Patterns
    • Costume Sewing Tutorials
    • Apparel Sewing Patterns
    • Learn to Sew
    • Beginner Friendly Sewing Projects
    • Hand Embroidery Patterns
    • Sewing Tips
    • All Sewing
  • QUILTING
    • Quilt Block Patterns
    • Learn to Quilt
    • Free Quilt Patterns
    • Quilt Patterns
    • All Quilting
  • CRAFTS
    • Disney
    • Cricut
    • Printables
    • All Crafts
  • HOLIDAYS
    • Seasonal Projects
    • Valentine’s Day
    • Easter
    • 4th of July
    • Halloween
    • Thanksgiving
    • Christmas
    • All Holidays
  • TUTORIALS
  • ABOUT
    • About Me
    • My Fabric Collections
    • Published Books
    • Press
    • FAQ’s
    • Contact
  • SUBSCRIBE
  • SHOP
menu icon
go to homepage
  • SHOP
  • TUTORIALS
  • SEWING
  • QUILTING
  • SUBSCRIBE
  • CRAFTS
  • HOLIDAY PROJECTS
  • ABOUT
    • Published Books
    • My Fabric Collections
  • CONTACT
    • Facebook
    • Instagram
    • YouTube
  • subscribe
    search icon
    Homepage link
    • SHOP
    • TUTORIALS
    • SEWING
    • QUILTING
    • SUBSCRIBE
    • CRAFTS
    • HOLIDAY PROJECTS
    • ABOUT
      • Published Books
      • My Fabric Collections
    • CONTACT
    • Facebook
    • Instagram
    • YouTube
  • ×
    Home » Sewing » Free Sewing Patterns- Accessories

    iPad Cozy… a tutorial

    Updated: Aug 13, 2012 by Melissa Mortenson · This post may contain affiliate links · This blog generates income via ads · 8 Comments

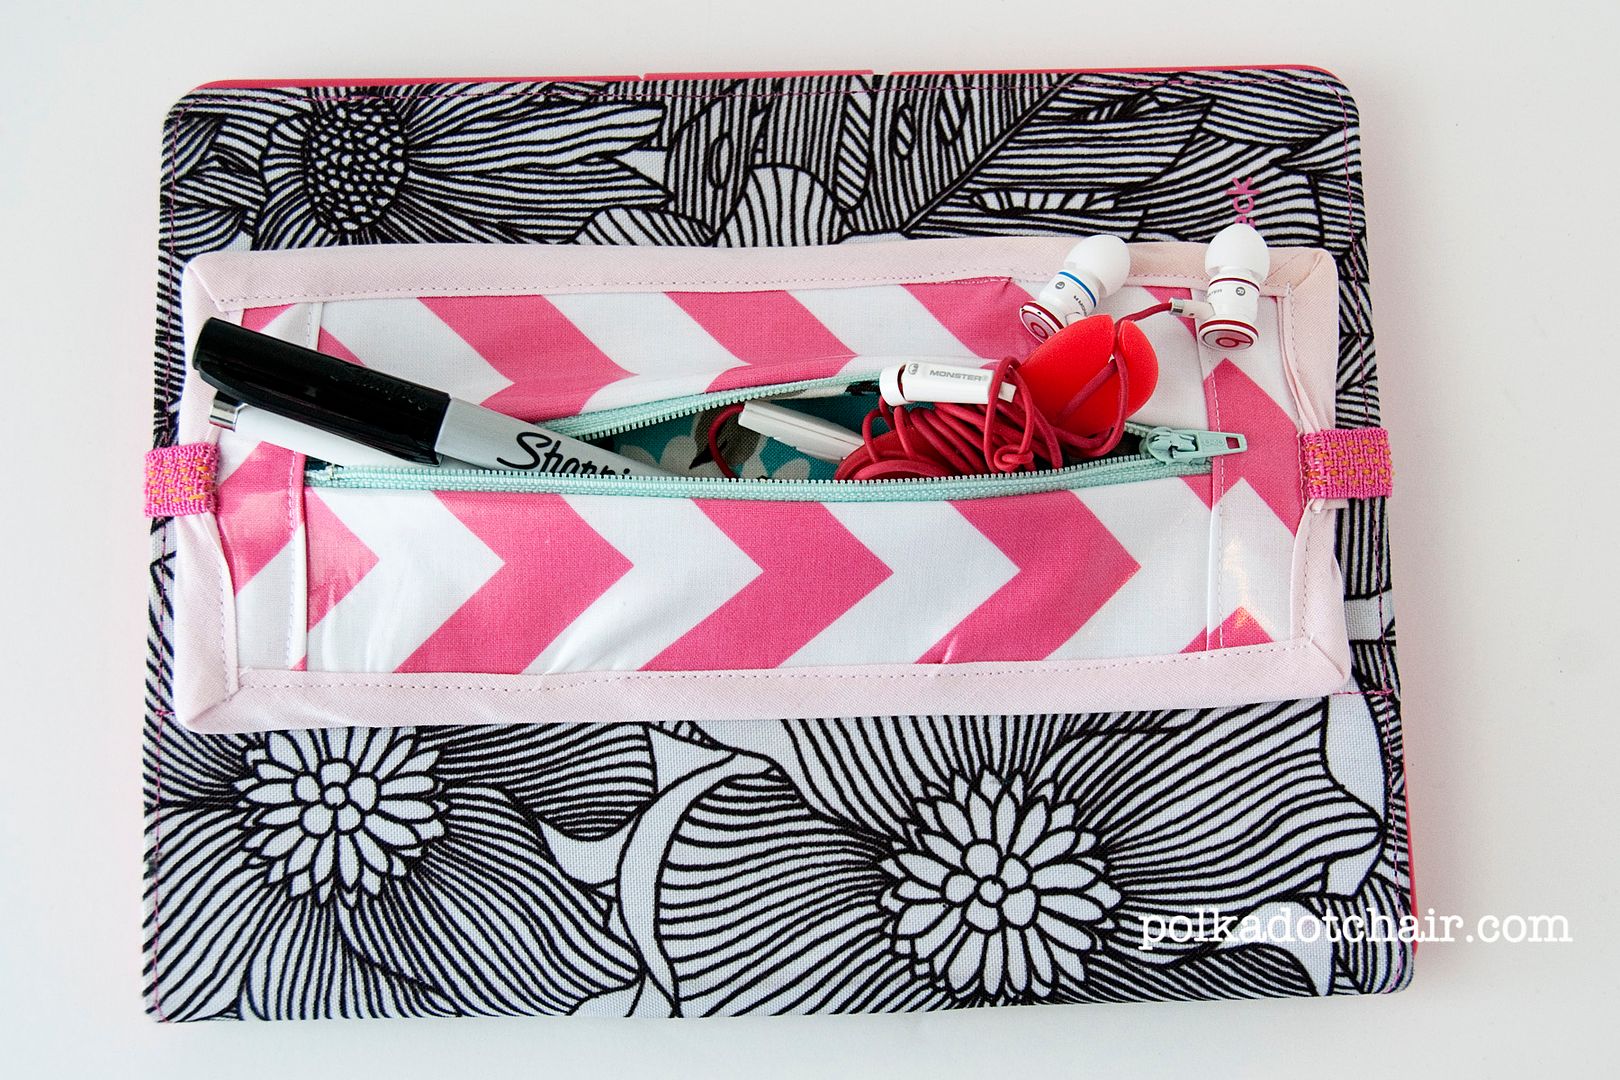
    I’ve been traveling a lot this year.  One thing I’ve noticed is that I’m a bit clumsy on a plane.   Juggling pens, iPads, headphones etc. in your tiny seat is not an easy thing to do.

    I started using a ziploc bag to keep these things in, then realized that I should make something nicer– as I started sewing this little pouch I had the idea of attaching it to my iPad to make things more compact. I still use this case that I made, but wanted a 2nd option.

    This is just a simple pouch with an elastic hair headband attached (so I could have a cute color 🙂  you could use regular elastic, but I liked the grippy stuff on the hair band).

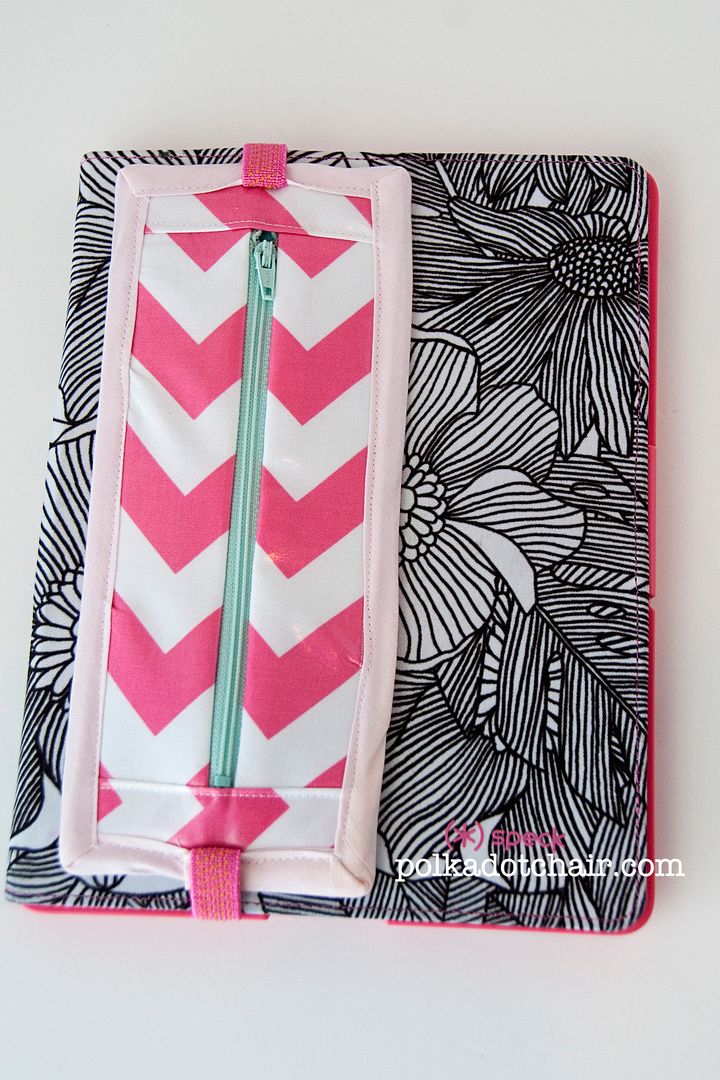
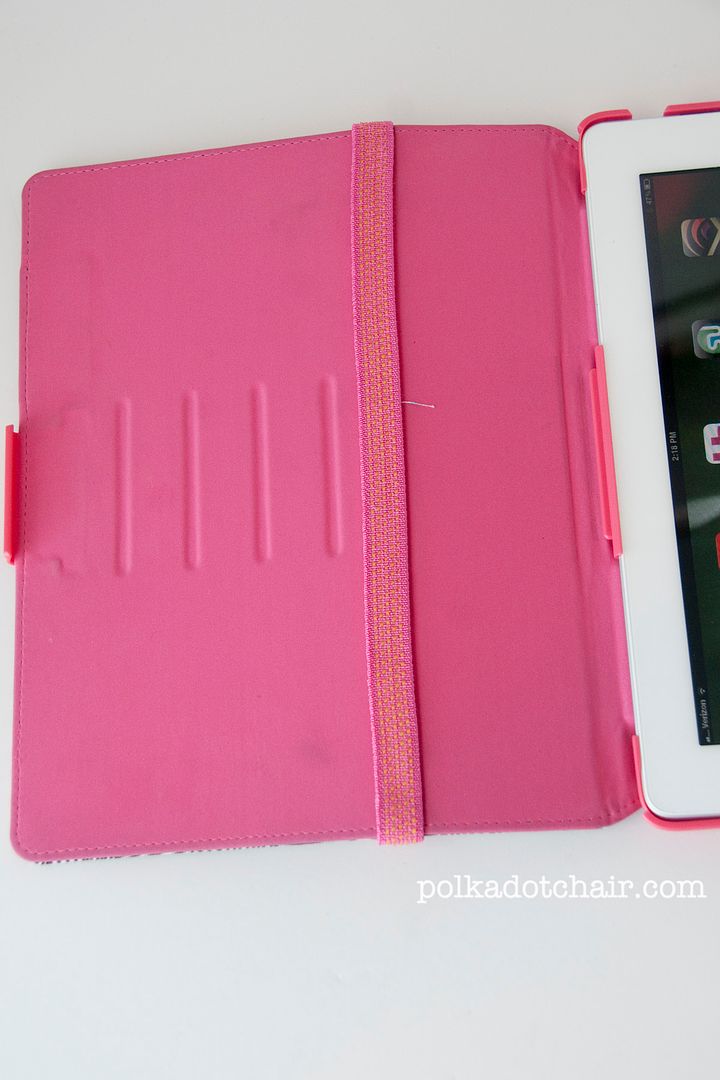
    Using the hair band you can attach the cozy to just the inside cover of your iPad or around the entire case, depending on what you need to use it for.  (You could also use this with Apple’s smart cover, which I used until I dropped my iPad a few too many times and realized I needed a sturdier case).
    Here’s what you need to get started:
    Elastic Hair Headband
    1 7″ zipper
    scraps of fabric, I used laminate for the front
    Extra wide double fold bias tape
    Fusible Fleece
    Heavy weight interfacing
    If you use laminate fabric, remember to use your teflon foot.
    To begin, cut 4 pieces of fabric.  They will each be 2″ wide by the length of your zipper.  2 for the front and 2 for the lining.
    To your 2 front pieces iron the heavy weight fusible interfacing to the back (if using laminate fabric, make sure you don’t iron the front!!)
    To your 2 lining pieces attach fusible fleece.
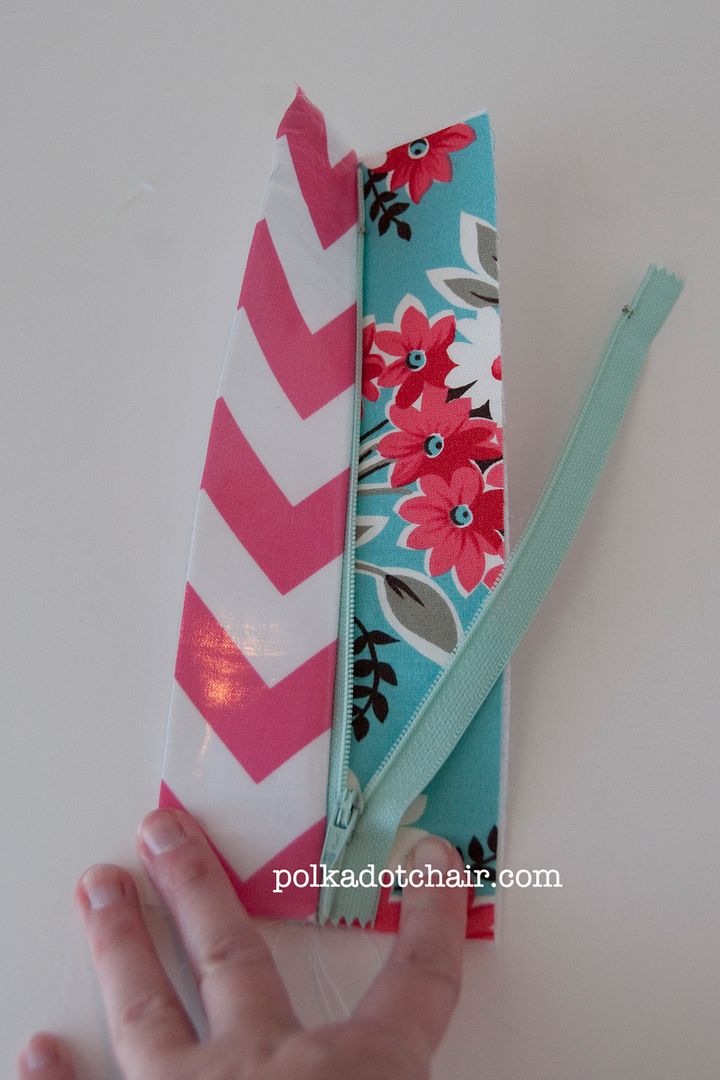
    Pin one front piece to the zipper and one lining piece to the zipper.  Stitch using your zipper foot.
    Repeat for the other side.
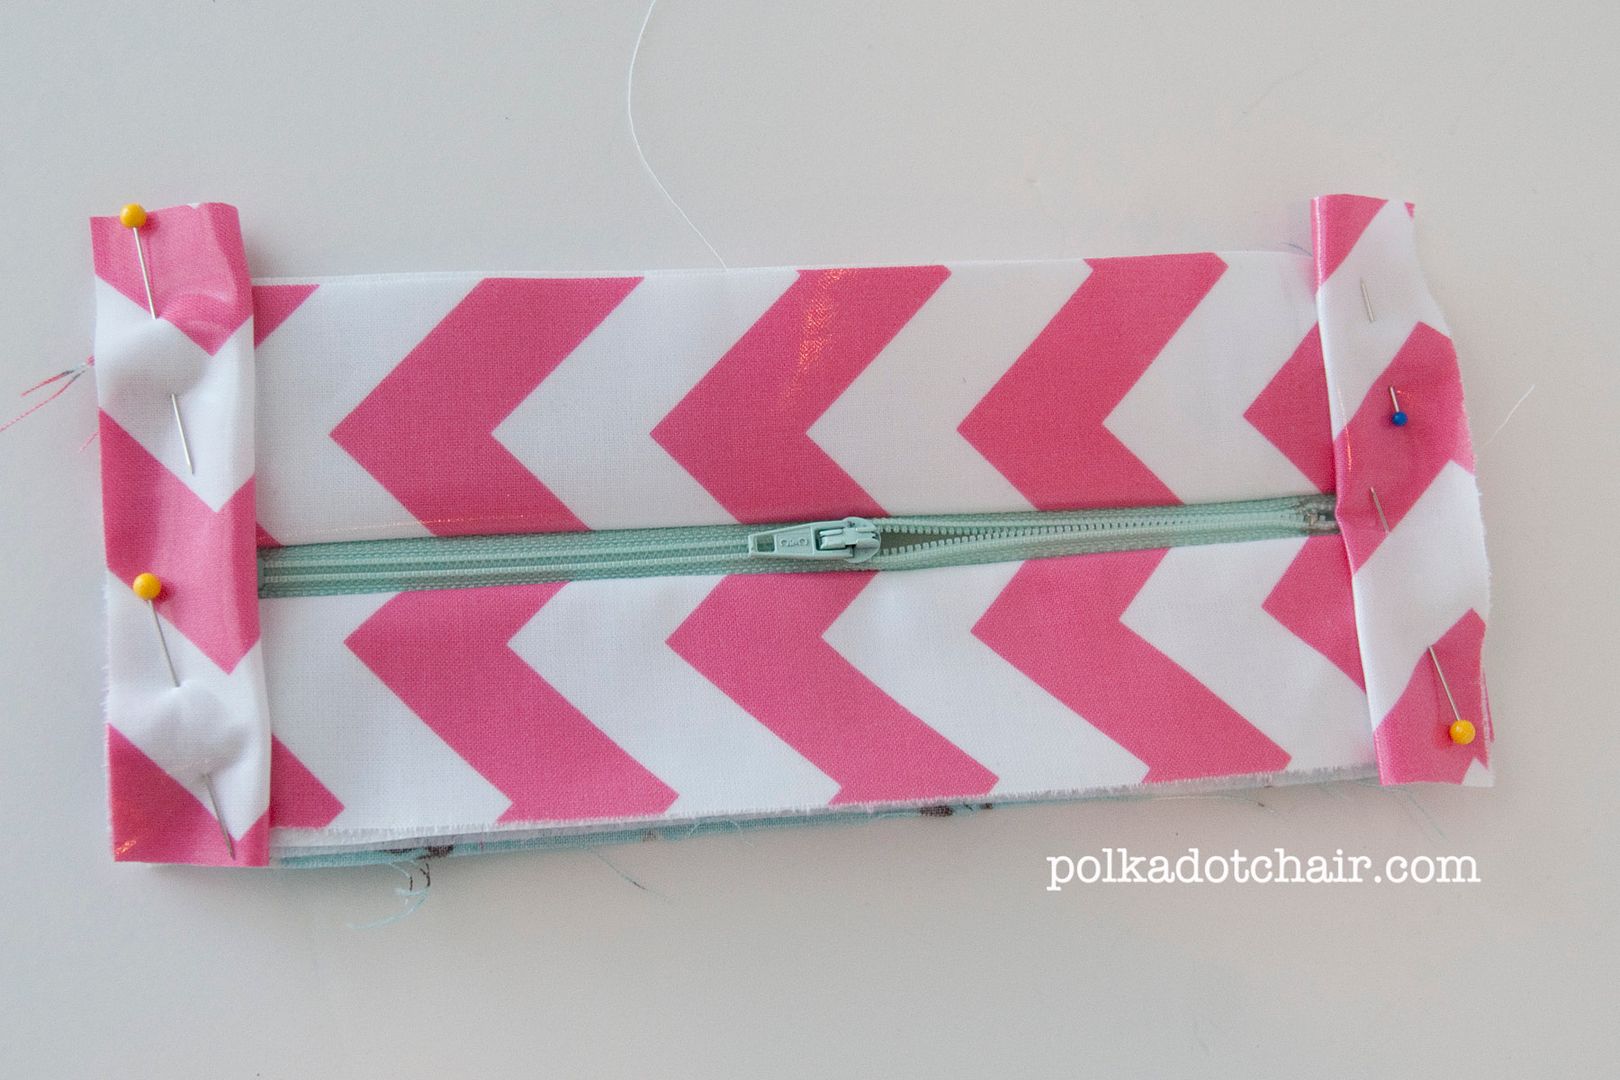
    Cut 2 pieces of laminate fabric to 2″ wide by 4″ long.  Fold in half and pin to the ends of your zipper piece. Making sure that the zipper piece is laying straight and flat.
    Stitch the folded fabric to the zipper piece, near the zipper at and the seam. Trim off excess fabric.
    Cut your elastic to 9″ long
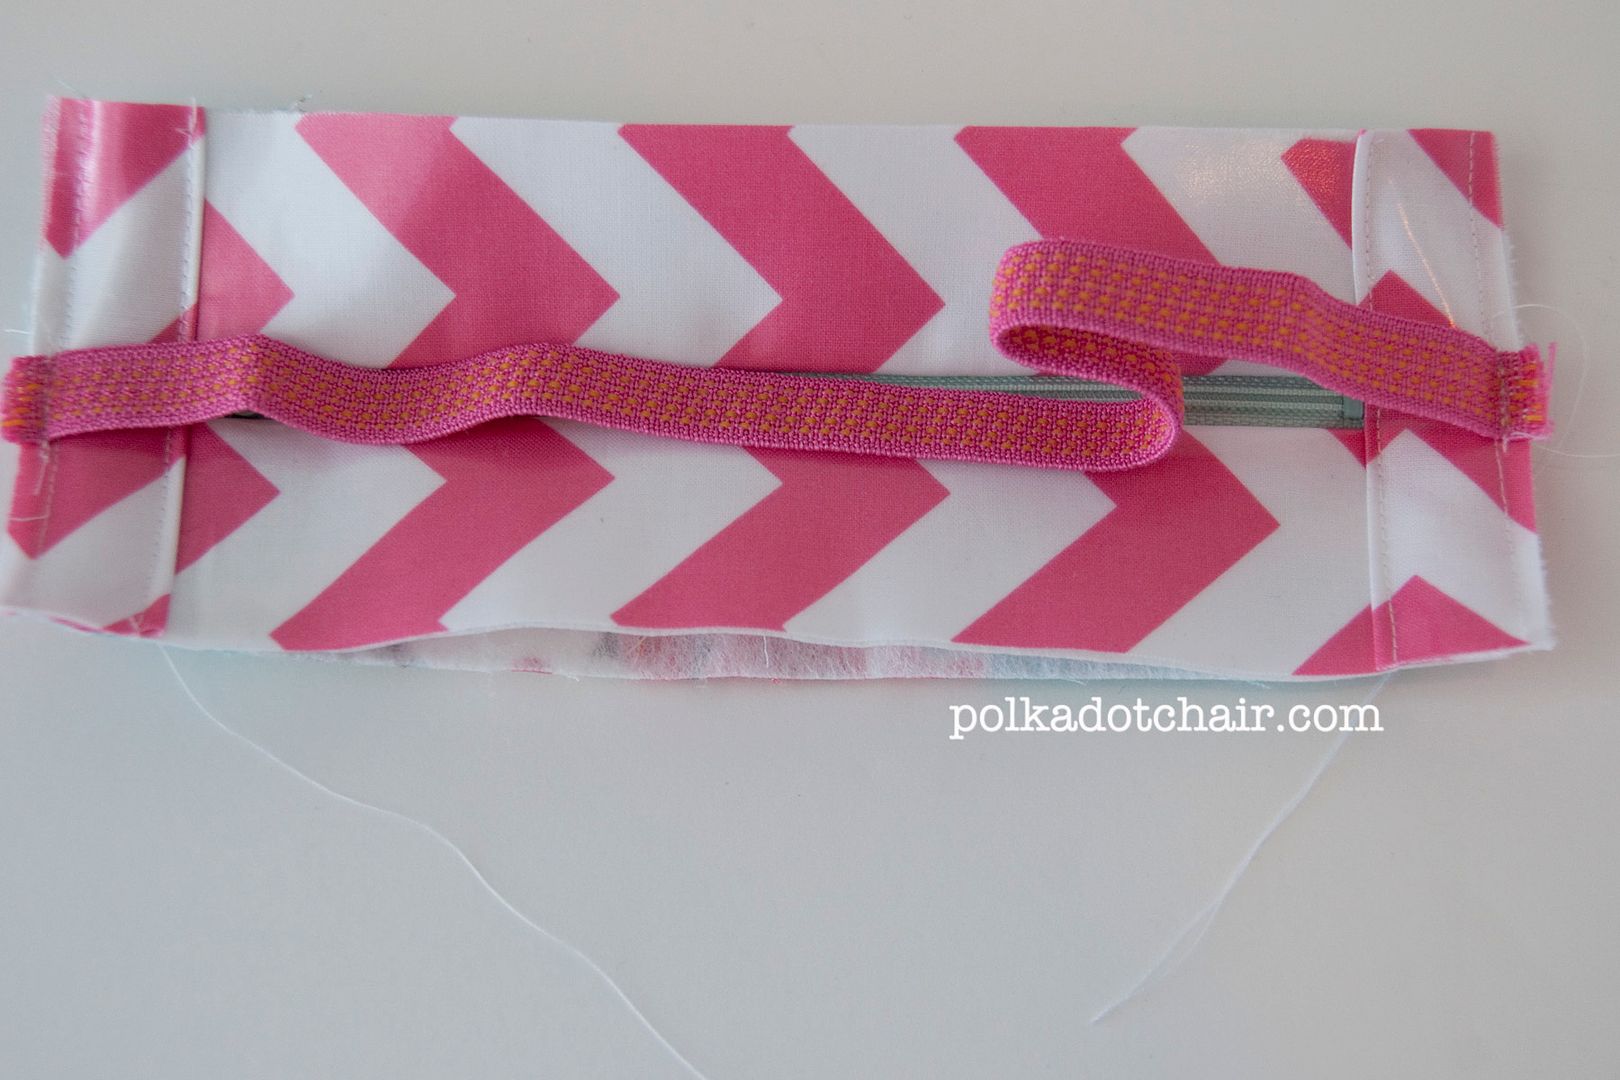
    Pin to ends of zipper piece. Stitch in place. Go over the seam several times to secure.
    Measure the size of this piece.  Then cut 1 piece of your main fabric the same size and one piece of  lining fabric the same size.
    Attach heavyweight fusible interfacing to the main fabric piece and fusible fleece to the lining piece.
    Make a “sandwich” in the following order:
    Back outside piece & Back lining piece, wrong sides together.
    Zipper piece (with the lining touching the back piece lining)
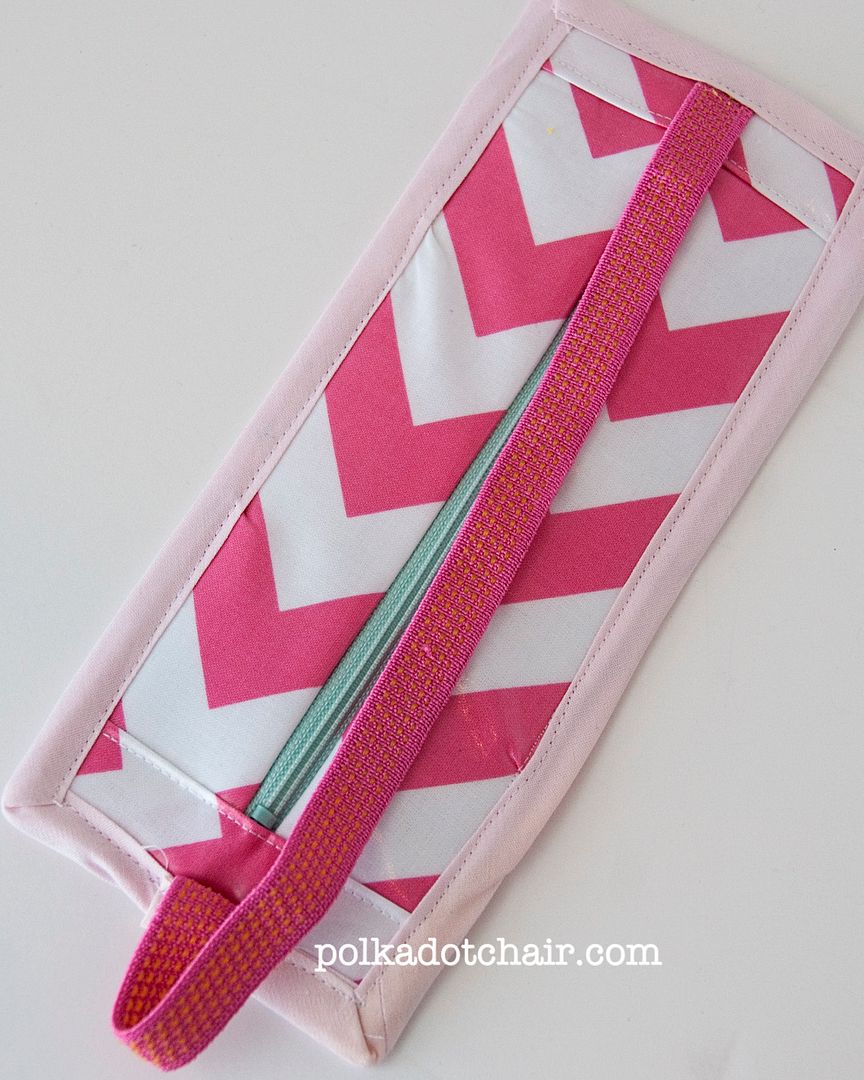
    With a scant ¼″ seam stitch around entire piece.
    To finish the raw edge, stitch double fold extra wide bias tape over the edges.  Hide the seam of your bias tape under the ends of one piece of elastic.

    post signature

    More Projects You May Enjoy

    • profile view of girl wearing headband outdoors
      How to Make a Braided Padded Headband
    • Quilted Toy Storage Bag Tutorial
    • striped pencil pouch on white wood grain table with school supplies
      Striped Pencil Pouch Sewing Pattern
    • nesting fabric baskets on white marble table
      Nesting Fabric Baskets Sewing Pattern

    • Share
    • Email

    About Author

    Melissa Mortenson

    Melissa Mortenson is a blogger, designer, and content creator. She is the Polka Dot Chair blog founder and has been sharing fresh and creative ideas with readers since 2008. She is the author of “Project Teen, Handmade Gifts your Teen will Actually Love.” Her work and designs have been featured on HuffPost, TODAY, Pioneer Woman, HGTV, BuzzFeed, Better Homes & Gardens, and many other established publications. Her first fabric line, “Derby Style,” debuted in January 2015 through Riley Blake Designs.  Additional fabric collections have followed it in subsequent years. A mom of 3, she considers herself lucky to be living in Kentucky.

    Primary Sidebar

    Hello! It’s nice to meet you.

    I’m Melissa. I like to design things, like fabric, printables, and projects.

    I’m also a Mom and a Maker. I am like most of you, just trying to do my best every day. Some days I succeed, many days I fail.  I find joy in creating, if you do too, then I hope that you find something here bring a little “happy” to your life.  Find out more about me here.

    COPYRIGHT POLICY

    All my images and text are copyrighted. You may NOT use any images from this site in any kind of Video (this includes YouTube). If you would like to feature my work, you may use ONE (1) NON-COLLAGED image and must “follow” link back to my original blog post. You may NOT edit, crop, or change my images in any way without written permission. You MAY NOT print out or copy and distribute any text, images or patterns from this site. All patterns, content, instructions, and templates are for personal use ONLY! Thank you! Violators will be reported.

    Footer

    ↑ back to top

    About

    • Privacy Policy
    • Disclaimers
    • About Melissa
    • Instagram
    • Facebook
    • YouTube
    • Pinterest

    Newsletter

    • Sign Up! for emails and updates

    Contact

    • Contact
    • FAQ
    • Press
    • Published Books
    • Fabric Collections

    Welcome to the Polka Dot Chair! Here you’ll find easy, step-by-step, sewing, quilting, and crafting projects. We design projects for Makers of all skill levels. Beginners are welcome!

    DISCLAIMER:

    While every effort has been made to ensure the accuracy of the content on this website, the information is made available without warranty of any kind. The Polka Dot Chair accepts no responsibility or liability, whether direct or indirect, as to the currency or accuracy of the information, nor any consequence of its uses. This website is not intended to substitute the advice of a professional.

    Copyright © 2022 Polka Dot Chair

    [ Placeholder content for popup link ] WordPress Download Manager - Best Download Management Plugin