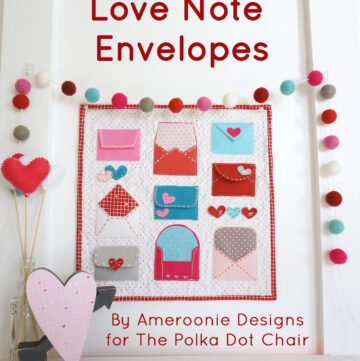
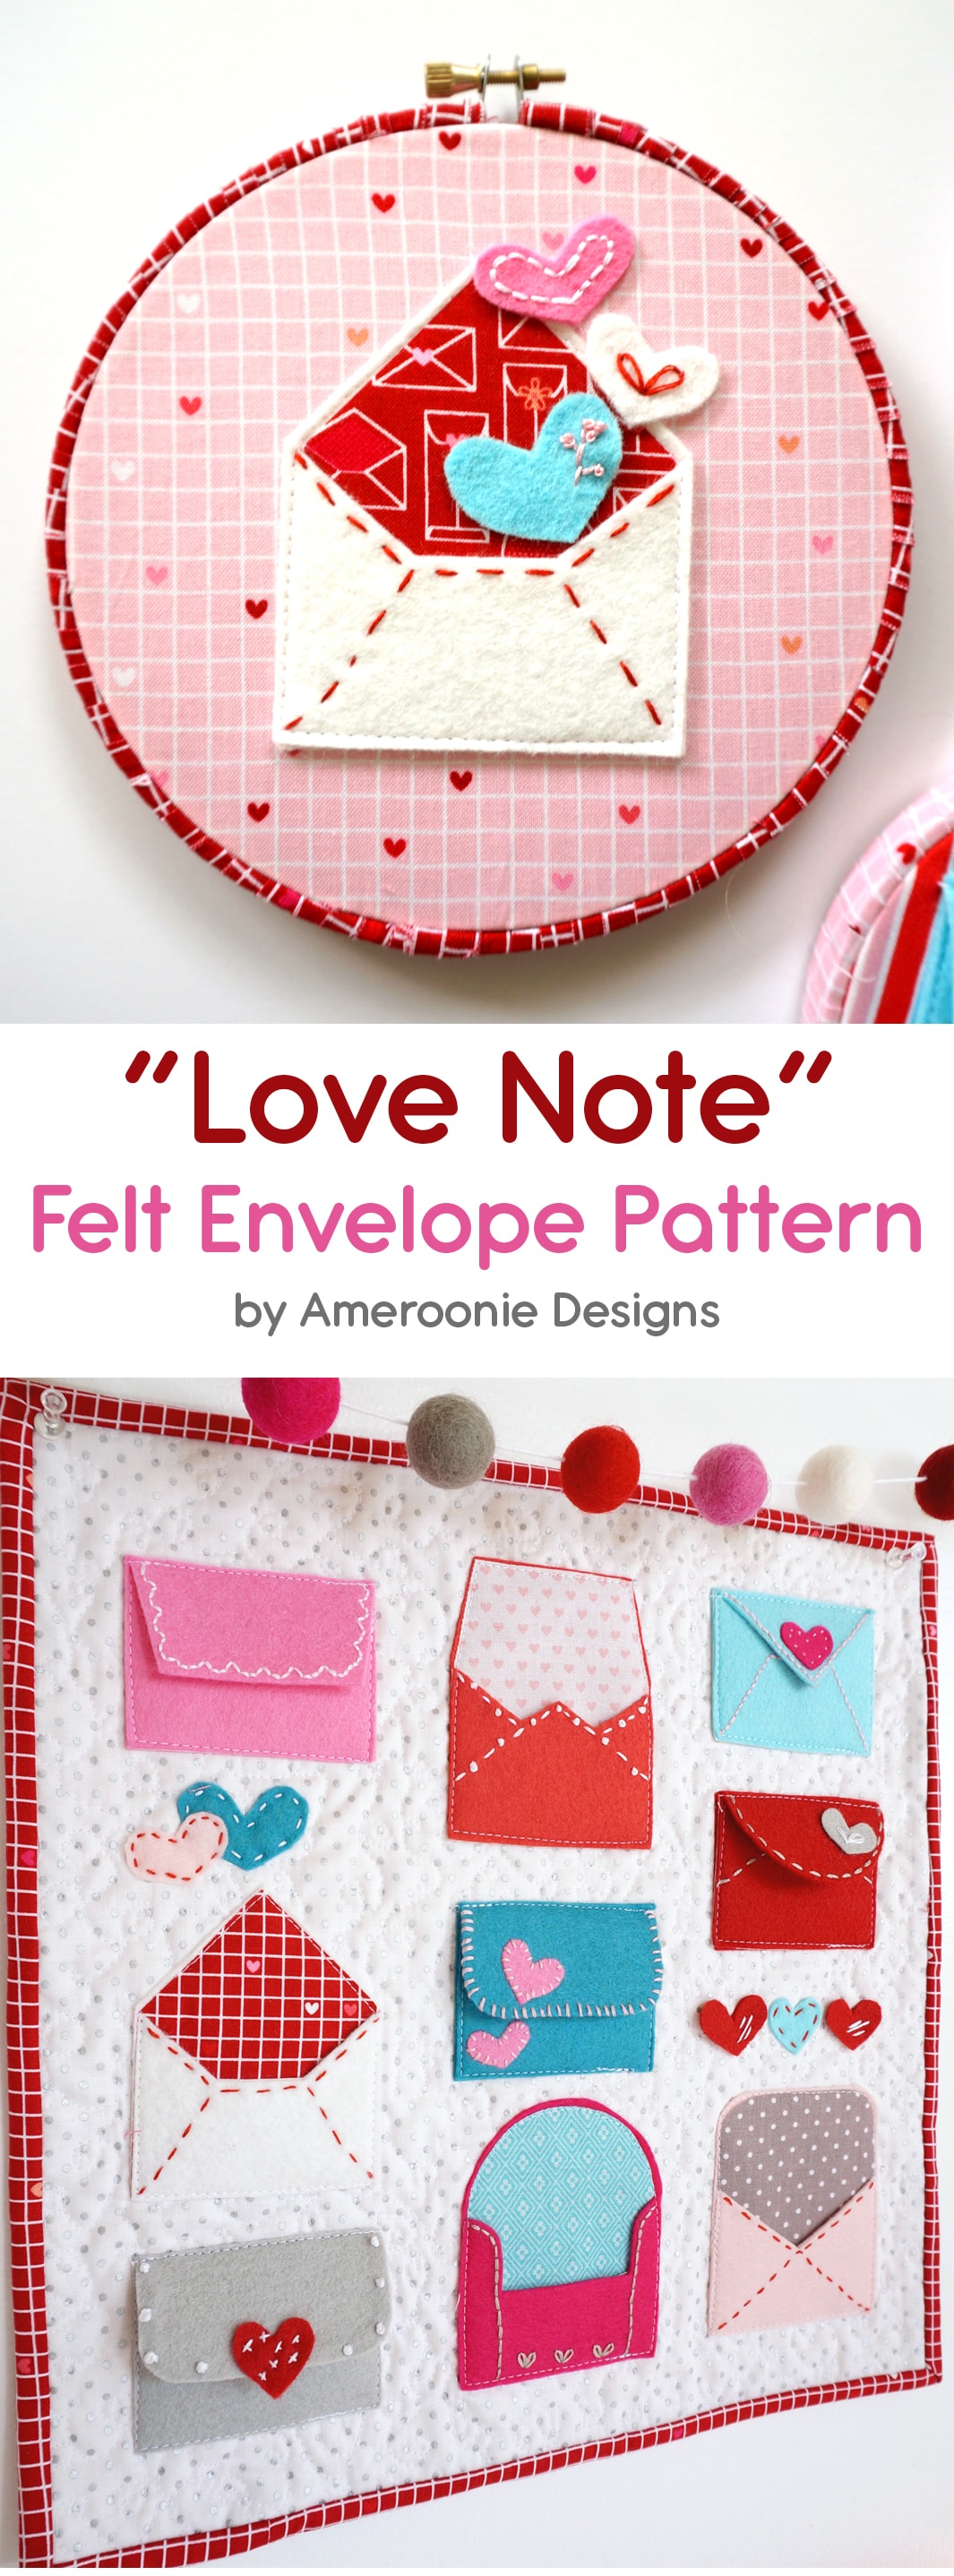
Valentine Felt Envelope Pattern
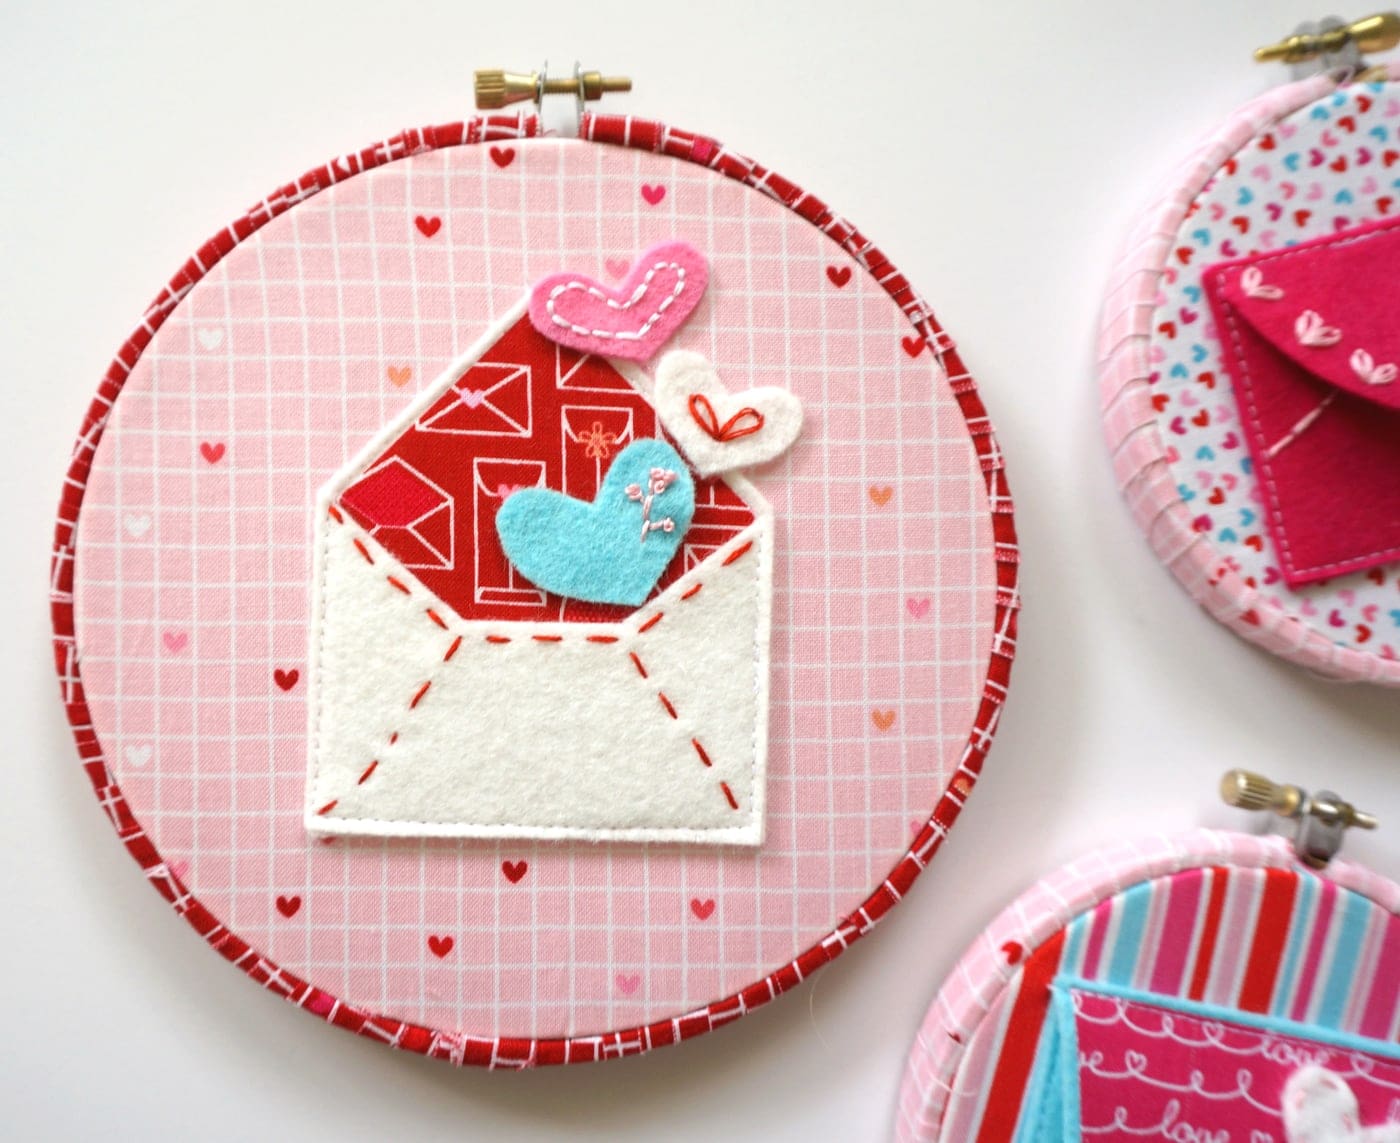
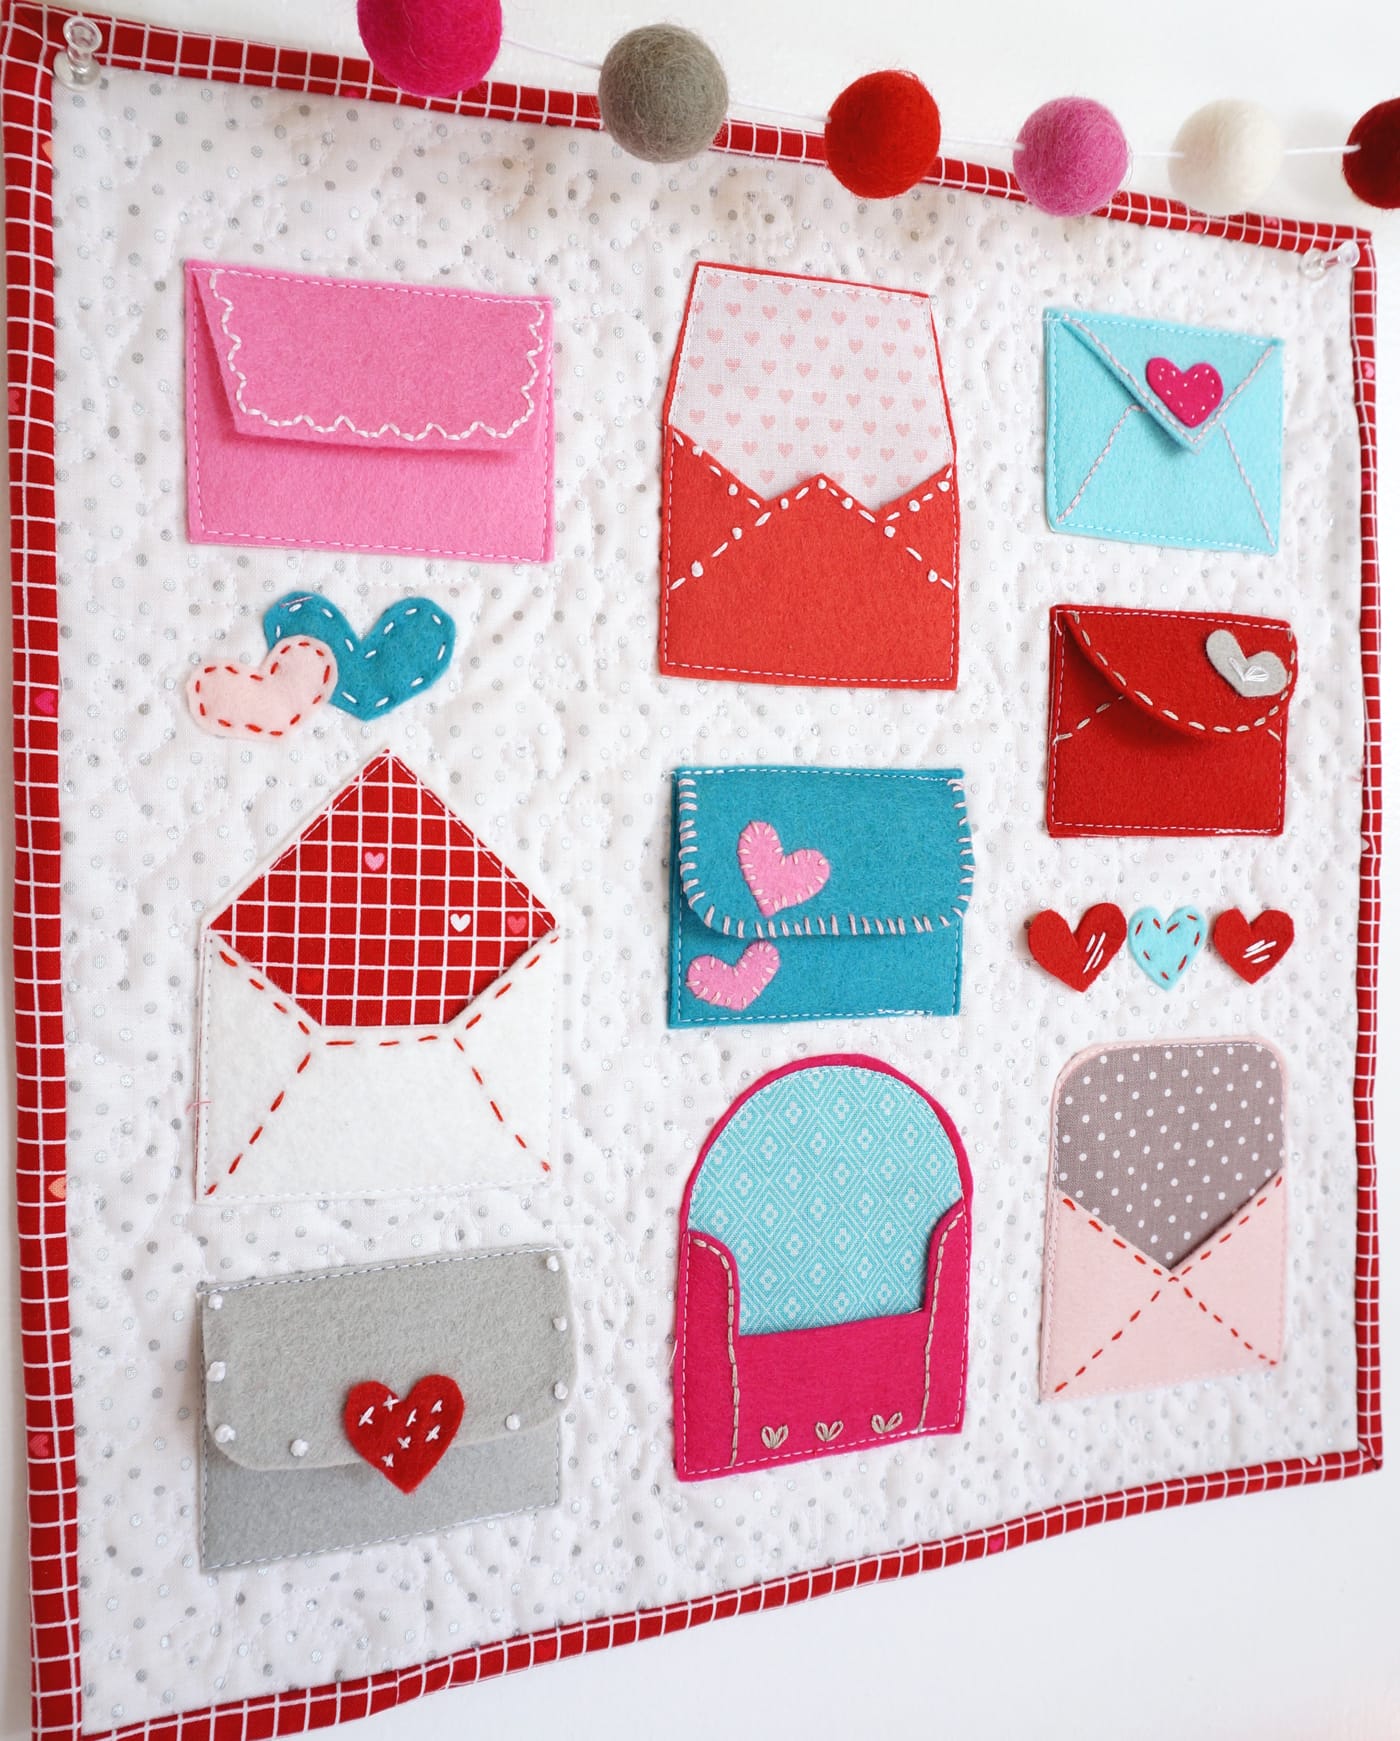
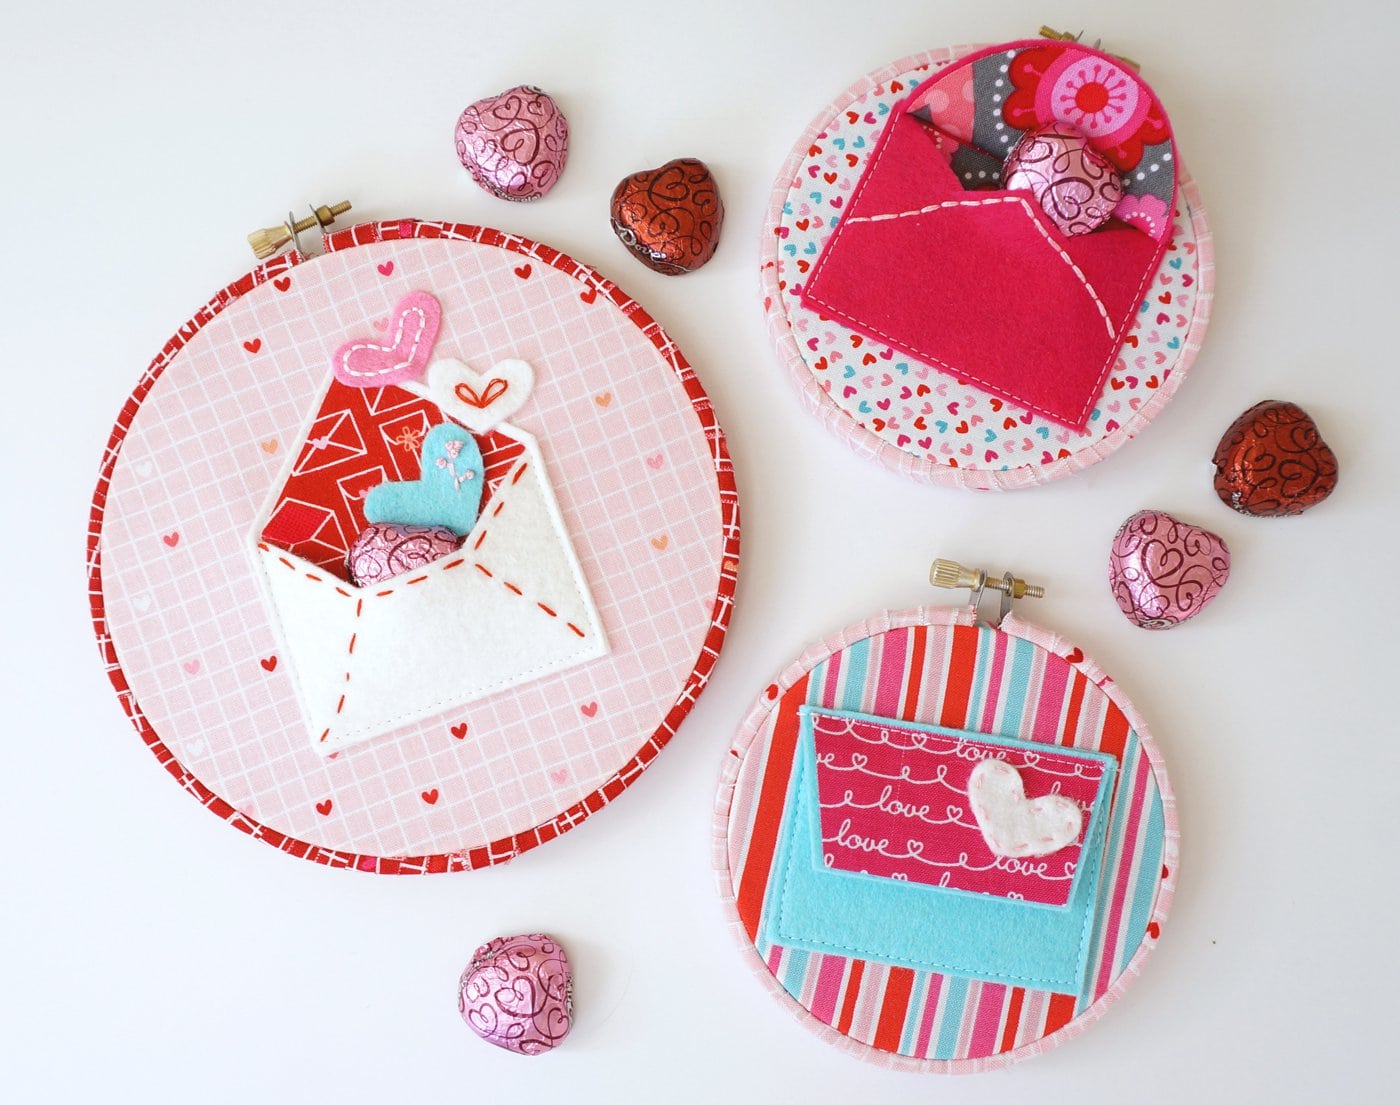
These adorable envelopes are made from felt and can be turned into a mini quilt or embroidery hoop art! Learn how to make them with our free “Love Note” Felt Envelope Pattern. It’s such a fun Valentine’s Day Craft idea that I’m seriously smitten!
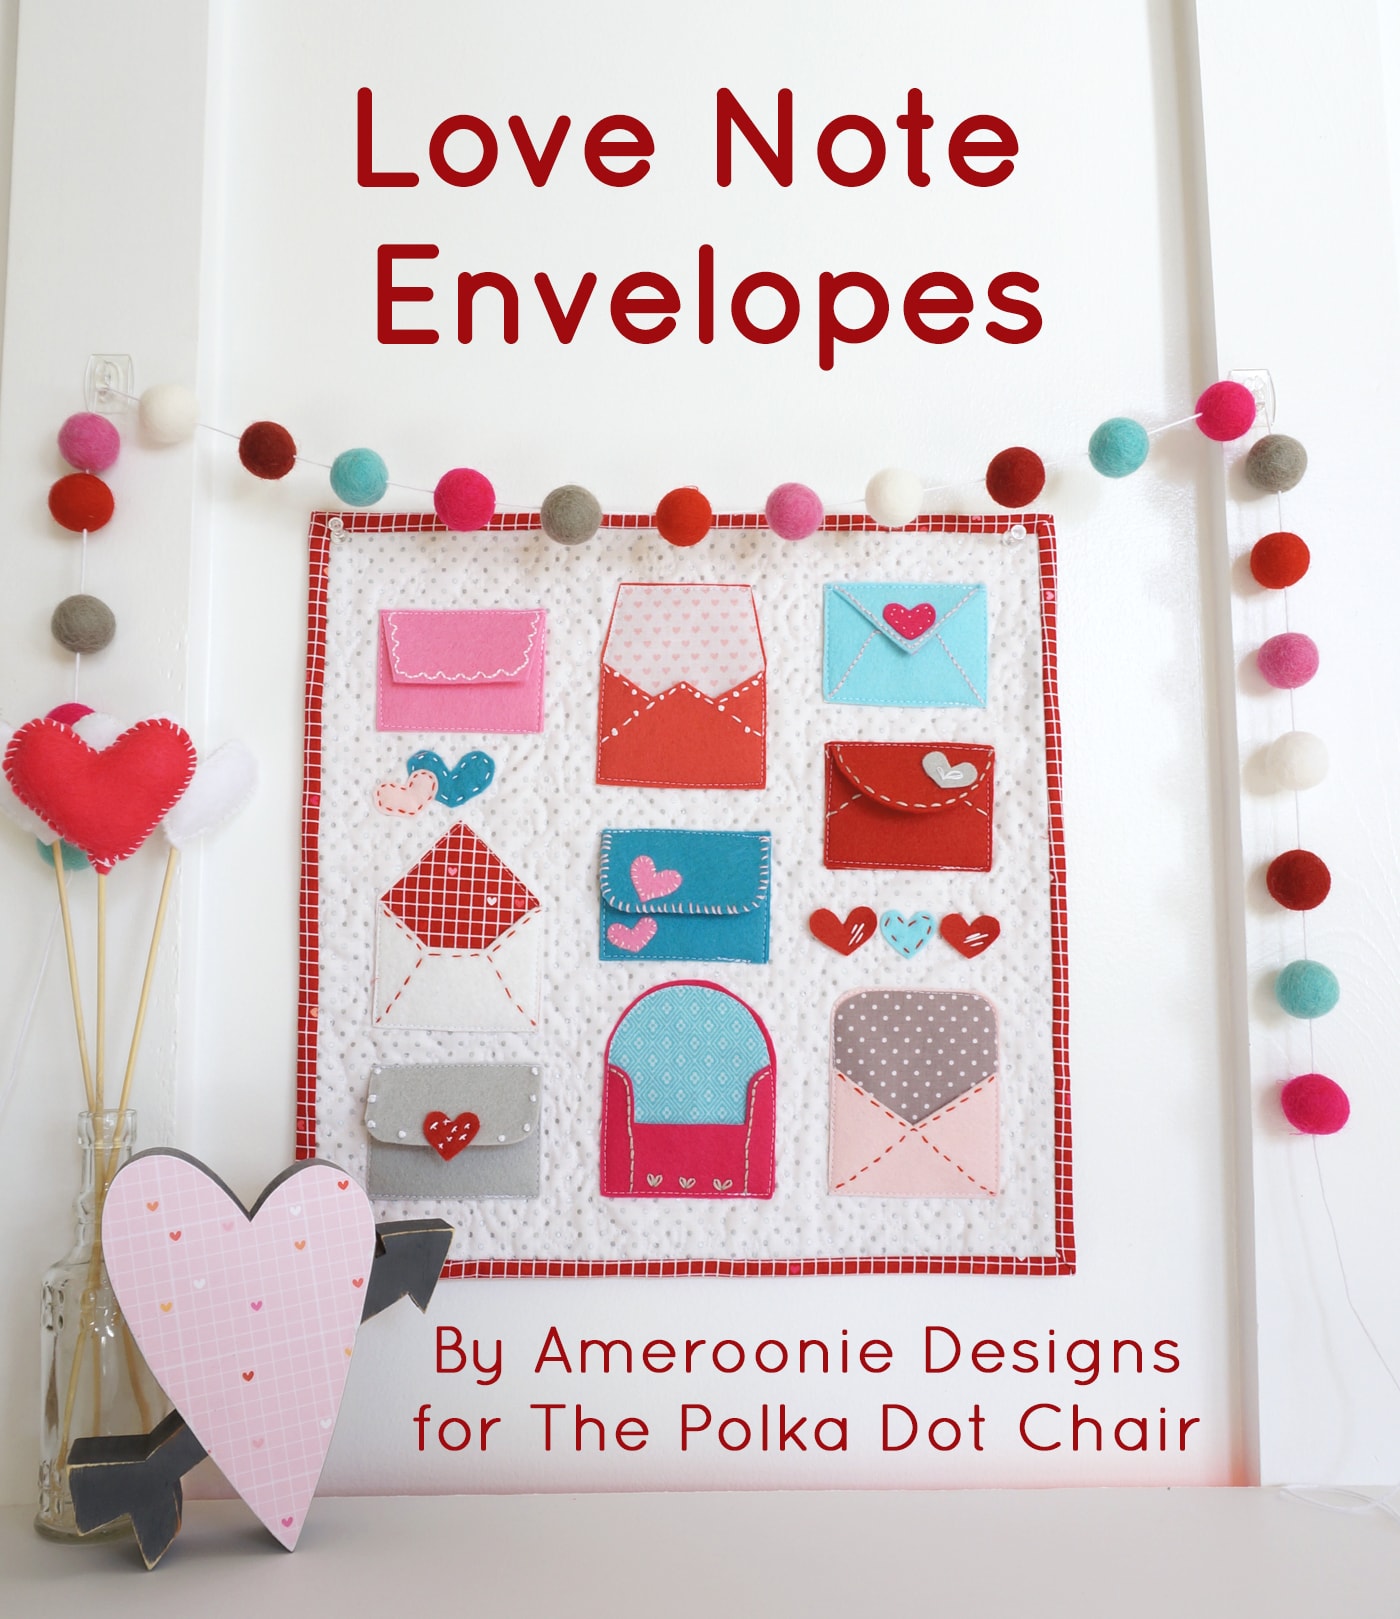
Hi friends! Amy Chappell from Ameroonie Designs is here again to share another project. I love these little Love Note Envelopes! They are tiny, sweet, and perfect for filling with treats or notes or decorating! You can make them functional envelopes or do the front, flap, and make decorative pieces.
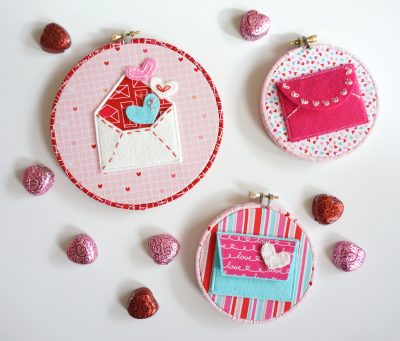
I had so much fun embellishing mine with embroidery and tiny felt hearts, and as always, choosing fabrics for accents is a blast! You can create a lining inside the envelope or make patterned envelopes by adding fabric to the outsides. Are you ready to make some?
“Love Notes” Felt Valentine Envelope Pattern
Fill out this form, and we will email you a copy of the template for the envelopes. You’ll still need the directions on this page to complete your project.
Valentine Felt Envelope Pattern
Equipment
- Embroidery supplies optional
supplies
- 2-3 pieces Felt specific requirements below
- Fabric Scraps optional
- 1 package Heat N Bond Lite if making a fabric lining
Instructions
- Print the template for the envelopes. You can find the template on this blog post, just fill out the form on the page, and we will email you the PDF.
Step One:
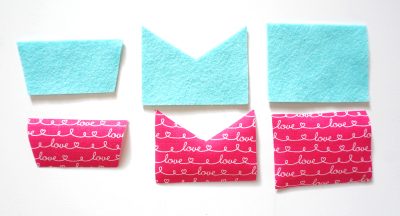
- Decide what envelopes you want to make. Four designs for the back of an open envelope, four front panels, and four flap options exist.
- For open envelopes, you need one back and one front- in felt and fabric lining
- For closed envelopes that function– you need one front panel and one flap, PLUS a 2 1/4″ X 3″ piece – all three pieces in both felt and fabric; even if you aren’t embroidering the pieces, the fabric fused to the felt helps keep the shape of the envelope if you add something bulky to it, it won’t stretch the felt as much.
- For closed envelopes that don’t function– you need one flap PLUS one two 1/4″ X 3″ piece in felt only.

Step Two:
- Cut out your envelopes.
- *TIP—I love using freezer paper to cut out felt. Trace the pattern onto the freezer paper’s paper side, and using a medium-heat iron with no steam, place the wax side down on the felt and iron it to fuse.
- Cut out your shape and pull the freezer paper off! Easy!
Step Three:
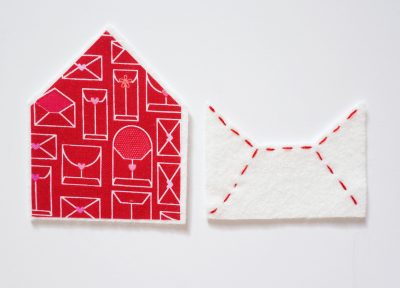
- Cut out your fabric lining. Trace the patterns on the paper side of the Heat N Bond and fuse to the lining fabric following the manufacturer’s instructions. Cut out.
- *TIP—Make sure you cut out INSIDE the lines when cutting the lining so it doesn’t go over the edges of the felt; I like to cut off a good 1/8″ from the sides of the lining to leave a little outline of felt around the edges.

- If you want to add embroidery to your envelopes, do it now.
Step Four:
- Fuse the lining fabric to the felt pieces- this will anchor the knots and hide your stitching if you’ve done embroidery. (only if you want to make full envelopes)
- Sew the pieces of the envelope together.
- Now, what are you going to make with these cuties?

___________________________
Thanks for the tutorial, Amy!
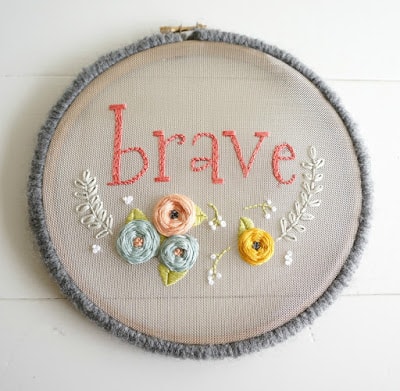
If you’re curious to see how Amy creates her embroidery hoop art, check out this tutorial. It will show you how to take your cute felt envelope and turn it into some fun Embroidery Hoop Art.
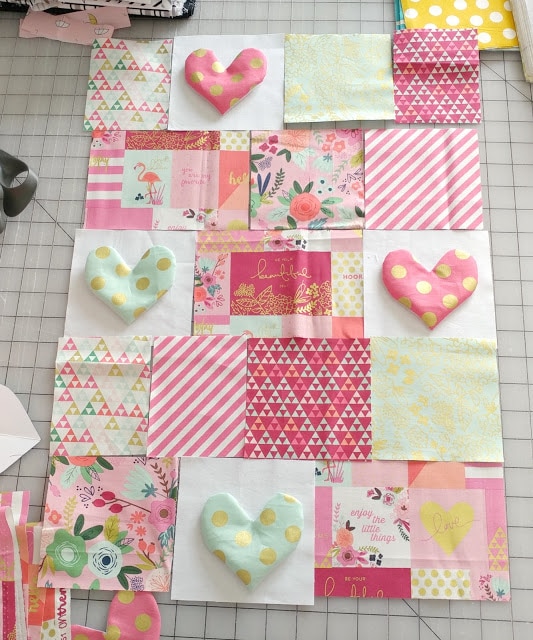
She also used them on a fun mini quilt! You can see how she makes her mini quilts by clicking HERE.
If you own a Cricut, Amy will be posting a tutorial on how to use this pattern with your Cricut Maker! Just click HERE to go to her site. How easy would it be to cut the felt with that instead of by hand?
About the Maker:

Hello! I’m Amy Chappell, the person behind Ameroonie Designs. I’m a sewing and quilt pattern designer, and I’m proud to say that my work has been featured in several print publications and popular DIY websites.
I am the mom of six kids- which is a big reason I create and sew. I find that I am happiest when I am making things, and taking time to be happy makes me a better mom.
Join me in my exclusive Let’s Sew Friends membership, where you’ll find small, manageable monthly sewing patterns, live classes, and lots of video tutorials!
More Projects by Amy:
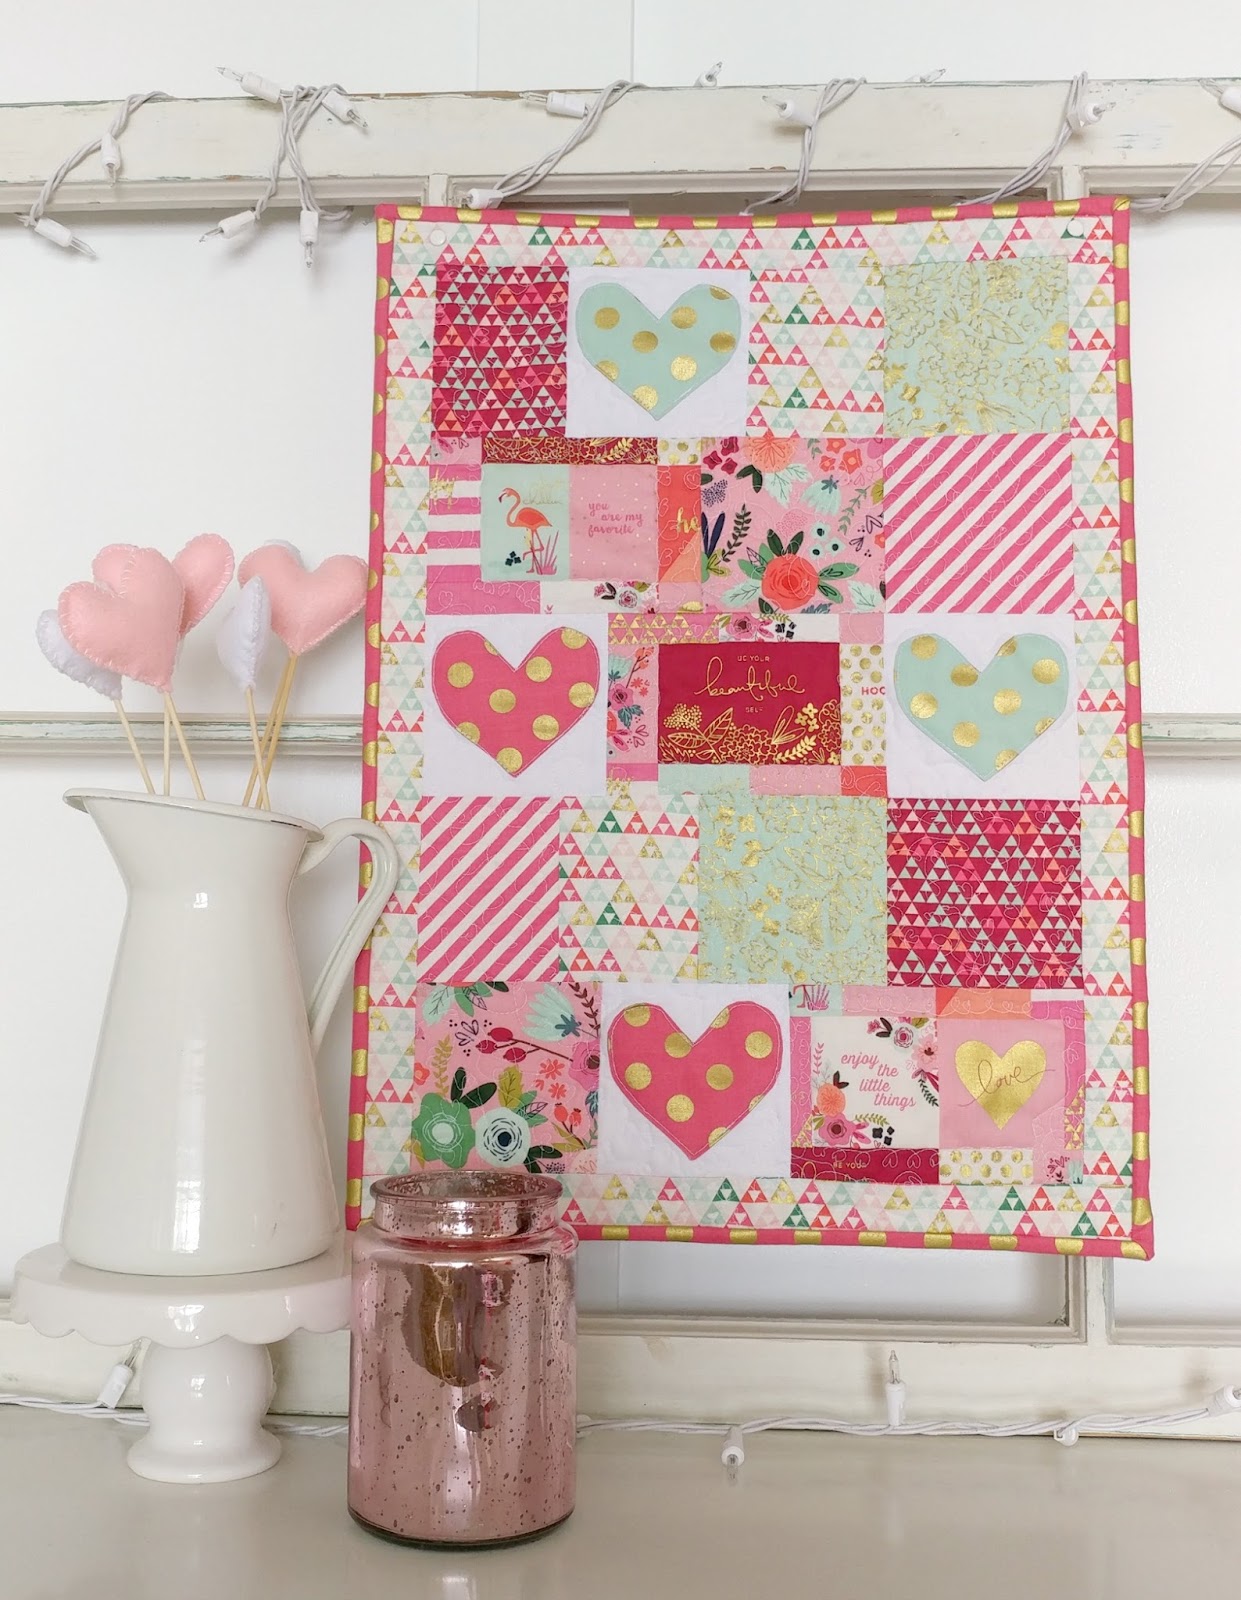
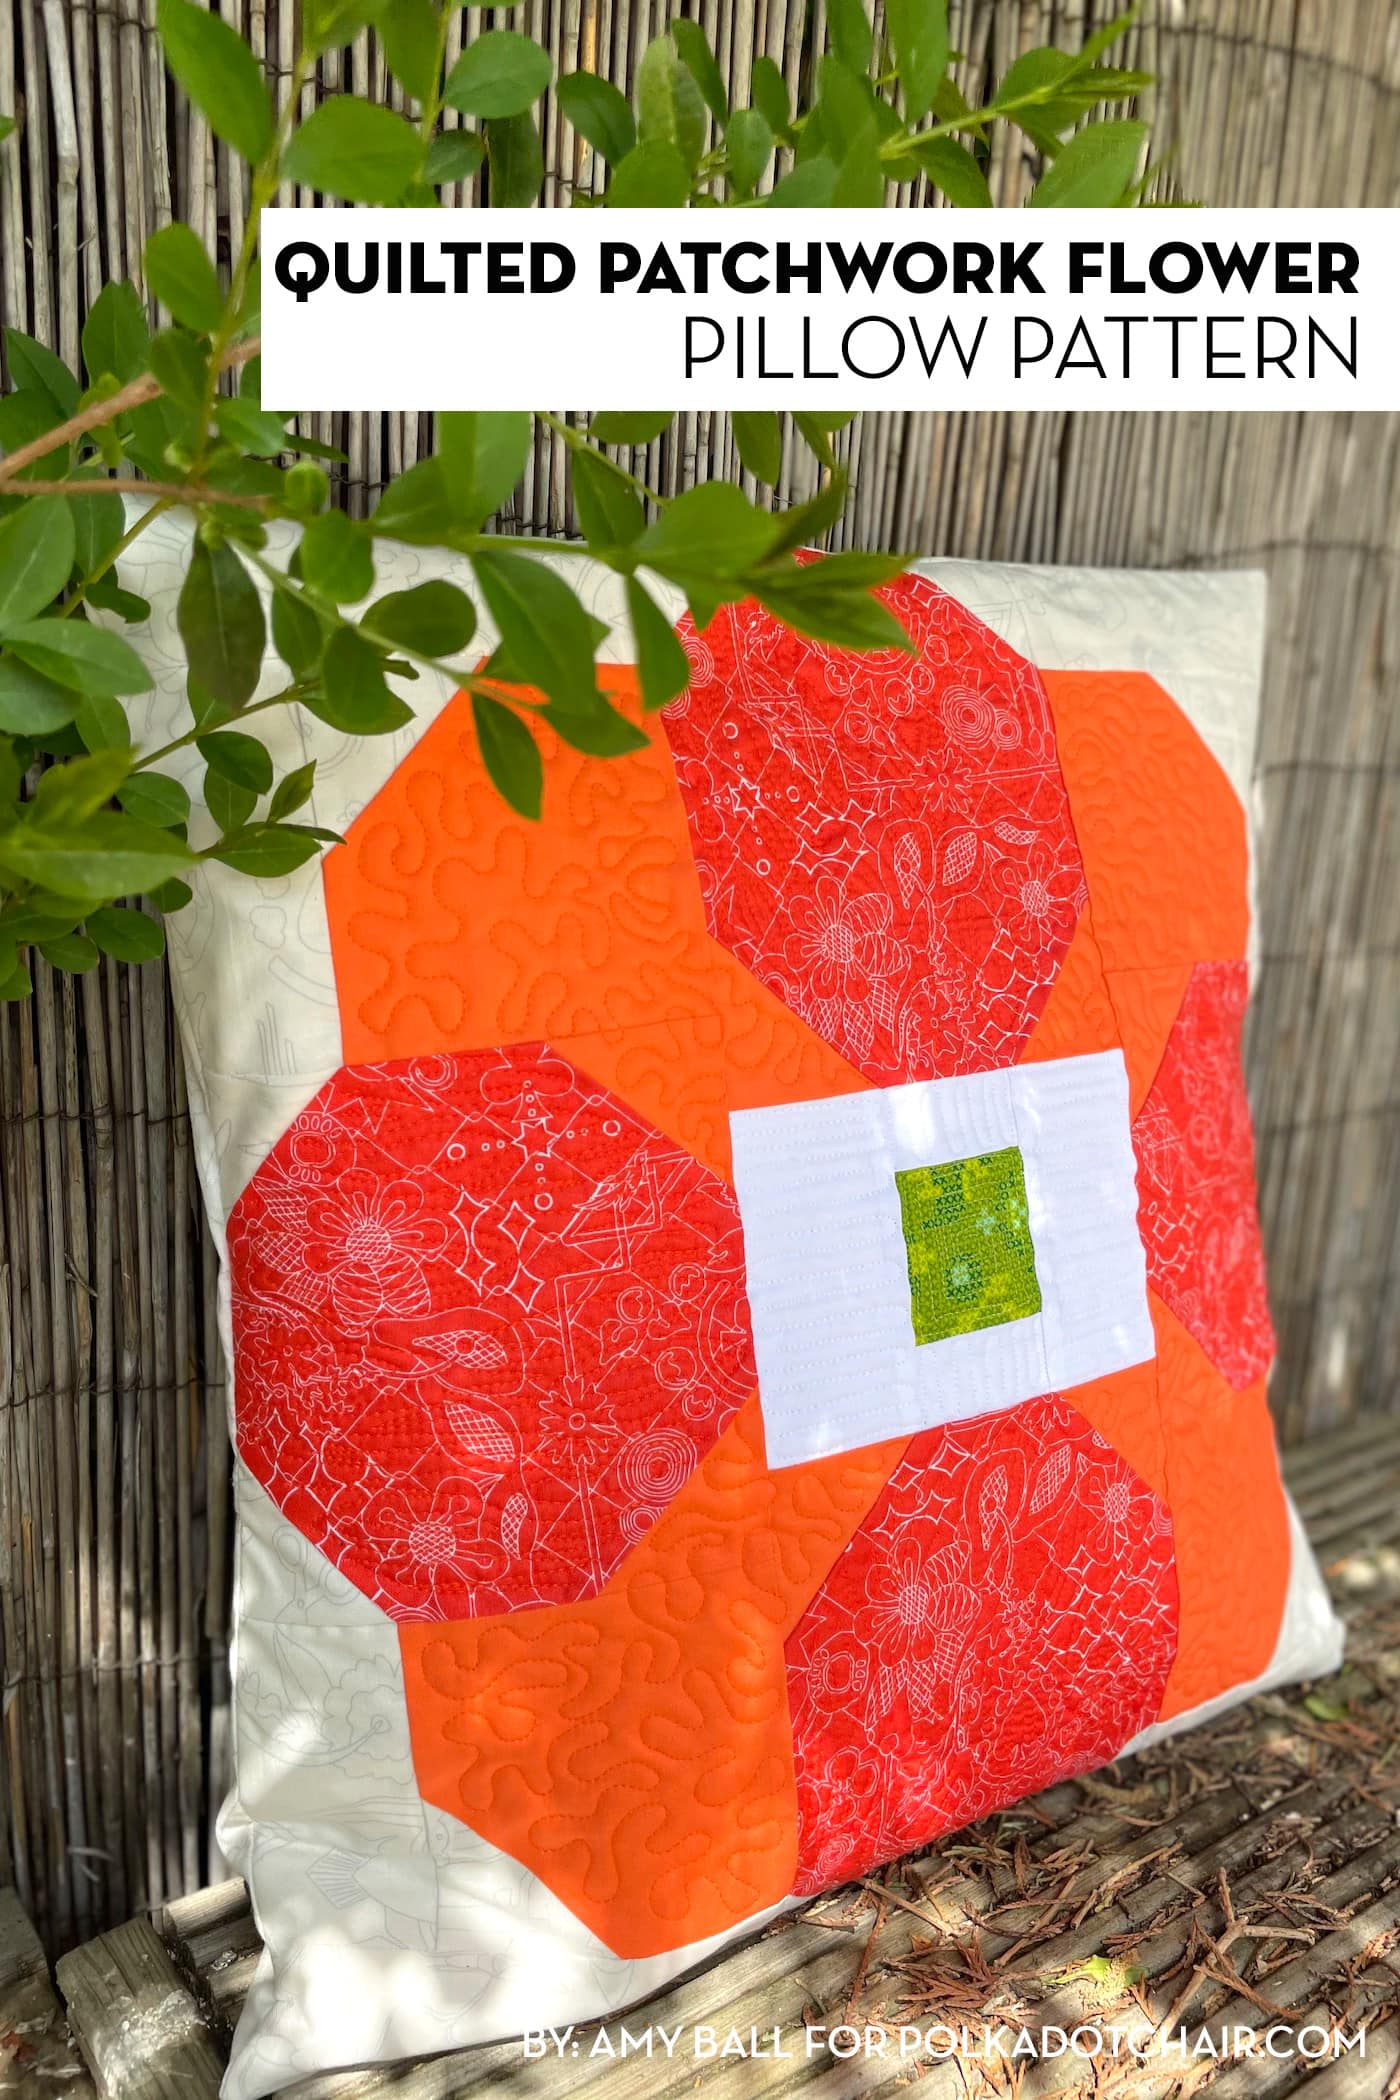
“On Trend” Valentine’s Day Mini Quilt
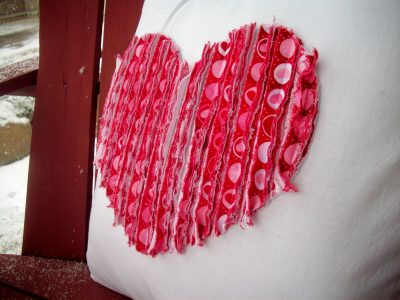
How to make “Faux” Chenille Pillow
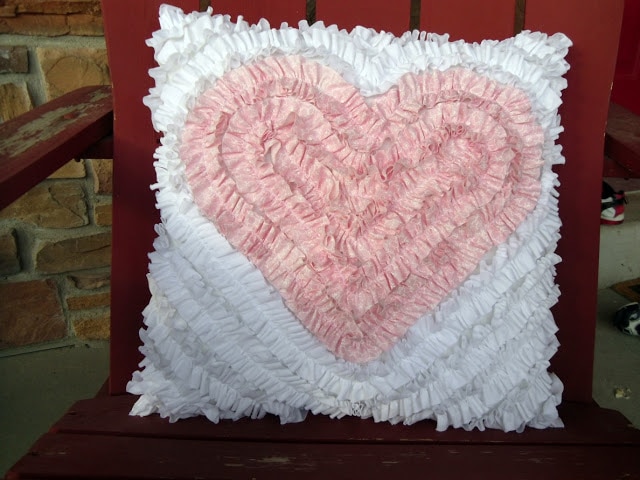
How to Make a Ruffly Heart Pillow


just what I was in the mood to make! these are so beautiful.
I don’t see the Valentine envelope template on the downloads page either.
It is there. There is more than one page of downloads, as it notes on the page please use the numbers on the page to scroll through the pages.
Thank you for sharing such a wonderful tutorial.
I love the envelope pattern! I clicked to download, when I scroll down the envelope download is not offered. Am I missing a step?
I bought little metal mailboxes at Walmart for my grandsons for Valentine’s day, these will be perfect for them to play “mailman”!!
I just checked and it’s there. Just click where it says “CLICK HERE TO DOWNLOAD” then scroll down. It’s the first download option.