IKEA Mudroom Hack! Turn IKEA Bookcases into Mudroom Lockers
Learn how to make your own Mudroom Lockers using IKEA Bookcases! We couldn’t afford to have custom mudroom lockers built in our home, so we figured out how to build them ourselves using IKEA bookcases.
We just turned them into IKEA cubbies! It’s a great and inexpensive IKEA Hack. If you like this post, you may also like this article on Laundry Room Storage Ideas.
I really, really love IKEA. I think I’ve said that here before, but it’s worth repeating. I realized I like IKEA because most of its stuff is simple, making it very easy to adapt to different purposes.
Right after we bought our home, we realized that the mudroom would not work for us, so we started brainstorming ideas for DIY mudroom lockers. With a new home, the budget was tight, and we had to find a way to build them ourselves, but we don’t have a lot of carpentry experience.
How We Built Mudroom Lockers from IKEA Bookcases
FYI: The photos are not great; it’s a very narrow room with terrible light and even with a separate flash is very hard to take photos of.
Our Mudroom Before
This is our mudroom right after moving in; to say it was not working for us is an understatement. It’s a combo mudroom/laundry room and is far too small for our family.
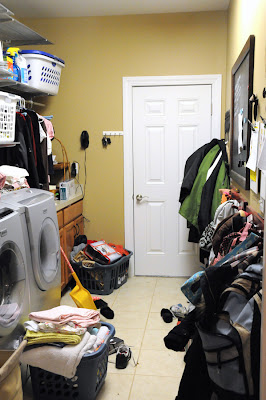
This is it before. The shot is from the hallway looking at the door that leads into the garage. It drives me crazy and is the one thing I would change about my house if I could.
Now I will say, the laundry side of this room is still NOT working for me. It’s one of the next big projects figure out what to do with it, but I have NO idea… open to suggestions on that one. (UPDATE: Found a solution for Laundry storage!)
The mudroom side, thankfully, is now working for us. I’ll show you what we did about a year ago, and it’s still working great.
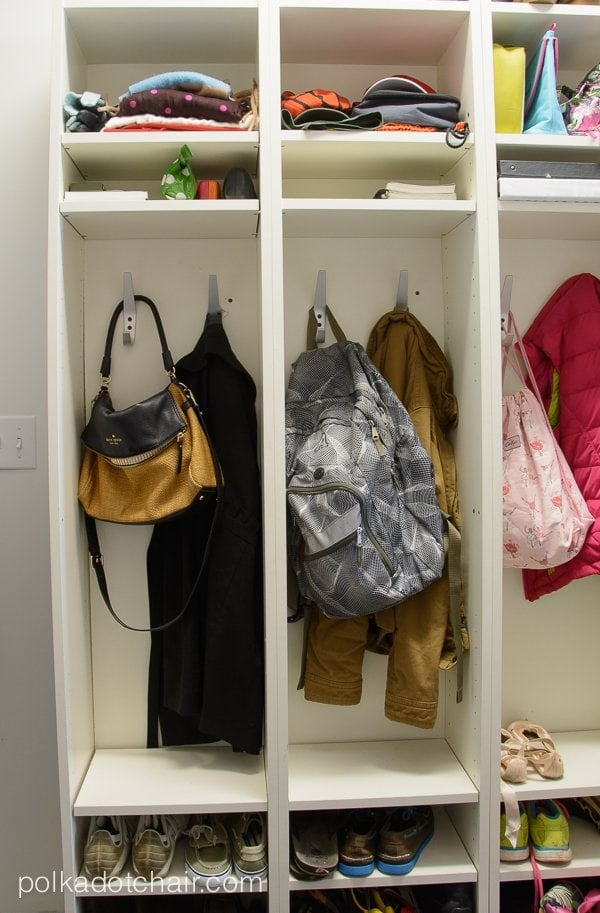
Our Mudroom Now with our IKEA Mudroom Lockers

When we were planning out the lockers we realized we had a few problems:
- Since the room is narrow and most “pre-made” lockers are wide at the base, none of the ones that I found online and in stores would work for us. They would all stick out too much from the wall, and you could not walk through the room.
- We have limited carpentry skills. We are very “handy” but would not know how to build mudroom lockers from scratch.
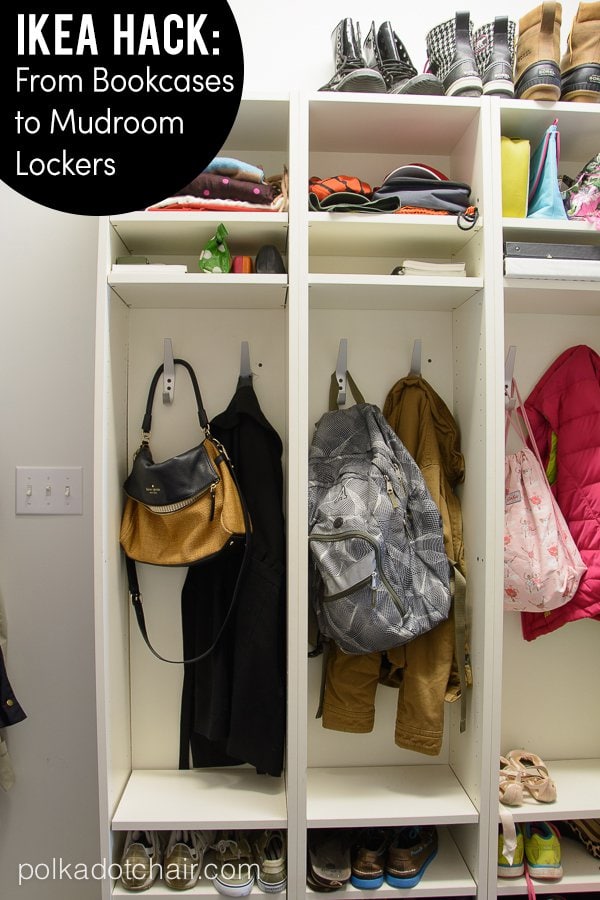
- I didn’t want just hooks on the wall; I wanted mudroom cubbies, so people had a place to “stash” their stuff.
- We needed to fit 5 lockers into a tiny space.
- We had a minimal budget.

How we solved our Mudroom problem by building our own Mudroom Lockers using Ikea Bookcases
One evening while I was perusing my IKEA catalog, I saw this… It’s the Billy bookcase, and it’s only $34 for the size I needed. It was not too deep, and we could easily fit 5 of them in the space that we had on the wall.
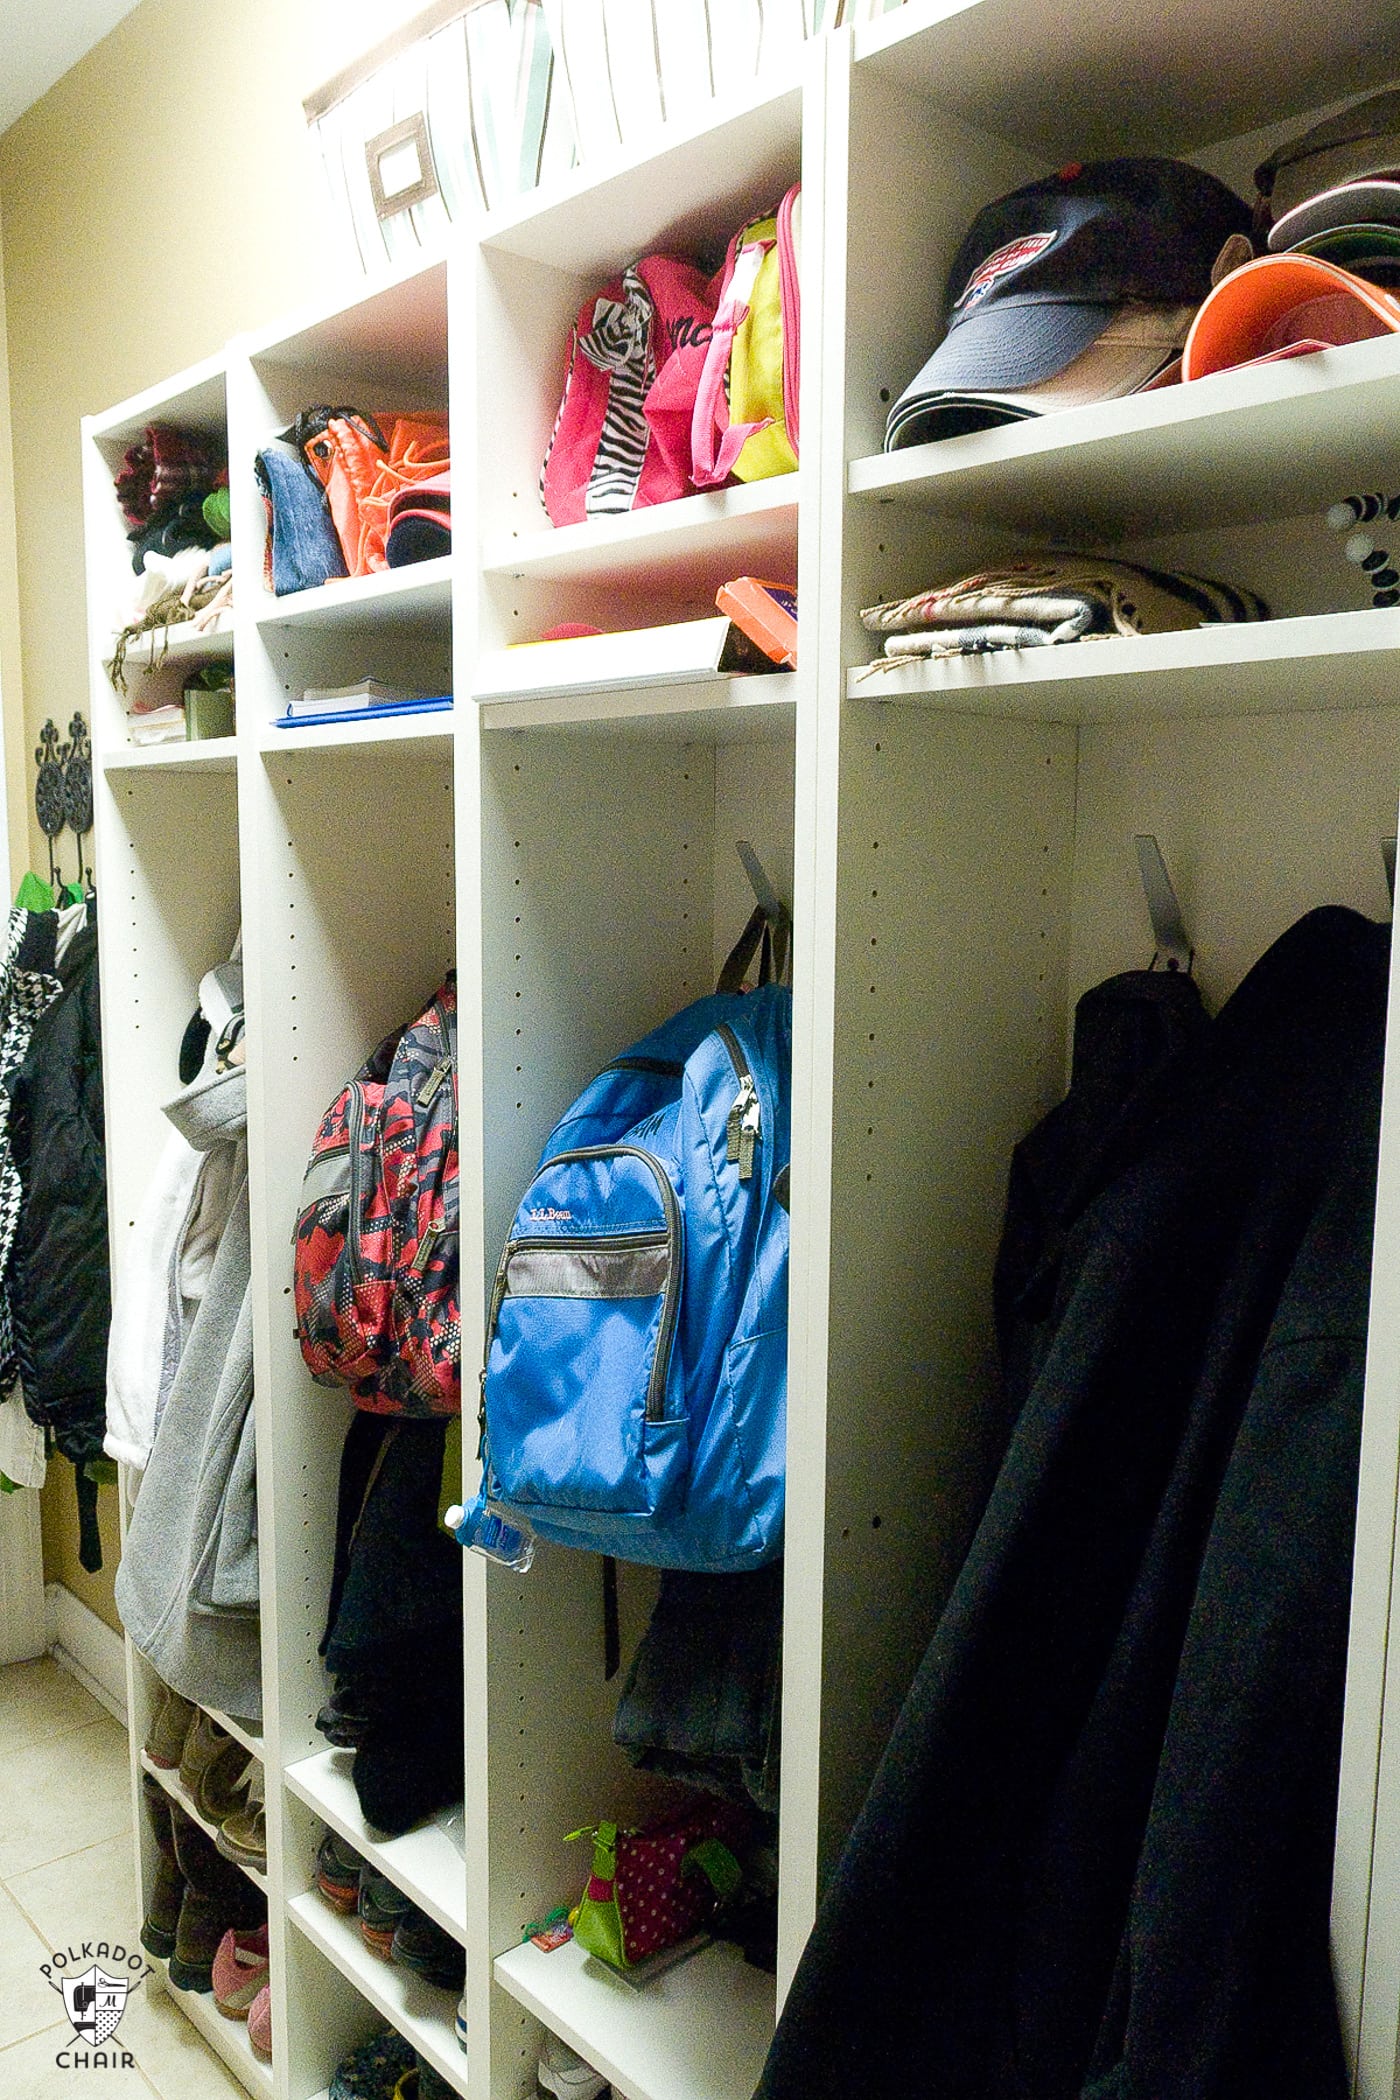
We bought 5 IKEA Billy Bookcases and installed them next to each other along the wall (5 of us, which is why we have 5 lockers). I also installed a hook at the end of the wall for long coats that would not fit the lockers.
How we turned the bookcases into lockers
The Billy Bookcase is designed with adjustable shelving. There are 2 fixed shelves, but they are at the top and the bottom, which left us with lots of space in the middle to work with. (Note: at the time we created our lockers, this was the design of the Billy Bookcases, it may have changed since then).
Instead of putting the shelves spaced evenly throughout the bookcase, we left a space in the middle to attach a hook for backpacks and coats. It worked great because the bookcases have holes all up the side to put the shelves exactly where we needed them. If you had tiny kids, you could install the hooks even lower.
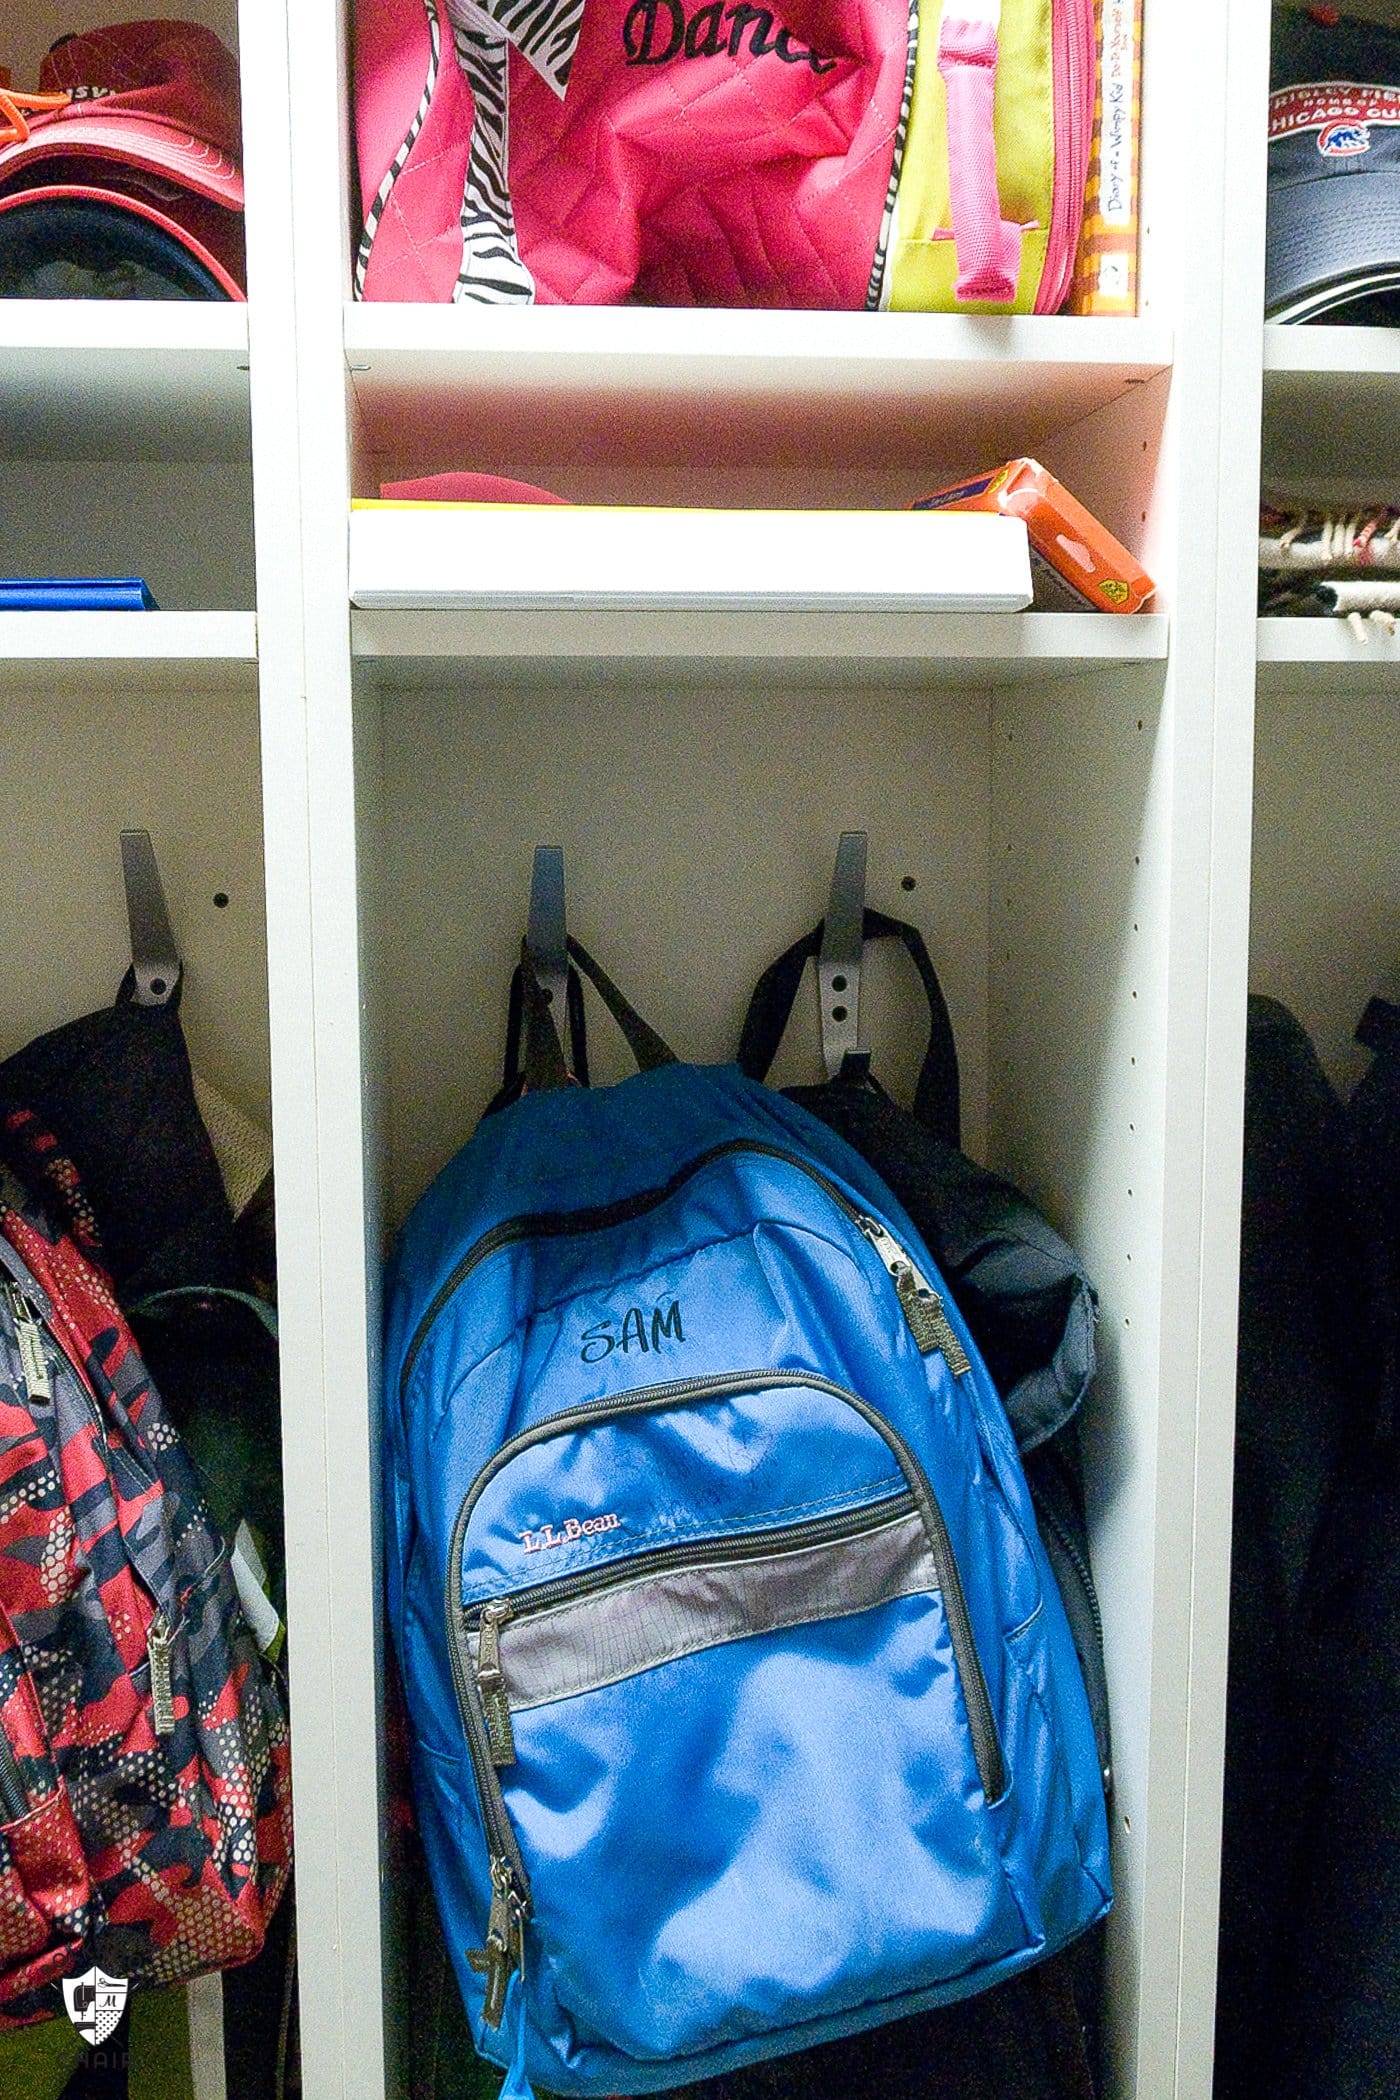
We then left 2 shelves on the top for things like lunchboxes & books.

and 2 shelves on the bottom for shoes.
Tips for Creating the Mudroom Lockers
1. After you have the bookshelves where you want them, screw them to each other. So you have one large piece, it will help with stability.
2. The bookcases come with a pre-cut notch in the back to make them lie flat against the wall. If your baseboard is taller than the notch, you will need to cut the notch larger. They must fit flat against the wall.
3. The back of the bookcases is just particle board, not strong enough to hold a coat hook. You will need to buy a 1×4 piece of wood and cut it to the width of the bookcase between the 2 side pieces.
Place it behind the bookshelf. Then you will screw your coat hooks through the back of the shelves and into that wood. We used a bit of glue to hold it in place temporarily, then bought long enough screws to go through the back of the bookcase, through the wood, and into the wall. You will need long screws to accomplish this.
4. Use the anti-tip kit that comes with the bookcases so no one will try to climb up and pull the whole thing onto them. (make sure you install them into a stud in the wall, we installed as many as we could just to be extra sure). Do NOT SKIP this step!
I had plans to use the bookcases only temporarily then get custom lockers made later, but it’s been 10 years and they work so well that I don’t think I’m going to do that. I’d rather use the money for another project in the house.
Project Update – How they are Holding Up!
Since this project was posted many of you have made your own lockers. If you scroll though the comments you will get tips from other Makers.
The most frequent question I get is “how did they hold up”? They have held up great. Now almost 10 years later we are still using them. We have had kids move out and go off to college and we just “took over” their lockers for ourselves!
Many times of the years we have talked about swapping them out for something custom, but they work so well we have not seen the point of doing that.
You May Also Like:
See how the other side of the room turned out– check out the Laundry Room Shelving Post Here
IKEA Raksog Hack- DIY Rolling Vanity Cart


Has anyone tried to attach door panels? I would love this idea even more if I could close a door on all the junk!