How to Make a Fabric Graduation Banner
Create a unique and personalized graduation banner out of fabric. You can easily customize this banner with your child’s school colors and graduation year.

My sister-in-law is the photographer for her daughter’s Field Hockey team. She came up up with a great idea to make a banner with “Class of 2012” for photos of the seniors this year.
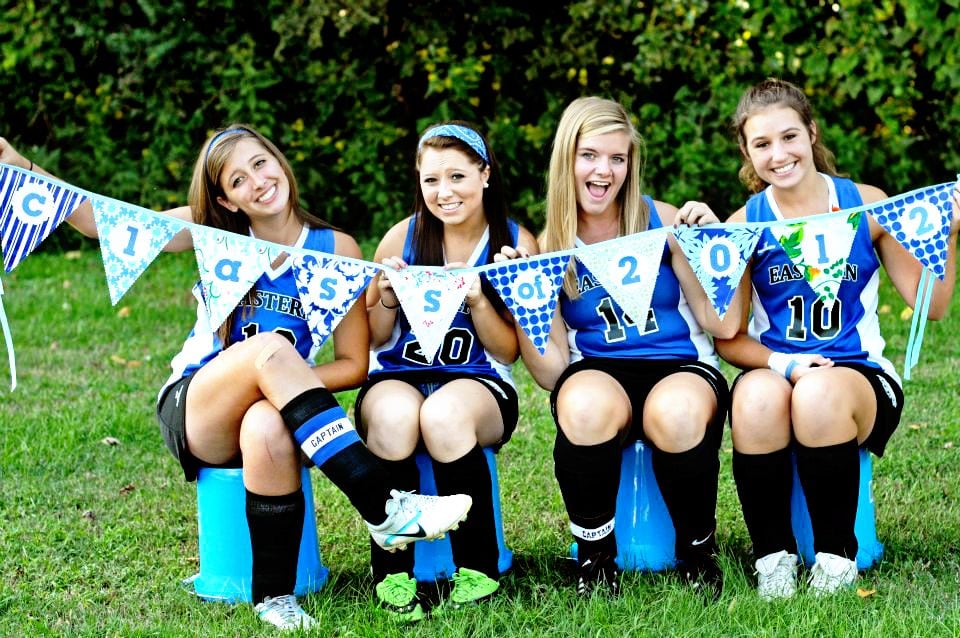
She enlisted my help to make the banner, and I was happy to help! I love a good project, and she had an excellent idea. I think this would also be great to use to decorate for a graduation party.
The banner was simple, I just used various blue fabrics, cut them to 10″x10″ then into triangles using my ruler and pinking blade for my rotary cutter.
How to Make the Banner
Supplies Needed
- 20 10″ x 10″ Squares of Fabric in a variety of prints (this would be a great way to use a 10″ precut stack!)
- Pinking Blade for Rotary Cutter
- Quilt Ruler
- Extra Wide Double Fold Bias Tape
- Felt
- Cricut Machine
- Paper Backed Fusible Web
The banner is double-sided – I put my niece’s name on the other side so that she could use it later to decorate her dorm room. Of course, you can leave the other side blank.
Cutting Directions
Find the center of the bottom of each of the 10″ squares and mark it with a fabric-safe pen.
Place two 10″ squares together, the wrong sides facing. (You need to keep them paired up as you cut and sew).
Place your quilt ruler so that it goes from the bottom center to the upper corner, and cut it with the rotary cutter.
Repeat this time with the ruler towards the other upper corner.
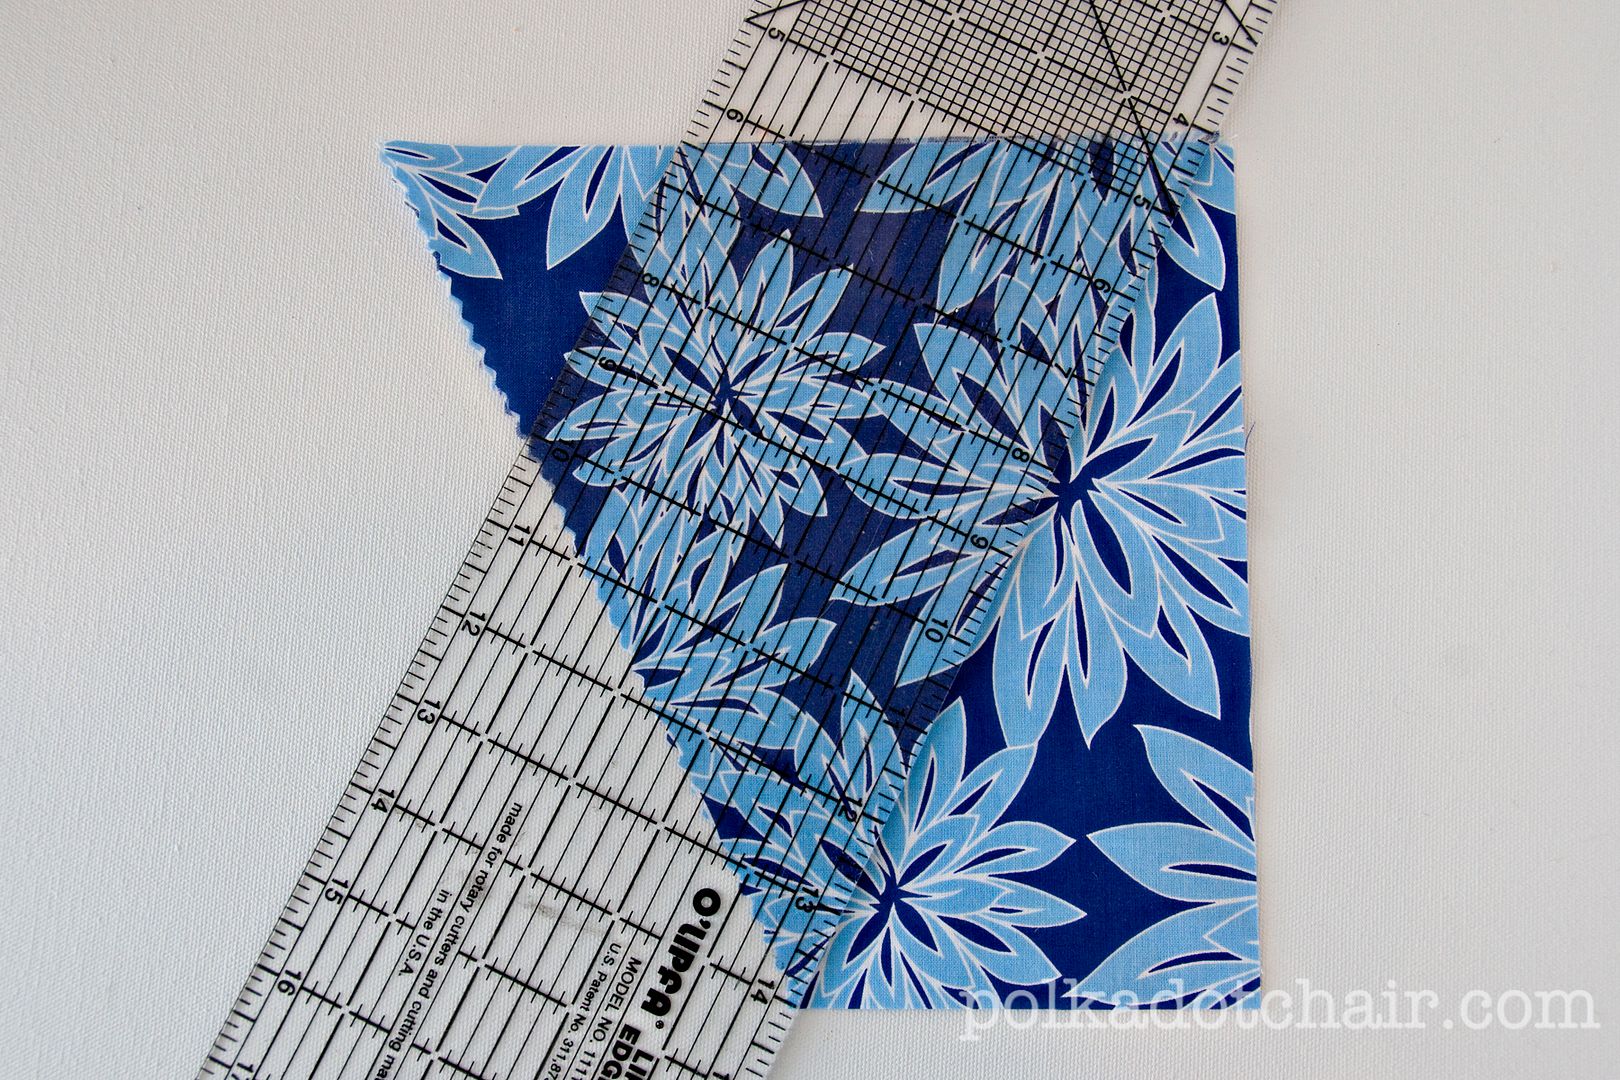
Sew each pair of cut triangles together along the pinked edges with a 1/4″ seam allowance.
Add the Applique
Iron the paper-backed fusible web onto the wrong side of the felt to be used for the lettering and circle.
Use a Cricut machine cut out from felt, your lettering, and ten felt circles (mine are scalloped and 3″ across; you can find a free scalloped circle in Cricut Design Space).
If you don’t have a Cricut machine, don’t worry! Using our free tutorial, you can also create the letters or numbers using raw edge applique.
Assembly Steps
Using pins and a sewing machine, sew the tops of the triangles into the bias tape.
Space the pieces evenly and sew them in place on your machine.
What a cute idea!
What a fun idea!!!
Looks great, and love the colour co-ordination! x