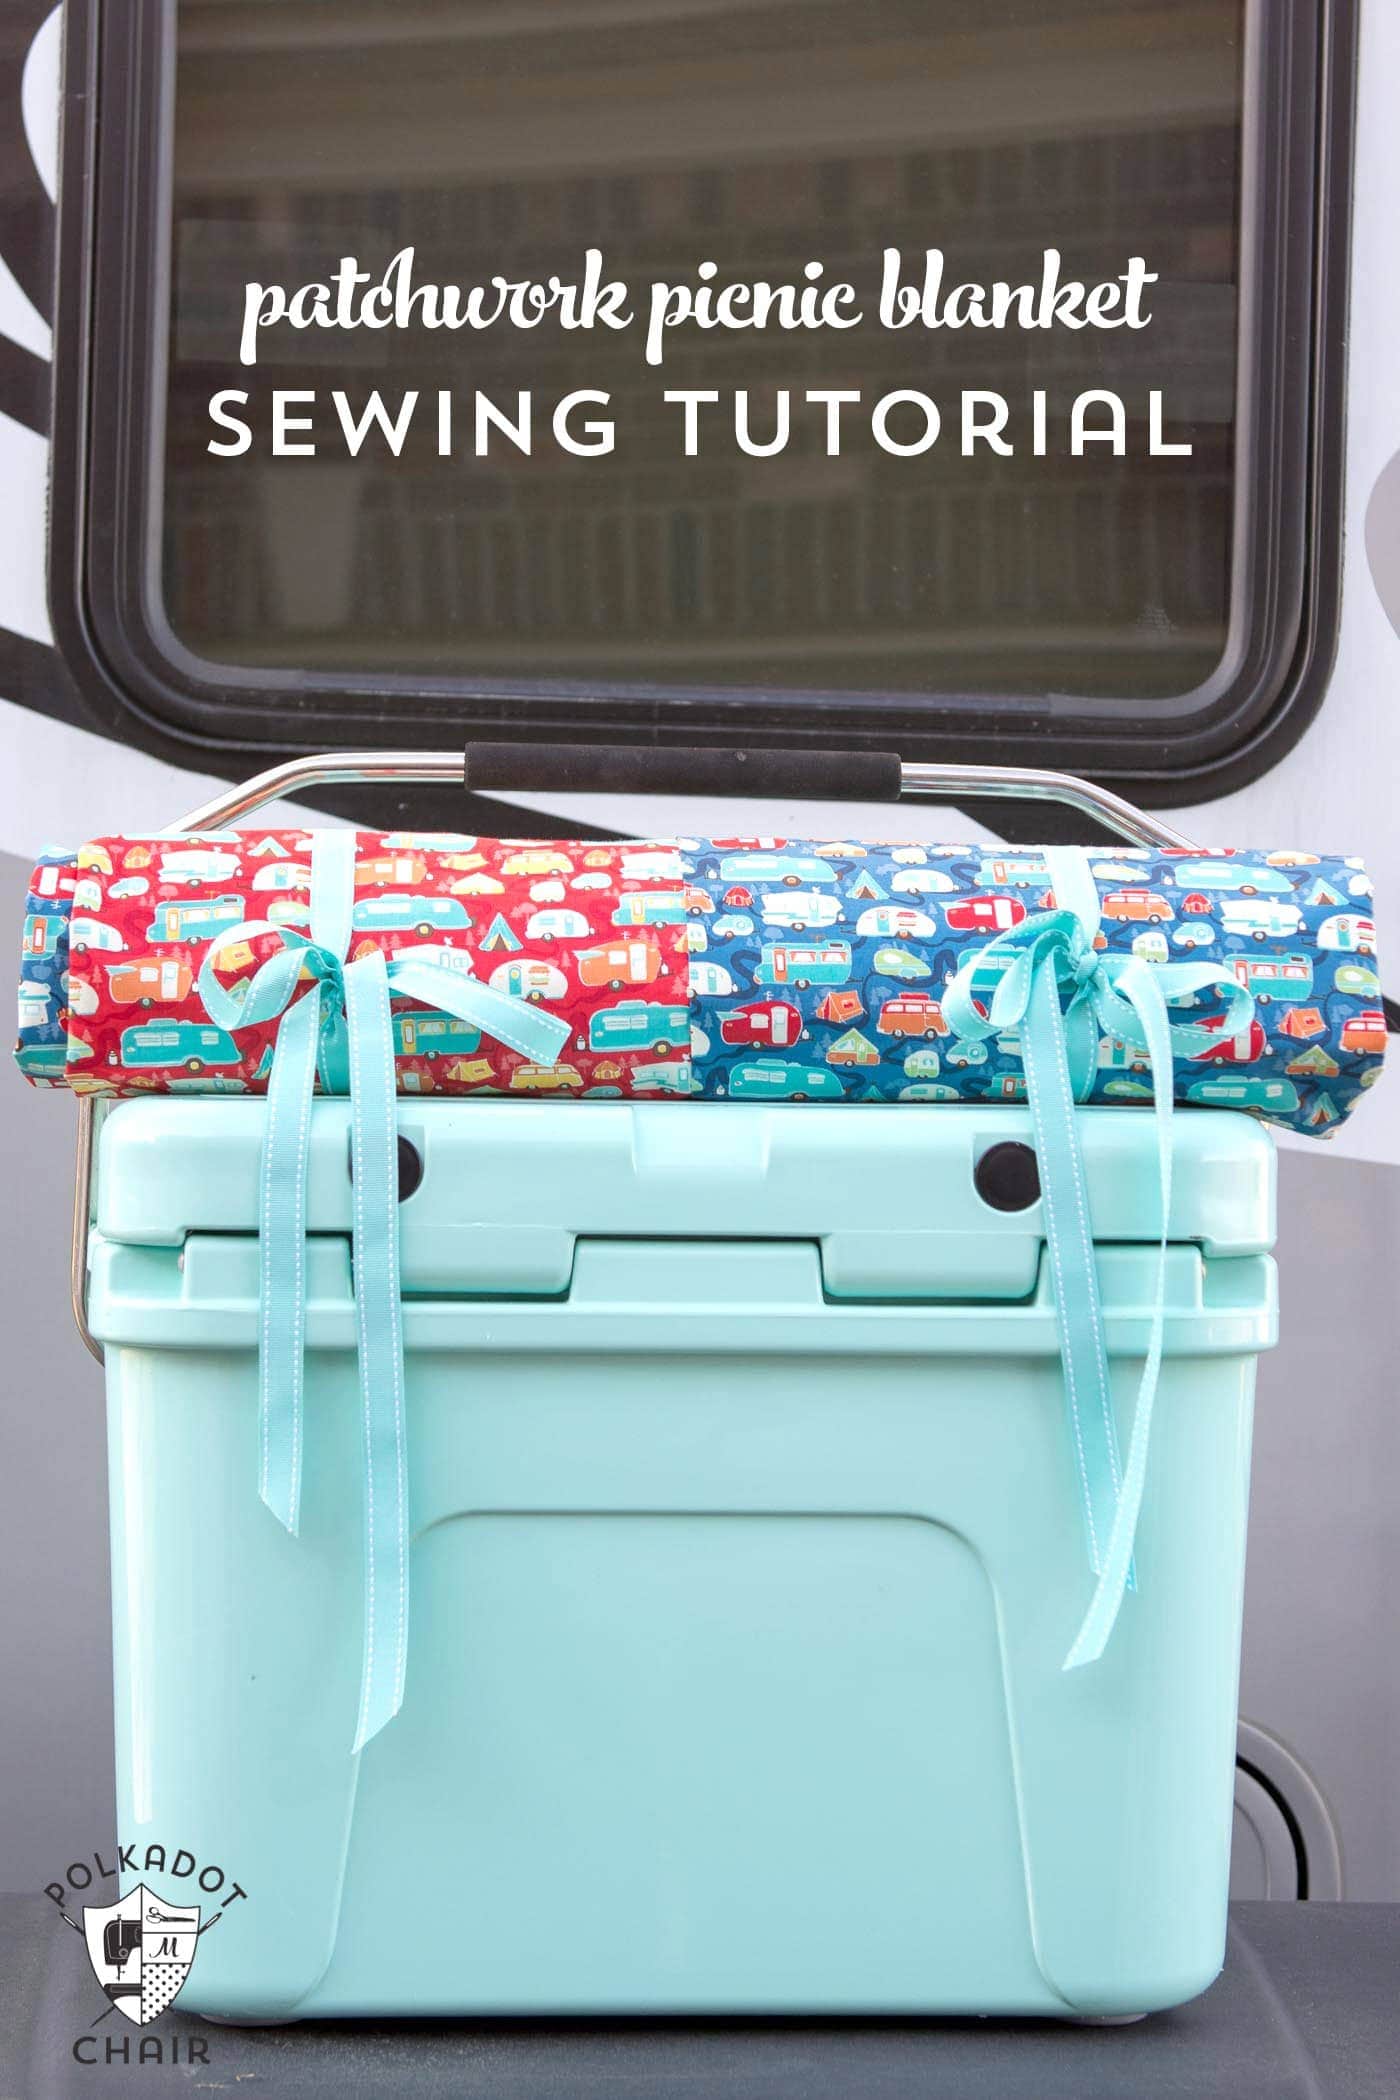
Waterproof Patchwork Picnic Blanket Pattern
Today, I’m sharing a tutorial for a waterproof patchwork picnic blanket pattern with you. It is made using squares of fabric and a vinyl tablecloth for the back! If you like this project, then you may also like this “Hit the Open Road” Pillow Pattern.
I’ve mentioned a few times that our family started RV’ing this year. As soon as we purchased our RV, I started planning some fun activities to create and use in the RV. So far this year, it seems that I’ve managed to do more “crafting” for the RV than actual RV’ing, as much of our Fall RV plans ended up being waylaid by the kids’ sports schedules.
Just this weekend, the weather turned cold and crisp, and we had our first freeze. It’s time to winterize the RV and “put it away” for the next few months. That thought makes me a bit sad, but it does give us something fun to look forward to in the Spring. (Next summer, we have a cross-country road trip planned, and I could not be more excited)
About the Roll-Up Picnic Blanket
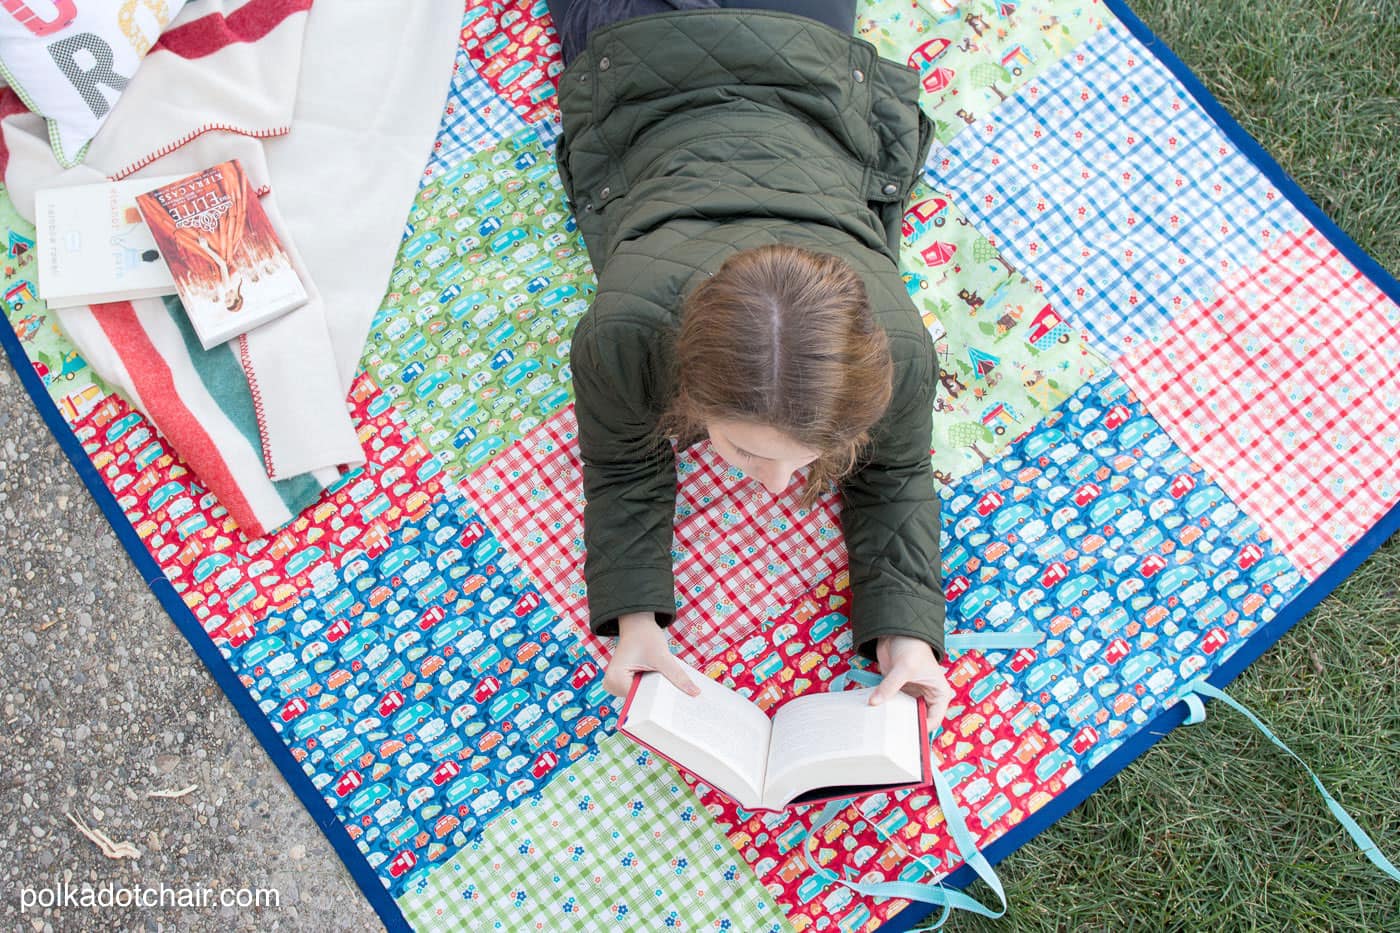
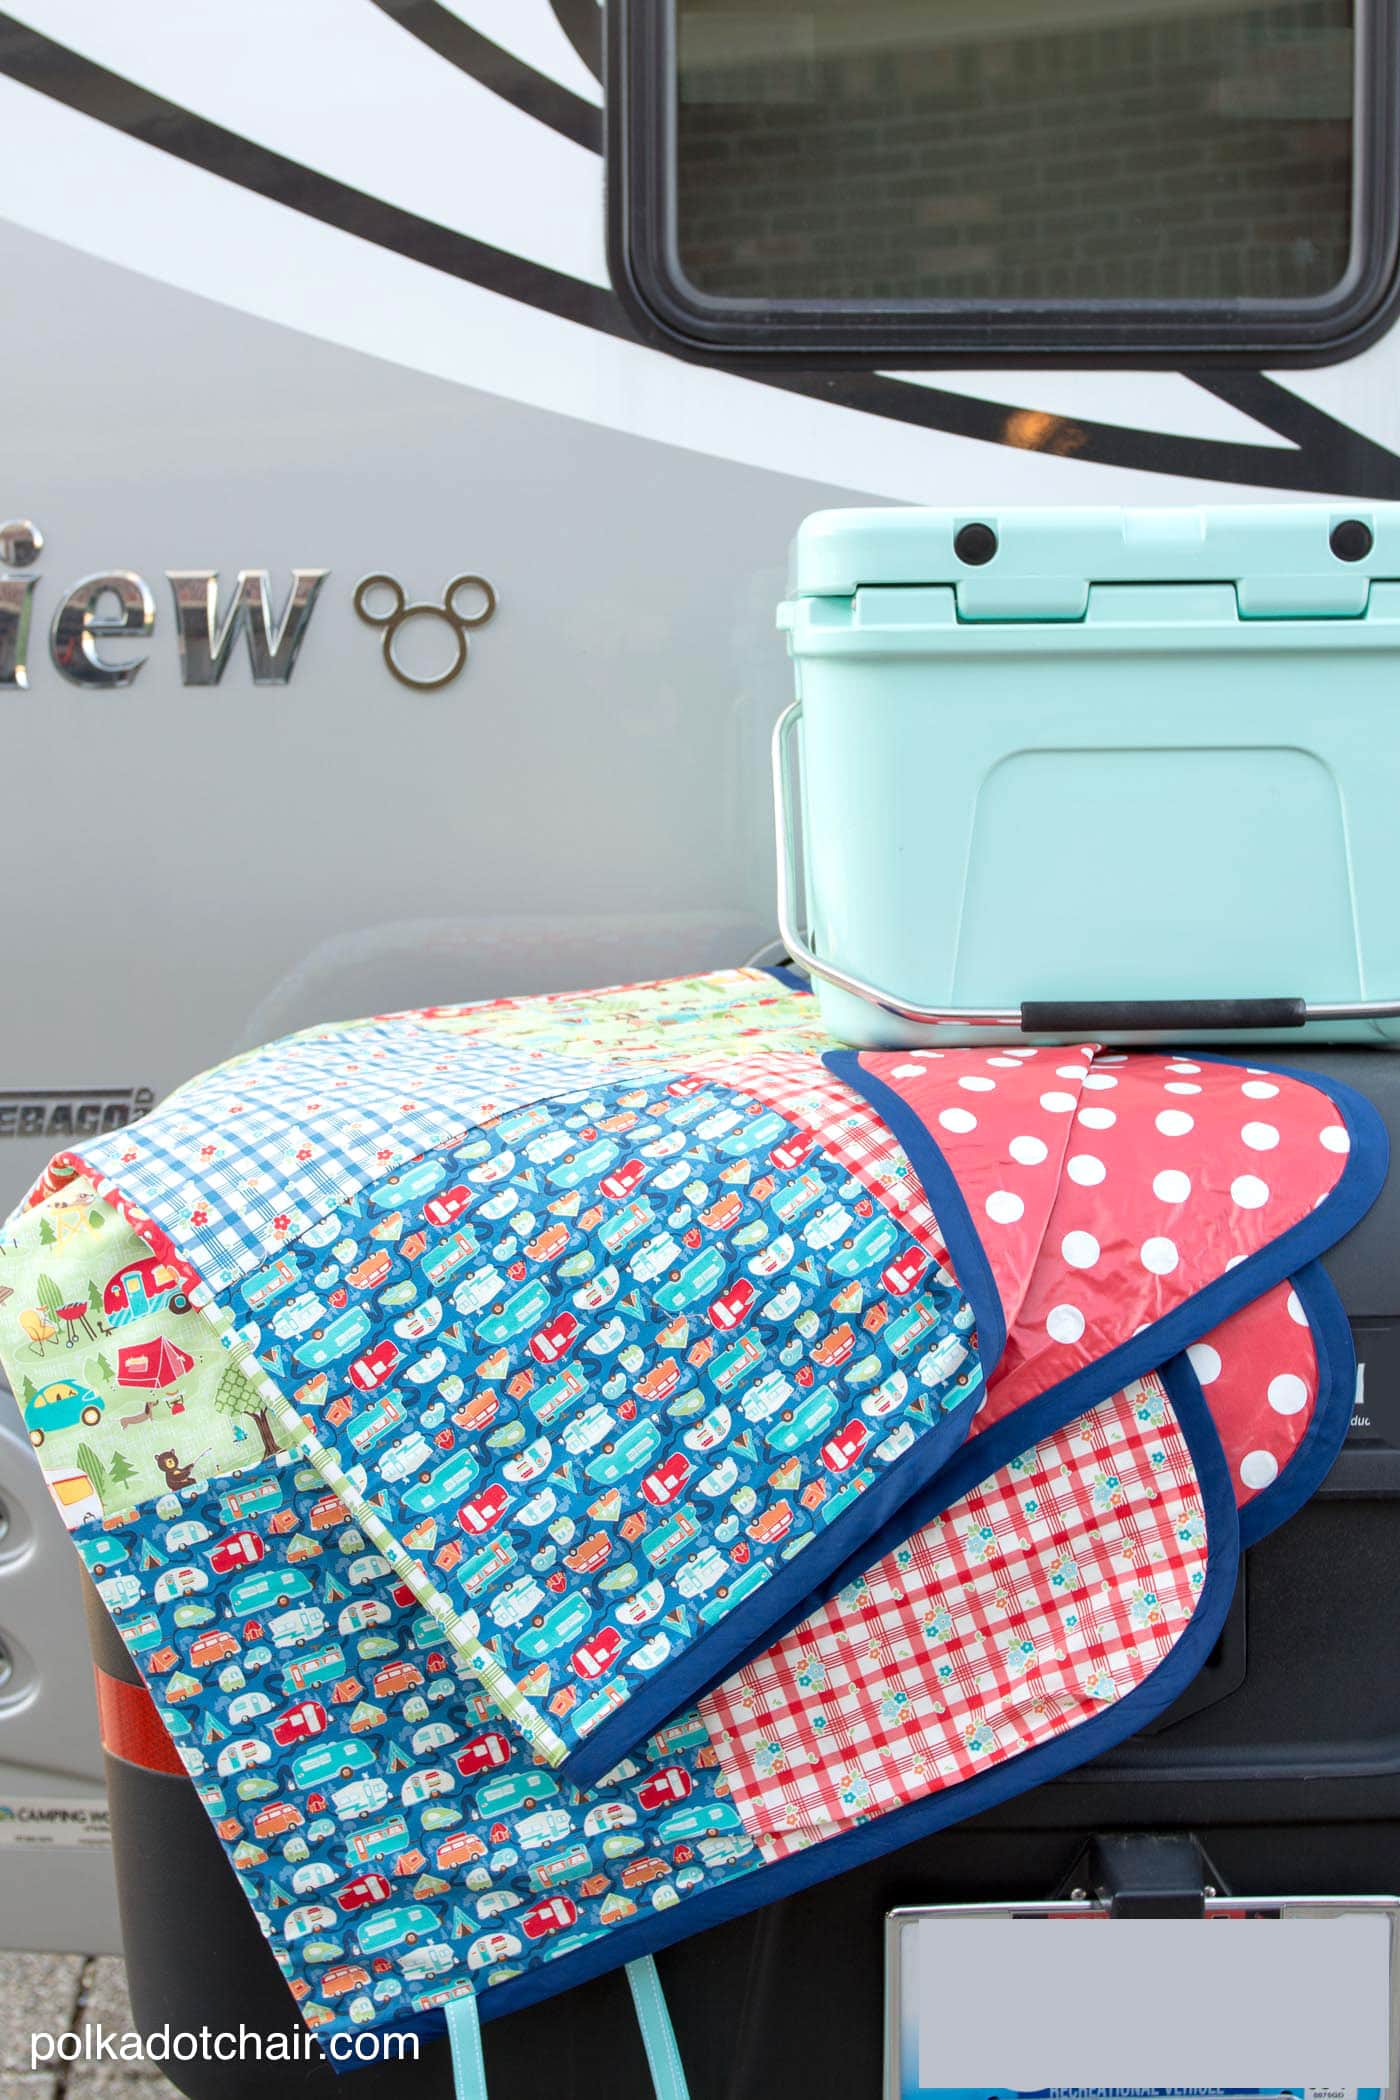
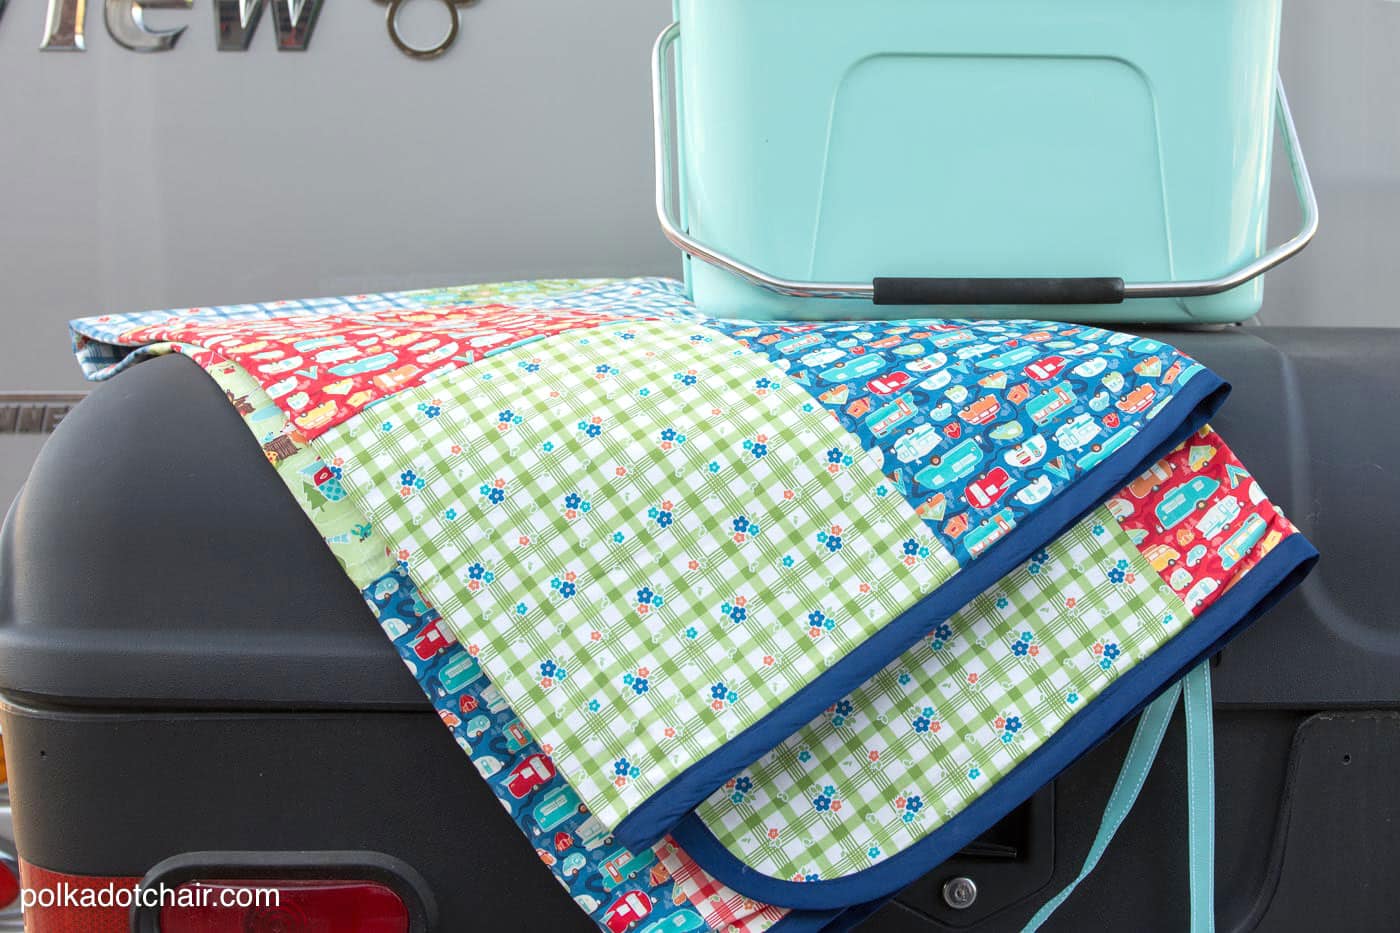
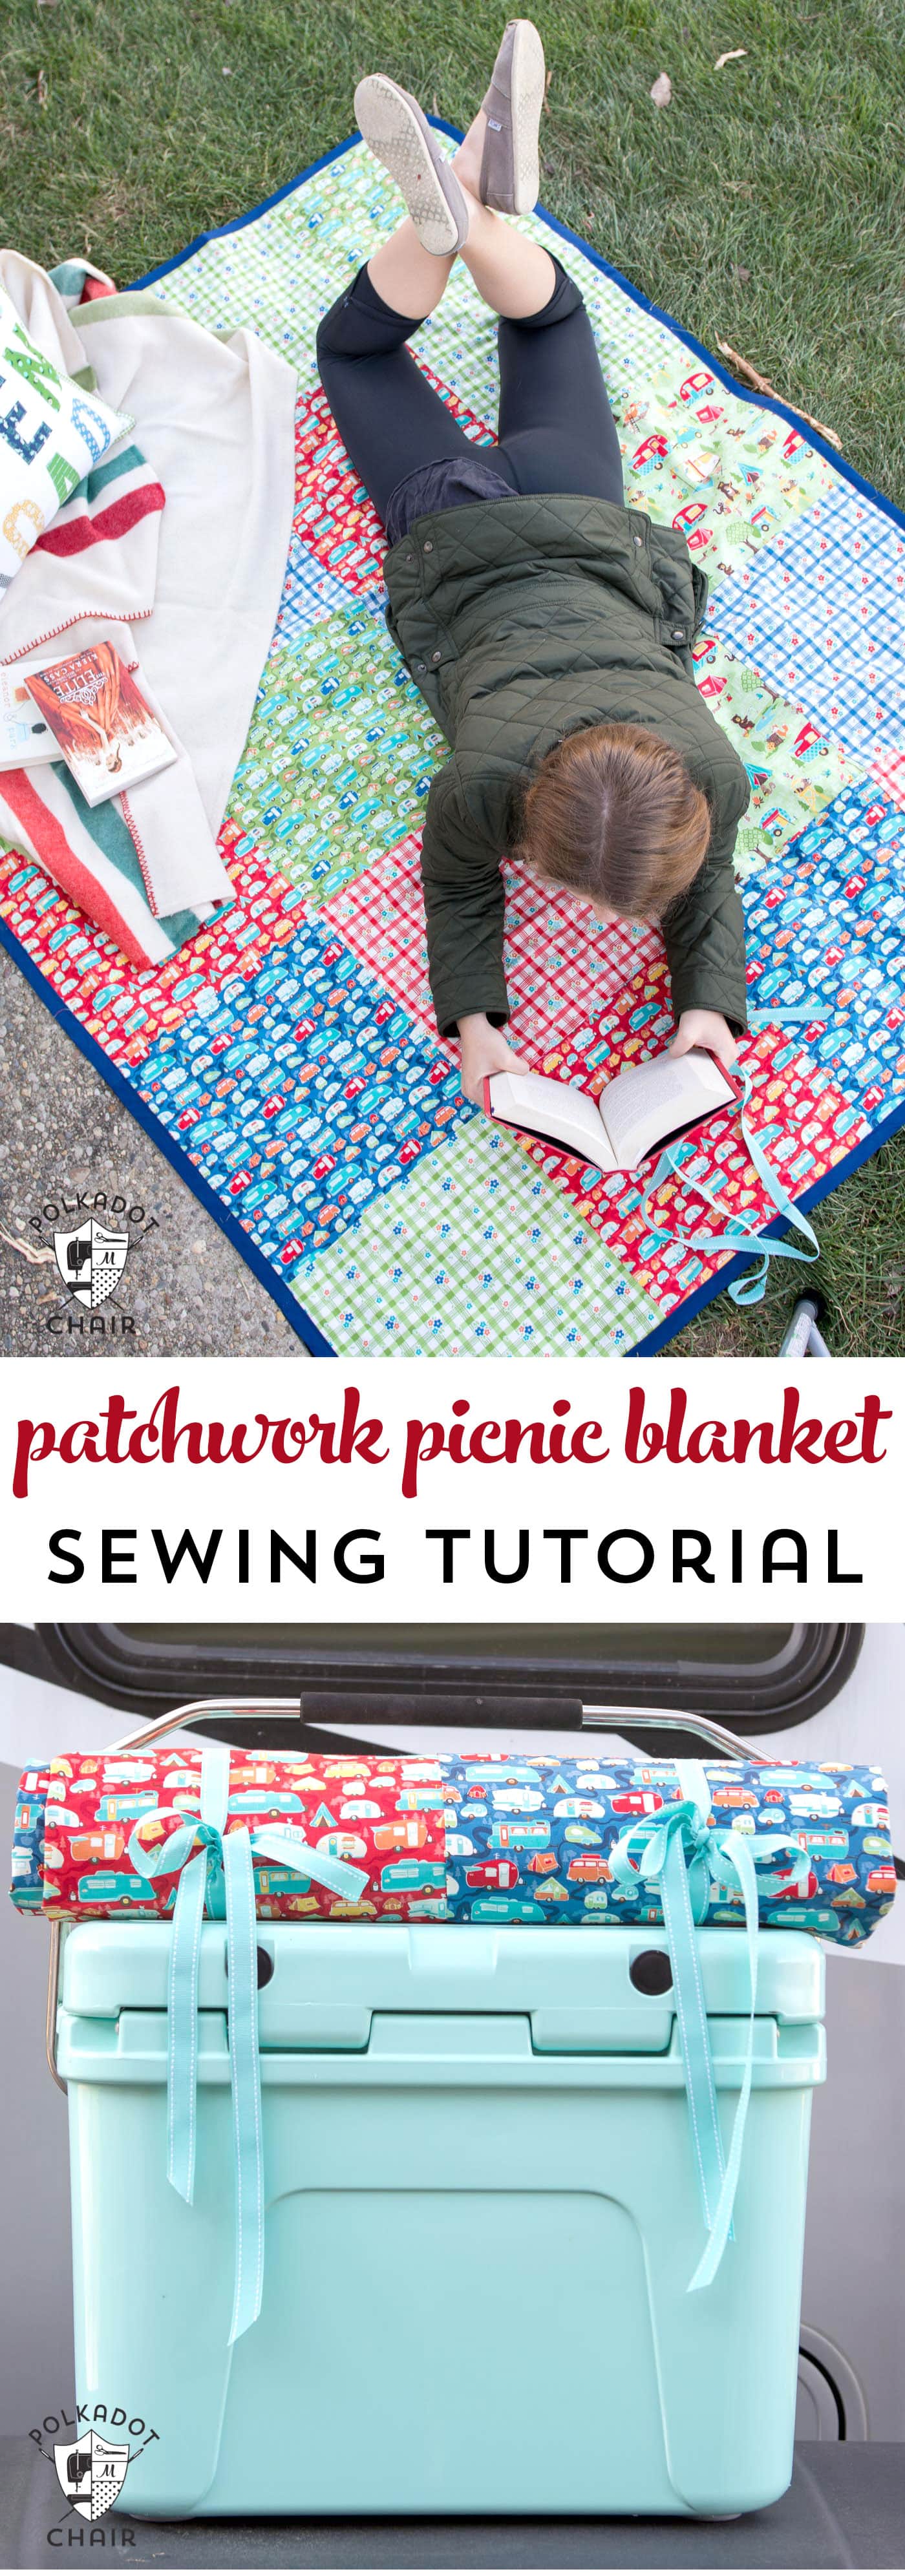
I was able to complete one last RV project before the cold weather hit: a waterproof patchwork picnic blanket. I noticed that when we are camping, we frequently need both picnic blankets and tablecloths.
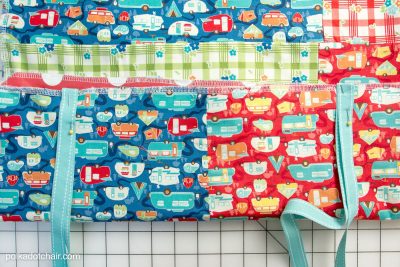
We have a few simple tablecloths in the RV, but we also wanted something cute and fun (that is part of having an RV, right?). When I saw Kelly Panacci’s new Road Trip line of fabric, I knew right away that I HAD to make something for our RV with it. Look at all of those cute trailers!! Don’t you love it??
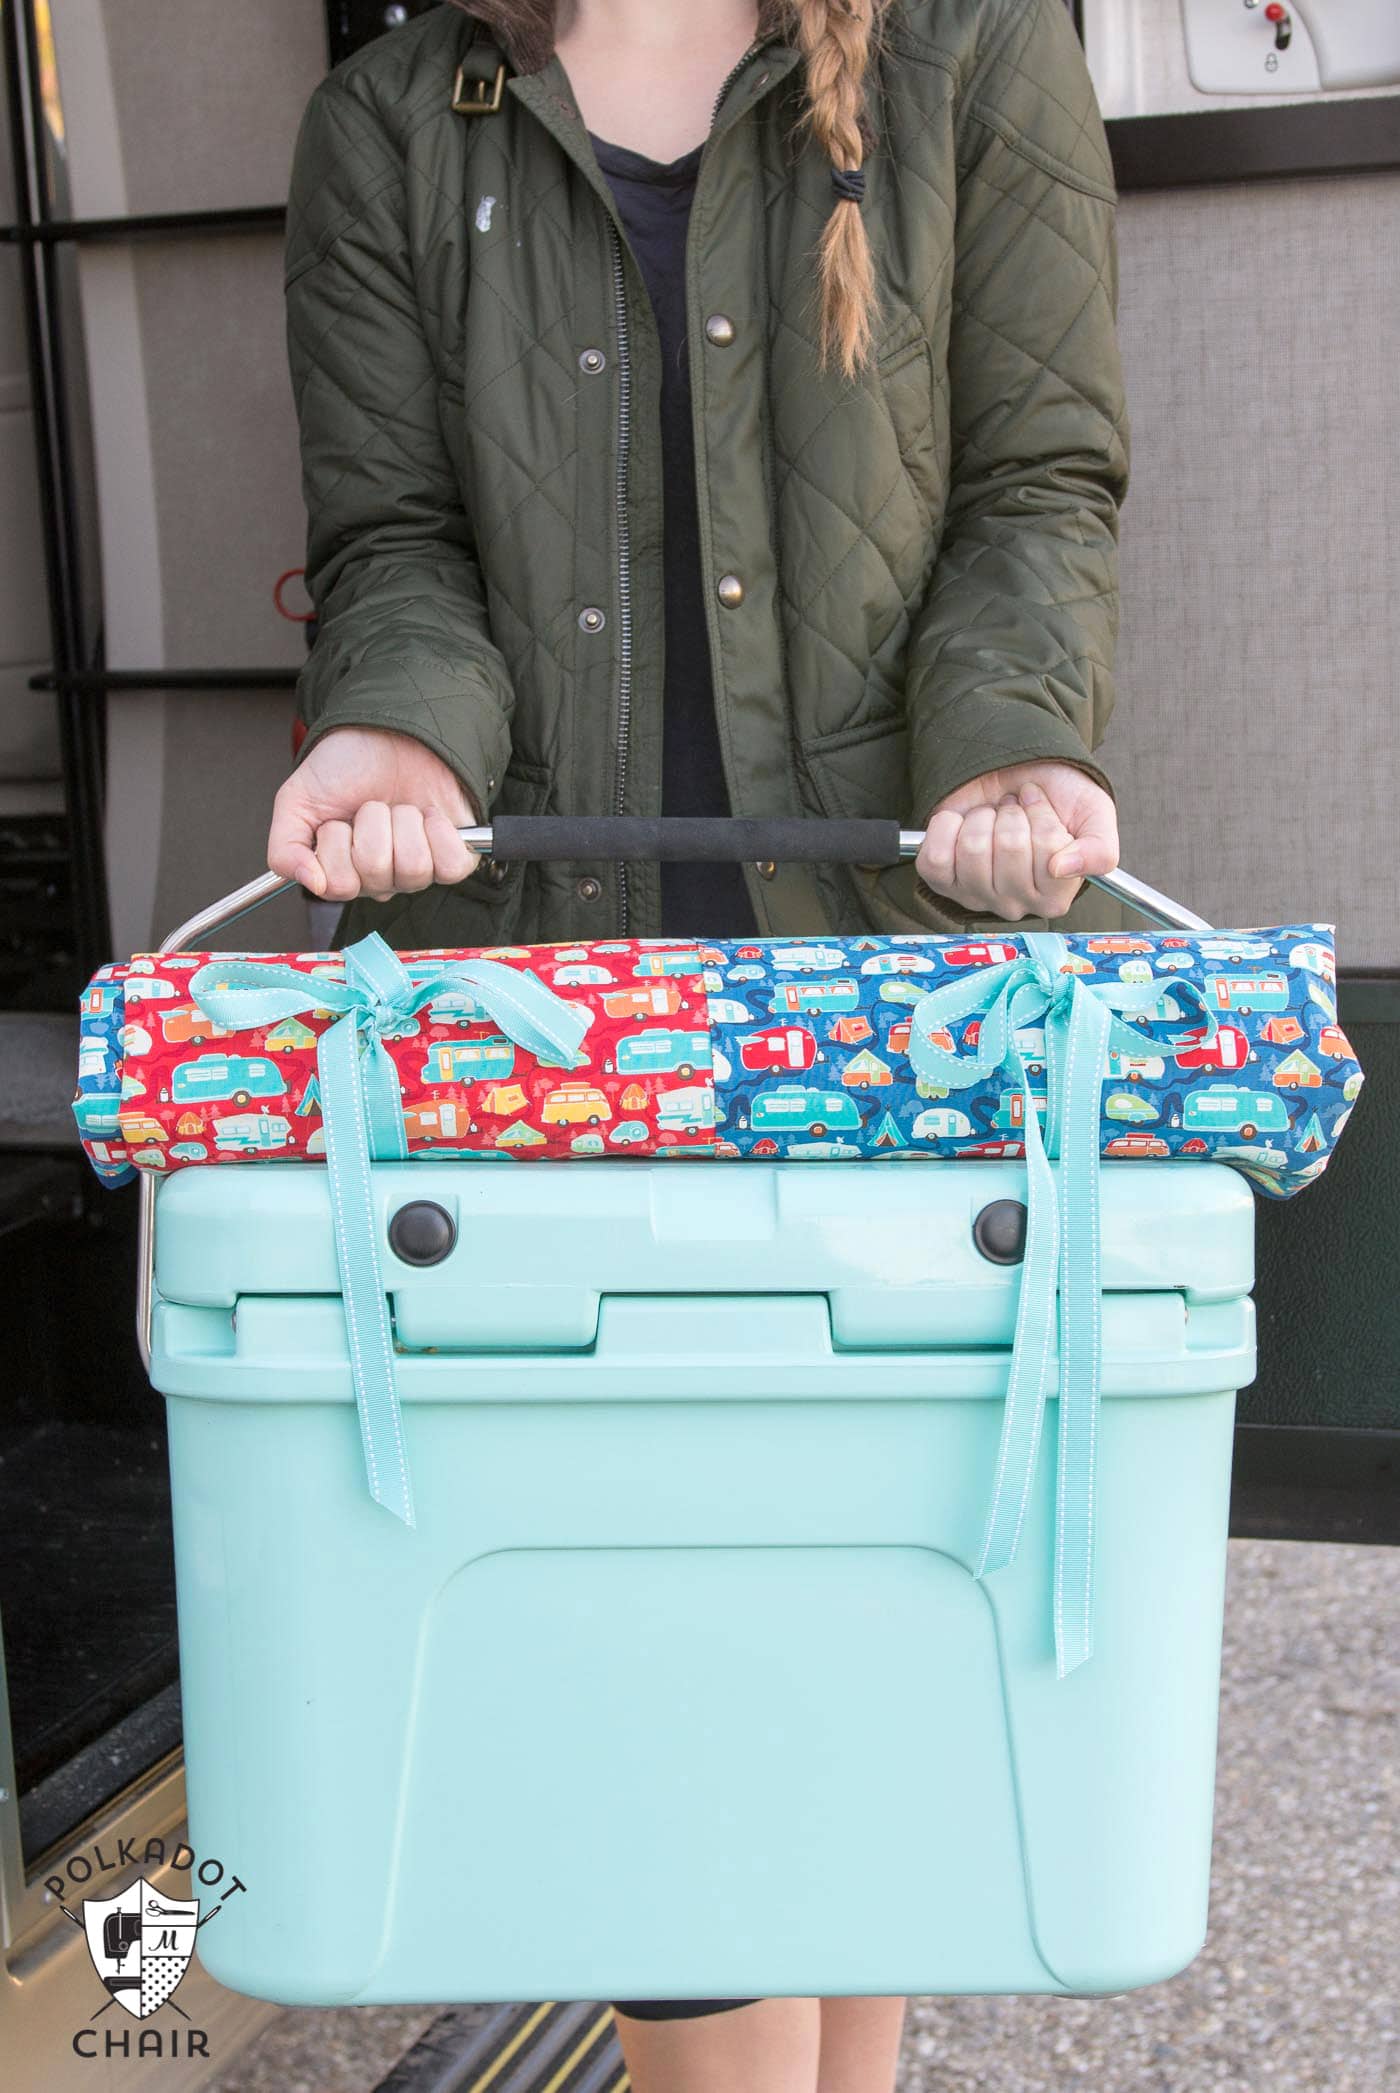
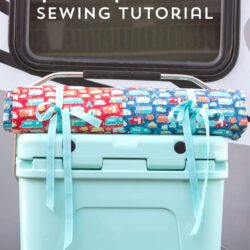
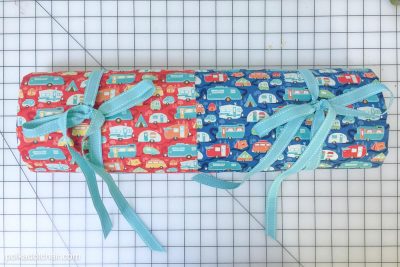
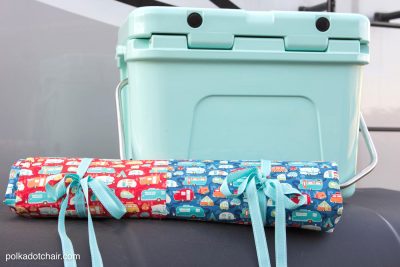
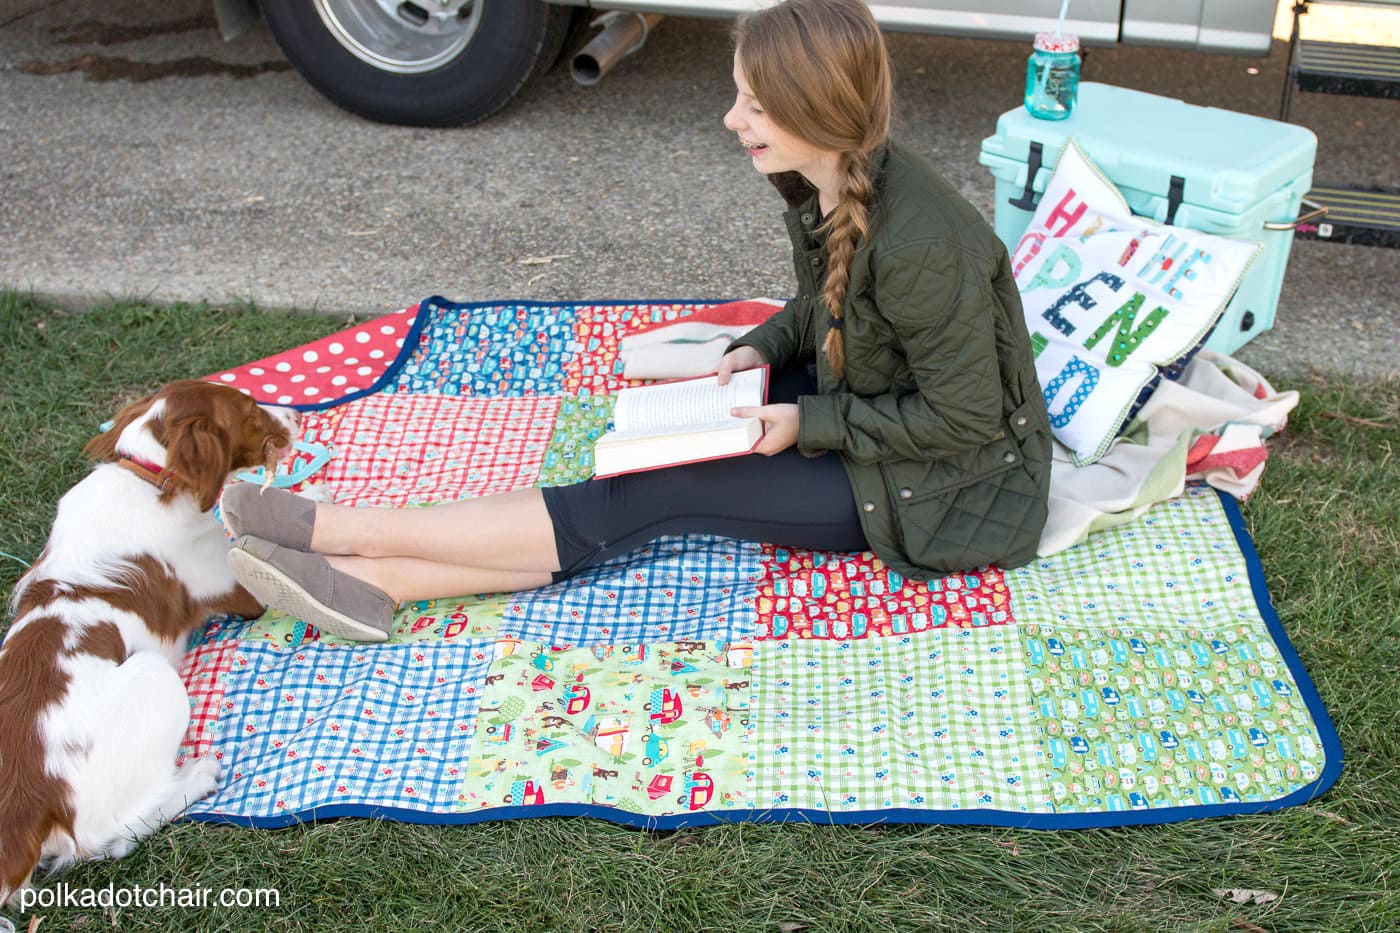
I designed a picnic blanket with ties so that it can be rolled up (for easy storage). To keep it waterproof, I backed it with a purchased vinyl tablecloth. This blanket could be used on the ground (like a traditional picnic blanket) or on the top of a picnic table as a tablecloth.
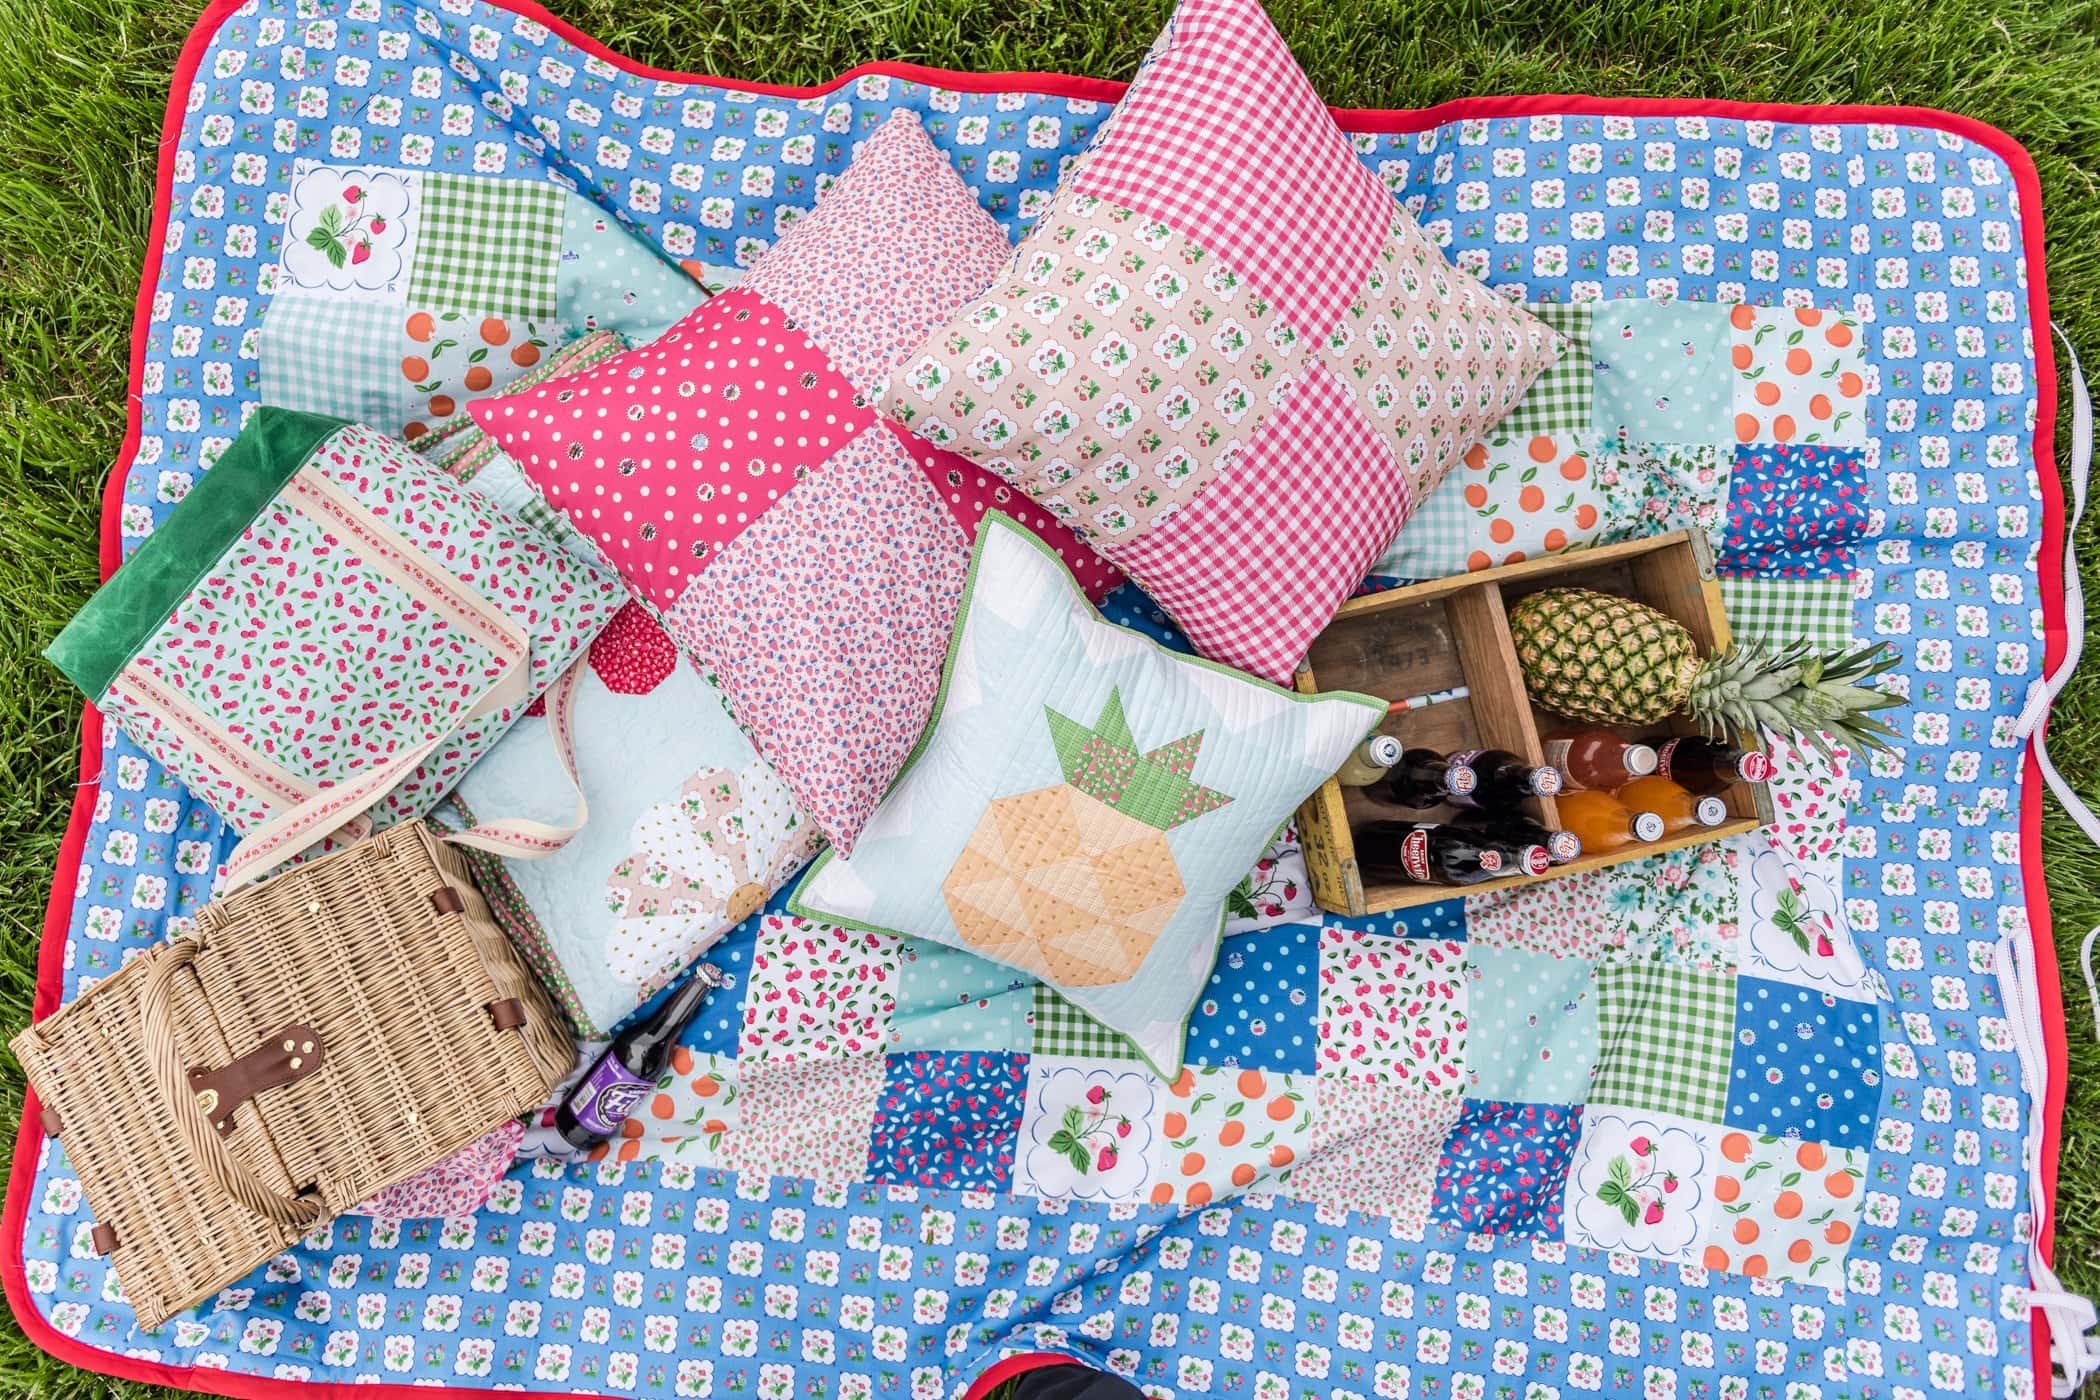
UPDATE: I made a second picnic blanket, this time with my Summer Picnic collection! I used smaller squares for this version and added a large border around the edge.
I kept the patchwork pattern on the front simple to showcase all the cute fabric prints and used my serger to save some time. All in all, the blanket took just over 2 hours to make (I know this because I was watching a movie while making it, and I finished it just after the movie ended 🙂 ).
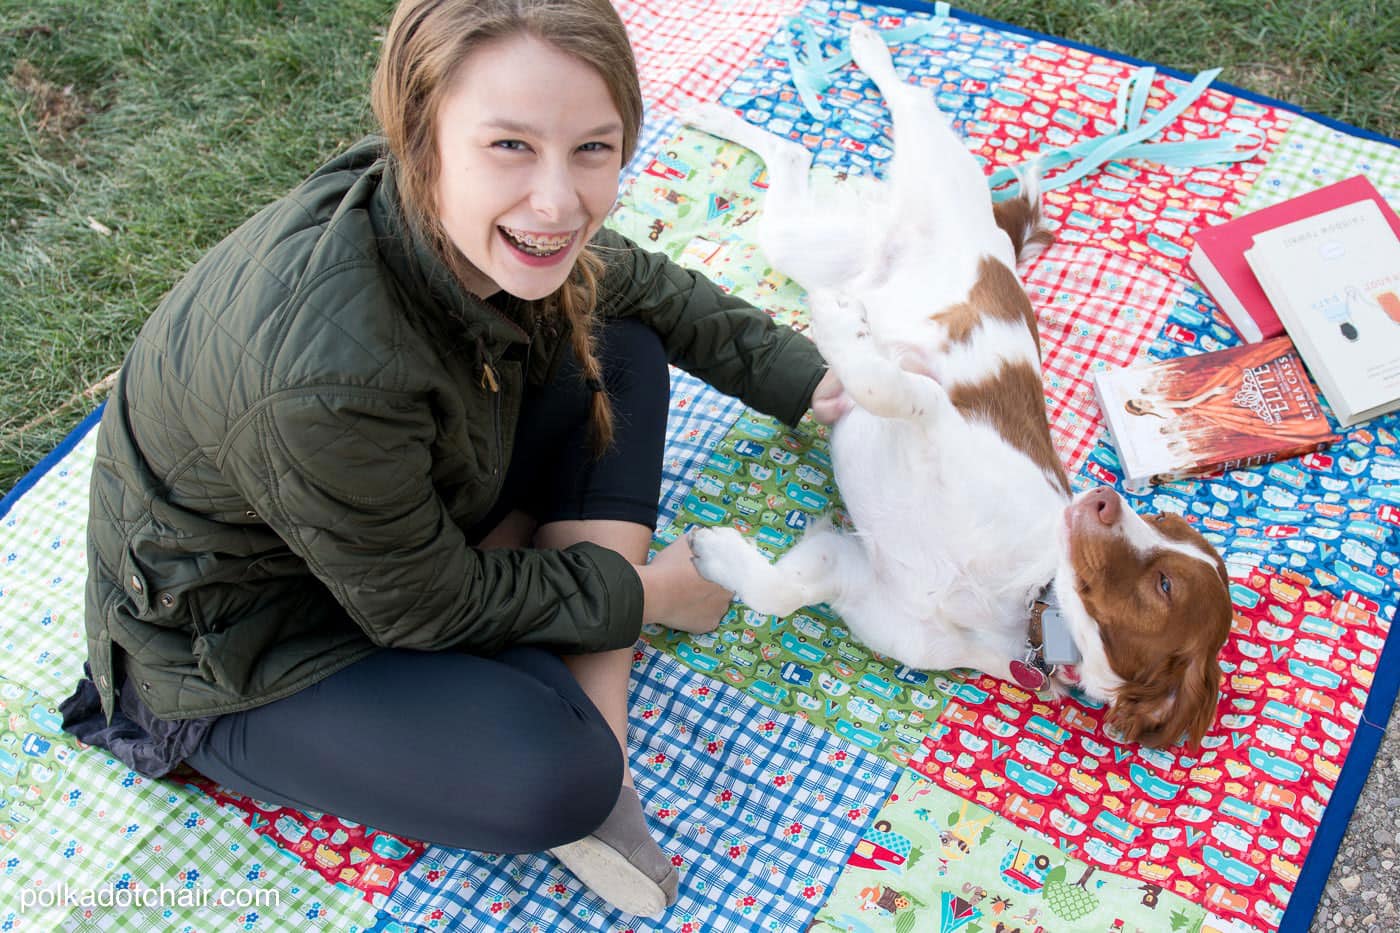
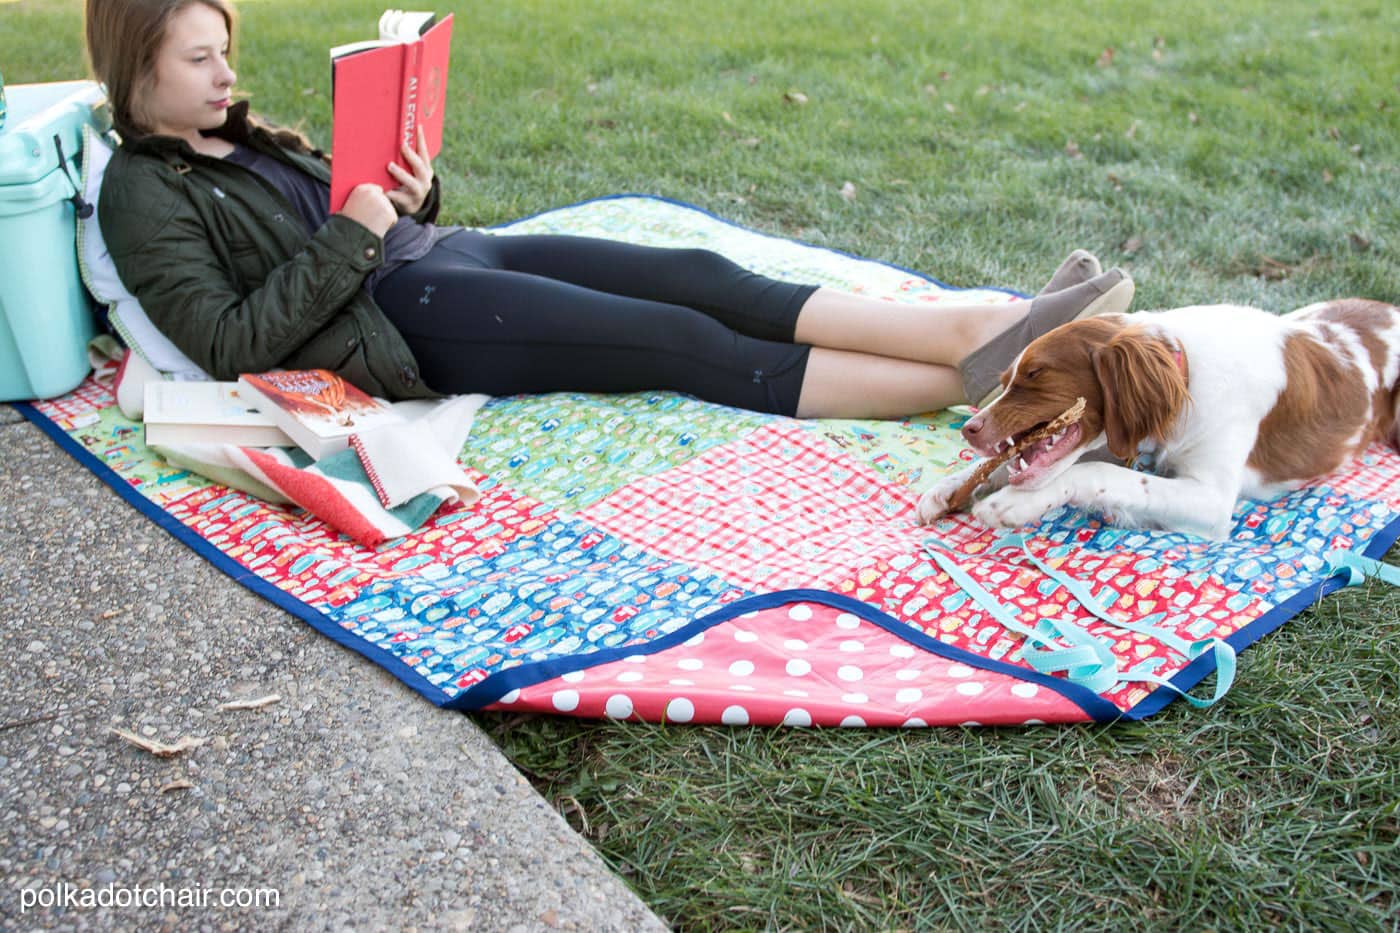
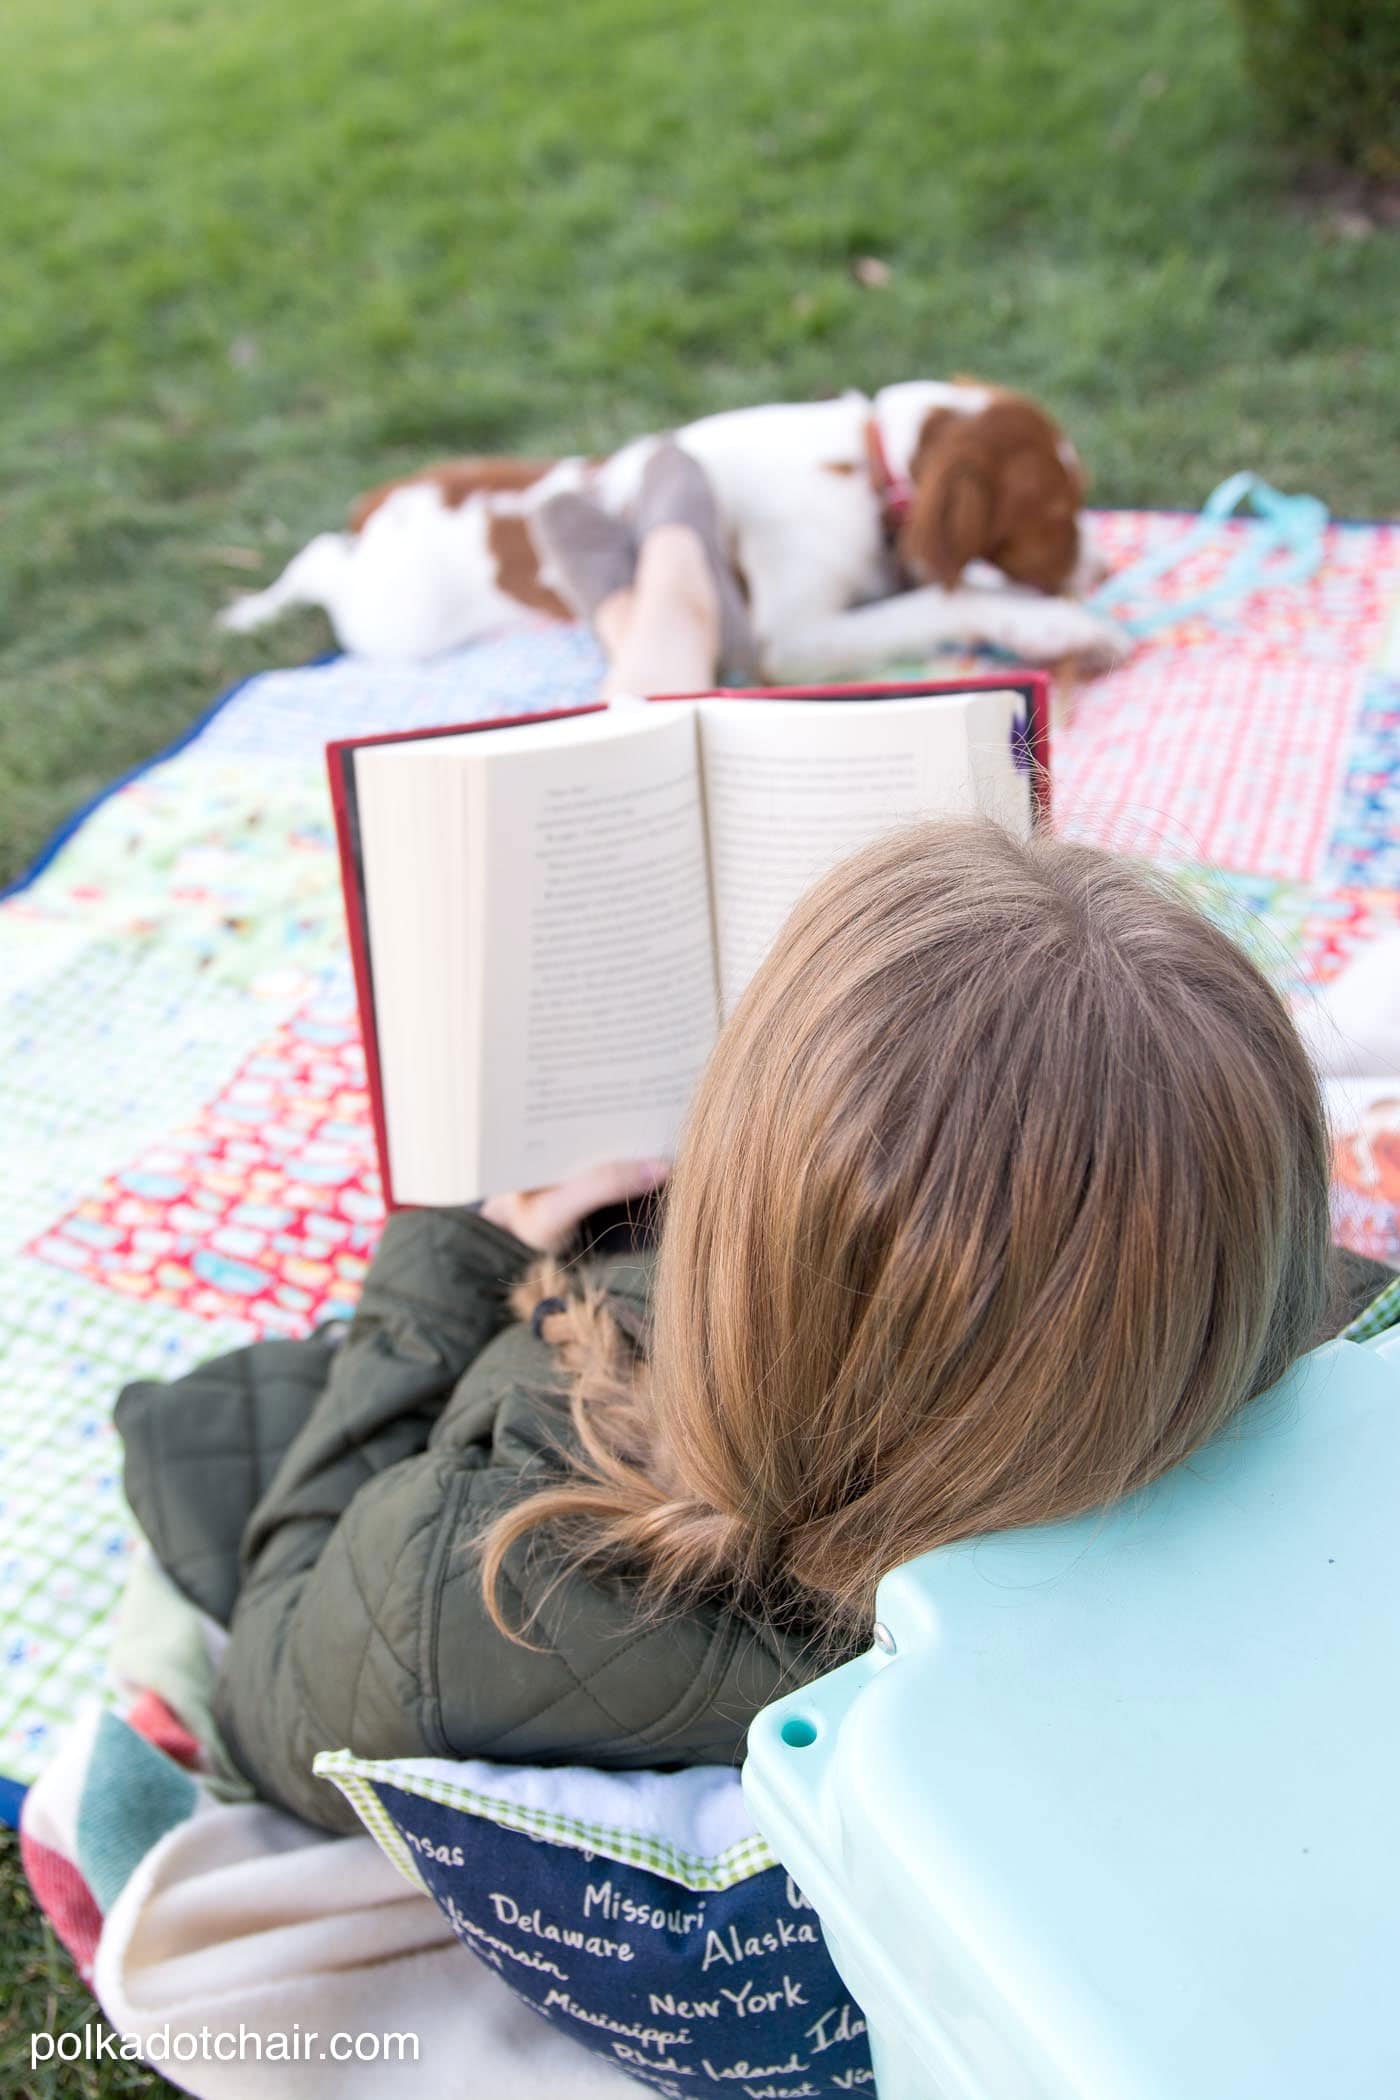
Making the blanket (and needing to photograph it) gave us a great excuse to take the RV out for a little ‘mini trip’.
We packed up the kids and the dogs and spent a few hours at a local spot. The dogs were not supposed to be in the photos, but one of them managed to work his way into them. He’s becoming quite a little attention hog.
I wonder at what point I can start counting him as a business expense, as he’s turning out to be the “unofficial” mascot of this site (he is polka dotted, after all *wink*).
Okay, are you ready to make a blanket?
Waterproof Patchwork Picnic Blanket Pattern Instructions
Waterproof Patchwork Picnic Blanket Pattern
supplies
- 1/2 Yard each of 7 different fabrics total yardage 3 1/2 yards
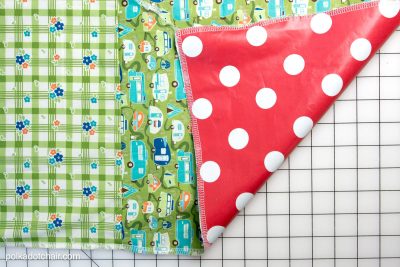
- 1 55" × 70" or larger vinyl tablecloth edited to add… mine was purchased on AMAZON click here to buy it (you could also use laminated cotton, you’ll just need to stitch it together so that it is 55″ wide)
- 3 packages double-fold quilt binding
- 2 yards 1/2 wide ribbon
- Basting Spray
- Safety Pins
Instructions
Step One:
- Begin by cutting 21 pieces, each 14 inches x 14 inches, out of the seven different fabrics. You need a total of 20 squares, each measuring 14 inches x 14 inches. You will have 1 square left over (also, if you want to use fewer fabric prints, it doesn’t matter, as long as you end up with 20 squares overall).
- Stitch the squares together into five rows of 4 squares each. Use a 1/4″ seam allowance.

- Lay the vinyl tablecloth out on a large table or the floor, the wrong side up. Spray it with basting spray. Lay the completed picnic blanket top on top of the tablecloth, wrong sides facing. Secure in place around the edges with safety pins.
- The vinyl tablecloth will be larger than your sewn picnic blanket top. Trim it so that all the edges are even.
Step Two:
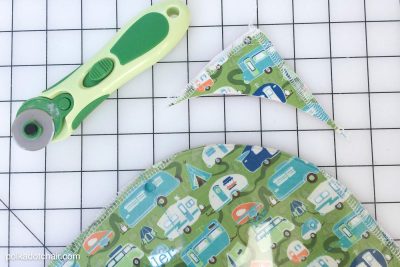
- You next need to stitch the top to the tablecloth. To do this, I used my serger. If you don’t have a serger, sew them together with a straight stitch about 1/2″ in from the outside edge.
- I decided that I wanted my edges to be rounded, so I used a circle quilt template and curved the corners. This step is optional.
Step Three:
- Cut two pieces of ribbon, each 60″ long. Fold the blanket in half and pin it to one of the short ends. Each one will be 7″ out from the center of the blanket. The fold of the ribbon will be flush with the raw edge of the blanket.
To Bind the Blanket:
- Stitch the three packages of double-fold quilt binding together.
- Open up the quilt binding and line up the raw edge of the binding with the raw edge of the blanket. Stitch the binding in place close to the 1st fold in the fabric. (If you need help with this step, CLICK HERE.)
- When you return to where you started, match the binding ends and stitch them closed.
- Refold the quilt binding and stitch it in place on the right side of the blanket, just inside the fold in the binding.
- To roll up the blanket, fold it in thirds lengthwise. Then roll up towards the end with the ties. Wrap the ties around the blanket and tie them to secure.
- One last thing. When this is washed, I do not recommend drying it on high heat. It may damage the vinyl tablecloth. Best to line dry or tumble dry on a cool air setting.
- That’s it, you’re done!
I’m about to make some of these for my daughter’s wedding in the park. I’m wondering if I should use permanent fabric fusion so the two layers don’t separate? Any thoughts on that? Thanks.
I don’t think it’s necessary, the static from the flannel will hold it well.
Thanks, Melissa. I finished the first top and am about to attach it to the tablecloth! Wish me luck!
On your smaller-squared version, what is the size of the small squares and your borders? Thanks! The blanket is so cute!
It’s actually a cheater print, not individual squares
Oh. Ok. I worked out my own pattern with 5″ squares and 7″ border. So cute! Thanks.
That sounds so cute!!
Is the vinyl tablecloth one of those flannel backed tablecloths?
yes!
I am late to the party , sorry love the idea
I am wondering do you quilting it in the ditch? Or is there no quilting, so as to not poke holes in the back?
Just wondering thanks
There is not any quilting. The flannel on the back of the tablecloth holds it all together so it’s not necessary. It’s not really a quilt, more a blanket.
We have had an RV for 5 years or so. I never thought of this. First of all those vinyl table cloths never stay on the table so ties would be great to hold them on and the other is we have 4 tiny dogs that sleep with us. They have no way to get off bed to use pee pee pad. At home we have stairs but in RV no room and bed is too high. Occasionally there is an accident. This would be perfect solution to cover the bed! Thank-you!
Glad I could help! Our dog once had an accident while I was holding him in the RV… that was not a fun day LOL! We love to use ours when we camp to cover picnic tables!
Clever idea and such a pretty picnic quilt. Does the vinyl tablecloth hold up during a wash?
Yes, just don’t dry it in the dryer
How clever to use a vinyl tablecloth to back this blanket! I recently made a “picnic blanket” as a gift for three young cousins and wish I’d seen your tutorial first.
Ohhhhhh Melissa!!! This was so fun to make and made me feel like a complete ROCKSTAR when I completed it!!! I love using your tutorials. <3
I love this tutorial so much and appreciate your posts! My sweet niece is getting married in December and they love to go on picnics! So I’m making this for her wedding shower. I also love the small ice chest in the photos! Can you tell me more about it? It’s so cute! Thanks!
What a cute idea for a gift! I’m sure she’d love it. The cooler is a Yeti. My husband got it for boating it’s supposed to keep you ice for days 😉 – It’s kinda pricey but I’ve noticed lots of similar coolers hitting the market (that’ arent’ as much) since that one became so popular.
I saw your tablecloth/blanket. This is a wonderful idea for campers alike. I will be doing this project for my children and grandchildren. I will also look at the pillow idea. I just love this idea the only thing I need to buy is the plastic tablecloth. I have enough fabric for everything else. Thank you so much for this idea. Wonderful idea.
What a fun story! Your picnic blanket is perfect! This would make a great gift, along with that interesting picnic basket. Yes, I’m going to ask for it’s source as well, pretty please?
Really cute!
It’s darling, but where did you find the polka dot table cloth for the back?
Where did you find that awesome picnic basket?
THANK YOU for this neat tutorial! Looks like it’d go pretty fast! Neat!