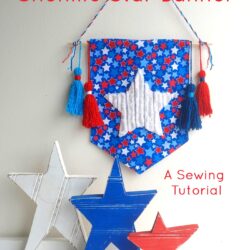
Chenille Star Banner Pattern; DIY 4th of July Decorations
This DIY Fourth of July Banner tutorial is so easy to create, and it makes a wonderful Fourth of July decoration!
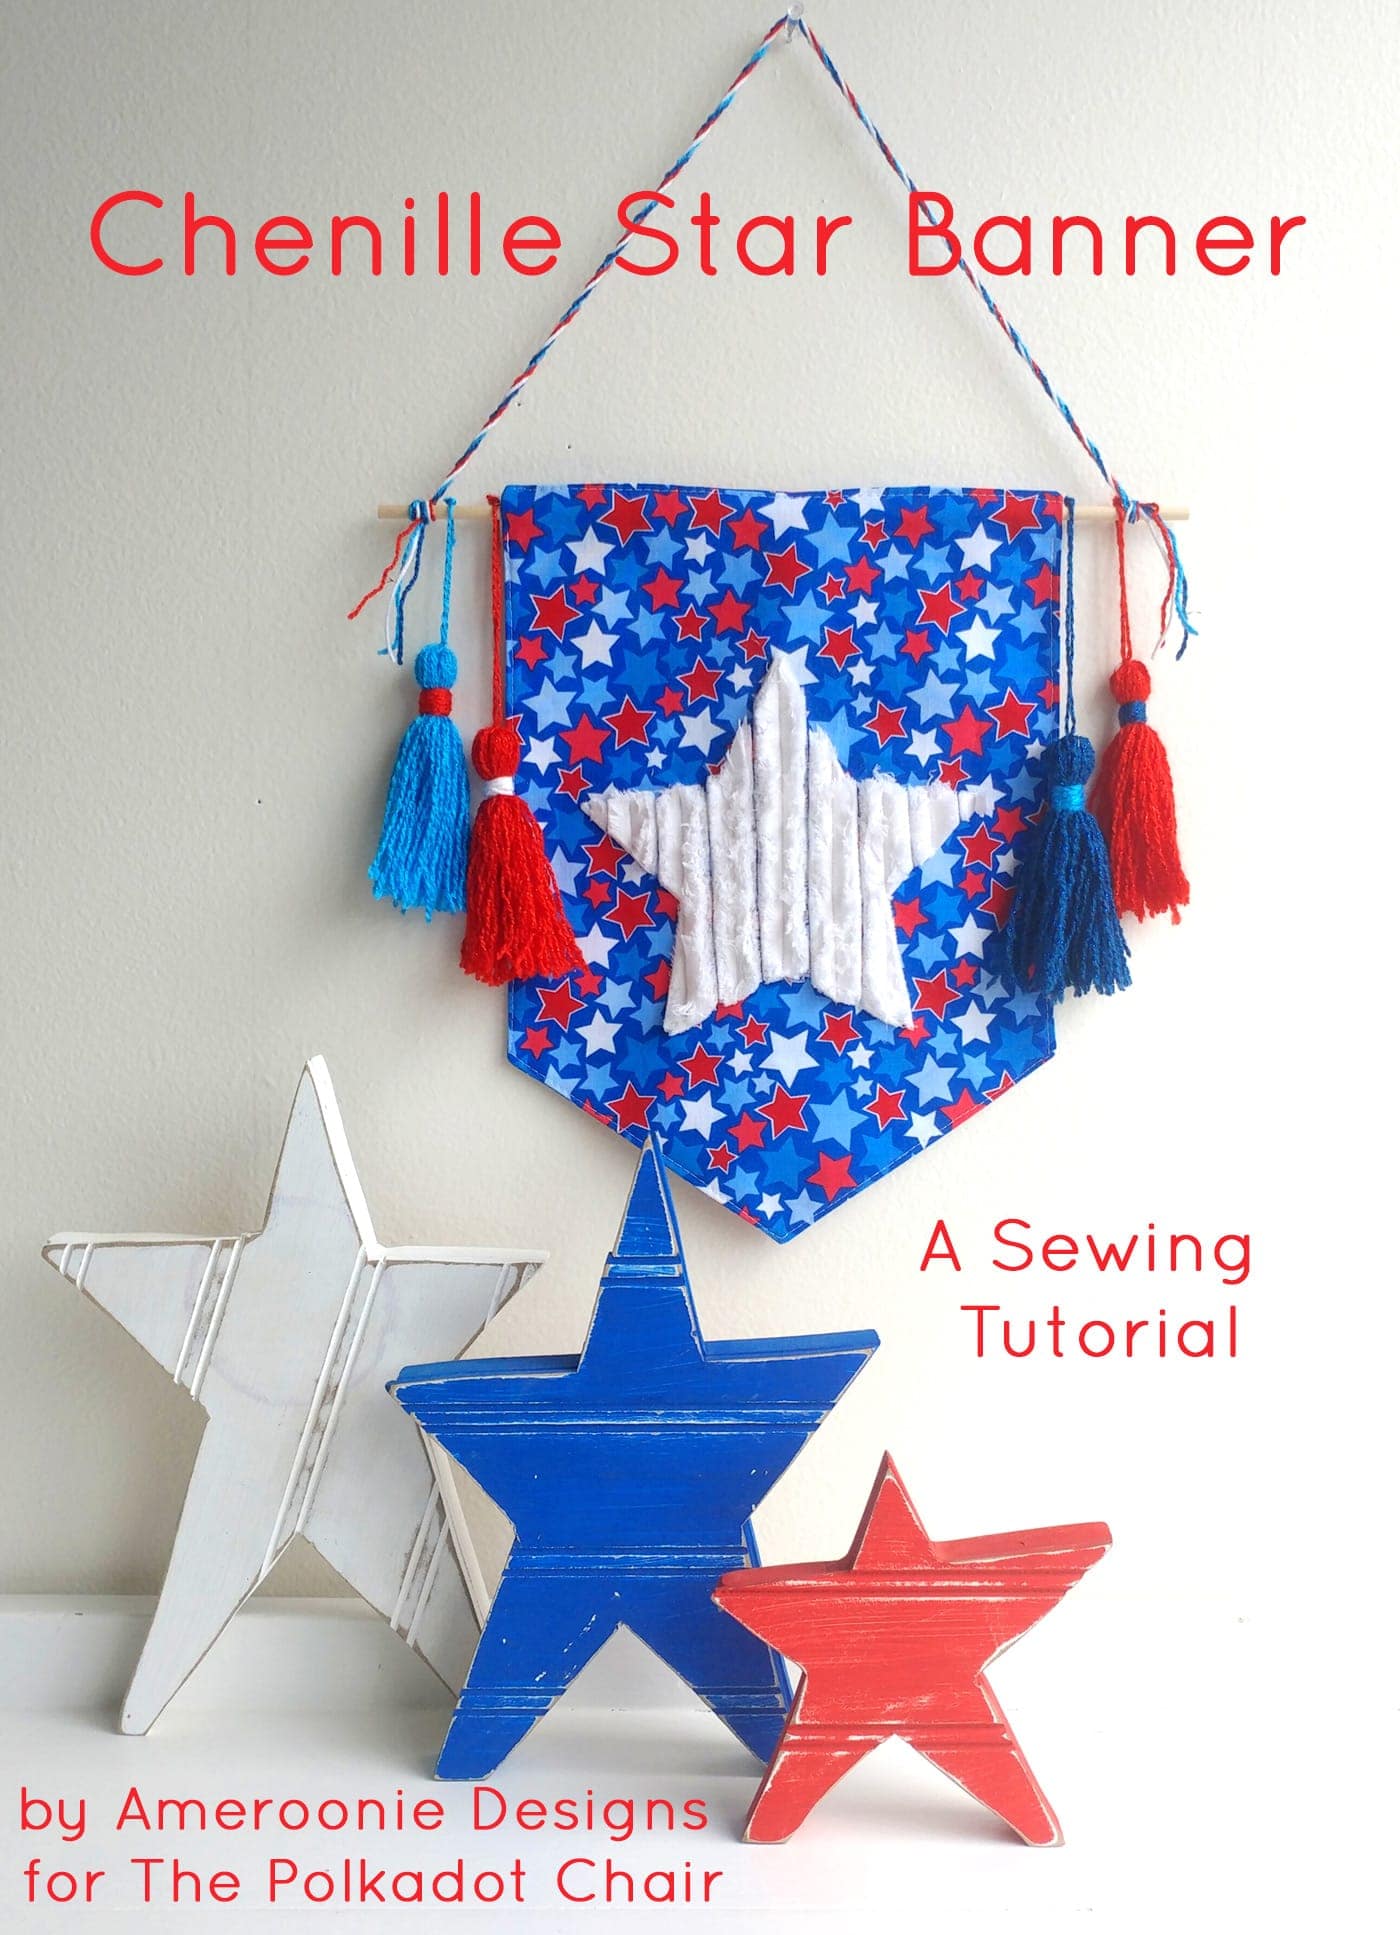
Amy from Ameroonie Designs is back with us again, this time to share a tutorial for a Chenille Star Banner. You’ll love this pattern if you’re looking for some fun DIY Fourth of July Decorations!
Can someone have too many banners? I often ask myself this question, and the answer is always a resounding “NO!” I love adding them to gallery walls, as part of seasonal decorations, or in place of a wreath on a door—there are just so many ways to use a banner.
How to Get the PDF Template
Fill out this form, and we will email you a copy of the PDF template for the Star.
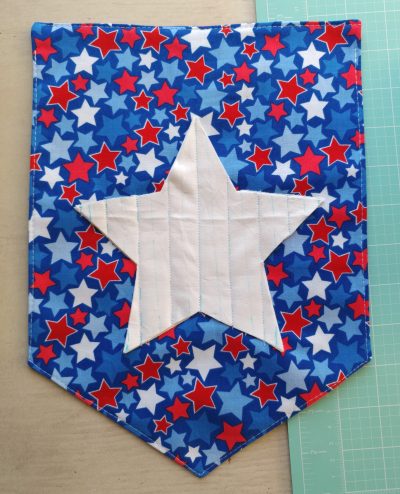
Today, I’m sharing the pattern for this small patriotic banner decorated with a faux chenille star.
Chenille Star Banner Sewing Pattern & Instructions
Equipment
- Fabric-safe marking pens
supplies
- 1/3 yard Banner Fabric
- 1/4 yard White Fabric
- 12" Dowel
- 1 package Medium-weight fusible stabilizer
- Yarn for tassels optional
Instructions
- Fill out the form on this page to get the PDF of the star template. Print it out.
Cutting Directions:
- Two 9″ X 12″ rectangles from banner fabric
- One 8 3/4″ X 11 3/4″ rectangle from stabilizer
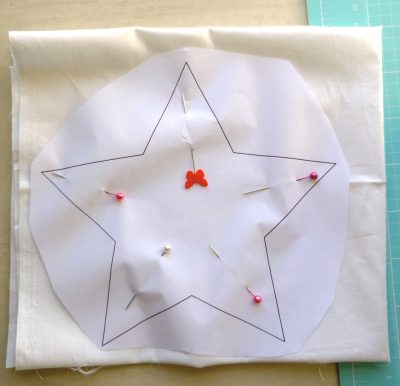
- Six 6″ stars from white fabric- print pattern for the star I used here
- **IMPORTANT- you need to make sure the star is going with the grain so that you can fray the threads later, the top point should be placed so it is going with the grain (lined up with the selvage edge of the fabric).
How to Make a Faux Chenille Star:
- I cut all the stars at once, pinning the pattern to the layers of fabric at each of the points and using a sharp pair of scissors to cut right through the pattern and the fabric simultaneously.

- You could also do this with three layers at a time, print the pattern off twice.
How to Sew the Banner:
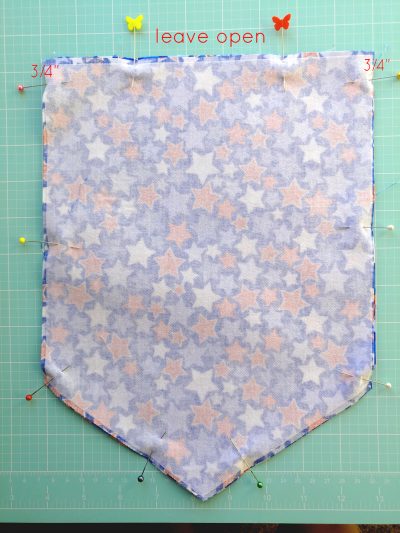
- Fuse the stabilizer to one of the banner rectangles. Place the two banner pieces on the right sides together. Mark a line 3″ up from the bottom on both sides of the rectangles, and make another mark at the center of the bottom.
- Connect these points to create the point of your banner and trim away the excess fabric. I find it’s easiest to do this using a rotary blade and ruler, but you can also draw the lines and use scissors to cut off the bottom two corners.

- Pin around the banner. Mark a section at the top 4-5″ wide to leave open for turning right side out. Also, mark 3/4″ down from the top on both sides of the banner.
- This is to mark openings for the dowel to slide into.
- Sew along the top using a 1/4″ seam allowance, from the edge to the first mark for opening, back stitch.
- Resume sewing on the other side of the turning opening- again backstitch, until you reach the end of the top. Begin sewing down one side, starting at the mark 3/4″ down, backstitch.
- Sew around the point and back up, stopping at the 3/4″ mark again. Backstitch. Clip corners and points, turn the right side out, and press the seams.
- Topstitch across the top, closing the opening for turning.
- Topstitch around the body of the banner, starting where the opening for the dowel ends, going around the bottom and point, and up to where the dowel opening begins on the other side.
Attach Star to Banner:
- Center your star on the front of the banner, lining up all the layers. Mark your lines for sewing. I marked the center line of the star first, and then marked the following line 3/4″ on both sides, then repeated marking lines 3/4″ away until you have the whole star marked.
- If your points are going to be lost because of where your lines are, mark lines at the points to keep them intact.

- It also helps to mark between the sewing lines so you have a guide when cutting the stars to create the chenille look. I mark this line with a dotted line so I don’t get confused when sewing.
- Sew down the solid marked lines using a short stitch length and backstitching at the beginning and end of each line.
- Take a pair of sharp fabric scissors and slide them through all the layers of the stars, cutting down the center mark between the sewn lines. Be careful not to cut through the banner.
Finishing:
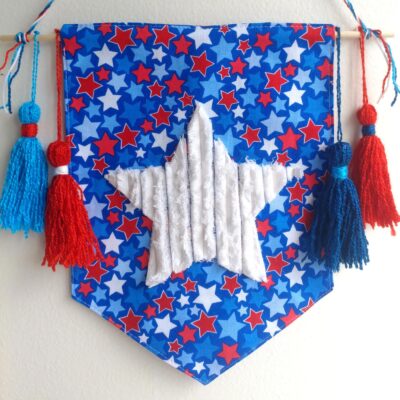
- Now for the fun part!! Fray your star by pulling the threads from all the layers of your stars. This will take a while. Settle in with a good movie and a small pair of scissors to help you along.
- I didn’t fray as heavily in areas where I wanted to maintain the shape, but on the longer lines, I tried to fray most of the layers to give it a nice fluffy look.

- Slide the dowel through the openings at the top and add a string or ribbon for hanging. I also decorated mine with tassels, but you don’t have to. This banner will surely be a fun addition to all your patriotic decor!
About the Maker:

Hello! I’m Amy Chappell, the person behind Ameroonie Designs. I’m a sewing and quilt pattern designer, and I’m proud to say that my work has been featured in several print publications and popular DIY websites.
I am the mom of six kids- which is a big reason I create and sew. I find that I am happiest when I am making things, and taking time to be happy makes me a better mom.
Join me in my exclusive Let’s Sew Friends membership, where you’ll find small, manageable monthly sewing patterns, live classes, and lots of video tutorials!
Other Great Projects to Sew from Amy:
Summer Sling Bag Sewing Tutorial


I cannot find the template for the star. Am I missing something?
It’s there. You may just be loading an older version of the page- make sure you click REFRESH on your browser and are using this link https://www.polkadotchair.com/free-sewing-templates/