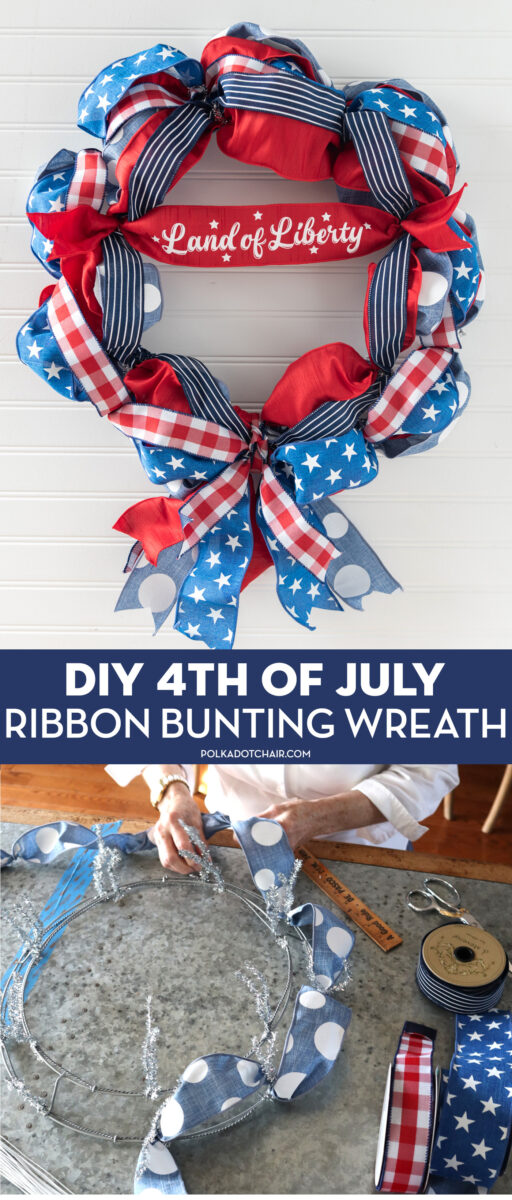
DIY 4th of July Ribbon Wreath
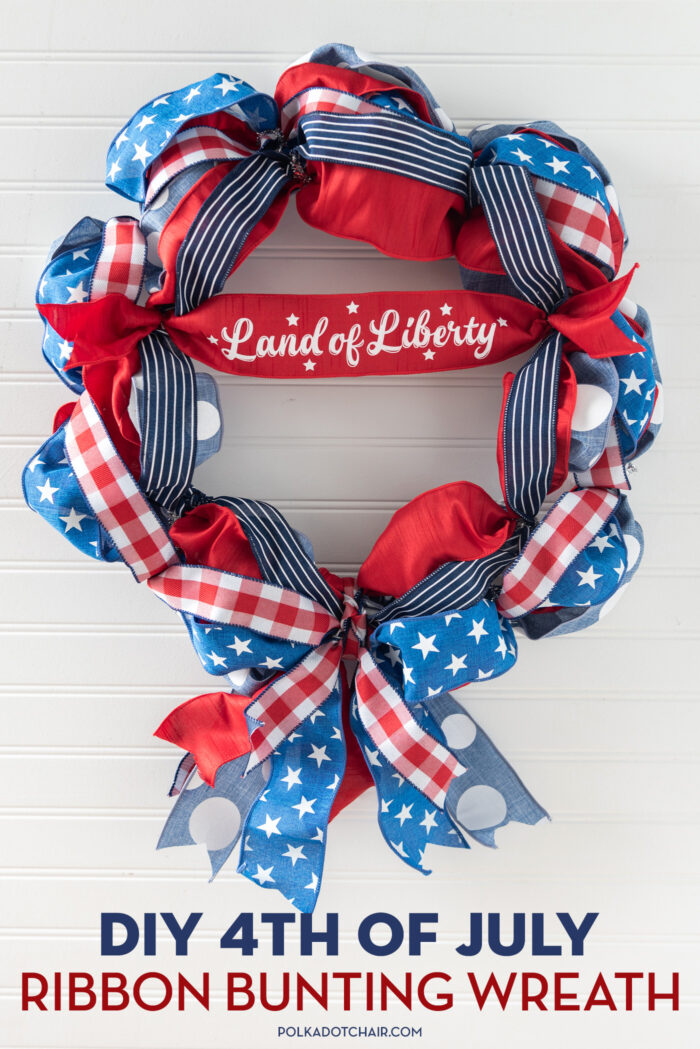
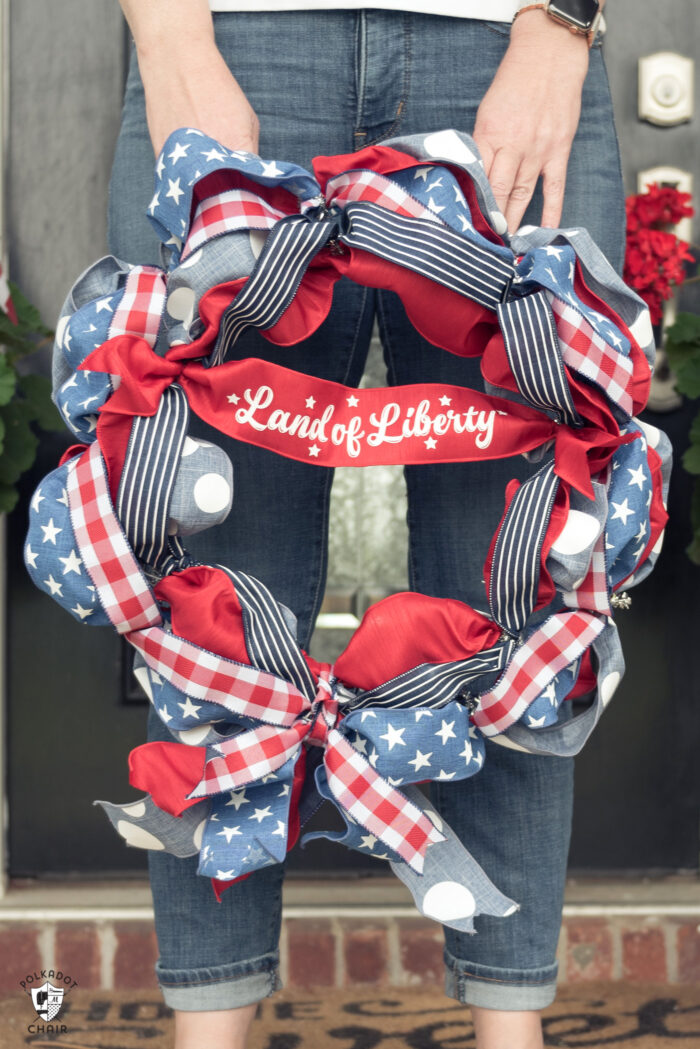
Create a festive wreath perfect for the 4th of July with various red, white & blue wired ribbons. This DIY Ribbon Wreath was inspired by the 4th of July buntings that I use to decorate my porch!
Recently my Mom came to visit. For years she has made the cutest ribbon wreaths for each holiday and season. She also makes wreaths using Mesh and helped me design my Halloween Eyeball Wreath.
While she was visiting, I had her sit down and show me how she makes her ribbon wreaths. There are many different ways to create these wreaths, and you can use a variety of materials; this is just the method that she has developed over the years.
I decided that I needed a few more 4th of July decorations, so we hit the store and picked out some adorable red, white and blue ribbons to create a wreath.
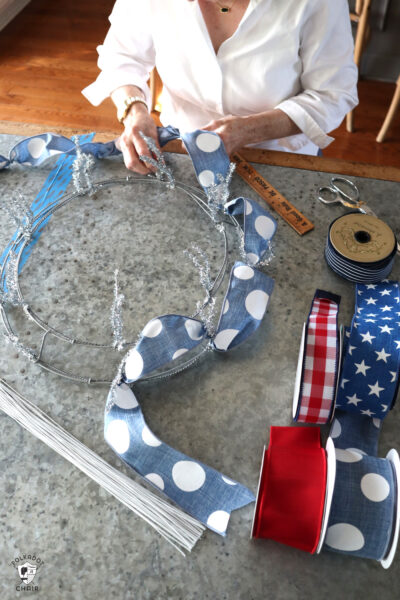
Ribbon Wreath Supplies
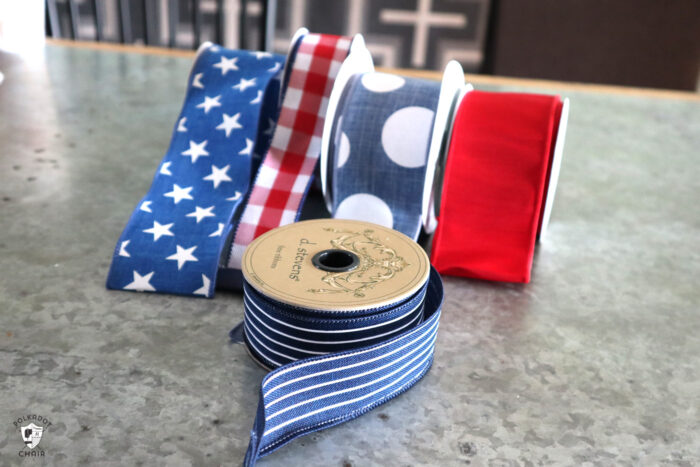
We chose to create our ribbon wreath using a variety of red, white, and blue ribbons. We chose a variety of prints that we felt worked together along with a solid red ribbon to give the wreath a bit of balance.
You will also need a work wreath.
What Kind of Ribbon Should I Use?
I recommend using a wired ribbon. If your wreath will be outdoors on an uncovered porch I recommend using ribbon that is designed to hold up to the elements.
We just used simple home decor ribbon in a variety of widths. The widest ribbon is about 2 1/4″ wide.
What is a Work Wreath?
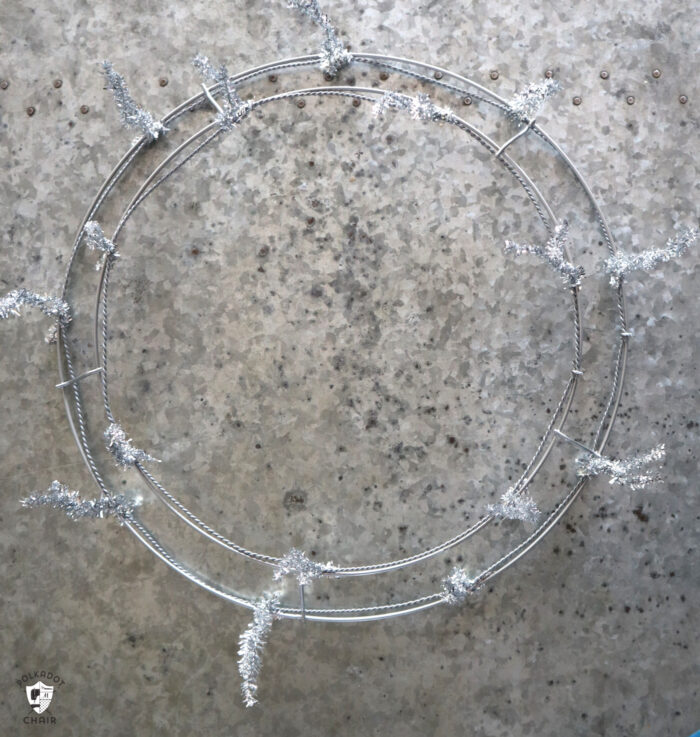
A work wreath is a wire wreath form that has twist ties attached to it in several places. They come in a variety of colors and sizes. I recomend buying a work wreath that is close to the same color as one of your ribbons, as it will show though a bit.
You need a WORK WREATH not a wire wreath. It needs to have twist ties attached already.
You can buy them at most craft stores, I’ve seen them an JoAnn & Hobby Lobby.
How Do You Add the Lettering to the Ribbon?
You can add lettering to your ribbon using a Cricut Machine, iron-on vinyl, and an EasyPress. If you do this, I recommend testing a small piece of ribbon beforehand to make sure it won’t melt when heat is applied.
Either way, you need a silicone pressing sheet to keep the ribbon from transferring to the plate of the EasyPress.
Is There a Video?
Yes! I’ve uploaded a video to this blog post; there is also a copy of YouTube. We filmed it in stop motion, so it moves kind of fast but is designed to give you an idea of how to wrap the ribbon around the wreath form.
Slower Version
For those of you asking, here is a slower version of the ribbon portion of the video. Please note, the video was filmed in stop motion, so I can not slow it down anymore. It took about 30 minutes to add the ribbon to the wreath, which makes for a VERY LONG video. That is why we made the decision to film it in stop motion. If you’re struggling, don’t OVERTHINK it. You just lay the ribbon in between the twist ties and twist the ties. Then go to the next twist tie. It’s EASY I promise!
The video is on YouTube and is unlisted, use the link to view it.
How to Get the SVG File
To get the Land of Liberty SVG file simply fill out the form and we will email you the SVG.

4th of July Ribbon Bunting Wreath
supplies
- 4-5 Spools Wired Ribbon in various patterns and widths
- 1 Work Wreath in a color that coordinates with the ribbon
- 1 piece Iron-On Vinyl I used Cricut Everyday Iron on in White
- 1 Land of Liberty SVG File Have it emailed to use using the form above.
Instructions
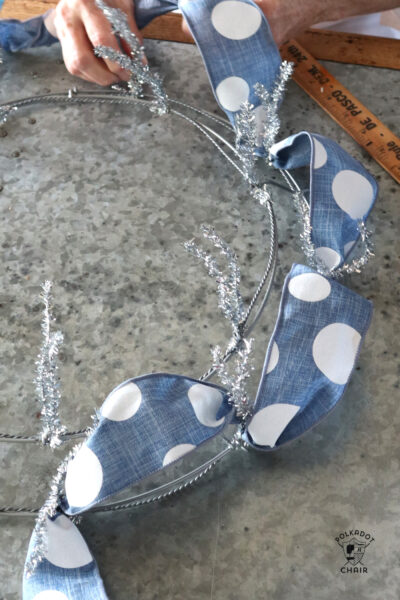
Add Ribbon to the Wreath
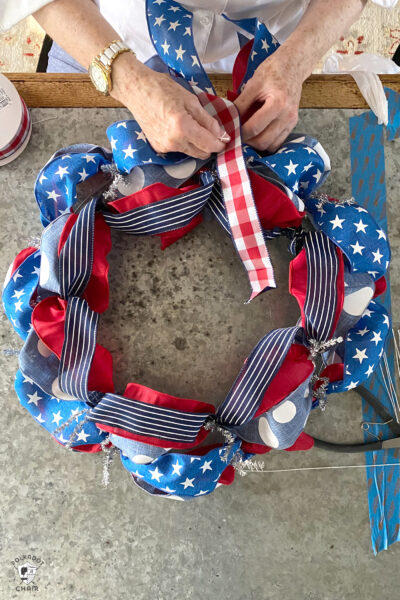
- Working with one ribbon at a time, begin adding the ribbon to the work wreath. Start on the outside circle.

- Using the twist ties attached to the wreath, pinch the ribbon and twist the ties. Move the ribbon to the next twist tie, making sure to leave a lot of "ease" in the ribbon. Measure the length of ribbon between each tie. As you work around the wreath, make sure that you leave the same amount of ribbon between each tie to give the wreath some uniformity.
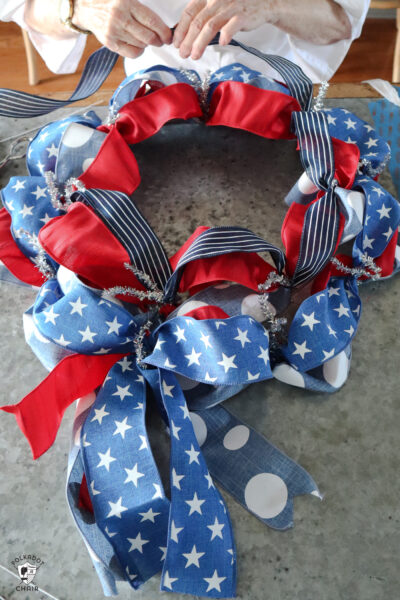
- Keep working around the wreath until you get back to where you started. You can then either cut the ribbon flush and tie it into the first twist tie, or leave a "tail" on the ribbon that will hang down the bottom of the wreath when finsihed.
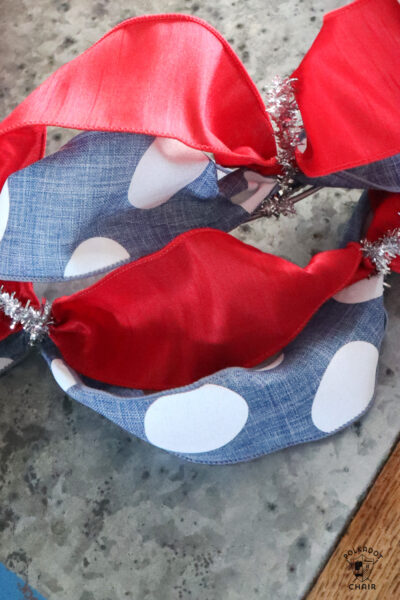
- Repeat this process with another ribbon.
- You will attach the ribbon with the same twist ties each time, creating layers of ribbon.

- I recommend starting with the wider ribbons and leaving the narrower ribbons for the top layers.
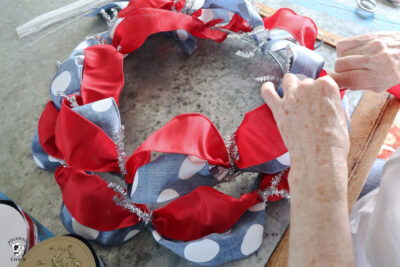
- Keep working until you get the "look" you want.
- When you are done, you will need to "fluff" the ribbons to arrange them the way you like them. Then, use the wire in the ribbon to shape the wreath.

Add "Land of Liberty" Lettering
- Get the "Land of Liberty" SVG from our Cricut Library. Upload it to Cricut Design space.
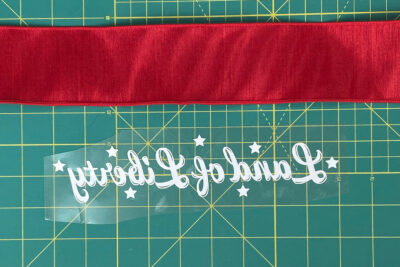
- Cut an extra piece of ribbon slightly wider than your wreath. Measure the ribbon.
- In Cricut Design Space, change the dimensions of the "liberty" image so that it will fit on the ribbon.
- Cut it out of iron on vinyl. (Make sure you mirror your image in Design Space)
- Remove the extra vinyl.
- Place the iron-on onto the top of the ribbon in the center.
- Place a ironing sheet ontop of this.
- Using your Cricut EasyPress adhere the viyl to the ribbon. You will set the temperature to 315 and adhere for 30 seconds.
- Remove the plastic backing and attach the ribbon to the wreath using the existing twist ties.

Video


I would love to make this! I wish the video was slower to see exactly how you do the ribbon. I’m not sure where to find a “work wreath”. My craft store has them, but they don’t have the twist ties on them.
A work wreath is one WITH twist ties. The other is just a wire wreath. It’s SO EASY, just put the ribbon in the center of the twist tie and Twist it once. Then go in a circle. I promise it’s simple! I’ll see if I can find one on Amazon to link
This is a unique idea to making a traditional wreath–and who doesn’t have a lot of ribbon lying around! Super cute idea! Thanks for sharing!