DIY Custom Printed Fabric Infinity Scarf
Learn how to sew an infinity scarf that is created from custom-printed fabric. Use your Cricut machine to create a stencil to create a custom fabric design. A big thanks to Cricut for sponsoring this post by providing me with the machine to do this project! Affiliate links are included in this post.
Today, I’m going to share with you the first project of a really fun blog series that I’ll be involved in this fall. I’m very excited about it and think that you guys will really like it, too, as it involves several free sewing and crafting tutorials. More about the blog series in a second. First, let’s talk about printing your own fabric!
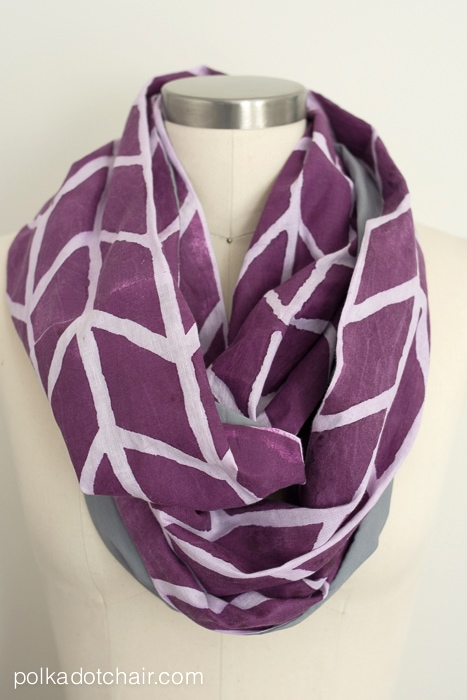
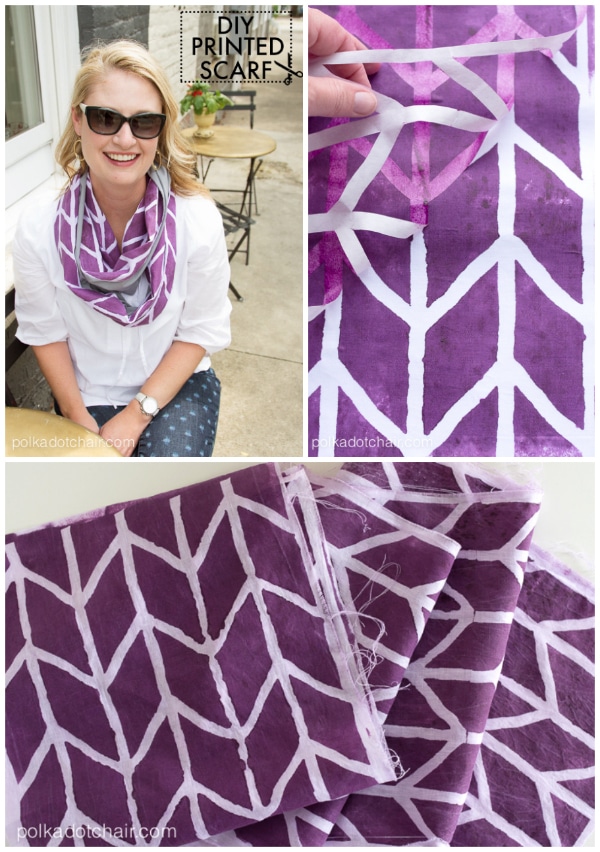
I’ve played around with fabric stamping and freezer paper stenciling before, but only on a small scale. I’ve never tried to make something larger than 5 or 6 inches across. A couple of weeks ago, I got the idea to try to freezer paper stencil enough fabric to make a scarf! It took a bit of trial and error, but I think the result is well worth it. I love the custom-printed fabric that I used to make this infinity scarf.

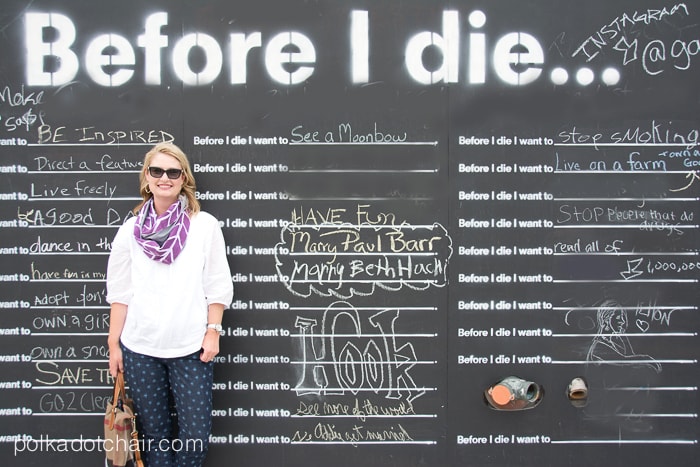
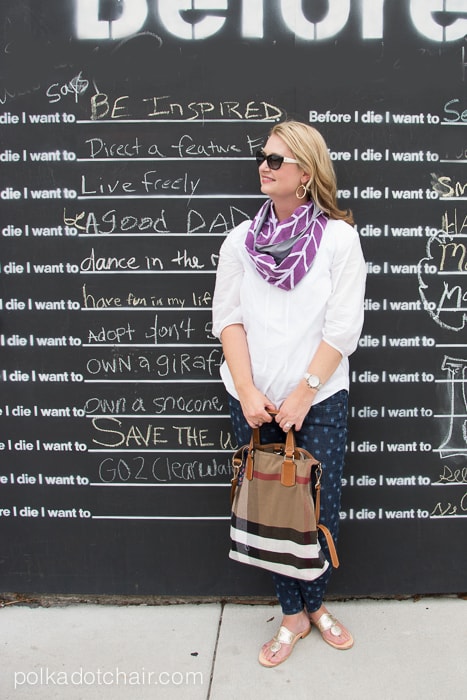
My daughter still has a little bit of time left before she heads back to school, so I thought I’d take advantage of the extra time with her and head downtown for a little lunch and window shopping. And since we were headed down there anyway, why not snap a few photos, too? We had a great time and even managed to get a few fun shots, so watch out—this post is quite photo-heavy!!
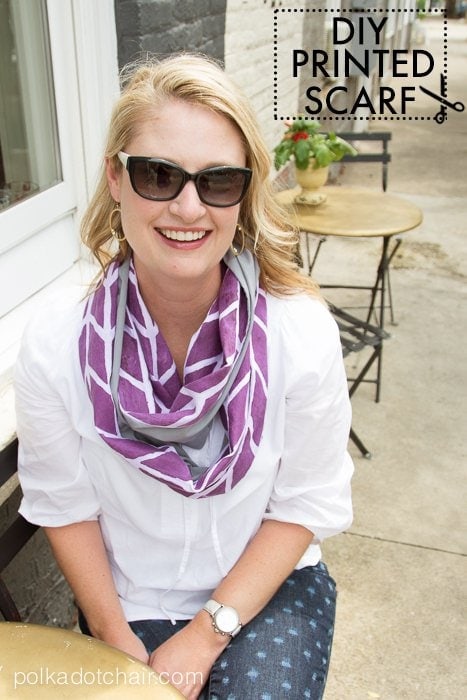
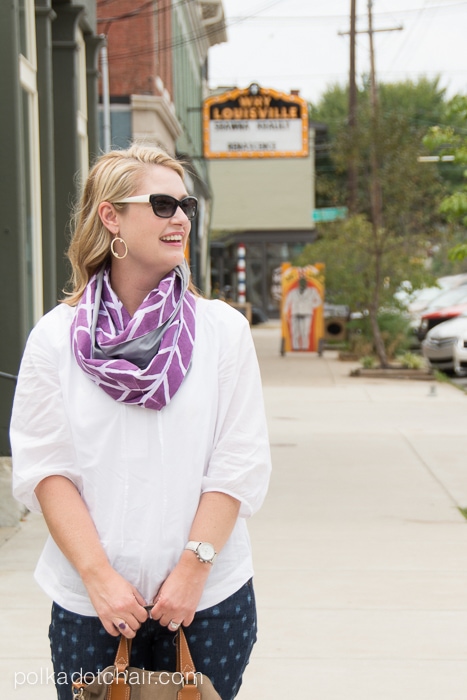
The scarf I’m wearing is made from fabric that was freezer paper stenciled using a custom stencil that I designed and then cut using my new Cricut Explore machine!
Remember that fun blog series I was talking about? Well, I’m participating in Cricut’s Next Design Team Star blog contest. Each month, several other very talented bloggers will design and share projects based on a certain theme with you.

This month’s assignment was Fashion. Each blogger is also assigned to a team, and as a team, they select a theme for all of their projects.

Our team came up with the theme of “Designer Inspired,” which brings me to my scarf. The inspiration for the fabric on the scarf came from this gorgeous print at Serena and Lilly—oh how I love just about everything that they make. The herringbone design was pretty easy to make in Illustrator. After I made my file, I saved it as a .jpg and uploaded it to the Cricut Design Space.
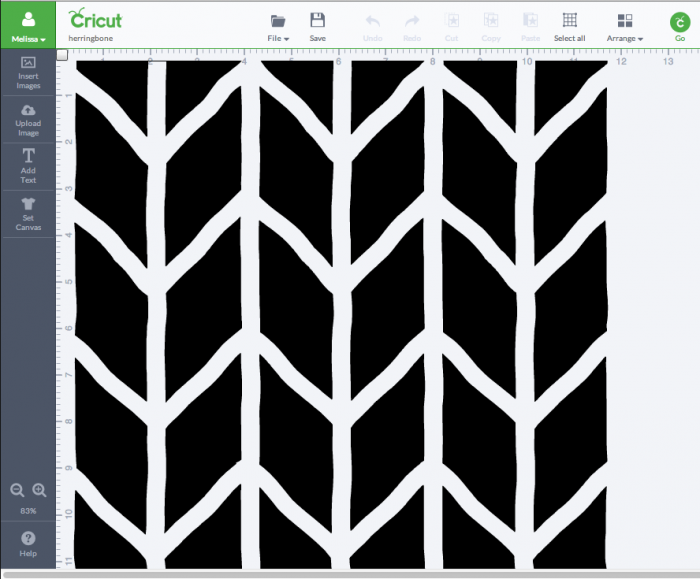
I then cut out the design with my Cricut. To do this cut freezer paper to 12×12 and place it shiny side down on the Cricut mat. Load the mat into the machine and cut using the setting that is 1 click past “paper” on the dial. To get enough stencils for my fabric, I ended up cutting out 6 stencils.
If you’d like to make a scarf of your own, here’s what you’ll need:
- Cricut Maker 3 (you can get great deals on machine bundles on Cricut.com)
- Roll Holder for Maker 3
- Cricut EasyPress (I like the large size the best): Make sure you get the EasyPress mat as well.
- Cricut Weeding Tools: (I use the small hook tool ALL the time, making weeding vinyl so much easier).
- Cricut BrightPad: A cordless, flat, bright lightbox. I use it to weed Cricut vinyl and use it all the time to trace applique shapes for sewing & quilting.
- Cricut Iron On Vinyl
- Cricut Permanent Vinyl
Cricut Explore Machine (if you don’t have one, you could hand cut the freezer paper with an exacto knife; the machine will save you time, though)
Freezer Paper
2, 12″ x 54″ pieces of Cotton/Linen Fabric – White
2, 12″ x 54″ pieces of lightweight cotton fabric (like voile in a solid color)
Fabric Medium for Acrylic Paint (2 bottles)
Acrylic Paint in the desired color (2 bottles)
a bit of dye in a color close to your paint
Foam Roller/Tray
Sewing Machine
Okay.. to start:
Take the stencil pieces you cut out with the Cricut and iron them shiny side down onto your 12″ wide white linen/cotton fabric. Iron down one piece at a time and match up the pattern (trim off excess freezer paper) from stencil to stencil. You can fit 4 stencils on one strip of fabric. Iron the other two stencils onto your 2nd 12″ wide white linen fabric piece.
Iron solid sheets of freezer paper to the entire back of the fabric.
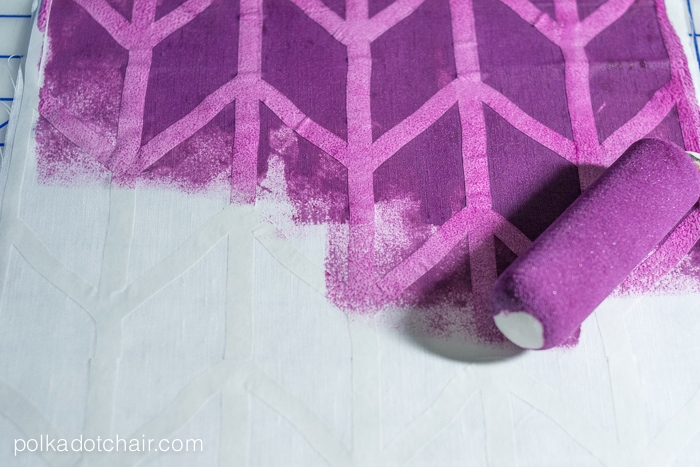
In a plastic cup, mix your 2 bottles of fabric medium, 1 1/2 bottles of acrylic paint together. Add enough dye to get the intensity of color that you want. The paint will be pretty runny.
Pick up a bit of the paint with the foam roller and roll over your fabric. DO NOT over saturate the fabric. Use just enough paint to get an even coverage.
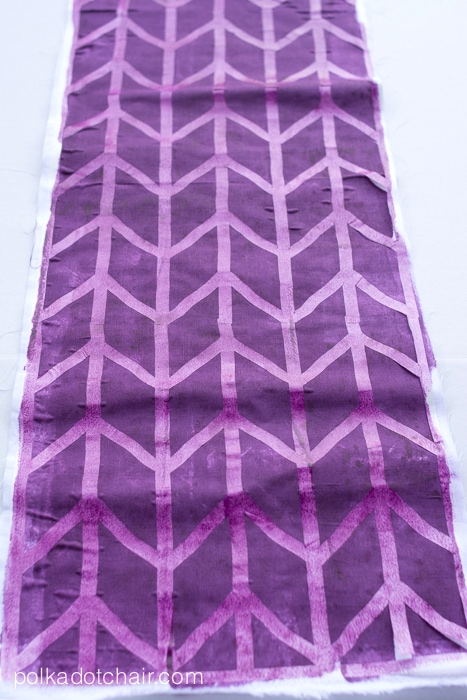
Do this to both pieces of freezer paper applied fabric. Let dry – overnight if possible.
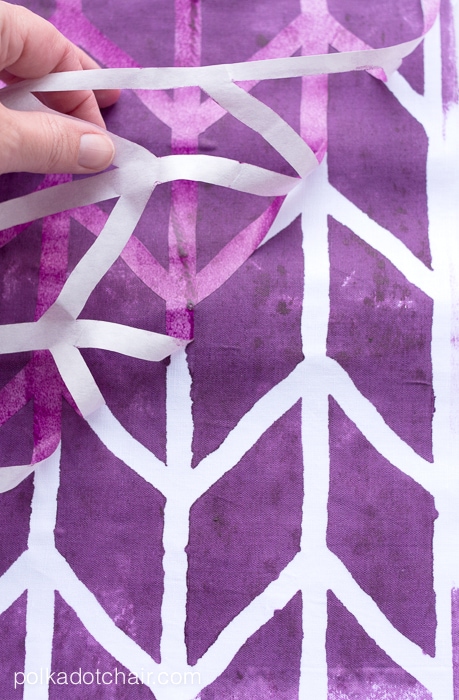
Now comes the fun part! When your paint is dry, begin to peel off the stencils. They should come off pretty easily.
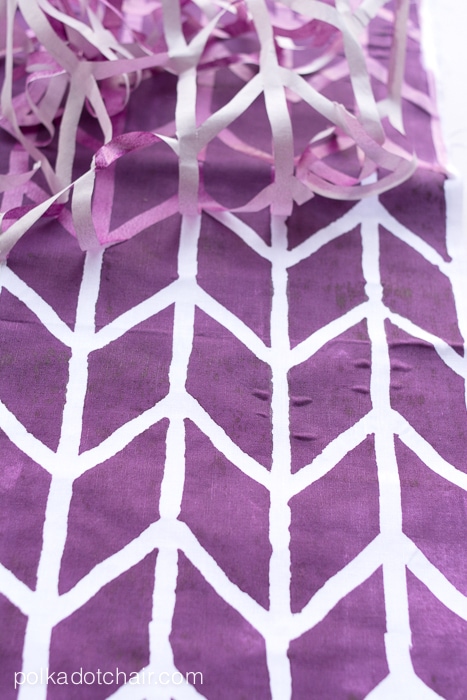
Then, pull the freezer paper off of the back of the fabric.
Run the fabric under the tap until the water runs clear. You can also throw the fabric in the wash if you like (with out detergent) if you do that I’d use a color catcher just to be safe. Let the fabric air dry, or throw it in the dryer on low heat.
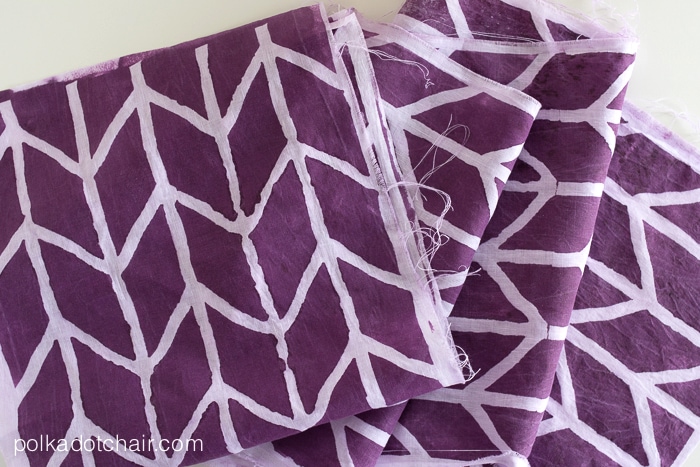
Pull it out, and you’ve got gorgeous custom-printed fabric!!
To make the scarf- trim your fabric and sew the two pieces of fabric together, matching the pattern. Press the seam open. Measure this piece. Mine was 68″ long. Cut and sew your cotton voile fabric to the same size as your printed fabric piece.
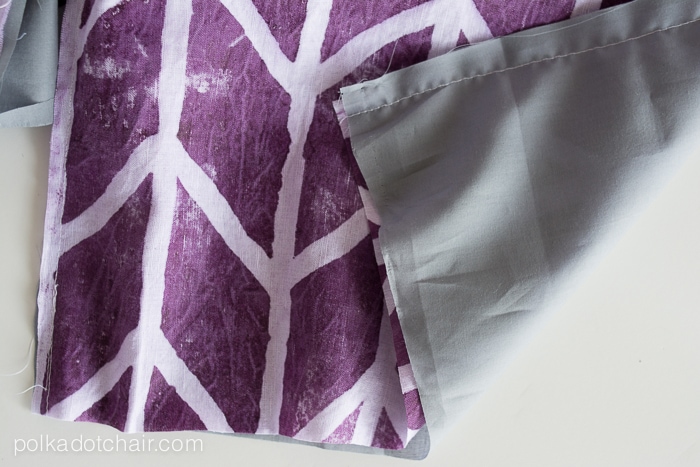
Sew the two pieces of fabric together with the right sides facing. Turn right side out and press.
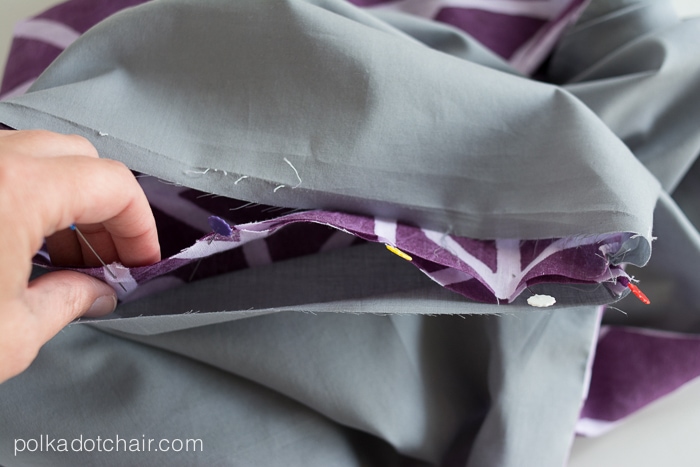
Pin the ends of the fabric to each other (right sides facing again) and sew this seam as far as you can on your sewing machine.
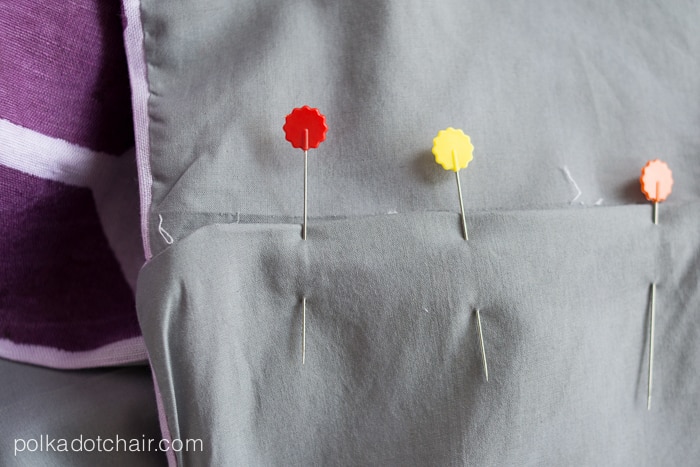
For the portion of the scarf that you can’t sew on your machine, press and pin the opening closed. Then just hand stitch it closed.
and voila you’re done! Enjoy your scarf!!
Let me introduce you to my awesome Design Star Team and 6 other Fabulous Designer Inspired Projects!
Ahhh! So smart! Great idea.
Thanks Andrea 🙂
Wow this is gorgeous!! I love that shade of purple! I have always wanted one of those machines! They look like so much fun! Susan
That is so clever. And I love the result!
I just adore this idea! Great project sister girl!
xo
Jeanne
This is awesome! I love the purple!!