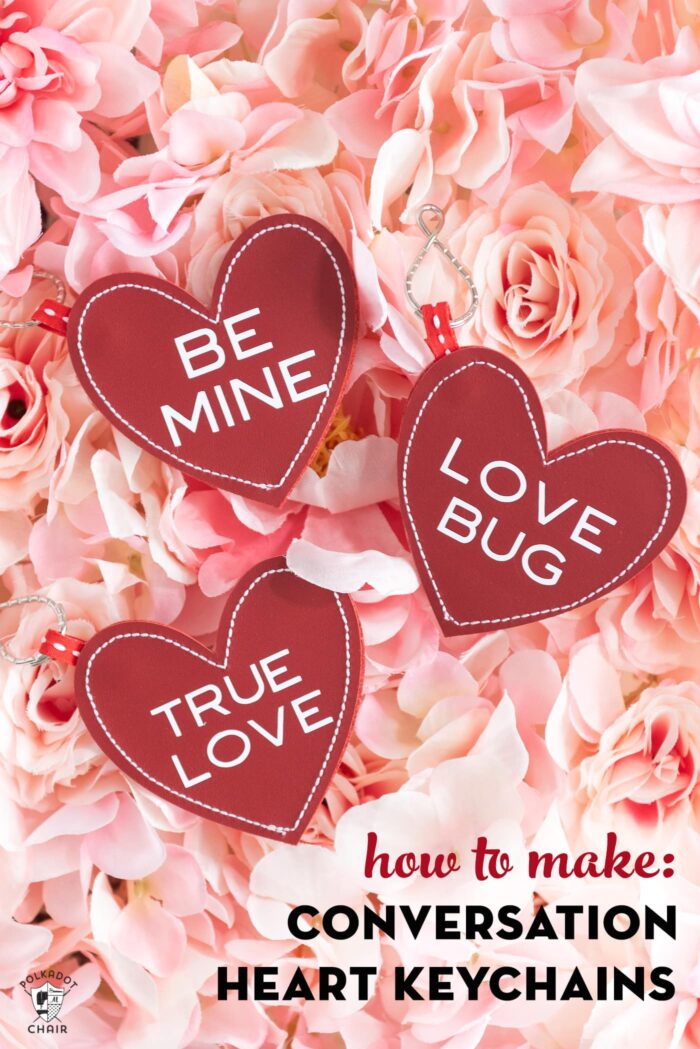
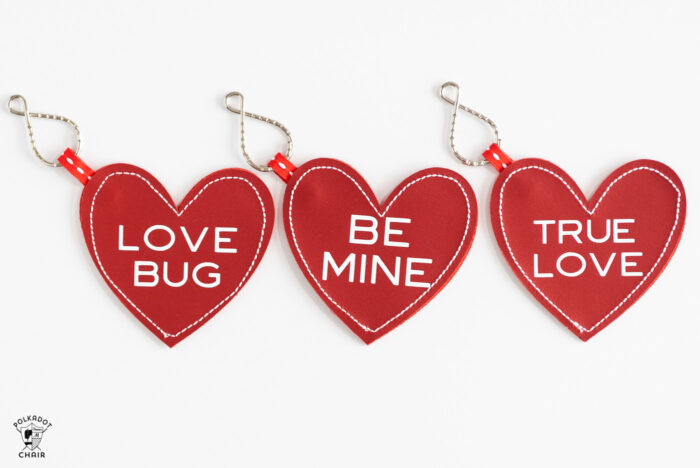
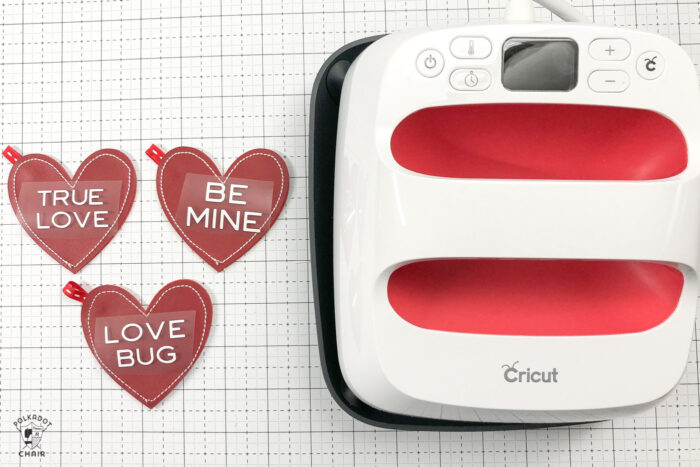
DIY Leather Conversation Heart Keychains; a Cricut Maker Project
DIY your Valentine’s Day gift-giving this year! These Leather Conversation Heart Keychains are oh so easy to make since your Cricut Maker does all of the hard work for you.
I work as a brand ambassador for Cricut, this is sponsored content.
I’d like to thank whoever decided to put Valentine’s Day smack dab in the middle of February. (I’m sure there is a good reason probably tied to a religious holiday, so just take that comment with a grain of salt *wink*).
By February every year, I’m usually over the “oh look, the snow is so pretty” and pretty much freezing cold and ready to go outside.
Valentine’s Day to me has always been a bit of a bright spot in what is usually an otherwise bleak month. A holiday designed to celebrate love! In our home, we’ve always taken it as a celebration of everyone we love, not just romantic love, and try to have a “fancy” family dinner that week.
My husband also always gets the kids those GIANT chocolate heart boxes (I apologize in advance to their future spouses as I’m sure they will want large amounts of chocolate each Valentine’s Day).
A few years ago I made some stamped leather conversation hearts. I turned them into a key chain for my husband. They were really popular, you guys seemed to have loved them.
For that project, I bought pre-cut leather hearts. I thought that I’d recreate the project this year, but use my Cricut Maker to cut the leather hearts.
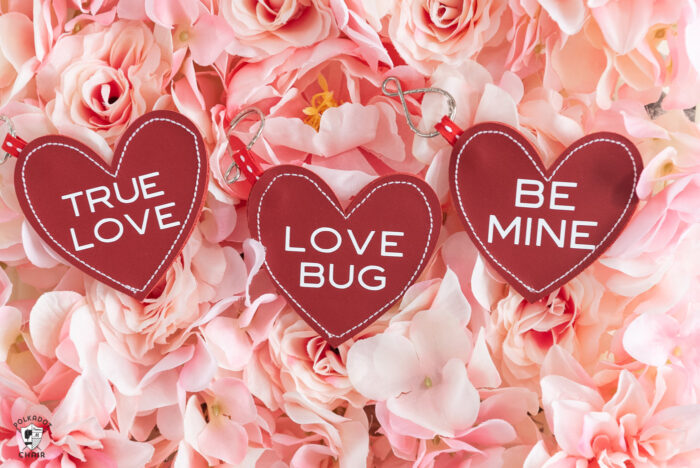
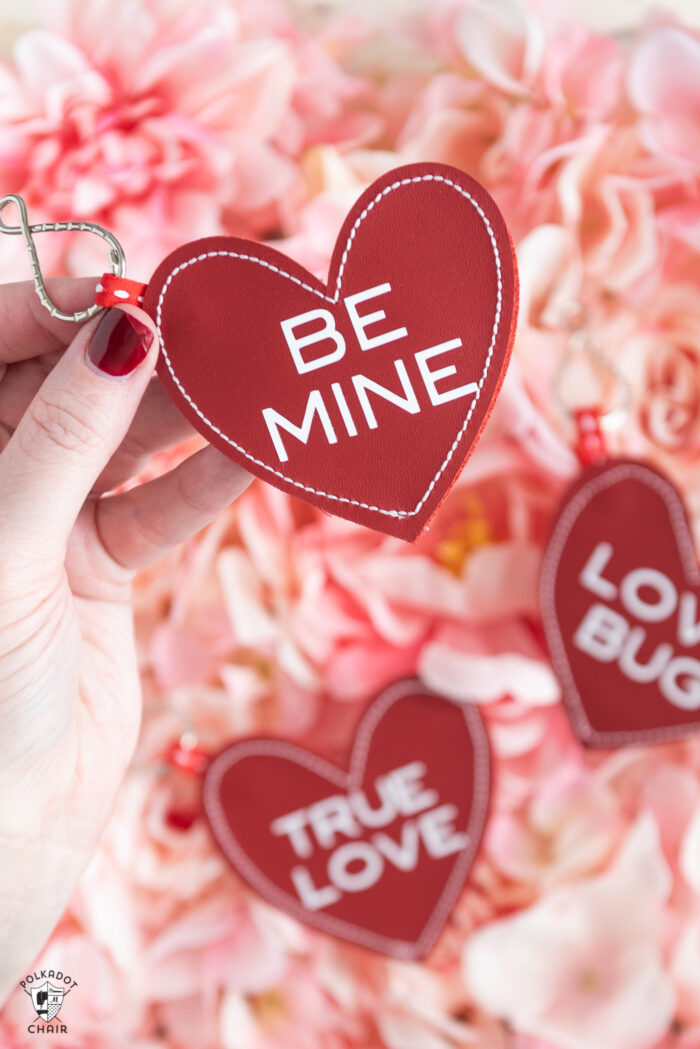
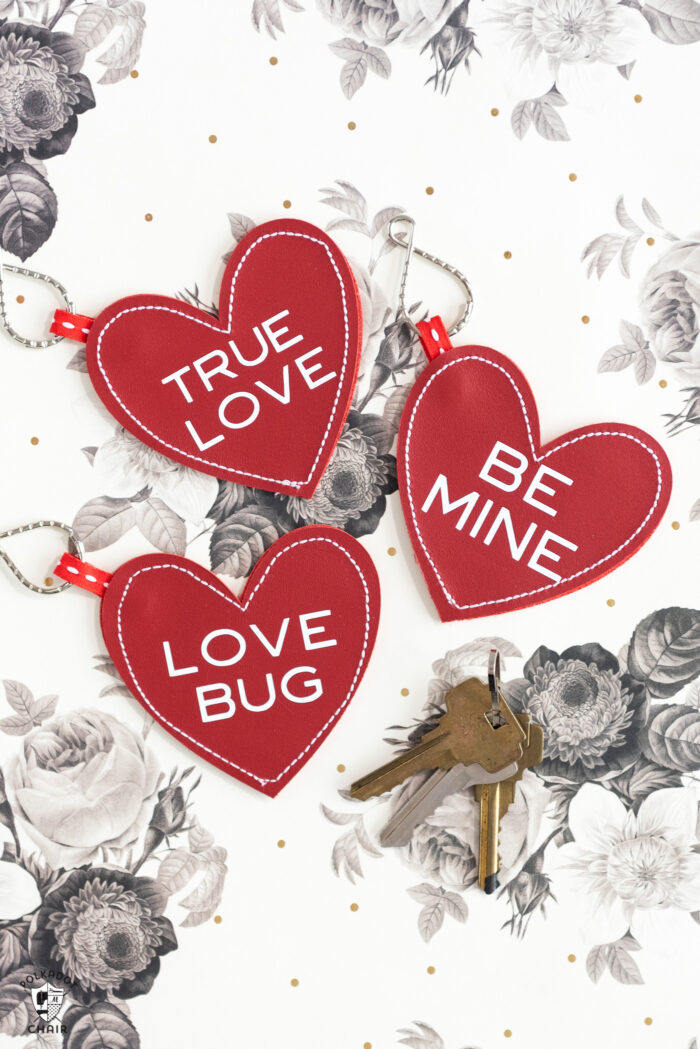
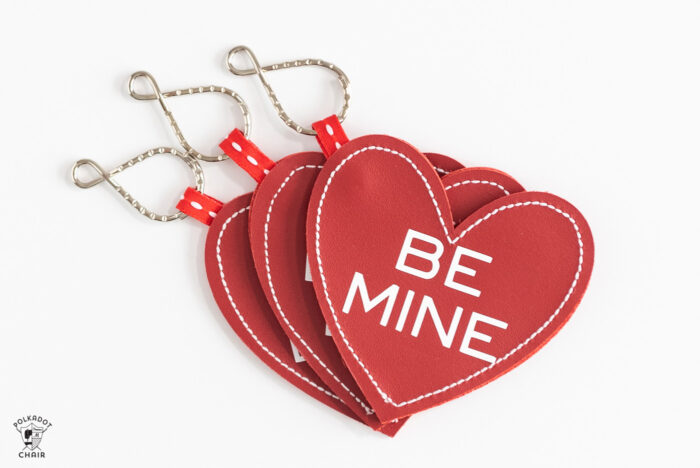
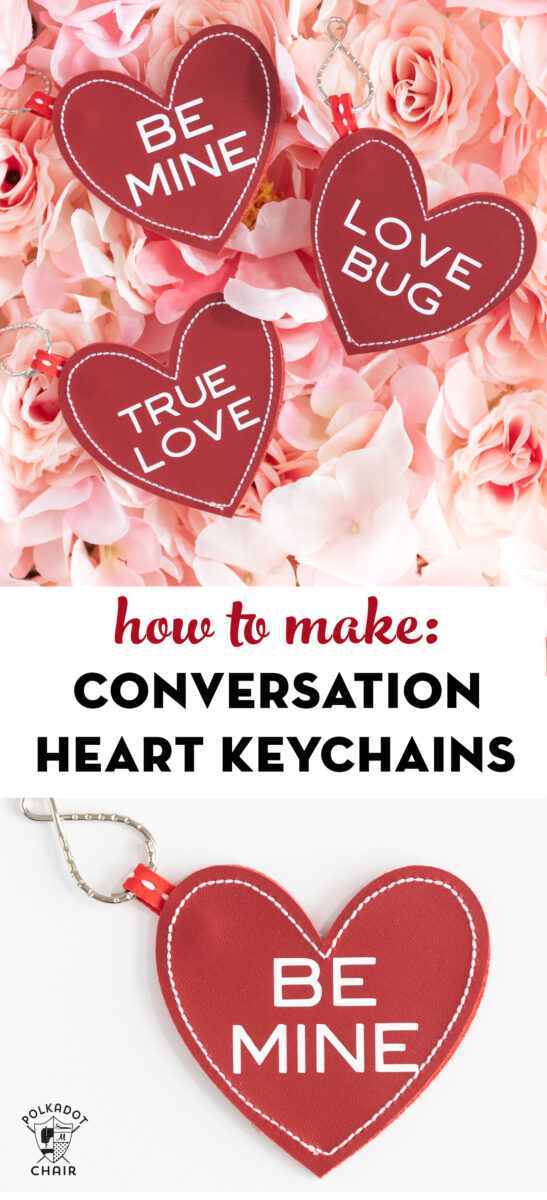
This time, instead of stamping the letters on the hearts, I decided to use a bit of Iron On to add some fun Valentine sayings inspired by candy conversation hearts! All of the materials were cut with my Maker, including the red leather hearts.
These leather conversation heart keychains took me an afternoon to make. I think they would be so cute to give out as gifts. Are you ready to make something? Here’s how to do it.
How to Make Leather Conversation Heart Keychains
Supplies Needed for Leather Heart Keychains

- A piece of leather at least 6″ x 11″ (I used the Cricut brand Genuine Leather, you could also use faux or vegan)
- Cricut Maker with Knife Blade
- Everyday Iron on in White
- Strong Grip & Standard Cricut Cutting Machine Mats
- Cricut EasyPress
- Heavy Duty Glue like Guttermans or E6000
- A small piece of 1/8″ Ribbon
- Keychain hardware
- A piece of Parchment Paper
- Optional:
- Sewing Machine
- Leather Needle for Sewing Machine
- Polyester Thread
- Hearts & Words File in the Cricut Design Space
Supply Links:
- Cricut Maker 3 (you can get great deals on machine bundles on Cricut.com)
- Roll Holder for Maker 3
- Cricut EasyPress (I like the large size the best): Make sure you get the EasyPress mat as well.
- Cricut Weeding Tools: (I use the small hook tool ALL the time, making weeding vinyl so much easier).
- Cricut BrightPad: A cordless, flat, bright lightbox. I use it to weed Cricut vinyl and use it all the time to trace applique shapes for sewing & quilting.
- Cricut Iron On Vinyl
- Cricut Permanent Vinyl
Step 1: Design your Keychain
The first thing you want to do is open up Cricut Design Space and design your keychains. I used the heart from the shapes menu (on the left sidebar) and Martha Stewart Smart Cookie Font.
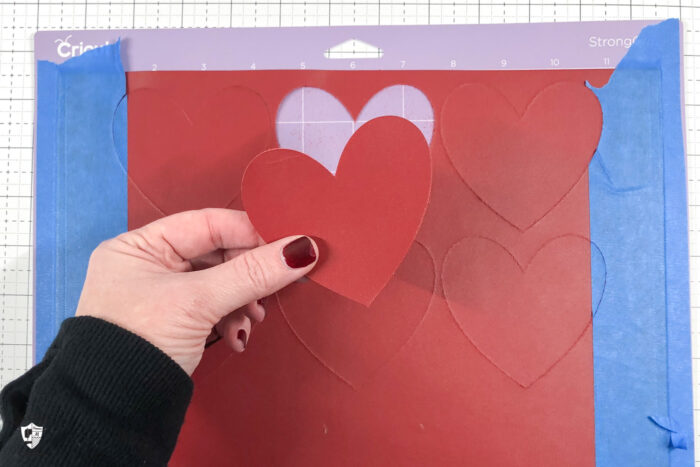
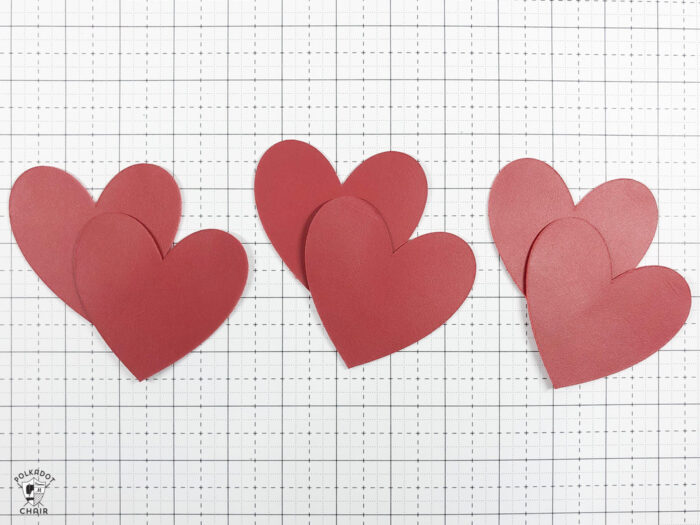
You need 2 leather hearts for one keychain.
My hearts are 3 1/2″ wide. I just sized my hearts and words so they looked good stacked on top of each other. You can CLICK here if you don’t want to set up the file yourself and just use my file.
Step 2: How to Cut Leather with a Cricut
You need to send your project to the Maker in two batches. The first batch will be the leather hearts, and the second batch will be the iron-on letters.
In Design Space, hide whichever items you are not cutting, then send the others to the machine.
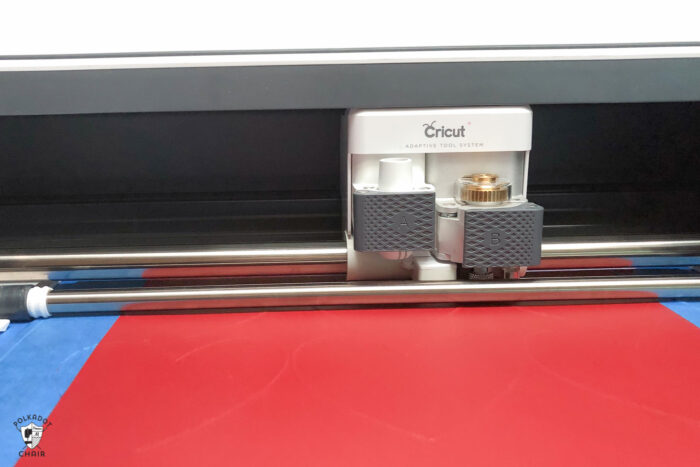
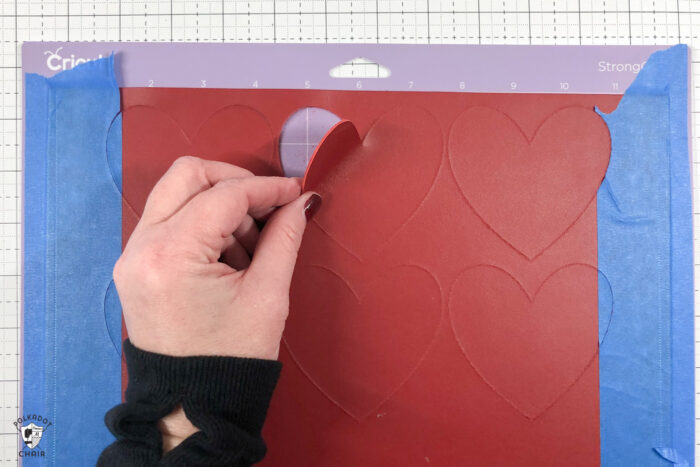
Load the Cricut Leather on the Strong Grip mat. Use some painter’s tape to secure it down a bit more. NOTE: Cricut recommends doing this, I have also had success cutting leather without the painter’s tape, but just to be safe, I usually tape down 3 sides.

Move the star wheels all the way out to the edge.
In Design Space select Garment Leather 2-3oz as your material. Make sure the knife blade is selected, load the mat, and cut!
When you’re done, repeat the process, this time with the Everyday Iron-on and the Standard Grip mat with the fine point blade.
Step 3: Add Top Stitching (optional)
If you have a sewing machine, you should be able to topstitch on top of your leather, for an extra bit of detail. To do this, you’ll need a leather needle in your sewing machine and a strong polyester thread. I used white heavy-duty thread, see what works in your machine.
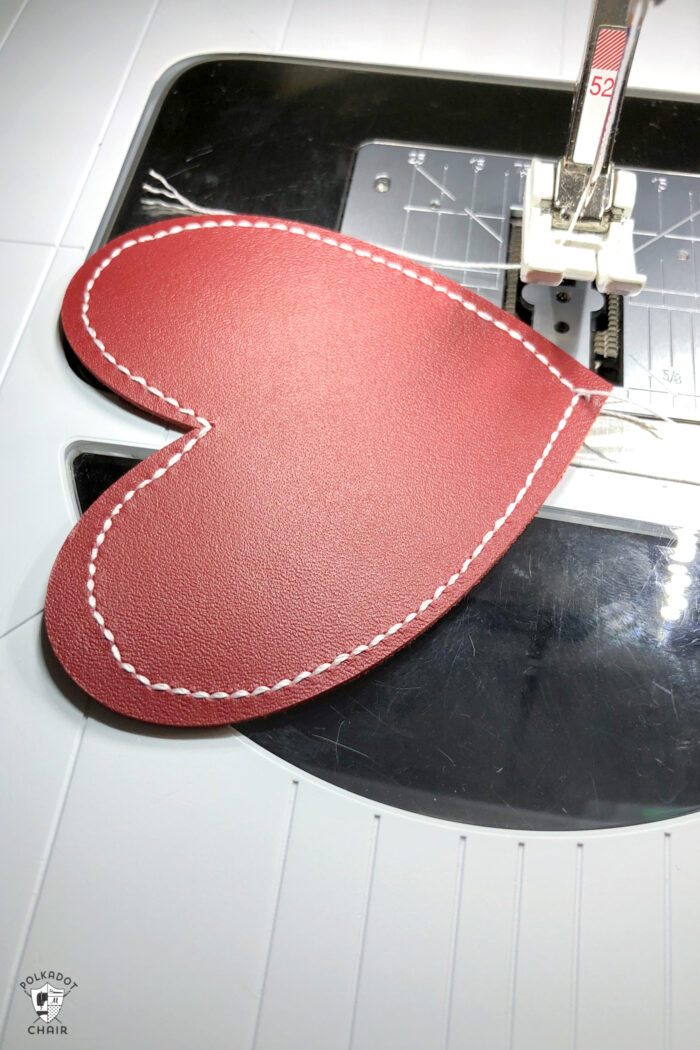
I tried this several times, and no matter what I did, I could not get the back of the leather to look as good as the front of the leather. For this reason, I decided to topstitch ONE heart (the top one) and then glue a second heart to the back for a nice finished back.
You can try stitching both pieces of leather at the same time. If you’ve not sewn with leather before, just go slow and see what your machine can handle.
Also, DO NOT try it without the leather needle. I also recommend a Teflon sewing machine foot; if you don’t have one, you can try a bit of Sewers Aid on the leather to help the presser foot glide easily over the leather. You can also buy a leather “roller” foot, but that’s a post for another day.
Assembly

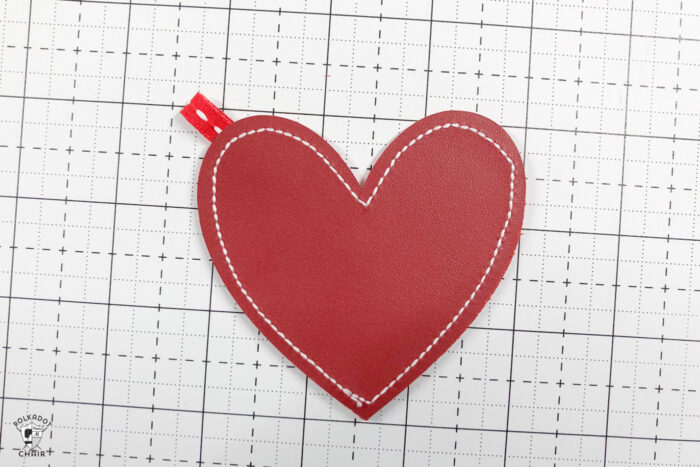
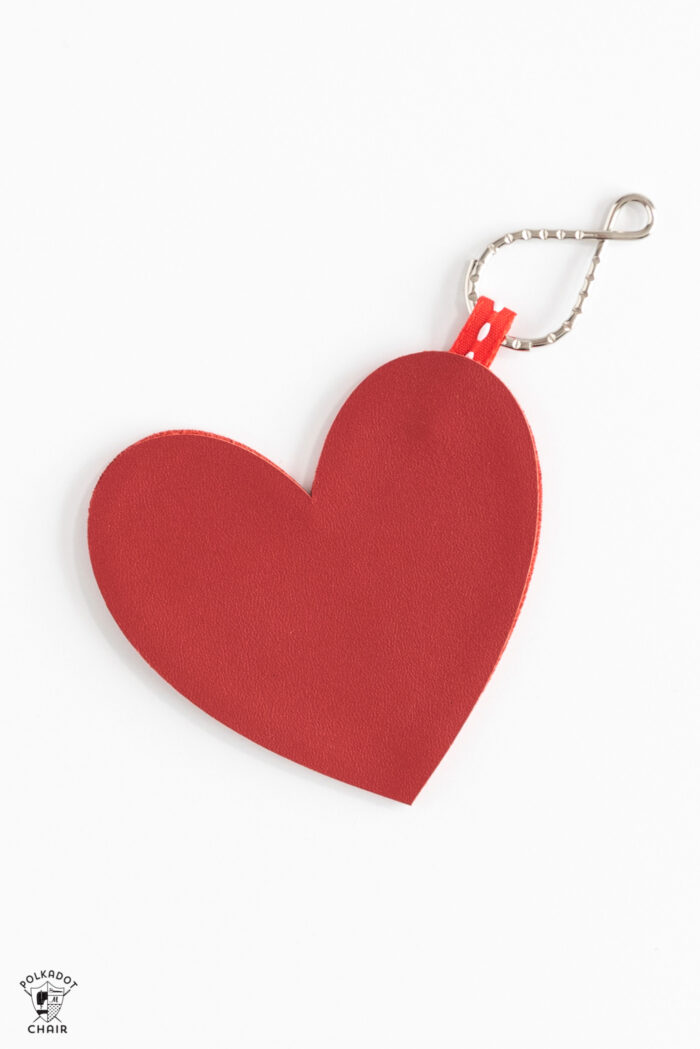
After you’ve topstitched one of your hearts, cut a piece of ribbon to about 1″ and fold it in half. Finish the ends of the ribbon with a match. Place a dab of the glue on the leather and put the folded ribbon on top.
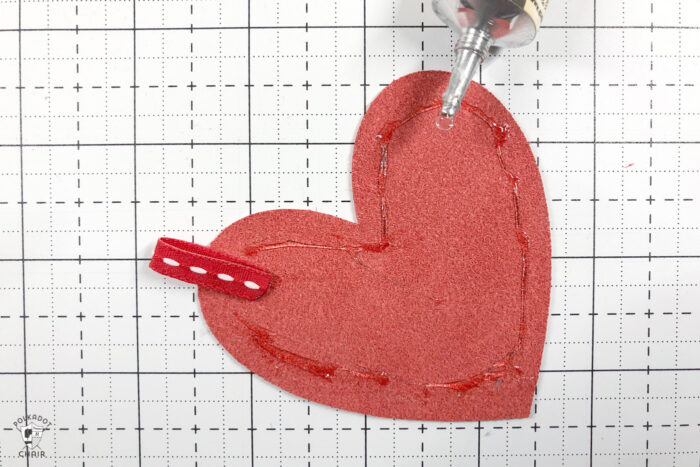
Apply a line of glue all around the leather heart (on the wrong side). Make sure you get a bit on top of the ribbon again. Place the matching heart on the top (wrong sides facing) and press down to secure. Place the heart aside until the leather is dry.
Don’t use too much glue, it will bleed out of the heart! (HA!)
How to add Vinyl Lettering to Leather
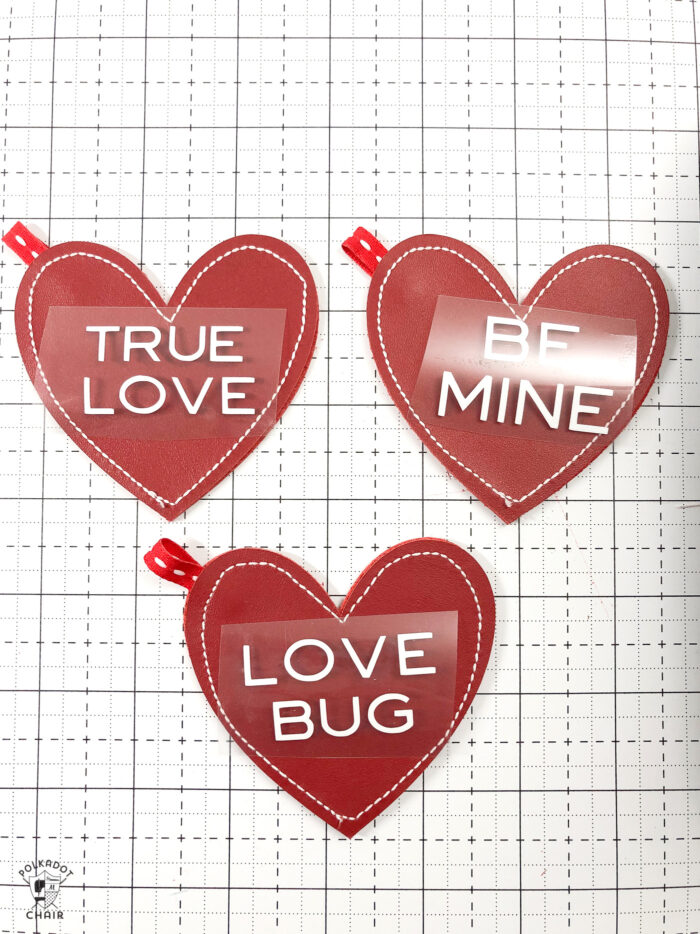
Peel away the excess iron-on vinyl from your words and cut out close to the edge of the text.
Turn on your EasyPress to 255° and set it for 30 seconds.
Place the heart on your EasyPress Mat, and place a piece of parchment paper on top of the heart. Set the vinyl with the EasyPress.
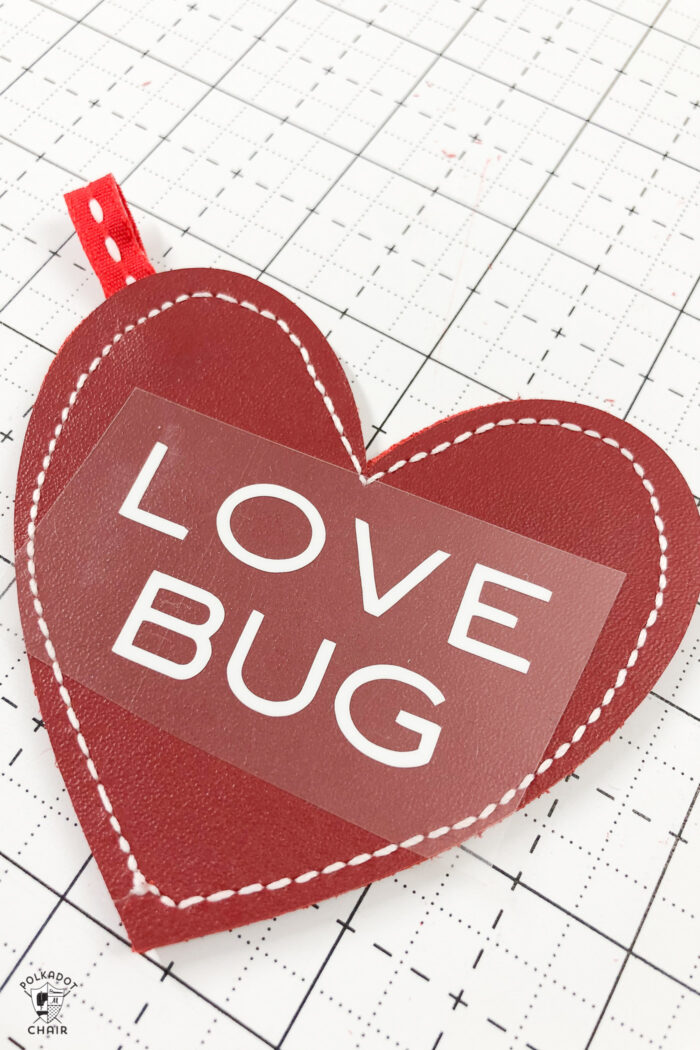
When it’s cool, peel away the plastic.
The last thing you need to do is to attach your keyring hardware to the ribbon pull!
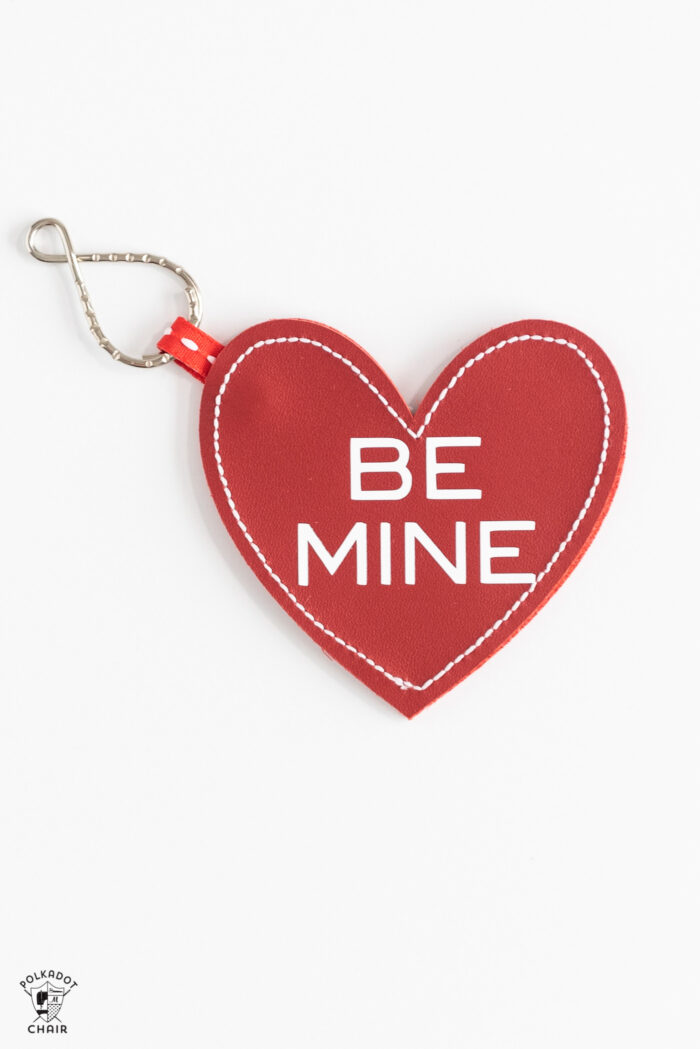
Here, you can see how it looks from the back.
I made these in red for Valentine’s Day, but I also think you could make them in other leather colors with monograms for Bridesmaid gifts!
This is a sponsored conversation written by me on behalf of Cricut. The opinions and text are all mine.
A Few other DIY Valentine’s Day Projects:
How to Make a Fabric Rag Heart Wreath


What are the star wheels, how do you move them? Thanks!
They are the wheels on the metal bar that feeds the cutting mat into the machine. To move them to the side you just slide them