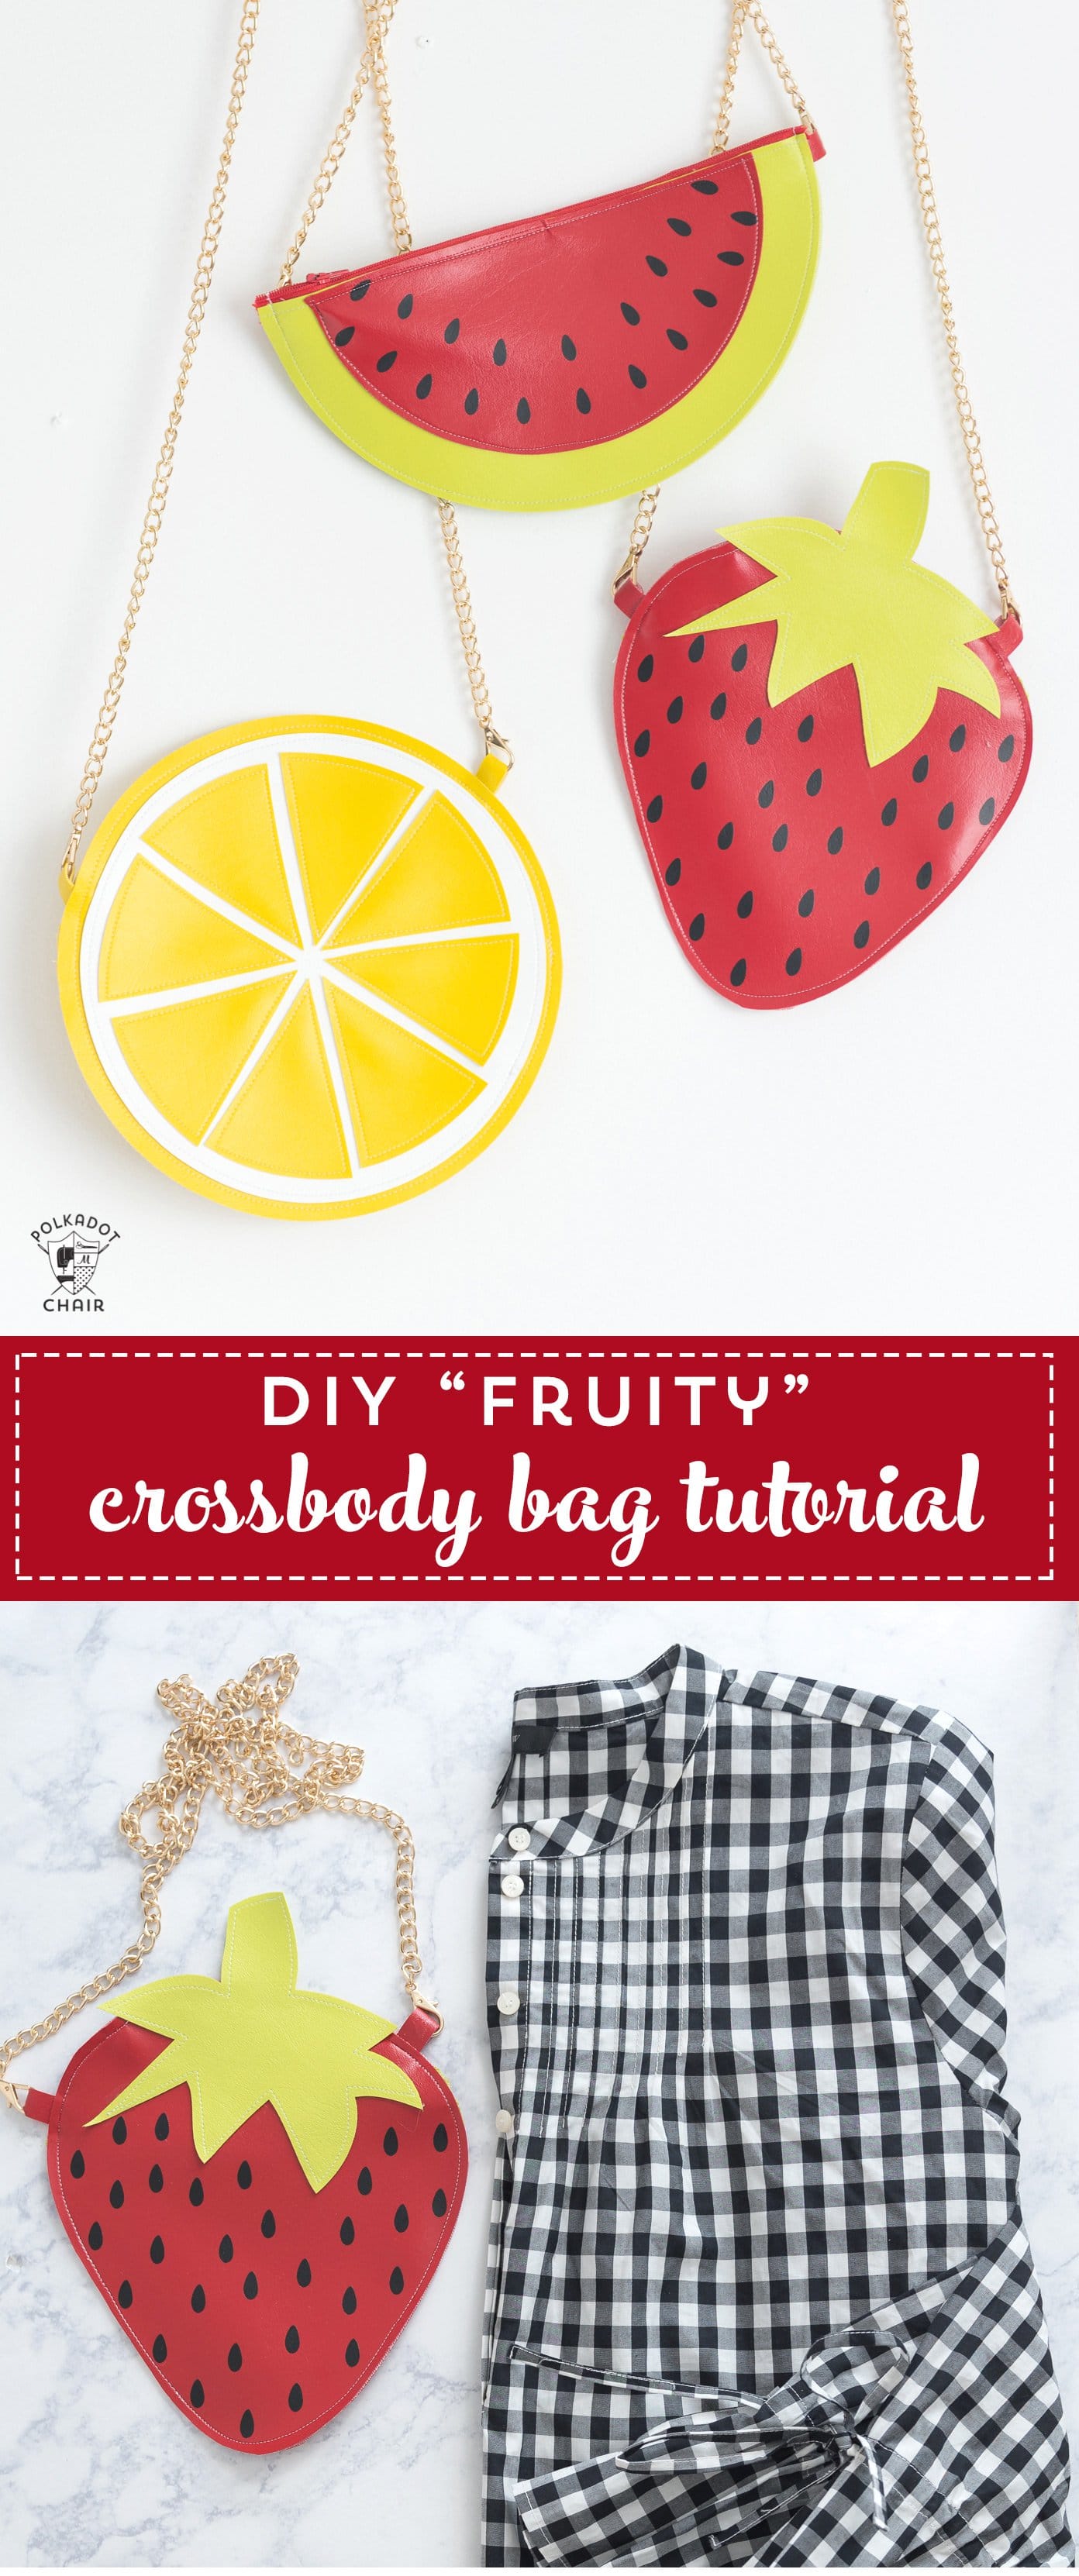
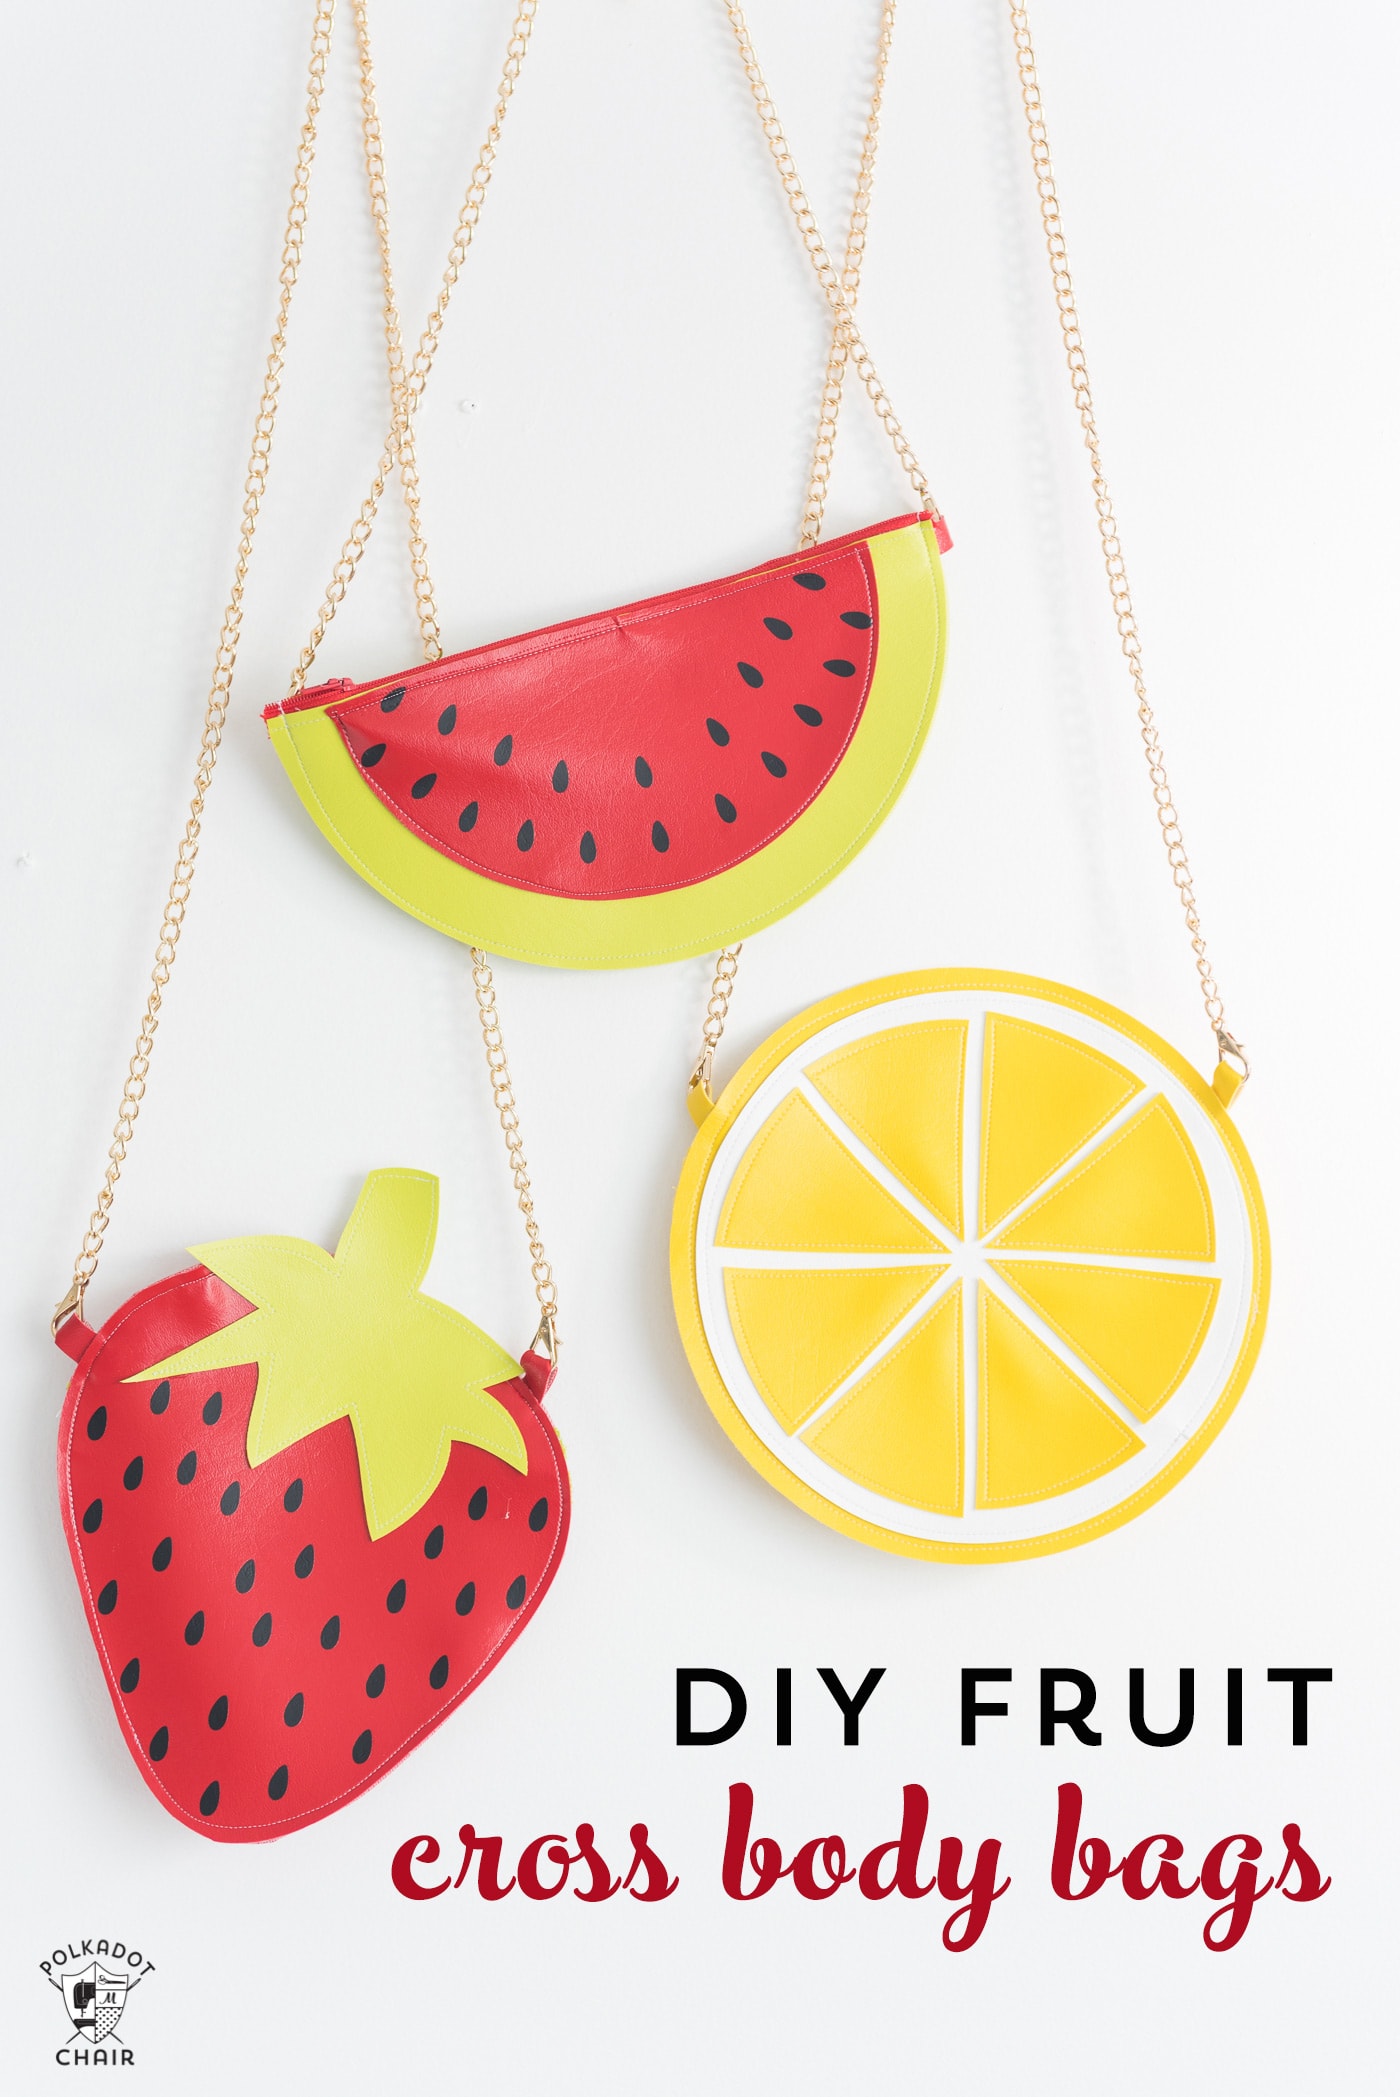
DIY Fruity Crossbody Bag Patterns, a Cricut Maker Project
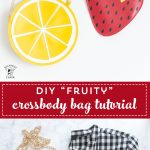
Celebrate summer by stitching up these fun DIY purses inspired by fruit! This Cricut Maker project uses the new Cricut Knife Blade to cut the vinyl pieces for the bag, making construction a breeze. Keep reading to find out how to make your own bag, and grab the free SVG files for the fruit crossbody bag pattern.
This is sponsored content. I work as a Brand Ambassador for Cricut and am so excited to be working with a product and company that I love.
Summer is in full swing and I could not be happier about it! Some people are Fall people, I think I’m a summer person. When I think of summer I think of BBQ’s, the 4th of July, flip-flops, summer clothes, and yummy treats.
Fun Summer Bags to Sew
Today’s project is inspired by some of my favorite things about summer, a good backyard BBQ. I decided to stitch up these fun DIY Fruit Crossbody bags with the help of my Cricut Maker machine.
They are made from Marine Vinyl, which the Cricut Knife Blade cuts beautifully. The strawberry and watermelon bags also feature a touch of Iron-On Vinyl to add an extra bit of detail.
About the New Cricut Knife Blade
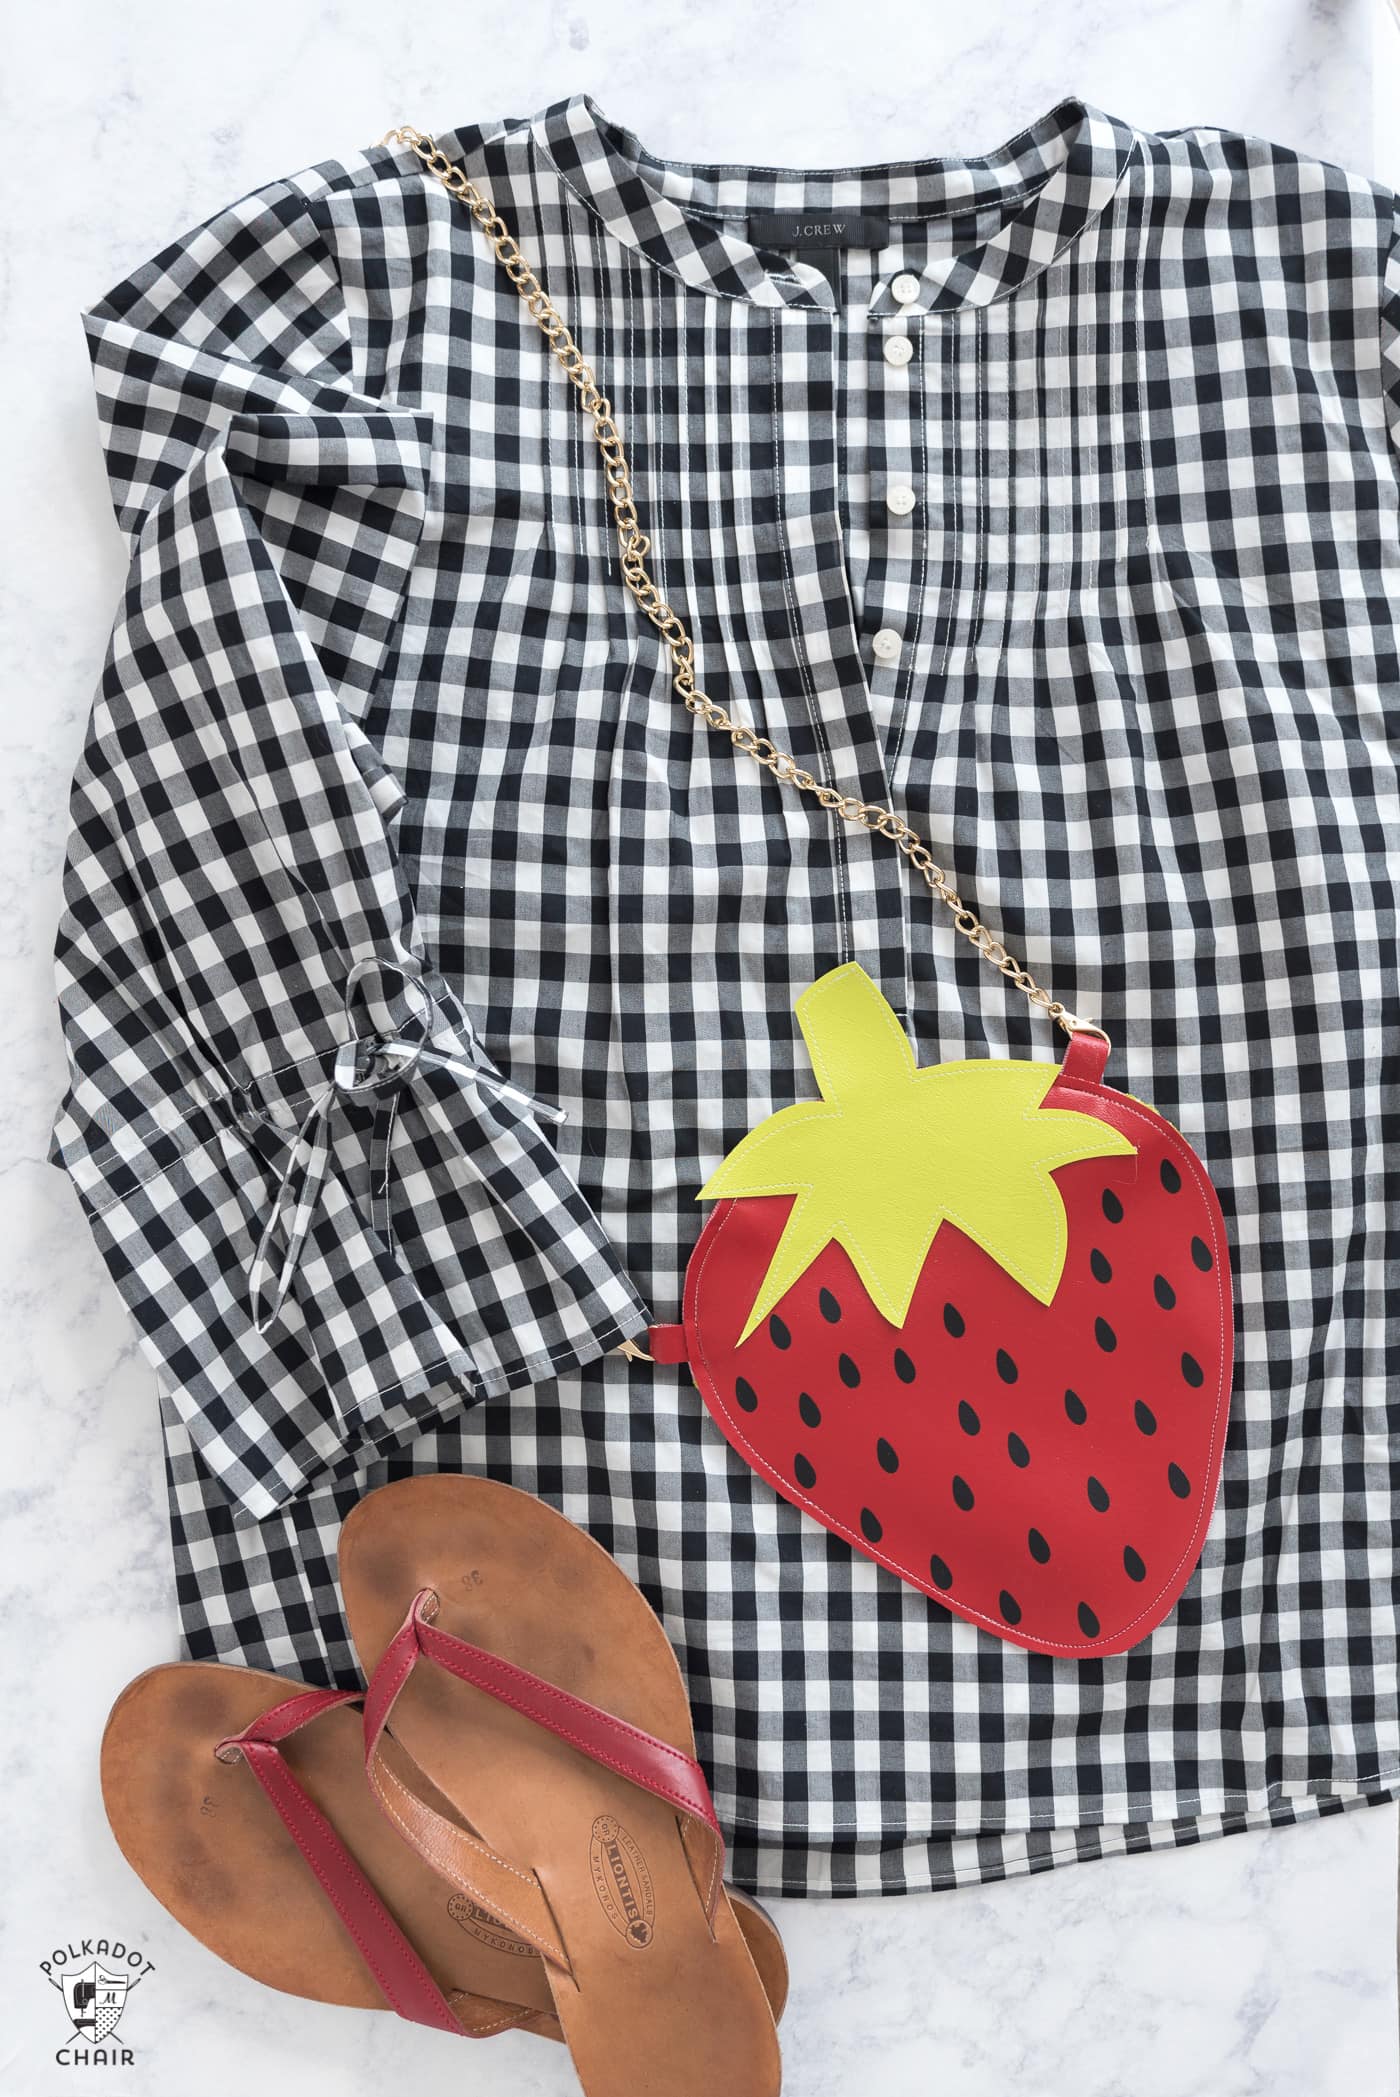
I love fun accessories. I always want to buy every novelty bag that I see at the store, I don’t necessarily want to use them. But I would love to have a shelf in my closet dedicated to fun, and whimsical clutches and handbags.
Cricut just released its new Knife Blade, and they sent me one to play with. I spent the better part of two weeks brainstorming a project to make with the new blade. I had so many ideas swirling around in my head that it was hard to pick which one to start with.
Since this post is pretty long already, I won’t go into too much detail about the Knife blade, watch for that in coming weeks. I did link up several posts with some great tutorials for the Knife Blade at the bottom of this post.
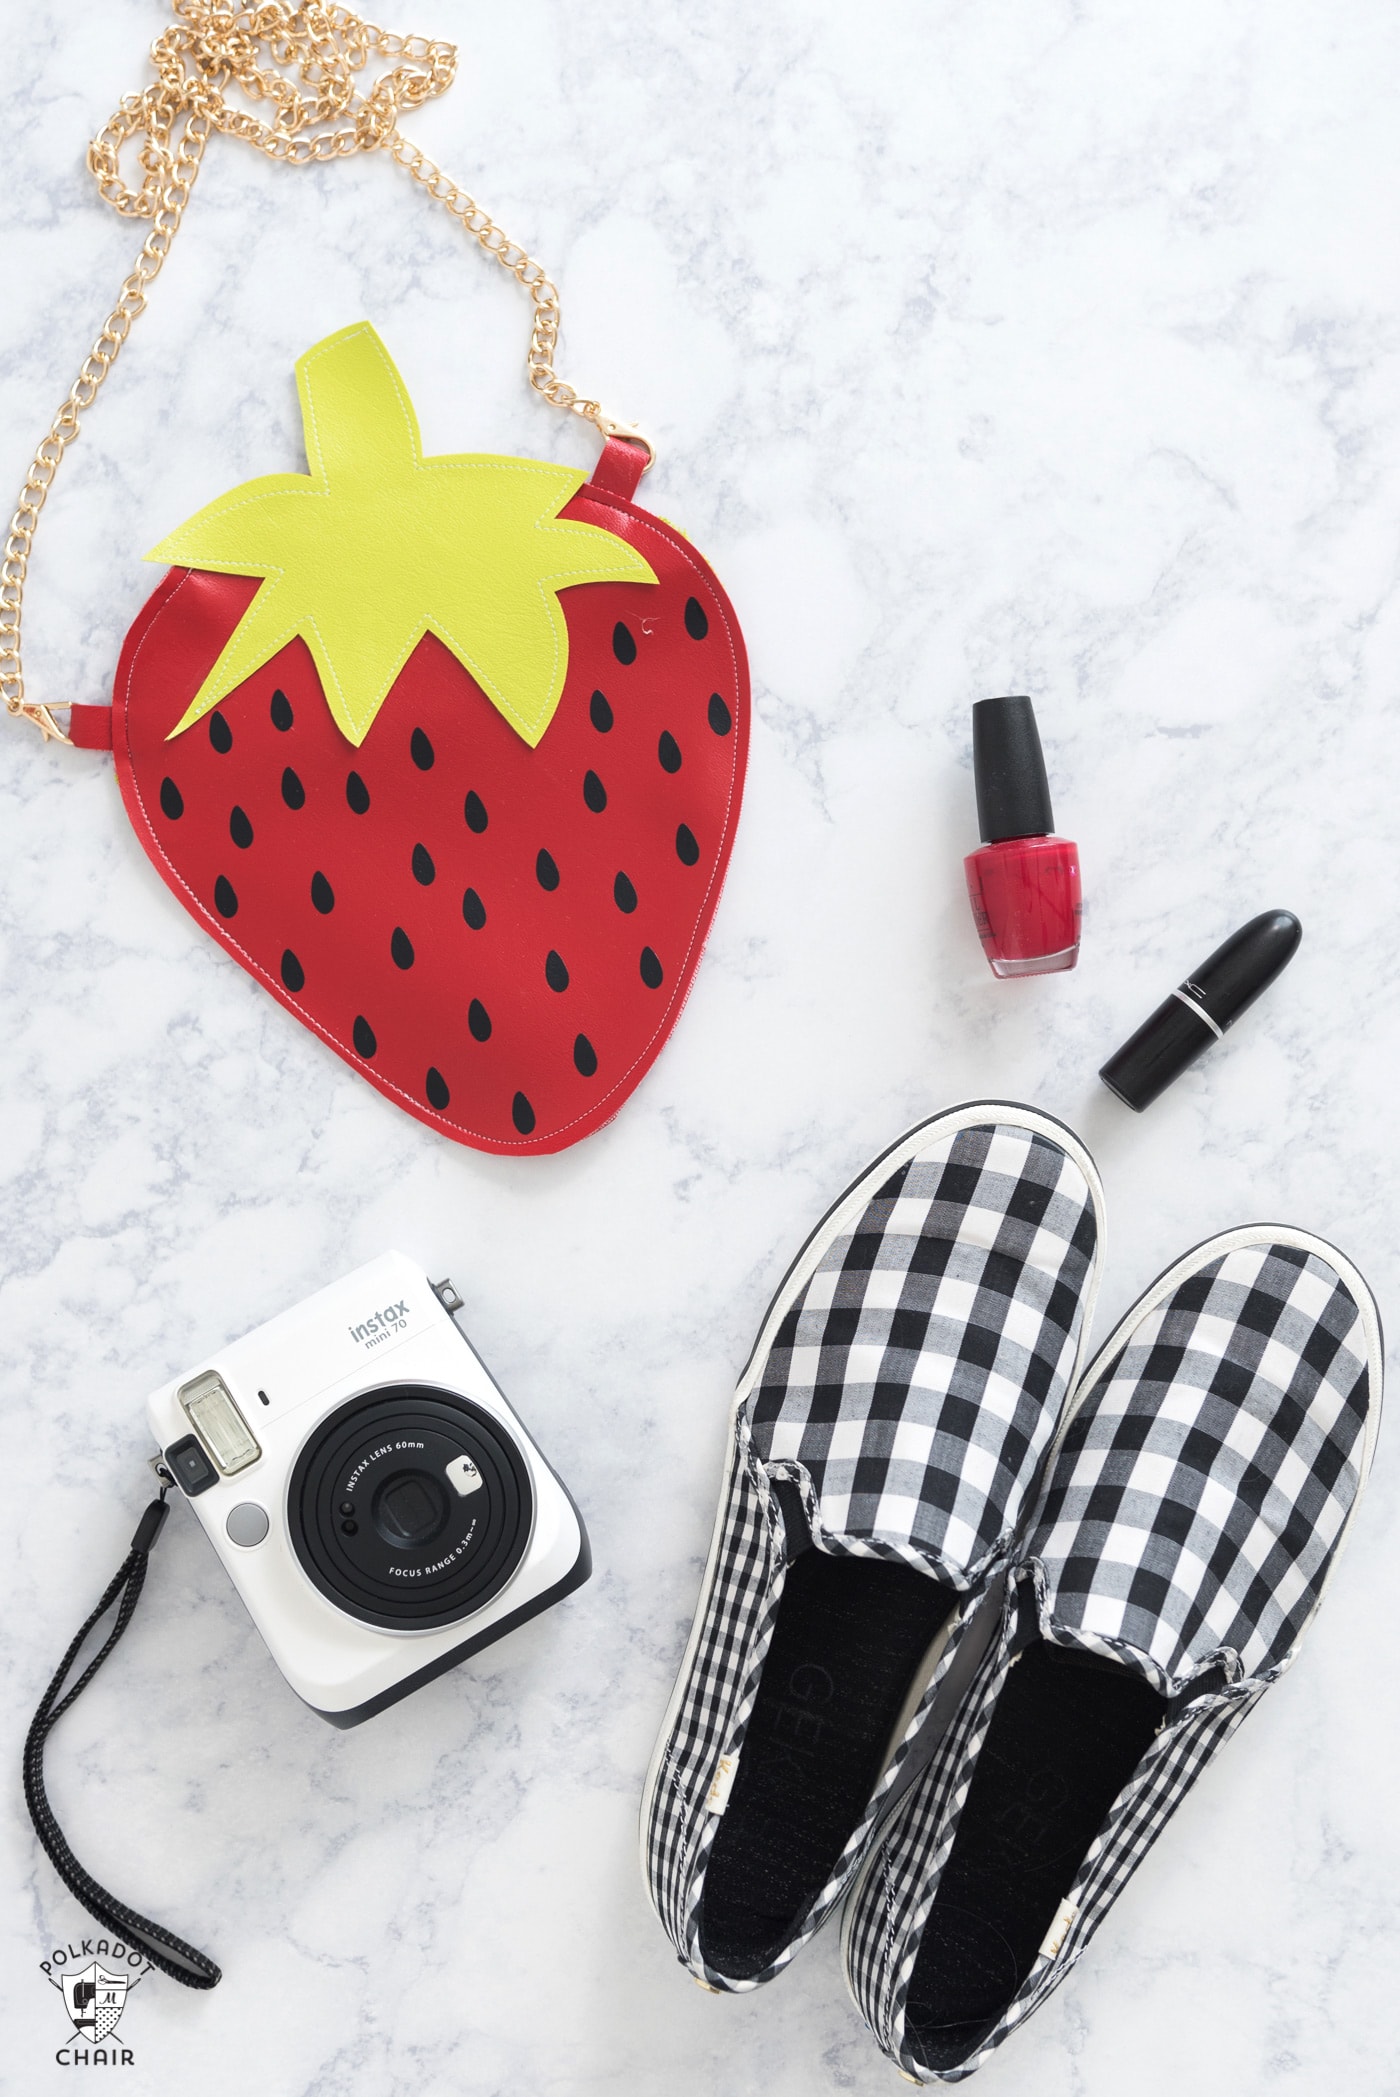
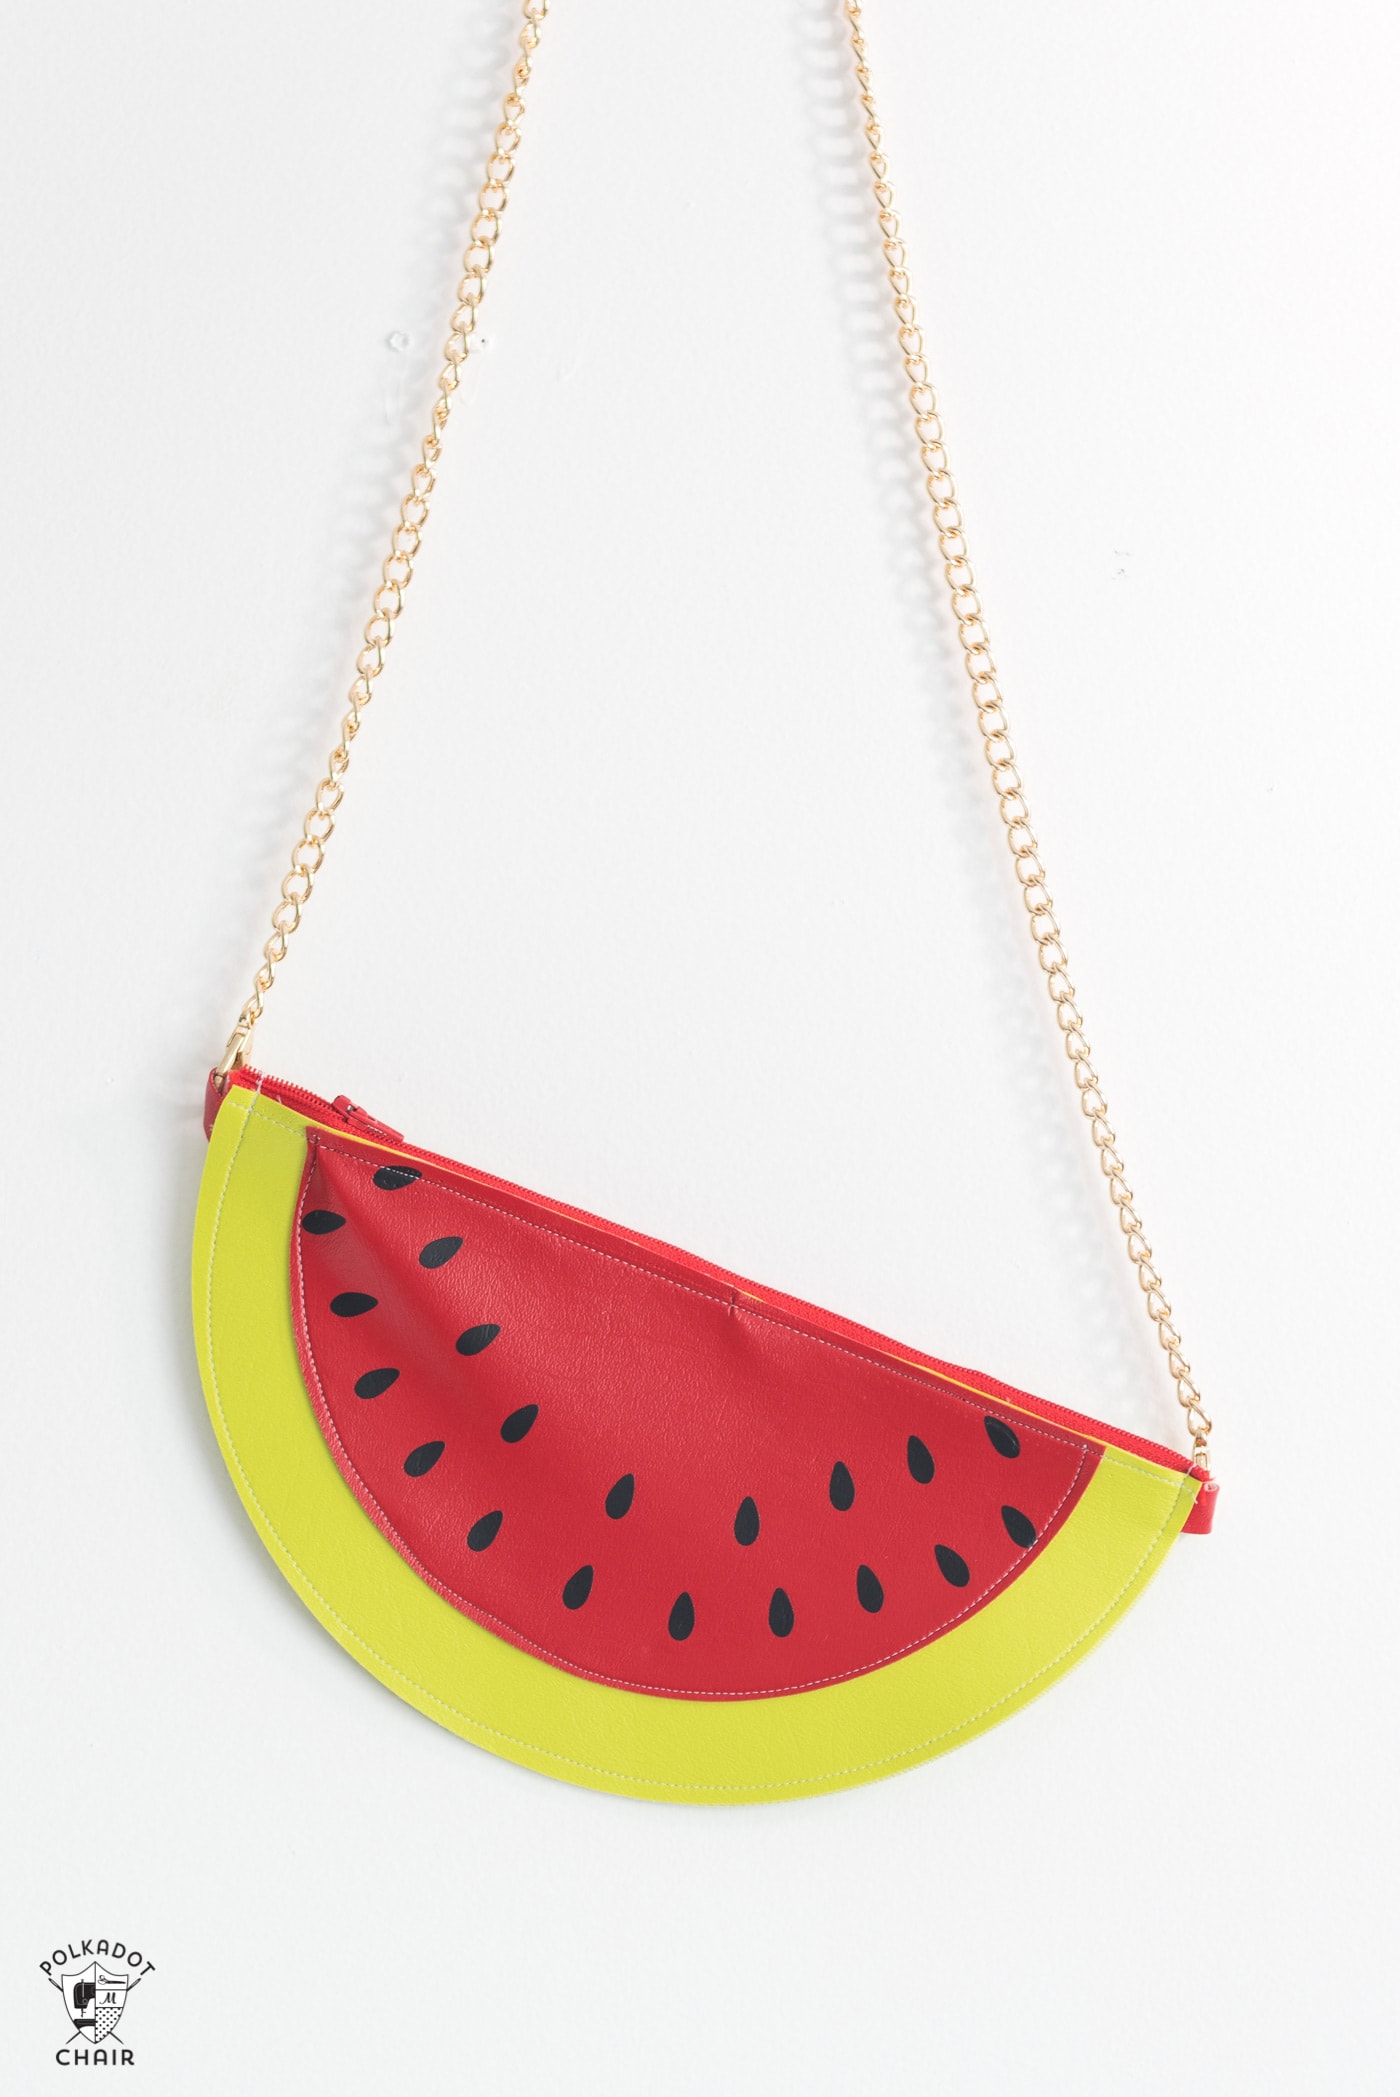
I decided that I’d love to make some fun, bright clutches and bags to dress up a few of my summer outfits. The 4th of July is just around the corner, and I think the Watermelon bag in this tutorial is the perfect thing to wear to dress up your favorite outfit.
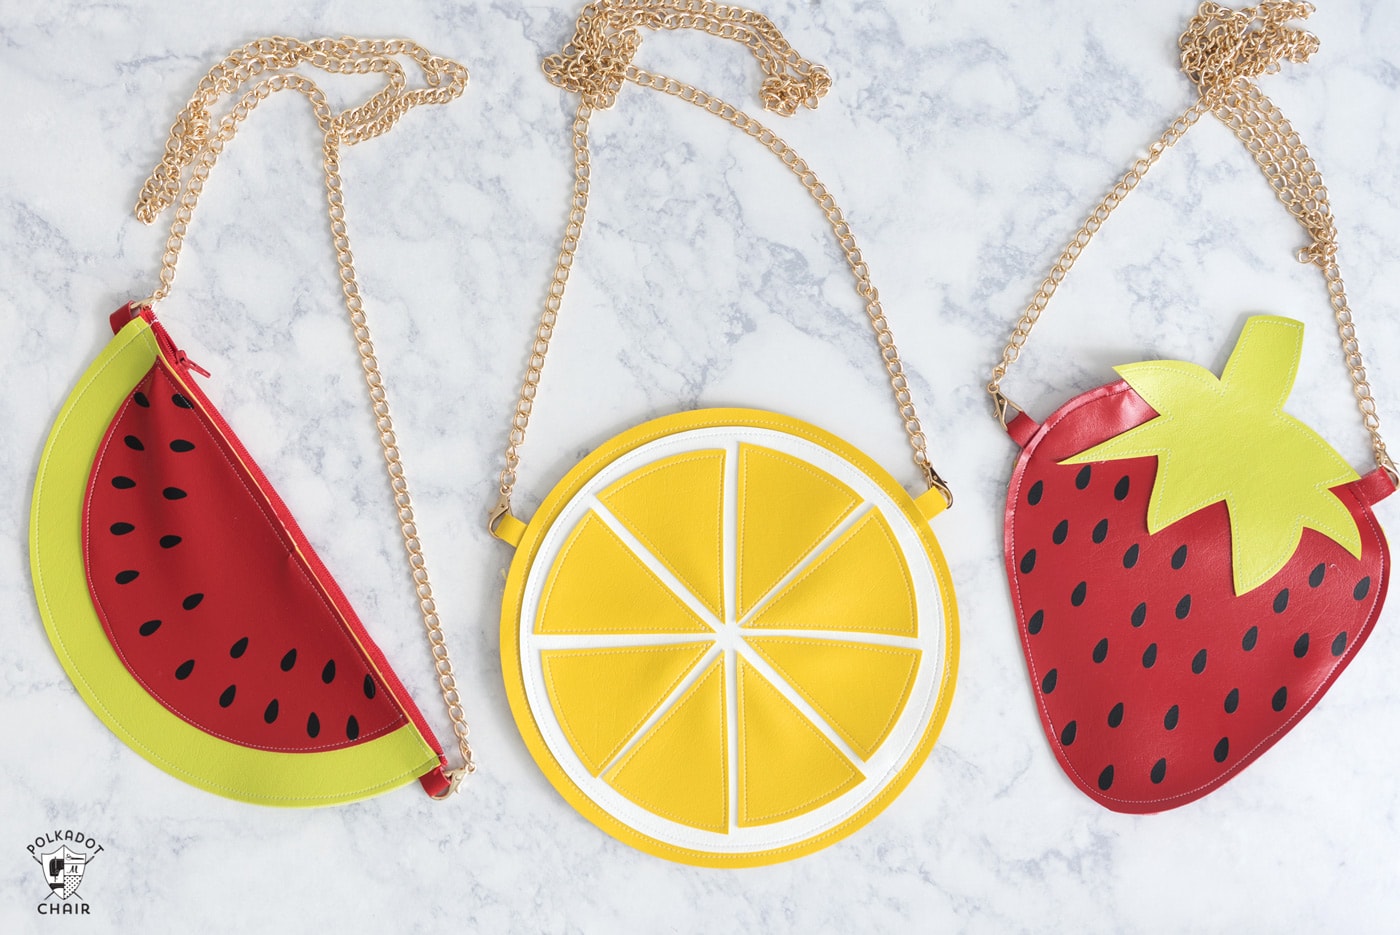
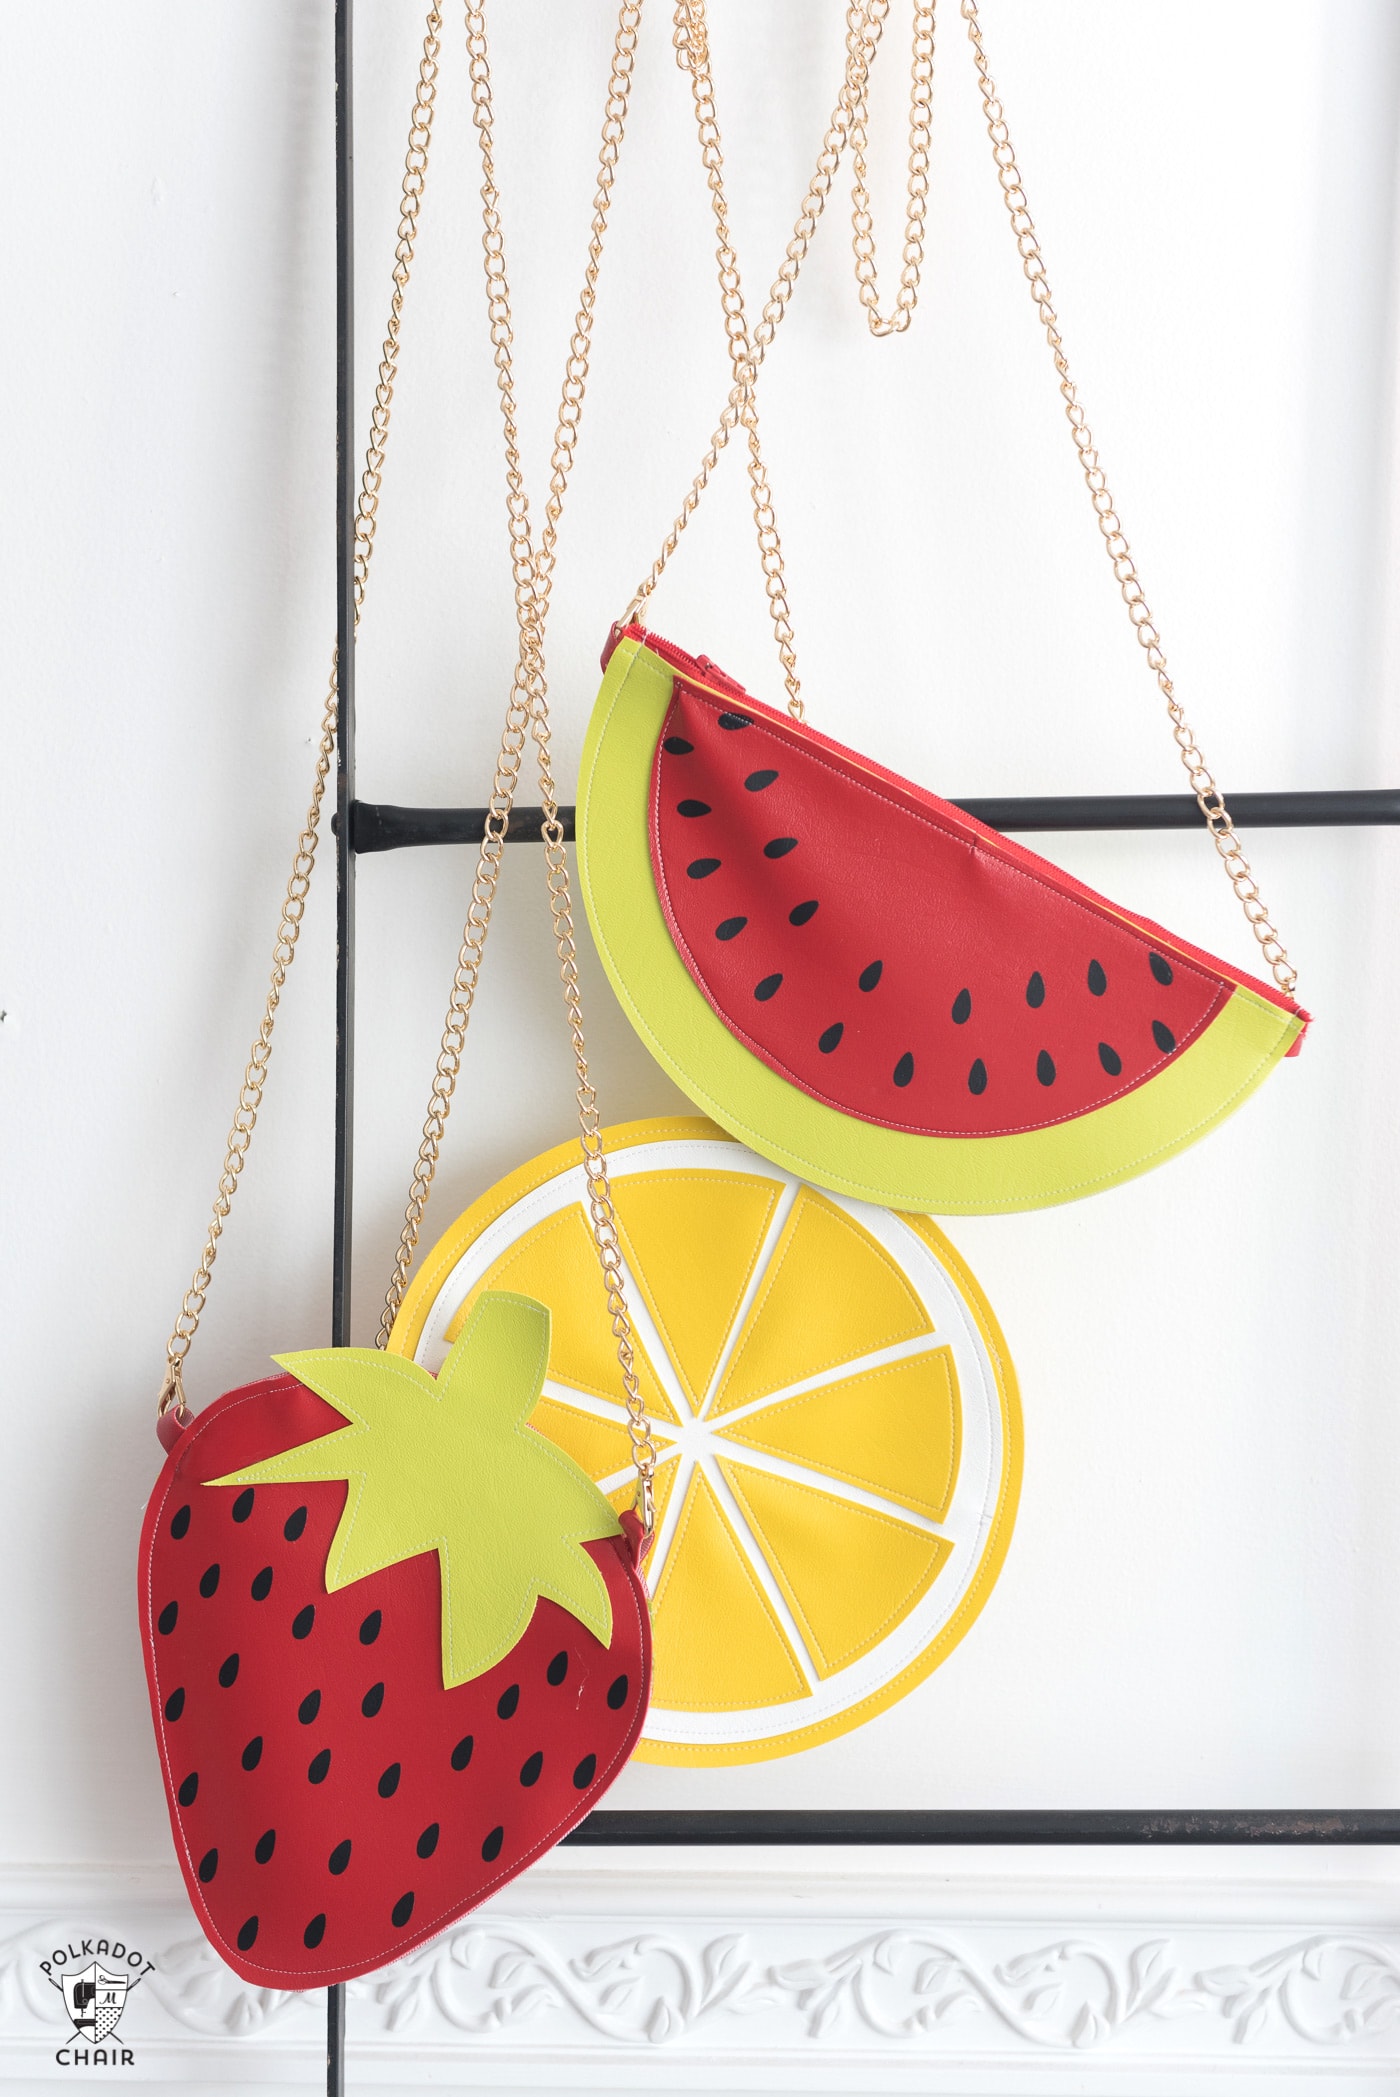
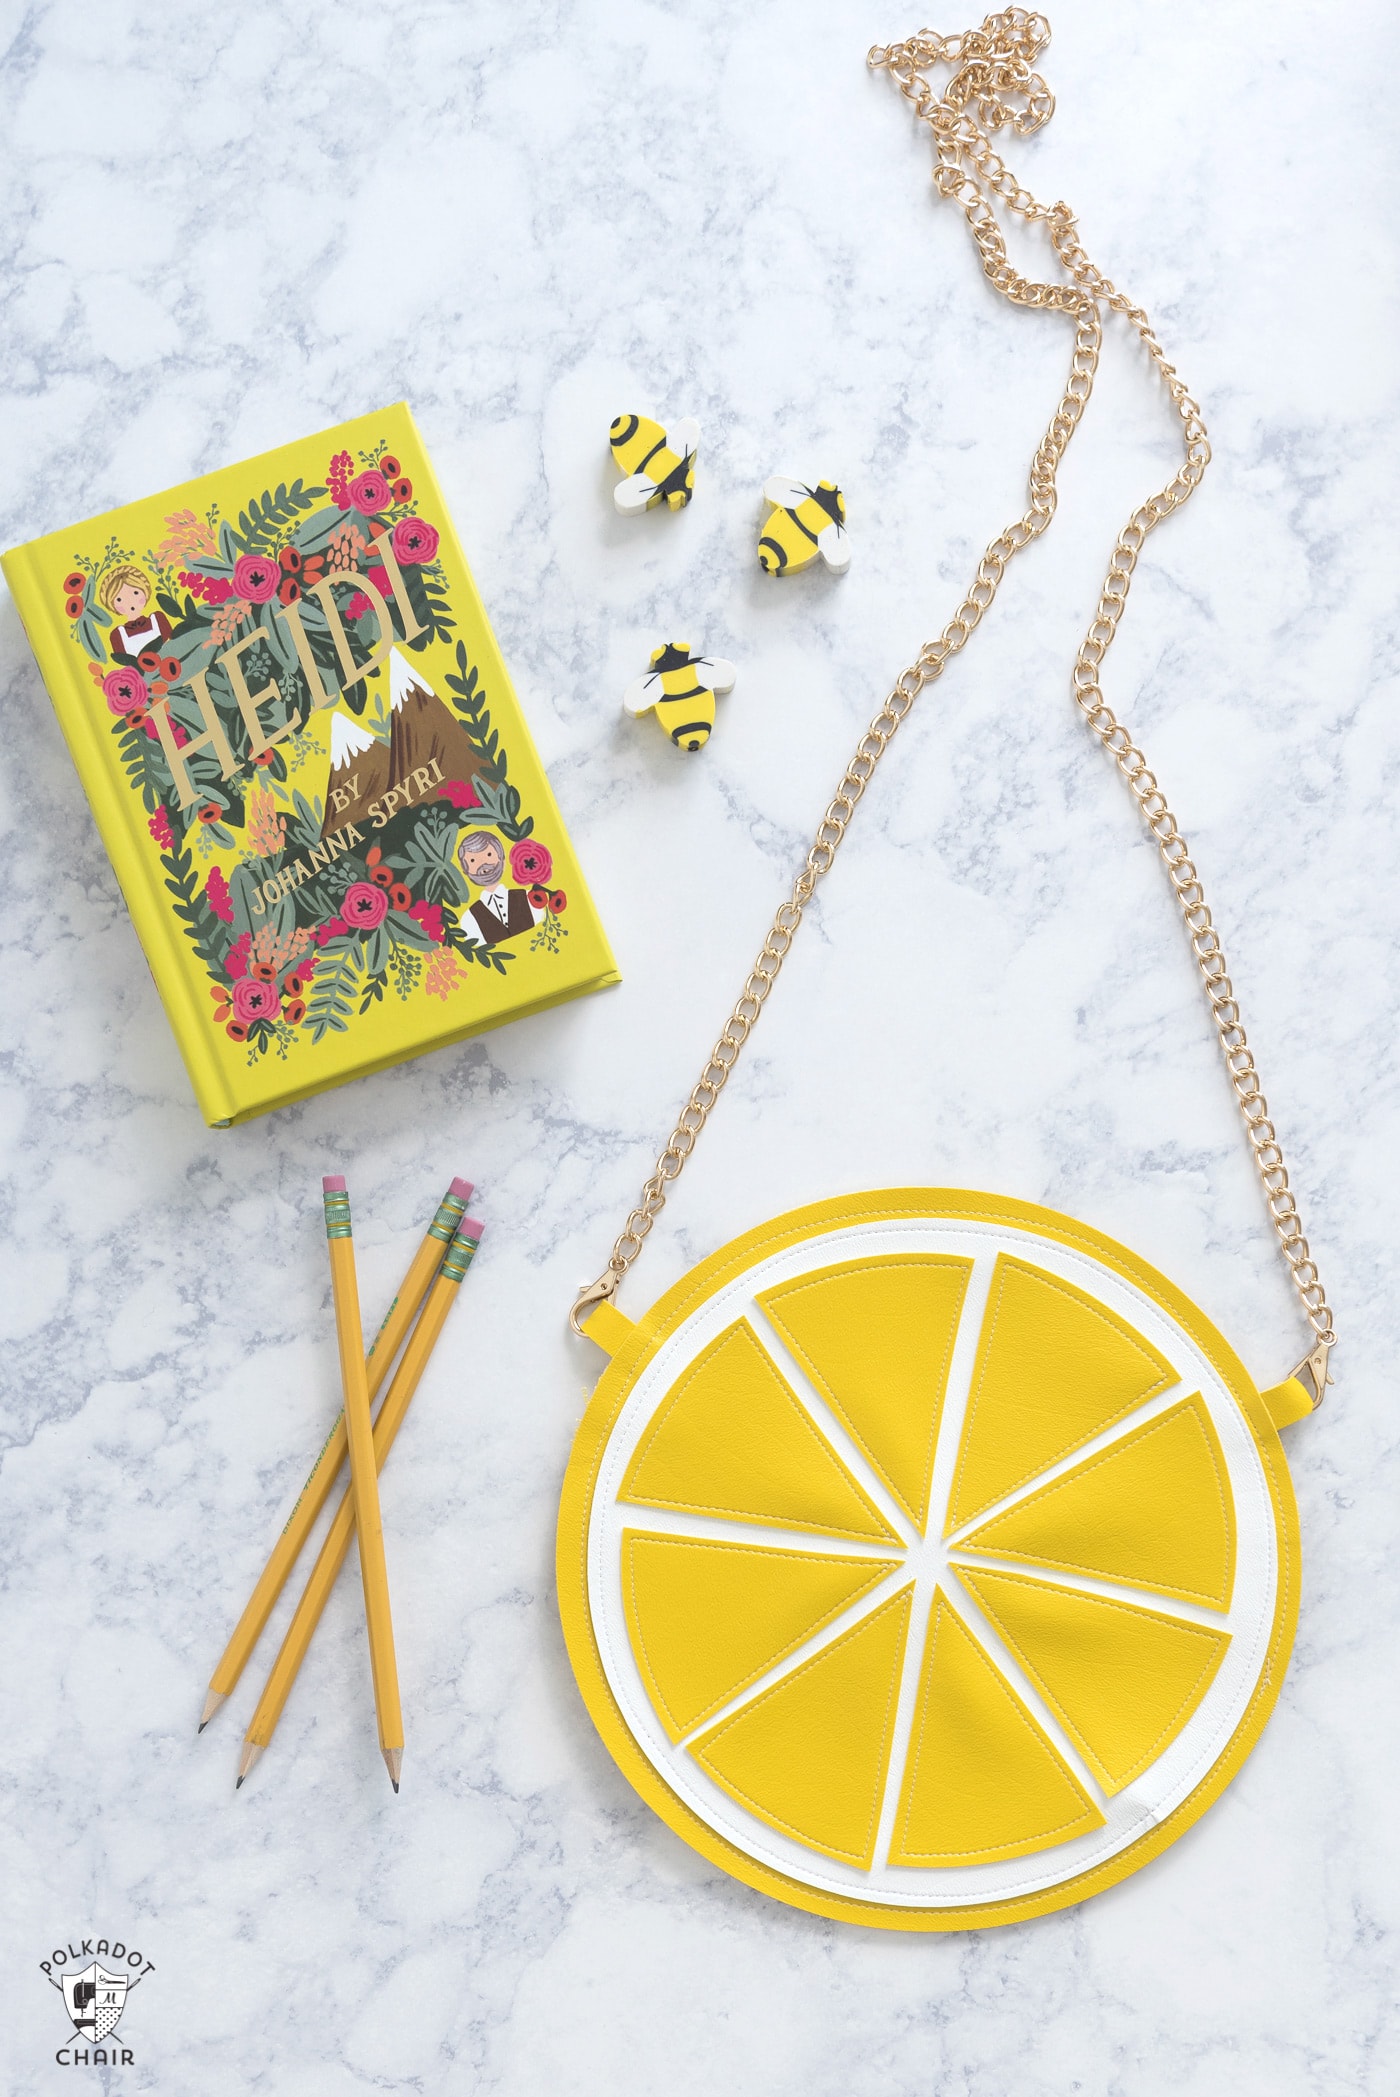
Lemon, Watermelon, and Strawberry Bag Patterns
All 3 of these bags have a zipper closure. It’s SUPER easy to sew the zippers into these bags, so don’t be intimidated by that step. The watermelon bag has a top zip closure, and the lemon and strawberry bags have a back zipper closure.
If you’ve not sewn with Marine Vinyl before, it’s not too hard either. You just need to make sure you have a sharp needle in your sewing machine and a Teflon foot for your machine. You can pick up Marine Vinyl at JoAnn, it’s on the back wall.
(the foot in the above photo is a piping sewing machine foot, you’ll use a regular foot)
If you don’t have a Teflon foot, you can put a bit of scotch tape on the bottom of your foot to help it glide over the top of the fabric.
A few things, DO NOT use an iron on this project… it will melt or distort your vinyl too much.
Are you ready to get going?
Strawberry, Lemon, and Watermelon DIY Purse Patterns:
Supplies for DIY Purses
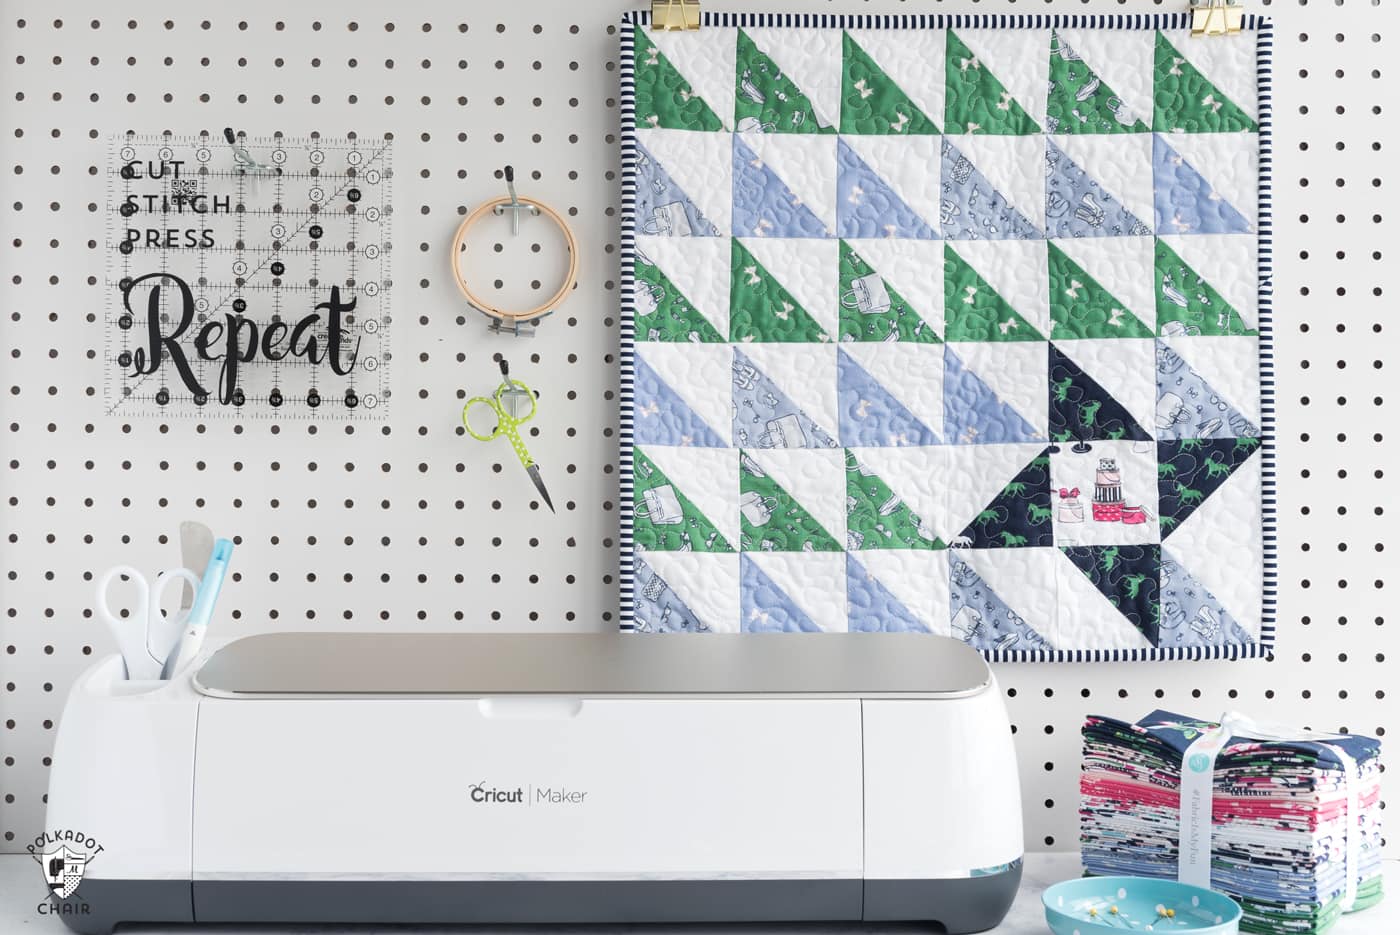
- Cricut Maker 3 (you can get great deals on machine bundles on Cricut.com)
- Cricut EasyPress (I like the large size the best): Make sure you get the EasyPress mat as well.
- Cricut Weeding Tools: (I use the small hook tool ALL the time, making weeding vinyl so much easier).
- StrongGrip Mat
- Cricut Iron-on Vinyl, Black
- Cricut EasyPress
- Sewing Machine
- Teflon Foot for Sewing Machine
FREE Cricut SVG Files- Download in our Cricut Library by Clicking HERE
For Lemon, Strawberry & Watermelon Crossbody Bag Patterns:
1/2 Yard Marine Vinyl – I used lime green, red, yellow and white Vinyl
Link Crossbody Bag Straps (these are the ones I purchased)
12″ or longer polyester zipper (MUST be polyester)
E6000 Glue (for Strawberry Bag)
Glue Stick
Binding Clips
Pins
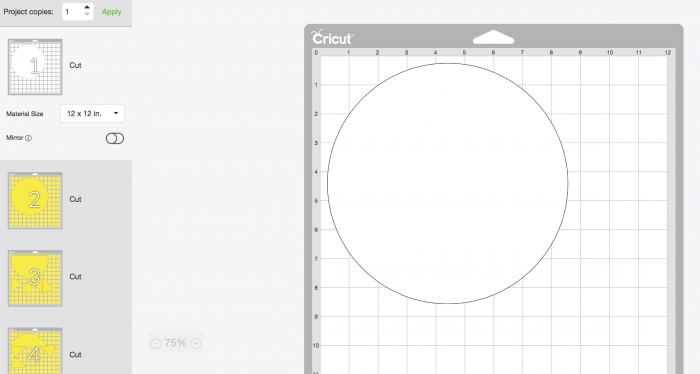
Uploading the Bag Patterns into Cricut Design Space:
Download the SVG files from the Cricut Downloads Page. Save them to your computer then open Cricut Design Space. Start a new project and click the UPLOAD button on the left toolbar. Select the file from your computer and click upload. Name the file something that you’ll recognize then insert the image into Design Space.
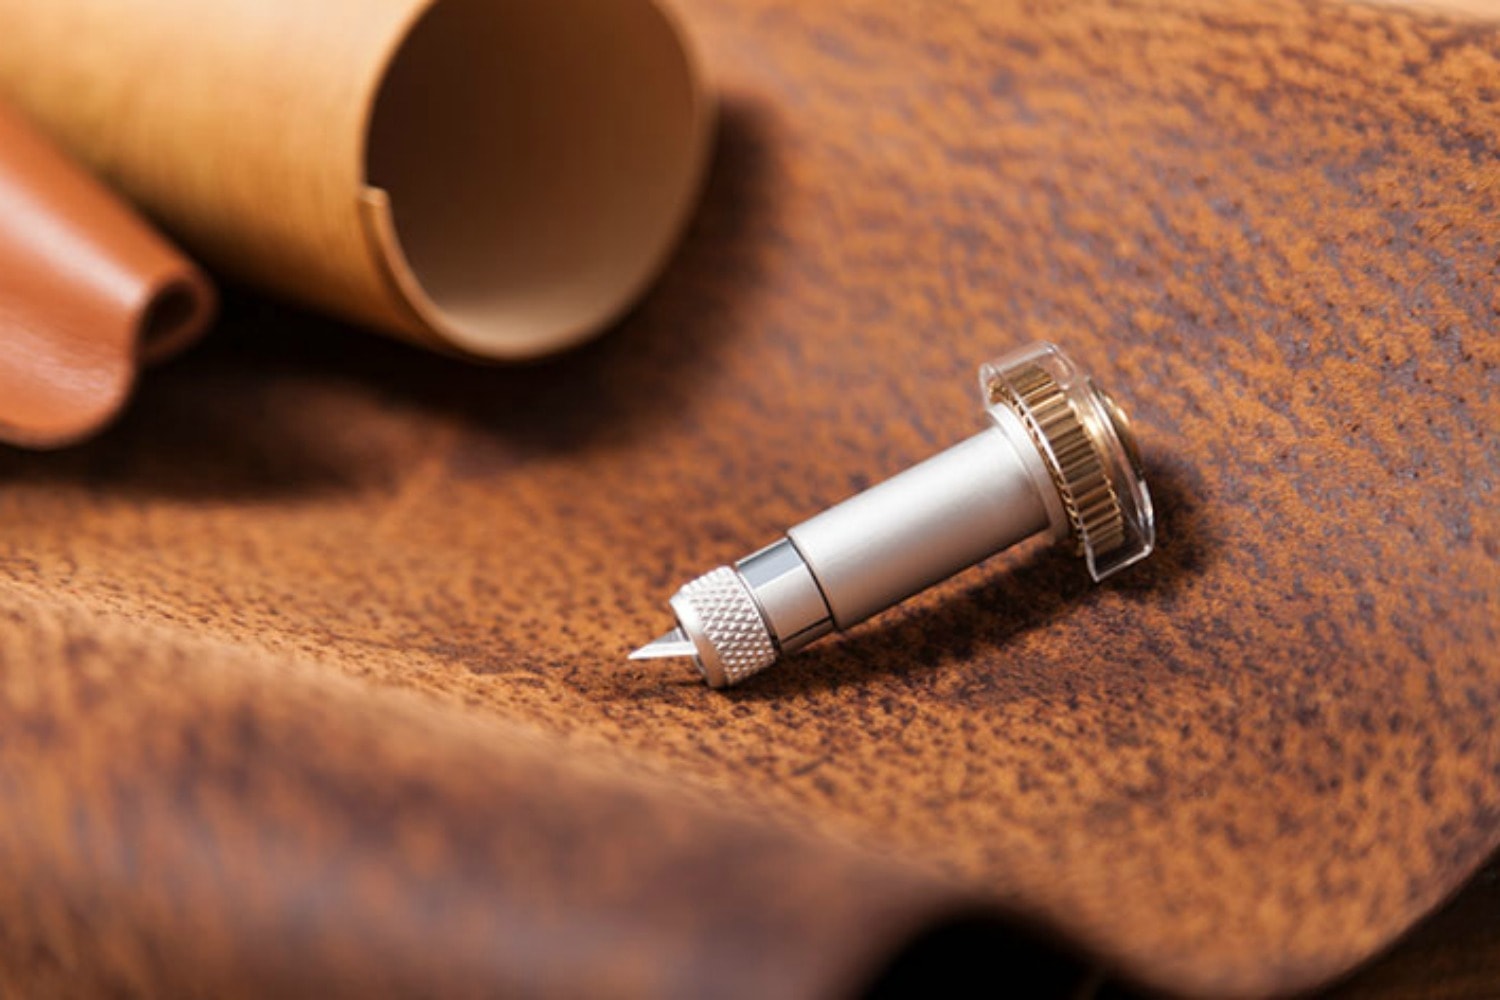
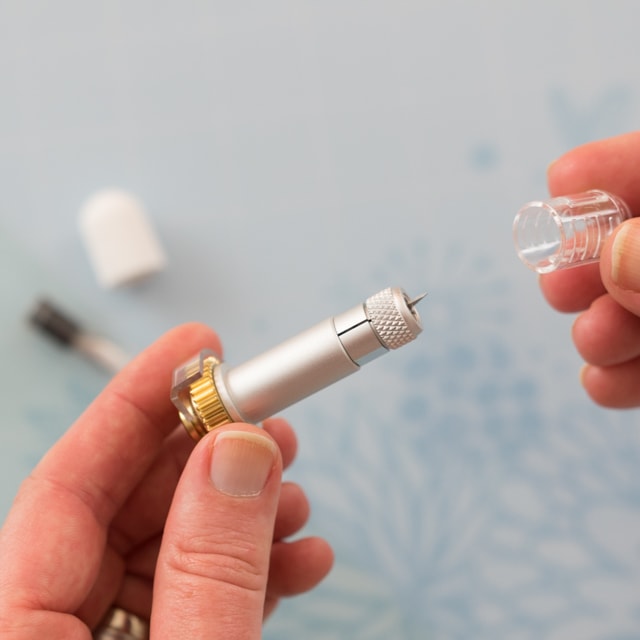
How to use the Cricut Maker Knife Blade
(Image from Inspiration.Cricut.Com)
For this project, we are going to use the NEW Cricut Knife Blade. It’s like a tiny yet powerful Exacto knife. It can cut many types of leather, including Basswood and Balsa! I played around with it quite a bit this week, and I’m amazed at what it can cut.
The Marine Vinyl for this project cuts easily with the knife blade. There is not a Marine Vinyl setting in Design Space. I used the Garment Leather 2-3oz setting, and it worked perfectly.
Remove the blade from your machine and install the knife blade. It is installed the same way that the rotary blade is installed. Just line up the wheels and click it in place. The machine is “smart” enough to know that the knife blade is installed; you don’t need to tell it that it is.
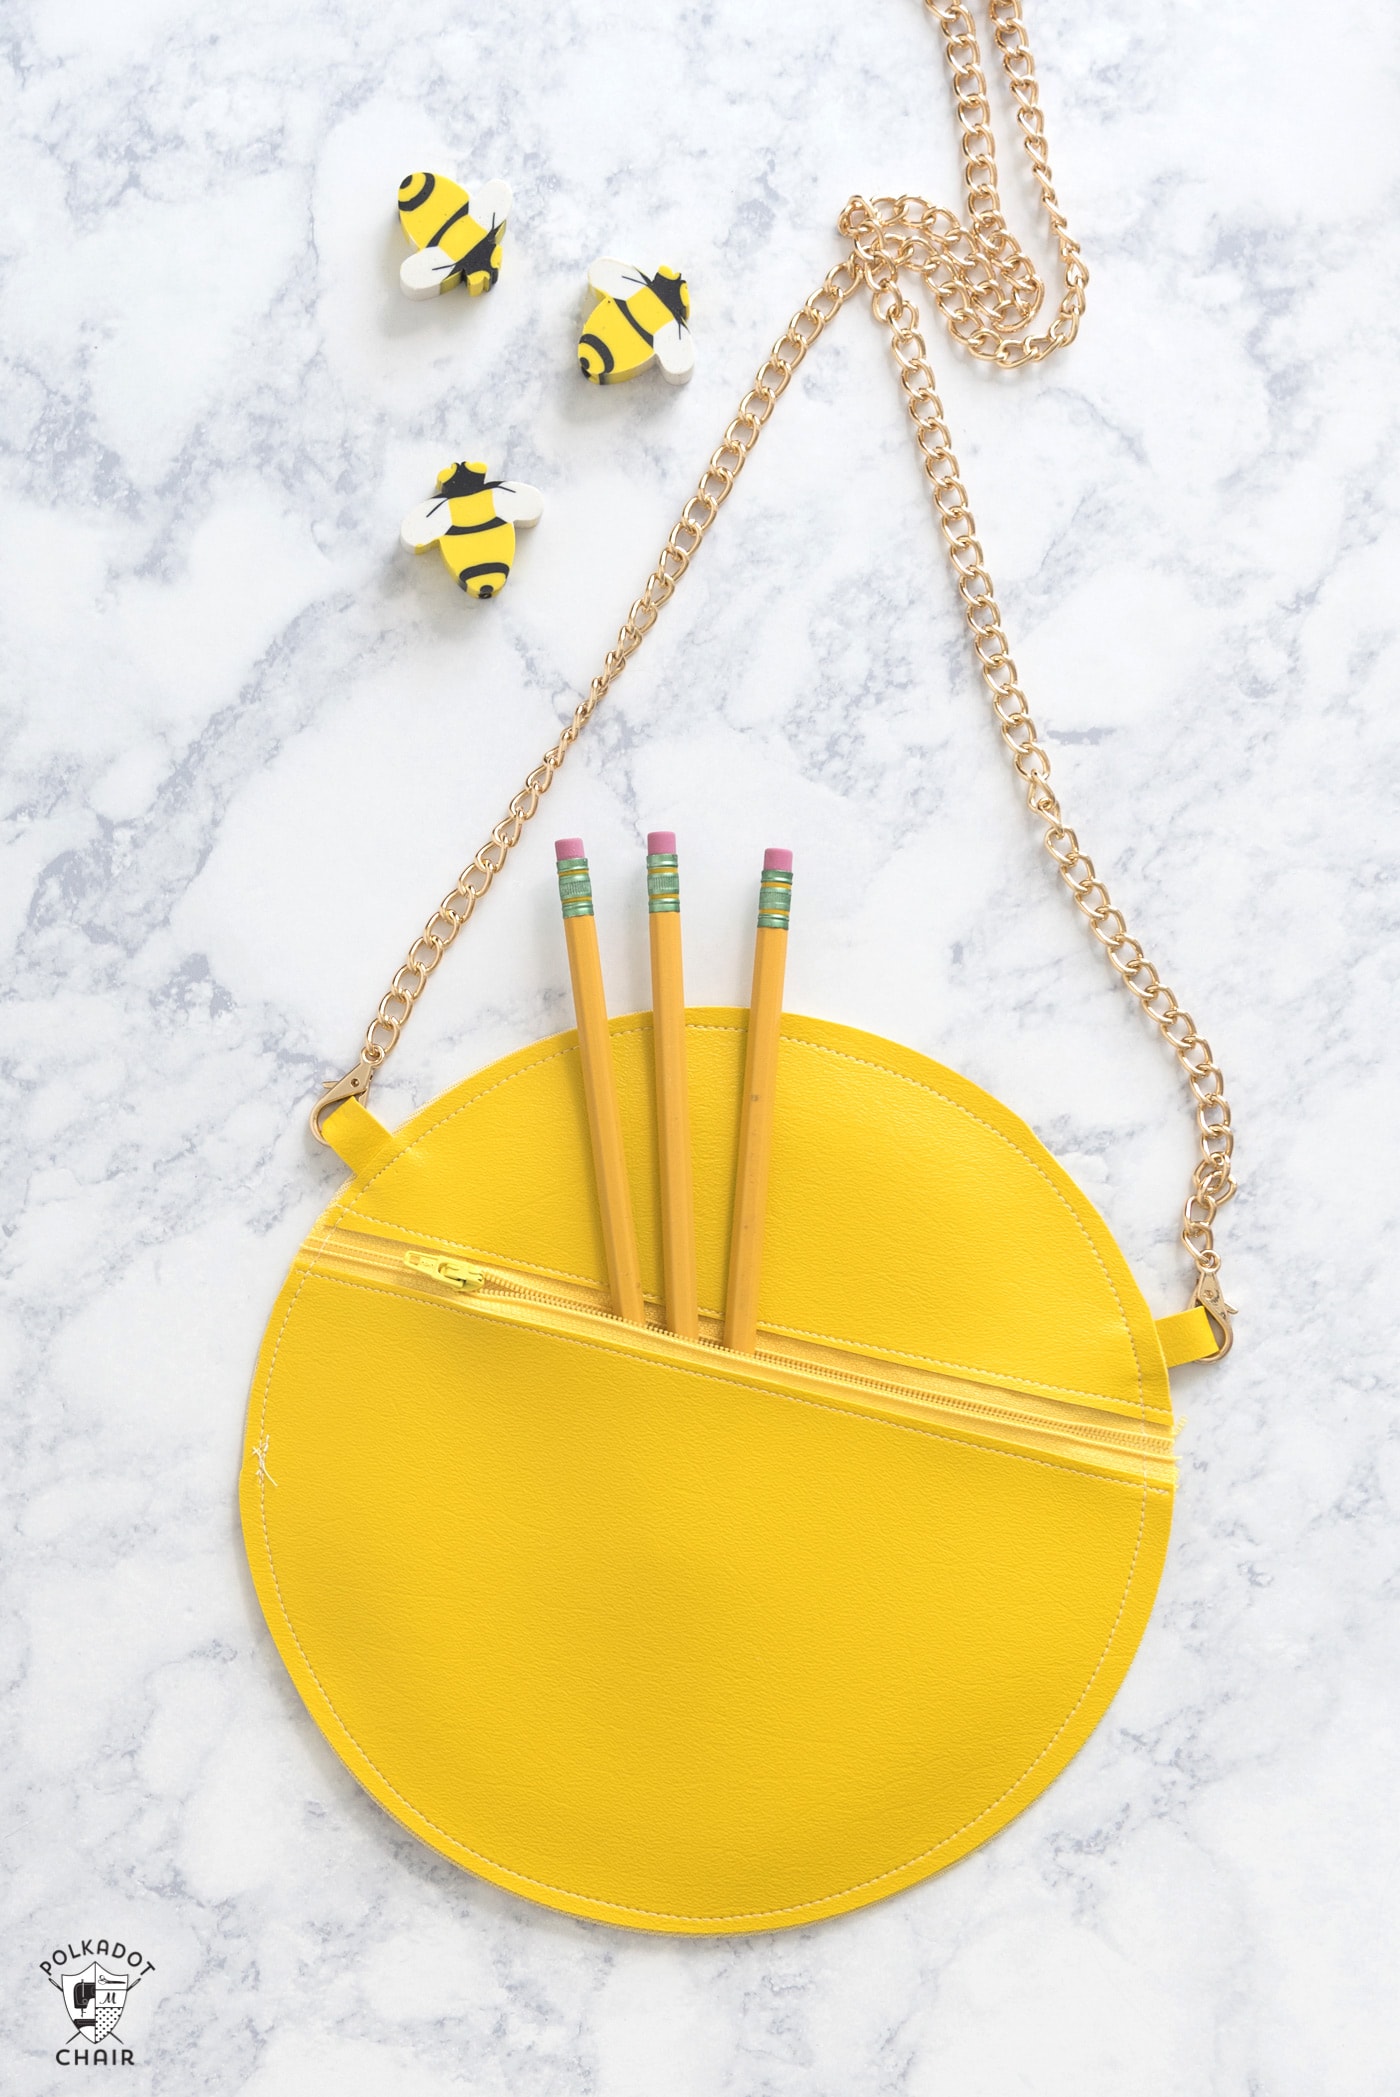
How to Make a Lemon Purse
Okay, now are you ready to make a purse??
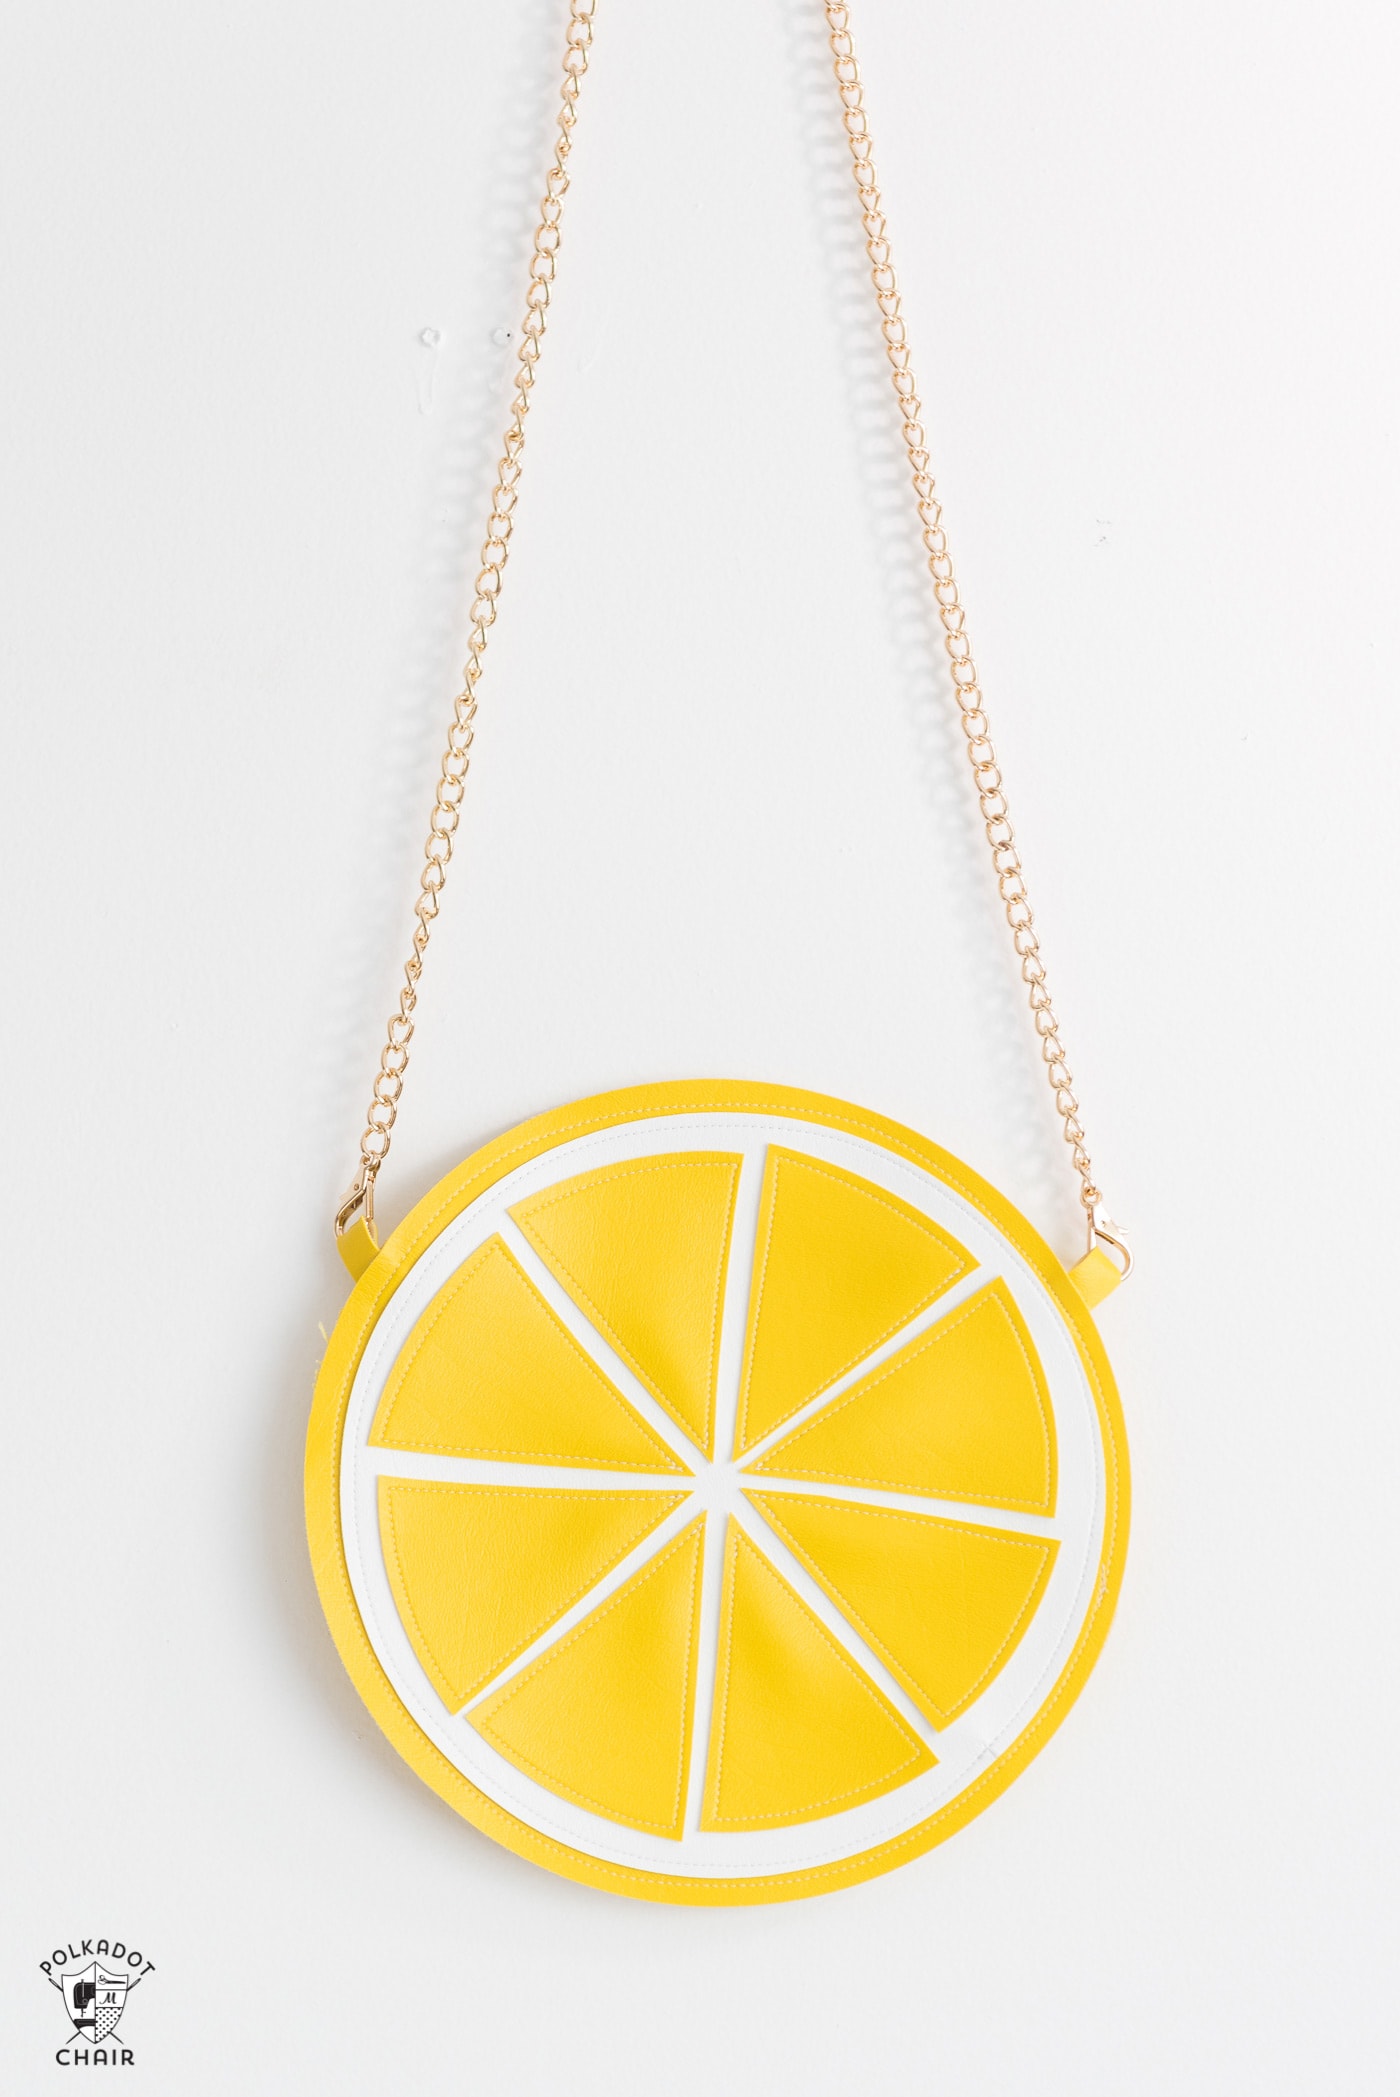
I’m going to teach you how to make all 3 fruit crossbody bags, but let’s start with the Lemon Bag. You’ll repeat a few steps when making the Strawberry or Watermelon bag, so be sure to read through this section even if you’re making a different bag.
Insert the Lemon SVG file into Design Space.
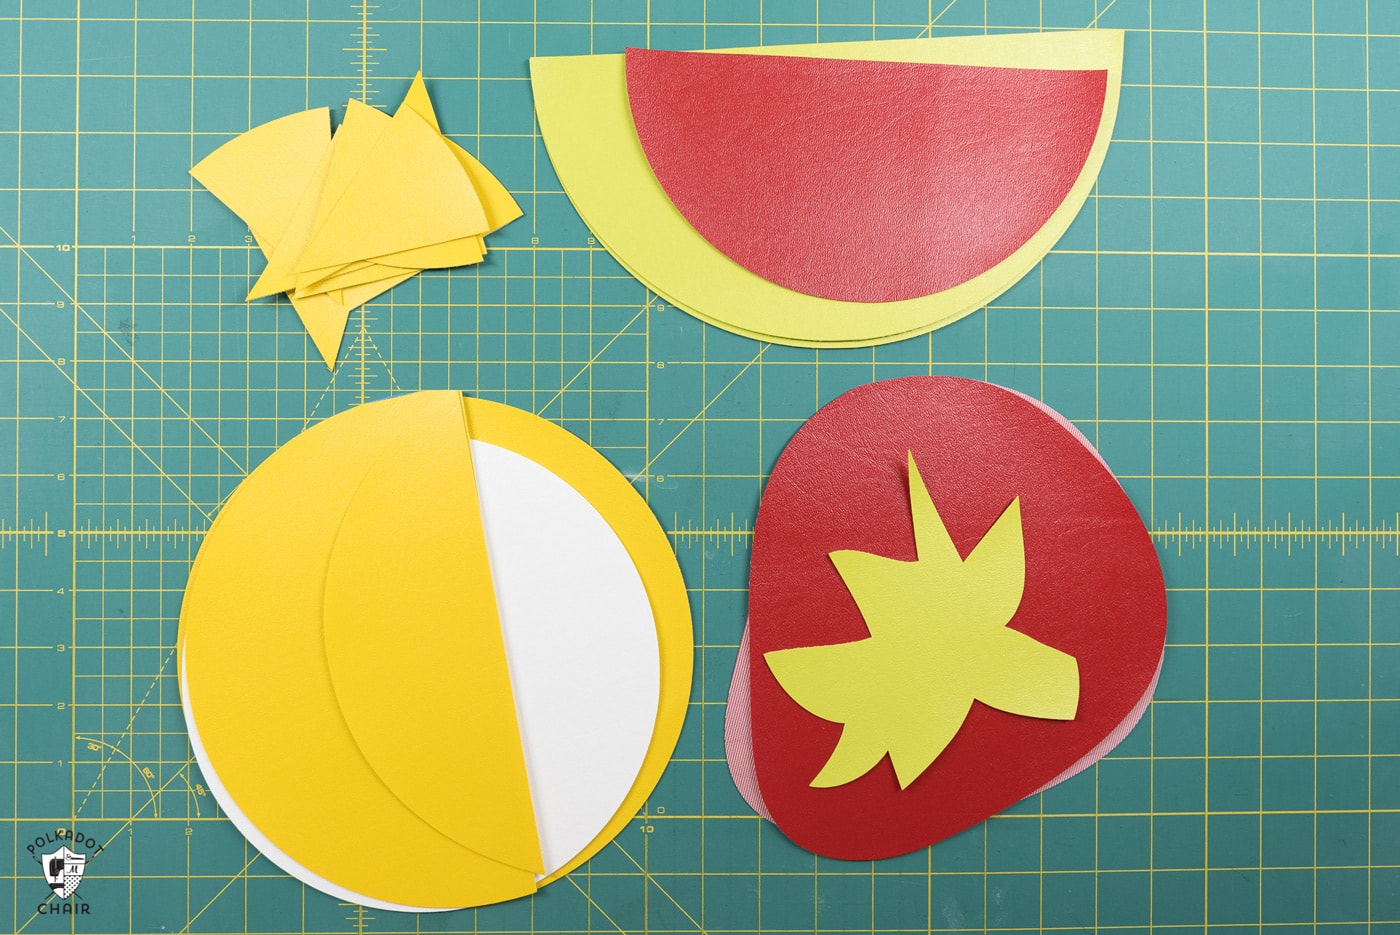
Cutting:

Cut 4 pieces of vinyl to 11″ x 11″ (one white and 3 yellow). Click Make It to cut the pieces out for the bag. You can resize the bag if you’d like. The one that I made is 9″ across. If you resize the bag, just make sure you resize ALL of the pieces the same amount.
Prepping the Mat:
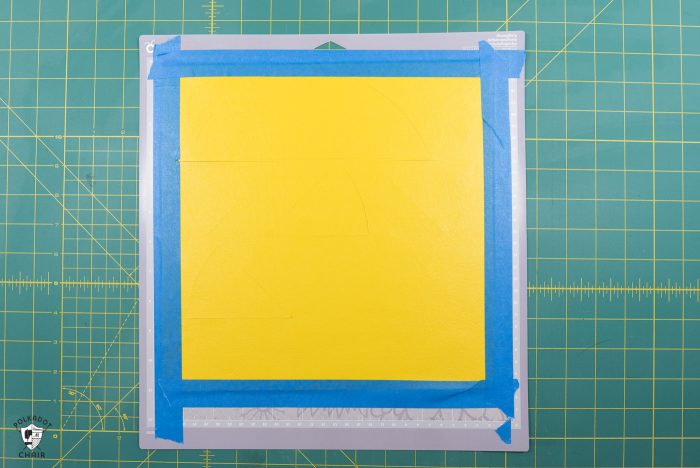
Place the 11″ x 11″ piece of vinyl (in the correct color- the screen will tell you what order it’s cutting the mats in) on the StrongGrip mat with the shiny side up. Place painter’s tape around all 4 edges to secure the vinyl to the mat – the Knife Blade cuts with a lot of force, and the tape helps to ensure that the vinyl does not move around while the machine is working. I did end up cutting 1 mat without the tape (because I forgot), and it worked ok. So just try one and decide if you need the tape.
Load the mat into the machine. Select “Garment Leather” from the materials drop-down menu, then click the Cricut button on the machine to start the cut.
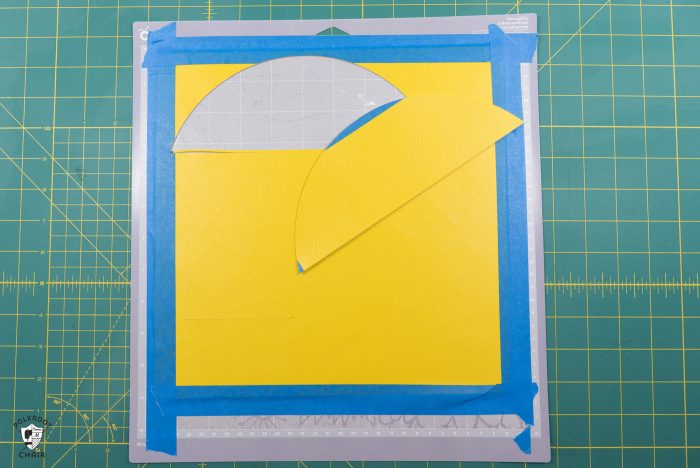
When the cut is finished, unload the mat, remove the pieces and load the next vinyl/mat into the machine. You’ll end up with 4 mats altogether – 1 white and 3 yellow.
Construction:
Let’s start with the zipper.
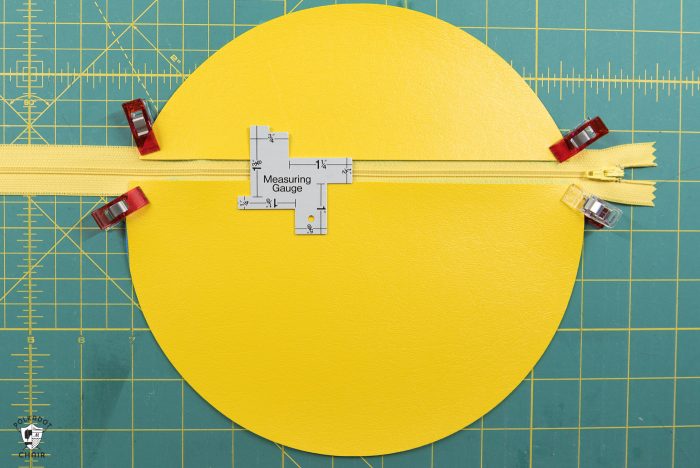
Pin the right side of the zipper to the wrong side of the two partial circle pieces. You can use a couple of pins for this step if you like since you’ll be sewing through the vinyl and it will hide the marks that the pins will leave.
With a Teflon foot on your sewing machine, stitch close to the edge of the vinyl on both sides of the zipper. The pattern is designed to have a 1/2″ space between the 2 pieces for the zipper, so double check that you have 1/2″ exactly of the zipper showing.
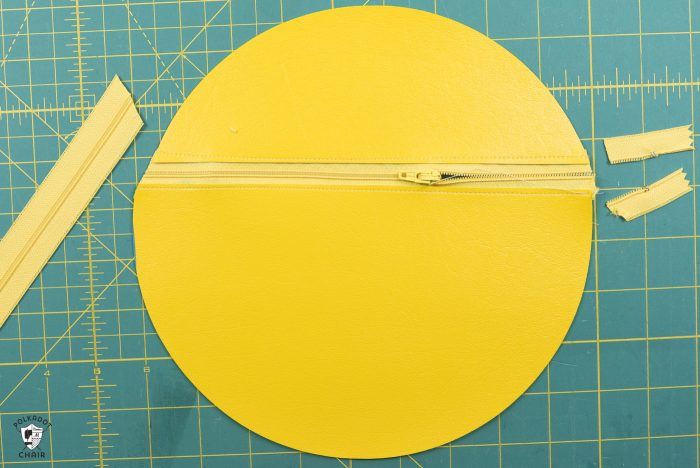
Unzip the zipper so that the zipper pull is in the bag (not hanging off the edge) and trim the excess parts of the zipper off (you can just cut them with scissors).
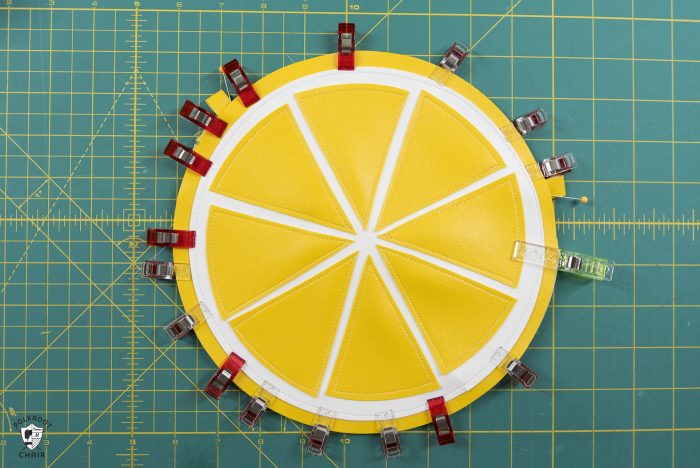
To Sew on the Lemon Wedges:
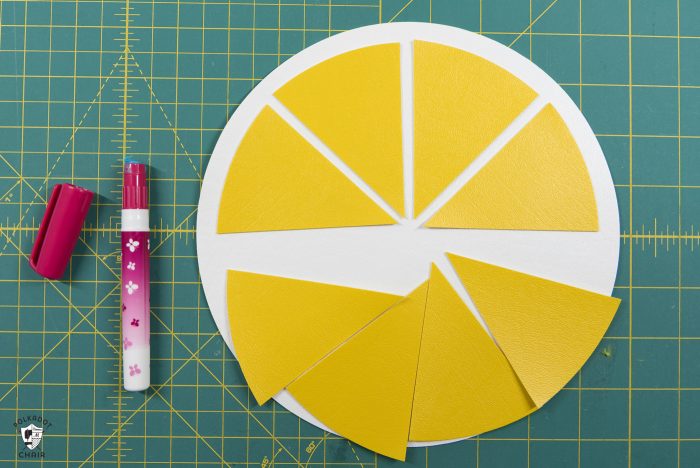
To make the front of the bag, lay the lemon wedges out on top of the white vinyl circle. Space them how you’d like. I used a bit of glue to hold the pieces in place as I worked. However, you’ll also need some binding clips or pins to also hold the wedges in place.
I found it easier to work on 1/2 of the bag front at a time. Place 4 wedges then stitch around the edge of each wedge to secure it to the white circle. Just use your Teflon foot and stitch close to the edge of the yellow wedge.
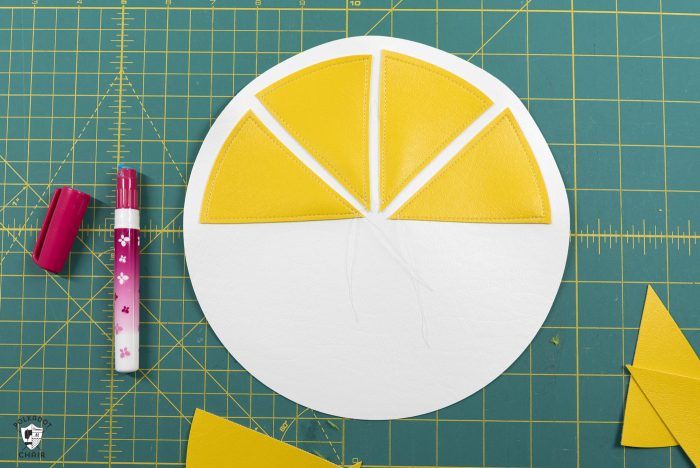
When you’re done sewing all of the wedges, layer the white circle on top of the yellow circle and stitch it in place stitching ONLY on the white circle.
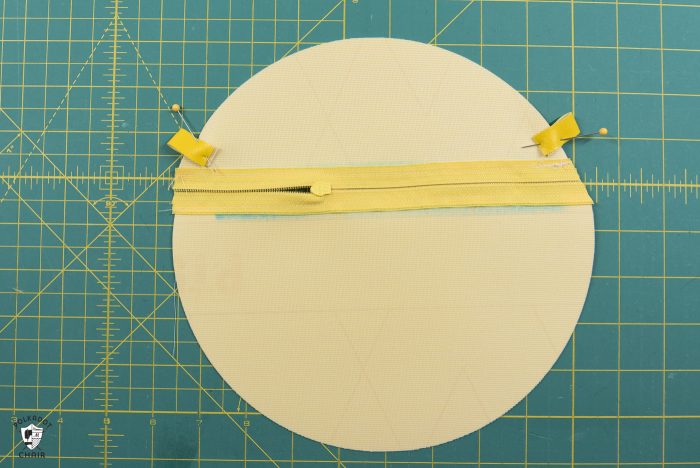
Cut 2 pieces of Vinyl 1/2″ x 2″ and fold them in half with wrong sides facing. Pin one piece to each side of the zipper piece, just above the zipper.
Finishing:
Layer the bag front piece on top of the zipper piece, and secure it with binding clips all the way around. Stitch the bag front to the bag back close to the outside edge of the bag. You’ll stitch right over the top of the zipper and the tabs that you pinned to the bag.
If for some reason the pieces shifted as you stitched them together, trim any excess vinyl from the front or back piece so that the front and back pieces are the same size again.
How to Make a Strawberry Purse

Upload the Strawberry File into Cricut Design Space the same way you did for the Lemon bag.
After you’ve inserted the image into Design Space, CLICK on the layer with the strawberry seeds, then click ATTACH, then click HIDE.
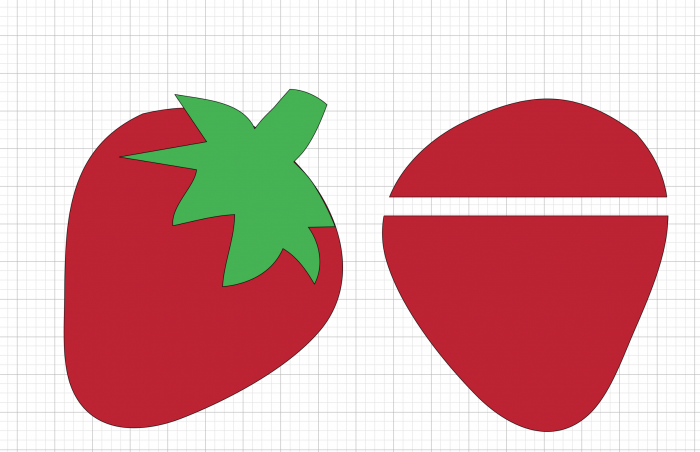
You’ll end up with these images left.
Cut the Strawberry bag pieces out of the Red and Green vinyl the same way you did for the lemon.
Next, you’ll need to cut out the Strawberry Seeds.
Back in the project, click HIDE on the red and green pieces, then click to show the seed layer.
Load a piece of Black Iron-On Vinyl onto a standard grip mat and cut it following the directions on the screen.
Remove the excess vinyl, so that you’re only left with the seed pieces.
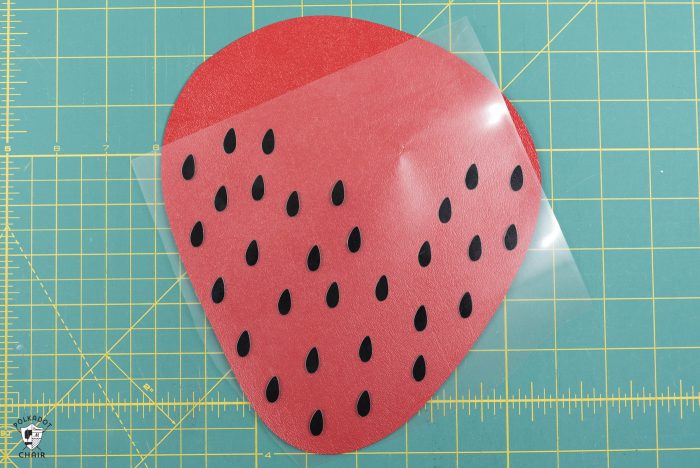
Place the seeds on top of the front of the bag front piece.
Set your Cricut EasyPress to 265 and 10 seconds.
Using a Teflon or a pressing sheet, use the EasyPress to adhere the seeds to the front of the bag. Do this ONLY for 10 seconds. The vinyl will lose it’s shape a bit when it’s heated so you want to heat it only as much as is necessary to adhere the vinyl to the bag front.
Peel away the plastic sheet.
Construct the Zipper:
Add the zipper to the two bag back pieces using the same method you used for the lemon bag.
Assemble the Bag:
Top stitch around the green stem piece. This is just for looks, you’ll not be sewing the stem to another piece of fabric.
Cut 2 pieces of vinyl to 1/2″ x 2″. Pin to the zipper bag piece just above the zipper.
Layer the Strawberry bag front and back pieces together, wrong sides facing. Clip together using binding clips, and stitch the bag together. Again, you’ll stitch right over the top of the zipper and the tabs.
To attach the Stem:
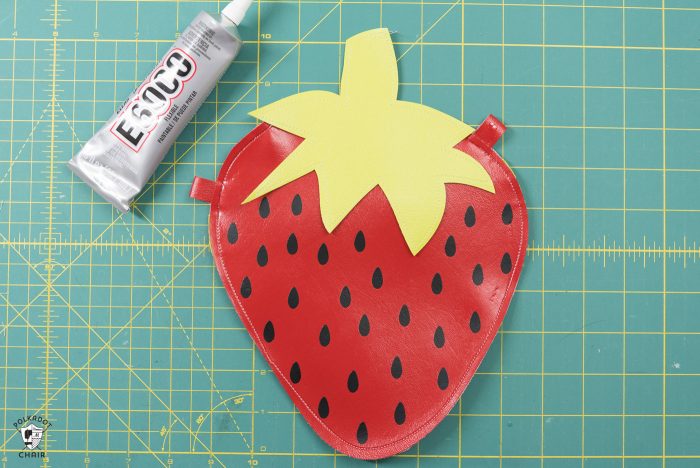
Place a bit of E6000 glue onto the wrong side of the stem piece. Do NOT put glue on the top of the stem as that part does not get glued down.
Put the stem in the correct place on the front of the bag. You can kind of tell where it goes based on where the seeds lie on the bag. Press in place with your fingers, and allow to dry.
How to Make a Watermelon Purse
The Watermelon Bag is constructed the exact same way as the Strawberry bag with the exception of the last step.
Upload the file into Design Space, then cut out the bag pieces and the watermelon seed pieces.
Apply the watermelon seeds to the red half circle.
Stitch the red half circle to one of the green half circles. The red piece will be centered on the green piece, and the top edges will be flush.
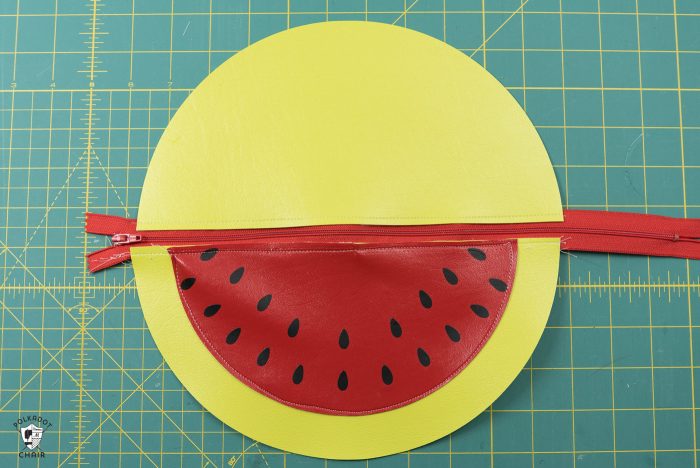
Stitch the zipper to the 2 green half-circle pieces, again leaving 1/2″ of the zipper exposed.
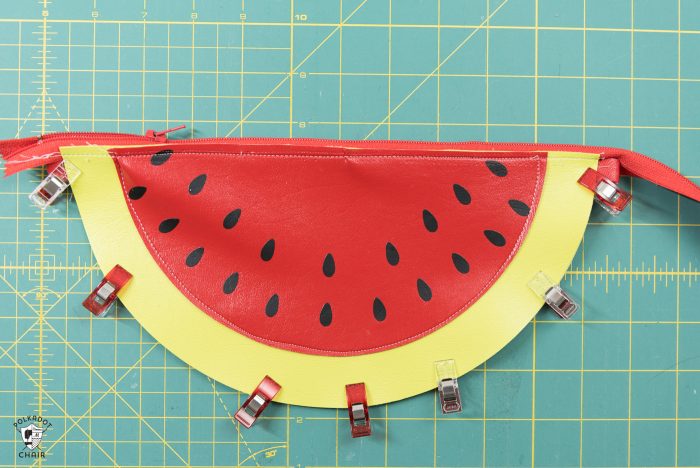
Move the zipper pull so that it’s not hanging over the edge of the bag.
Clip one 1/2″ x 2″ piece of vinyl to each side of the bag, just under the zipper.
Finishing:
Clip the two green half-circle pieces together using binding clips. Stitch around the outside edge of the bag, right over the zipper. Make sure to backstitch a few times when you start and stop your seam.
Trim off the excess zipper pieces, attach your bag chain, and you’re done!!
This is the first project that I’ve created with the Cricut Knife Blade and I was so happy with how easily it cut the fabric. The next thing I’m going attempt is to cut my own purse handles. I’ll be sure to share a tutorial for that when I’ve got it figured out!
Other Helpful Cricut Knife Blade Tutorials:
How to Cut Leather with the Cricut Knife Blade
How to Change the Cricut Knife Blade
Using the Cricut Knife Blade to Cut Balsawood and Basswood
Other Free Cricut Maker Projects:
Fabric Basket Cricut Maker Sewing Pattern
Lined, Personalized Drawstring Bag Sewing Pattern
Tips for Using the Cricut Maker with Existing Quilt Patterns
This is a sponsored conversation written by me on behalf of Cricut. The opinions and text are all mine.