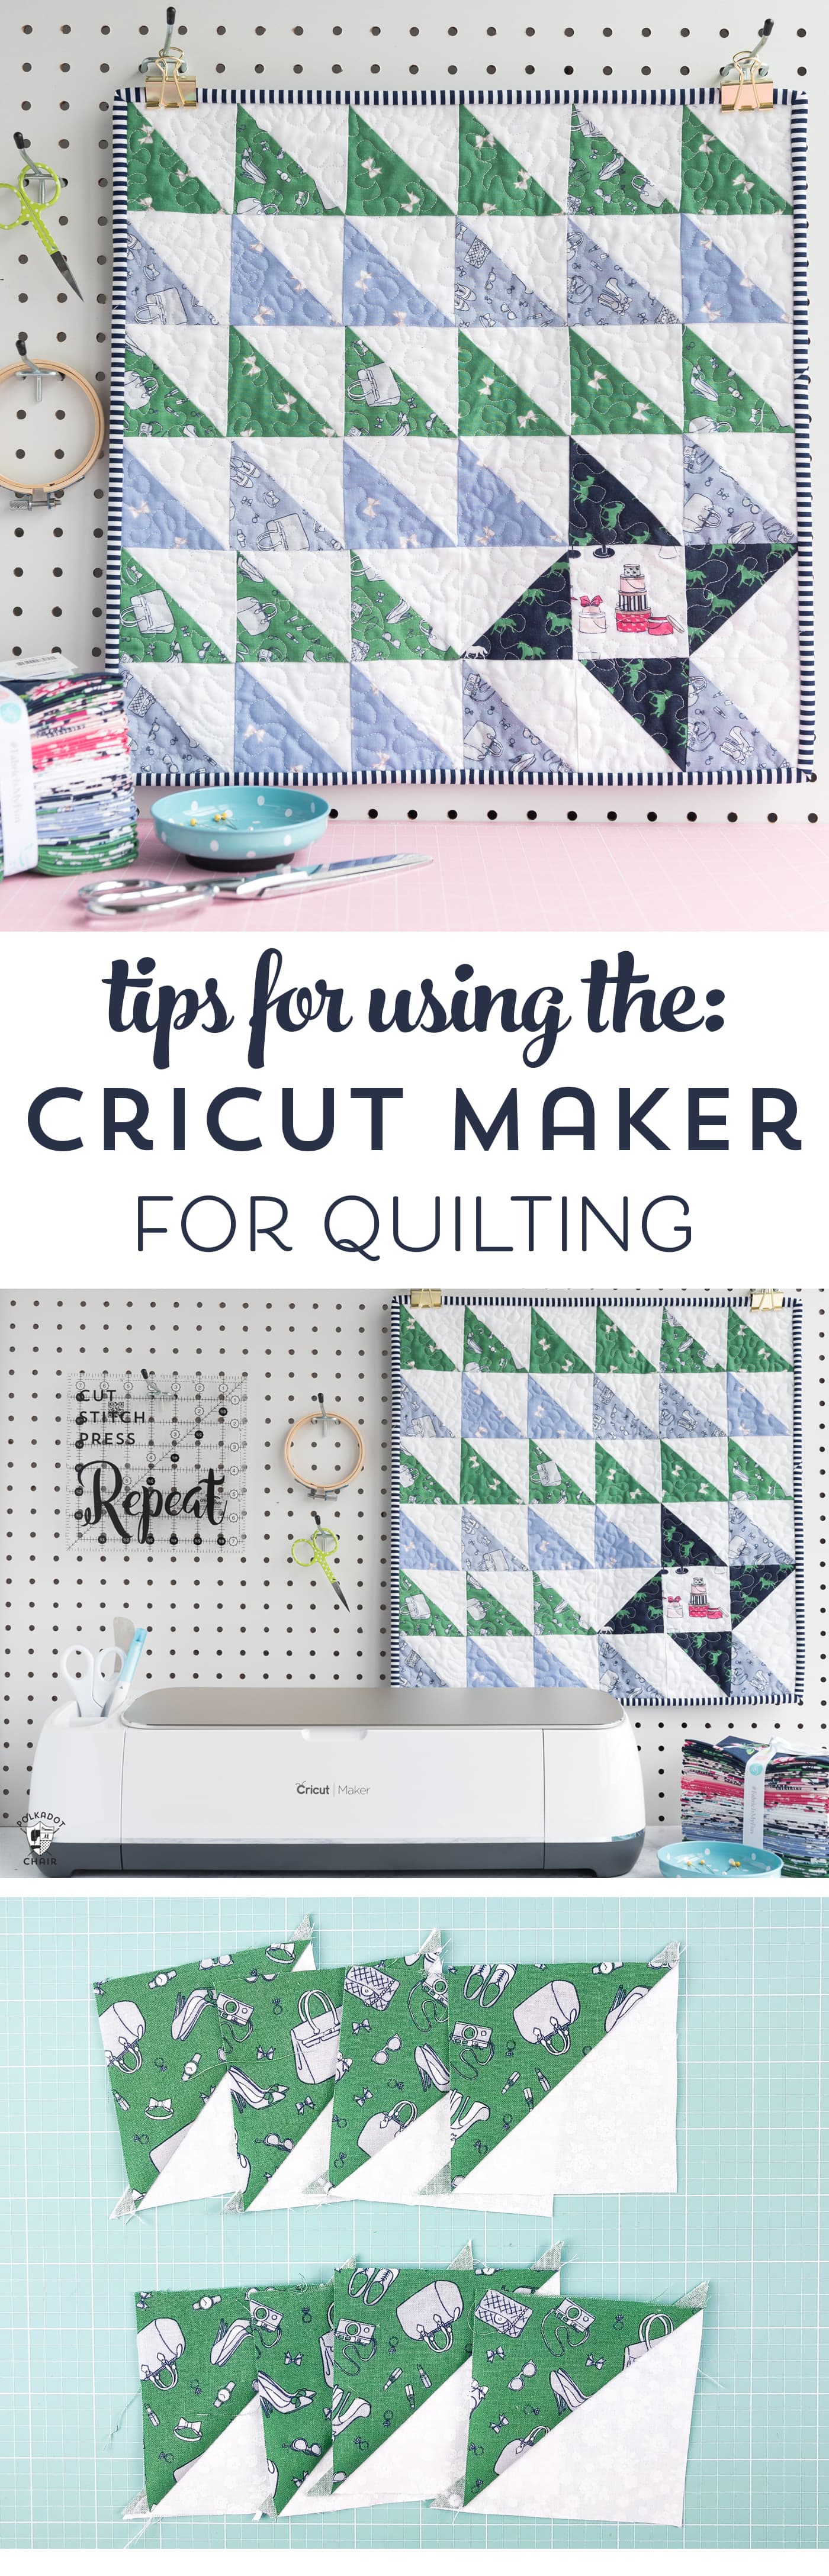
How to Use the Cricut Maker for Quilting & Free Mini Quilt Pattern
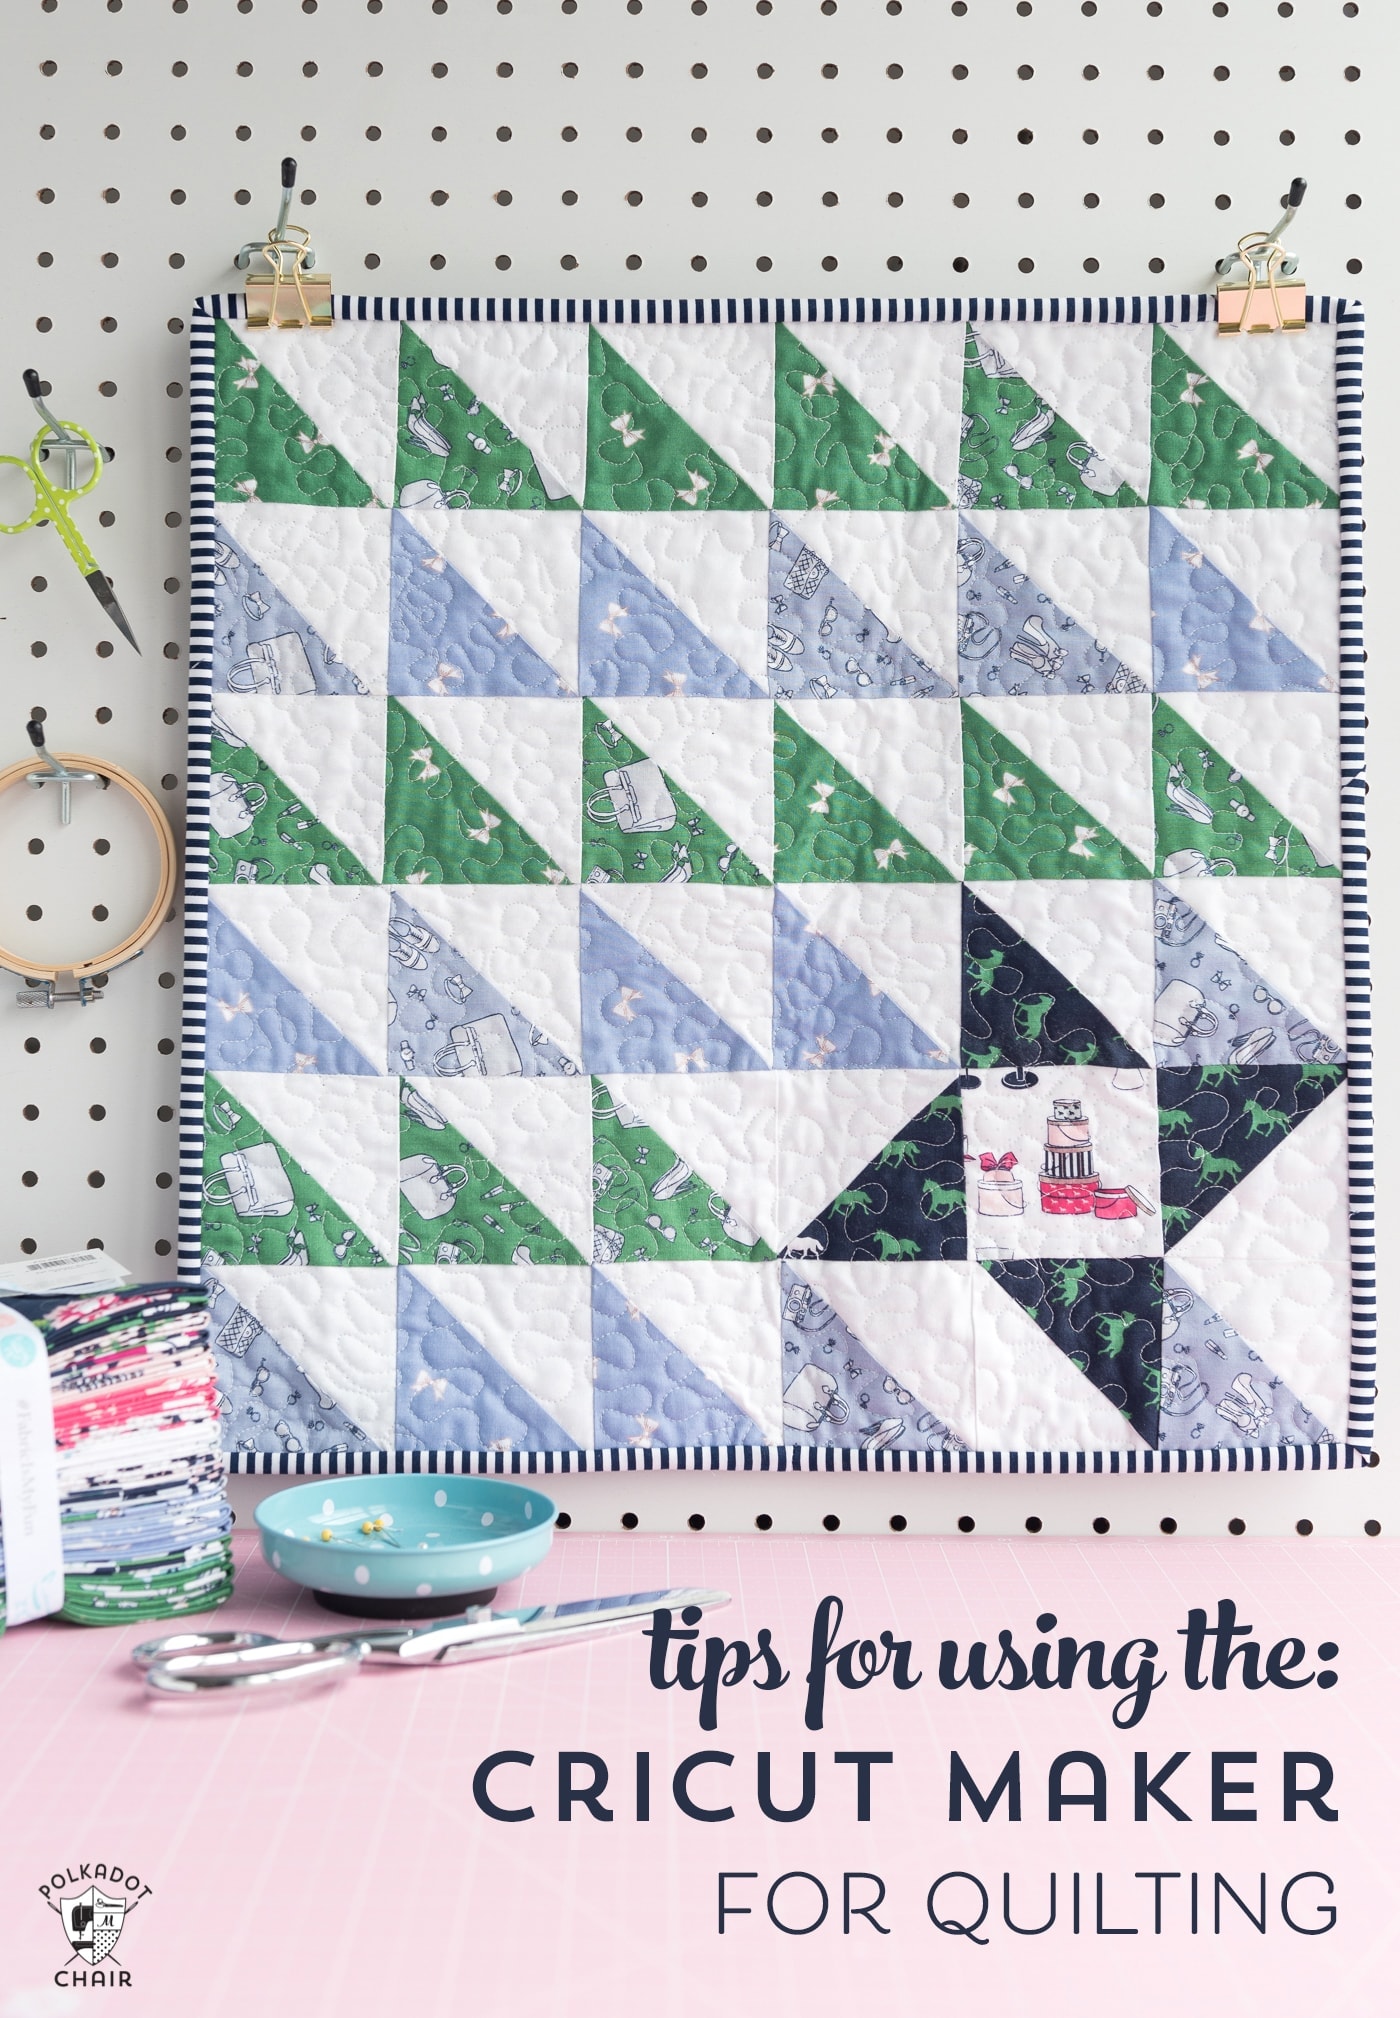
Today, I’m going to share with you some tips tricks and how-to’s for using the Cricut Maker for Quilting. We will talk about how to cut out basic shapes from fabric with the machine and how to cut out all of the shapes for your quilt project when working with an existing pattern.
I’m also sharing with you a free SVG cut file for Dresden blades for the Cricut Maker and a free pattern for a fun half-square triangle mini quilt! As an Ambassador for Cricut, this is sponsored content.
This is the 7th in a series of posts that I have done showing you how to use the new Cricut Maker machine. If you’ve never heard of the machine before, you might want to start by reading this post. I introduce the Maker machine and share a review of the features of the machine. You can click HERE to see all of my Cricut posts share to date.
Ever since the Cricut Maker came out last August and I began blogging about it, I’ve received the same few questions repeatedly. Today, I thought I’d address some of the most frequently asked questions about the Cricut Maker machine and share a bit more with you regarding how I’m incorporating it into my workflow. I’ve been asked questions about quilting and sewing with the Maker, so today, I’m going to address many of your quilting FAQs.
How to use the Cricut Maker for Quilting
Let’s start off first by addressing a few of those Frequently Asked Questions about the Cricut Maker.
How can I use the Cricut Maker with existing Quilt Patterns?
This is the #1 question I get regarding the Cricut Maker machine. You already own a quilting pattern, and you want to be able to “load” it into the Cricut software to cut out the shapes for the quilt.
Can you do it? Yes or No?
Well, the answer is both yes and no. If your quilt pattern comprises simple shapes (triangles, rectangles, squares, circles) then YES you can quickly load it into the software and get the machine to cut it out for you.
Just keep in mind two things. The machine thinks in terms of mats, so you need to think that way, too. If you’re cutting out 40 pieces of all different sizes from white fabric, it’s pretty straightforward. But if you’re using two different fabrics, you’ll need to plan it out a bit.
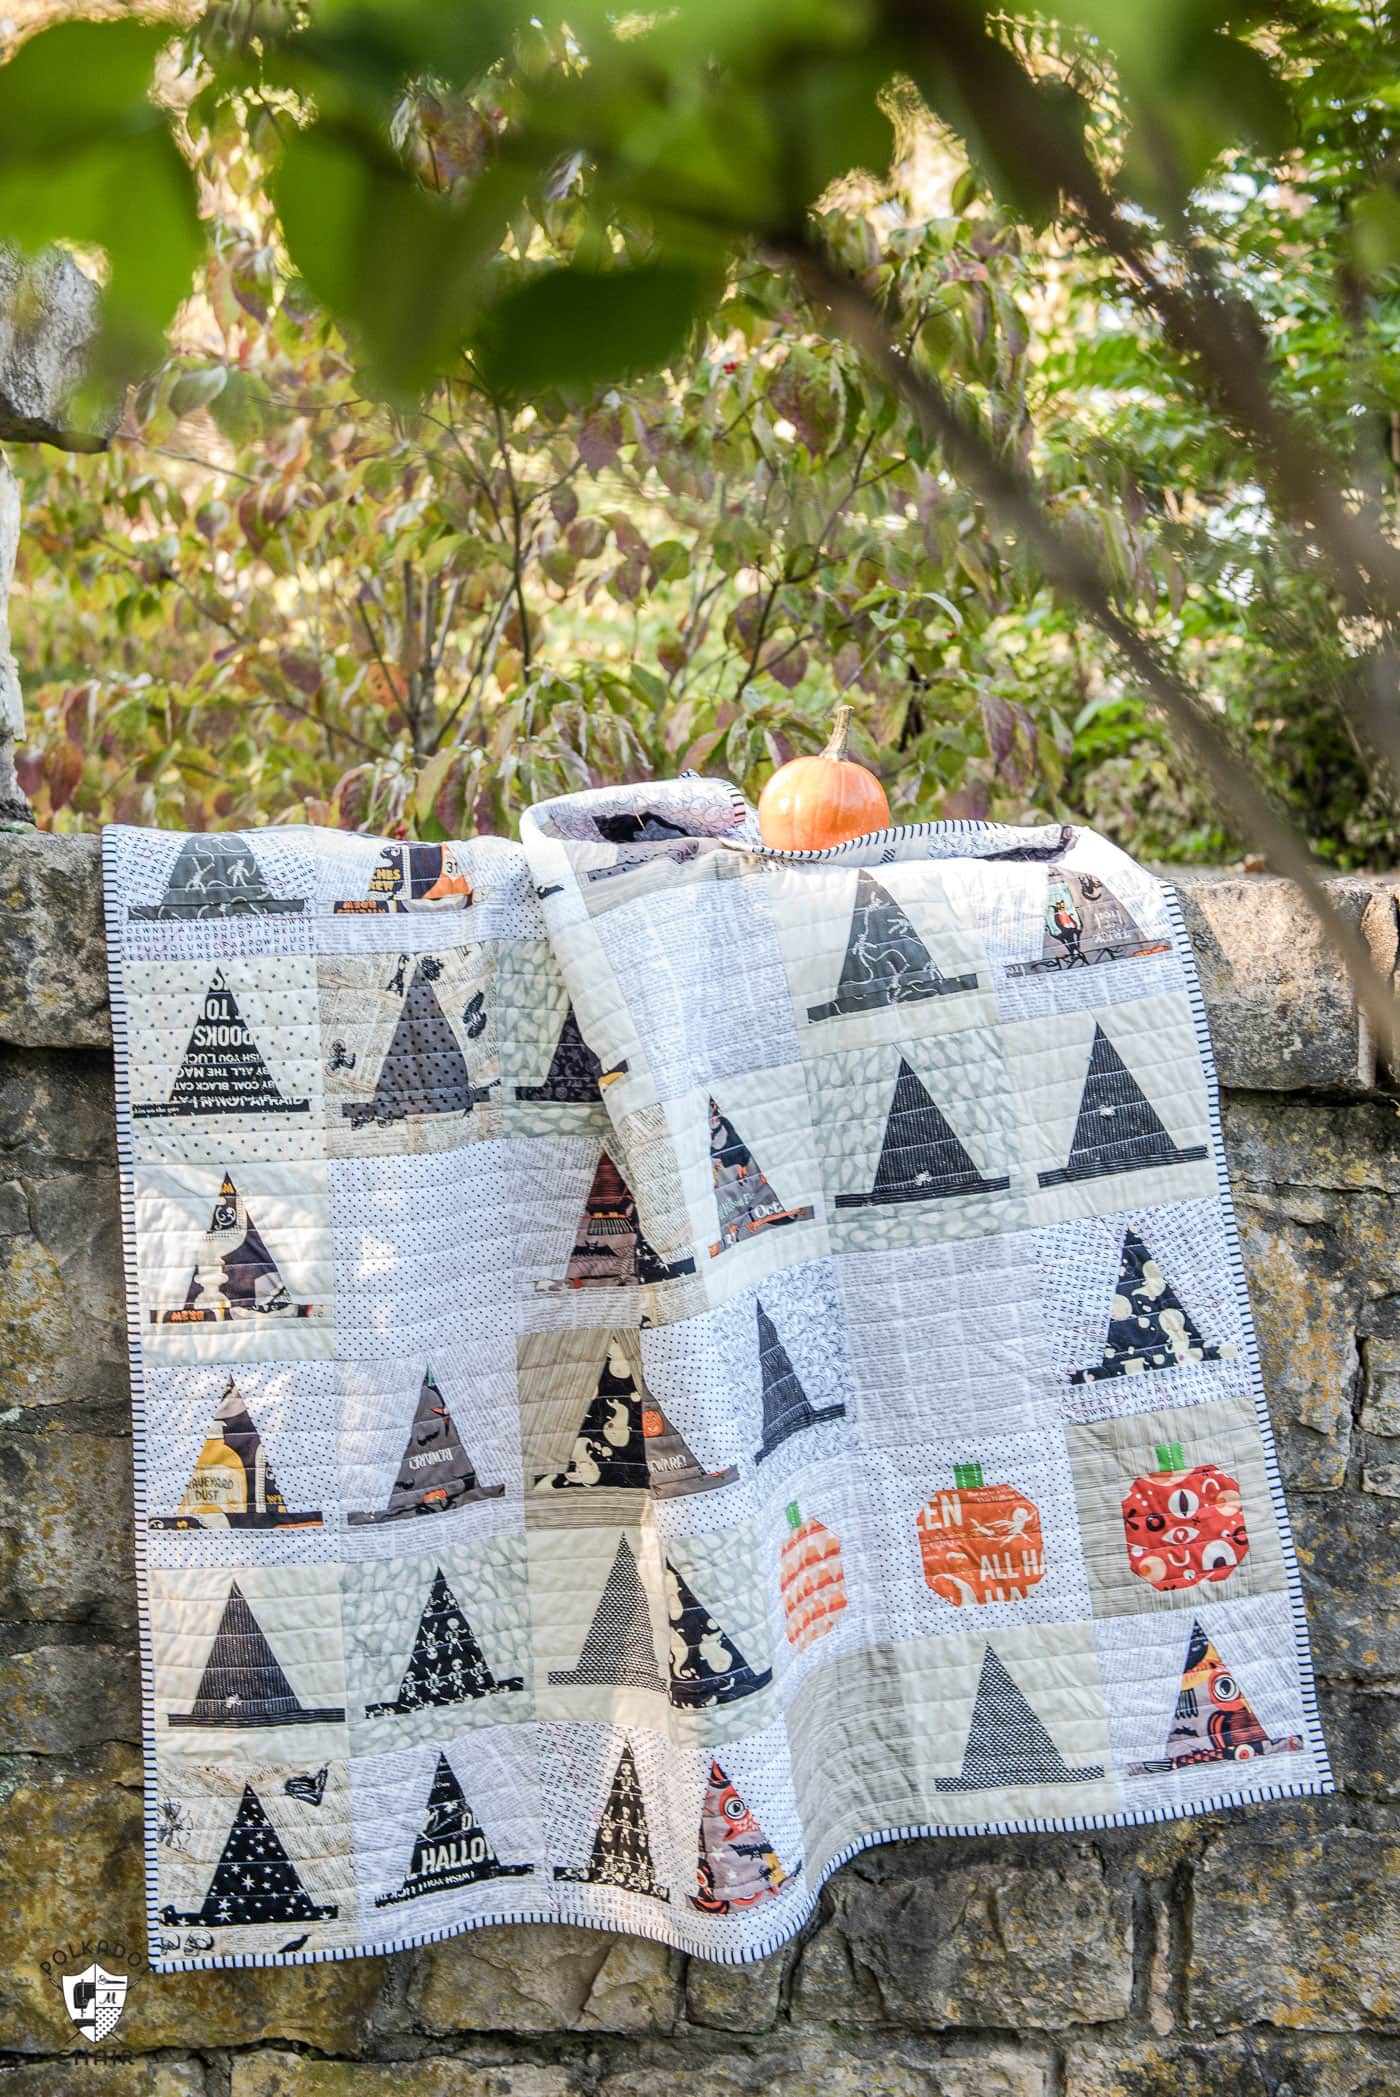
For example, I can easily cut out all the pieces I need for my Halloween Haberdashery Quilt. The pattern lists the size of the triangle needed for the hat shape and the rectangle shapes for the other pieces.
Here you can see what it would look like in the Design Space software:
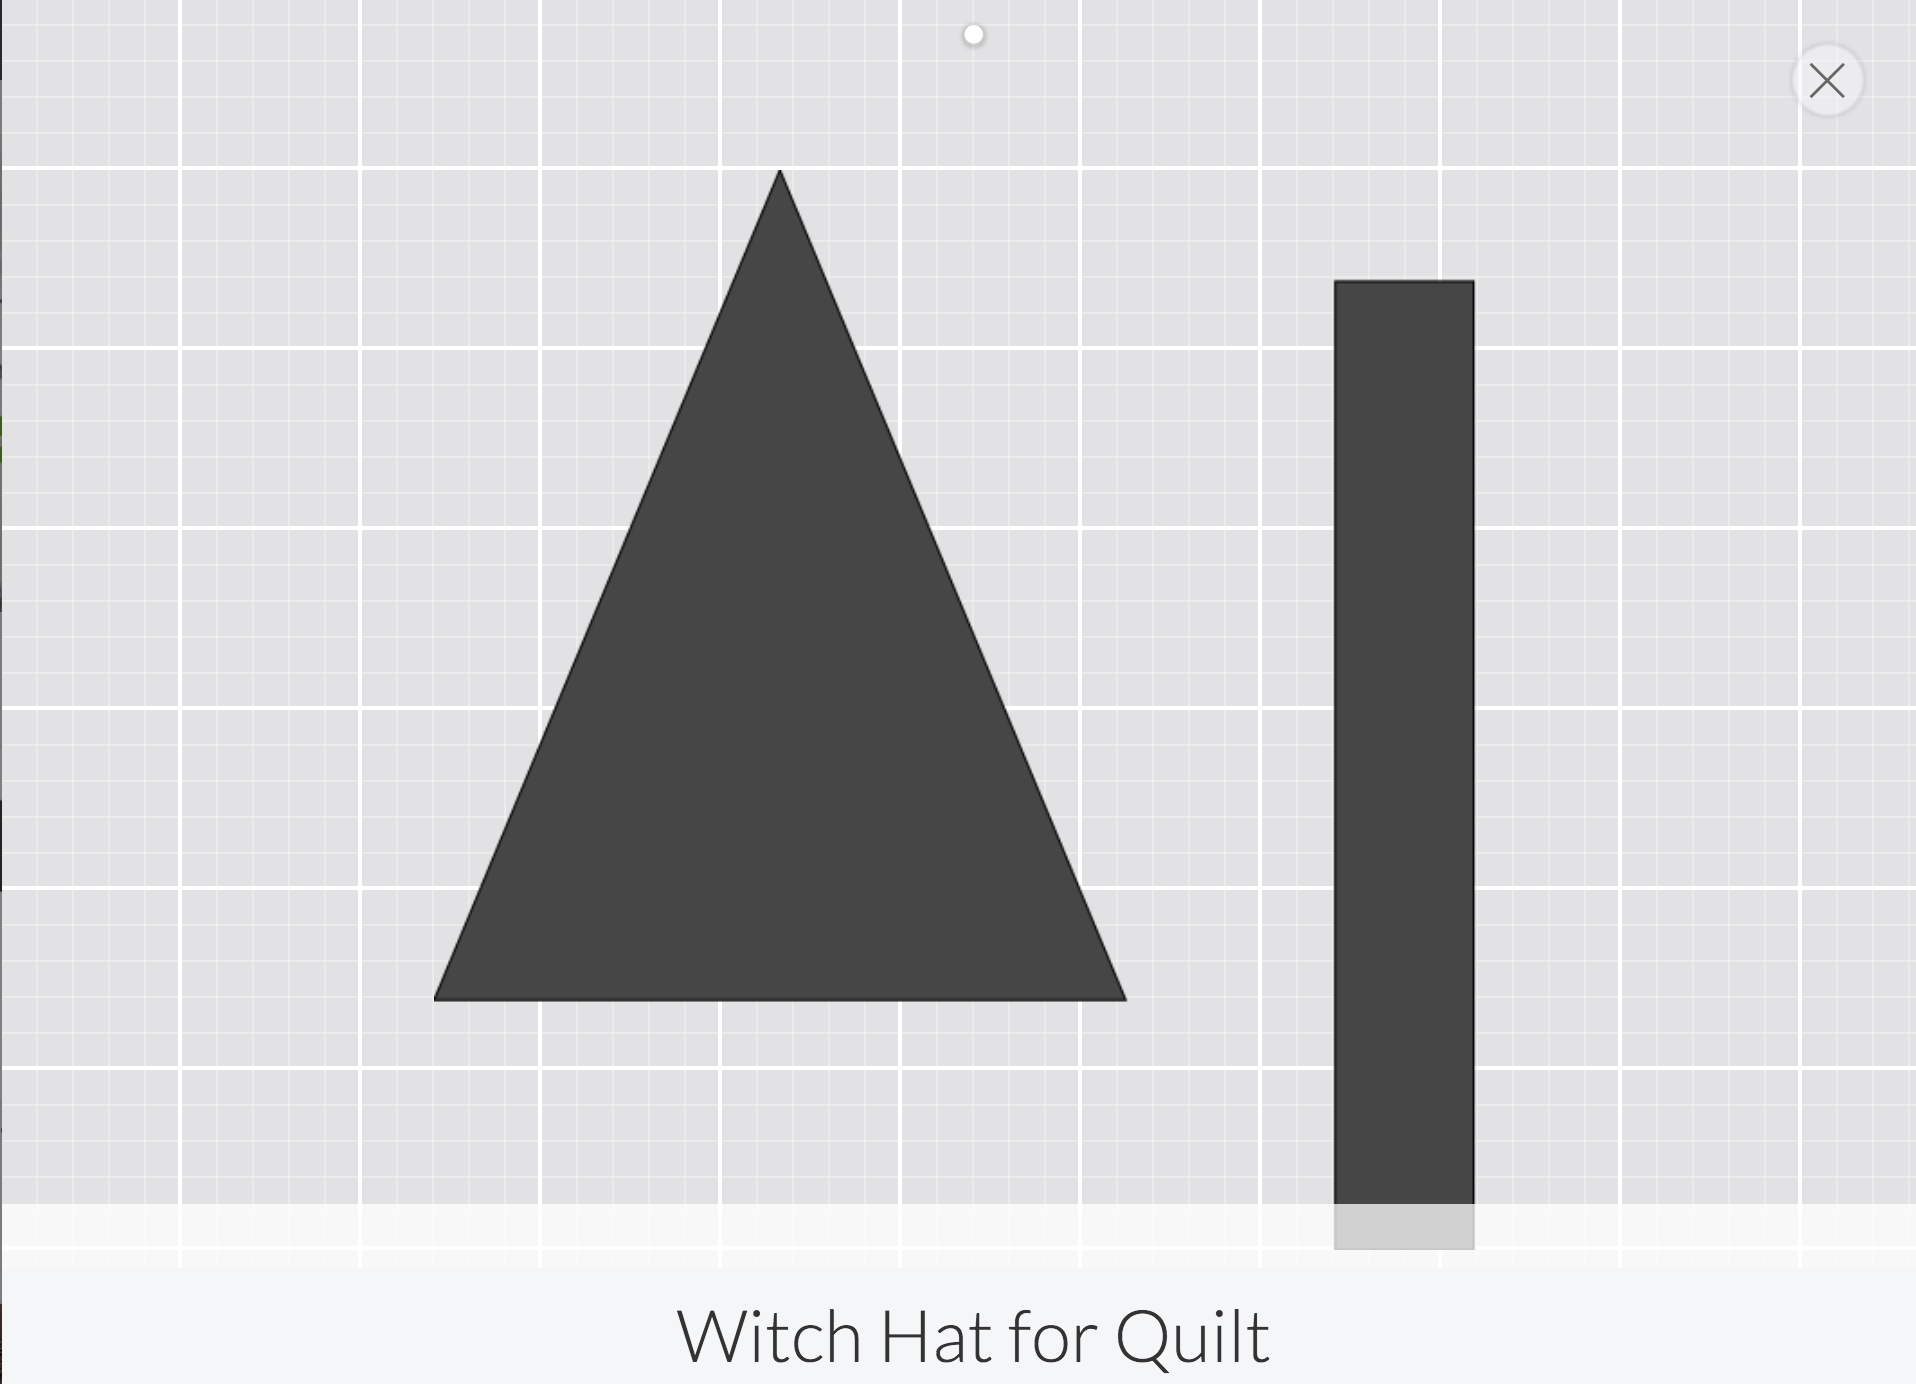
This is my “file” for the hat fabrics.. and below is the file for the background fabrics for the block. I made this file myself using Cricut software. You can make one too, if you own the pattern, all of the measurements are already there.
You’ll see that with a 12″ x 24″ mat, I can cut all of the background fabrics at once. Since the Halloween Haberdashery quilt uses lots of rectangles in various shapes, the Maker DOES save you quite a bit of time cutting.
All I did was draw each rectangle in the Design Space software, and then the machine figured out for me how many mats I’d need and the most efficient way to cut all of the fabrics out.
Note: It will cut the fabric at right angles. You don’t need to worry about cutting on the bias, but you might want to pay attention to the fabric direction. We’ll talk a little bit more about that in a minute.
and now for the “no”
If the pattern contains a specific shape or template unique to the pattern designer, then no, you can not cut it with the Maker unless you can figure out how to draw it yourself in the software and Illustrator.
Then you are getting into weird copyright territory. If you’re just using it for yourself, then it’s not a big deal, but if you want to share the file with others, it is a big deal. Also, most pattern makers are not likely to let you upload an SVG file of their pattern (or give you an SVG file of the FULL pattern). This is because the SVG file type is not secure, and it’s like giving away the “digital blueprints” to a pattern. If you ask, and a designer says “no” then just respect it and move along.
Can I cut two layers of fabric at one time?
Kind of. I have experimented with using 505 spray to “baste” two layers of fabric together, then running them through the Maker at the same time. It works half the time.
The rollers have a tendency to catch on the 2nd layer of fabric and a few times I managed to “clog” the machine. The bottom line is you need an even coating of the 505 spray which begs the question of what do you do about the spray AFTER you cut? Right now, I have to say that I don’t recommend it. I’ll keep working on it, though.
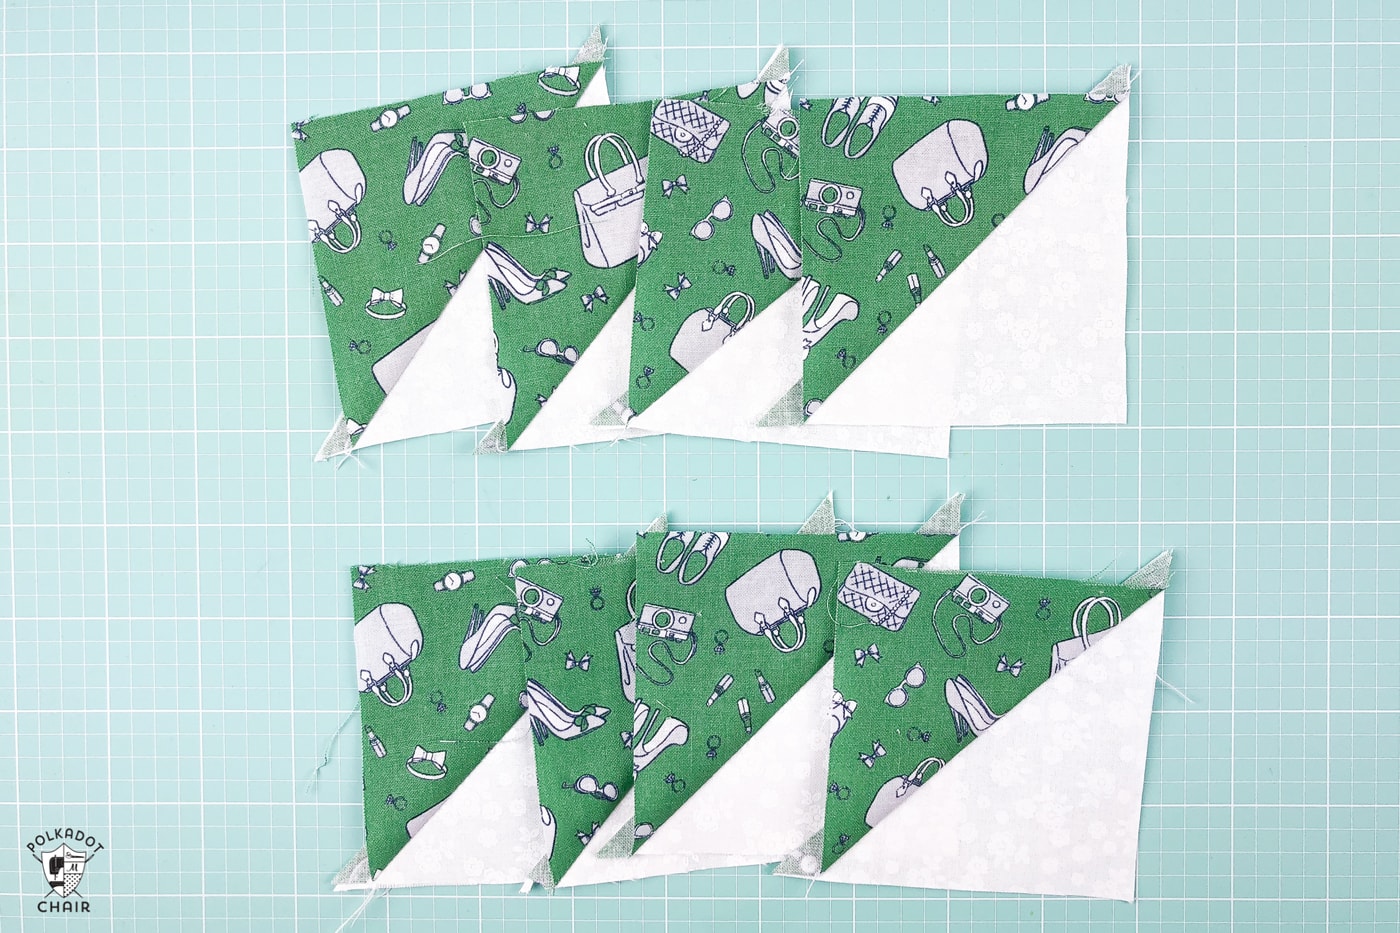
Cutting Basic Quilt Shapes with the Cricut Maker
(fabric is Derby Day by Riley Blake Designs)
The 3rd question I’m going to address today is how to cut basic quilt shapes with the maker. Things like Half Square Triangles, Iscocoles Triangles, Hexagons, etc..
Since this post is already pretty long, I’m going to share with you how to cut two basic shapes with the Maker: the Half-Square Triangle and the Dresden Blade. We’ll leave other shapes for a different post.
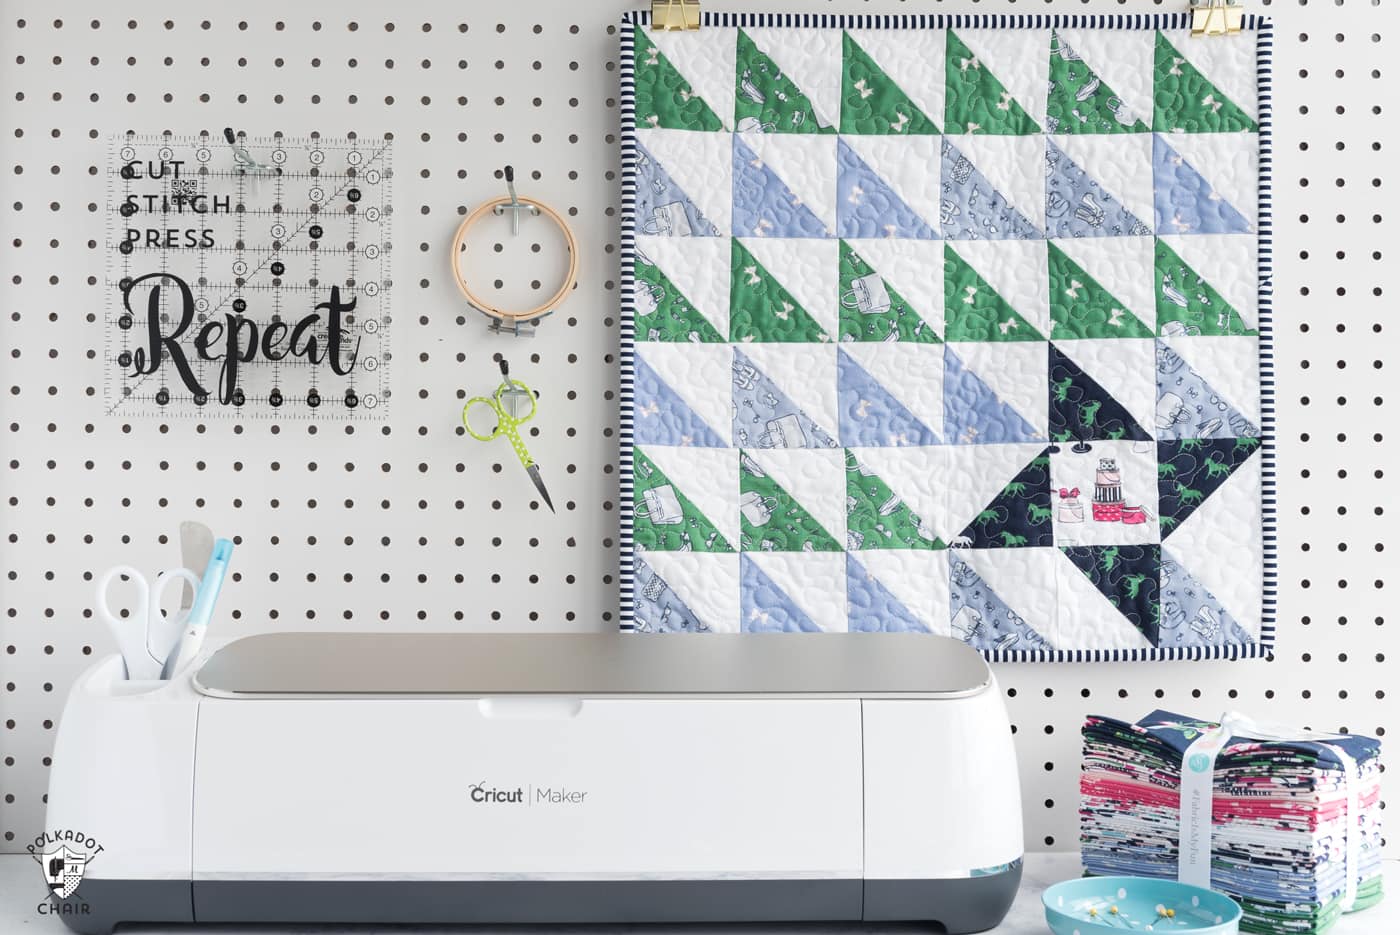
My Favorite Cricut Supplies
- Cricut Maker 3 (you can get great deals on machine bundles on Cricut.com)
- Roll Holder for Maker 3
- Cricut EasyPress (I like the large size the best): Make sure you get the EasyPress mat as well.
- Cricut Weeding Tools: (I use the small hook tool ALL the time, making weeding vinyl so much easier).
- Cricut BrightPad: A cordless, flat, bright lightbox. I use it to weed Cricut vinyl and use it all the time to trace applique shapes for sewing & quilting.
- Cricut Iron On Vinyl
- Cricut Permanent Vinyl
How to Cut a Half-Square Triangle with the Cricut Maker
First, you need to do a bit of math. You need to know what size FINISHED Half Square Triangle (HST) you want to make. The FINISHED size of an HST is always 1/2″ smaller than the size of the HST before it’s sewn into the quilt. So if you want to make a 3″ HST it will be 3 1/2″ BEFORE you sew it into the quilt. Make sense?
So let’s say you want to make a 3″ finished HST. You want to start then with a square that is 3 7/8″ x 3 7/8″. Since the Cricut Design software is in decimals, just convert that to 3.875 x 3.875.
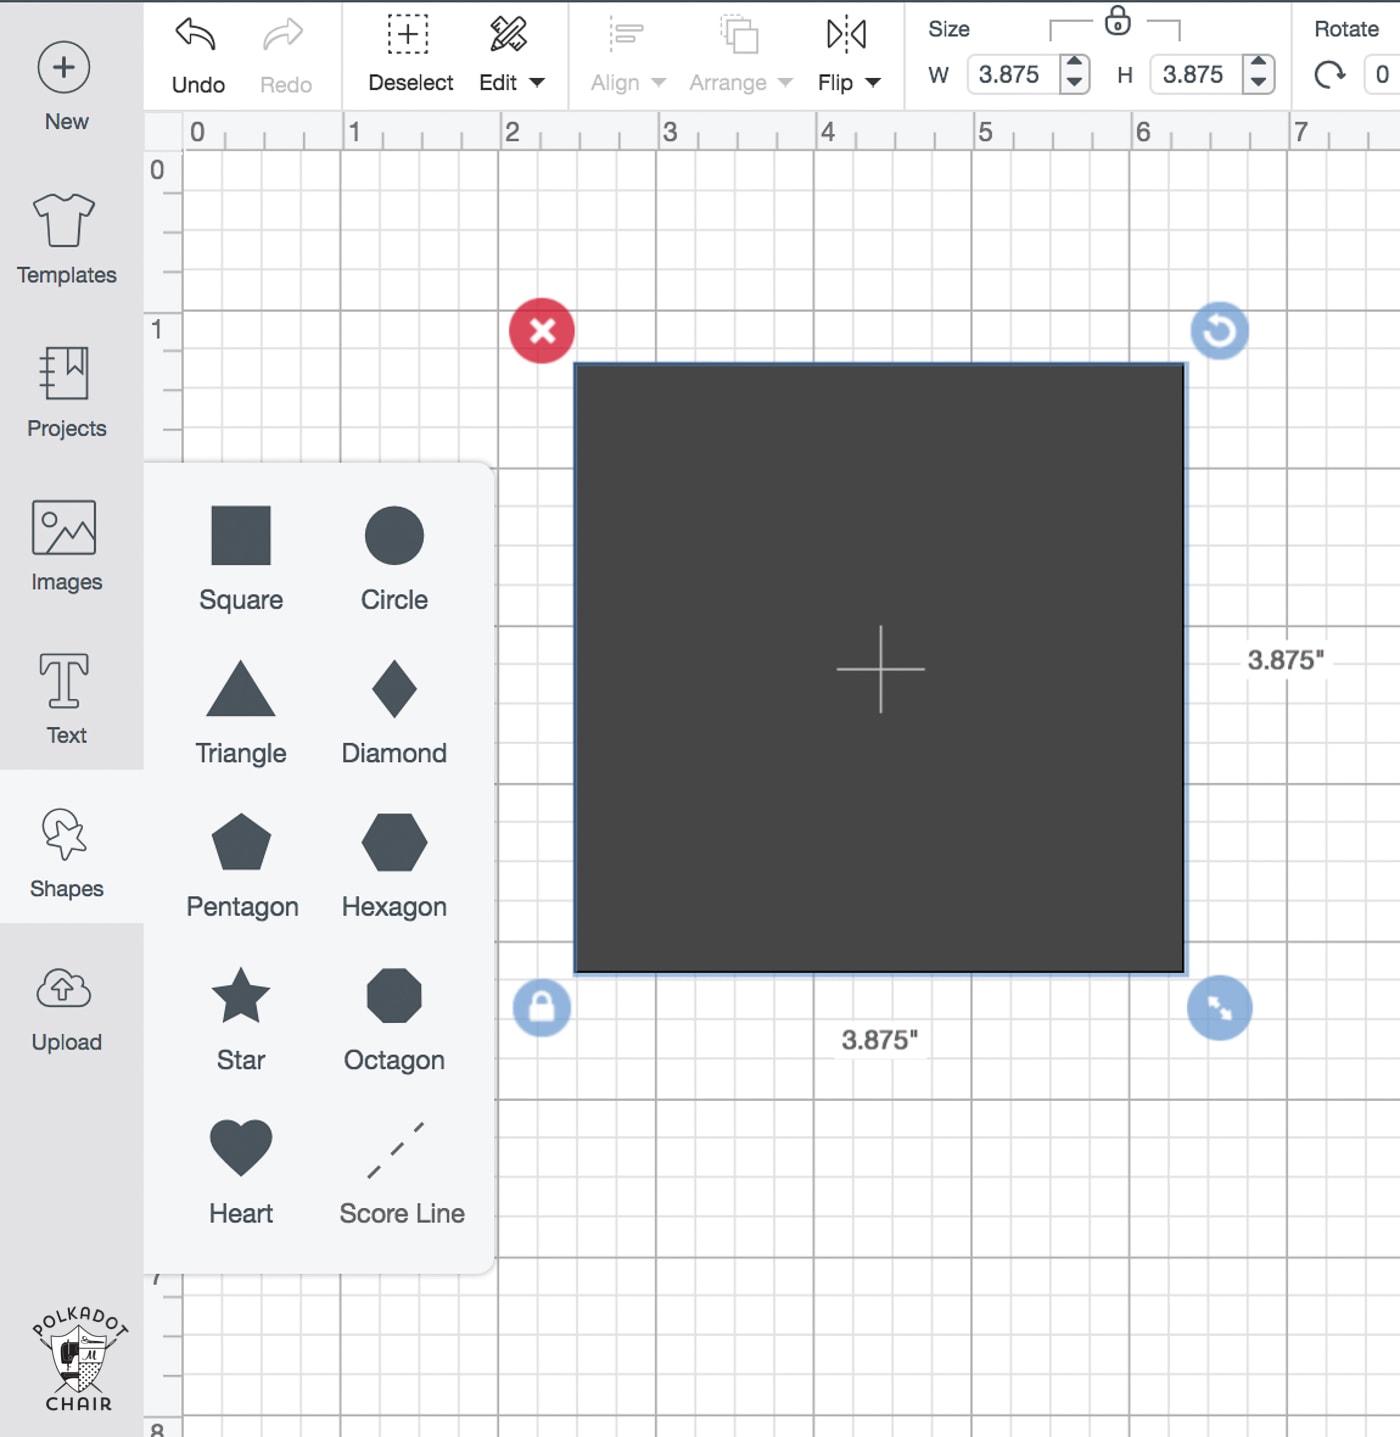
In Design Space draw a square that size:
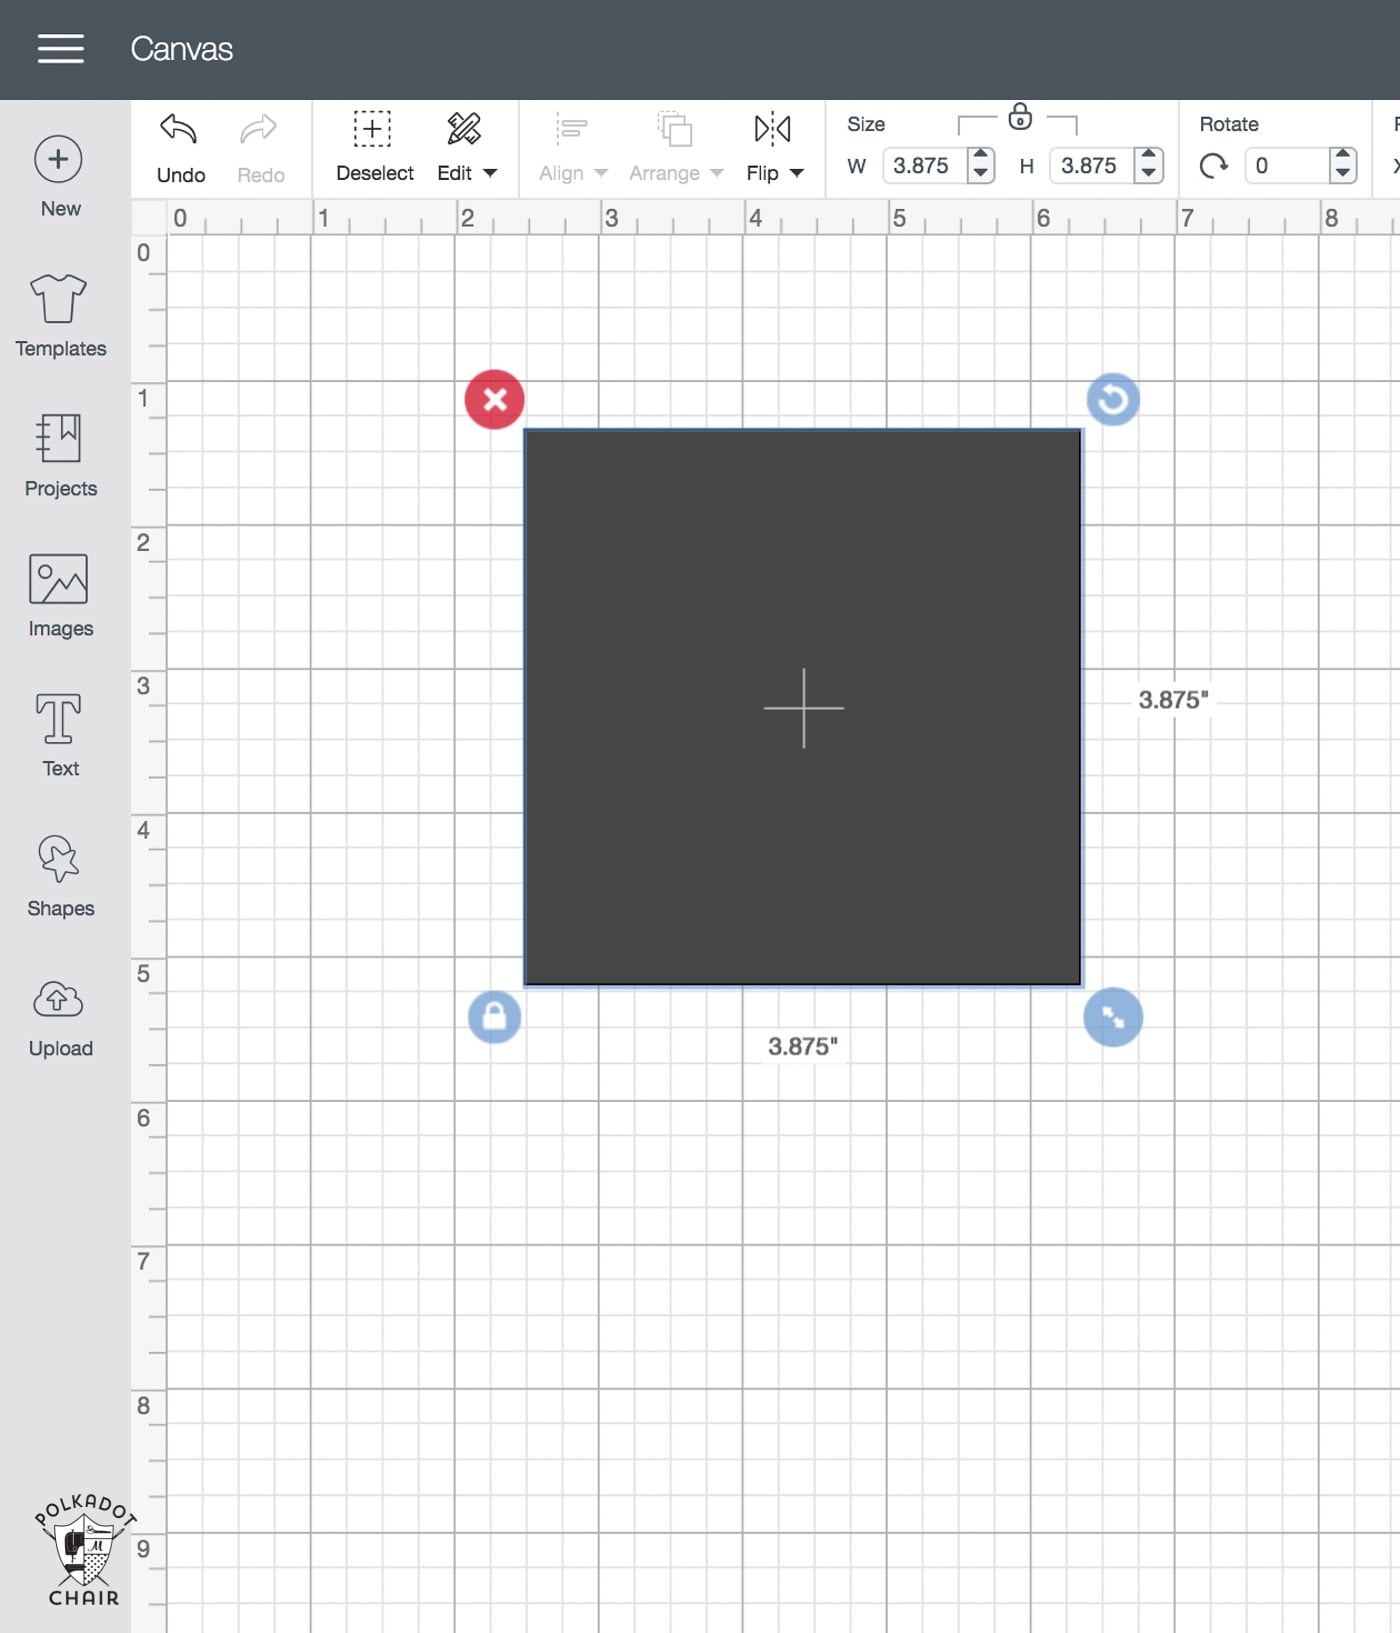
To make it easy, just type the dimensions you want into the size box on the toolbar.
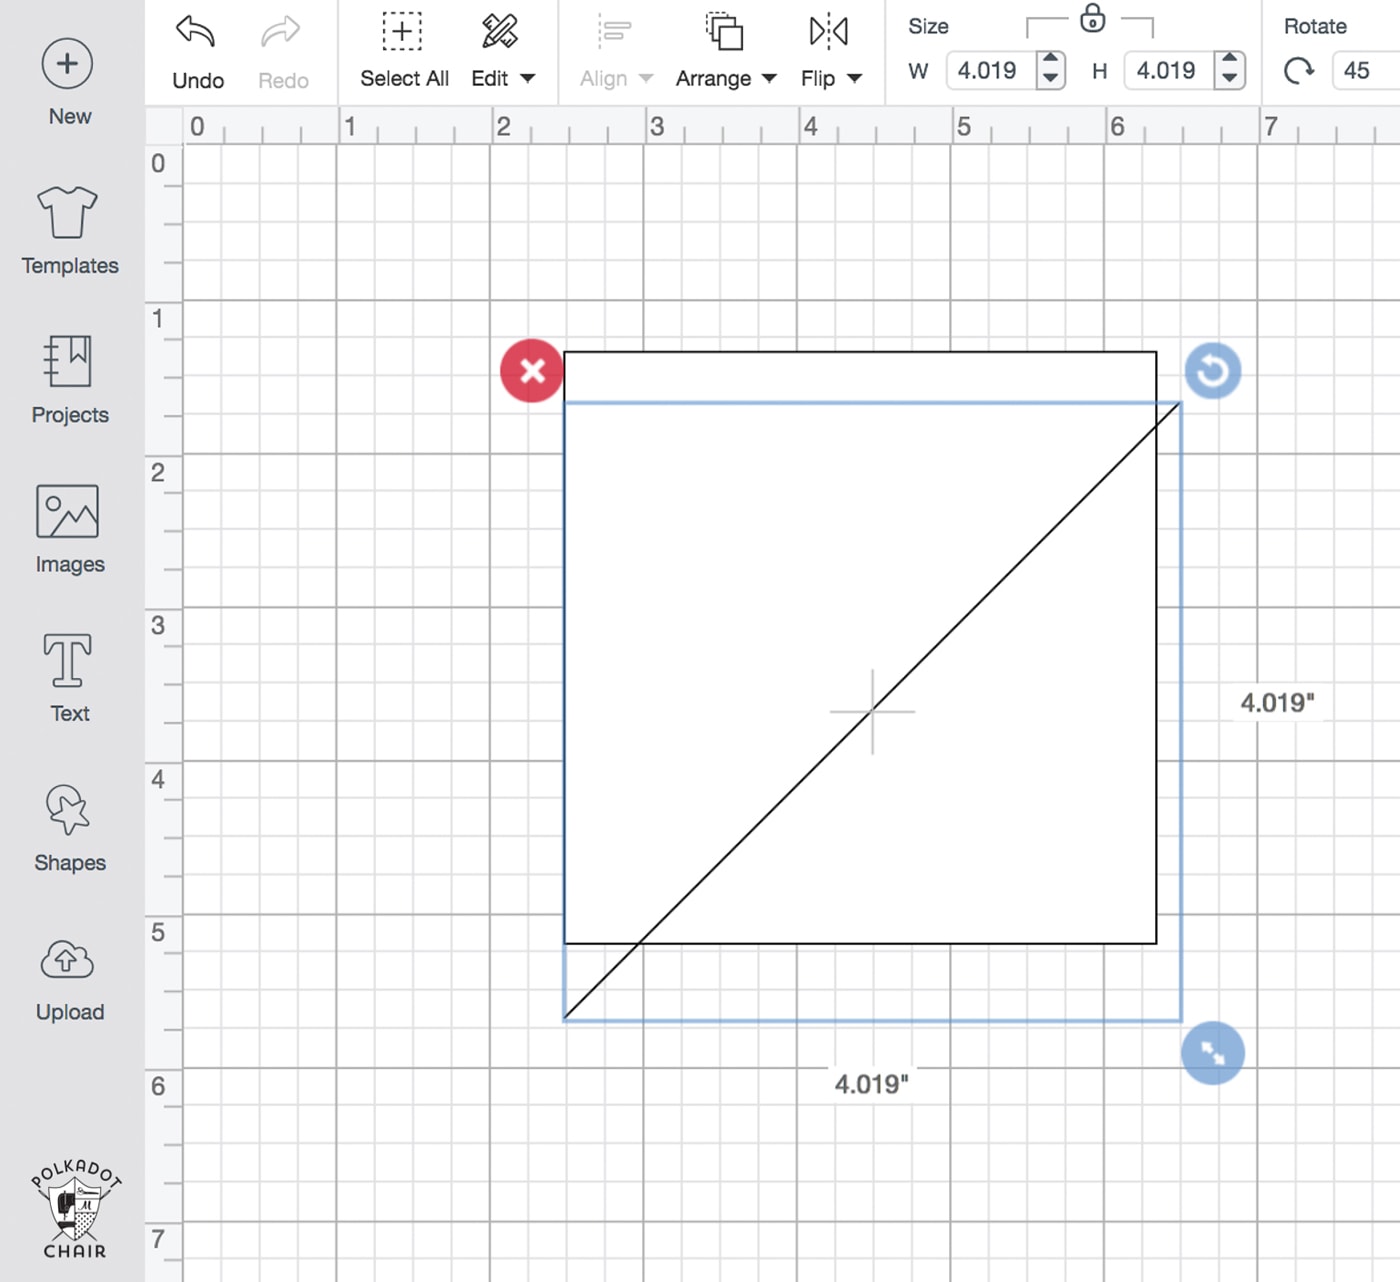
Next, click the shape box again and select SCORE LINE.
It will add the scoreline to the canvas for you. Hold down the shift key and hover over the bottom corner of the shape until you see the rotate icon. Hold the shift key and rotate; it will rotate in 45-degree increments. Rotate the line 45 degrees. Size it so that you have a diagonal line that will fit the square perfectly.
Next, you need to change it from scoring to CUT.
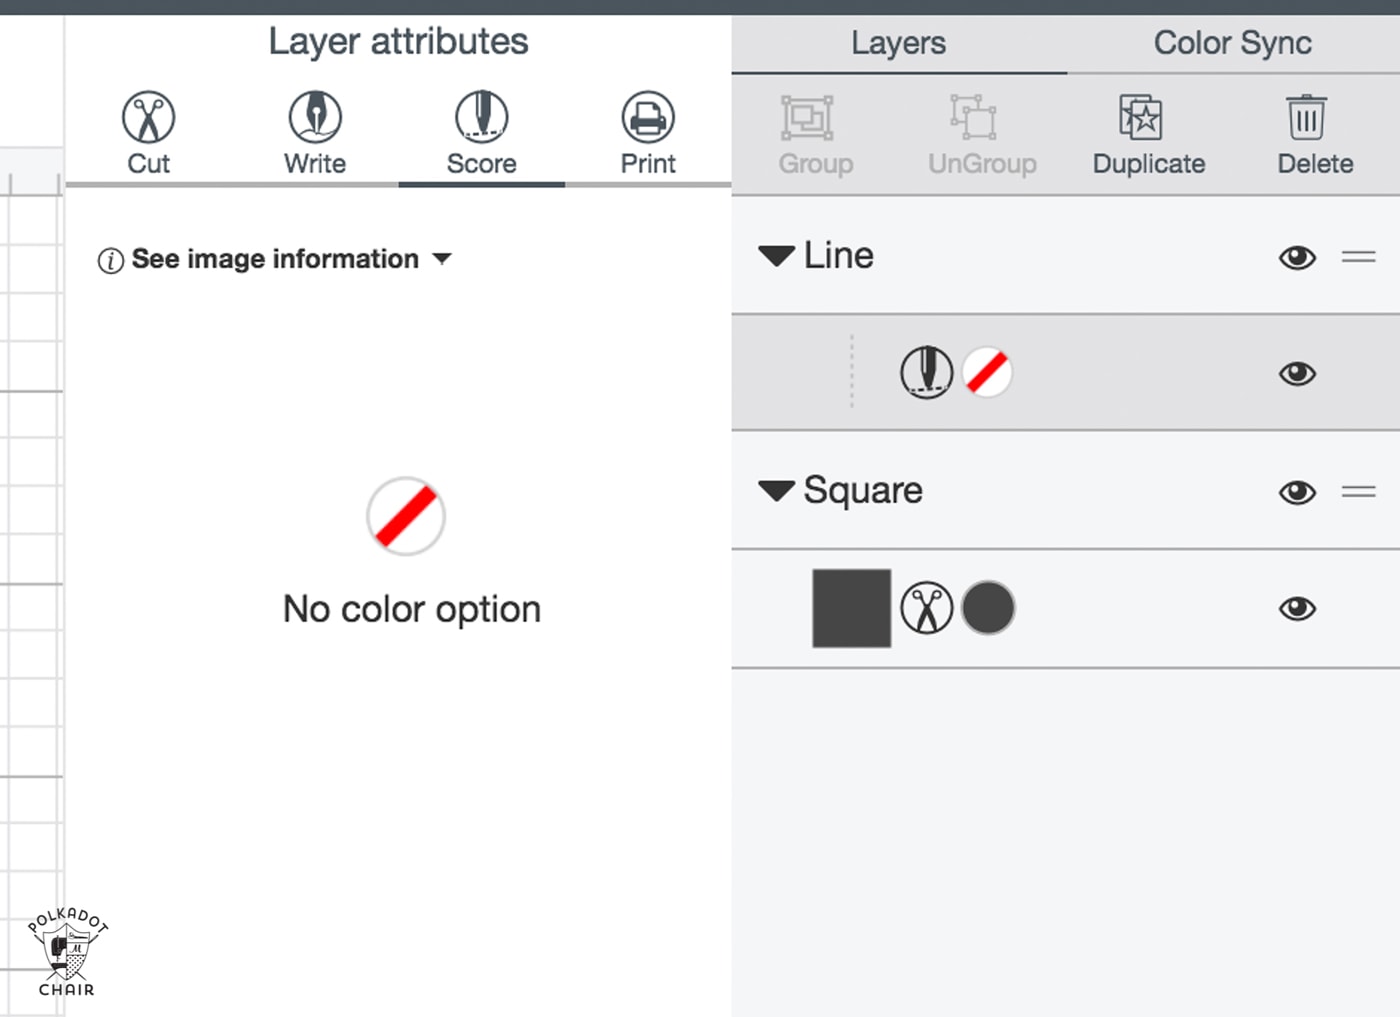
Select the line on the palette to the right. Click the icon, and it will take you to the attributes panel. Change the scoreline to a cut line.
Select the square and the line at the same time. Use the ALIGN button on the toolbar to center them on top of each other exactly.
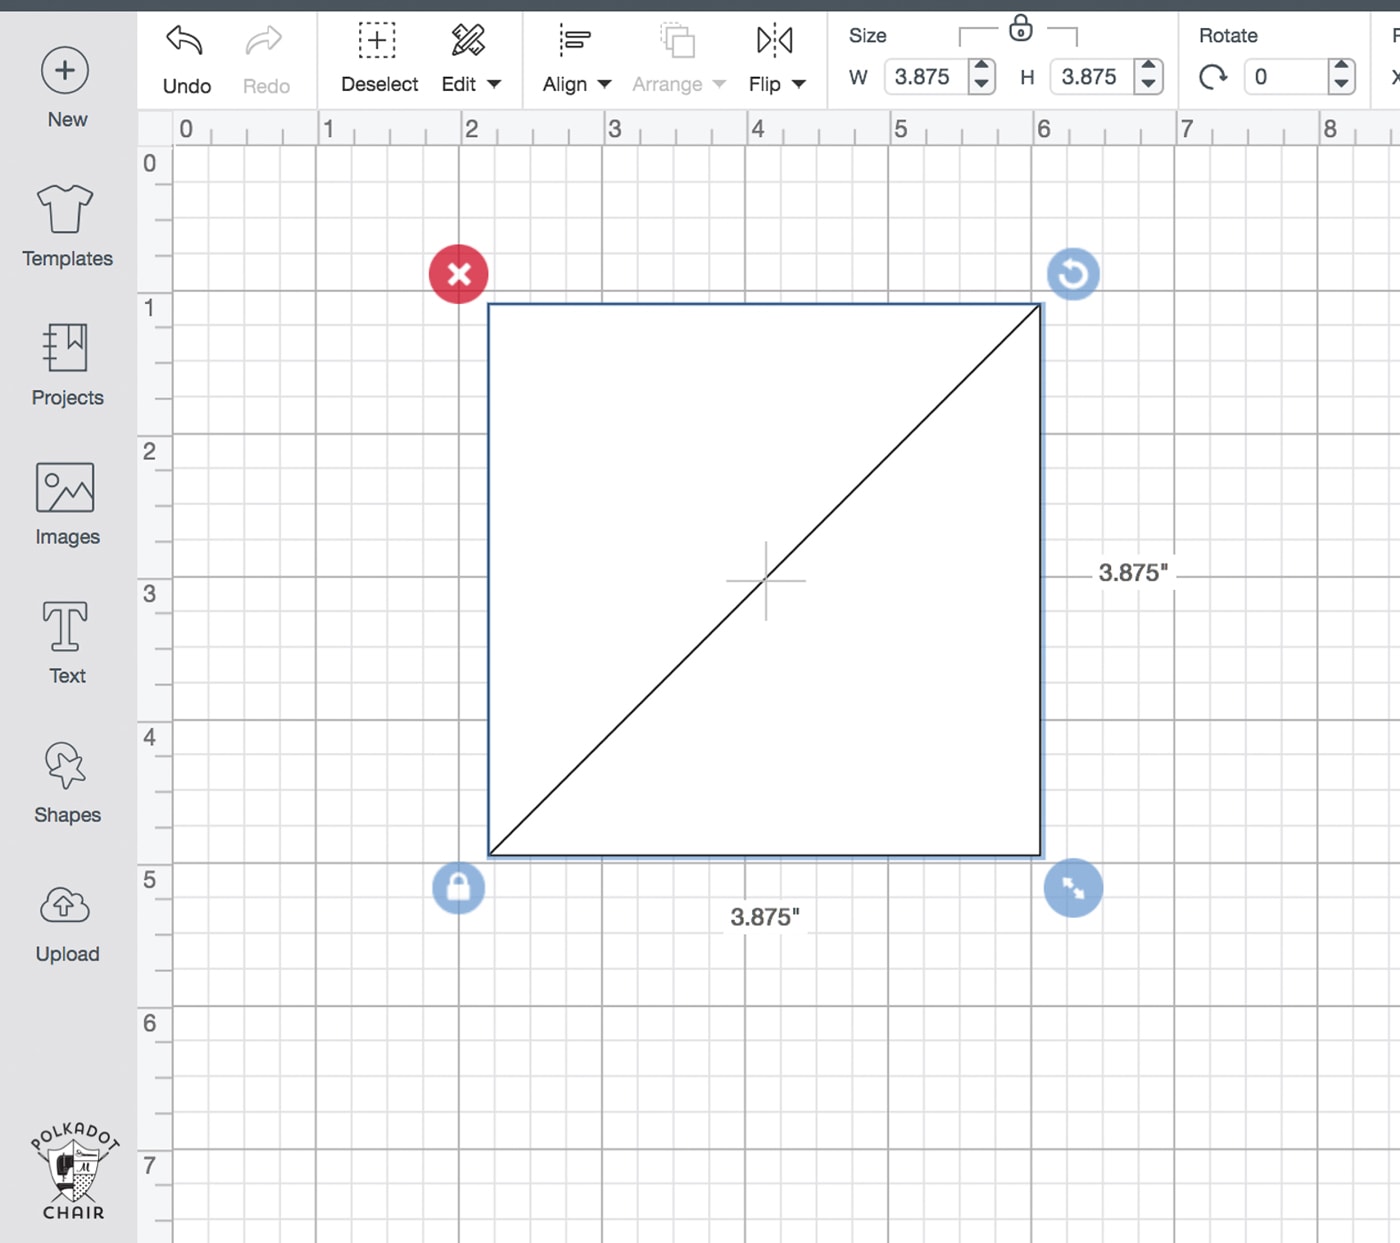
Click both layers, then click ATTACH at the bottom right corner of the canvas. This will make both of them cut at the same time, in the same place.
Now, you need to decide how many you want to cut. A half-square triangle comprises two triangles of two different prints of fabric. So, if you need 8 Half-Square triangles, you need to cut 8 of fabric 1 and 8 of fabric 2 (8+8=16). You are cutting 2 triangles at once, so to cut 8 triangles of fabric 1, you’d need to cut out 4 squares.
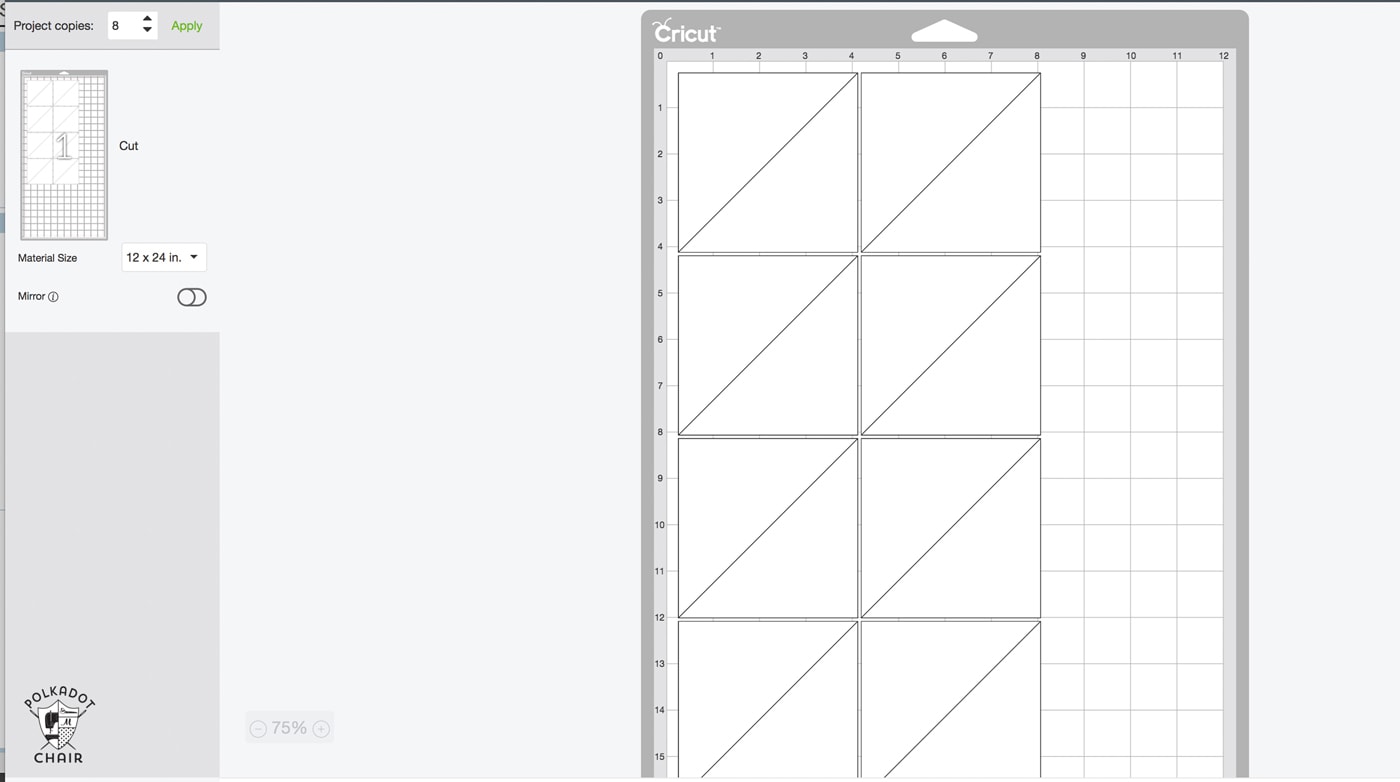
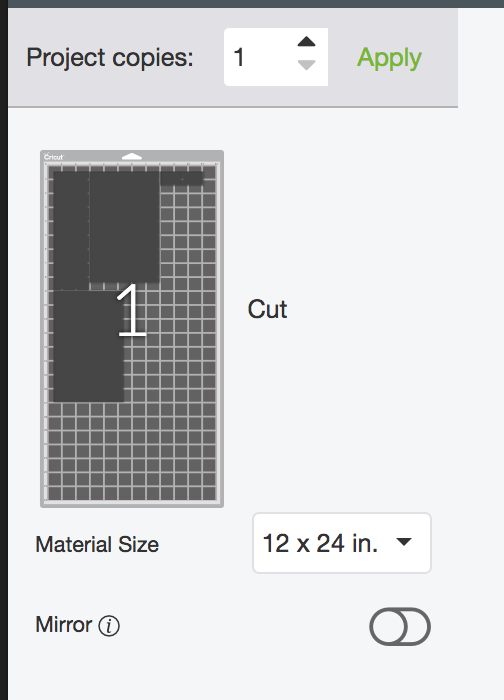
Click MAKE IT and on the upper left corner, tell the software how many shapes you want to cut. (Remember we made 2 triangles at the same time)
In my example above, I’m cutting some of the WHITE triangles for my mini quilt.
I’m using the 12×24 mat to fit them all.
I told the machine to cut 8 shapes, which would yield 16 triangles, which would make 8 HSTs.
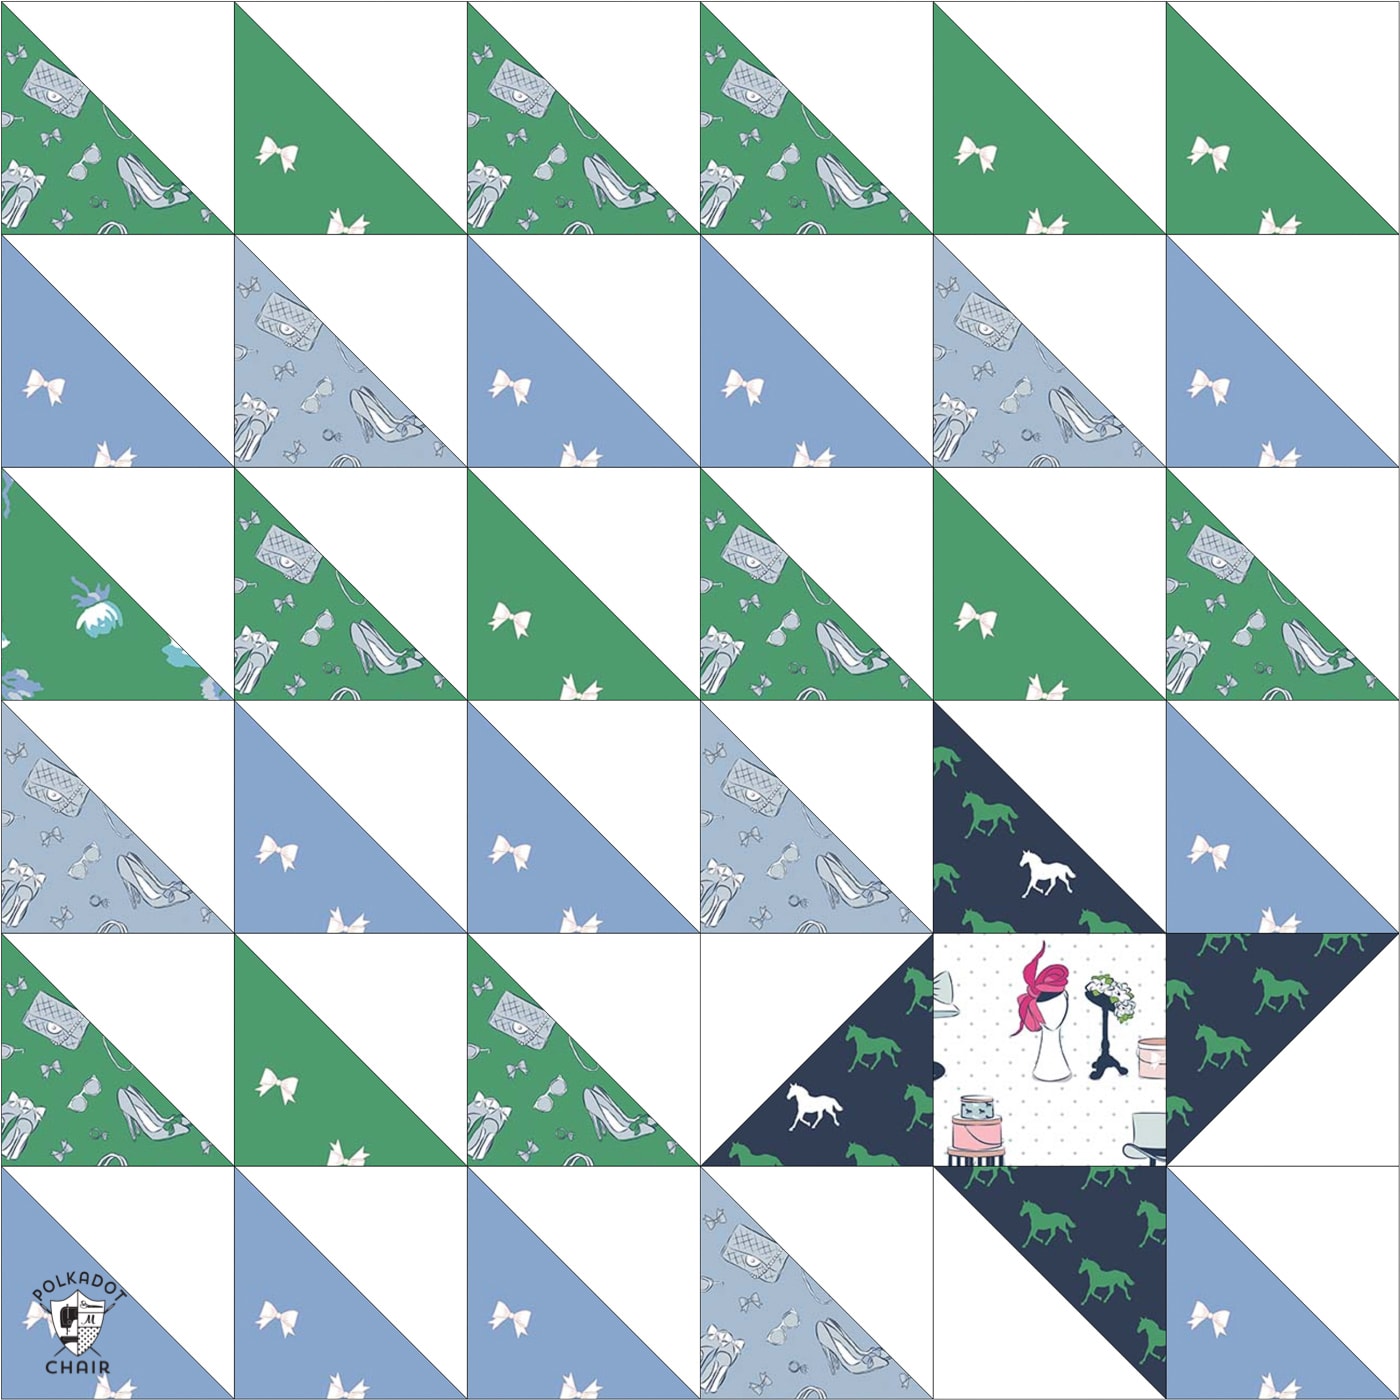
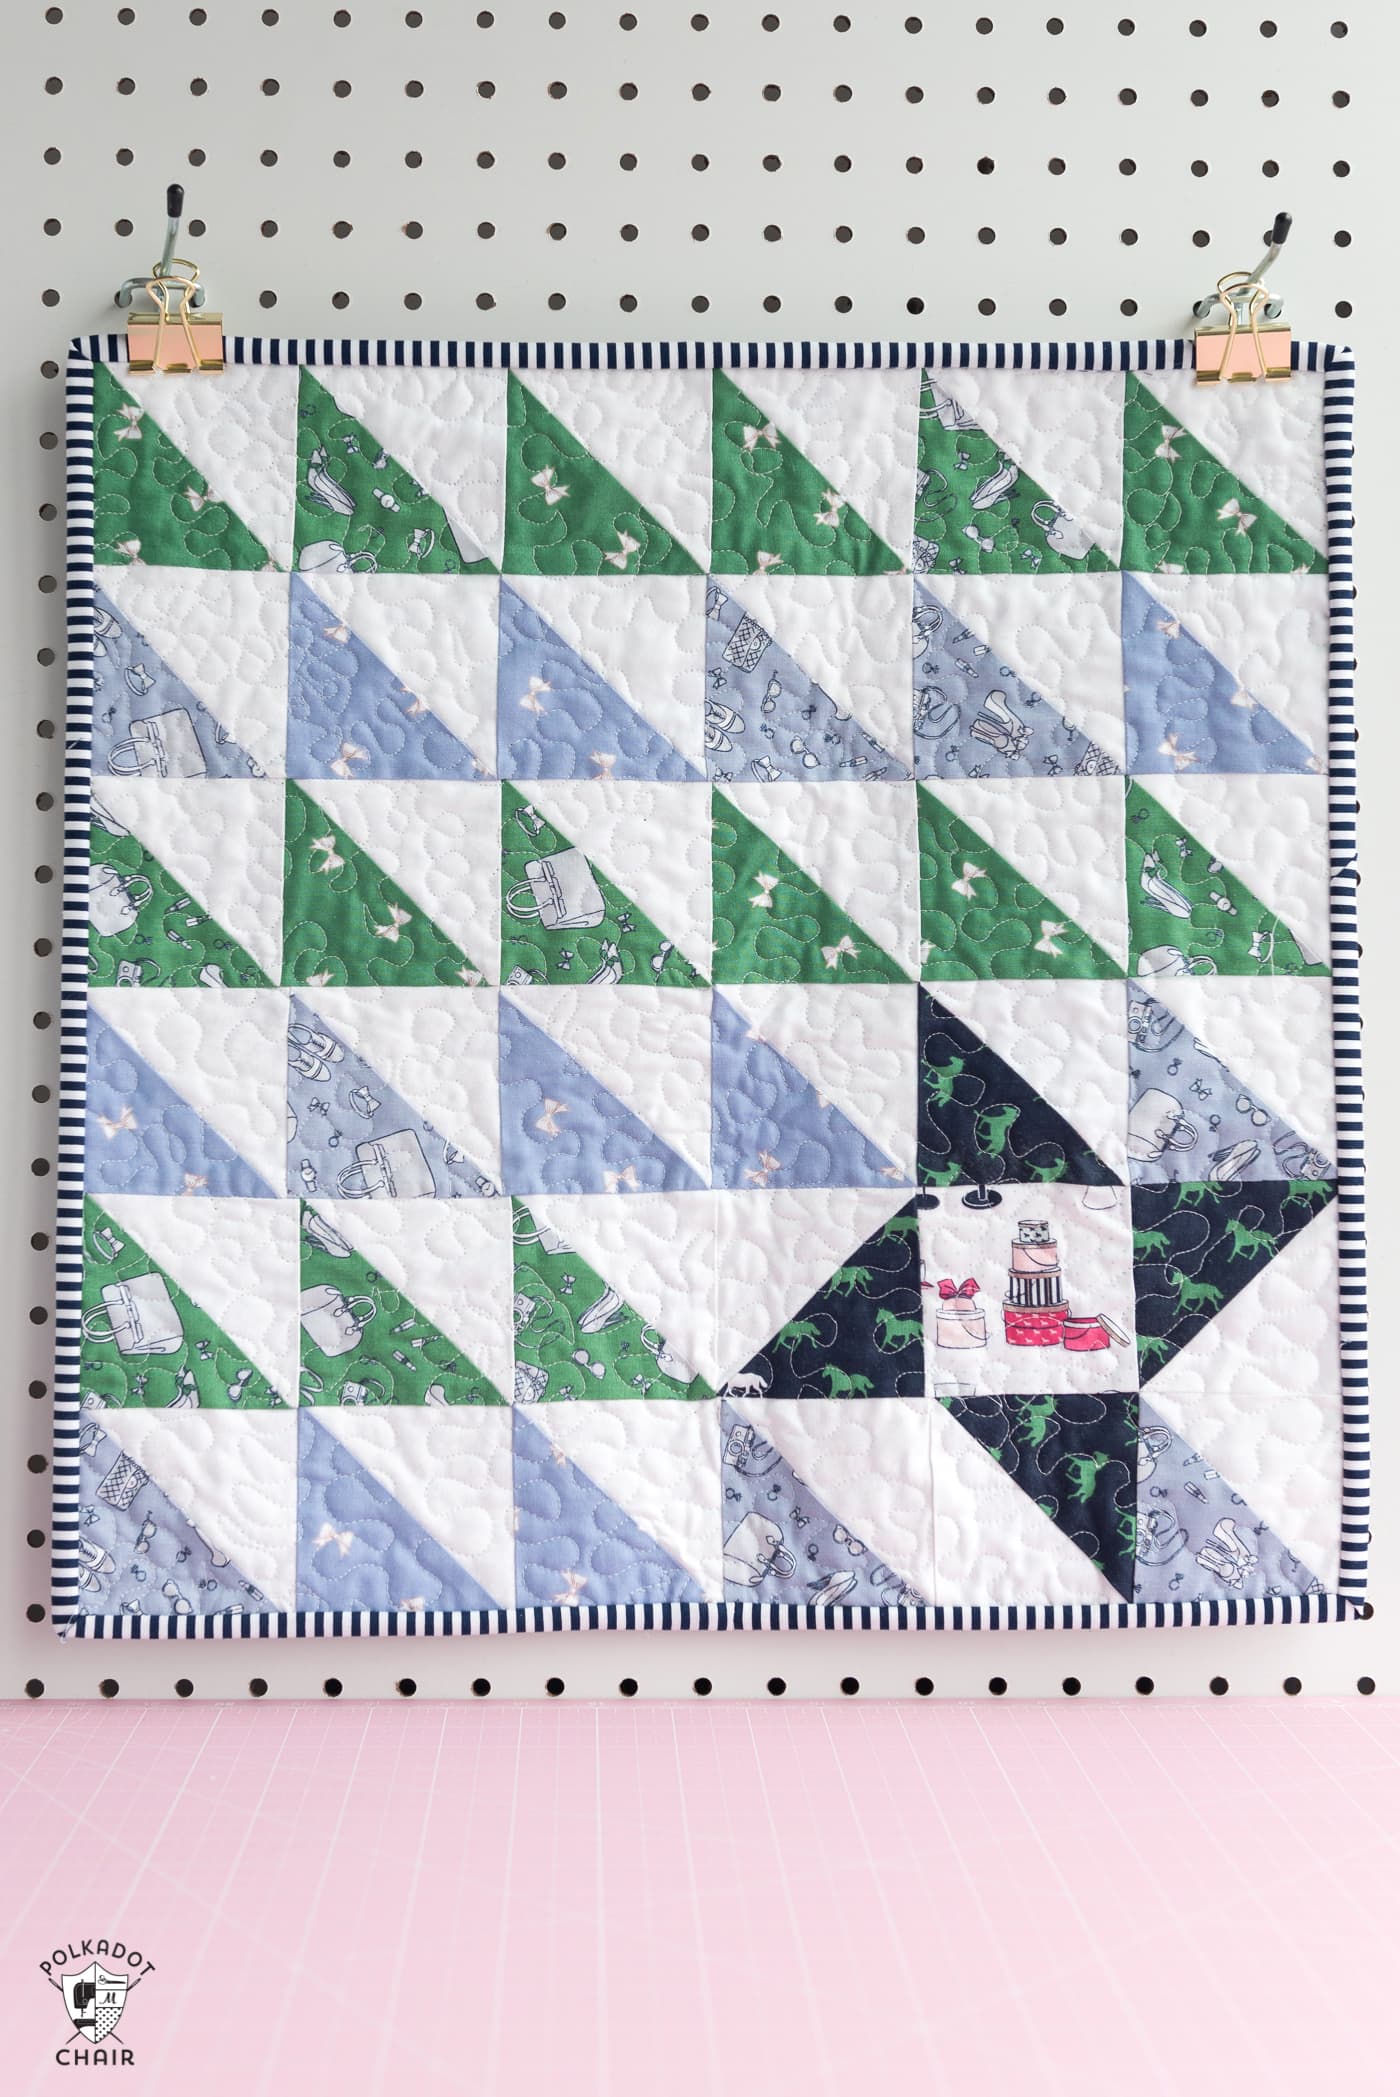
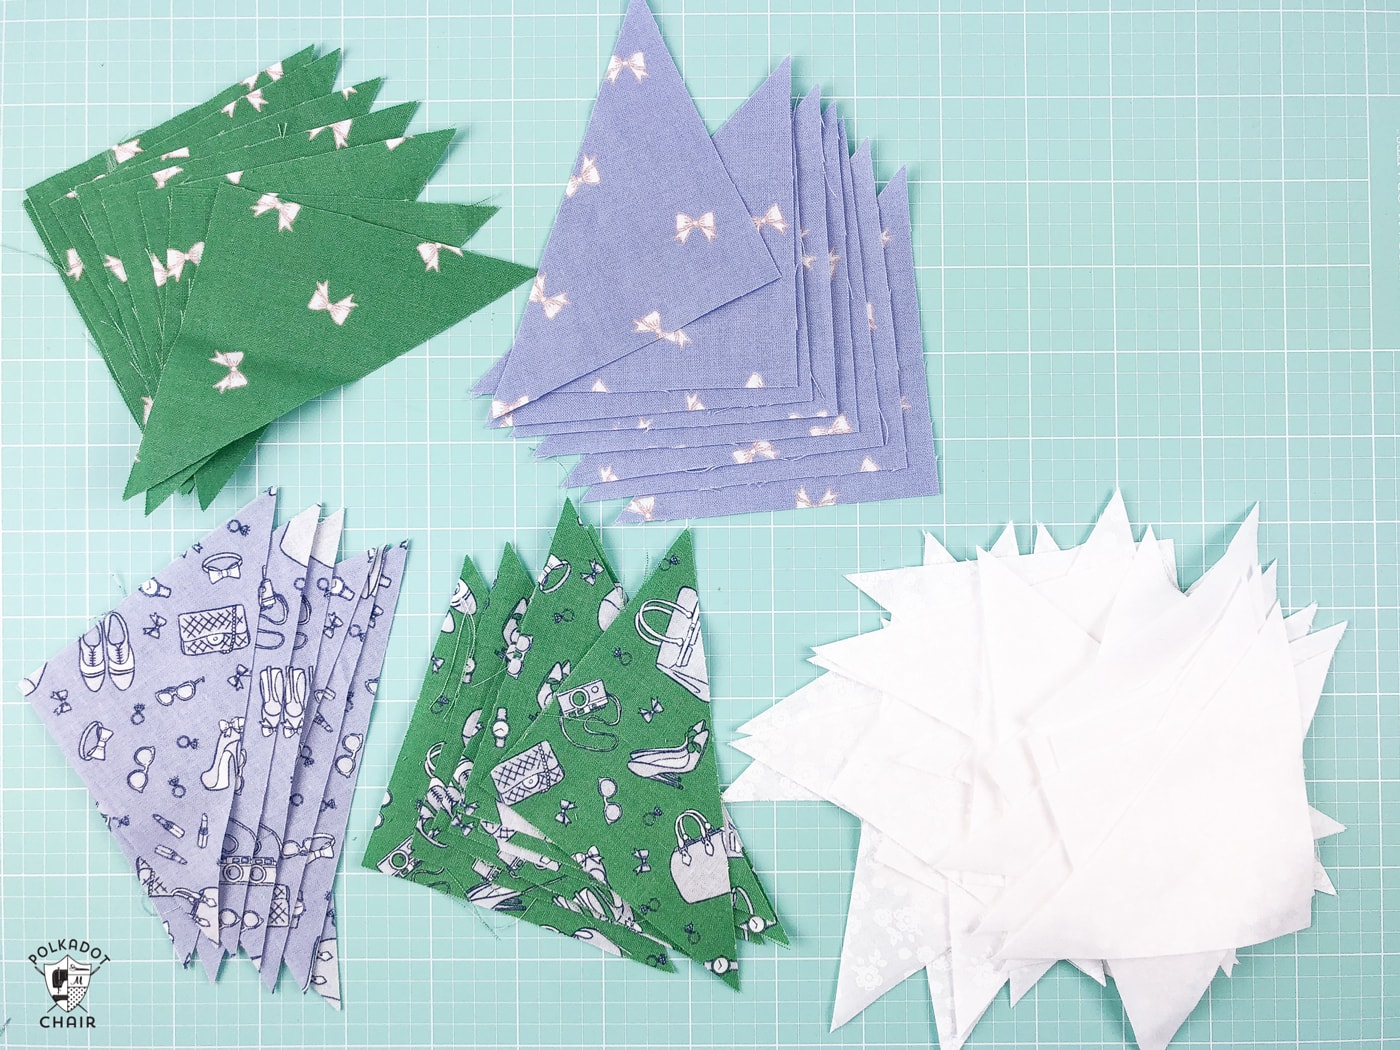
To make the Mini Quilt in the photo above, you need to cut:
- 16 Light Blue Triangles
- 15 Green Triangles
- 4 Navy Triangles
- 35 White Triangles
So that would be two mats with two different Light Blue fabrics. Tell the machine to cut four squares (remember there are two triangles per square).
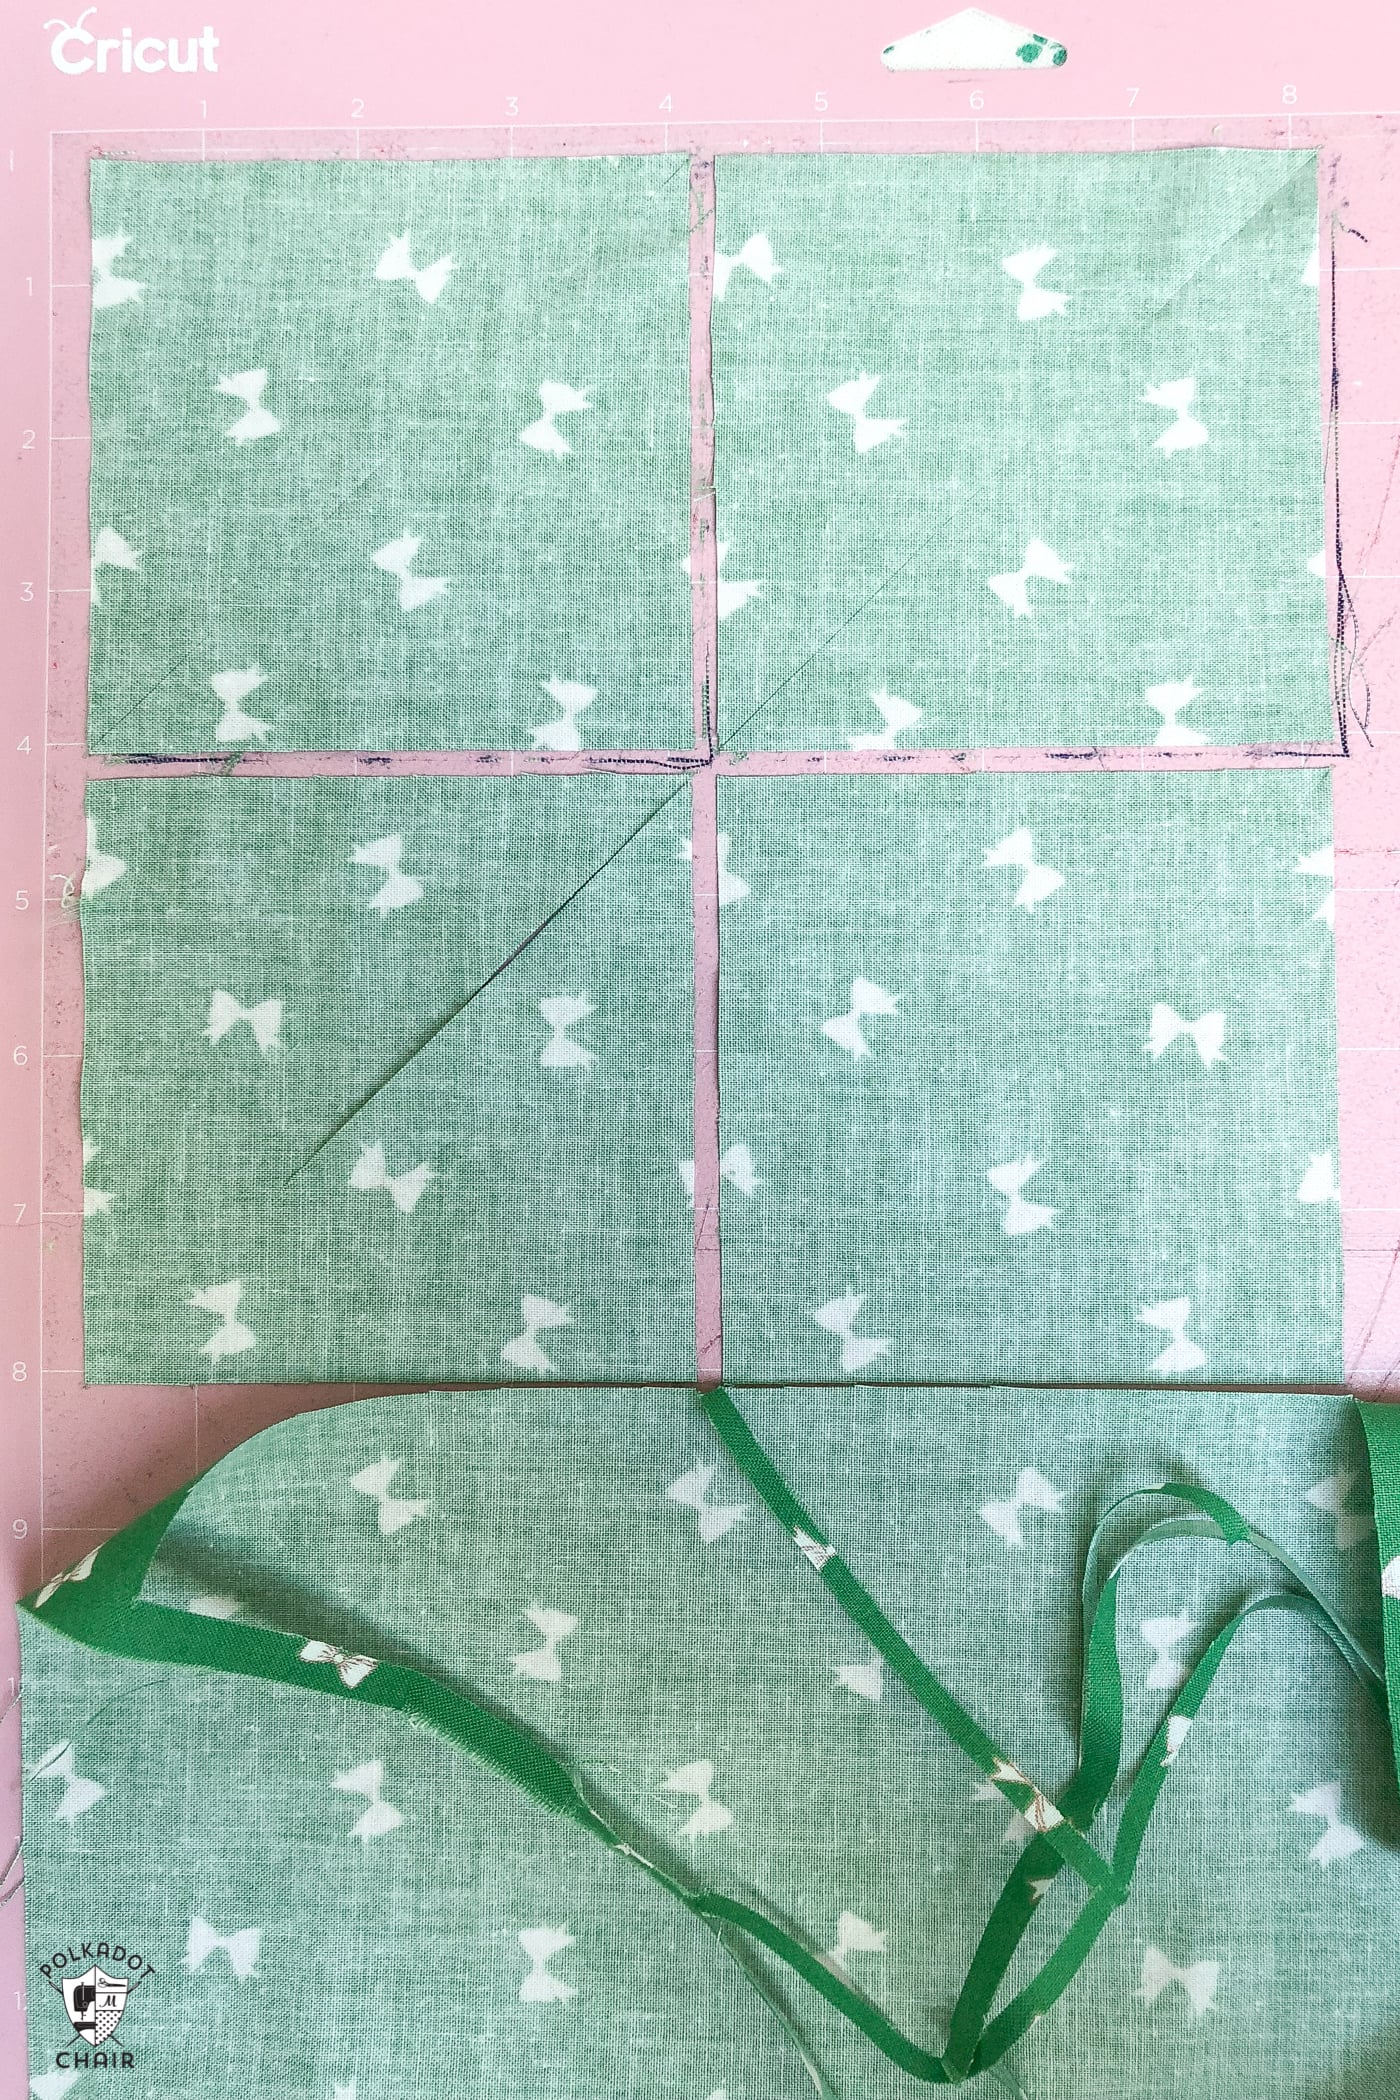
2 mats with two different Green fabrics – tell the machine to cut four squares.
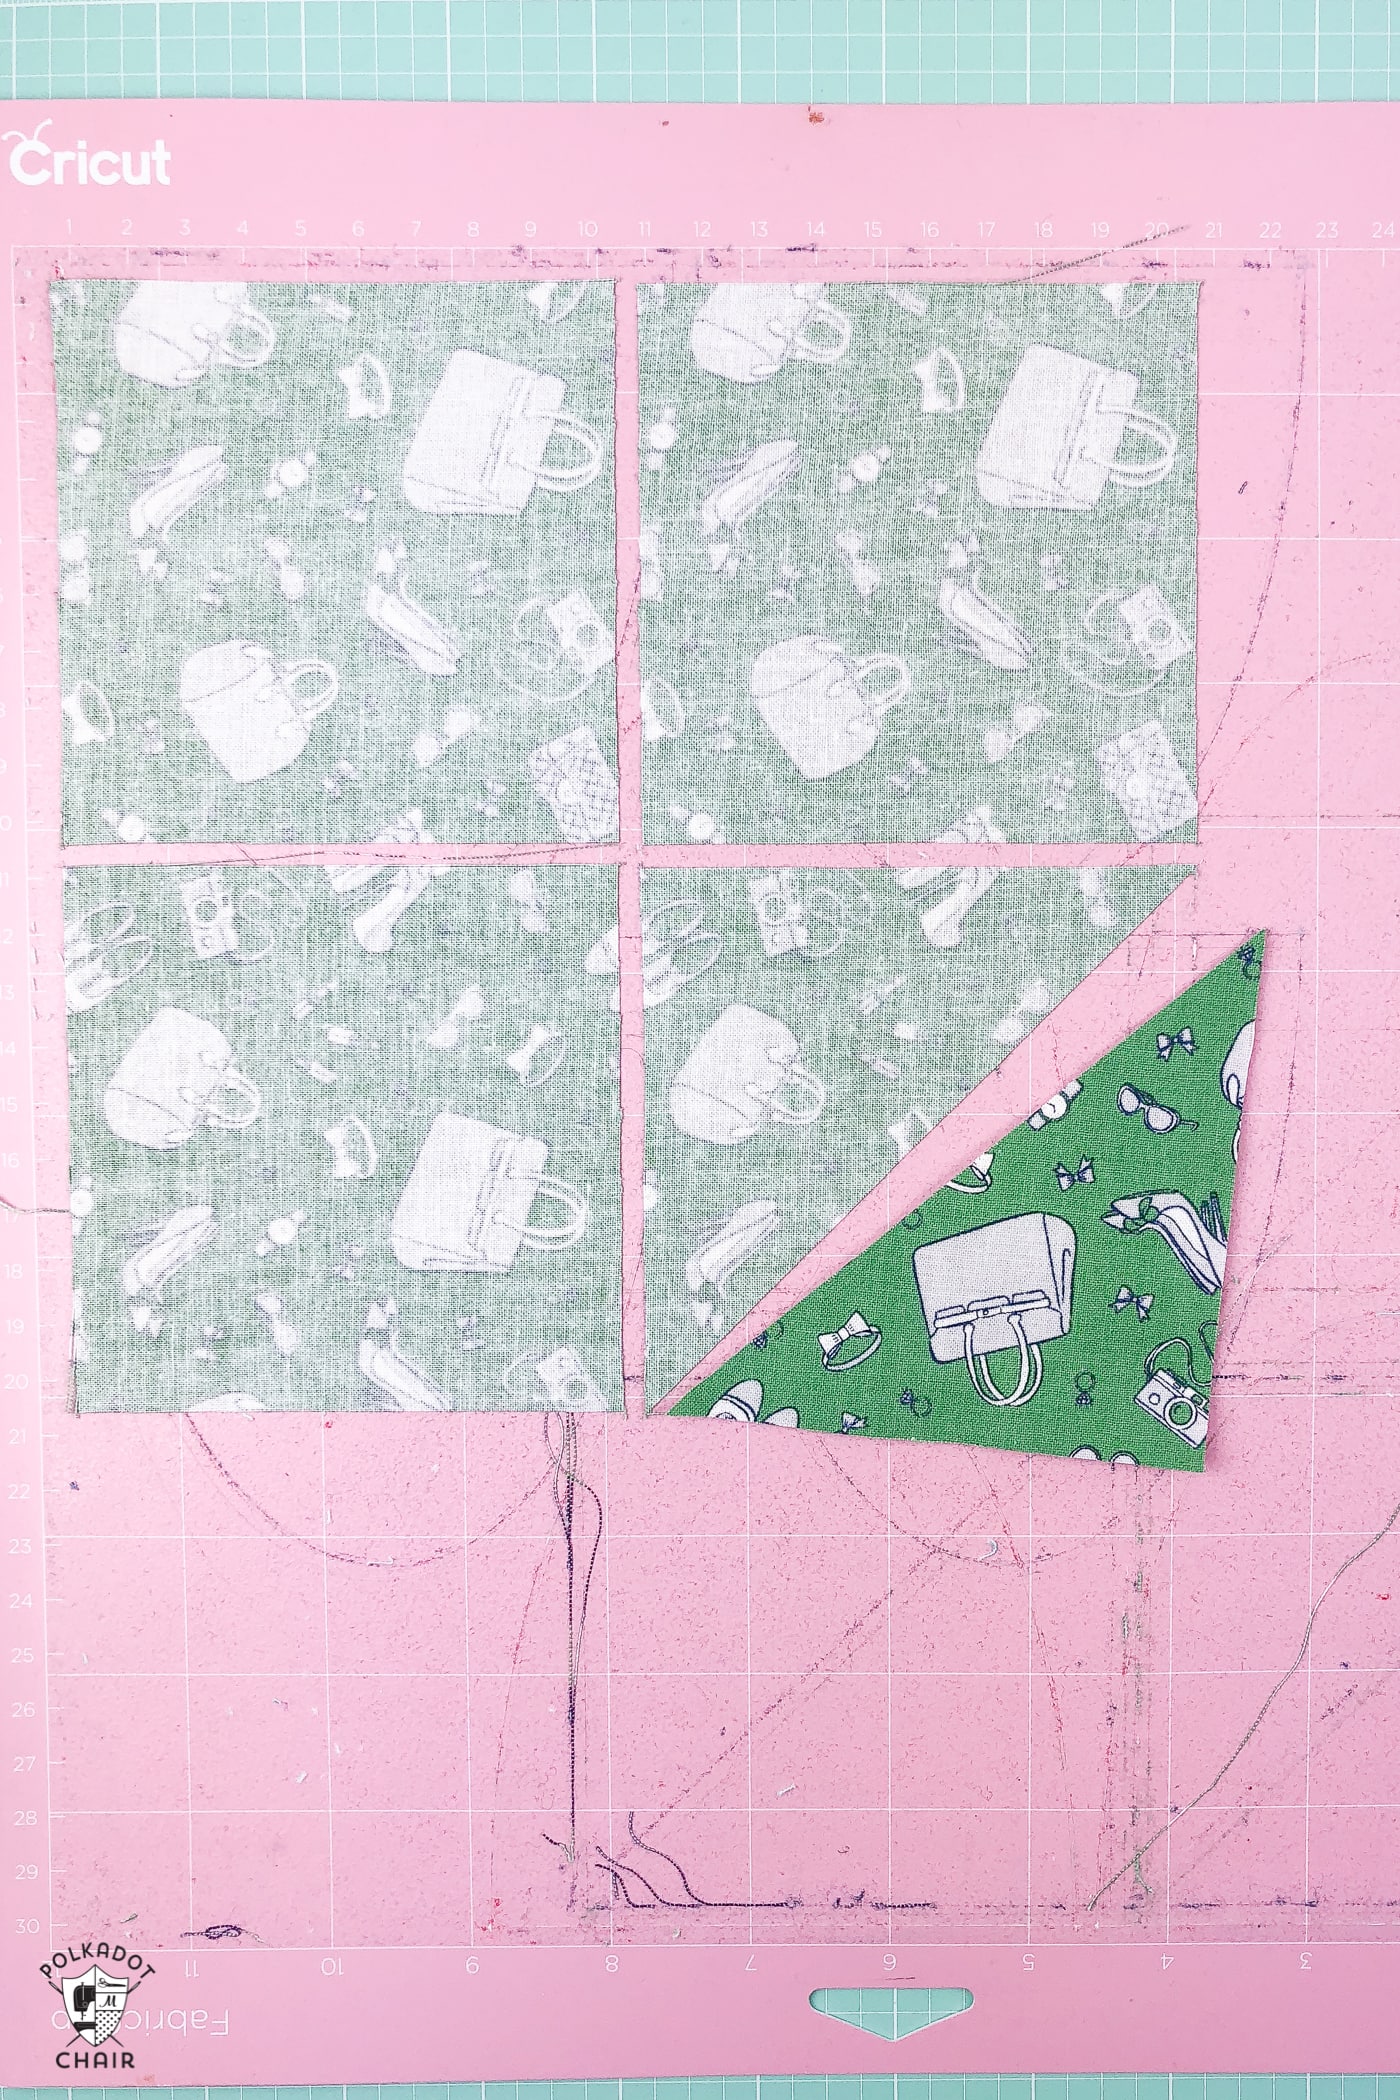
One mat with White Fabric – tell the machine to cut 18 squares (you’ll have one triangle leftover). If you use the 12×24 mat, they will all fit more efficiently.
Then, cut by hand one square 3 1/2″ x 3 1/2″ (the hat fabric in the photo above).
TIP: When you’re cutting your fabric to fit your mat, just cut it 12″ wide and let the rest of the fabric hang off the mat. You don’t need to go to the trouble of cutting it 12″x 12″—just 12″ wide will work. Also, don’t drive yourself crazy pulling off fibers from the mat. It will work fine with them left on.
You can use the same technique for ANY size HST, just remember to add 7/8″ to your finished HST measurement.
For the FULL tutorial on how to make the mini quilt in the photo above, just CLICK HERE.
How to Cut a Dresden Blade with the Cricut Maker
Another common shape I’d like to show you how to cut today is the Dresden Blade. There is no easy way to draw a Dresden blade in the Cricut Designs software, but don’t worry! I’ve done the work for you and included a FREE SVG file to cut Dresden Blades with your Cricut!
To cut the blades:
Go to the CRICUT DOWNLOADS page and download the SVG file.
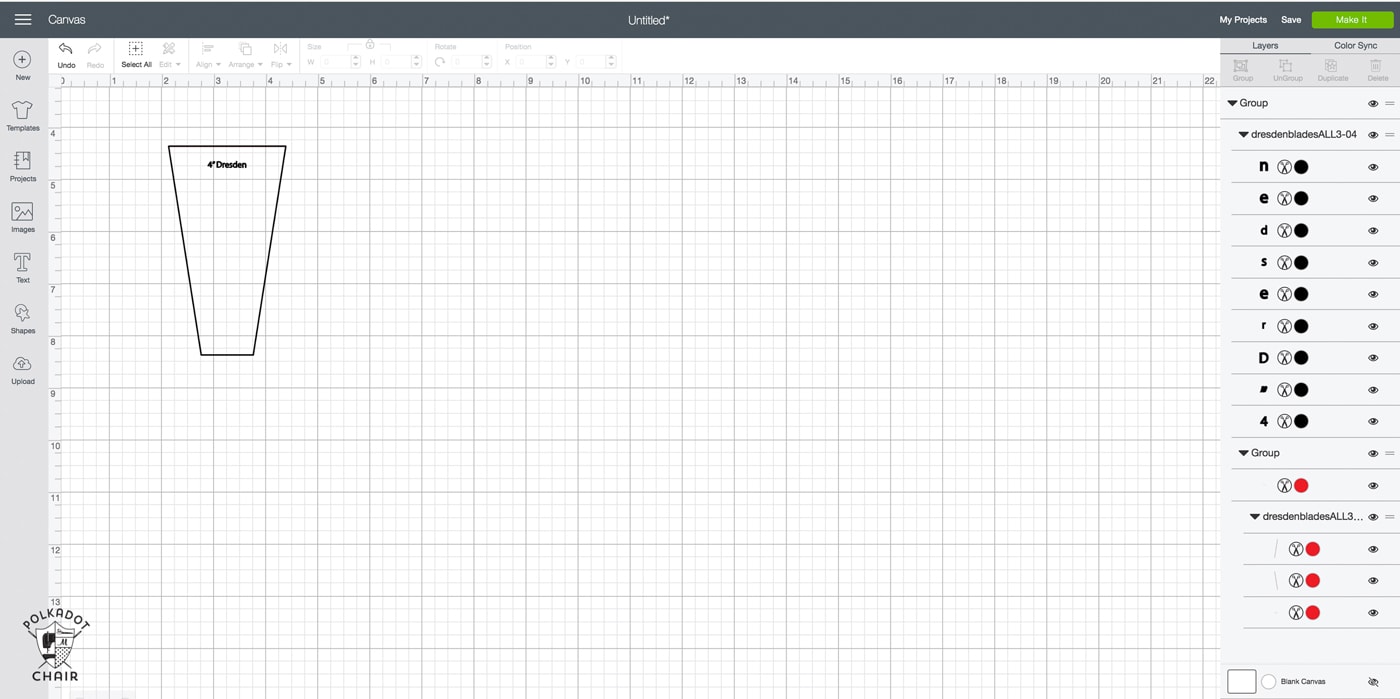
Open Cricut Design Space and UPLOAD the file into the software.
Insert the file into your canvas. DO NOT resize the image AT ALL! Just keep it the exact same size it is when it imports.

Included in the file are shapes to cut 2 1/2″ tall up to 5 1/2″ tall Dresden blades. You obviously don’t want to cut them all at once, so I will show you how only to cut the ones you want.
First, right-click on the imported image and click UNGROUP.
Next, on the right sidebar, you’ll see lots of groups. I made each blade group a different color to help you out.
Decide which size Dresden Blade you’d like to cut, then DELETE all the other blades.
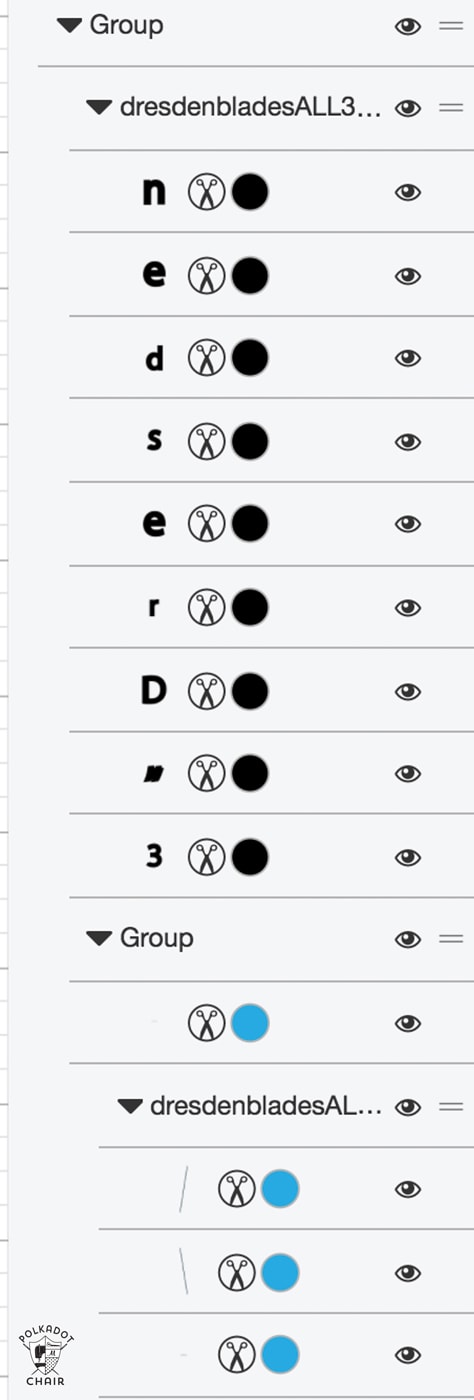
You’ve probably noticed that there are words with the blade; you don’t want to cut them. They are just for reference so you know which blade is which size. On the group of the letters, click the eyeball icon. This will hide the words so they will not cut.
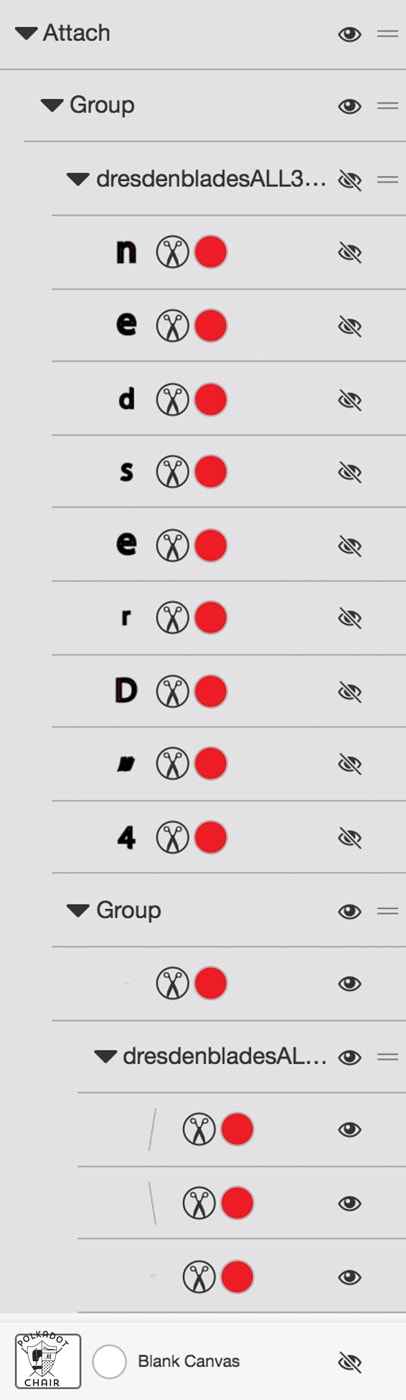
Click on all of the remaining layers and then click ATTACH.
Now you’re left with one Dresden blade ready to cut!
Click MAKE it and tell the machine how many blades you want to cut. I told it 10 just for fun.. this is what my mat looked like:
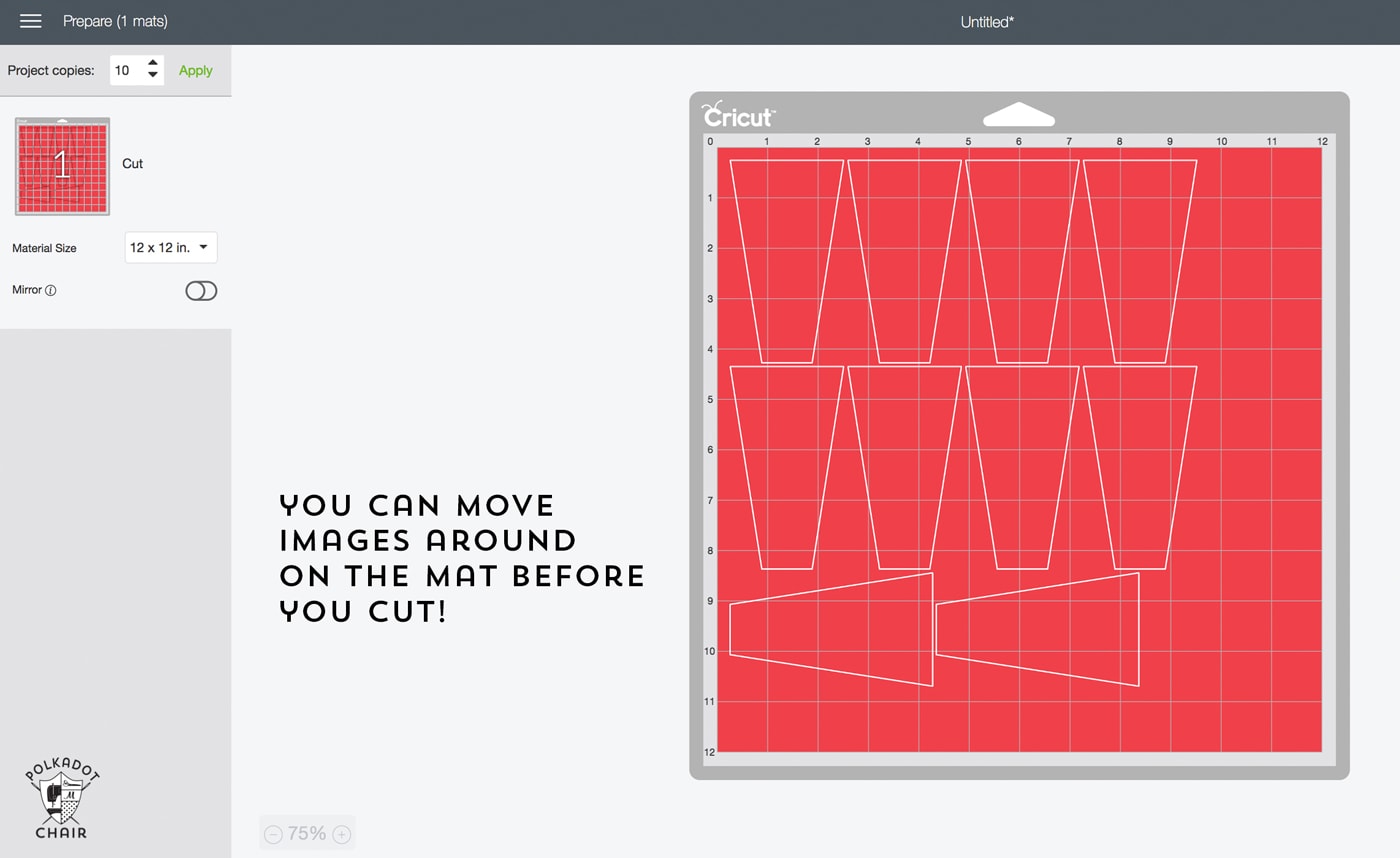
Let’s say your fabric is directional and you don’t want to cut those two pieces sideways, you can just move them on the mat.

You can pick them up with your mouse, rotate them, and move them into place (hold down the shift key to rotate the image in 45-degree increments).
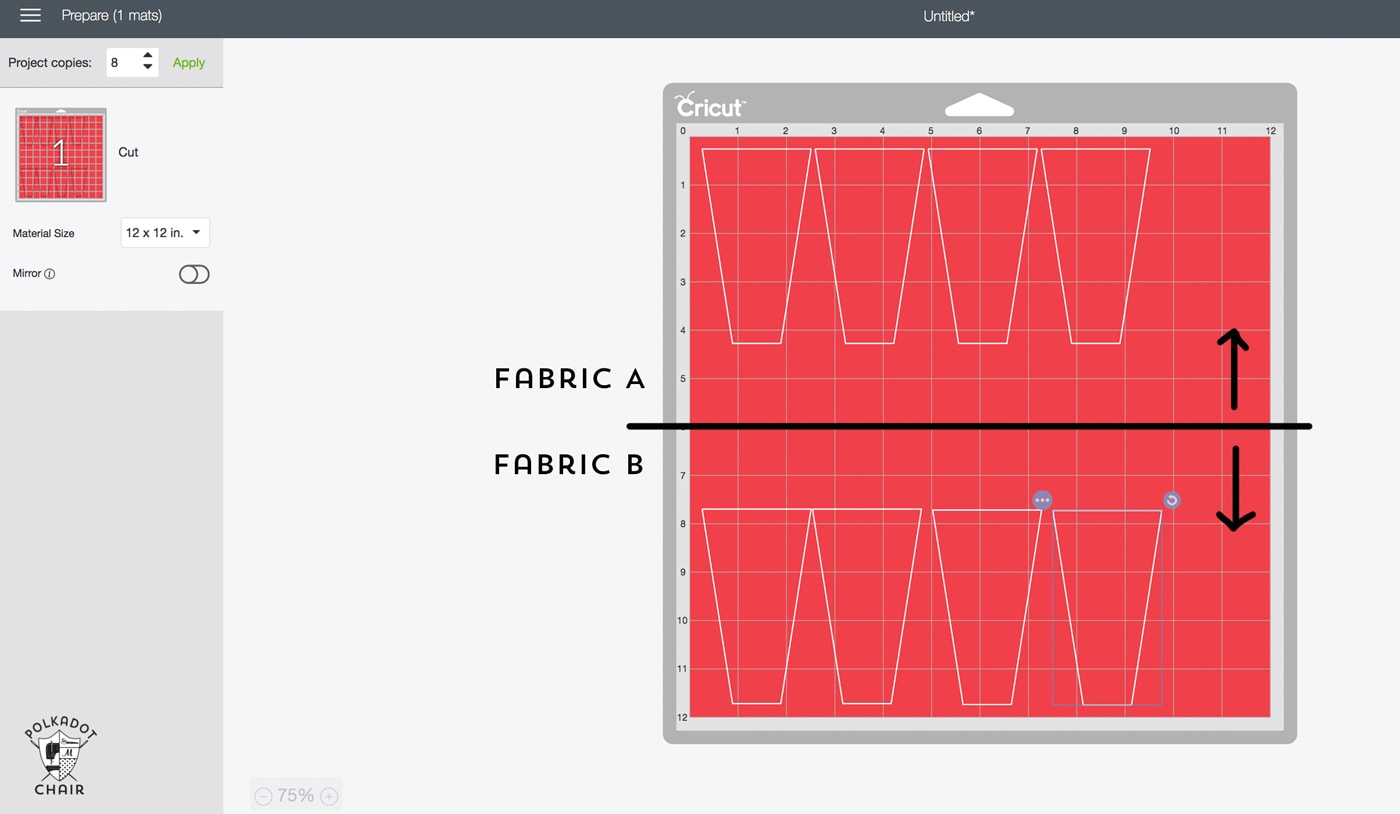
The other cool thing you can do is load two different fabrics on your mat and cut out the blades all at once. You just need to drag the lower four blades to the bottom of the mat. When you load the fabric on the mat, put print 1 on the top and print 2 on the bottom! Pretty cool, huh?!?!? The marks on the mat are EXACTLY where your cuts will be. You can also use this technique if you want to use up a bunch of scraps.
This is especially great if you are working with a 10″ x 10″ pre-cut piece of fabric; you can make sure you cut only on the precut!
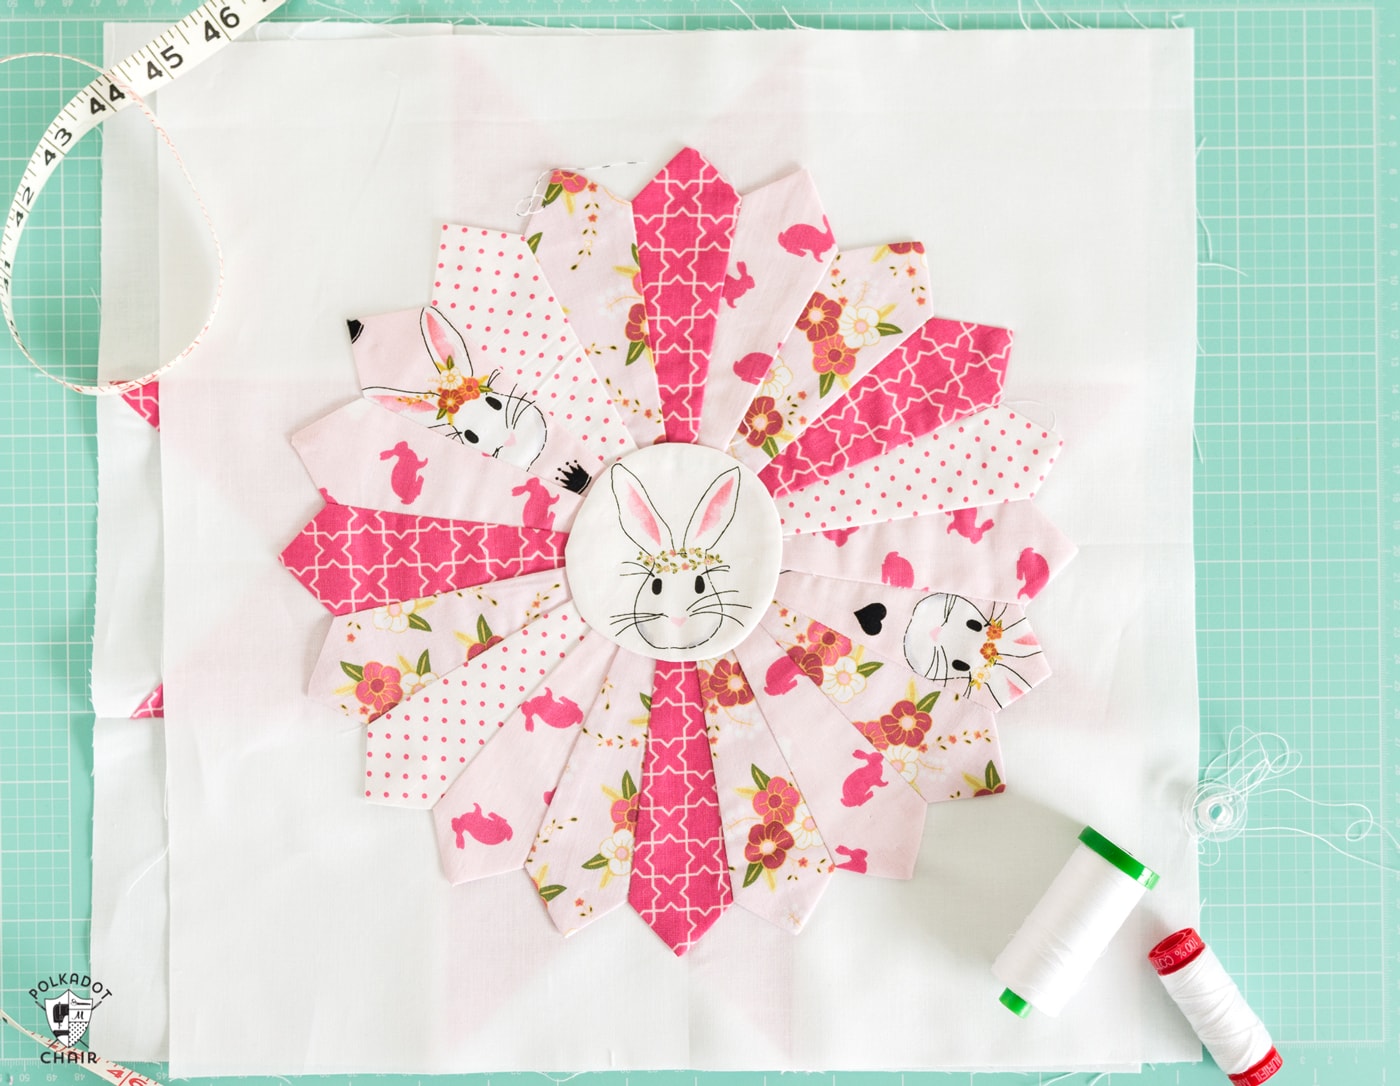
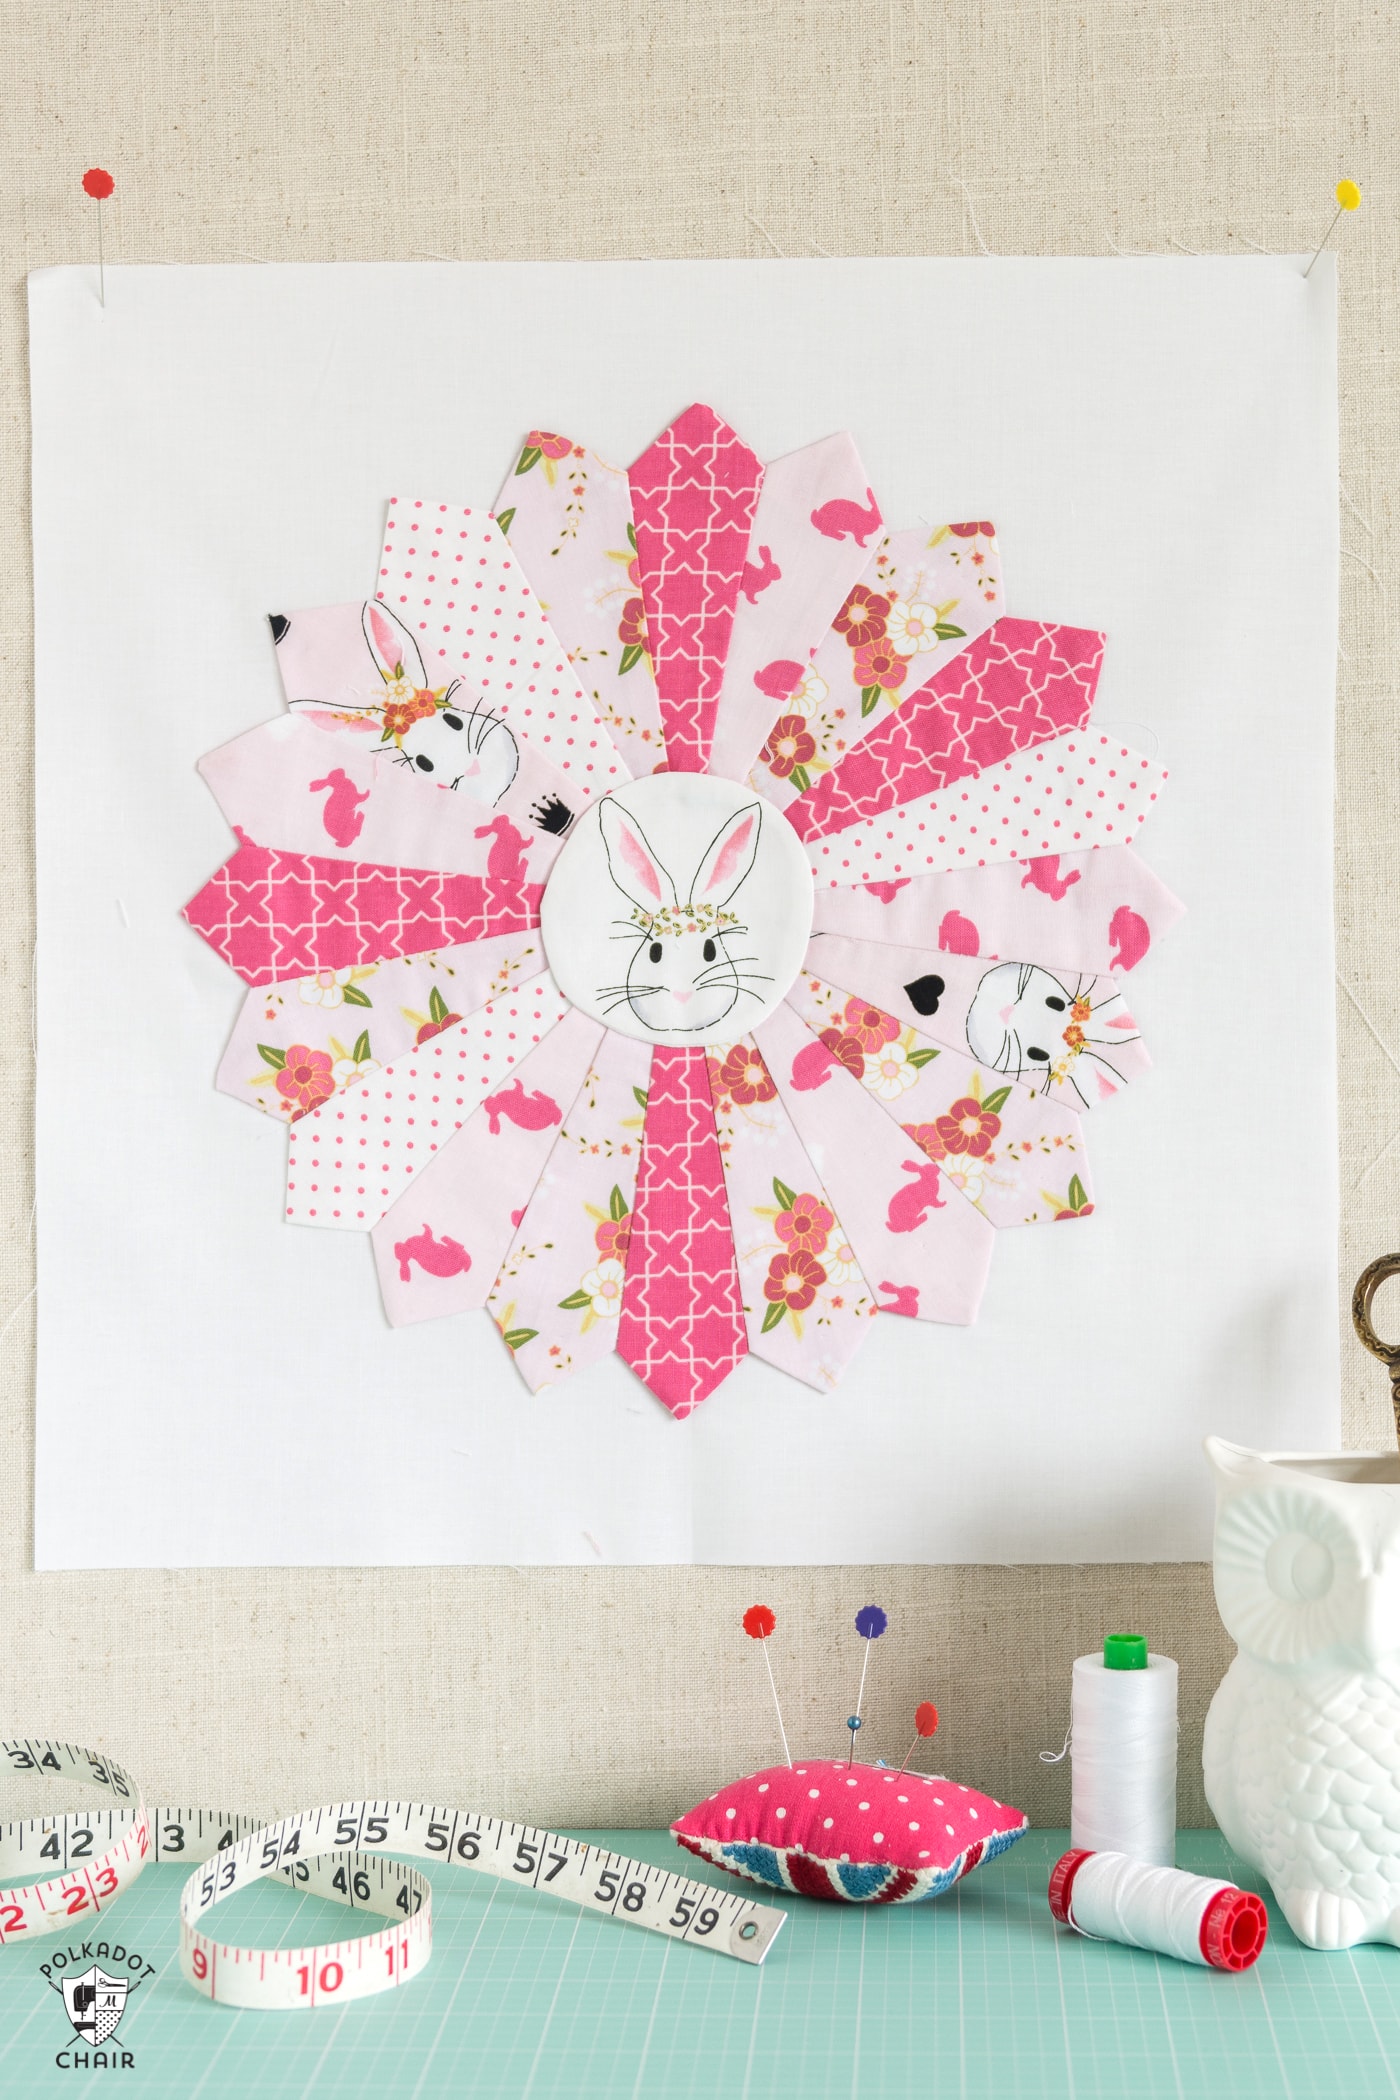
If you’d like to make this Dresden block, you can find the full pattern for it by CLICKING HERE.
Cutting other Shapes with the Cricut Maker
With the Maker, you can cut Hexagons, Diamonds, Circles, Triangles, Squares, and Rectangles, which are all pretty common quilting shapes. Just draw the shape and adjust the size as needed.
We’ll talk more about hexagons and diamonds in another project!
This is a sponsored conversation I wrote on behalf of Cricut. The opinions and text are all mine.


I just my Maker, and bought it to cut my quilt pieces, including hexagons. I have several questions, and don’t seem to know where to ask them, and get answers.
1. If a quilt pattern is a baby quilt, and I want to cut more squares to make it bigger, how I do that?
2. If I get the 30 day free trial of Access, and decide I don’t want to keep it, are my patterns mine to keep? Where will they be?
3. How do I group my hexies to be adjacent to save fabric? Thanks for any help, or a location where I can get help.
Hi,
Some of the questions might be better directed at Cricut support, but I’ll try to answer a few.
1- The quilt patterns in Cricut Design space are not meant to be resized. You’d just have to cut pieces by hand separately if you want something else. They are designed as “one and done” projects, so you don’t have to think or do extra math.
2- When you pay for Access it’s a “pass” to use all of the files/projects inside of Cricut Access. So if you cancel it the projects are not available anymore. However, if you purchase a project/image separately from Cricut Access inside of Cricut Design space it’s yours forever.
3. When you click “Make it” and it takes you to the screen with the layout of the cut, simply grab the pieces your cutting with the mouse and move them to the location you want on the mat.
Can it do fancier cuts like butterflies for applique?
And to cut the basic shapes what all extra do i have to purchase?
I think the confusion is when after you discuss the 3″ finished HST the next paragraph you say:
So say you want to make a 3″ finished HST start with 3 7/8″.
Did you mean 3 1/2″ finished?
Thanks so much for explaining how to cut quilt pieces.
3″ finished refers to the size AFTER the block is sewn into a quilt. It’s pretty common in quilting to refer to finished sizes that way. I was confused for a while about it myself!
A block that is 3″ finished will be 3 1/2″ before it is sewn into the quilt. So the measurements are correct.
Oohhh, I get it now! That creates the seam allowance for the diagonal cut. We already made the seam allowance for the top, bottom and side seams, by adding the half inch. But that doesn’t create any seam allowance for the diagonal cut.
Yes, so that for any other size besides 3 inch finished, you would need some (what I would consider) complex math to figure a seam allowance for any diagonal cut.
But! Using those measurements, we could calculate a seam allowance for any other size, without knowing that complex math. Well, I guess for some people, using those measurements as a conversion factor might also seem like complex math, haha.
In any case, I see the path forward now. I just wanted to make the pattern in a different size, but I was stuck understanding what that was for. Now I see what to do.
Thank you very much!
I’m a newbie at this, so I apologize if this is common knowledge. In the 2nd example, where you want 3 inch squares (HST) for the finished size, and then you say you actually need to cut a 3.5 inch square, which I assume means you’re creating a quarter inch seam allowance — that totally makes sense.
But then next you make a leap to say you need to cut 3 7/8 or 3.875 inch squares. Why? Why do you need the extra 0.375 inches (which would be 0.1875 per seam allowance)?
Is that to account for some kind of waste attributable to the cutting blade? (This waste material is called “kerf” in wood cutting. Not sure about fabric cutting, haha.)
Thank you very much!
It’s a general rule that you need to cut 3 7/8 to get a finished 3 1/2 square. The seam allowance is on a 45-degree angle. I believe that is why the math is different, but I am not a geometry expert. I just know that measurement always works.
Wow, I love how your simple patterns turn into something so special with the right fabrics. What a gift you have! Looking at the Halloween Haberdashery quilt, is it quilted with horizontal lines, are some lines vertical and/or diagonal? My free motion quilting is a disaster and I’d really like to finish this one myself. Yours looks SO good–
Wow, this maker machine is amazing. I will be checking into possible buying one. Your work is always fabulous. I love these quilts, both small and large.
I am so glad I found this information on the Cricut Maker. I want one sooo bad. Had the Cricut Air 2 and gave it to my daughter when I moved because I am more interested in the fabric cutting end of this machine. I’m certainly going to keep all the information from you i can find. I don’t have my sewing room set up yet in this new place but I sure hope i can get one when I get settled. I get your emails on a regular basis – how did I miss all these on the Cricut??