How to Stencil a Bookcase
Today I’m excited to share with you one of the projects we tackled as a part of our Kitchen make-over, this DIY Stenciled Bookcase. It’s quite easy to stencil the back of a bookcase with paint. Keep reading to find out how we did it.
This project is sponsored by Royal Design Studio but the text, opinions and crazy ideas are ALL mine.
Way back in 2007 we were not even thinking about moving. Then one day we walked through a home for sale and I had one of those “you need to buy this house” moments. It’s a crazy long story with a few twists and turns but in the end, everything worked out the way it was supposed to. I loved the home layout and the location, I did not however love the kitchen. It had a few “strikes” against it in my opinion.
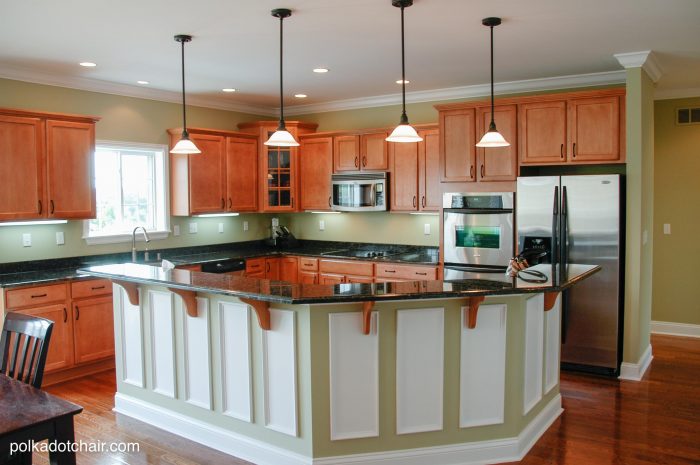
Slowly over the last 8 years, we have been updating our kitchen. After burning meals for a month straight, the first thing we changed was the cooktop. We also added a backsplash, rearranged the cabinets, and added a vent hood.
This is what the kitchen looks like today (well not TODAY, this was on a day when the kitchen was clean, it’s not technically clean today *wink*)
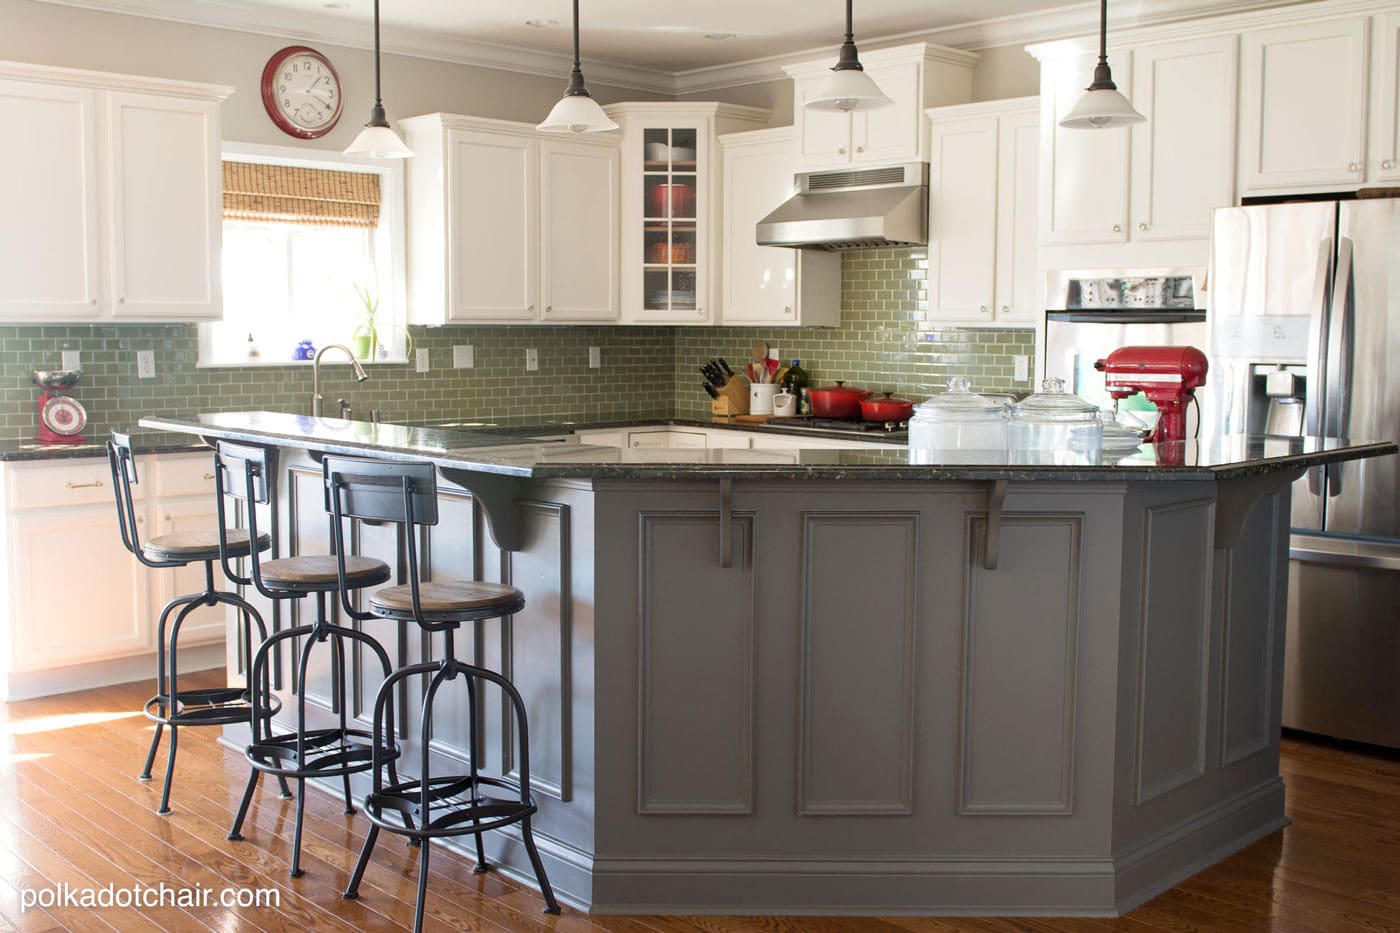
The kitchen redo deserves a post all of its own, as does the adjoining family room. Today I’m going to share with you one of my favorite smaller projects that we tackled in our kitchen, this bookcase project.
Why a Bookcase in a Kitchen?
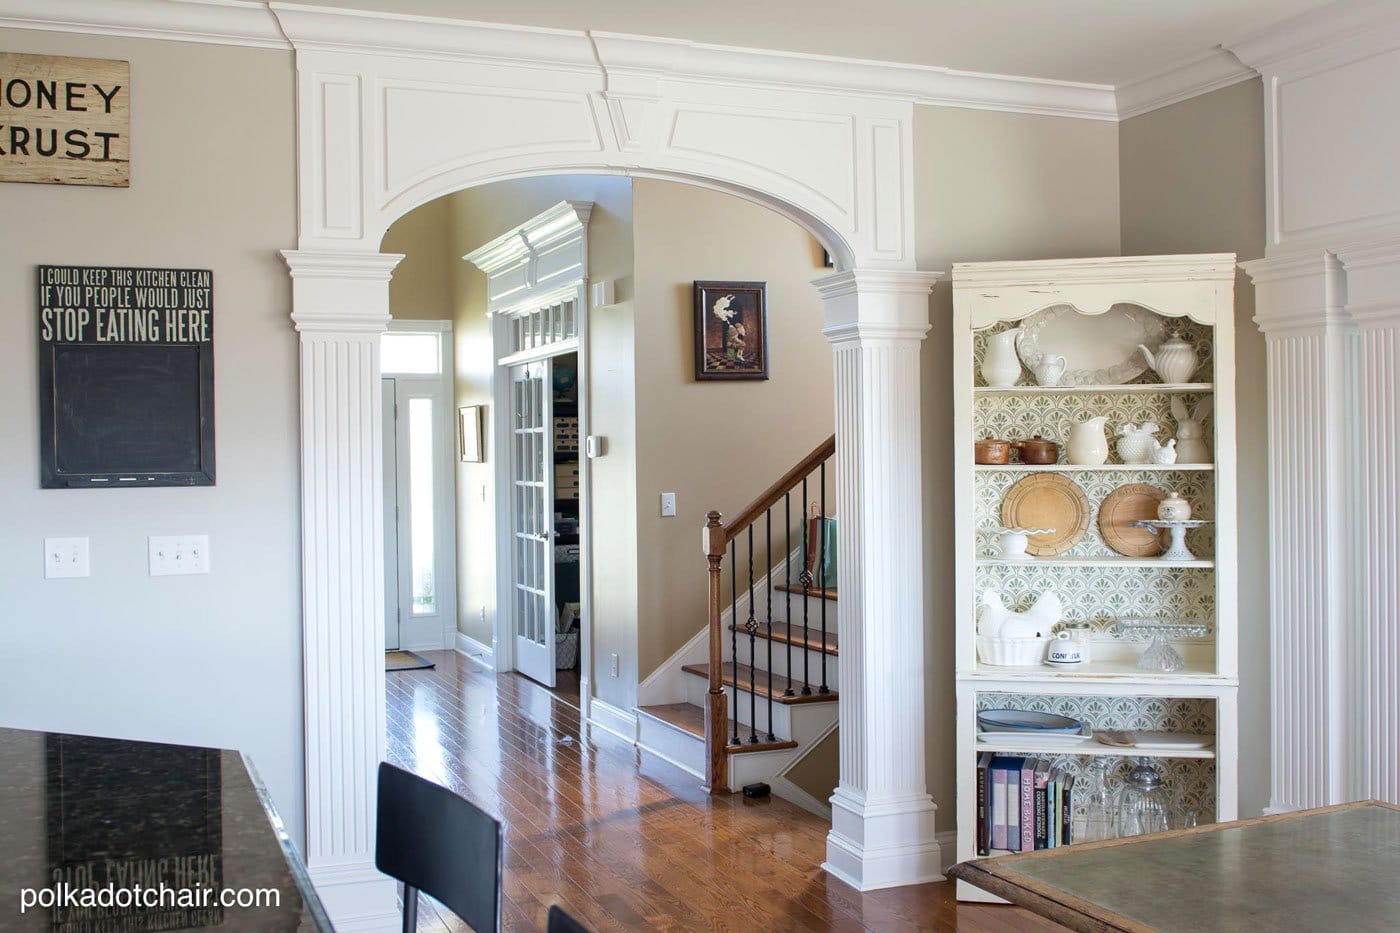
We have a funny corner in our kitchen that we could not find a piece of furniture to fit. We’ve had a mini-fridge there, a wire bookshelf, and even a Christmas tree.
I looked for years for a piece of furniture that would fit in the corner and match the look we were going for in our kitchen, but I never found one (or at least couldn’t find one in the price range I was looking for). After a while, I decided that I needed to stop looking at commercial produced furniture and possibly take on a redo project.
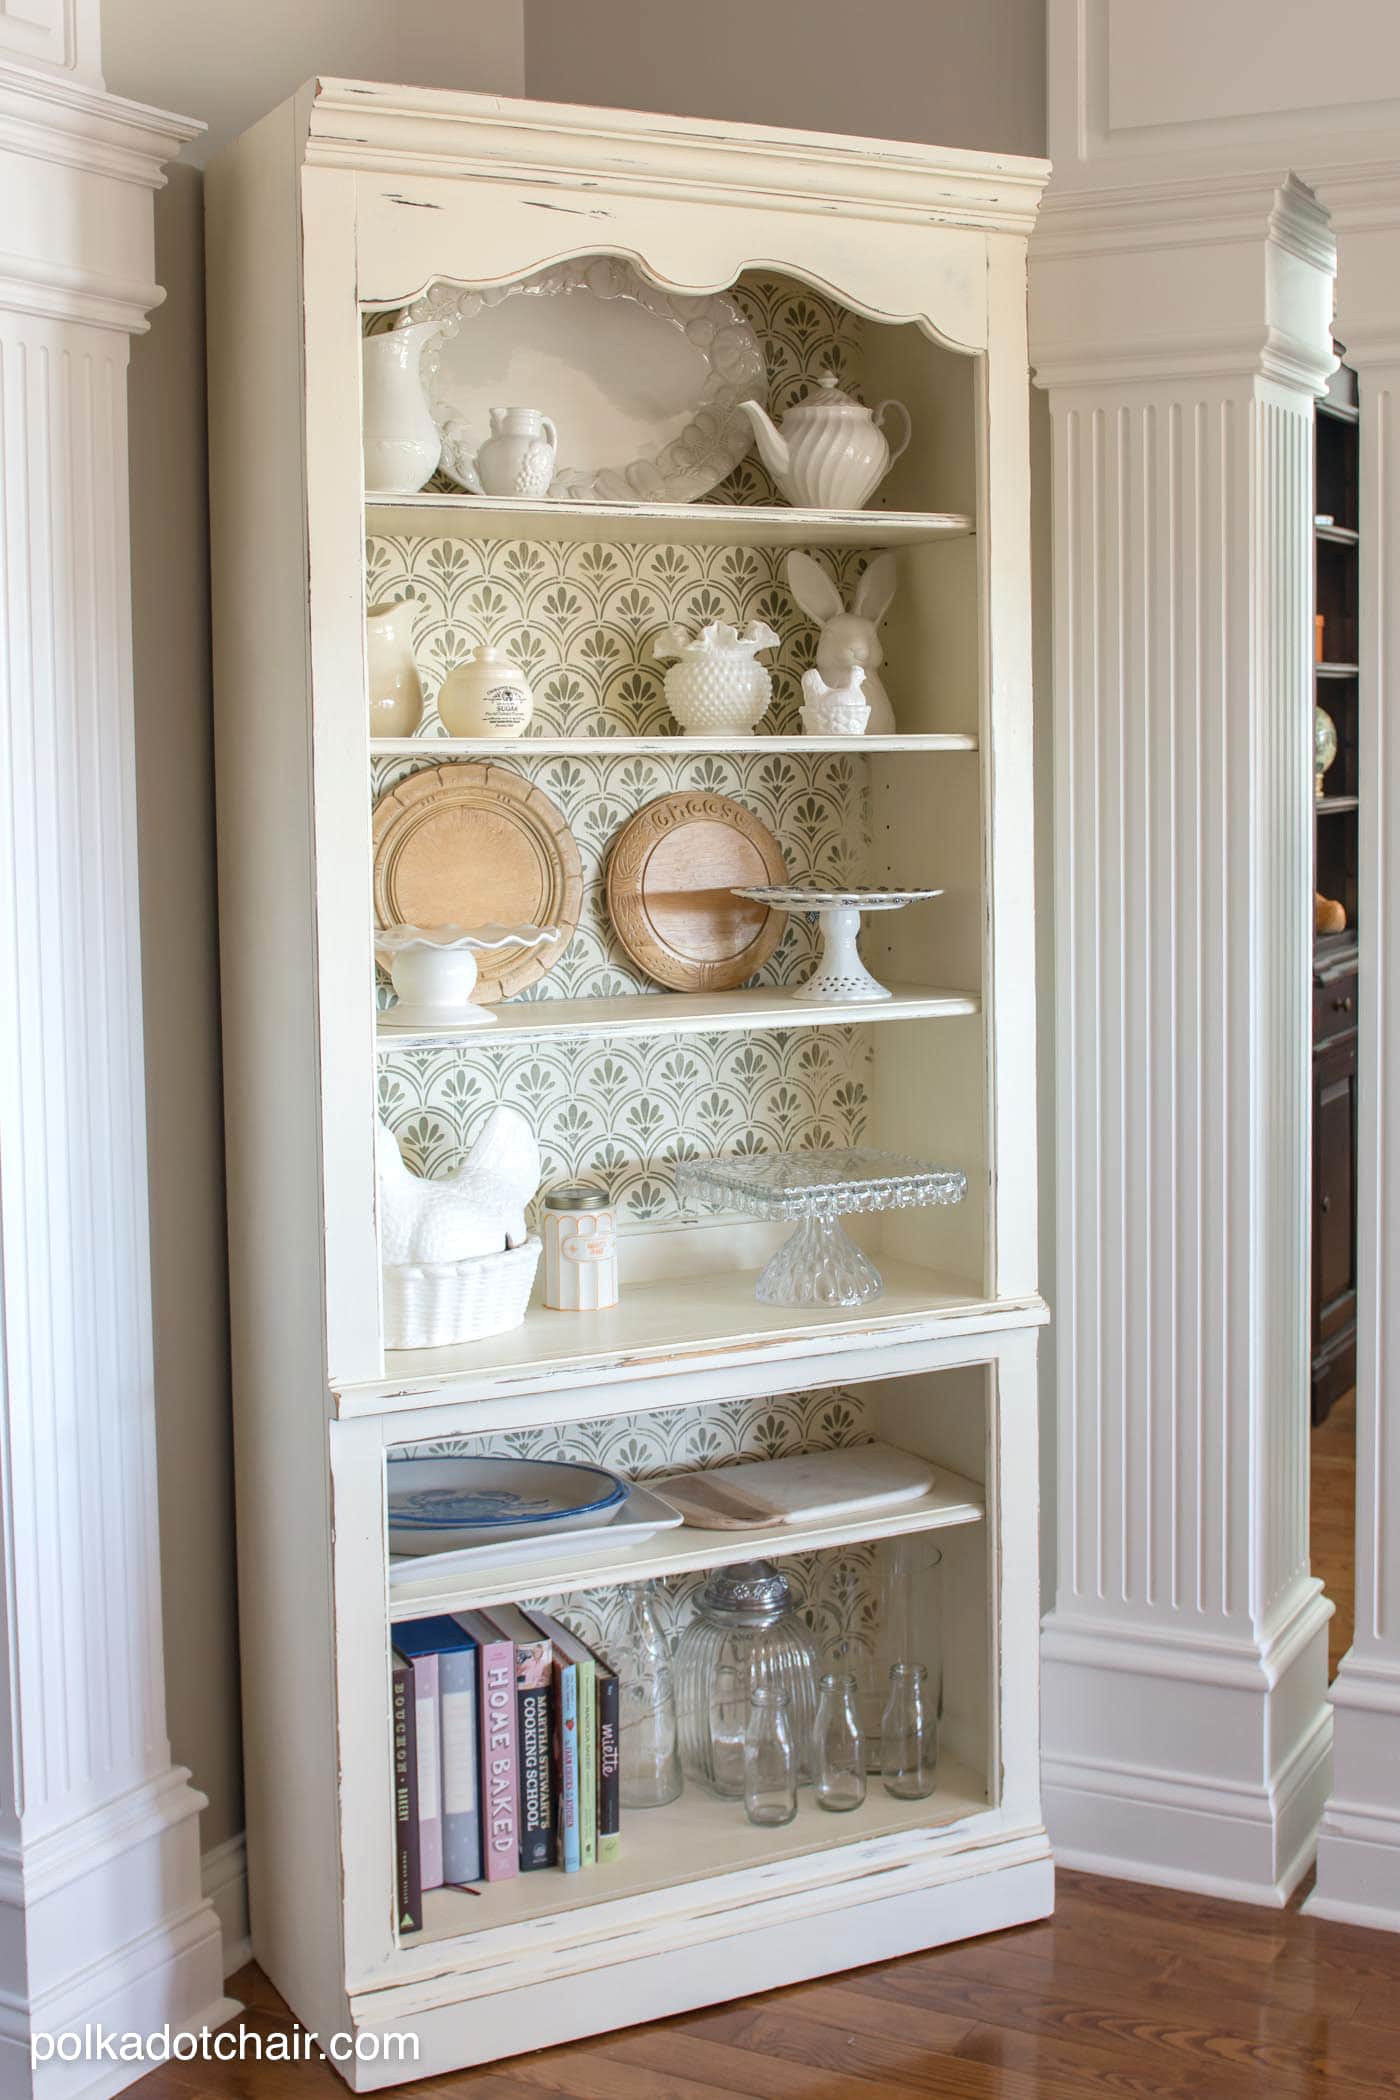
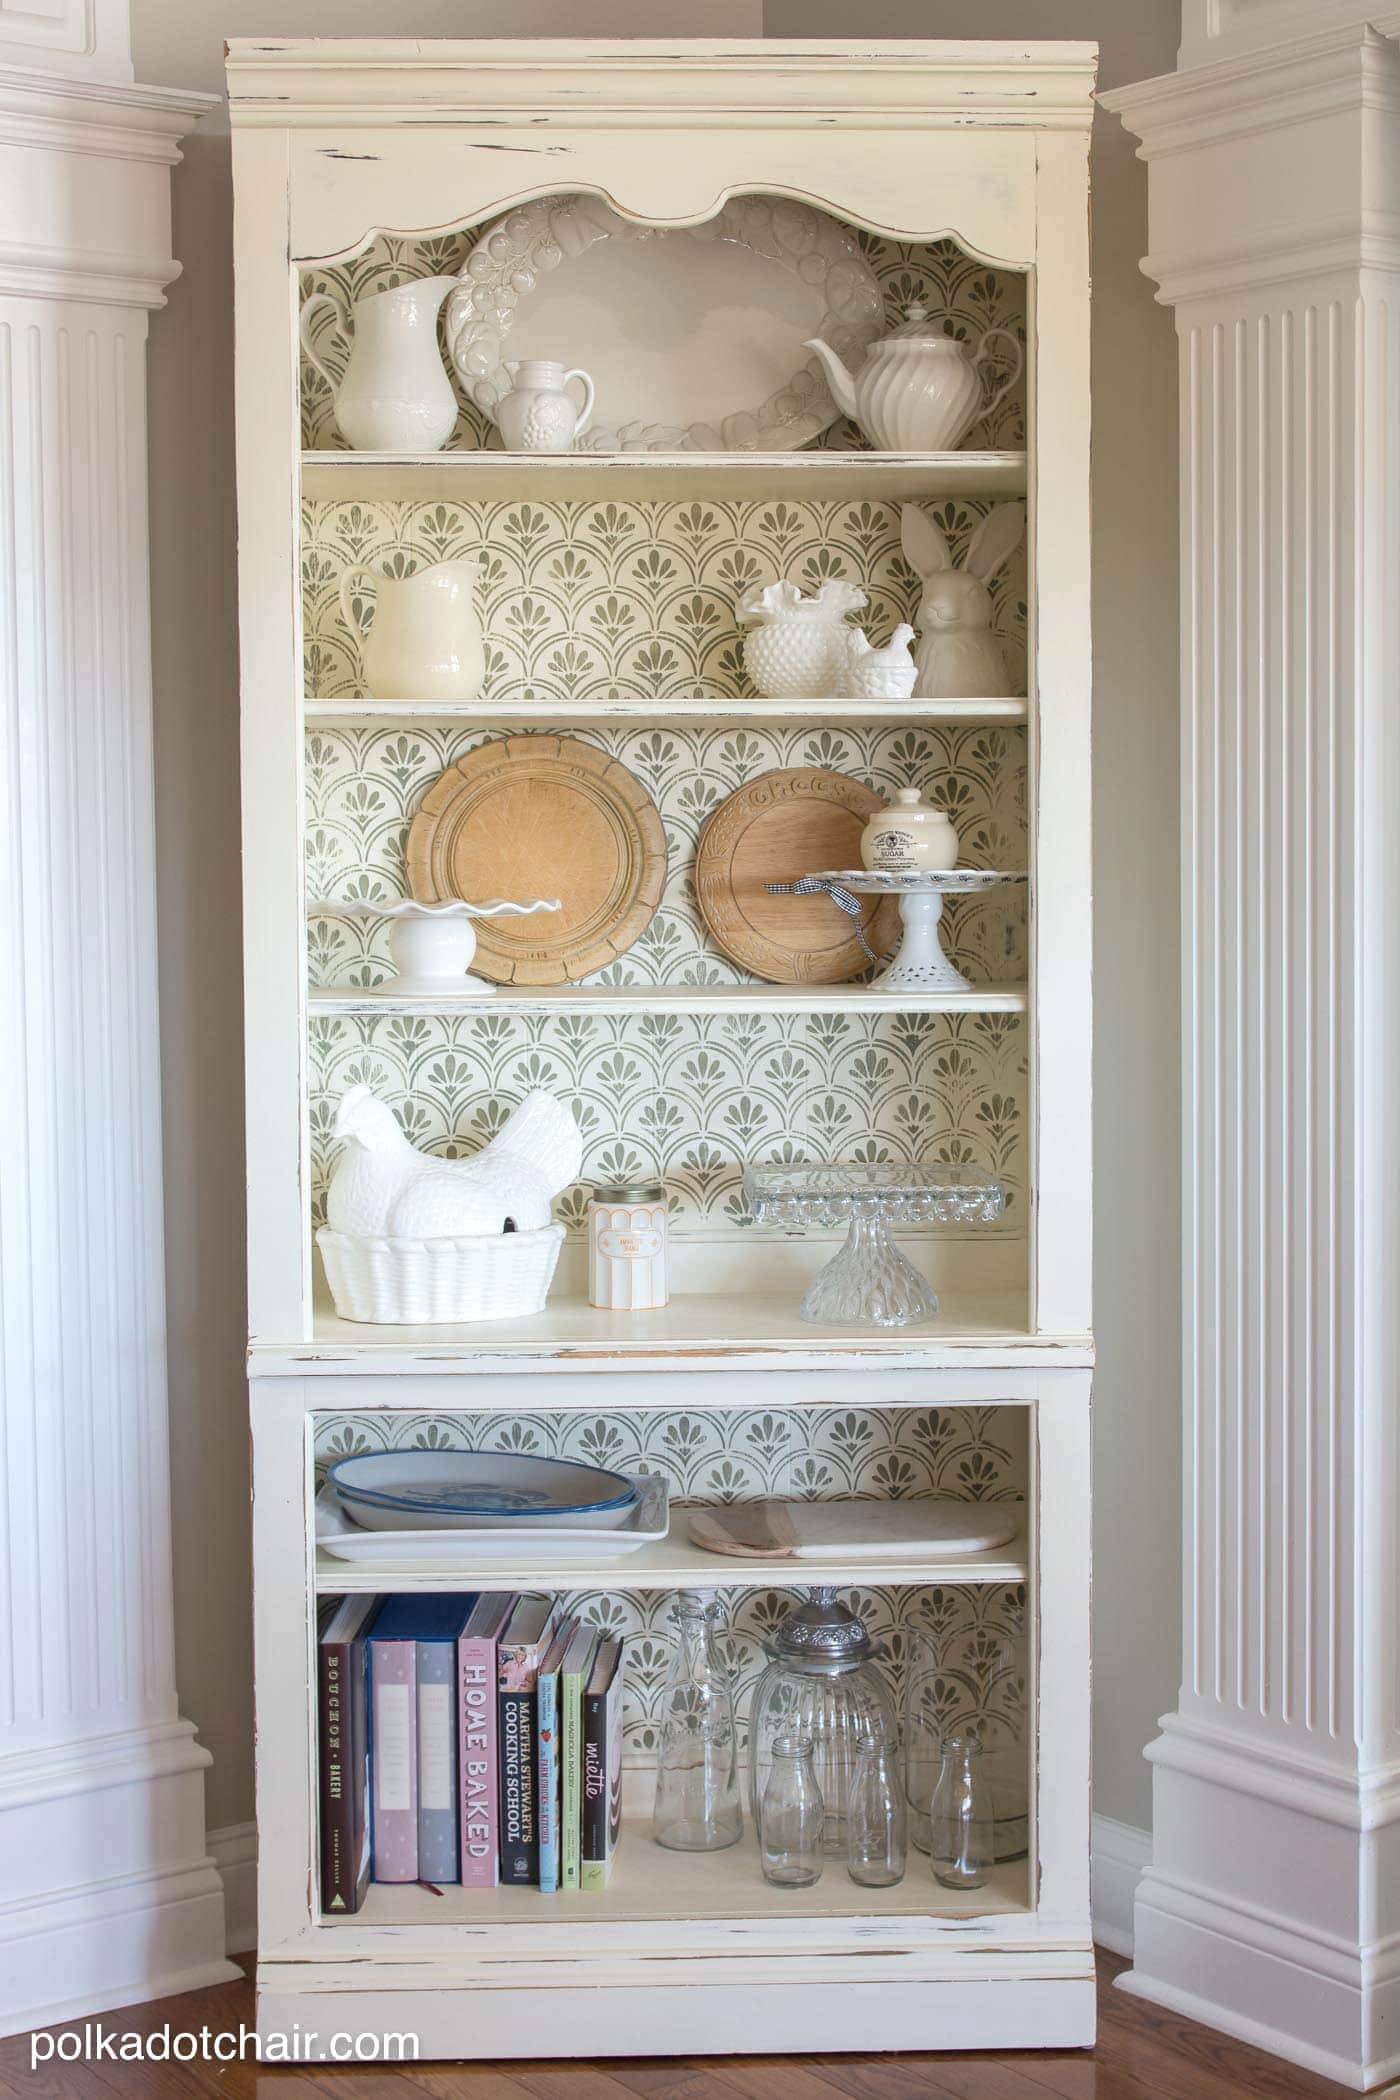
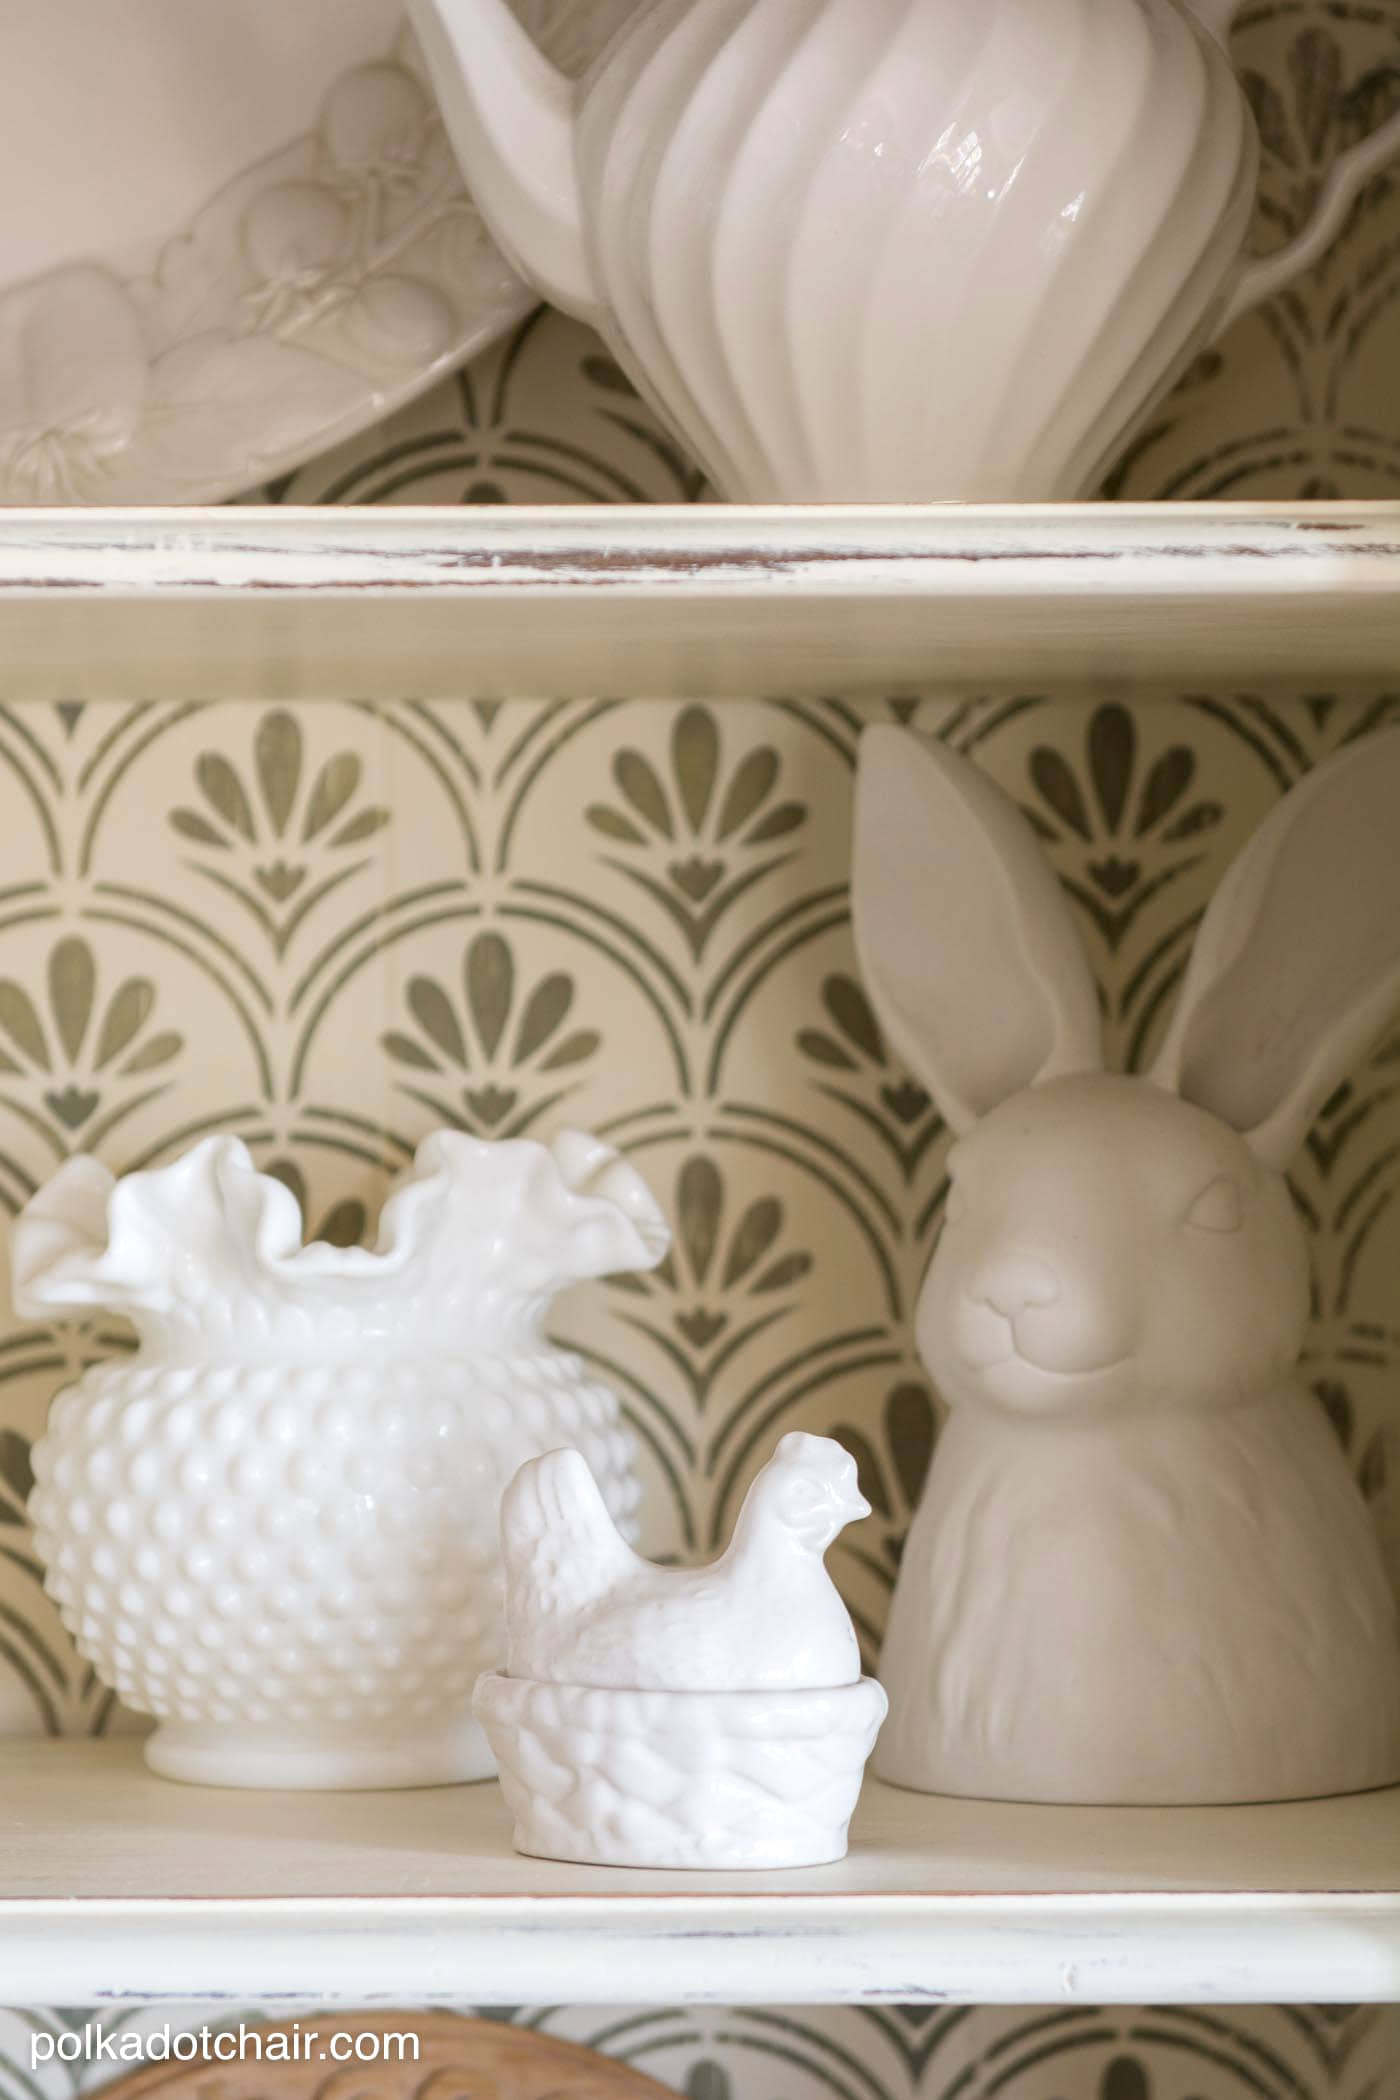
We have a lot of storage in our kitchen but I wanted a space to keep my frequently used cake plates and large platters.
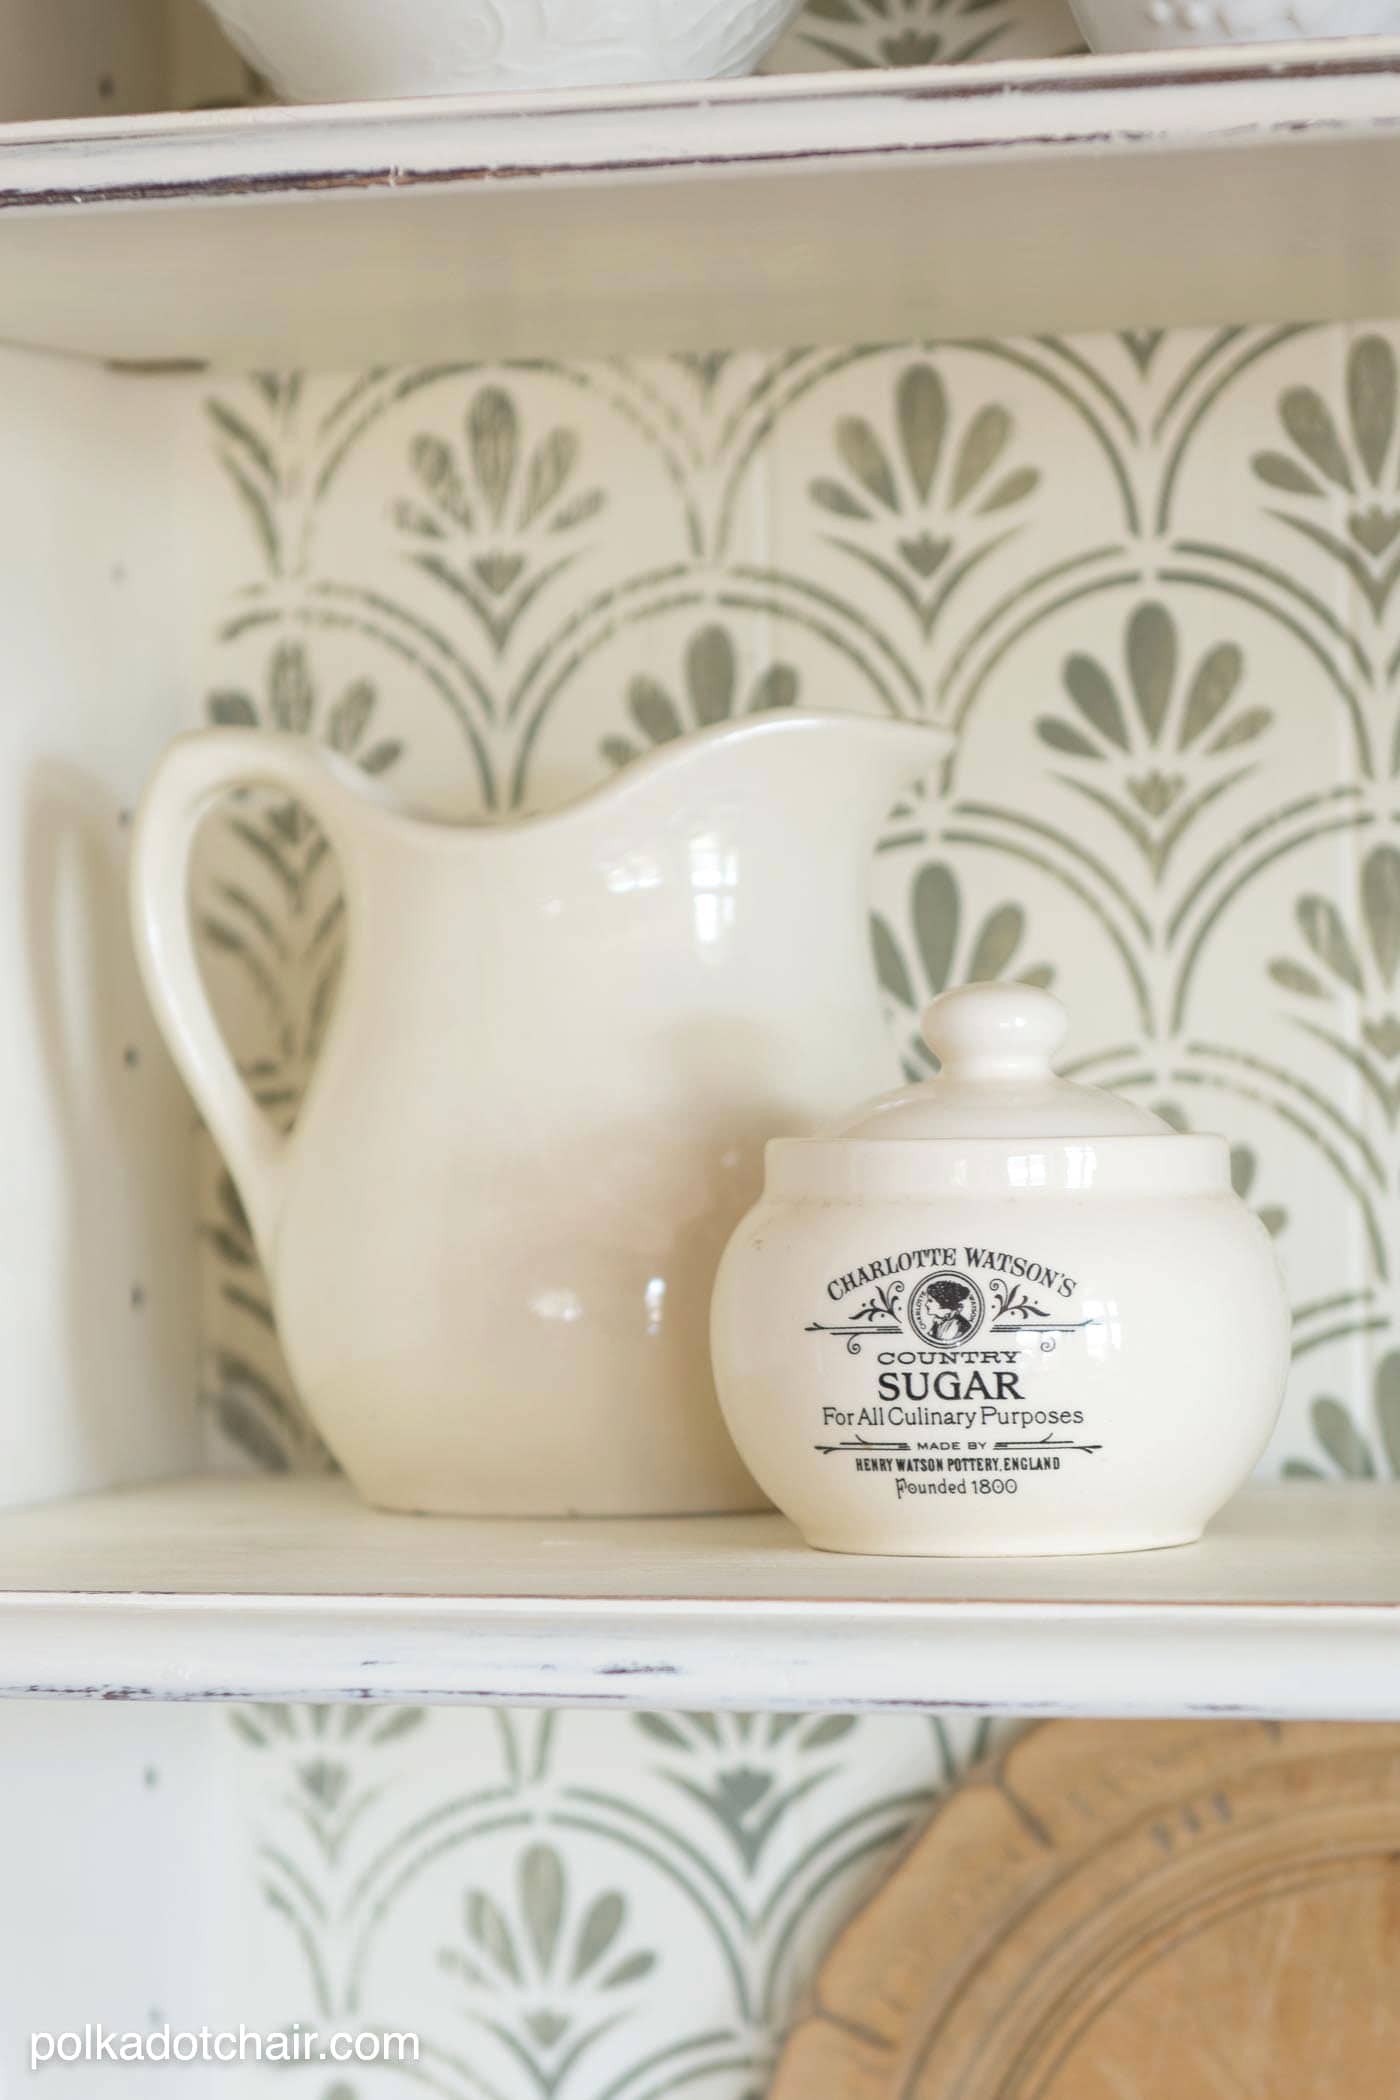
I also wanted a space to display some of the items I’ve collected over the years. (The breadboards were hidden away in a cabinet, and I was so happy to get them back out, I picked them up on Portabello Road in London years ago.)

Since we painted our kitchen cabinets white I was a bit worried about an entirely white kitchen, I didn’t want to lose too much color and detail in the process and wanted to make sure that we still kept a bit of “kitchen charm” in that room.
I’ve been pinning stenciled bookcase projects for the last few months on Pinterest and decided that it would be the perfect project for that funny corner in the kitchen. The only problem was finding an old bookcase in need of rehab. That was not as easy as you think it would be. Most antique stores keep their large bookcases for display. I also knew I wanted a wood bookcase, not a pressboard one.
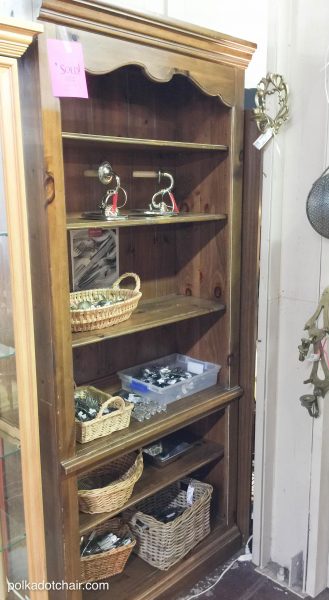
I spied this one at a local store and it said it was not for sale. I spoke to the owner and after a little bit of sweet-talking, the bookcase was in my car on the way home with me.
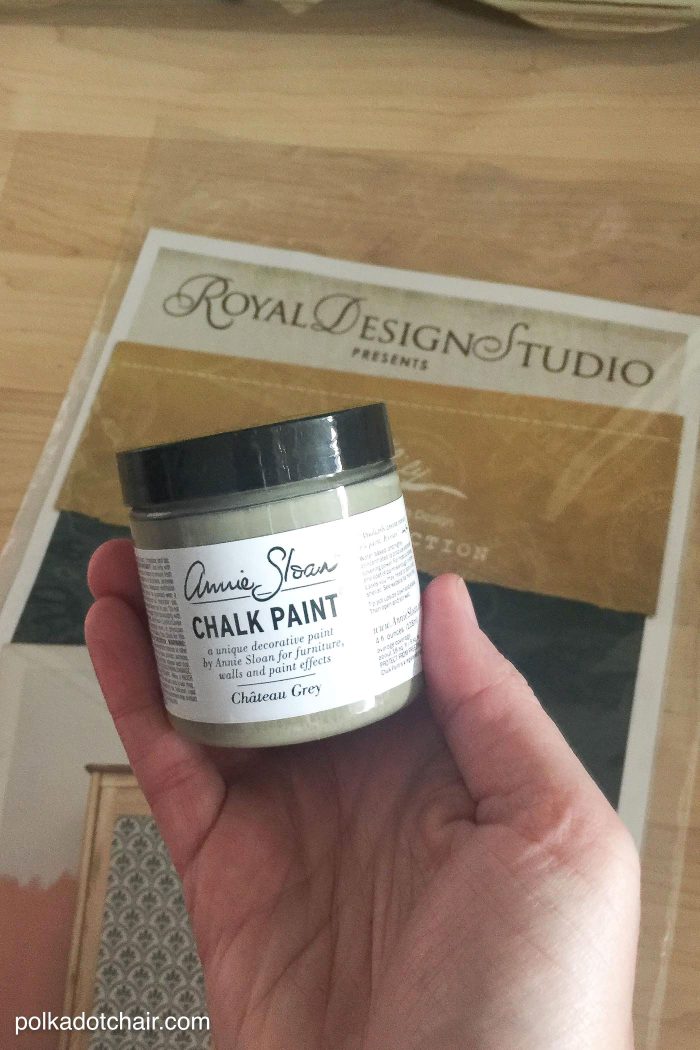
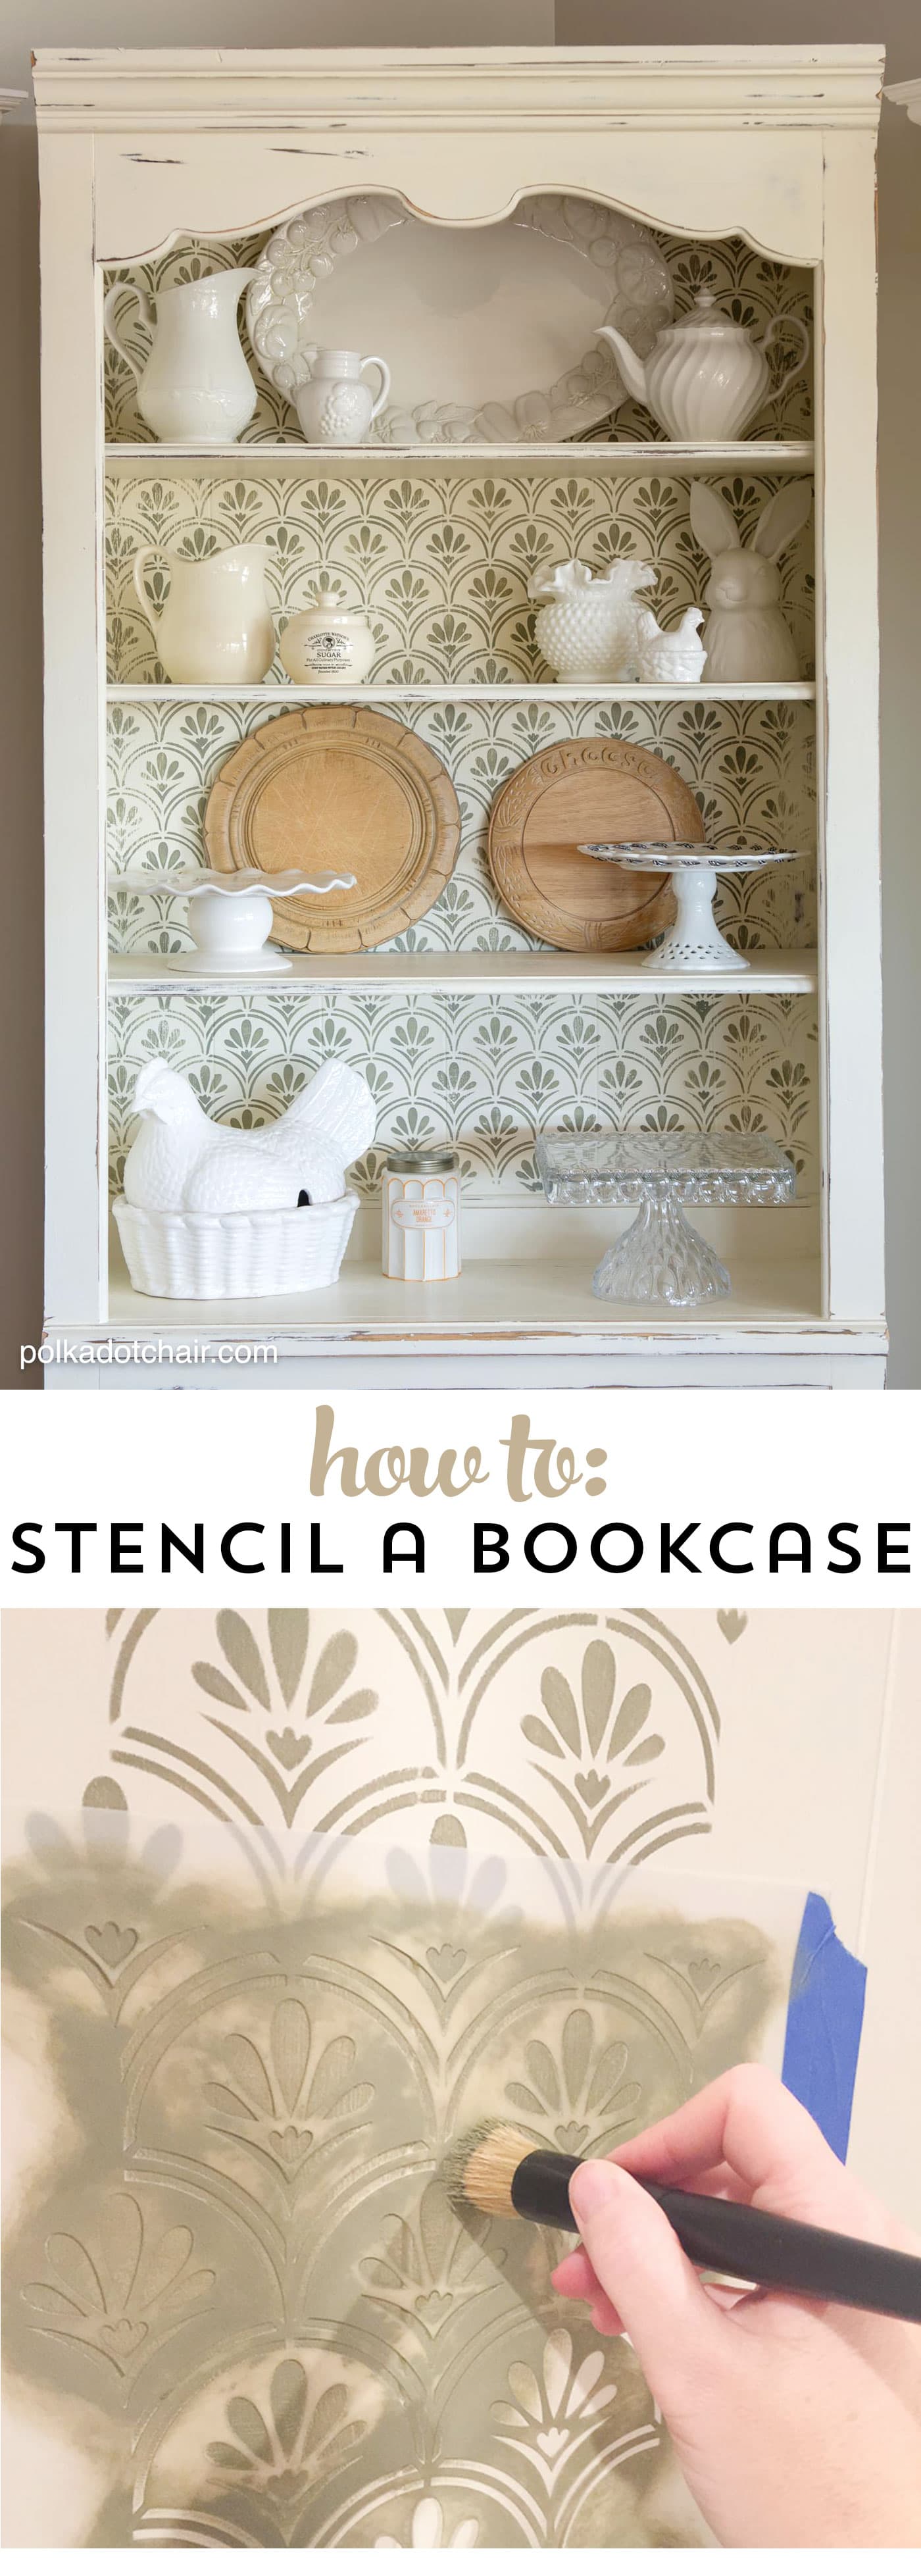
After I got the bookcase home I cleaned it off and painted it with Annie Sloan Chalk Paint in Old White. It ended up taking 3 coats, I then stenciled the back with a stencil from Royal Design Studio….
Want to tackle a project like this yourself? Here’s what you need and what to do.
Chalk Painted & Stenciled Bookcase Supplies
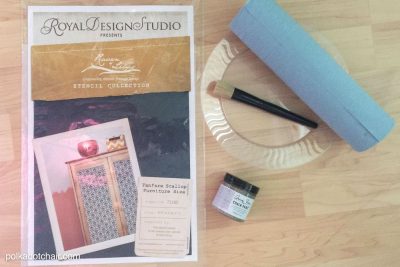
You’re going to need:
- A Stencil, mine was the Fanfare Raven + Lily Furniture Stencil
- Stencil Brush
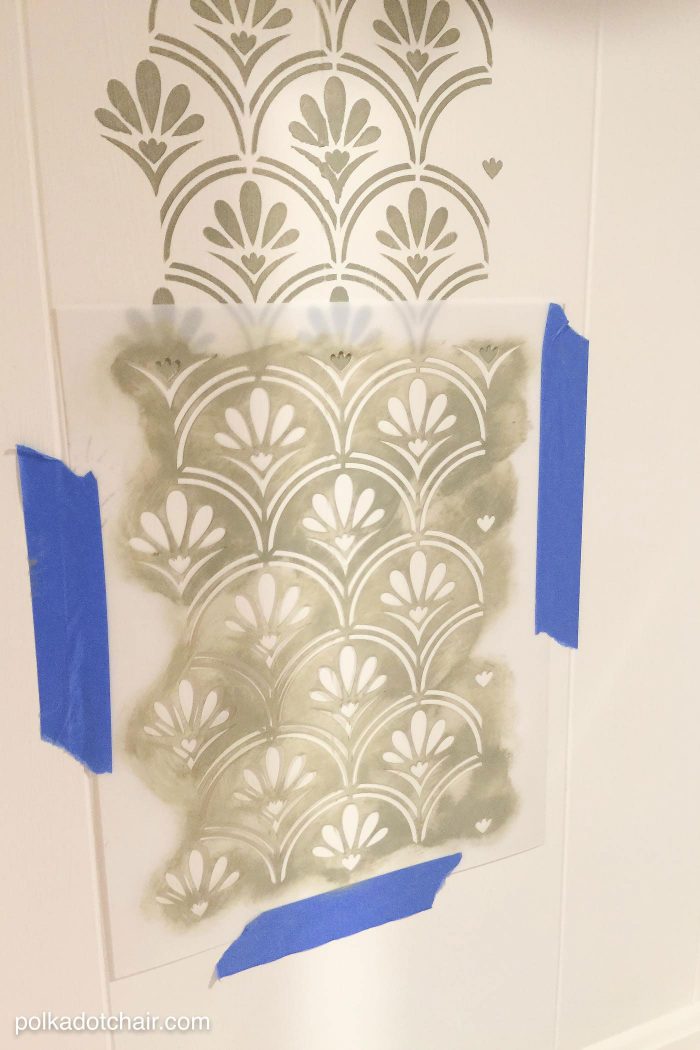
- Painters Tape
- Chalk Paint for stencil (I used Chateau Gray by Annie Sloan)
- Paper Towels (the blue are the best as they have less lint)
- Spray Adhesive
- Level
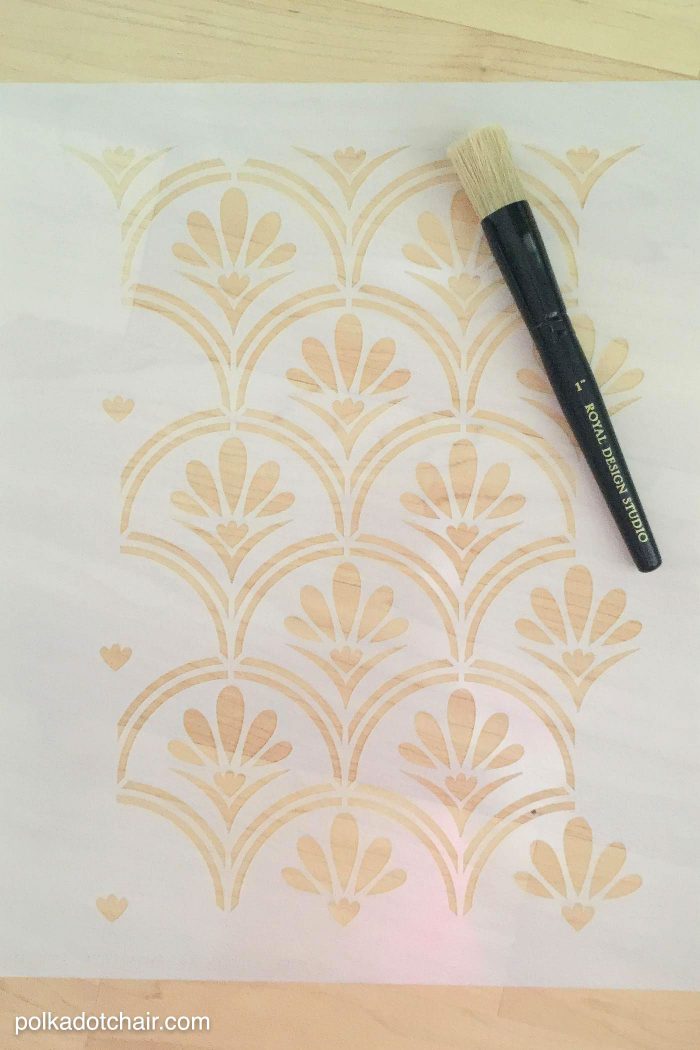
I chose to work with the Fanfare Raven + Lily stencil from Royal Design Studio, it’s one of their newest stencils that are inspired by African Tribal Designs. I actually had a hard time picking on the stencil. You can see their full selection here, there are so many great ones to pick from… A few years ago I stenciled the wall in our Dining Room and had a pretty good feel for the process and felt pretty confident working on a smaller project like a bookcase.
Preparation Steps
If you are stenciling a bookcase I recommend first checking to see if you can get the back off in one piece. If you can take it off and stencil it on the floor, it will be much easier. The back of my bookcase was glued on so I stenciled it in place. You can still do it that way it’s just easier if the back is separate from the rest of the bookcase.
Start by finding the center of your bookcase. Line up the stencil with the center. You’ll want to use a small level to make sure the stencil is straight. Spray your stencil with a bit of spray adhesive and adhere it to the bookcase using painter’s tape.
How to Use the Stencil
Pick up a bit of the paint in your stencil brush. Fold several pieces of paper towel together and place them on a paper plate. Dab the stencil brush on the paper towels until the brush is almost dry.
The biggest mistake you can make in this process is to use too much paint.
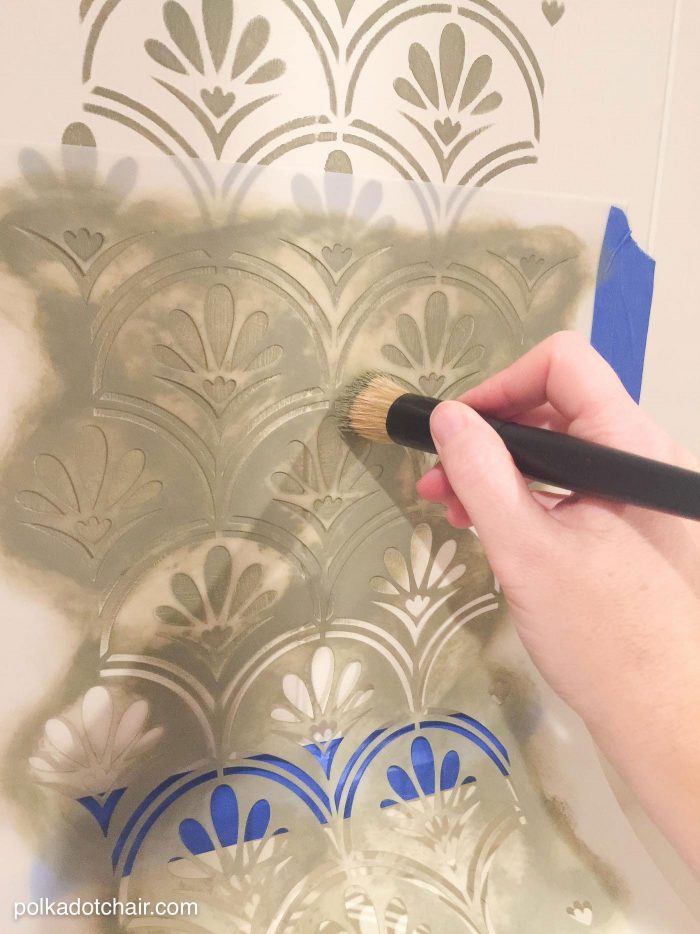
Apply the paint to the stencil in a circular motion. Pick up more paint as necessary, making sure to dab off the extra each time.
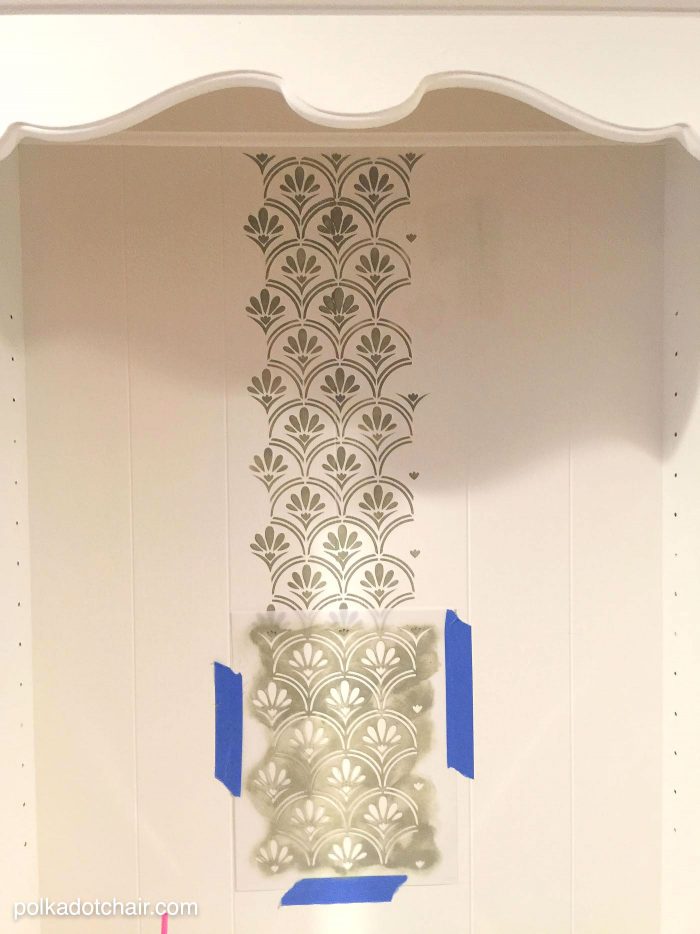
When you’ve covered the entire stencil remove it. Double-check that no paint bled through to the back of the stencil, then using the marks on the stencil line it up and begin stenciling again. Repeat this process until you’ve covered the entire back of the bookcase.
TIP: When you get to the corners you’ll want to use a bit more spray adhesive on the back of the stencil. Then you’re going to want to push the stencil into the corner, it’s flexible and should bend.
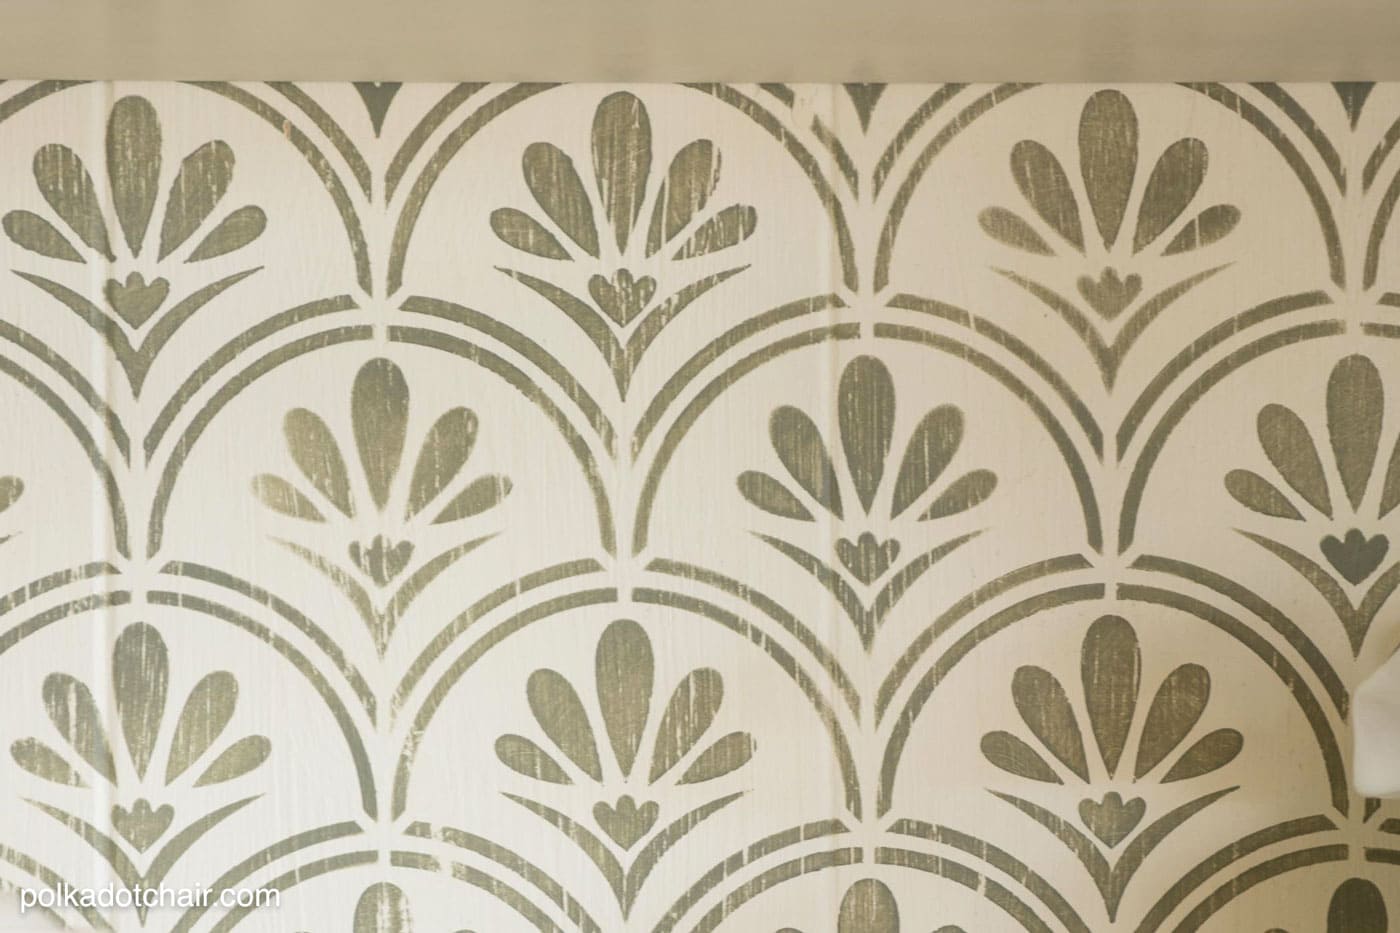
After you’ve stenciled the back of the bookcase, sand and distress it. I lightly sanded the stenciled portion of the back. Then finish the piece with a coat of wax.
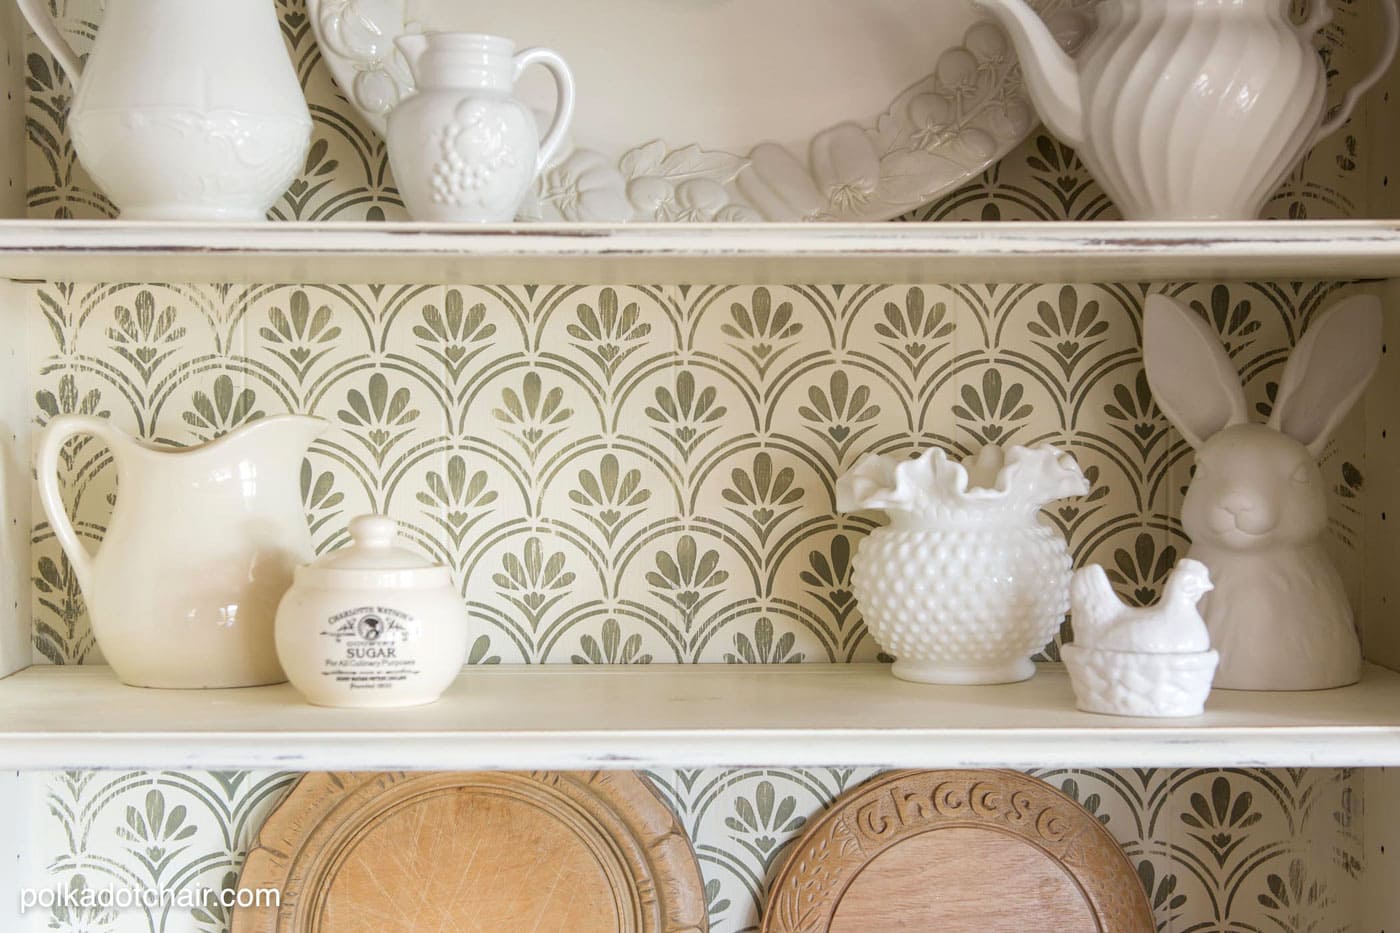
That’s it! Now just load up the bookcase with all of your stuff!

This would be a great way to personalize my daughters’ room they are moving into to make space for baby girl #3!
Lovely redo, she stands tall and proud now. Can’t go wrong with white on white – congrats.
I love RAJ TRELLIS INDIAN WALL STENCIL! It’s gorgeous.
I love get ziggy with it. I’d love to use it behind the shelves of our built-in to make it pop !
Love the distressed stencil. Never thought of that. Great look
I have a bookcase i need to do now lol loved how it turned out
I like the owl stencils & sewing stencil,,,place on pillow wall……Thanks
I love the Morroccan Geometry stencil! It is so chic!