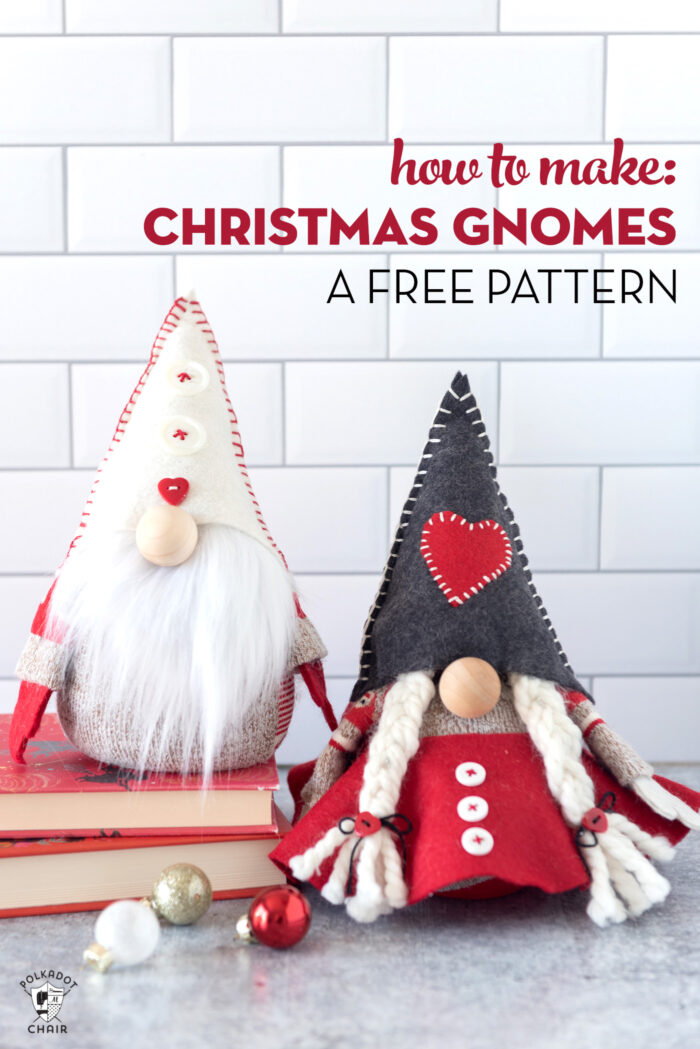
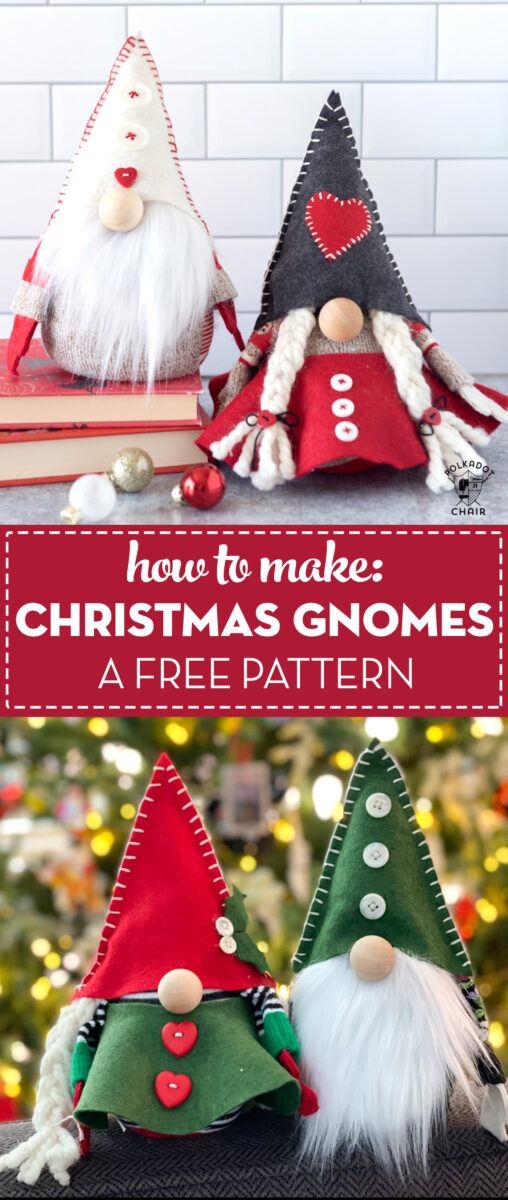
How to Make ADORABLE Christmas Gnomes
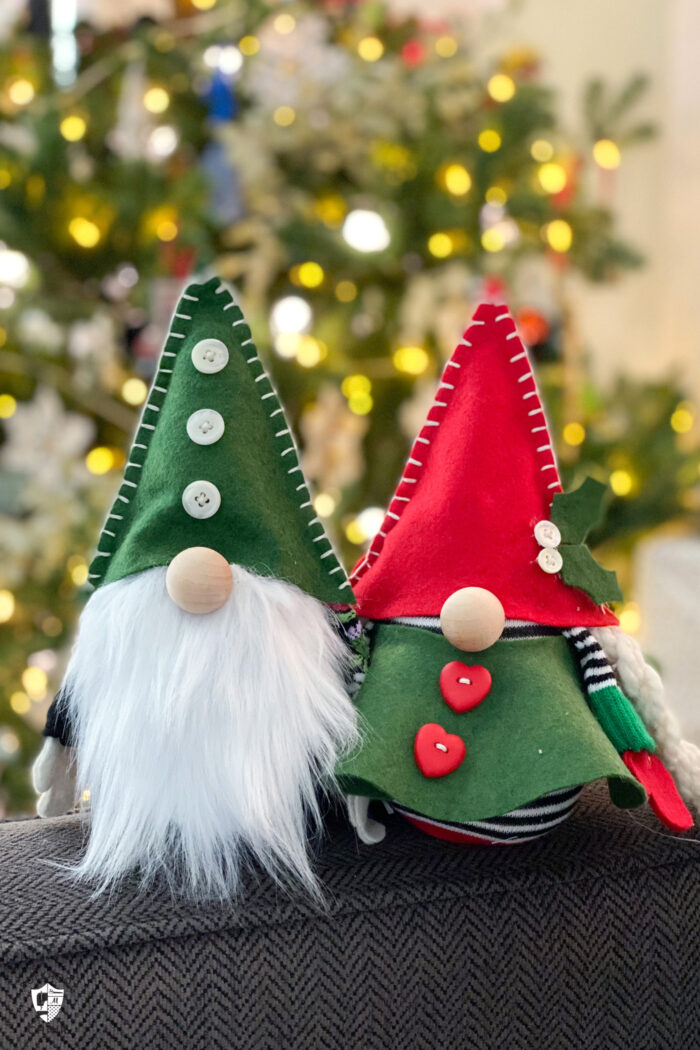
Create your very own Christmas gnomes with this fun and easy craft project! In this easy DIY gnome tutorial I’ll walk you through the steps to create both boy & girl gnomes. They are so cute and easy to make, that you’ll find you can’t make just one! Create a cute set to add to your Christmas decor this year.
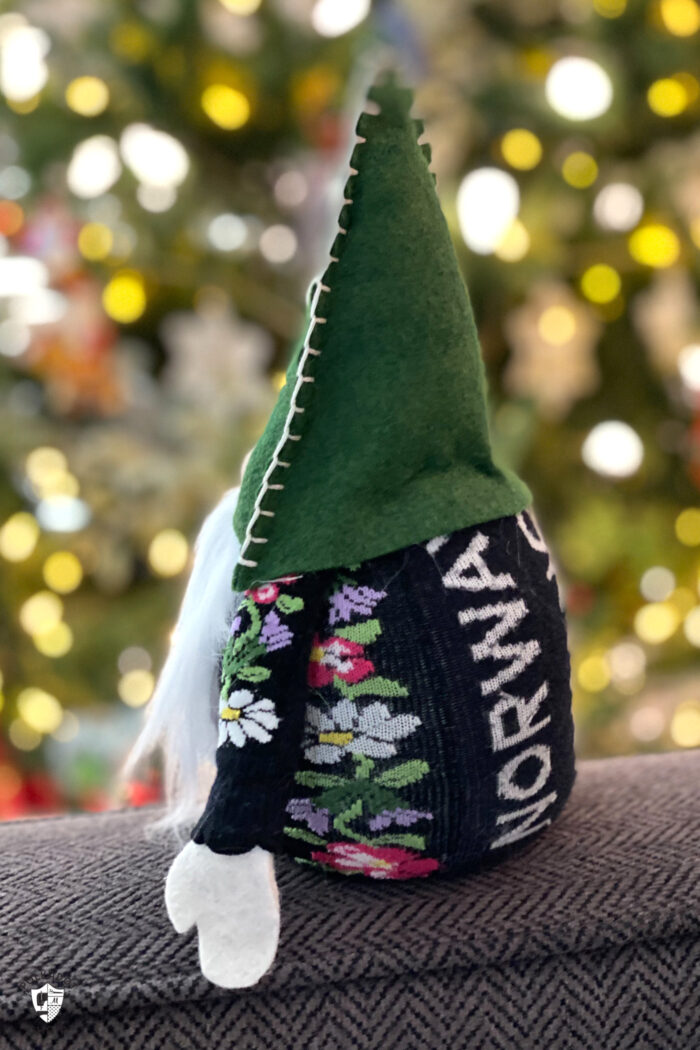
I’ve mentioned before that my family has Scandinavian roots. My Grandfather was Norwegian and my Grandmother was Icelandic. Several years ago my family had the opportunity to visit Norway on a cruise. I absolutely loved the experience and came back with so much inspiration for my creative projects. The year we returned I created a cute Christmas Gnome pillow & Scandivnian patchwork snowflake pillow.
Scandinavian Christmas Crafts
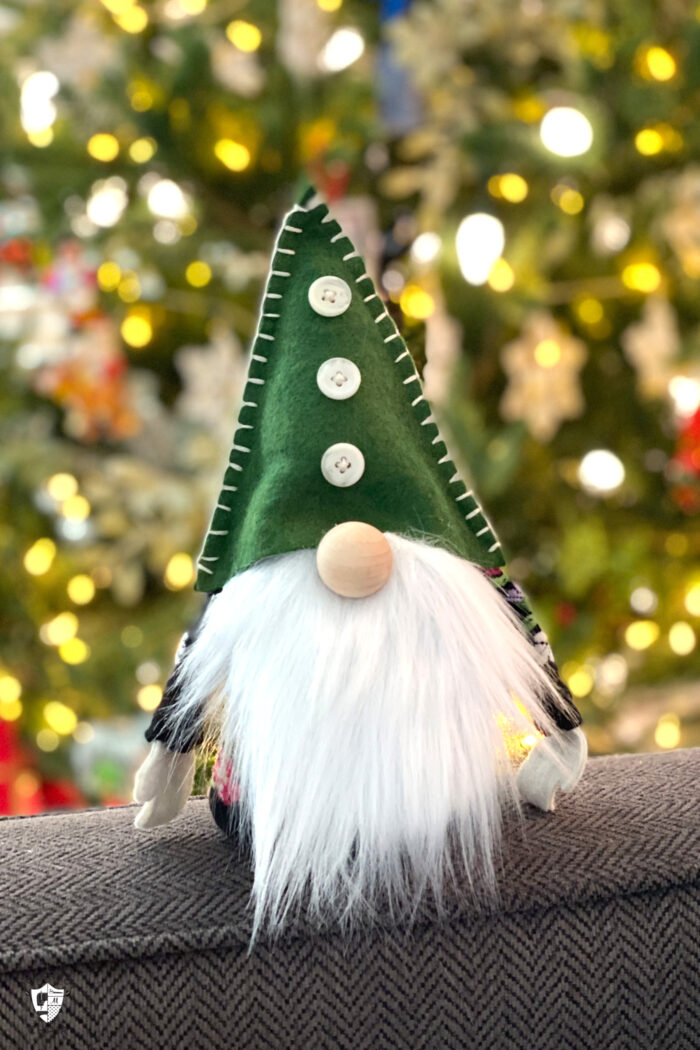
In the years since then, I feel like I’ve seen little Christmas gnomes popping up everywhere. When we were in Bergen we stumbled on the CUTEST Christmas shop, full of little gnomes (sometimes called Tomte, or Tomten). I snapped a million photos and told myself that I’d make a set of sweet little gnomes for myself one day.
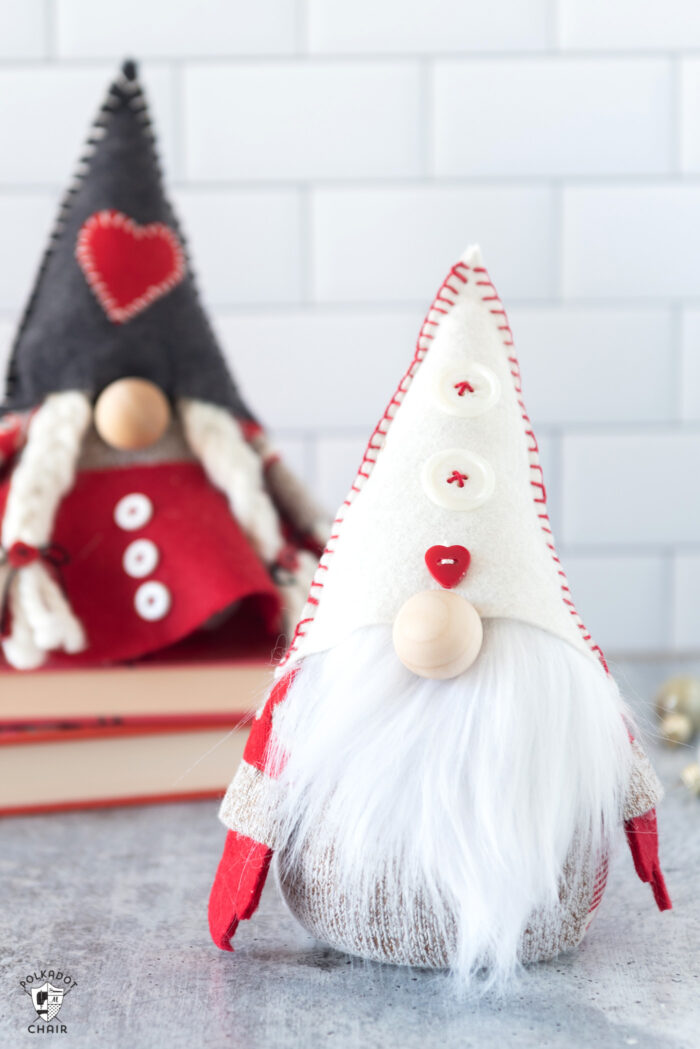
I’m always on the lookout for new Scandinavian-inspired Christmas decorations. I love the bright reds and winter whites.
My mom has been making sock gnomes for years. My dad joked last Christmas that the little guys seemed to be multiplying as he slept! I asked her and she’s not sure how many she’s created over the years, but it is a lot.
Last summer she came to visit and I had her show me how she makes her sock gnomes. We obviously didn’t invent this DIY gnome method, but she had lots of tips to share with me and I thought all of you might benefit from her expertise.
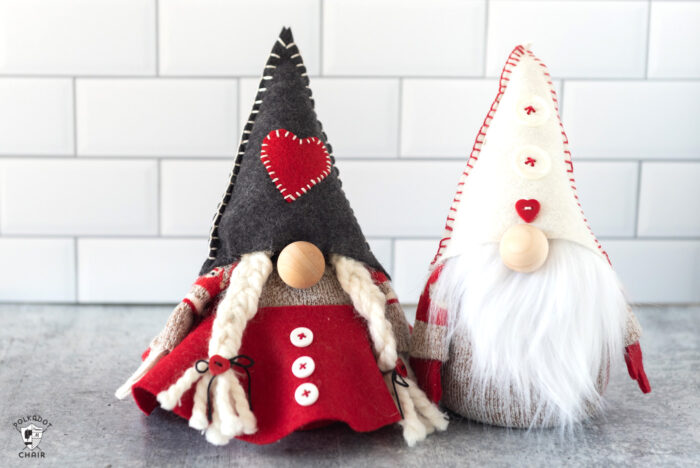
While she was here we decided it would be fun to find a way to create both Boy & Girl gnomes, so I designed a cute circle skirt and we figured out how to add yarn braids to one of the little characters.
What is the Christmas Gnome Tradition?
The folklore traces back to the late 18th and 19th centuries when gnomes were believed to be household spirits responsible for the care and prosperity of a farm or family. These little creatures helped to take care of a family. In many stories, they tended to act mischievously if the families didn’t take care of them properly.
Much like the stories of Elves in US Christmas traditions, Scandinavian legend tells the stories of gnomes emerging from the forest on Christmas Day to help deliver gifts to children. Obviously, that is just my understanding of the tradition that I was taught growing up. If I’m wrong, just let me know in the comments section!
What Supplies Do I Need to Make a DIY Gnome?
- Socks for the Gnome’s Body. You will want to use both a thick sock for the lining and a decorative sock for the outside of the gnome.
- Faux Fur for the Gnomes Beard. You can buy small pieces of faux fur at the craft store.
- Felt for the Gnome Hat, Gnome Hands, and for embellshments. I like to use wool felt.
- If you are making the girl gnome, you’ll also need a bit of felt (or fabric or polar fleece if you prefer) for her skirt.
- 1″ Wood Beads for the Gnome Nose
- Sharp Scissors to Cut the felt & Socks.
- Embellishments like ribbon, embroidery floss, & buttons.
- Hand embroidery needle.
- Rice
- Wide-Mouth Funnel
- Large Bowl
- Hot Glue Gun & Glue
- Twine or Heavy Duty Thread
- Small rubber band or elastic
What kind of socks should I use?
We found that women’s ankle socks worked the best. You need them to be tall enough that you can cut the arm pieces from the socks. If your sock is not very thick, you’ll also want to use a cotton athletic sock as a lining. Since the sock makes up the body of the gnome, and it will show, choose something that is cute and Christmasy!

How do you make a no-sew gnome?
This gnome tutorial gives you the option to assemble the DIY sock gnome with hot glue, with hand sewing, or with a sewing machine. Just choose which method is best for you.
How to Get the Free Pattern Pieces
Fill out this form and we will email you a link to download the pattern pieces for the gnome.
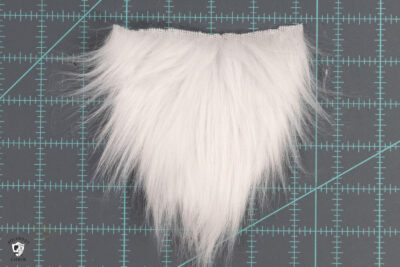
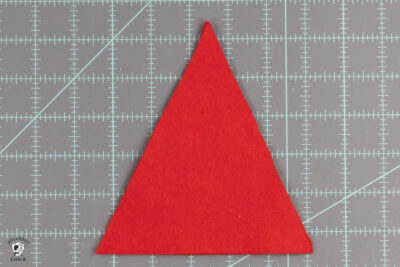
How to Cut Faux Fur
If you try to cut the faux fur for the beard traditionally using scissors you’re going to end up with a big mess.
Instead, cut it this way.
Trace the beard pattern onto the back of the faux fur piece of fabric.
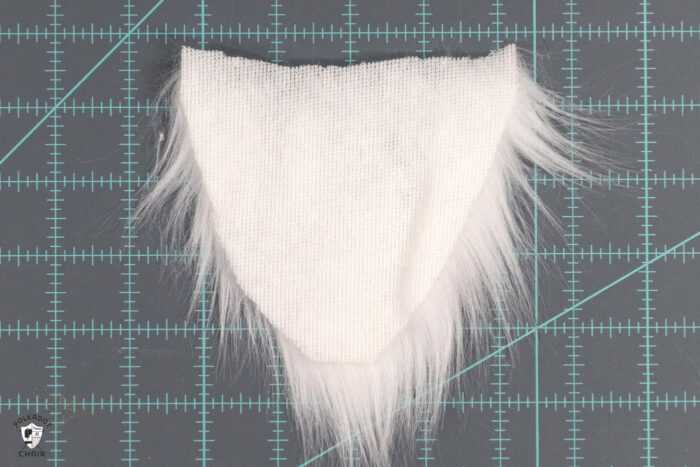
Using very small scissors or an exacto knife, cut along the line you drew cutting only through the backing fabric. Do NOT cut the fur. Just go slowly and make small snips with your scissors.
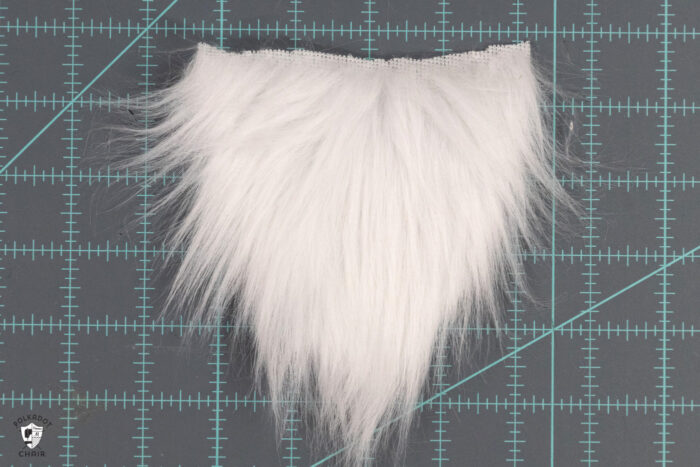
After you’ve cut the backing fabric, pull the beard piece and the attached fur will come along with it. This also allows the fur on your beard to hang more naturally after its been cut.
DIY Gnome Easy Step by Step Tutorial

DIY Gnome Easy Step by Step Tutorial
supplies
- 1 piece Felt for Gnome Hat
- 1 piece Felt for Gnome Skirt
- 1 decorative Sock for Gnome Body
- 1 Thick sock for Gnome Body Lining
- 1 piece Faux Fur for Beard
- 1 1" Wood Bead for nose
- 2-3 skiens Embroidery Floss
- Buttons for embellishment
- 1 ball Thick yarn for braids
- 1 spool Bakers Twine or Thick Thread
- 1 pattern Pattern Piece for Beard & Skirt use the instructions on the blog post to obtain the pattern piece.
- 1 bag Rice for body
Instructions
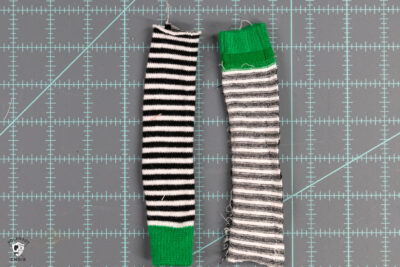
Cutting Instructions
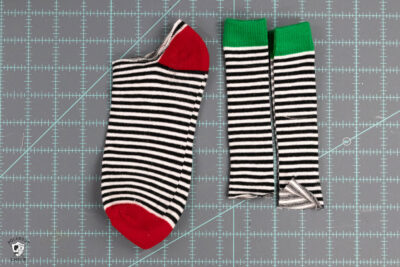
- Cut your sock into 3 parts to make the gnome pieces. To do this, cut the sock right above the heel straight across.

- Then cut the “leg” part of the sock in half lengthwise, to create two arms.
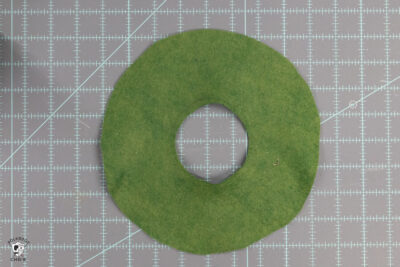
- Cut one circle of felt for the skirt using the Skirt Pattern Piece.
- Cut one beard from fur using the beard pattern piece.
- Cut 4 mittens from felt using the mitten pattern piece.
- Cut 2 hat pieces from felt using the hat pattern piece.
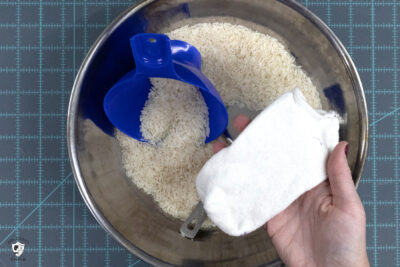
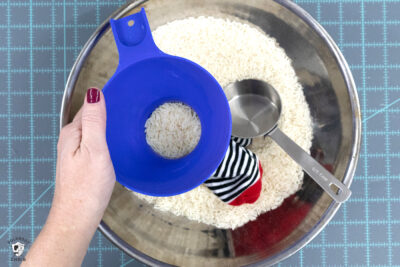
Step One: Fill with Rice
- Insert the athletic sock into the sock that will be used for the outside of the gnome.
- Using a wide-mouth funnel fill the sock with rice. I find it easiest to fill the sock with rice while you’re working over a large bowl. That way you won’t end up with a giant mess when you’re done.
- Keep filling the sock until it’s very full. You will need more rice than you think. We were able to fill 3 gnome bodies with one package of rice.
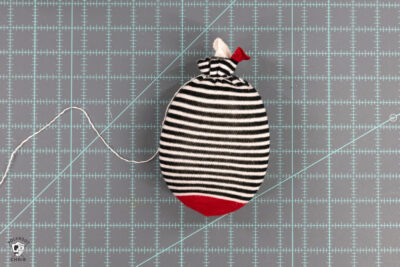
- Using some twine or a small elastic, tie off the top of the sock.

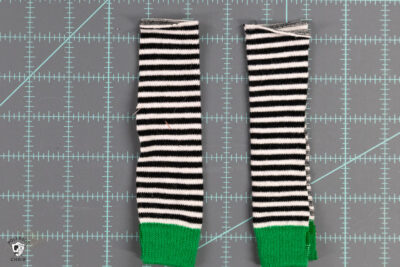
Step Two: Create the Arms
- Sew the long seam of the sock portion that you cut for the arm. You can sew it with a hand needle and thread or with a sewing machine.
- Turn the arm piece right side out.
- Using hot glue, glue two mitten pieces together. Then insert them into the arm piece. Use a bit of hot glue to hold them in place.
- Repeat for the other arm. Set aside.

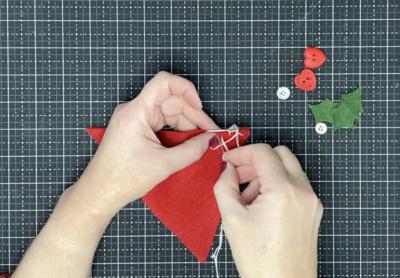
Step Three: Create the Hat
- Sew the two hat pieces together. You can do this one of two ways. You can hand sew them, wrong sides facing using a blanket stitch.If you do not wish to sew, you can also use hot glue to glue the sides of the hat to each other.
- You can also sew them together by machine, right sides together and turn it right side out when you are finished.

- I prefer to sew them right sides out with a blanket stitch because I like the extra detail of the stitching.
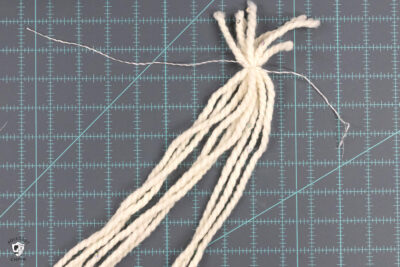
Step Four: Create the Braids
- Cut 18 pieces of thick yarn about 10” long. Gather 9 of the pieces together and secure them with a bit of twine.
- Braid the yarn pieces together with 3 strands in each braid section. Tie off at the end with twine.
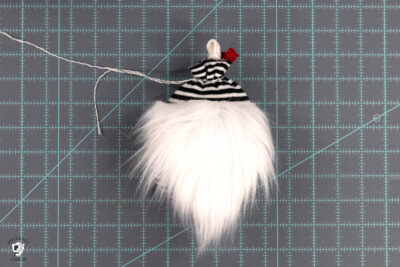
How To Create the Bearded Gnome
- Glue the beard piece to the rice stuffed sock body. Glue it about one quarter to one-third of the way down from the top.
- Glue one arm to each side of the sock body.
- Fill the sewn hat piece with a bit of stuffing.
- Glue it to the top of the sock body. You may need to use a few pins to hold it in place as you glue.
- To finish glue a 1” round wood ball to the top of the beard for the nose.
- Embellish with yarn, buttons & felt as desired.
How To Create a Gnome with a Skirt
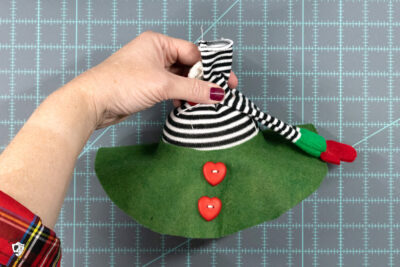
- Embellish the skirt with buttons as desired.
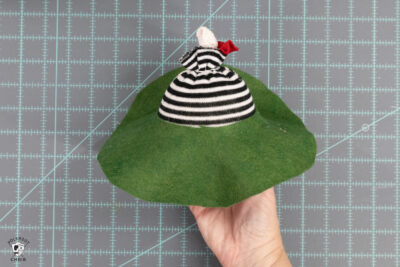
- Place the skirt piece over the top of the sock body piece. Pull-on it a bit to get it to fit snugly.
- Glue the two arm pieces to each side of the sock body.
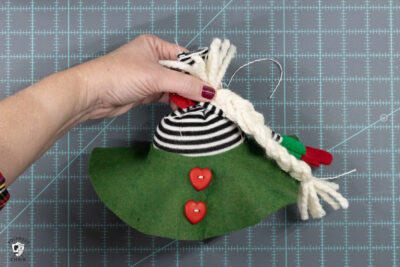
- Glue the two braid pieces to each side of the sock body. You can place them in front of or behind the arms. It’s up to you. I couldn’t decide which way I liked better so I made one both ways.
- Fill the hat with a bit of stuffing.
- Glue it to the top of the sock body piece, covering the arms and the braids.
- To finish, glue a 1” wood ball to the sock body piece right below where the hat sits. Embellish with extra buttons, ribbons, and felt as desired

You may also like:


Hi. Don’t see how to get the pattern. Above says “fill out the form to get the gnome pattern” but there is no form to fill out. There is just a spot to put your email address to subscribe to the weekly newsletter.
There is a form in the middle of the page, with a photo of the gnomes and the text reads “Get the Gnome Pattern Pieces” and a spot to enter your email and a blue button that says “subscribe”. You need to fill out that form so we know which PDF to send you. If you fill out the general subscribe form at the bottom of our website we don’t know which one to send you.
These Gnomes are so cute. I made a couple at Christmas and I decided to make some for St. Patrick’s Day and Easter. I used plastic beads instead of rice.
Such a good idea!
I love the tip about cutting the fur!
Cute Boy and Girl Gnomes! Could you please take a photo of a sock before cutting into three pieces? There are different sizes of socks.
Thank you!
PS: My ancestors came from Norway and with my deceased grandma, we baked many Scandinavian baking items, lefsa, krumkake, etc. Yummy!! I still continue doing them.
Thank you, I will get my supplies together, make it and let you know how it goes, yours are so cute!!! Thx again,