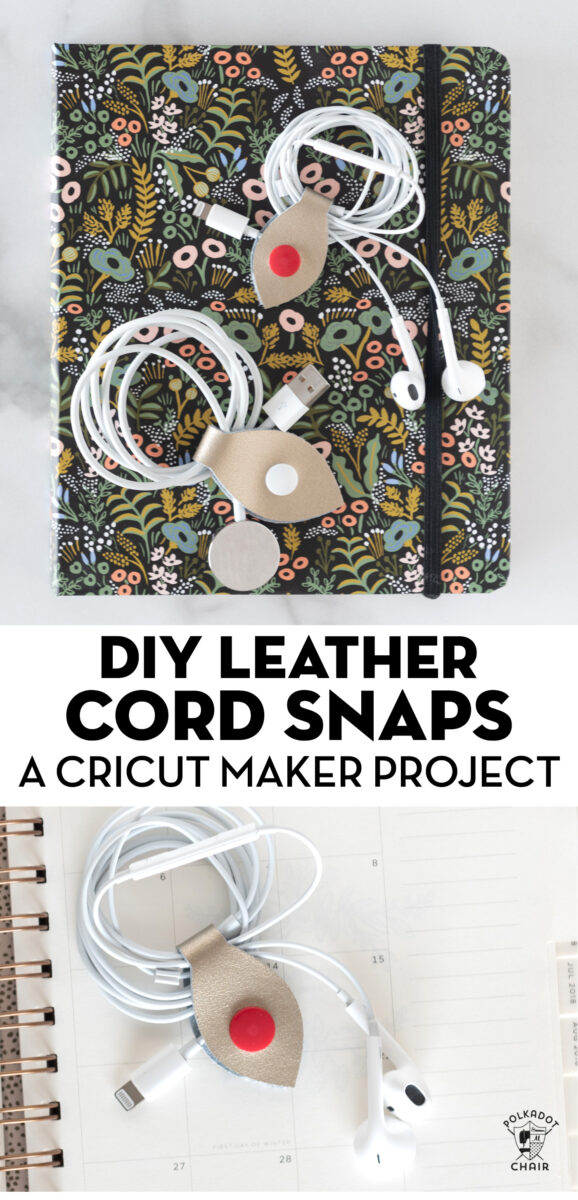
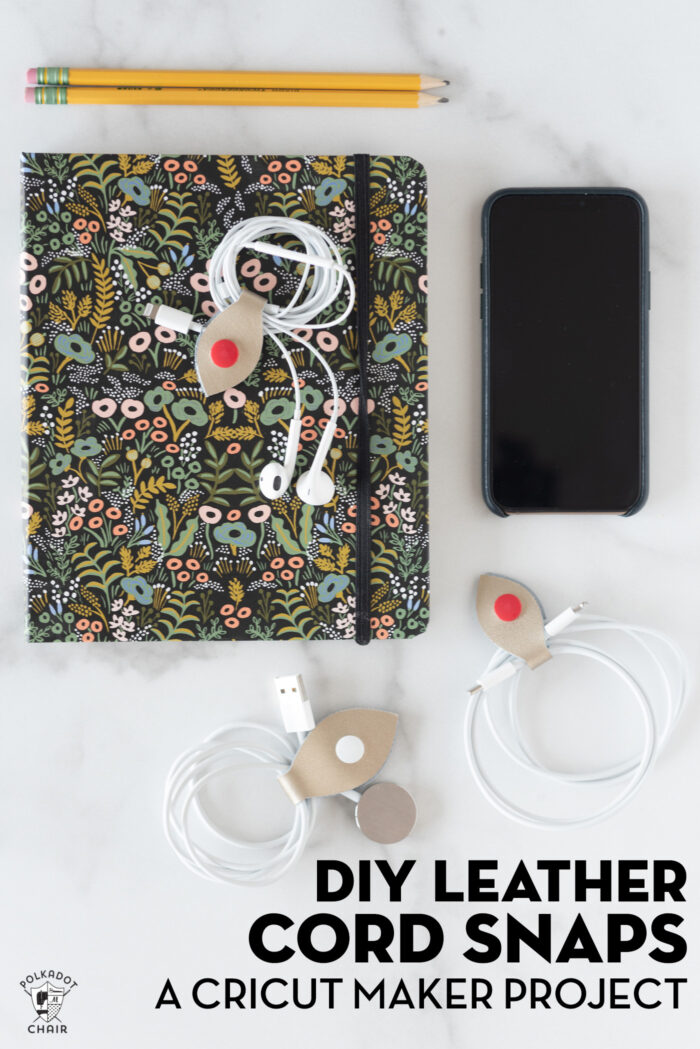
How to Make Leather Cord Snaps; a Cricut Maker Project
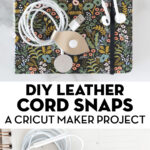
Tired of tangled cords? Use your Cricut Maker to create a set of leather cord snaps.
I have a zip bag that I use when I travel to hold all of my chargers and cords (and by “travel” lately, I mean a weekend in the RV *wink*). Recently I was trying to find an iPhone charger in the mess in the bag and ended up dumping out the entire contents of the bag onto the floor.
I found the charger and maanged to untangle it from all the other cords in the bag. After that I decided it was time to “fix” the contents of the bag.
How to Make Leather Cord Snaps with a Cricut
I’ve designed a set of leather cord snaps (or cord wraps) that can be made with a Cricut Maker.
Note: if you have a Cricut Explore you can also do this, but you will need to use the deep cut blade.
What is a Cricut? A Cricut Machine is an electronic cutting machine. It hooks up to your computer via USB or Bluetooth and cuts images you send to it, much like a printer. It just cuts instead of prints. It can cut vinyl, paper, fabric, and much more. The images are all digital; you can upload your own images or buy images in the Cricut Design space individually. You can read my full review of the Cricut Maker Machine HERE.
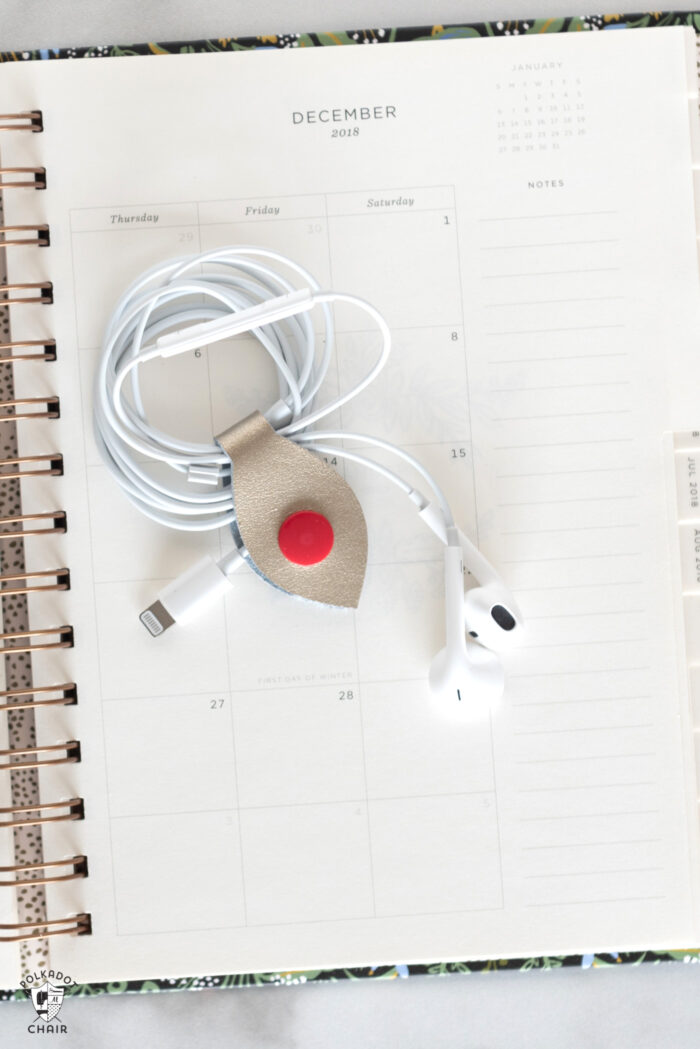
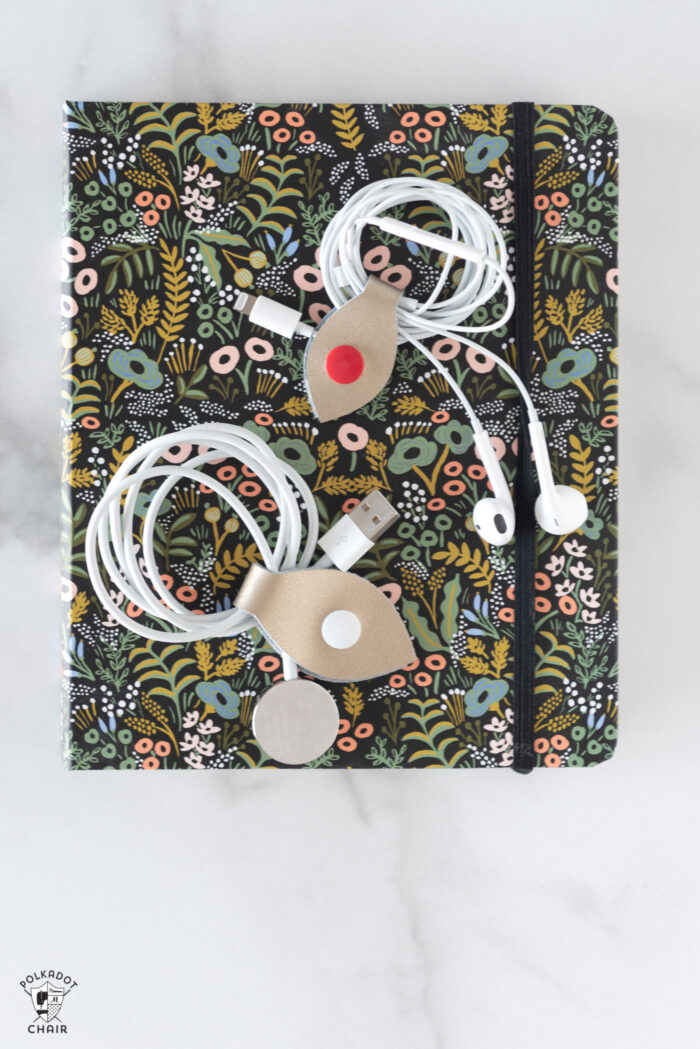
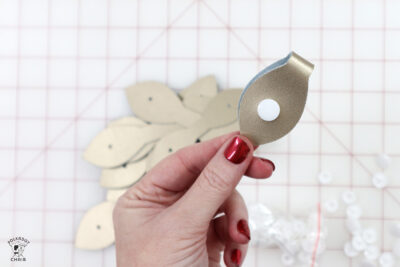
I was able to cut out a dozen or more cord snaps in a matter of minutes! I then used a set of KAM snaps to add the snaps to the cords.
The leather I used is the Cricut metallic genuine leather, but you could also use leather scraps or faux leather. Just make sure they are sturdy enough to hold their shape when cut.

If you have not cut leather with a Cricut before, then you should really give it a try. It’s easier than you think! I’ve used my Cricut Maker to cut leather for a lot of projects and am always very happy with the results.
Cricut SVG File: Note: all files in the Library are for personal use only. You may not sell items you make with the files. To get these files into the Cricut Design space, you need to visit OUR CRICUT LIBRARY and follow the directions. When prompted, select the button and save the file as an SVG to your computer. Please do not open it in a new window. It will load as an image, not an SVG. Next, go to the Cricut Design Space page with your browser. Select NEW when the screen pops up; select IMAGE. Then select – upload. Upload the image you obtained. It’s ready to use in Design Space!
Leather Cord Snaps
Equipment
supplies
- 1 Piece Leather, 12" x 12" I used Cricut Geniune Leather that is 3oz. Recommended leather weights for the Cricut are between 2-6 oz.
- 1 SVG File of Snap Shape Download in our Cricut Library
Instructions
Upload the File
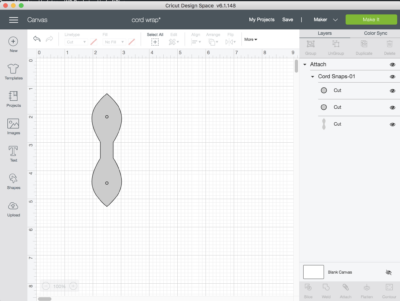
- Download the SVG on our website (directions above) and upload it to Cricut Design Space. Insert it into a new project.
- Select all the layers and click "attach". Resize the image to the length of cord snap that you would like. The snaps I made were 4" and 5" long. I would not go smaller than 4".

Cut
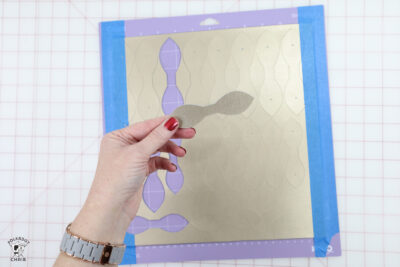
- Load your piece of leather onto the Cricut Strong Grip mat. Tape all 4 sides down with painters tape.
- Move the roller bars on the Cricut to the far outside edge.
- Send the cut to the machine. On the left-hand side of the screen select how many snaps you want to cut out. The machine will automatically figure out the best placement of all of the shapes on the mat.

- On the selection screen, be sure to select "Cricut Leather" from the materials list and the Knife Blade for the tool.
- Cut. When you're done peel the shapes off of the mat.

Add Snaps
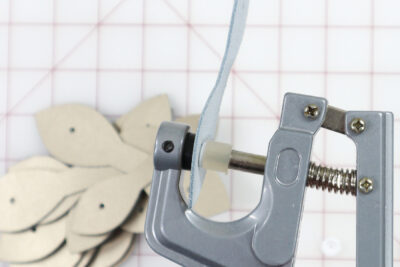
- The Cricut should have cut a small circle in the center of each end of the cord snap. Since this is such a small circle, it might not have cut all the way out. If this happens use a leather punch tool or CropADile to punch a small hole.
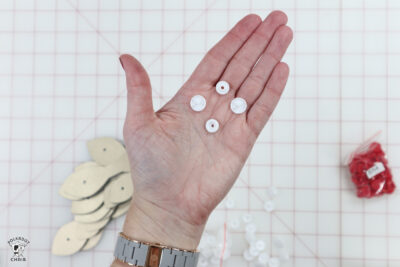
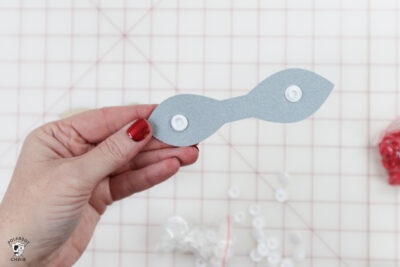
- KAM snaps come in 4 pieces. Two outside pieces that are identical. Two interior pieces. One is the snap and one is the snap receiver.
- Place one snap outside piece on the outside of the cord snap and feed thru the hole. Place the snap on the other side. Using the tool press set the snap.
- Repeat on the other side of the cord wrap with the other half of the KAM snap.
- Test the snaps a few times to make sure they are secure. I have had them pull out before. So take a minute and make sure you don't need to squeeze the snap anymore.
Notes
Cord Snap DIY Gift Idea
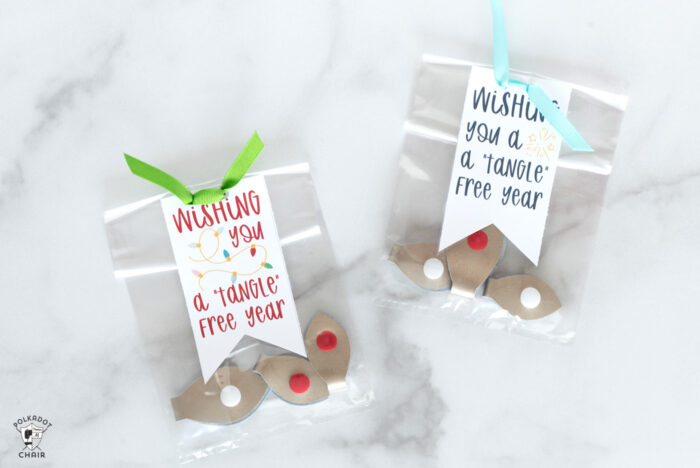
Looking for a creative gift idea? Package them up with a set of free printable tags. We have tags with Christmas, New Years’ & Birthday themes.