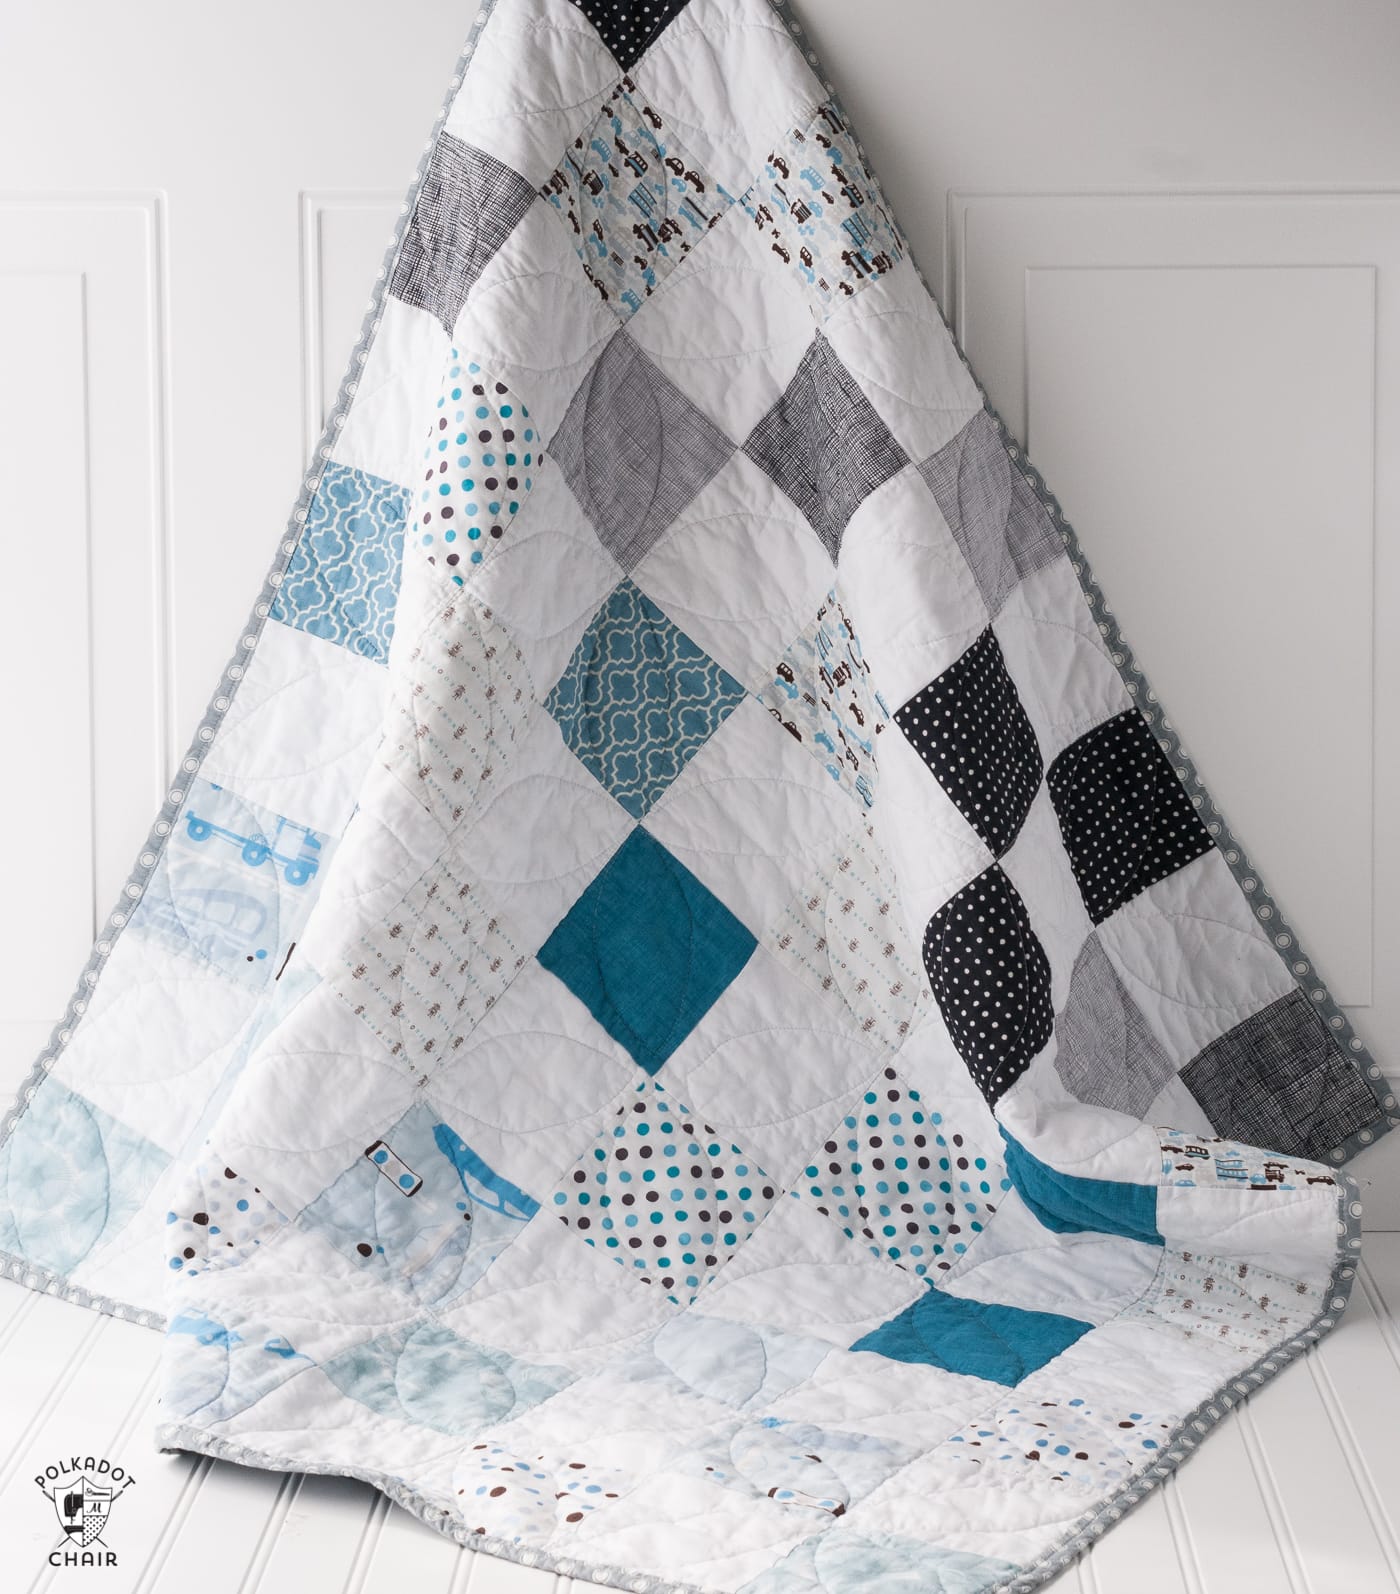
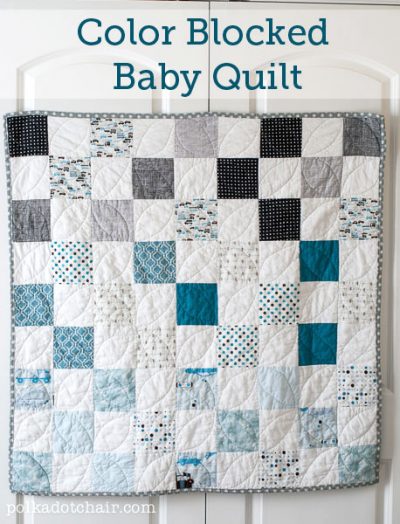
Simple Color Blocked Charm Pack Baby Quilt Tutorial
Today, I’m sharing a Color-Blocked Patchwork Baby Quilt Pattern and Tutorial with you. This simple baby quilt is created from two five-inch precut stacks (sometimes called Charm Packs).
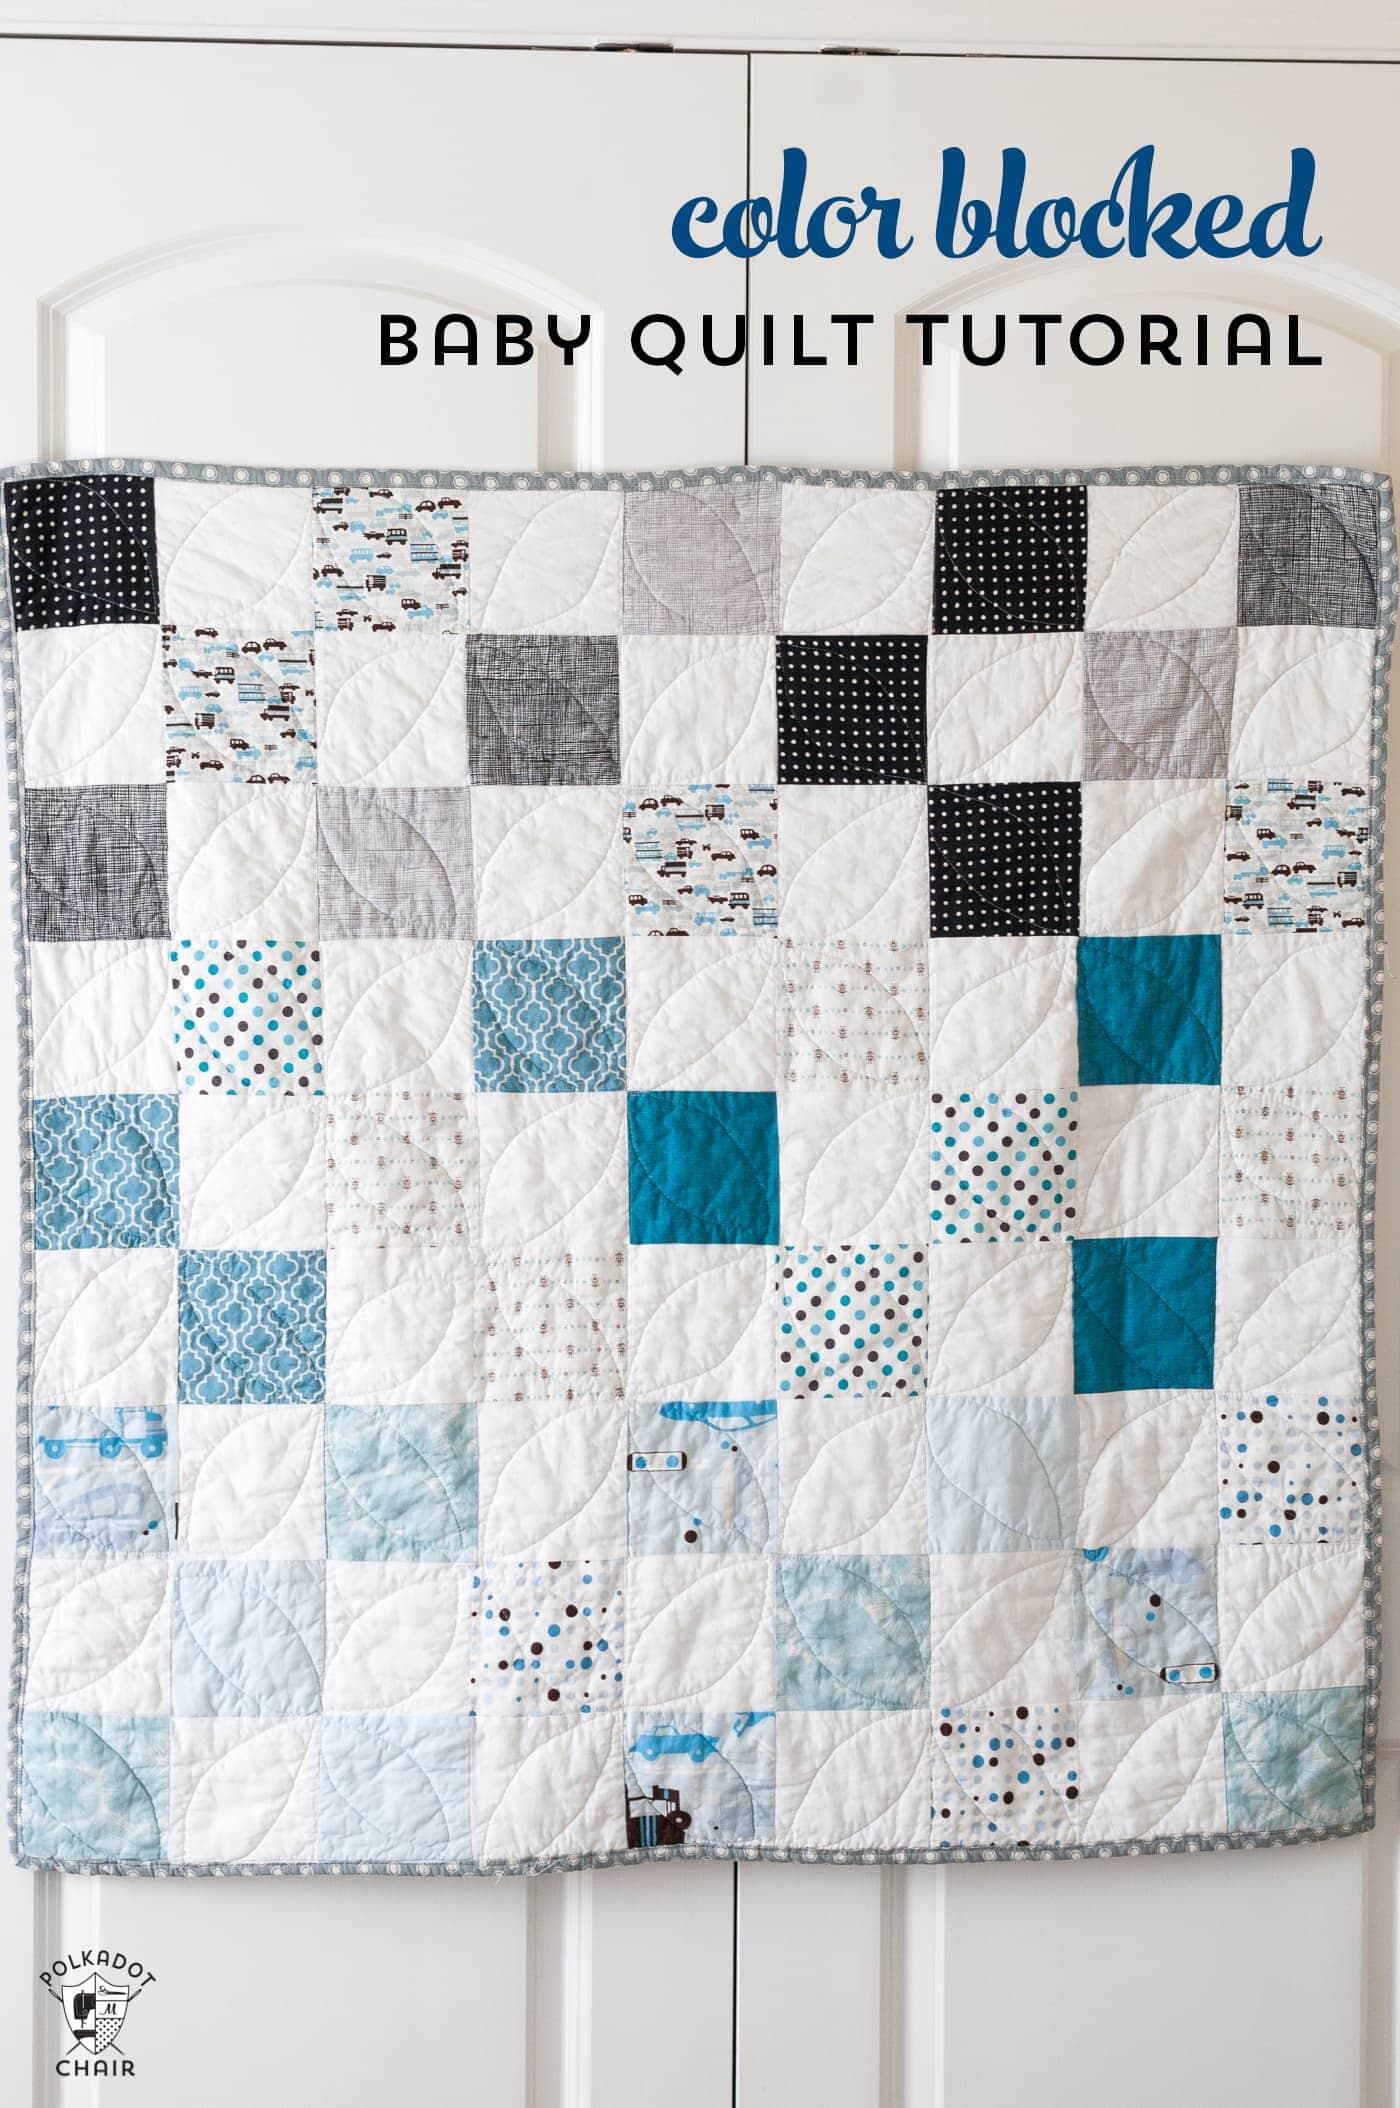
This baby quilt pattern features a straightforward design; there is no need for a pattern. The blocks are arranged in color order, with the darkest at the top going down to the lightest at the bottom. If you like this pattern, you may also like this Sawtooth Star Baby Quilt Tutorial.
All the fabrics I used in the quilt were from a custom-created charm pack I purchased. This quilt would be great for using some of your fabric stash. Just pull a selection of light, medium, and dark blue fabrics. It also looks great with a pop of black.

If You are New to Quilting
Welcome! This is a great quilt for a beginning quilter. Before you get started, there are a few things you may want to know.
Be sure to check out:
- How to Cut Fabric with a Rotary Cutter & Ruler
- 10 Best Pressing Practices for Perfect Patchwork
- 3 Must-Know Quilting Safety Tips
- How to Finish a Quilt a Step-by-Step Guide
Simple Patchwork Color Blocked Baby Quilt Pattern
supplies
- 4 Fat Quarters of various prints You can get twelve 5” x 5” squares per fat quarter and, this quilt takes fourty one 5” x 5” square prints. You want to pick fat quarters in varying light and dark colors to get the “ombre” effect. OR
- 1 Charm Pack in lieu of the Fat Quarters, One Precut 5" Stack (sometimes called a Charm pack) with at least 41 squares.
- 40 pieces pre-cut 5” x 5” white squares. or one precut stack (charm pack) of 5" squares of fabric with at least 40 squares all the same color.
- 1 1/2 yards of fabric for the backing
- 1 1/2 yards Batting I prefer cotton batting
- 1/2 yard Fabric for Binding
Instructions
- Finished Size: Approx. 40 1/2" x 40 1/2"
Cutting Directions
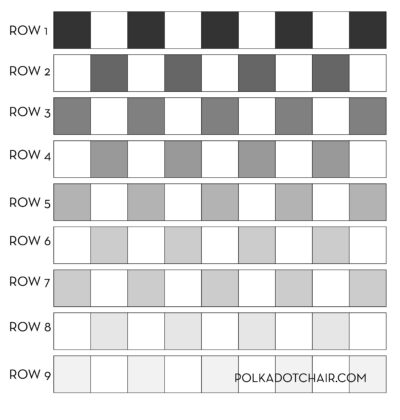
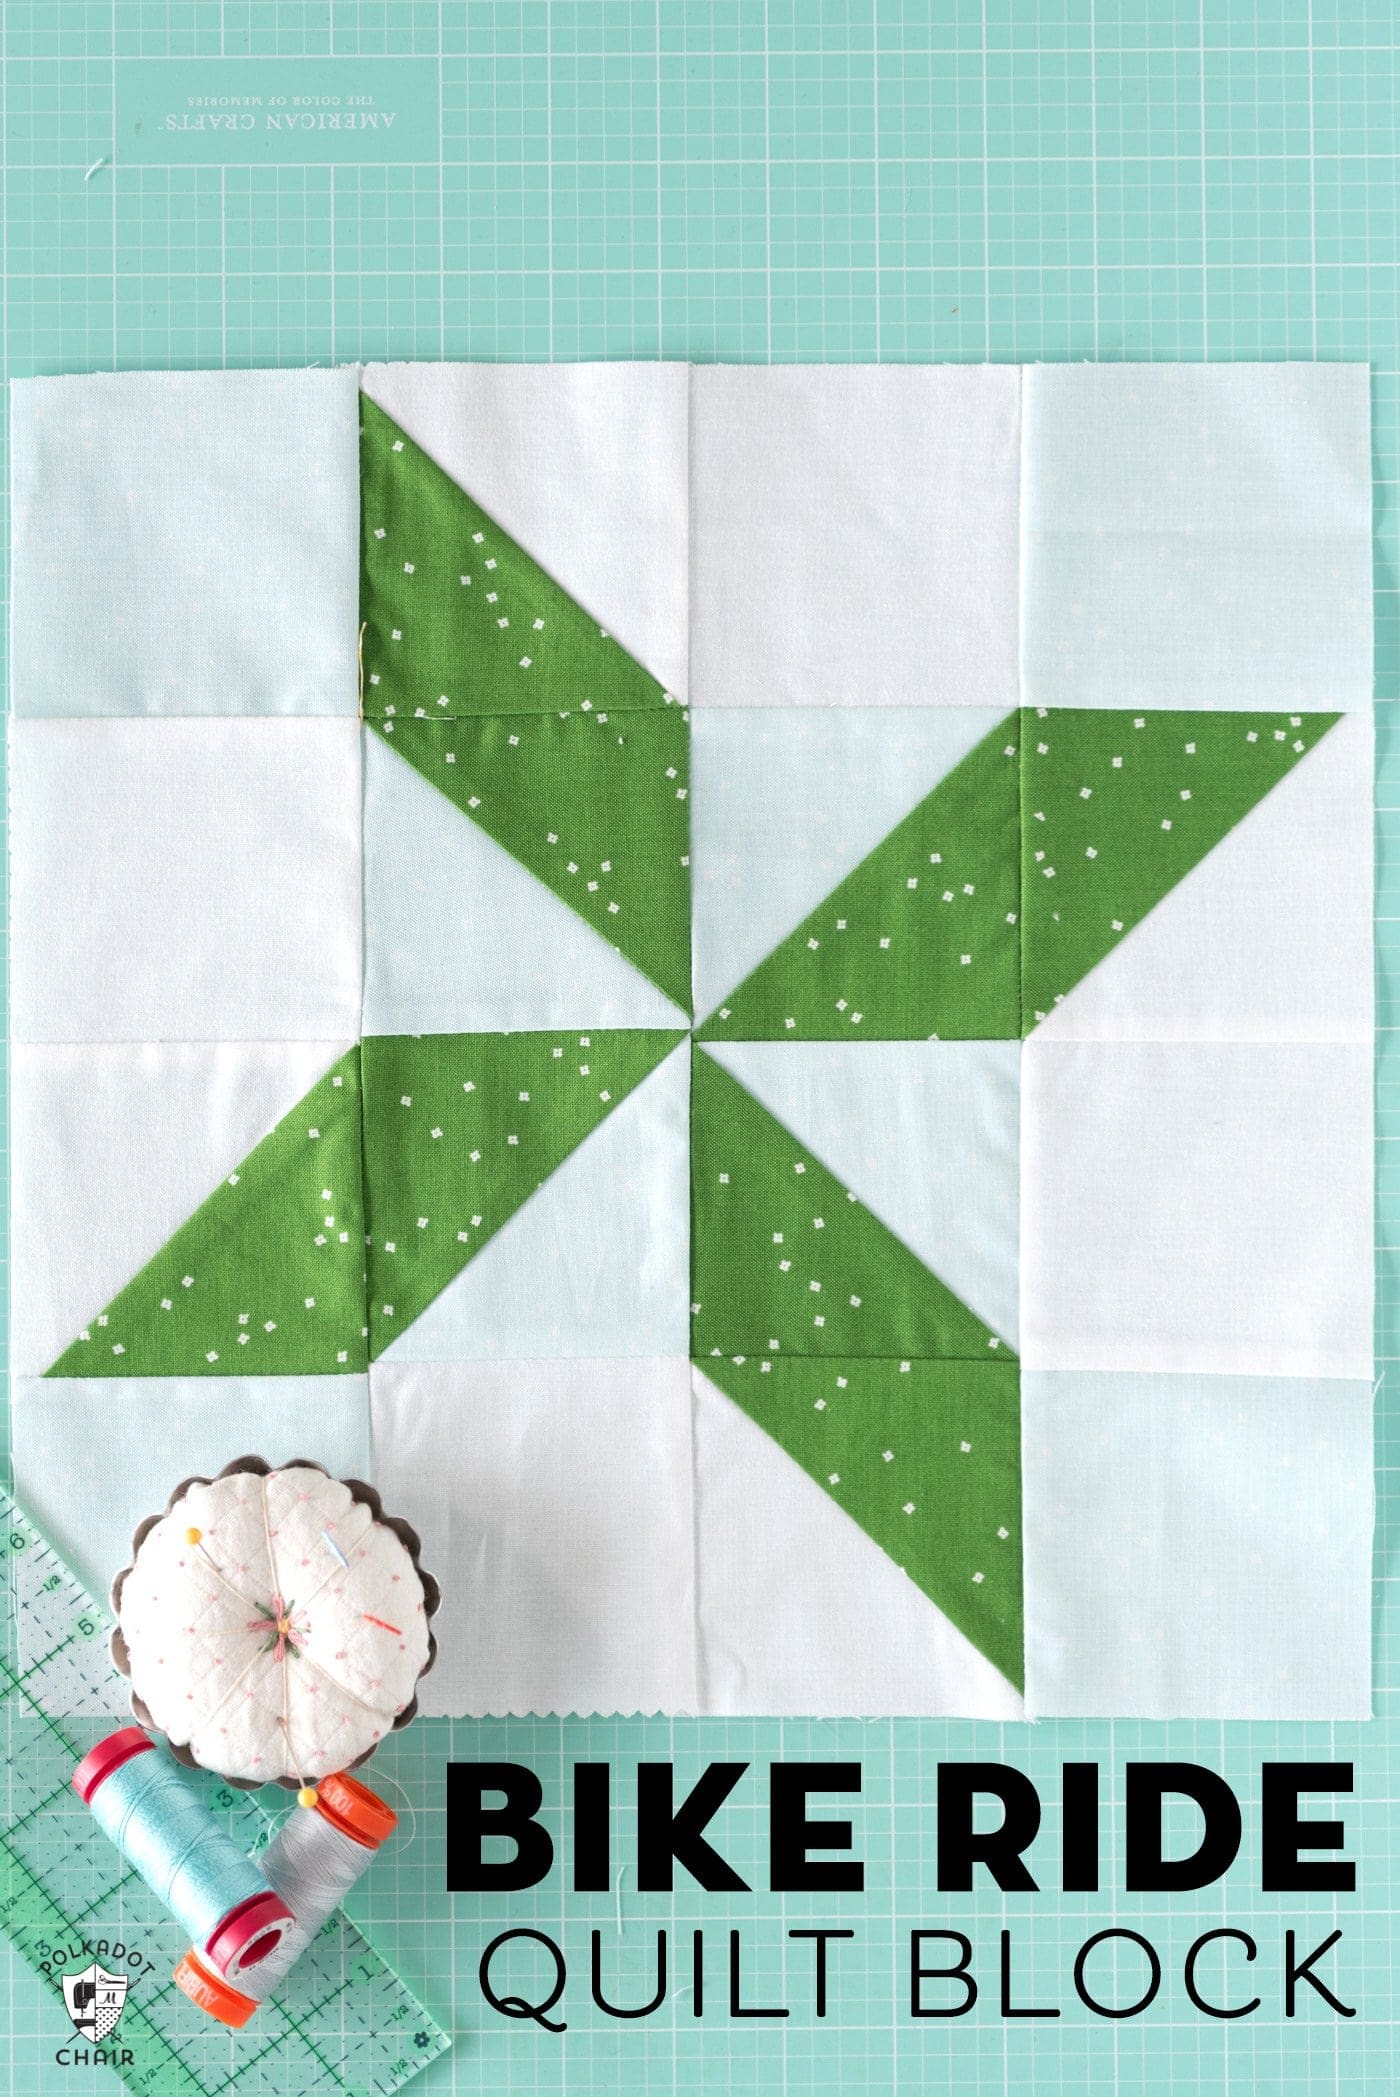
- Cut 41 squares each 5" x 5" from your various prints. Arrange by color value. Darkest, Mid, Light Colors.OR sort one of your precut packs by color and value. Photo shown is an example of a charm pack with a variety of print squares.

- If your white squares are not precut, cut them into 40 squares each 5" x 5".
- Lay out the order you want your squares on a table, design wall or your floor. As you lay out the pieces, keep your darkest colors in rows 1 and 2, then gradually lighten them as you work down the rows, if you want the quilt to have an ombre effect. You can also organize them by color, depending on what fabric you choose to work with.

Assembly Instructions
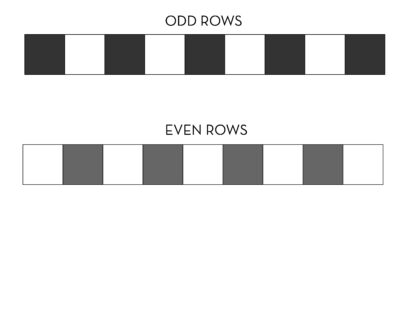
- For odd-numbered rows, sew nine 5” x 5” squares together, alternating print and white, starting and ending with a print. Do this for rows 1, 3, 5, 7, and 9. Press seams to the right.

- For even-numbered rows, sew nine 5” x 5” squares together, alternating white and print, starting and ending with a white block. Do this for rows 2, 4, 6, and 8. Press seams to the left.
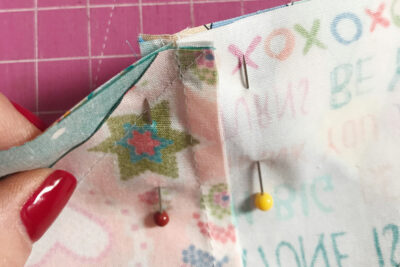
- Tip: After you have sewn the squares together into a row, press your seams to one side. Press the seams of all of the squares towards the print fabrics, this will allow you to "nest" your seams together when you sew the rows of the quilt to each other.

- Assemble rows.

Finishing
- Quilt and bind as desired! I quilted mine using the Dogwood quilting pattern. The backing is flannel (my favorite for a baby quilt). It’s bound using 2 1/2” wide strips.


What is the finished size for this quilt?
Just made my first quilt with these instructions! Thank you
Hello, I may have missed this, but did you use premade binding or did you make your binding? Thank you so much!
I made the binding. Just cut 2 1/2″ strips of fabric, sew them together and fold in half and press lenghtwise.
I’m so in love with this pattern I’m using it for my first quilt…eeek!! But I’m the go big or go home and hope I don’t fail lol
Since I’m making a double size do you think I still sew each row and then attach each row to each other or is it better to make them into bigger blocks and then block those together?
I prefer to still sew them by rows, but it’s up to you if you’d rather go the other way. Either will work.
If the finished size is 47×47 you must have pieced the back… reccomendations about the piecing? Down the Venetian or two side pieces?
I just pieced it straight down the middle. If I had some I’d have used Minke on the back since it’s 60″ wide.