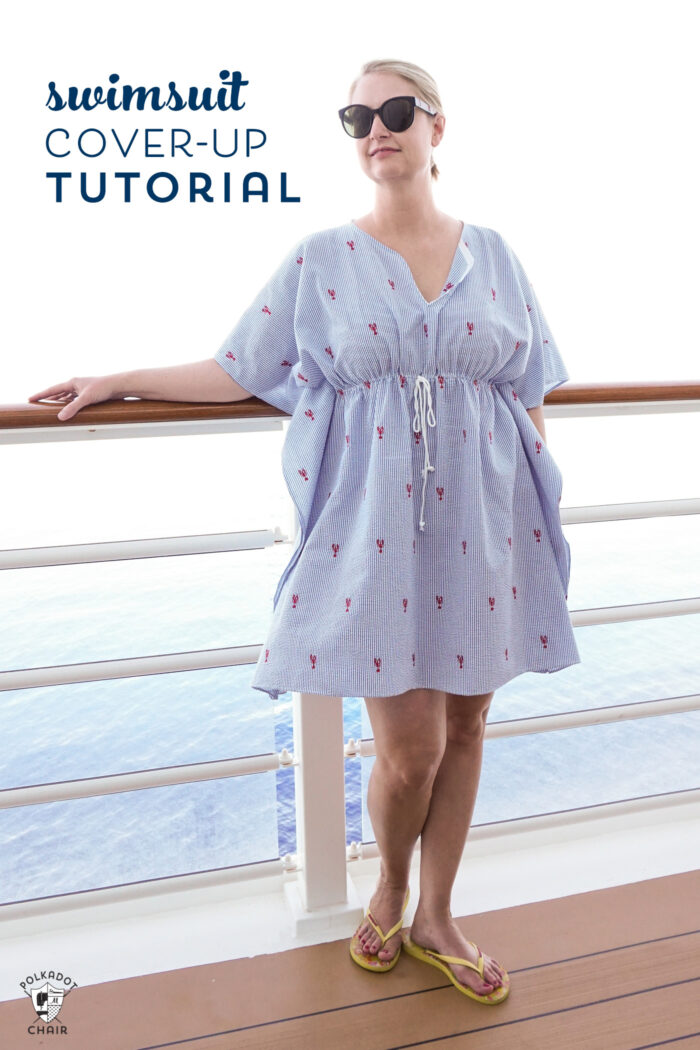
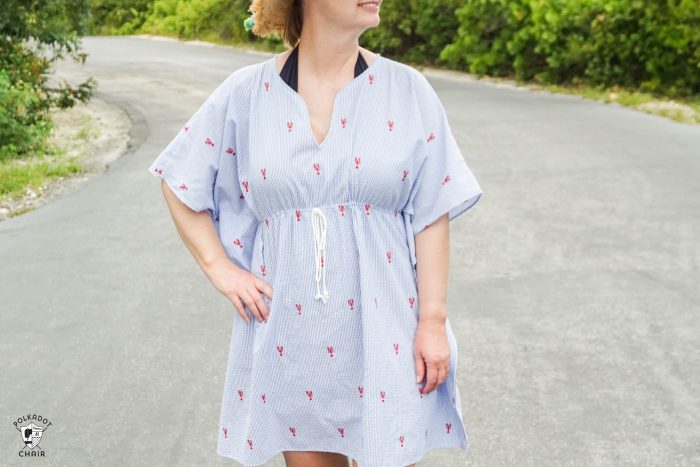
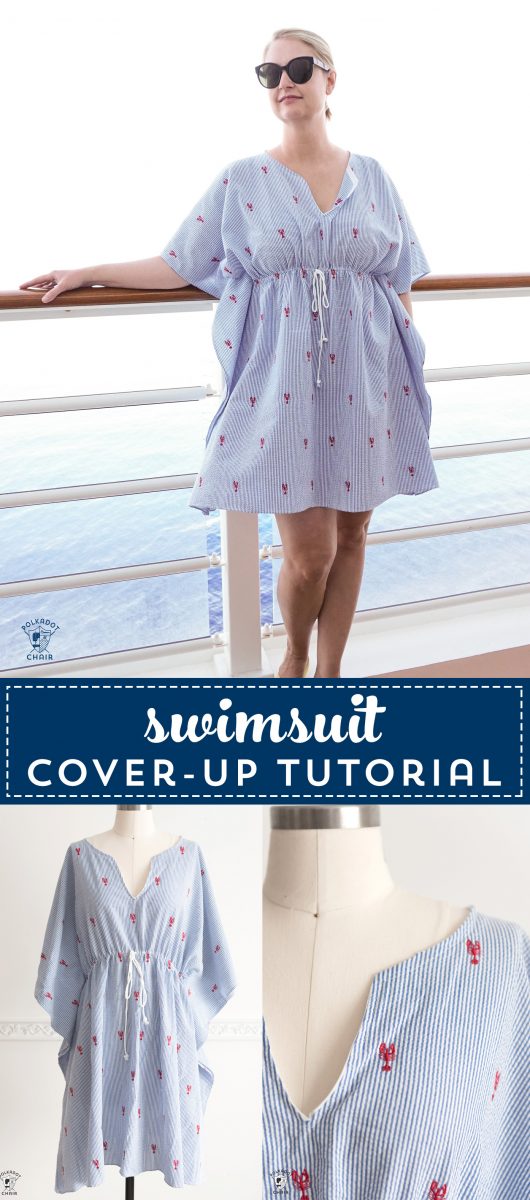
Make a Cute Swimsuit Cover-Up with this Free Sewing Pattern
I always look for cute cover-ups to take to the beach or pool. One year, for Spring Break, we went on a cruise, and I could not find any bathing suit cover-ups that I liked, so I decided to try to make one. I’m thrilled with how it turned out and have been wearing it nonstop! I sat down and typed the directions, and I am excited to share this free Swimsuit Cover-Up Sewing Pattern with you!
While packing for our Disney Cruise last April, I noticed that my swimsuit cover-ups consisted of somewhat ratty knit dresses or shorts and tank tops.
Since we were going on a Cruise and people on cruises usually dress up a bit more than I do in my backyard pool, I thought I should take a cute bathing suit coverup. I started searching for cover-ups online. I found a few that I liked but none that I loved.

After looking at an older cover-up I own (it’s all worn out now), I thought it would be possible to make one myself. After a bit of trial and error (if you follow me on Instagram you may remember the many errors I shared on my Insta story), I was finally happy with the result.

This swimsuit cover-up pattern is considered a “fits most” pattern. I am about 5’9″ and wear a size 8-10, which fits me well. It would also fit me if I was larger and fit my daughter (size 6) as well. If you are larger or smaller than a size 6-16, you may want to adjust the pattern size up or down.
Okay, are you ready to get started? It’s easy I promise!
How to Get the Neck Pattern Piece
For this pattern, you’ll need a template for the neck cut-out. Fill out this form, and I’ll email it to you
Swimsuit Cover-Up Pattern:
Supplies to Sew Cover-Up:
2 yards of Lightweight Fabric for the cover-up. I used a seersucker. I do not recommend making this with medium-weight fabrics.
1 package of double-fold bias tape
2-3 yards of twine or rope for the drawstring
Fabric Safe Marking Pen
Ruler
Basic Sewing Supplies
Neckline Pattern Piece- fill out the form, and we will email it to you.
Swimsuit Cover-Up Directions

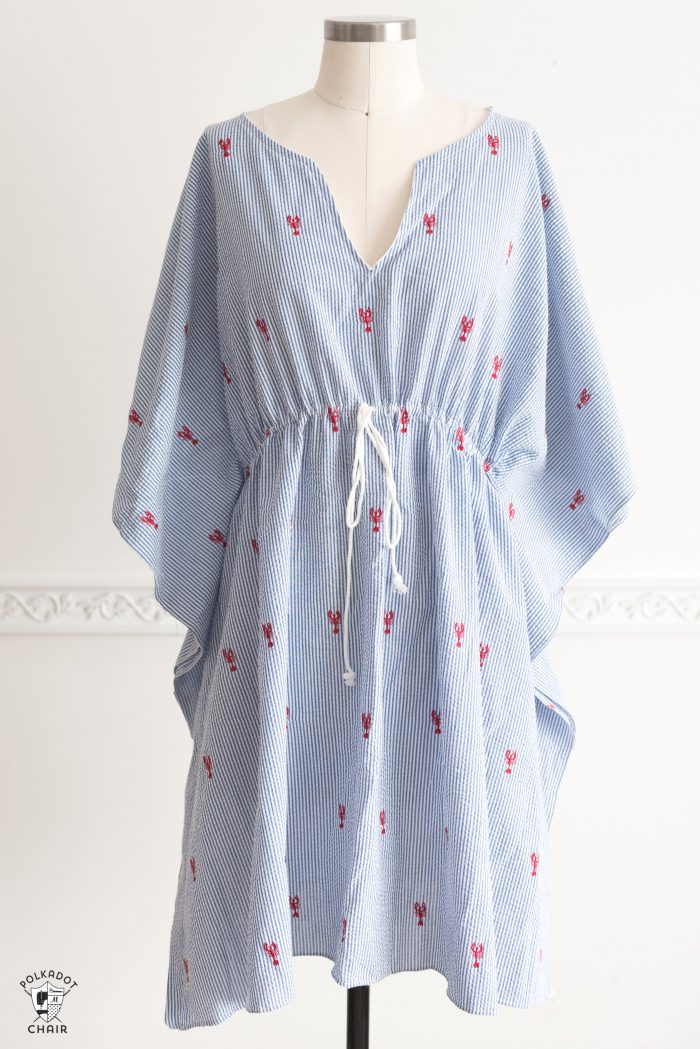
Women’s Swimsuit Coverup Sewing Pattern
Equipment
supplies
- 2 yards of Lightweight Fabric for the cover-up. I used Seersucker
- 1 package of double-fold bias tape
- 2-3 yards of twine or rope for the drawstring
- Neckline Pattern Piece- fill out the form and we will email it to you.
Instructions
Step One:
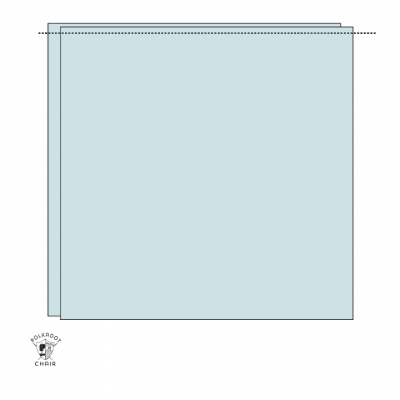
- Begin by cutting two pieces of fabric, each 40″ wide by 36″ tall. The 36″ length goes from your shoulder to your leg. Just in case you’re working with directional fabrics.

- Stitch the two pieces together at the top along the 40″ sides. Right sides facing. If you have a serger, finish off the edge.
Step Two:
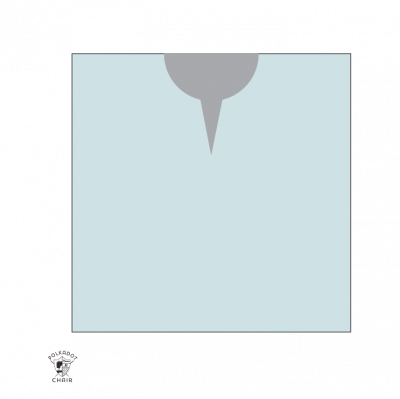
- Print off your neckline pattern piece. Trace it onto a scrap of interfacing or pattern paper on the fold so that you have a full pattern piece. Place the pattern piece on the front of the swimsuit cover-up and pin in place. The straight edge will be even with the seam in the fabric. Cut out through the front fabric piece ONLY. Do not cut the cover-up back piece.

- Cut a slight curve in the cover-up back piece so that it lines up with the cut-out you made in the cover-up front piece.
Step Three:
- Stitch a small rolled hem on the two sides and bottom of the cover-up. I like to use a rolled hem foot for this step.
Step Four:
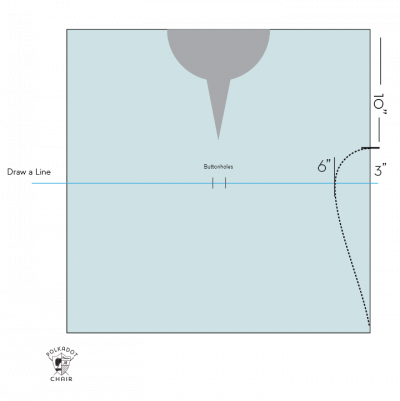
- You need to make a few marks on your fabric pieces, with the fabric pieces right side out and with the front and back pieces lined up exactly on top of each other. Make the following marks.

- Measure down 10″ from the top corner. Place a mark.
- Measure down another 3″ (so 13″ total). Place a mark.
- Repeat on the other top corner.
- Draw a line connecting the two marks that are 13″ down. Repeat for the back piece.
- Find the center of your front piece, and place two marks each 1/2″ long 1″ apart in the center of the front piece. These are your buttonholes.
- Next, place a mark 6″ in from the edge of the front piece on the 10″ line.
- Draw a curve connecting the 10″ line to the bottom of the cover-up (the dotted line in the photo above). The curve will come in the sharpest at the top, stop curving at the 6″ mark, then gently taper off towards the bottom. Repeat for the other side.
Step Five:
- Stitch two button holes in the marks you made on the front piece.
Step Six:
- Refold the coverup so that the front and back pieces are on top of each other, with the wrong sides facing.
- Pin along the curve you drew. Pin it well!
- Stitch along the curve, making sure to backstitch at the start and the stop. Repeat for the other side.
Step Seven:
- Turn the cover-up inside out.
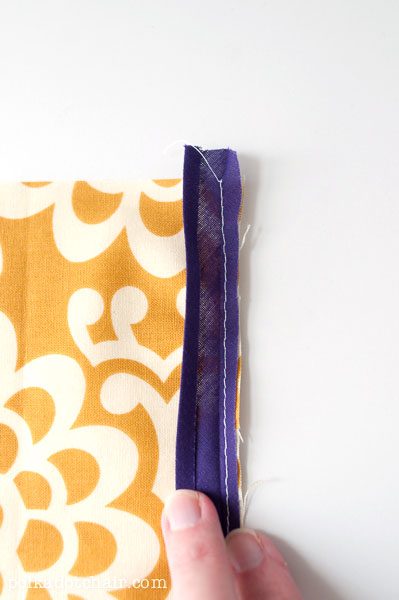
- Open up your bias tape so that it lies flat and is folded under on each end.

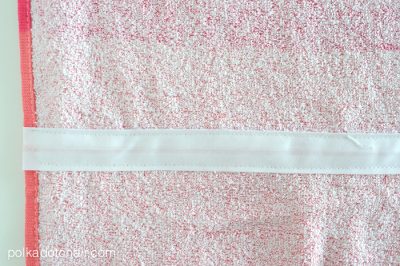
- (This is a different project, the photo is just to show bias tape folded out flat)
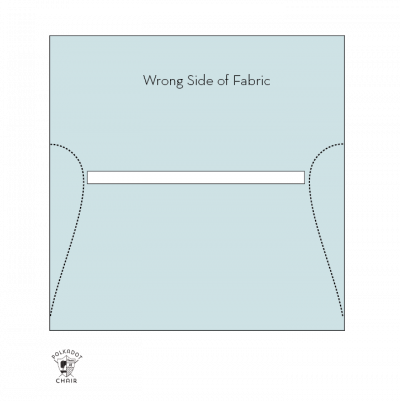
- Pin the bias tape’s wrong side to the cover-up’s wrong side, along the line that you drew across the front piece of the cover-up. When you get to the point where you stitched the curve (the side seams), fold the raw edge of the bias tape under.
- Stitch the bias tape along the top and bottom edges. DO NOT stitch across the ends. Repeat for the back piece. You will have two different pieces of bias tape sewn to the cover-up. One to the back and one to the front.
Step Eight:
- Feed your drawstring through the front of the cover-up, through one of the buttonholes. Feed the string all the way around until it gets back to the other buttonhole. Cut to the desired length and tie knots at the ends.

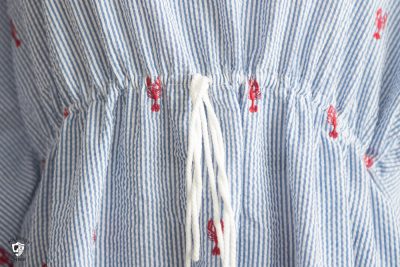
Step Nine:
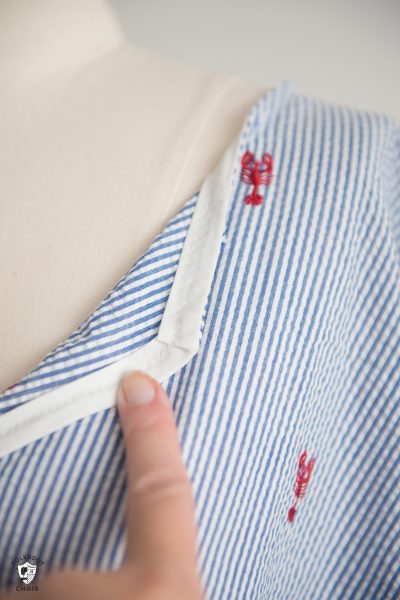
- Using your bias tape, finish off the neckline. You will start at the back of the neckline and place the bias tape on top of the neck, with the raw edges even and the right sides facing (you’ll need to unfold your bias tape).
- (an example of how the bias tape is folded open for the neckline)

- Stitch in place close to the fold in the bias tape. When you get back to where you started, join the ends.
- Fold the bias tape to the inside of the neckline. Press well. Top stitch along the outside of the neckline, catching the bias tape as you go.


That’s it, you’re done!
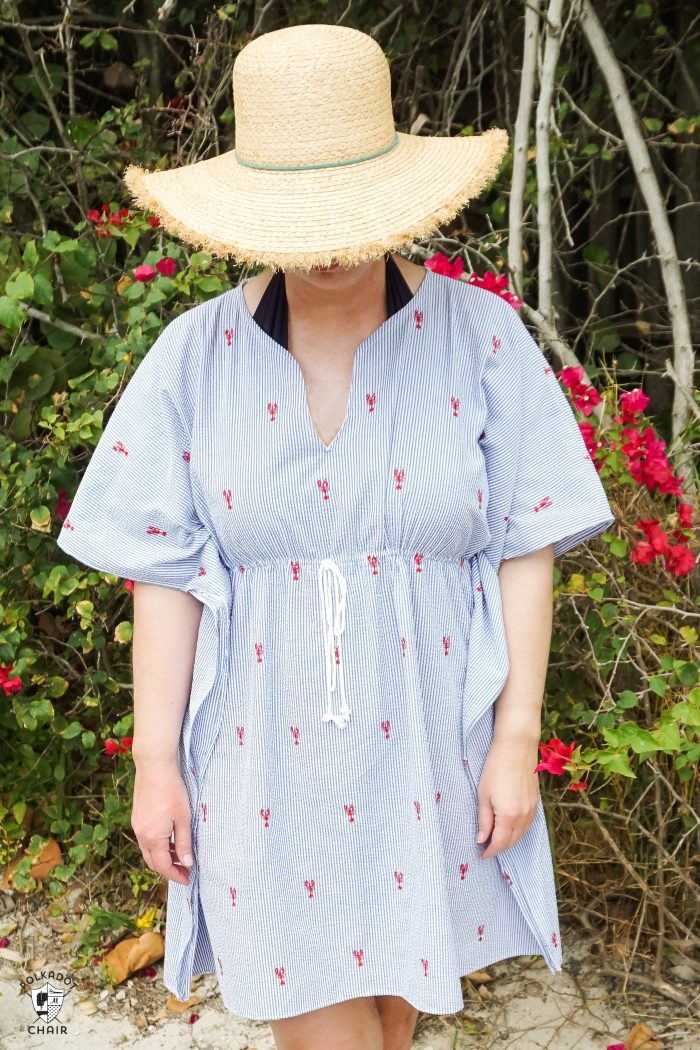
To wear, pull up on the drawstring in the waist until it’s gathered the way you like it!
You May Also Like:
Kids DIY Beach Towel Swim Cover-Up Tutorial
Splash Proof Phone Zip Pouch Tutorial
Sewing Lesson: How to Finish Seams if you don’t have a serger.


I cannot find the neck piece for the swimsuit cover up. I filled out my email & it sent me the pika dot chair pattern
Sharon
Did you open it? The Polka Dot Chair is our site, and the file attached to that email is the neck pattern piece.
could you not just fold a piece of fabric and mark or pinfold if you need to instead of sewing two together on the top line ?
I would like to see this done with a jersey knit, is there anything that you would change with the finishing of the neck line? (I would definitely just make it a sweetheart neckline instead of the deep plunge).
Yes, but honestly that’s an entirely different pattern. This is the way that I made mine and am happy with how it turned out.
I will add pockets on it for sunglasses and such.
Thanks! Making some as gifts out of fun fabric–if you Google Beach Babes fabric, Swimsuit Ladies etc . you will find them like on sites like Etsy, Fruit Ladies (with big fruit Bums ) is really cute!
I can not download the neckline pattern piece too!
thank you for your help!
It should be there now.
I was excited to see the swimsuit cover-up pattern – it’s EXACTLY what I’ve been looking for! Unfortunately, I’ve spent the last 25 minutes trying to find / download the neckline pattern piece. I’ve tried the templates page, done searches, checked the project index… NOTHING.
I’m signed up and can access the templates page, but just can’t find this template. HELP!!!!
Try it again. Sometimes it does not update the downloads at the same time the post publishes.