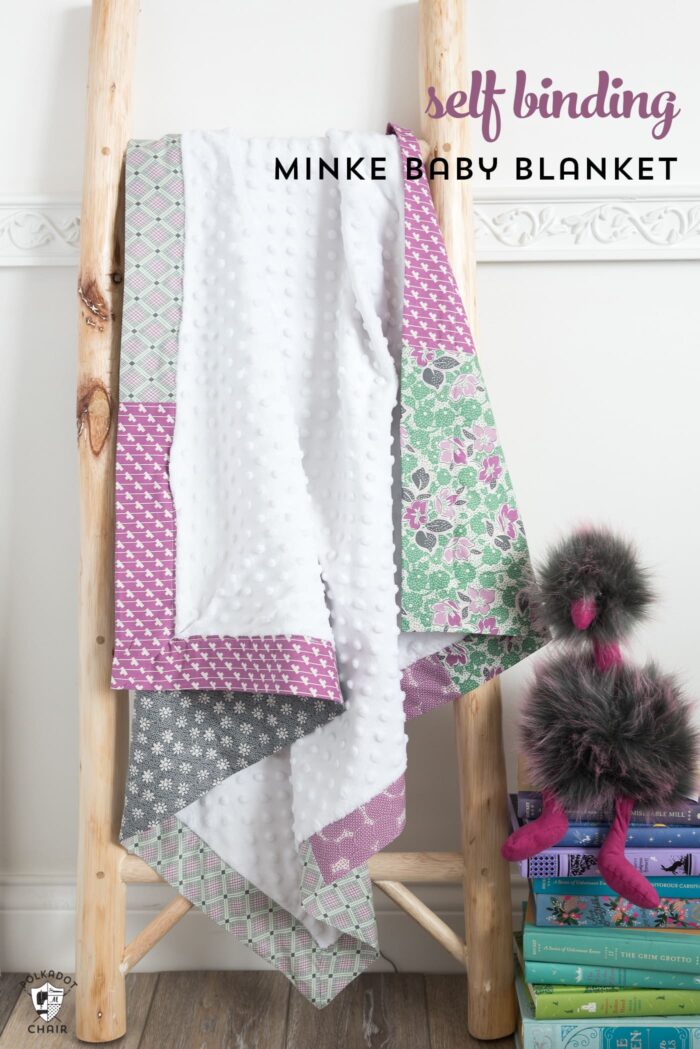
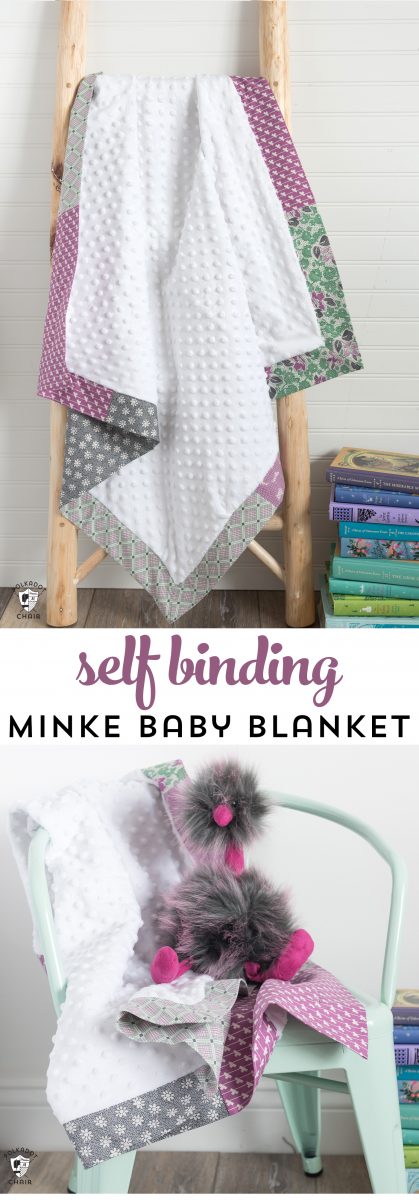
Self-Binding Minky Baby Blanket Tutorial
If you are looking for a quick and easy-to-sew baby gift, then you may like today’s tutorial. I’m going to show you how to make a Patchwork Self-Binding Minky Baby Blanket. It is made using a fun technique that I learned years ago, which sews and binds the blanket at the same time!
Last Fall at Quilt Market, I fell in love with Leonie Bateman’s new fabric line, Sorbet. Leonie is an amazing quilter who hails from Australia. I’ve been lucky to get to know her over the last year or two. Let me tell you; she’s a hoot!
Leonie designs for Riley Blake’s sister company, Penny Rose, which focuses on vintage and reproduction prints. The line designed by Leonie was inspired by vintage prints, but I think has such a fun modern vibe!
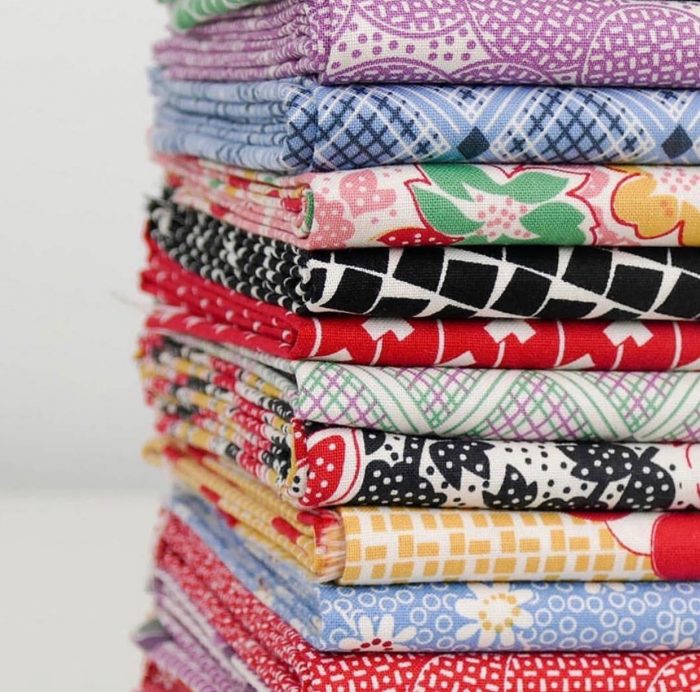
Here you can see a sampling of some of the prints and colors of the line.
The photo is from the Sorbet Look Book
Although it was designed to work with traditional quilting projects, I think it works wonderfully on other projects as well.
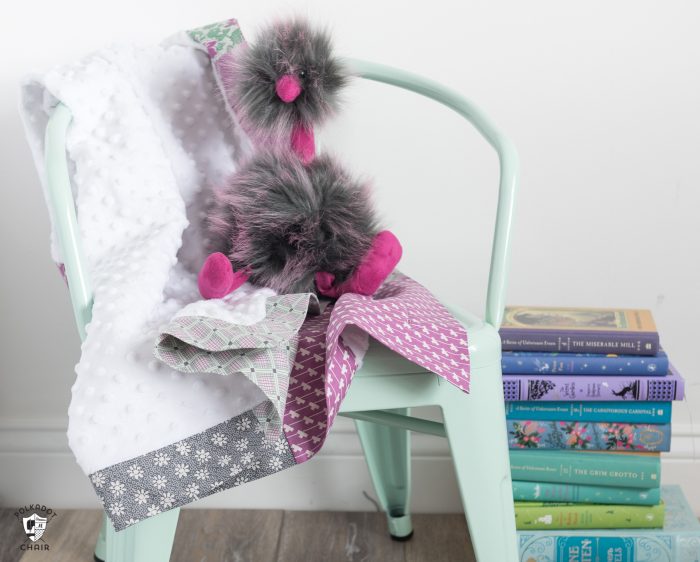
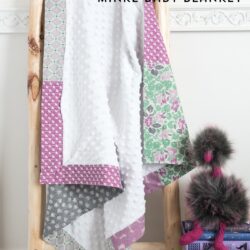
I thought that the purple and green palette would make a great baby blanket. The prints and colors are timeless. I think they make a great baby blanket for a baby girl that is sweet but not too frilly.
How to Make a Self-Binding Baby Blanket with Minky Fabric
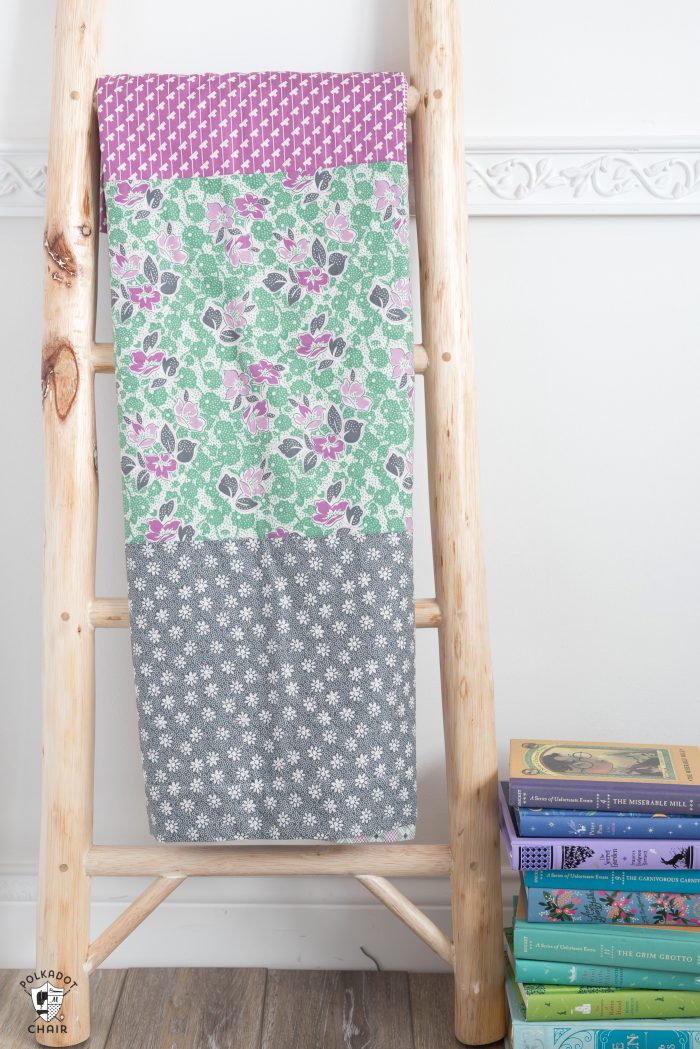
This project stitches up really quickly. It’s great to make for a fun and quick baby gift. It’s also a great way to showcase some of your favorite prints of fabric since you don’t have to cut them up into tiny pieces!
The back of the quilt is made using a very simple patchwork. The fun part is that you use the back of the blanket to bind the blanket, so you get a fun scrappy binding that shows on the front.
(the bird in the photo can be purchased HERE or HERE) Are you ready to make one?
Supplies
may contain affiliate links
- 9 Fat Quarters of Fabric; I used Sorbet by Penny Rose Fabrics
- 1-yard Dimple Minky in White
Just a note: I used a 32″ x 32″ piece of Minky because that is what I had on hand. The tutorial calls for 1 yard of Minky. You can use the whole yard. If you do that, you want to cut it to 36″ x 36″ and increase the size of your squares to 15 1/2″ x 15 1/2″
Cutting Directions
Cut from the Fat Quarters:
9 pieces, each 14″ x 14″
Cut from the Minky:
1 piece 32″ x 32″
Finished Baby Blanket Size: 39″ x 39″
Self Binding Minky Baby Blanket Tutorial
supplies
- 9 Fat Quarters of Fabric
- 1 Yard Dimple Minky Just a note: I used a 32" x 32" piece of Minky because that is what I had on hand. The tutorial calls for 1 yard of minky. You can use the whole yard. If you do, you will want to cut it to 36" x 36" and increase the size of your squares to 15 1/2" x 15 1/2"
Instructions
Cutting Directions
- Cut from the Fat Quarters: 9 pieces each 14" x 14" Cut from the Minky: 1 piece 32" x 32"
Instructions
- Finished Baby Blanket Size: 39″ x 39″
- Begin by laying out your nine 14″ squares into 3 rows of 3. I just did a random layout making sure that I didn’t have two of the same print of fabric next to each other.
- Stitch the squares into 3 rows of 3 using a 1/4″ seam allowance. Press the seams to one side. Mark the center of this piece on all 4 sides.
- Mark the center of each side of your piece of minky as well.
- Lay your sewn squares and piece of minky on top of each other, right sides facing.
- Next pin your two pieces right sides together. To do this you want to find the center of each of the 4 sides of both pieces and begin my matching up the centers. Then pin out from there. Since the pieces aren’t the same size you’ll end up with a funny bunny ear-looking thing at the end; don’t worry this is correct.
- Sew each of the 4 sides starting and stopping 1/2″ from the end of the fabric. Leave a 4″ hole in one of the sides so that you can turn the blanket right side out.
- After you’ve sewn all 4 sides fold the blanket in half diagonally so that it makes a triangle. (photo from an older tutorial that is why the fabric is different)

- Two of the corners will look like this. Using a pen draw a line from the point you stopped sewing to the end of the fabric. Sew.
- Fold the blanket the other way and sew the other two sides. Quickly turn the blanket right side out to make sure you’ve sewn the corners correctly.
- If you have then turn the blanket back inside out and trim off the excess fabric at the corners.
- Turn right side out and press the blanket well. Topstitch along the edge of the center of the blanket making sure to catch the opening in the blanket as you go.
Notes
If you like this project, then you may also like this Soft N Snuggly Baby Blanket Tutorial (psst… the tutorial is a great way to use up a bunch of scraps of minky fabric)
Other Free Sewing Tutorials you may like:
Double Gauze Quilted Blanket Tutorial
Fat Quarter Baby Quilt Pattern
This makes no sense, I have 15.5 blocks and 36×36 kinky. Two will stretch to meet corners other 2 sides will not. Your help would be greatly appreciated.
Katherine
You don’t stretch the fabric to fit. The backing is intentionally larger, as you sew it the extra backing comes to the front of the project and creates the binding. Read though the directions thoroughly it will work.
What size does the backing end up after sewing the blocks together? I don’t use fat quarters, just yardage. Thanks for the great idea.
I started this project and am stuck on sewing the corners. I don’t understand how to get the fabric to lay right to make sure I am able to line up the minke to make sure the corners of it are nice and lined up. Is there anyway you could give more information on how to properly sew the corners and get the two sides to look right.
Do you have instructions to make this self-binding baby blanket, that are printable? I am getting ready to start blanket #2 and my computer is not close to my sewing area. I remember having some difficulty with the corners on the previous blanket (done over a year ago). It took me a while, but I finally figured it out. I’m a little uneasy to start this new project, but the blanket is for someone else to give as a gift.
We had a print option but it was causing our site to crash so we had to remove it. We are slowly transitioning to another method, but have over 2000 tutorials to transfer so the process is slow and long.
Do you happen to have a photo of what this looks like after pinning the front and back together? I’m having trouble visualizing it.
Very pretty, I love it! Have a nice weekend. You truly do beautiful work.
Oh thank you!! Have a wonderful week!