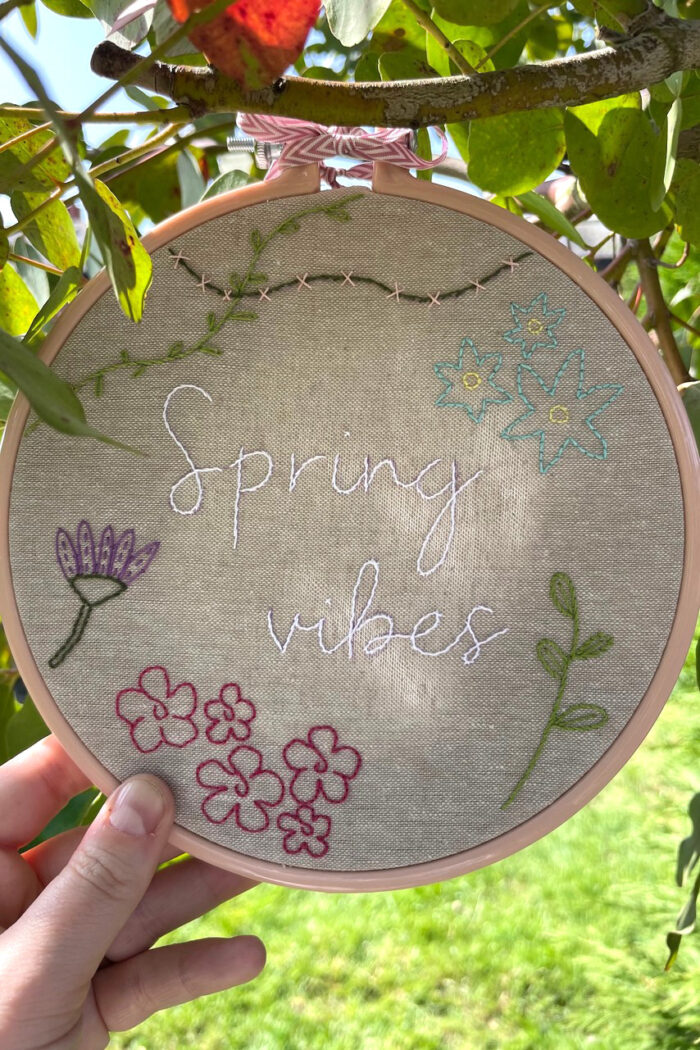
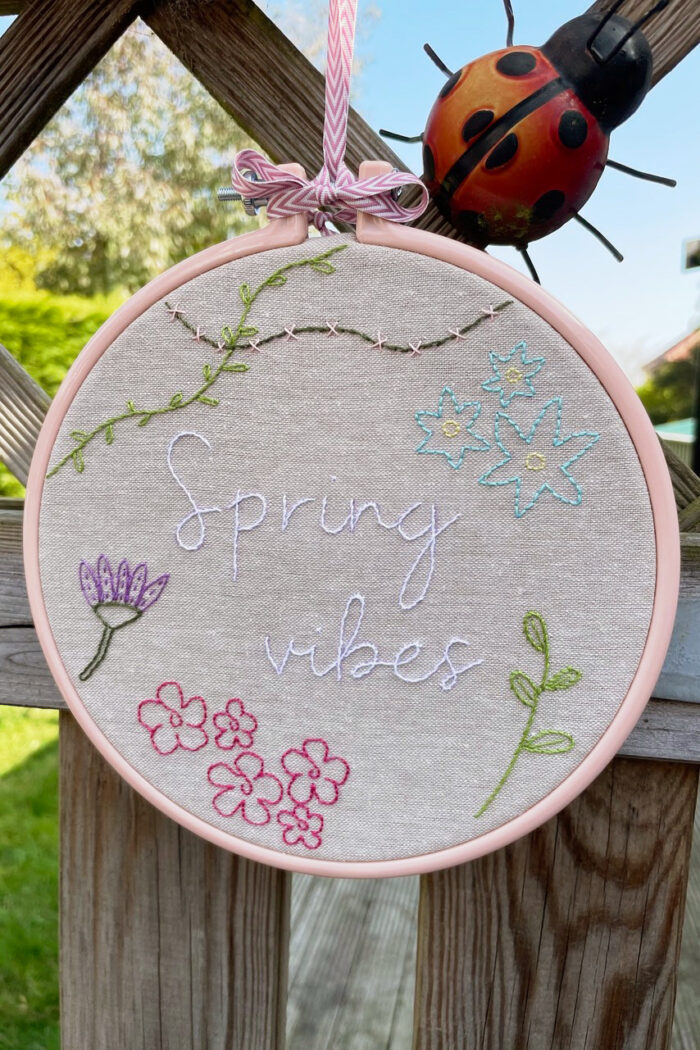
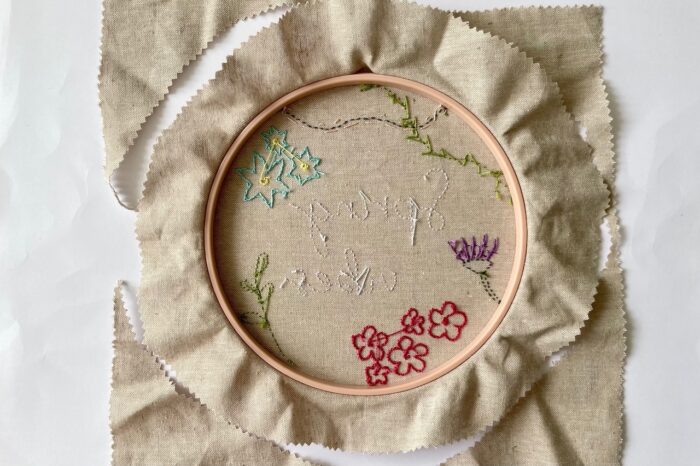
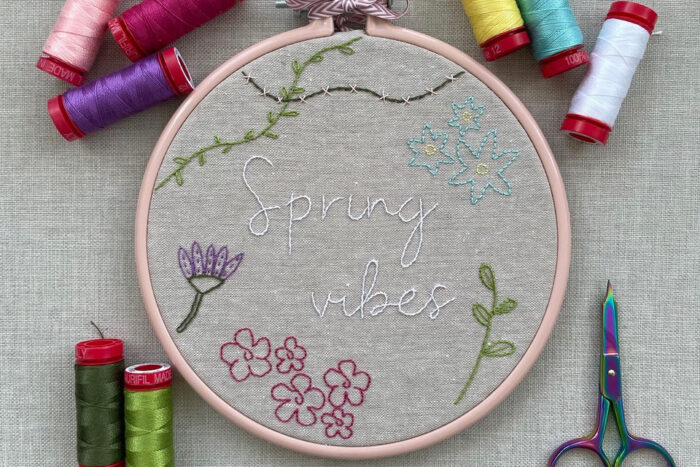
Spring Vibes; Free Sampler Stitch Hand Embroidery Pattern
Celebrate the arrival of Spring with this “Spring Vibes” hand embroidery sampler pattern. We’re sharing the free embroidery pattern with you today, along with giving you a step-by-step how-to for the different embroidery stitches.
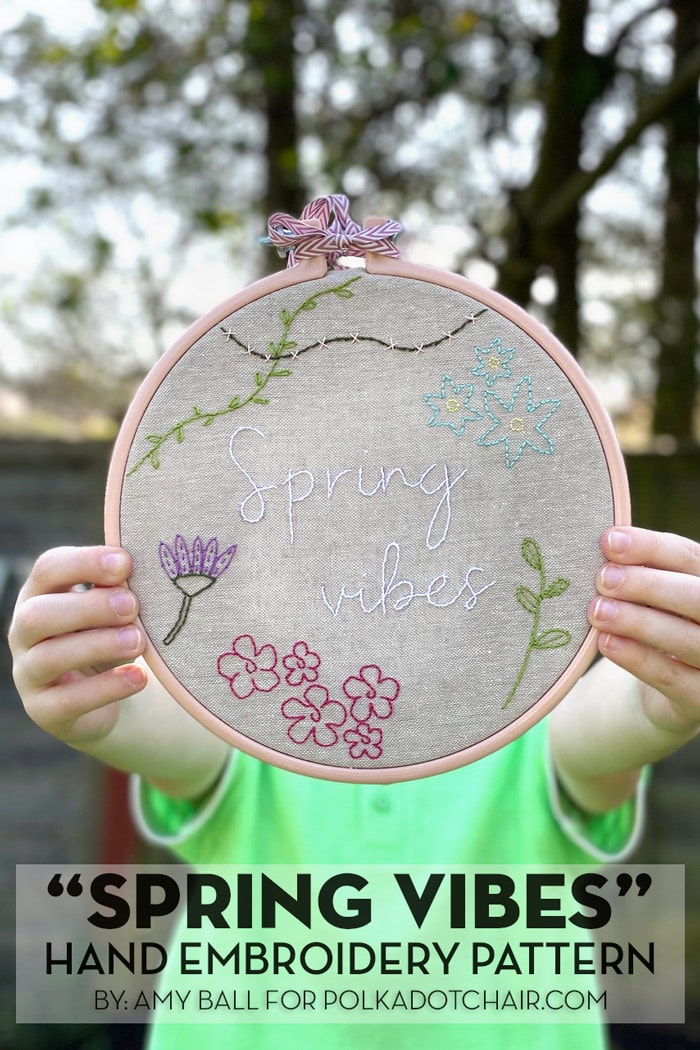
Celebrate the changing seasons with this hand embroidery design, inspired by the blooms and growth of Spring. I love small embroidery projects at this time of year as they are so portable…stitch outside in the garden when the weather is fine or work on it inside, snuggled on the sofa.
The instructions will show you how to display the finished embroidery in the hoop, but it would also work well in a square frame or as part of a patchwork cushion.
- Prep time 30 mins
- Activity time 3hrs 30 mins
- Total time 4hrs
- Yield 1 embroidered hoop
- Author Amy Ball
Tools & Supplies
- Basic sewing tools
- Embroidery thread
- Embroidery needle
- Fabric pen
- Lightbox
- Optional: hot glue gun (or strong fabric glue)
- 7” embroidery hoop
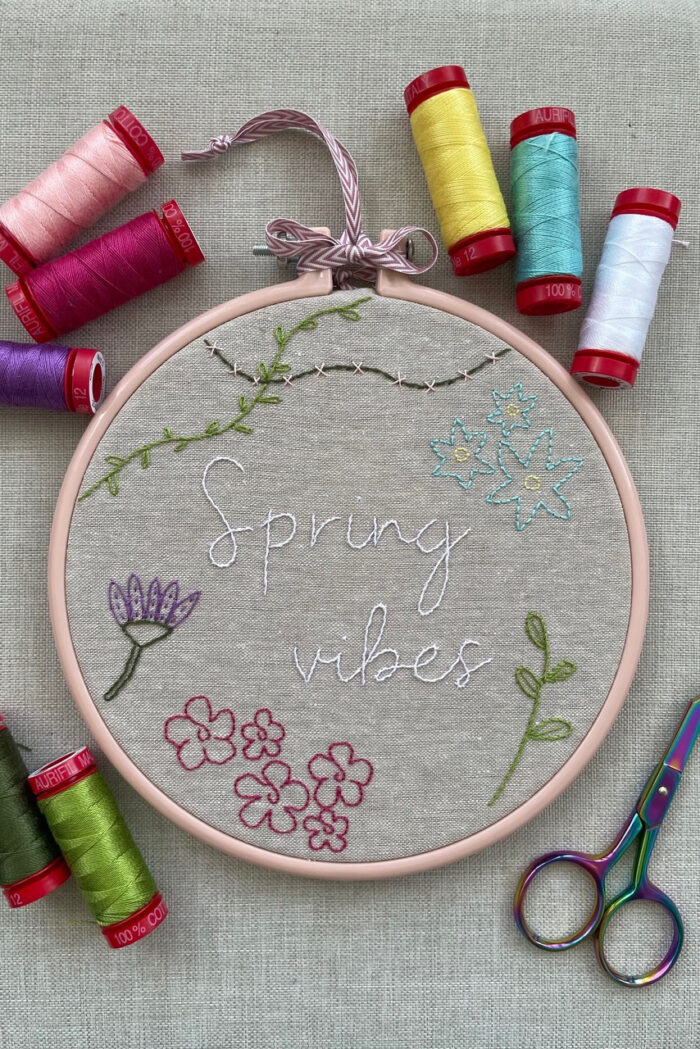
- 1 piece 10” x 10” piece of fabric (I used Essex Yarn Dyed Linen)
- 1 piece 7” diameter circle of felt
- Selection of colors of embroidery floss or similar (I used 8 colors in Aurifil 12wt)
- PDF pattern (download in the sewing templates library)
How to Get the Printable Pattern Pieces. You can get a copy of the pattern pieces used in this project in our Template Library. Access to the library is for our Newsletter subscribers, and subscriptions are free. Please visit this page and follow the instructions to get the pattern pieces. PLEASE READ the instructions on that page. NOTE: The PDF only contains the pattern piece; you still need to read this tutorial to complete your project.
Preparation
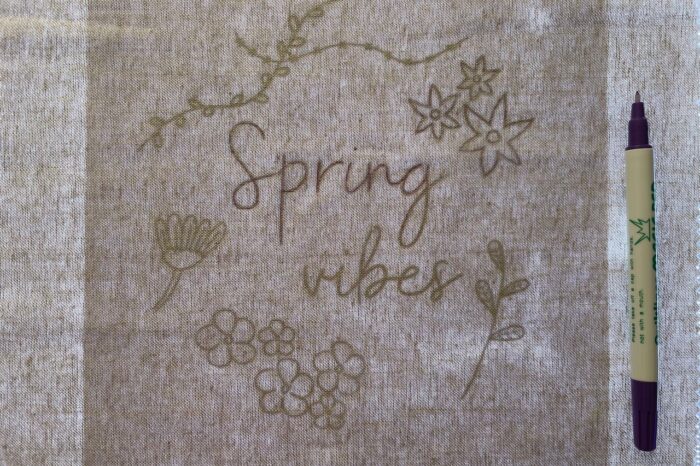
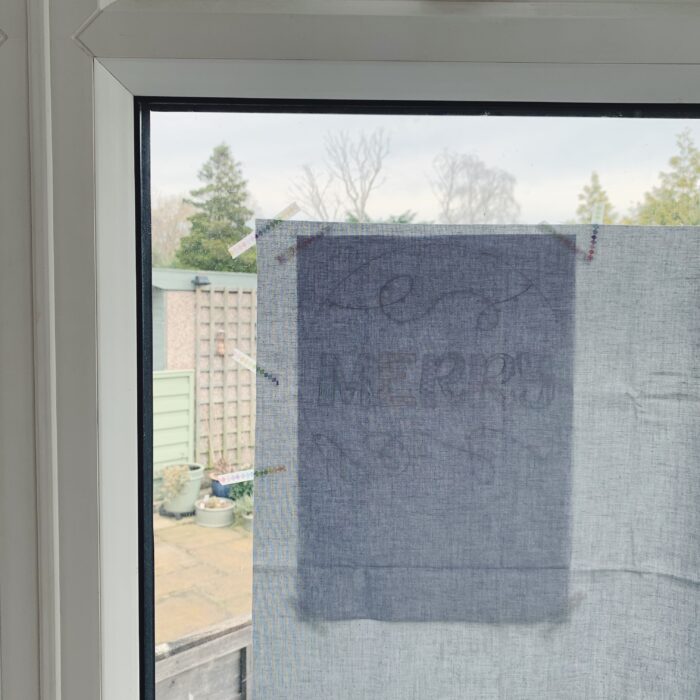
- Print out the pattern ready to use as a template for tracing. I used a lightbox for tracing, but you can easily replicate one by using a well-lit window if you don’t have one.
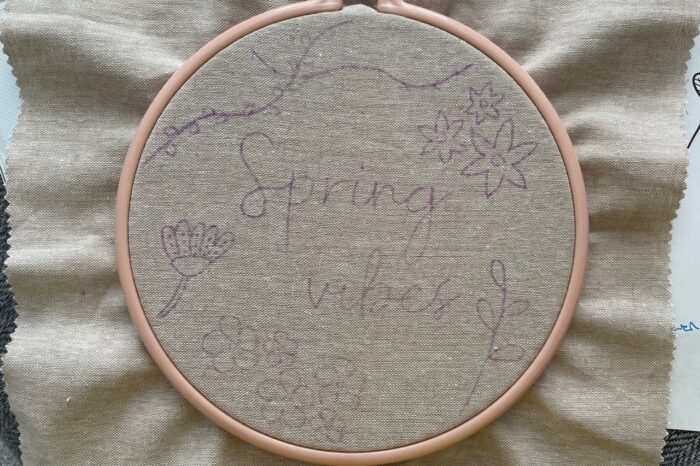
- Tape the 10” square fabric to the printed design, making sure the design is central. Trace using a fabric pen that will fade (I like to use one that fades on its own after a few days).
- Once you have traced the full design, put the fabric into the embroidery hoop, making sure the design is in the middle of the hoop.
Instructions for the Different Embroidery Stitches
The guide diagram shows the thread colors and stitches I used. Follow the steps below for how to create each of the stitch types.
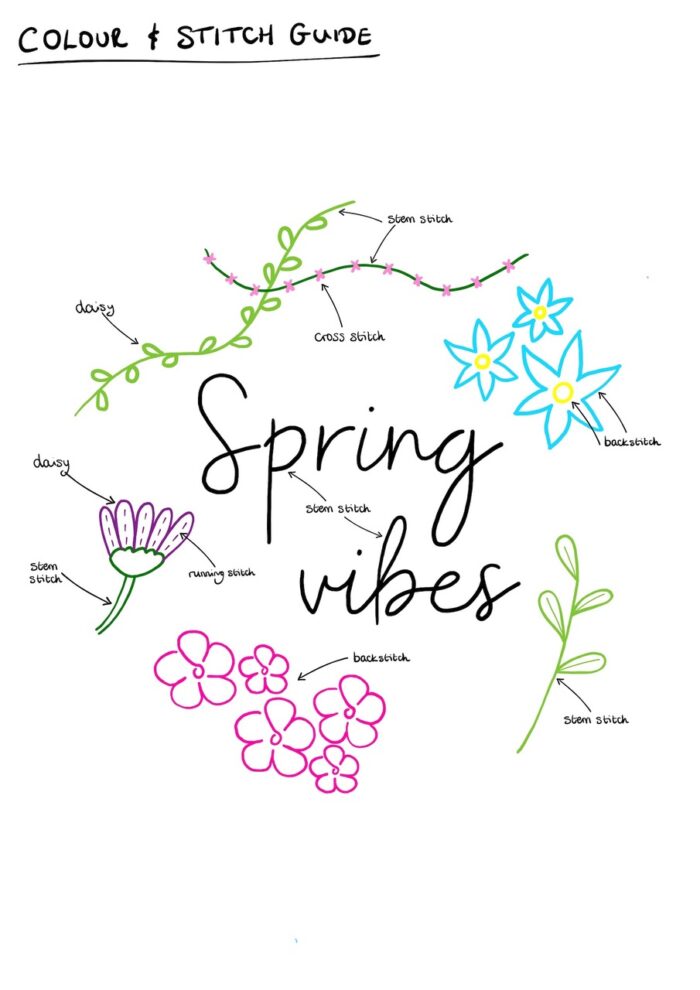
How to Sew A Stem Stitch
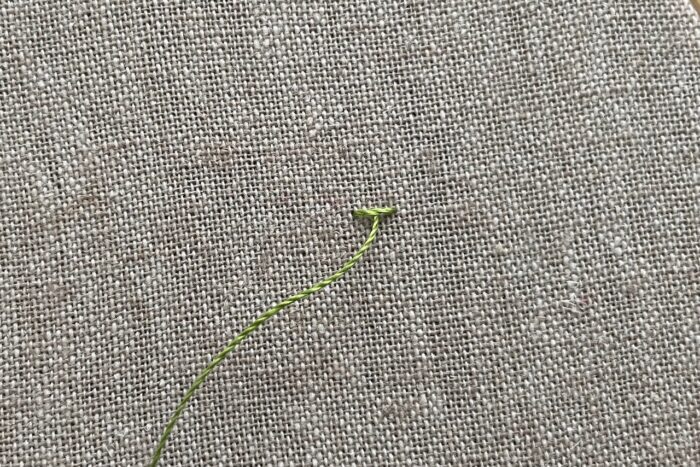
- Start with a regular straight stitch but when you come up through the fabric for the second time, come up in the center of the first stitch (being careful not to catch the thread of the first stitch).
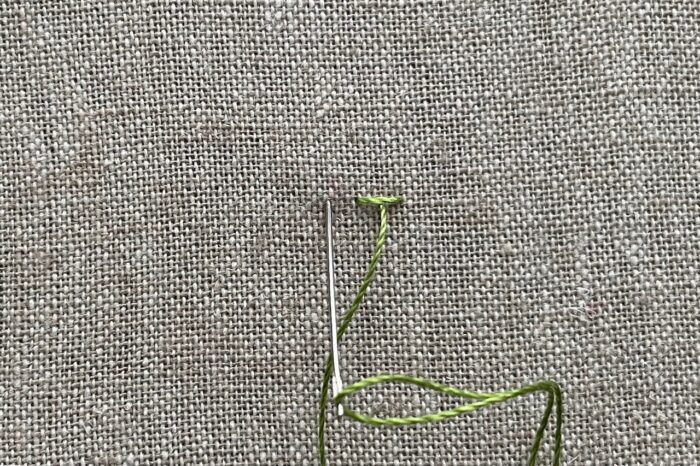
- Now create a second stitch that is a little longer than the first by going back down through the fabric level with the first stitch.
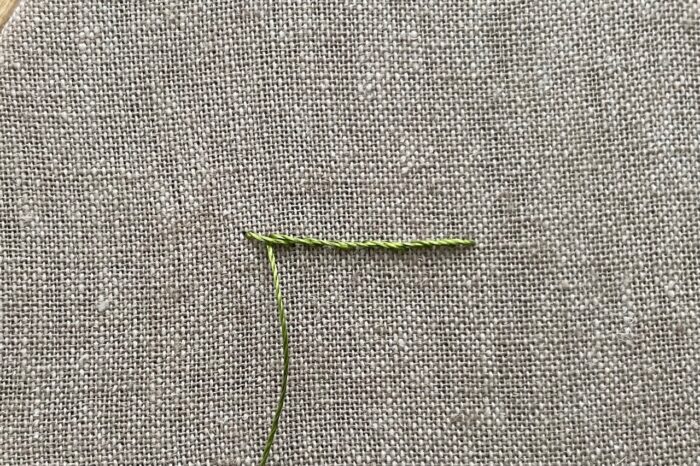
- Repeat to create the twisted effect of the stem stitch. When sewing a stem stitch around corners make all the stitches a little shorter and be careful not to pull them too tight.
How to Backstitch
- Start with a regular straight stitch but then come up through the fabric one stitch length away from the first stitch.
- Now create a second stitch touching the first but going back down the “down” hole of the first stitch.
- Repeat to create a neat line of backstitches.
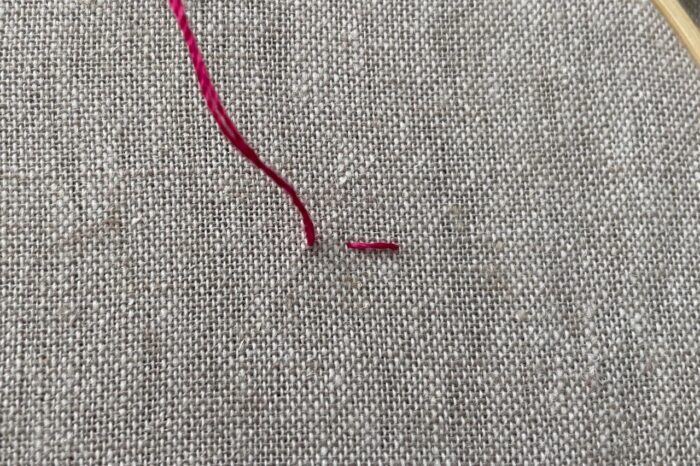
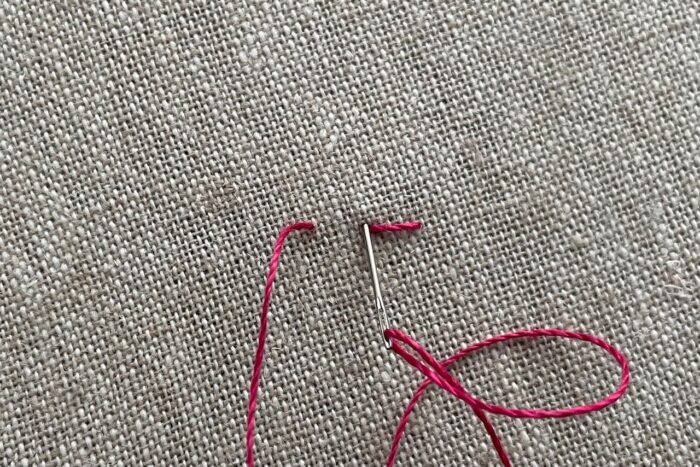
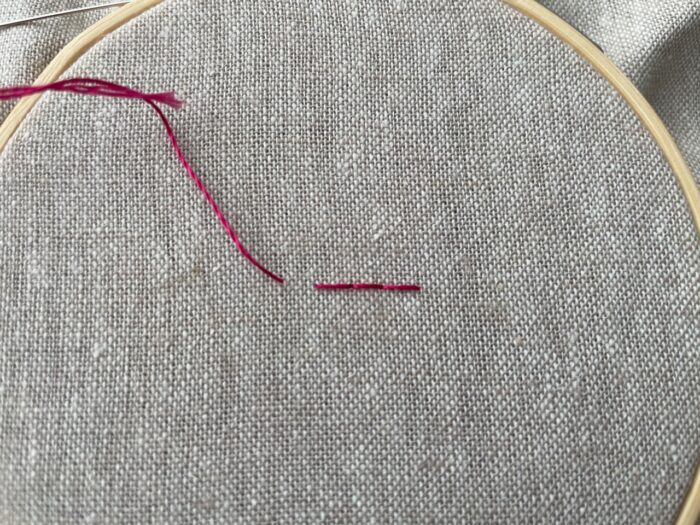
Running Stitch How-To
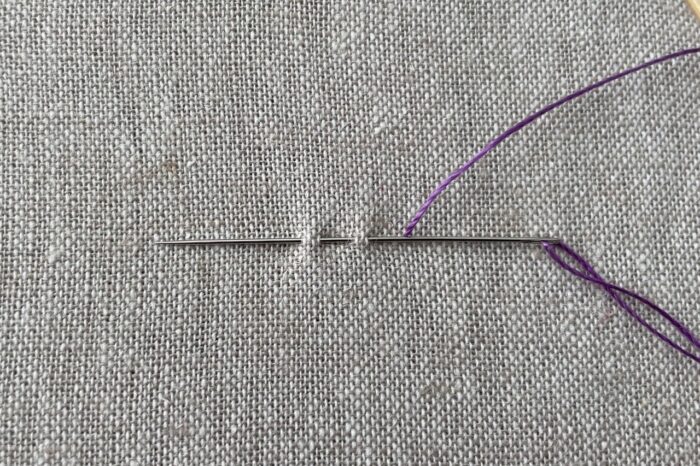
- Start by bringing your thread up through the fabric and then back down to create a single straight stitch. Leaving a small gap, then sew the next stitch. You can weave your needle in and out to create a few stitches at once or sew one at a time.
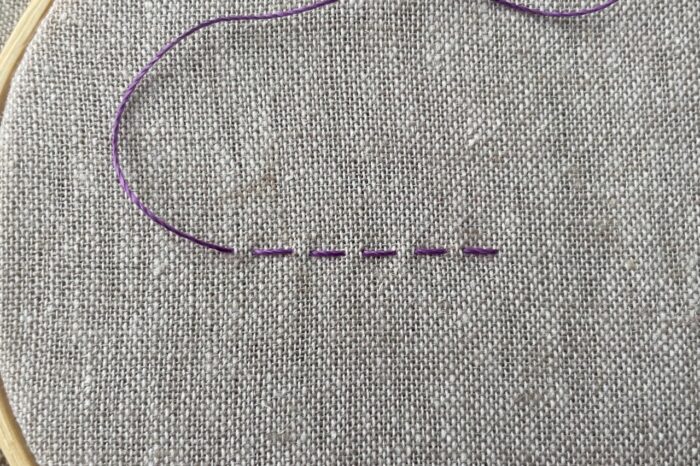
- Repeat to create a line of single straight stitches with a small gap between them.
Cross Stitch Instructions
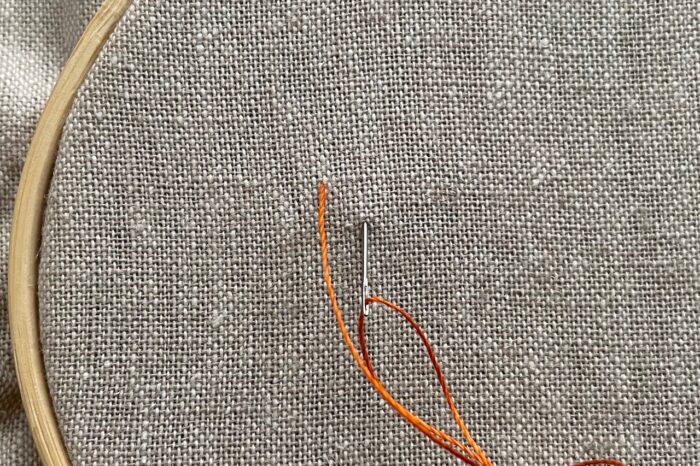
- Imagine a square on the fabric. You are going to use the corners of this invisible square to create a cross-stitch. Start by bringing your thread up through the fabric in the top left corner and then back down again in the bottom right corner to create a diagonal straight stitch.

- Now come back up through the fabric in the top right corner and down into the bottom left corner to create a second diagonal line that overlaps the first.
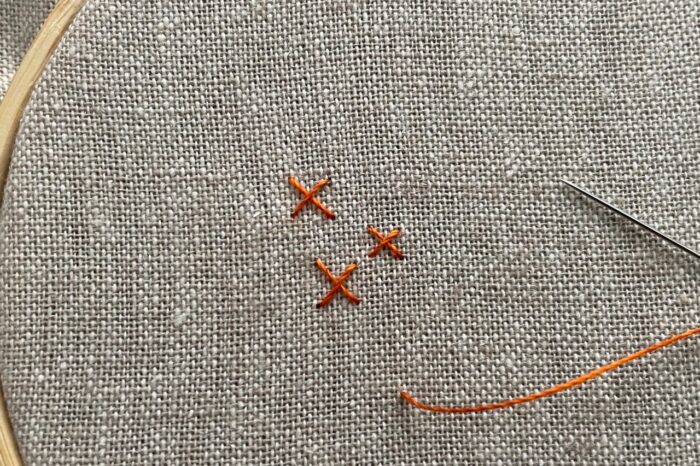
- Repeat to create more individual cross stitches.
Daisy Stitch Instructions
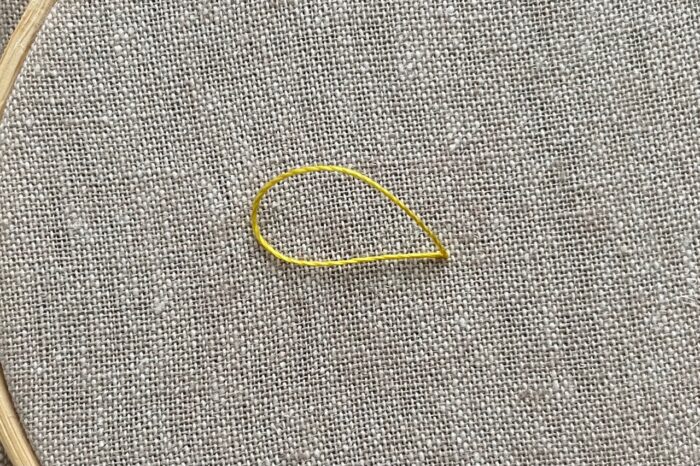
- Start by bringing your thread up through the fabric and then back down again in the same place, leaving a loop of thread.
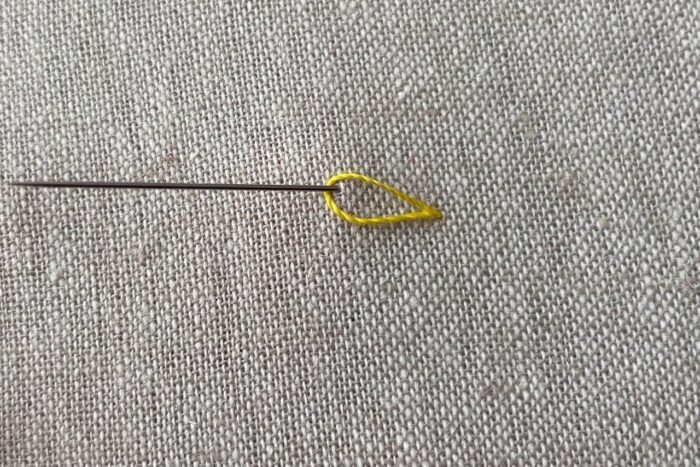
- Gently pull the thread until the loop is the size you want, then bring the needle up inside the loop, at the top of the curve.
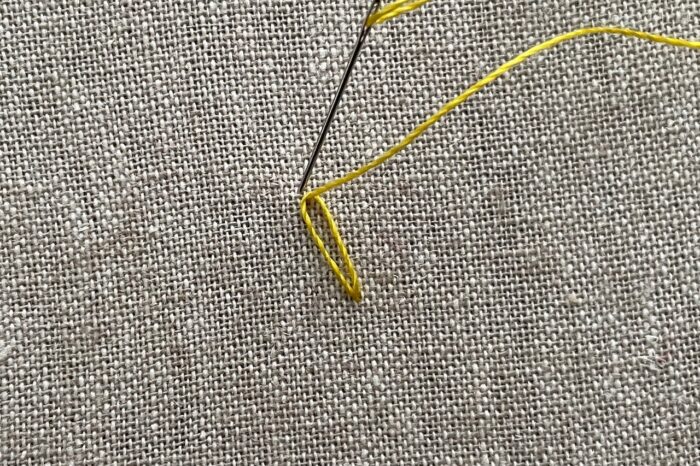
- Now create a tiny stitch to secure the loop.
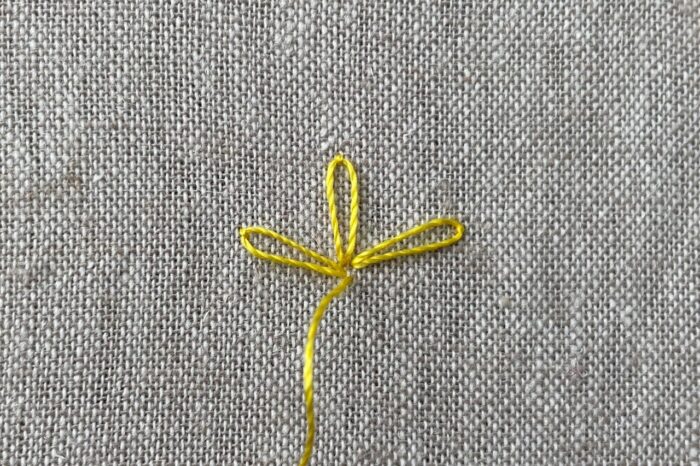
- Repeat to create more daisies. I used a large daisy stitch to create the full petals on one flower. As these needed larger loops I added extra tiny stitches on the sides to secure the thread in a position that gave the “daisy” a fuller, rounded shape.
Finishing
- Trim the excess fabric around the embroidery hoop to about a 1½” border. I used pinking shearers as my fabric easily frays, but you could use regular scissors too.
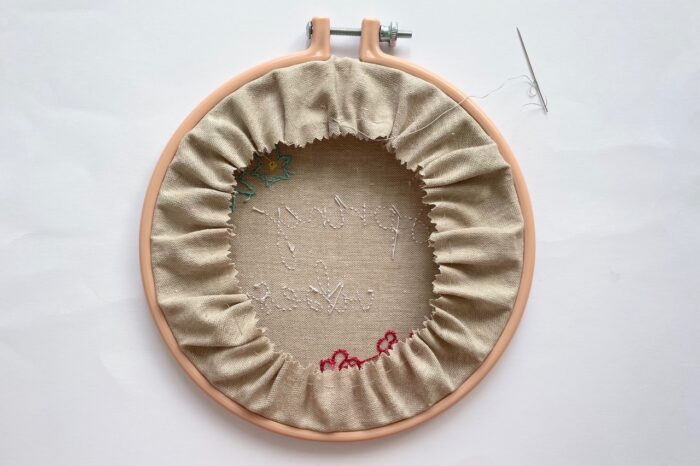
- Sew a large basting stitch about ⅜” from the edge of the fabric, then gently pull the thread ends to gather the excess fabric.
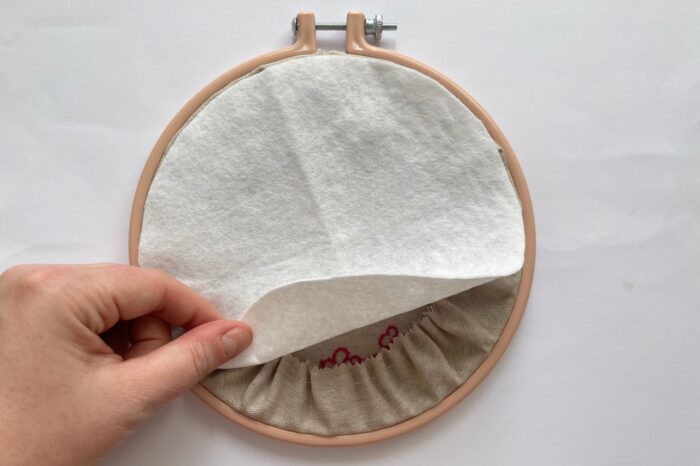
- Attach the 7” felt circle to the back; you can glue it in place or secure it with a running stitch.

- To finish, loop a ribbon around the top of the embroidery hoop.
More Great Projects by Amy
How to create your own light box
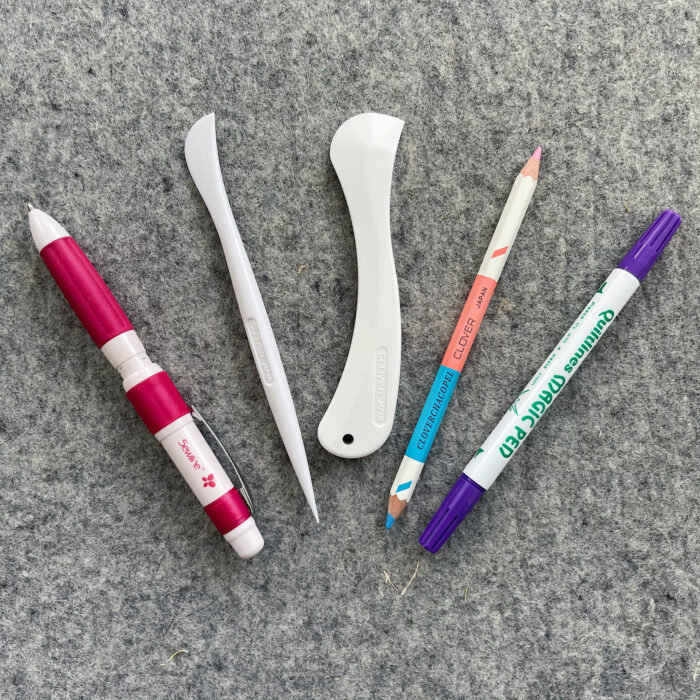
On your marks…| Favourite marking tools
Guide to (near) Perfect Patchwork
About the Designer

Amy lives in the north of England with her husband and son. When she’s not sewing and quilting, Amy can usually be found baking or reading. You can find her on Instagram @amyatthegate