Beginner Friendly Irish Chain Baby Quilt Pattern
Learn how to make a simple, beginner-friendly baby quilt with our free Irish Chain Baby Quilt pattern.
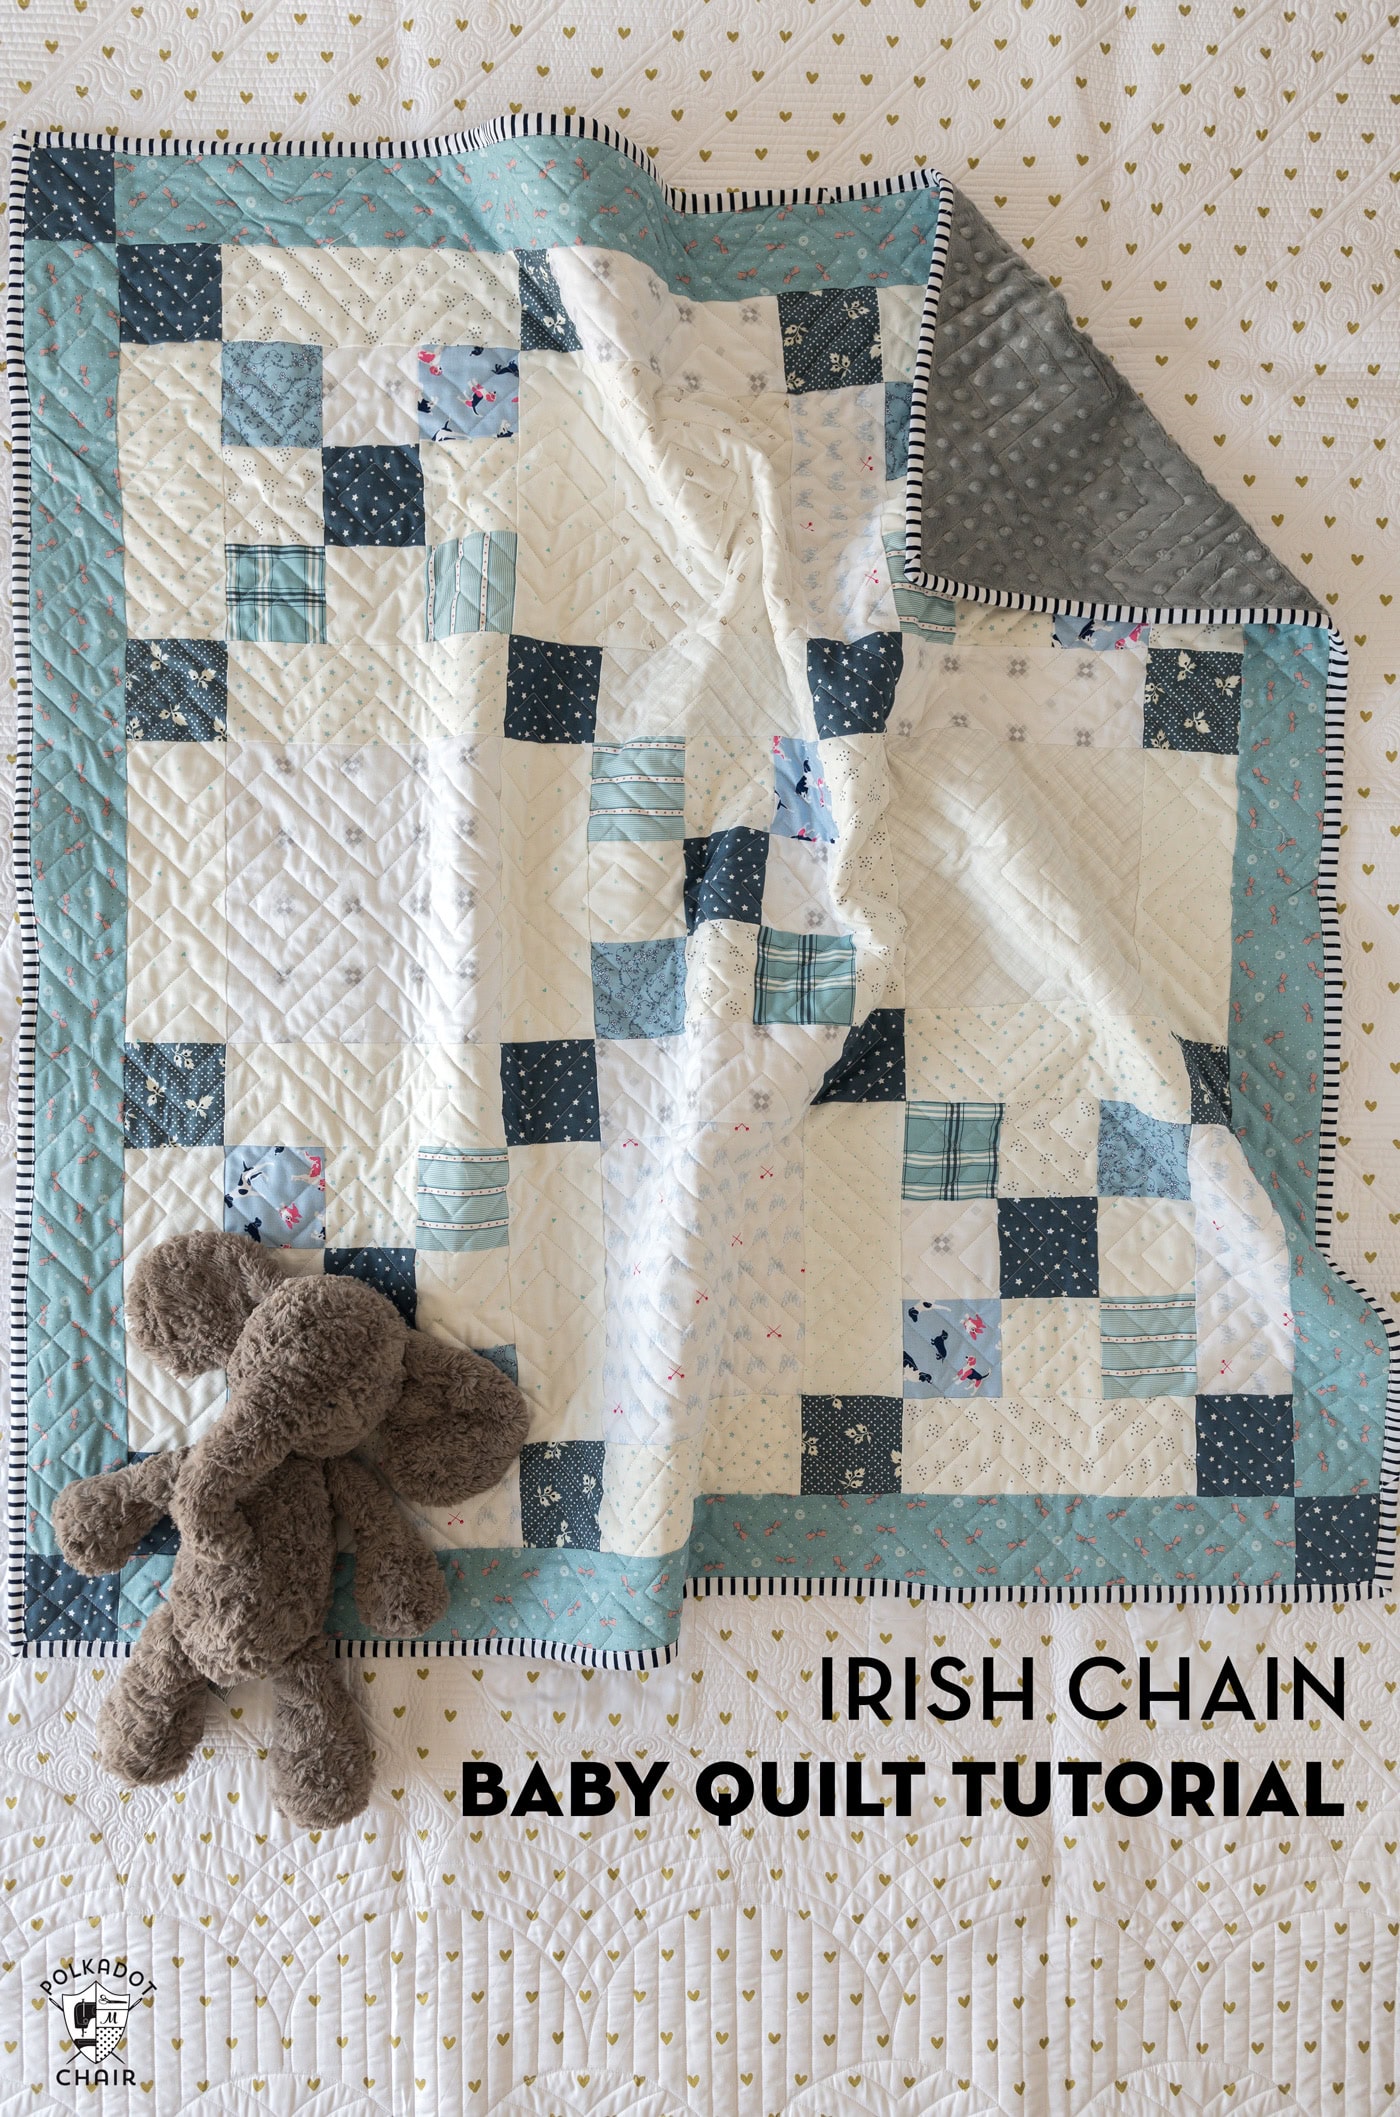
I’ve reached the age where sewing baby quilts has become a “thing” for me again! I’ve had several nieces give birth recently (all but one had a boy), and I’ve found it necessary to design a few simple, modern-looking baby quilts.
I’m lucky that most of my nieces appreciate traditional style and quilting, so my goal when creating the baby quilts was to use traditional quilt blocks in “updated” ways.
I won’t necessarily say modern because none of these quilts have the qualities of a modern quilt. Still, the fabric choices make the projects lean more towards “fresh traditional, or updated traditional.”
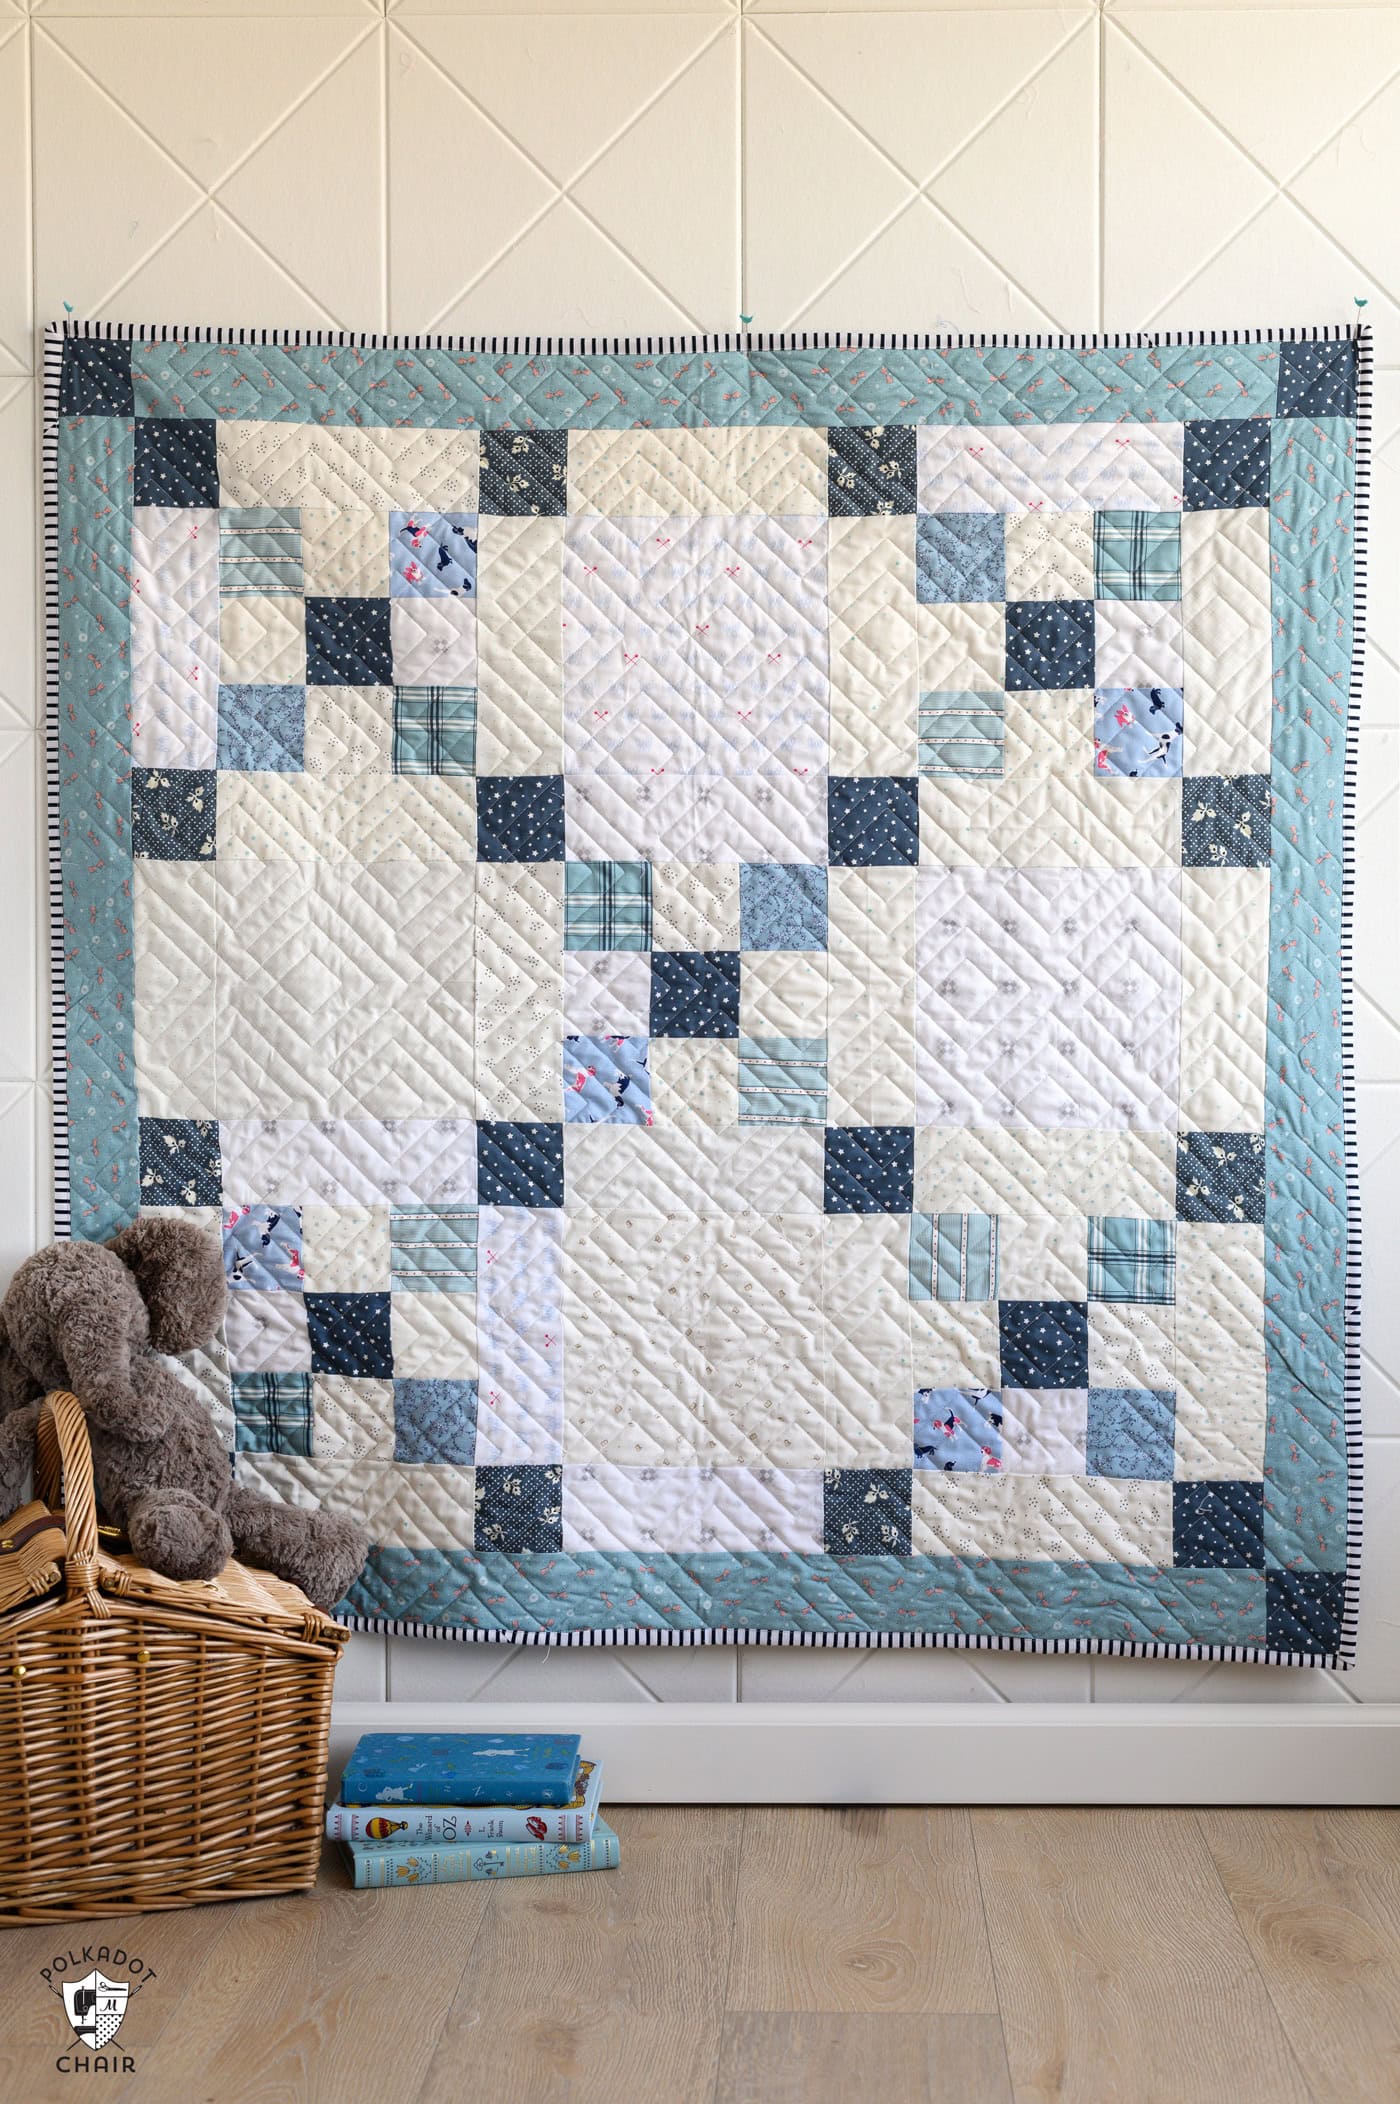
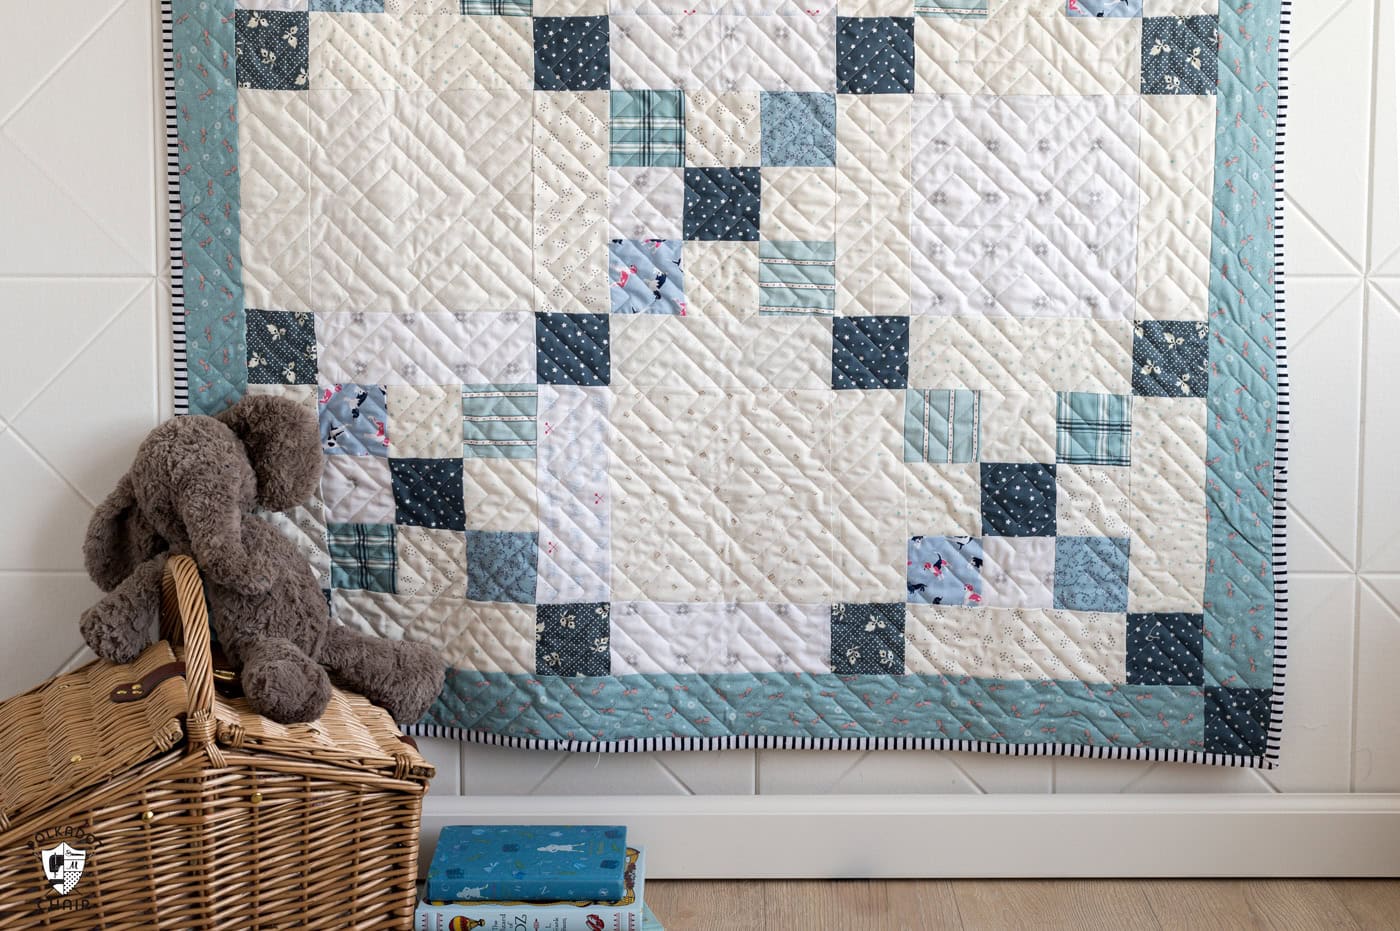
I’ve been enamored by Irish chain quilts lately and thought it would be fun to make a baby quilt using the traditional method. If you’re new to quilting, Irish Chain quilts are great for beginning quilters!
I created the quilt from a mix of blue, low-volume white, and cream fabrics to give it more texture.
What are Low Volume Fabrics?
Low-volume fabrics are quilting fabrics characterized by subtle, soft, and often neutral prints that blend into a quilt’s background.
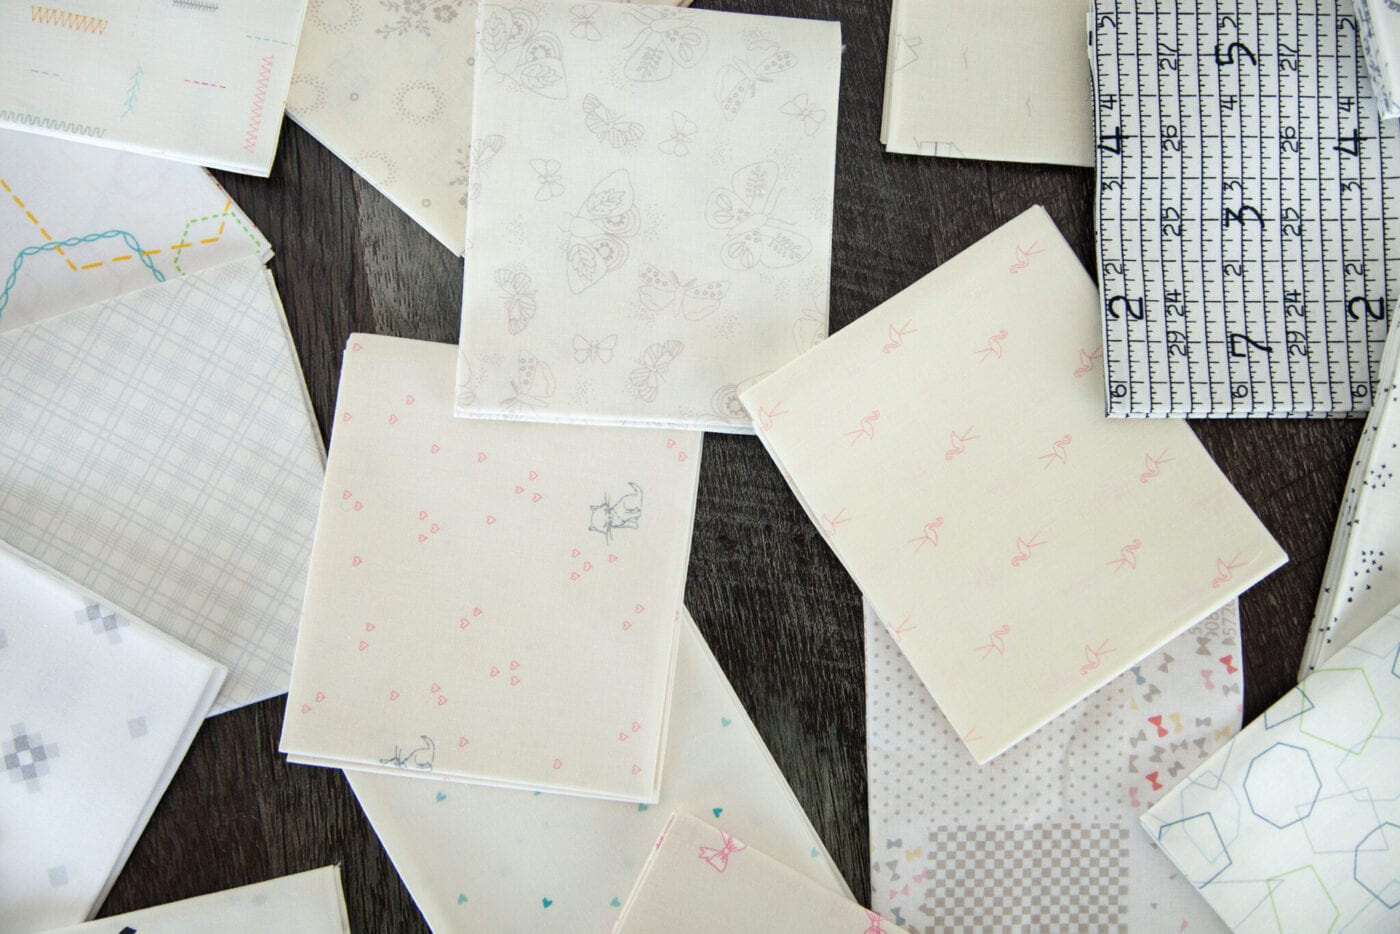
They typically feature light backgrounds (like white, cream, or light gray) with delicate, low-contrast patterns or motifs. These fabrics add texture and visual interest without overpowering other elements in the design.
Key Features of Low-Volume Fabrics:
- Light Backgrounds: Often white, off-white, beige, or pastel tones.
- Subtle Prints: Includes small-scale designs like dots, stripes, text, floral motifs, or geometric shapes.
- Low Contrast: The print contrasts slightly with the background, giving it a soft appearance.
Construction Tips
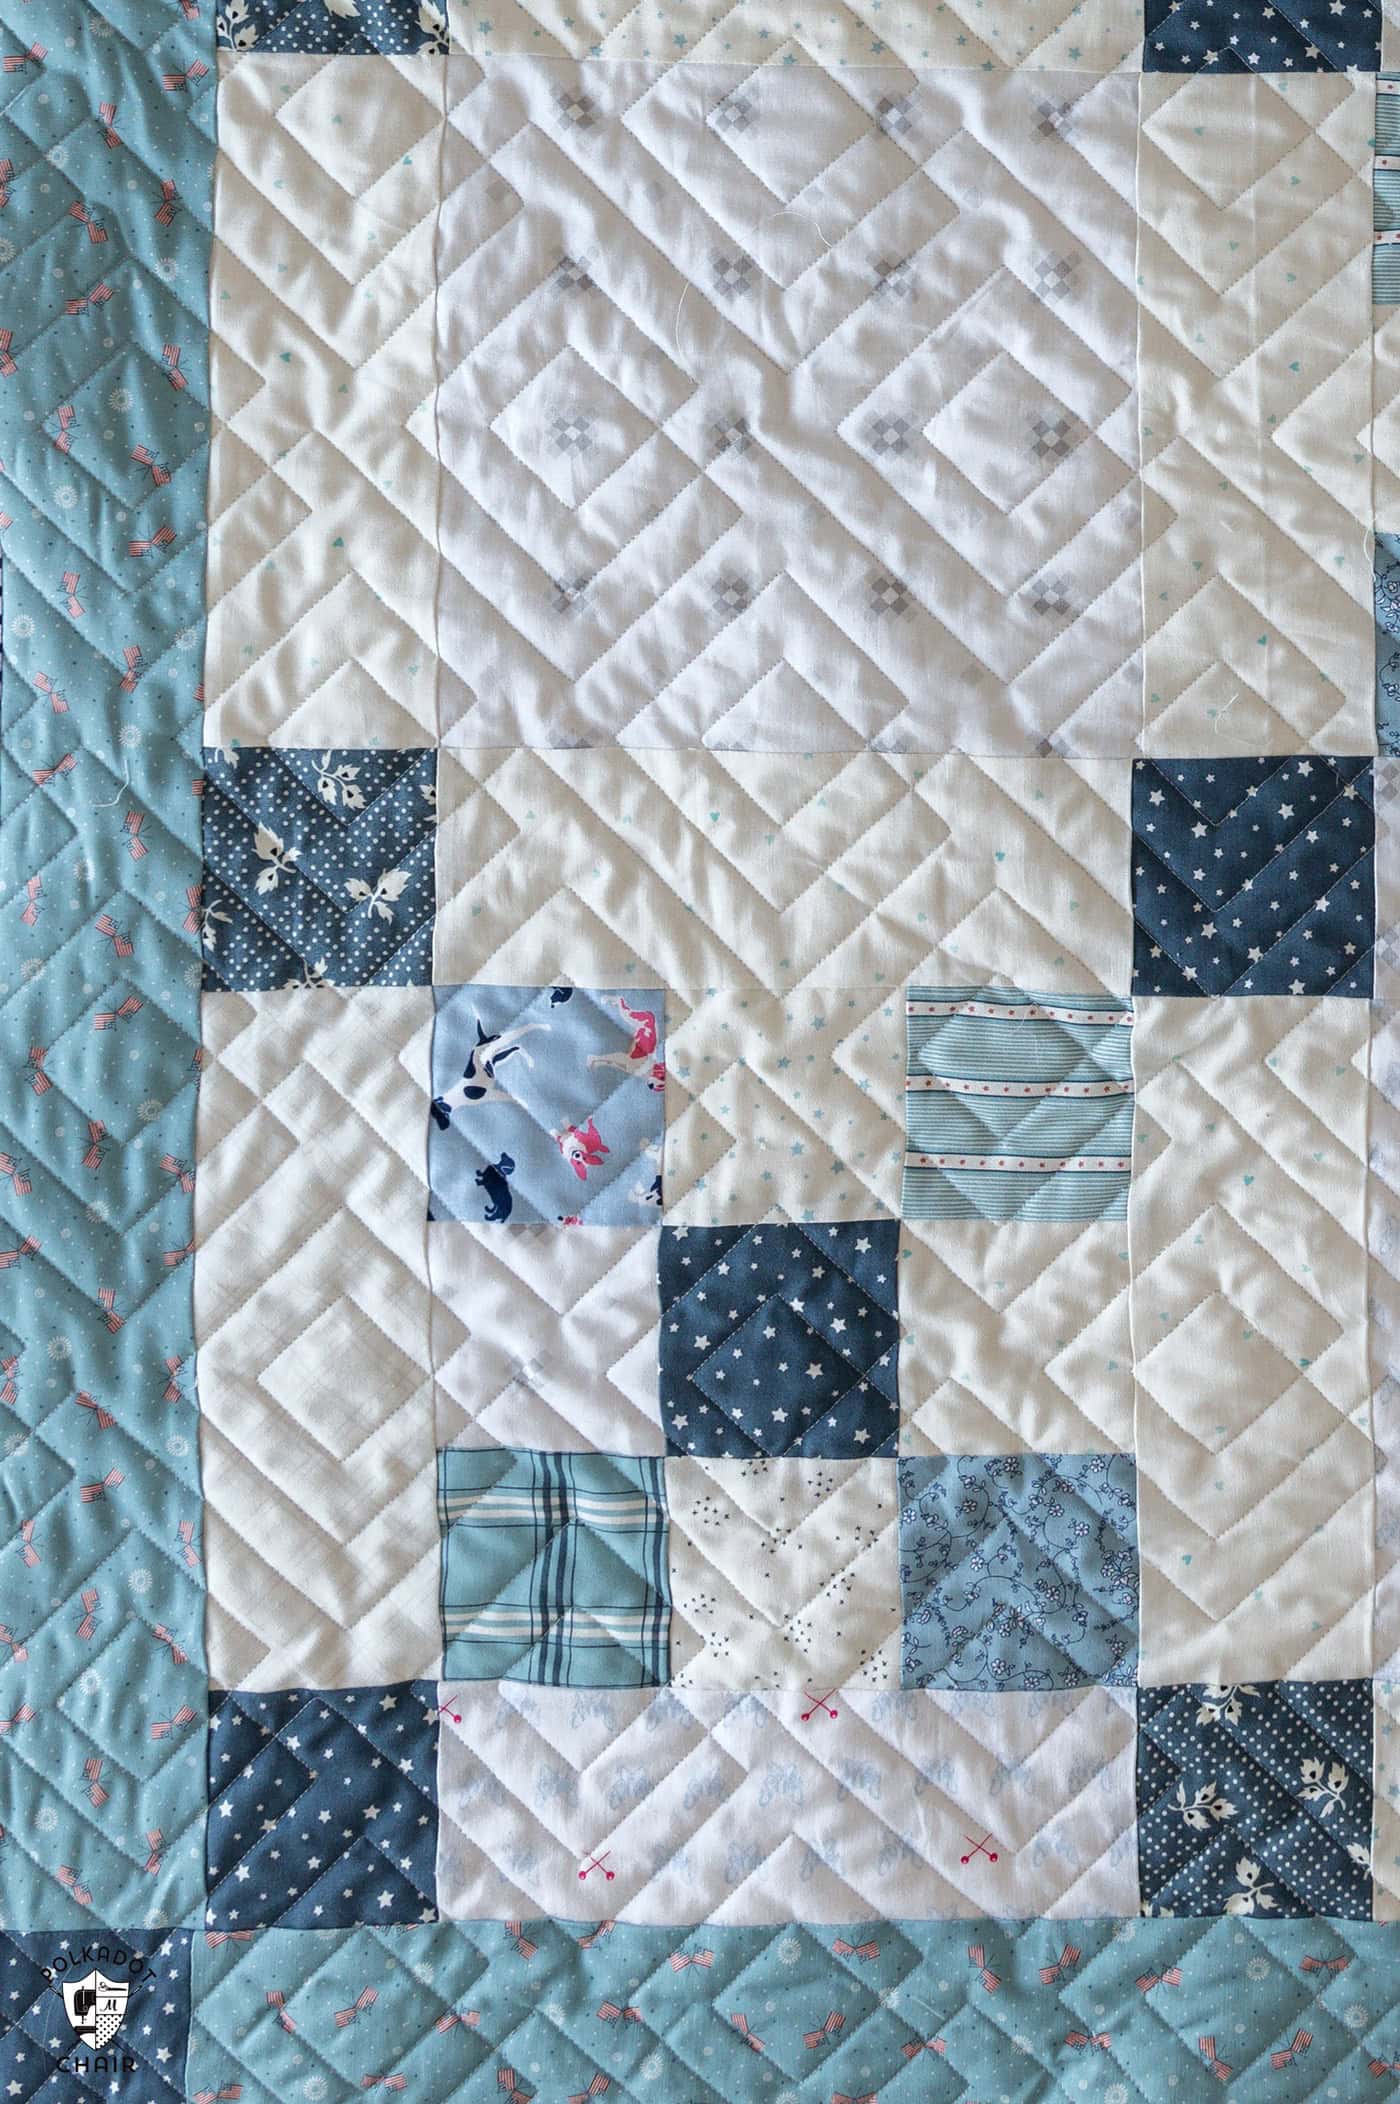
This quilt pattern is beginner-friendly! Especially if you follow a few of my tips.
- Lay out your quilt blocks on a table, design wall, or even the floor to make sure that you have a good balance of warm and cool tones in your quilt. You may want to rearrange a few blocks before you sew them together after you look at everything all laid out.
- Starch your fabric before you cut it. This will give the fabric more “body” and make it easier to make precise cuts.
- Cut carefully. If you need help with this, I have an entire article dedicated to “how to cut fabric for quilting.”
- Nest your seams. This will allow your blocks to have more precise points.
What Does it Mean to Nest Seams?
To nest seams, press the seams of adjacent seams in quilt blocks to opposite sides. This can be to the right and left, in and out from the center, or towards and away from a specific fabric color. In this case, we will nest the seams by pressing all of the seams towards the darker fabrics.
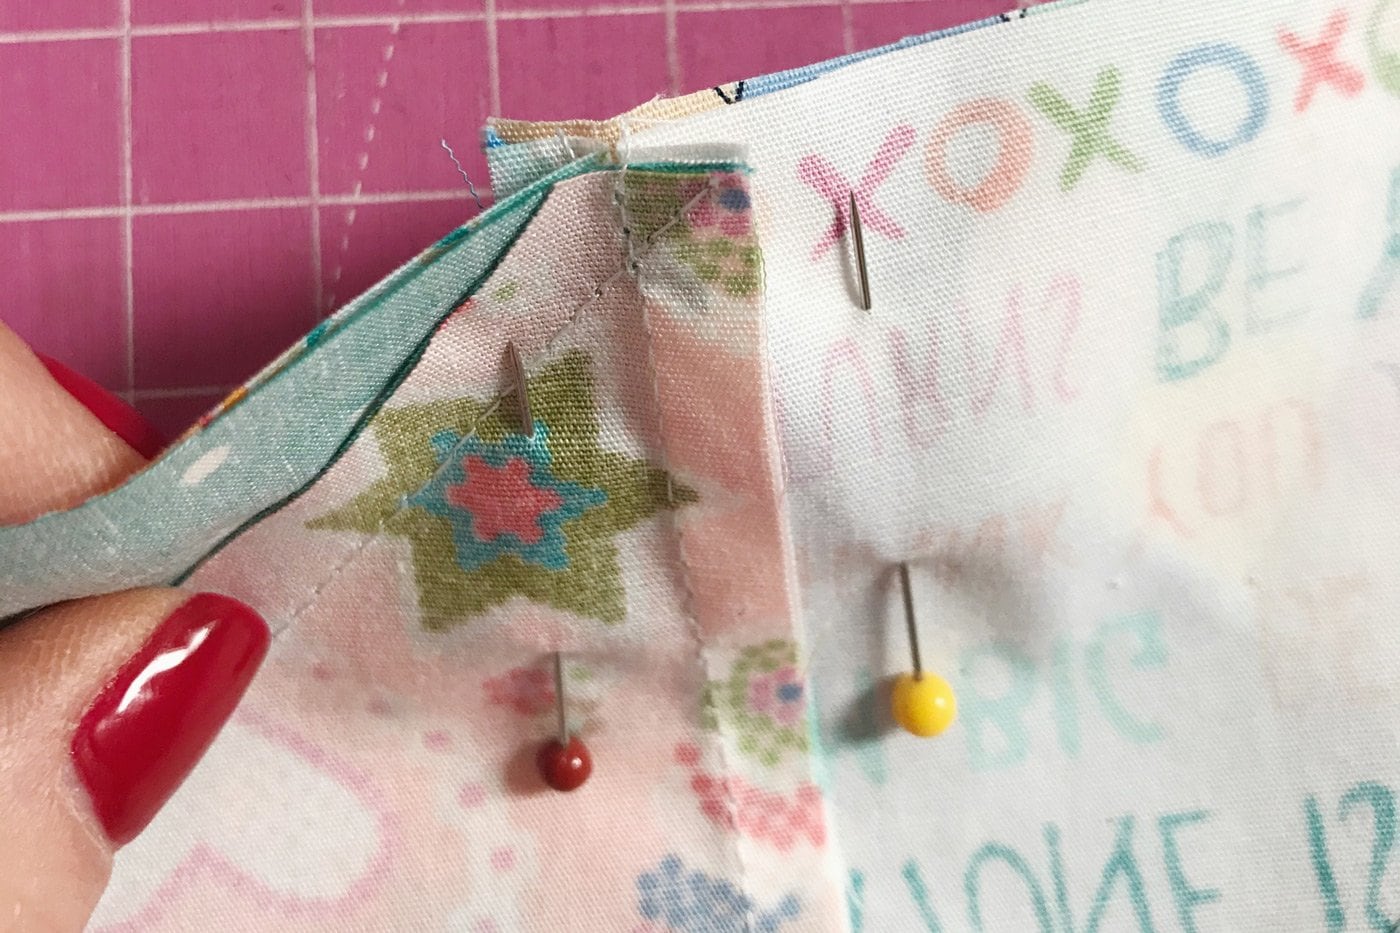
When sewing the blocks, align the seams to lock together, pin, and sew for precise intersections and a flatter finish.
Quilt Details
- Size: Approx 42″ x 42″
- Blocks are 9″ Finished
- Pantograph: Squared by Leisha Kaye
- Fabrics: Low Volume Fabrics from Hush by Riley Blake Designs
- Blue Fabrics: Most are from my personal stash. Some are from Portsmouth by Riley Blake Designs.
- Backing: Gray Dimple Minky
- Elephant Toy: Jelly Cat
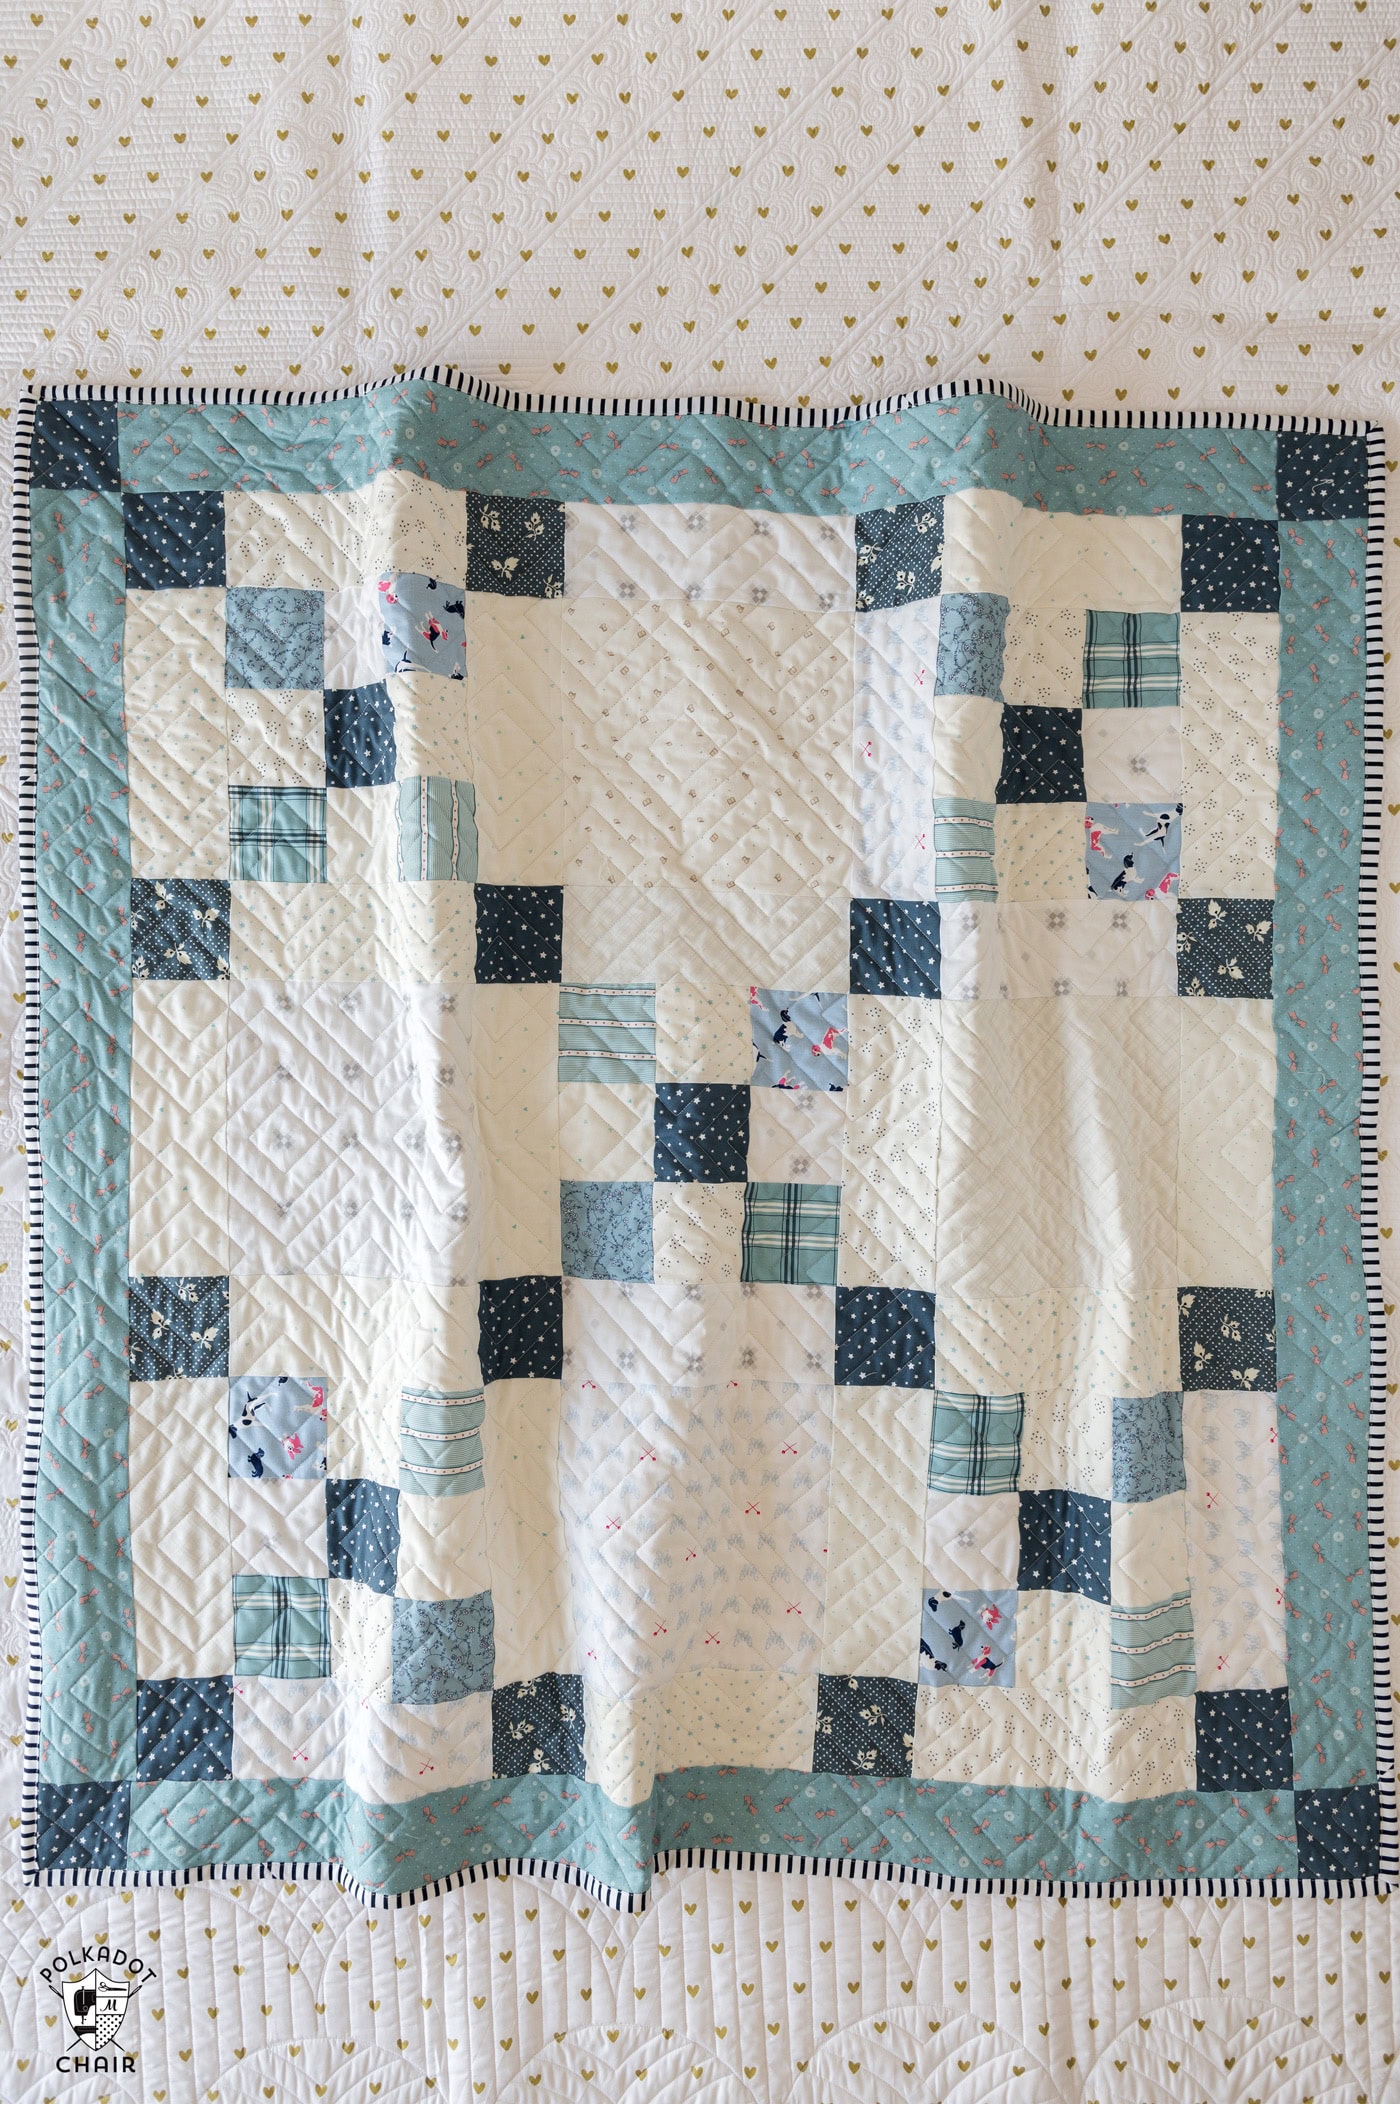
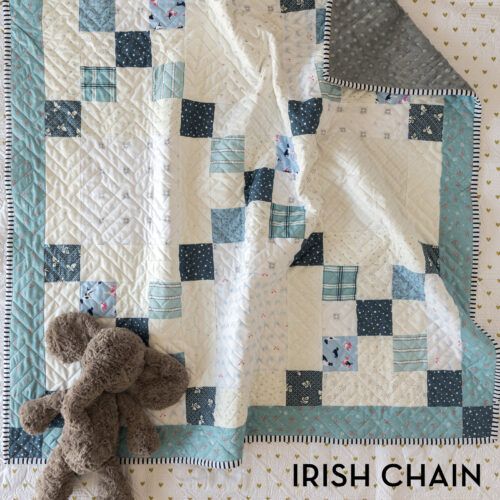
Irish Chain Baby Quilt Pattern
supplies
- 2-3 Fat Quarters Blue Fabrics – for Nine Patch Blocks
- 2-3 Fat Quarters Low Volume Fabrics – for Nine Patch Blocks
- 1 Yard Low Volume Fabrics – for Sashing – in a variety of prints – I recommend at least 3 different fabric prints
- 2-3 Fat Quarters Low Volume Fabrics will be cut to 9 1/2” x 9 1/2” for Blank Blocks
- 1/4 Yard Fabric – for Cornerstones
- 1/2 Yard Fabric – for Borders
Instructions
- Size: Approx. 42" x 42"
Cutting Directions
- For Nine Patch Blocks: Various Prints Blue Fabric Cut5 pieces 3 1/2” x 20”For Nine Patch Blocks: Various Prints White Fabric Cut4 pieces 3 1/2” x 20”For Blank Blocks: Various Prints White Fabric4 pieces 9 1/2” x 9 1/2”For Sashing: Various Prints White Fabric Cut24 pieces 3 1/2” x 9 1/2”Cut for Cornerstones:20 pieces 3 1/2” x 3 1/2”Cut for Borders:4 pieces 3 1/2” x 39 1/2”
Step One: Create Unit A
- There are 10 Unit A’s in the Quilt.
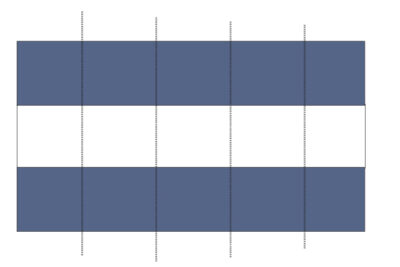
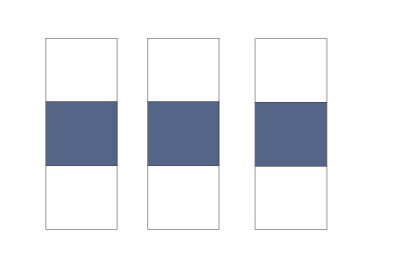
- Sew two blue and one white 3 1/2” x 20” pieces of fabric together in the order shown.
- Press the seams towards the blue fabric.
- This unit should be 9 1/2” wide. If it is not, you may need to adjust your seam allowances.
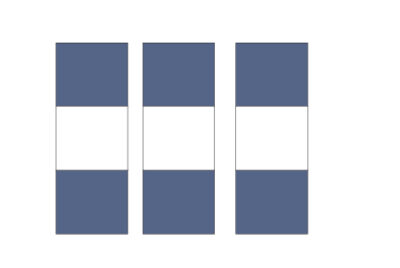
- Sub-cut this unit into five pieces 3 1/2” wide.
- Check that each unit is 3 1/2” x 9 1/2”, trim if necessary.
- Repeat one more time so that you have 10 Unit A pieces.
Step Two: Create Unit B
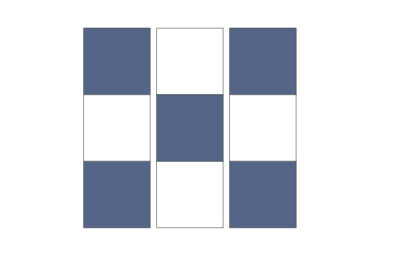
- There are 5 Unit B's in the Quilt.Note: if you wish to have a contrasting square in the center of your nine patch block, the blue fabric in this unit creates the center square of the nine patch block.
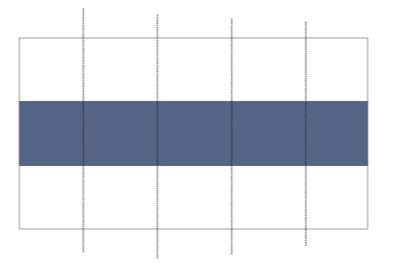
- Sew two white and one blue 3 1/2” x 20” pieces of fabric together in the order shown.
- Press the seams towards the blue fabric.
- This unit should be 9 1/2” wide. If it is not, you may need to adjust your seam allowances.
- Sub-cut this unit into five pieces 3 1/2” wide.
- Check that each unit is 3 1/2” x 9 1/2”, trim if necessary.
Step Three: Assemble Nine Patch Block
- Sew two Unit A’s and one Unit B’s together as shown.
- Nest your seams into each other to allow you to get a precise point at the seams.
- Repeat four more times so that you have five Nine Patch Blocks.
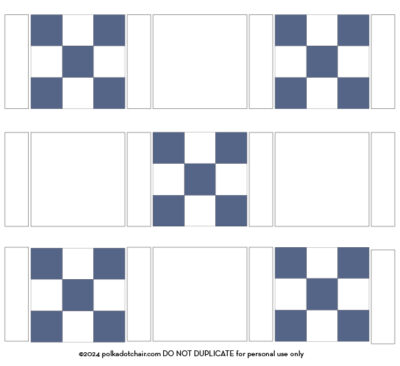
Step Four: Sew the Rows
- Sew the following units together in order:
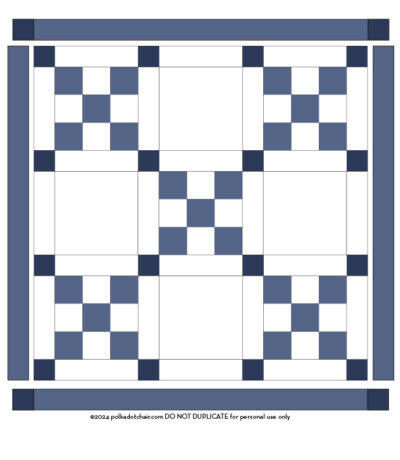
- Row 1: 3 1/2” x 9 1/2” piece of White Fabric; Nine Patch Block; 3 1/2 x 9 1/2” piece of White Fabric; 9 1/2” x 9 1/2” piece of White Fabric; 3 1/2 x 9 1/2” piece of White Fabric; Nine Patch Block; 3 1/2 x 9 1/2” piece of White Fabric.
- Row 2: 3 1/2 x 9 1/2” piece of White Fabric; 9 1/2” x 9 1/2” piece of White Fabric; 3 1/2 x 9 1/2” piece of White Fabric; Nine Patch Block; 3 1/2 x 9 1/2” piece of White Fabric; 9 1/2” x 9 1/2” piece of White Fabric; 3 1/2 x 9 1/2” piece of White Fabric.
- Row 3:3 1/2” x 9 1/2” piece of White Fabric; Nine Patch Block; 3 1/2 x 9 1/2” piece of White Fabric; 9 1/2” x 9 1/2” piece of White Fabric; 3 1/2 x 9 1/2” piece of White Fabric; Nine Patch Block; 3 1/2 x 9 1/2” piece of White Fabric.
Step Five: Sew the Sashing
- Sew the following pieces together in order along the short sides:
- 3 1/2” x 3 1/2” piece Blue Fabric; 3 1/2 x 9 1/2” piece of White Fabric; 3 1/2” x 3 1/2” piece Blue Fabric; 3 1/2 x 9 1/2” piece of White Fabric; 3 1/2” x 3 1/2” piece Blue Fabric; 3 1/2 x 9 1/2” piece of White Fabric; 3 1/2” x 3 1/2” piece Blue Fabric.
- Repeat three more times so you have four sewn units.
Step Six: Sew Rows & Sashing Together
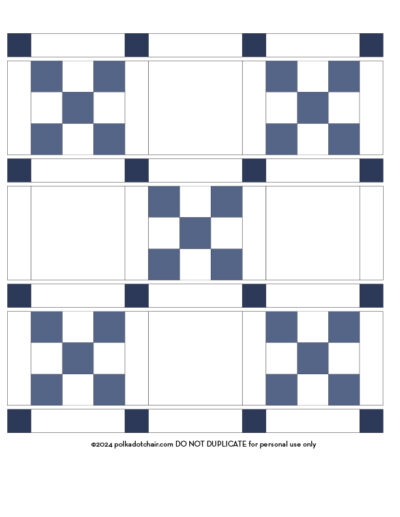
- Sew the following units together in order, going from top to bottom.
- Sashing RowRow 1Sashing RowRow 2Sashing RowRow 3Sashing Row
Step Seven: Add Borders
- Sew one 3 1/2” x 3 1/2” Cornerstone piece to each side of two of the 3 1/2” x 39 1/2” pieces of Border Fabric.
- Sew one 3 1/2” x 39 1/2” piece of Border fabric to each side of the quilt top.
- Sew the sewn cornerstone/border pieces to the top and bottom of the quilt top.
You May Also Like:
