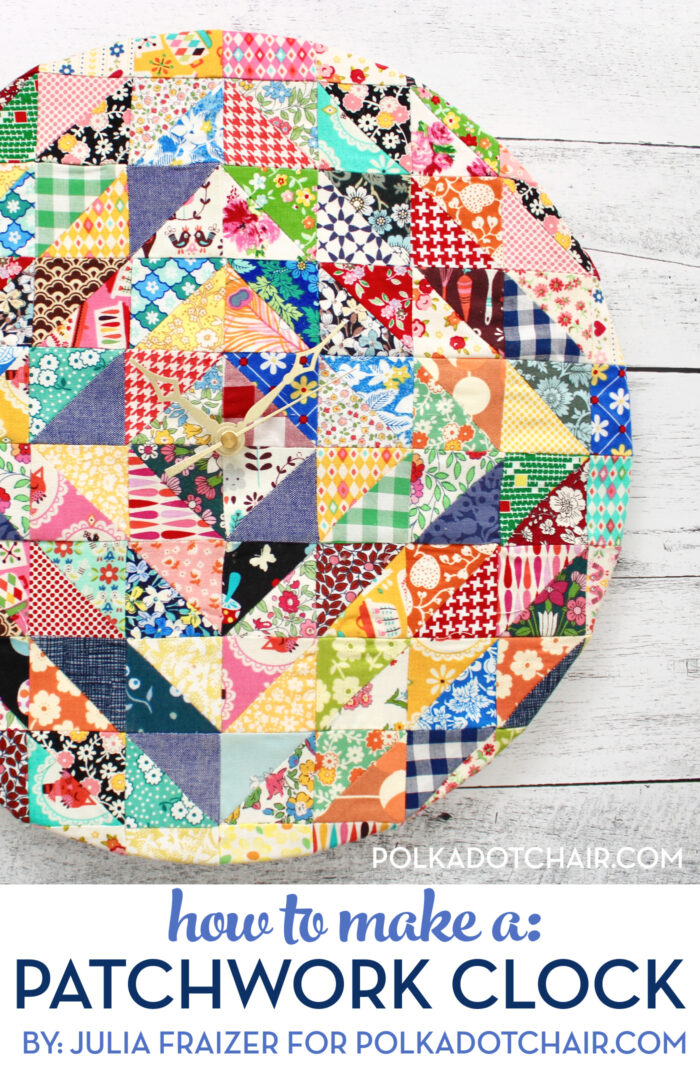
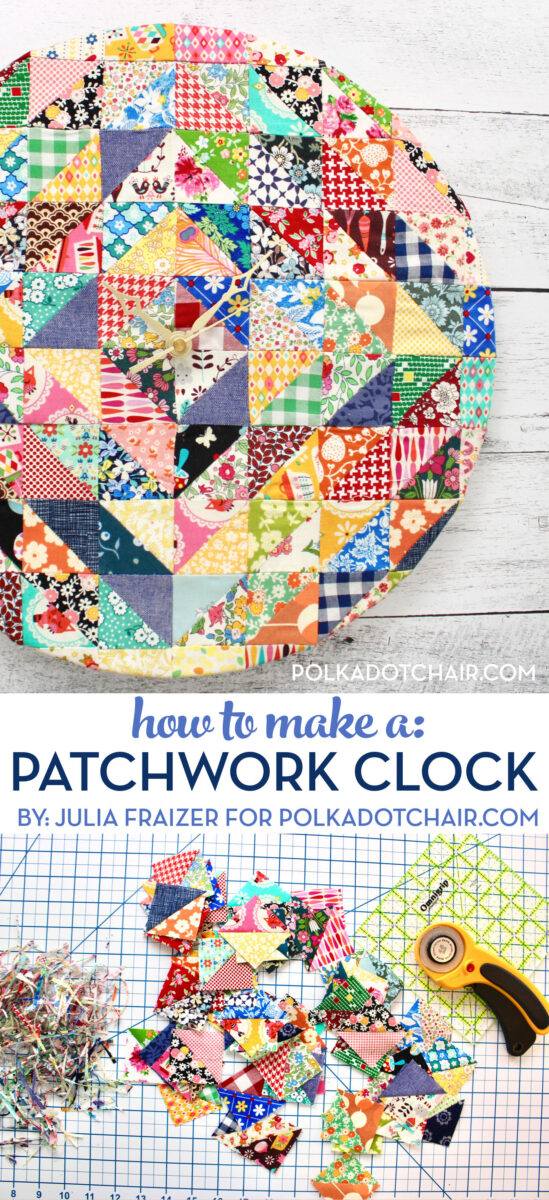
Scrappy Patchwork Clock Tutorial
Julia of Bayhill Studio is sharing a tutorial for this wonderful scrap-busting patchwork project. Use up some of your favorite fabric scraps and create a great piece of decor for your home or sewing room with this Patchwork Clock Tutorial.
I’ll confess, I love making quilts, but there are times when I need a smaller project to get me through a creative slump, or just to feel the satisfaction of a quick finish.
This Scrappy Patchwork Quilt Clock perfectly fills that small project itch, and after you have made one, you seriously won’t want to stop!

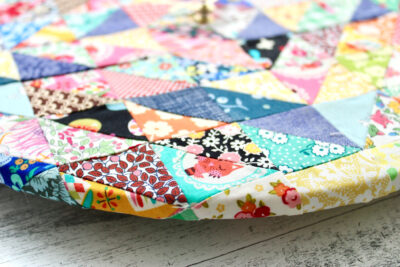
This is a true scrap buster project. I opted to use a random mix of colors and prints, which resulted in a colorful vintage look. You could stick to one color family, such as coastal blues, rich orange, and yellows, or any color combination that speaks to you.
Believe it or not, this is a very beginner-friendly project. The only thing you need to know is how to sew a half-square triangle. Piece of cake!
Patchwork Clock Supplies
To make the Scrappy Patchwork Clock, you will need:
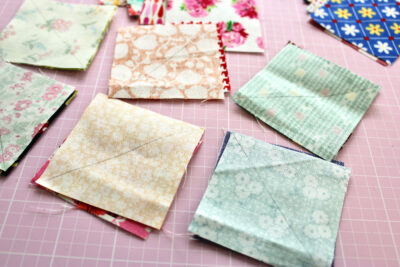
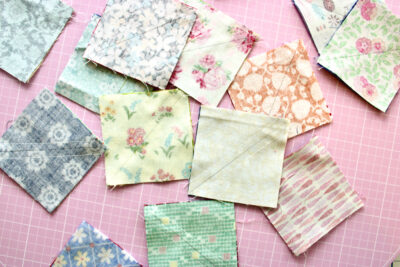
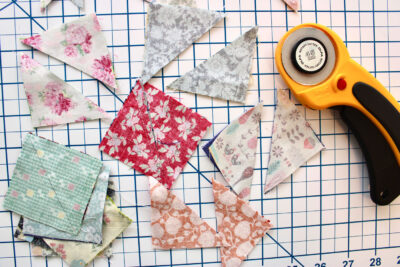
- A variety of scrap fabric cut into one 64 – 2 ½” squares
- More scrap fabric cut into 36 – 2” squares
- 20” x 20” piece of Pellon SF101
- Wooden Clock Surface – I found mine here:
- Clock Kit – I found mine here:
- Tools: staple gun, glue, hammer

Scrappy Patchwork Clock Tutorial
Equipment
- 1 Staple Gun
- 1 Rotating Cutting Mat optional; but helpful
- 1 Iron
- 1 Hammer
- Glue
supplies
- 64 pieces A variety of scrap fabrics cut into 2 ½” squares
- 36 pieces A variety of scrap fabrics cut into 2" squares.
- 1 piece 20” x 20” piece of Pellon SF101
- 1 Wooden Clock Surface
- 1 Clock Kit
Instructions
Step 1:
- Set aside 16 of the 2” squares for later. For now we will be working with 64 squares.

Step 2:
- On half (32) of the squares, draw a line from corner to corner.
Step 3:
- Pair up the squares — one regular square with one square that has a line drawn on it.
Step 4:
- Stitch ¼” on either side of the line
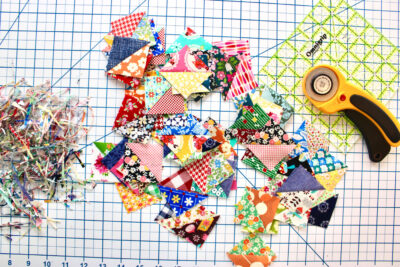
- Cut along the line on all of the squares. Each square makes two half square triangles. You will now have 64 half square triangles.
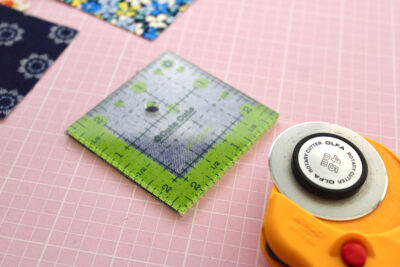
Step 5:
- Press open the half square triangles and trim to 2” square
Step 6:
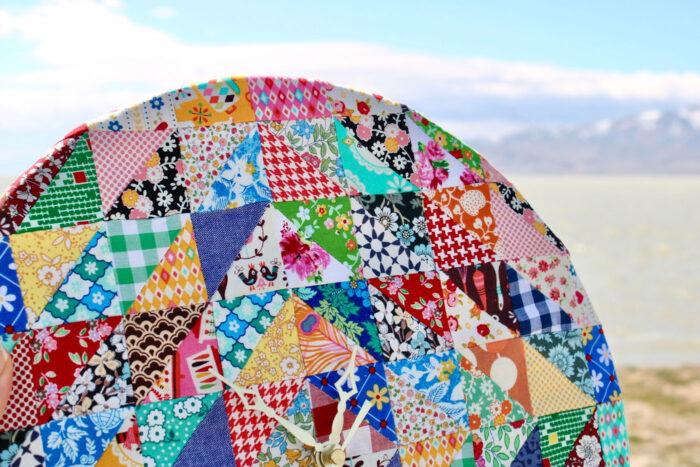
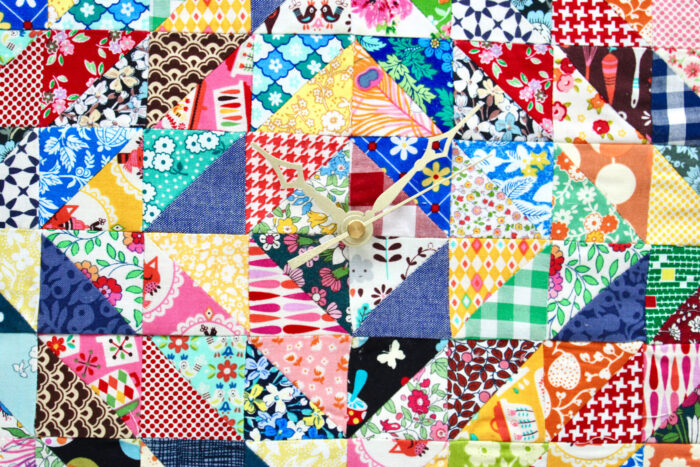
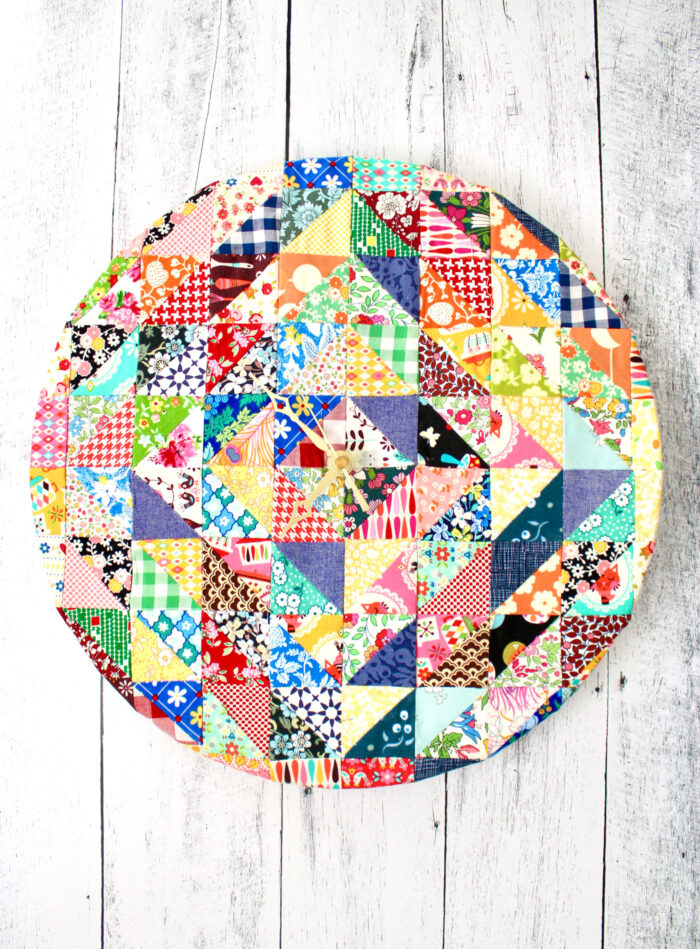
- Arrange the squares into any design you like in rows of 8 squares across and 8 down. In my video, I show three options, including this one. Half square triangles are very versatile, so your choices are limitless. This version, I start with the center diamond and work my way outward. Take a look at my video to watch me assemble this design.

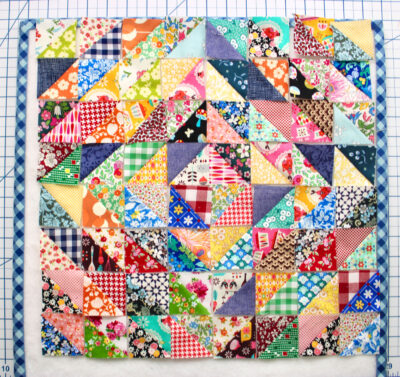
Step 7:
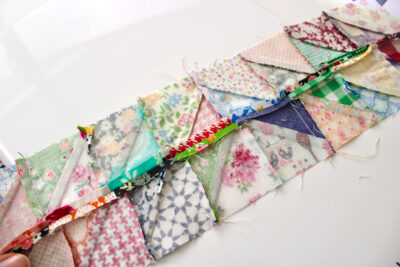
- Start assembling the rows. Sew the first row and press all of the seams in the same direction. For the next row, press the seams in the opposite direction. Repeat this for all of the rows.
- Sew rows one and two together, pressing the seams open. Repeat for all of the rows.
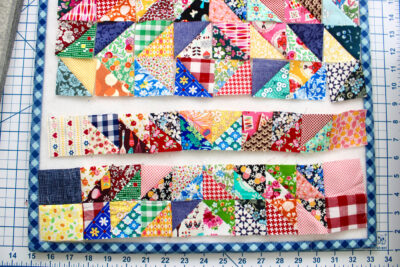
Step 8:
- Now that the main block is finished, it is time to sew a border. I don’t have a photo for this because I think these written directions will be easier than the “on the fly” troubleshooting I did in my video. This border is scrappy like the rest of the block, but because it will hardly be seen, we won’t be making them into half square triangles.
- We will be using the thirty-six 2” squares we set aside earlier.
- Sew a row of 8 squares. Press. Repeat.
- Sew one of the rows to each side of your block. Press.
Step 9:
- Sew a row of 10 squares. Press. Repeat. Sew one row to the top and one row to the bottom of the block.
Step 10:
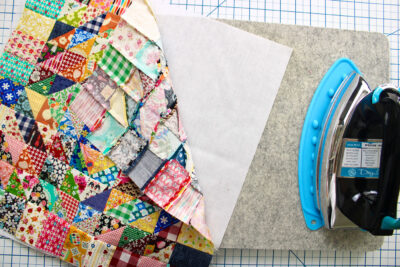
- Press the fusible interfacing (I used Pellon SF101) to the wrong side of your block.
Step 11:
- Center the block on the wooden clock base. Use a few drops of glue to hold the block to the clock base. This just helps you turn the clock over without losing your centering.
- Using your staple gun, staple each side, and then the top and bottom. Then staple the for corners and work your way around the circle. I show exactly how to do this in the video.

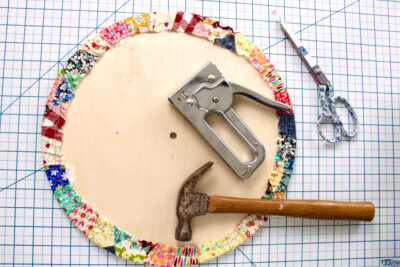
Step 12:
- Be very generous using the staples, making sure every part of the fabric is secured. If you have any staples protruding at all, take a hammer and hammer them down.
Step 13: ‘
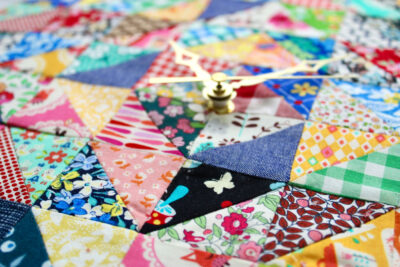
- Attach the clock kit following the manufacturer’s directions. I found that because of the extra bulk the fabric adds, I had to leave out the rubber washer in order for the clock to fit.
- The clock motor is on the back of the clock, and it has a small indentation meant for hanging, so after the clock kit is installed, this little beauty is ready to hang!
Video
I can’t wait to make more of these to give as gifts to everyone on my list! I hope you’ll try your hand at this project and share your makes by tagging me on Instagram @bayhillstudio. Follow my Instagram and YouTube channel, also @bayhill studio for more fun project ideas and inspiration!
About the Designer

Julia Frazier is the founder of Bayhill Studio. Julia designs quilts and projects geared toward beginner quilters and crafters. You’ll usually find her at her sewing machine or hiking in the nearby mountains. Follow Julia on Instagram @bayhillstudio, and subscribe to her YouTube channel for new and exciting projects and tutorials. Be sure to check out her Bayhill Studio website for a growing list of tutorials and patterns.
More Great Projects by Juila

Easy! Around the Corner Border Strip Quilt Tutorial
The Perfect Boho Beginner Quilt
Modern Mountains Quilt Block & Zippered Pouch Pattern
Thank you for the clock tutorial. It is perfect for a sewing room.
Nice tutorial and looks like fun.
But there is no link to the clock surface or the clock kit – would like to know where to purchase these. Thank you!