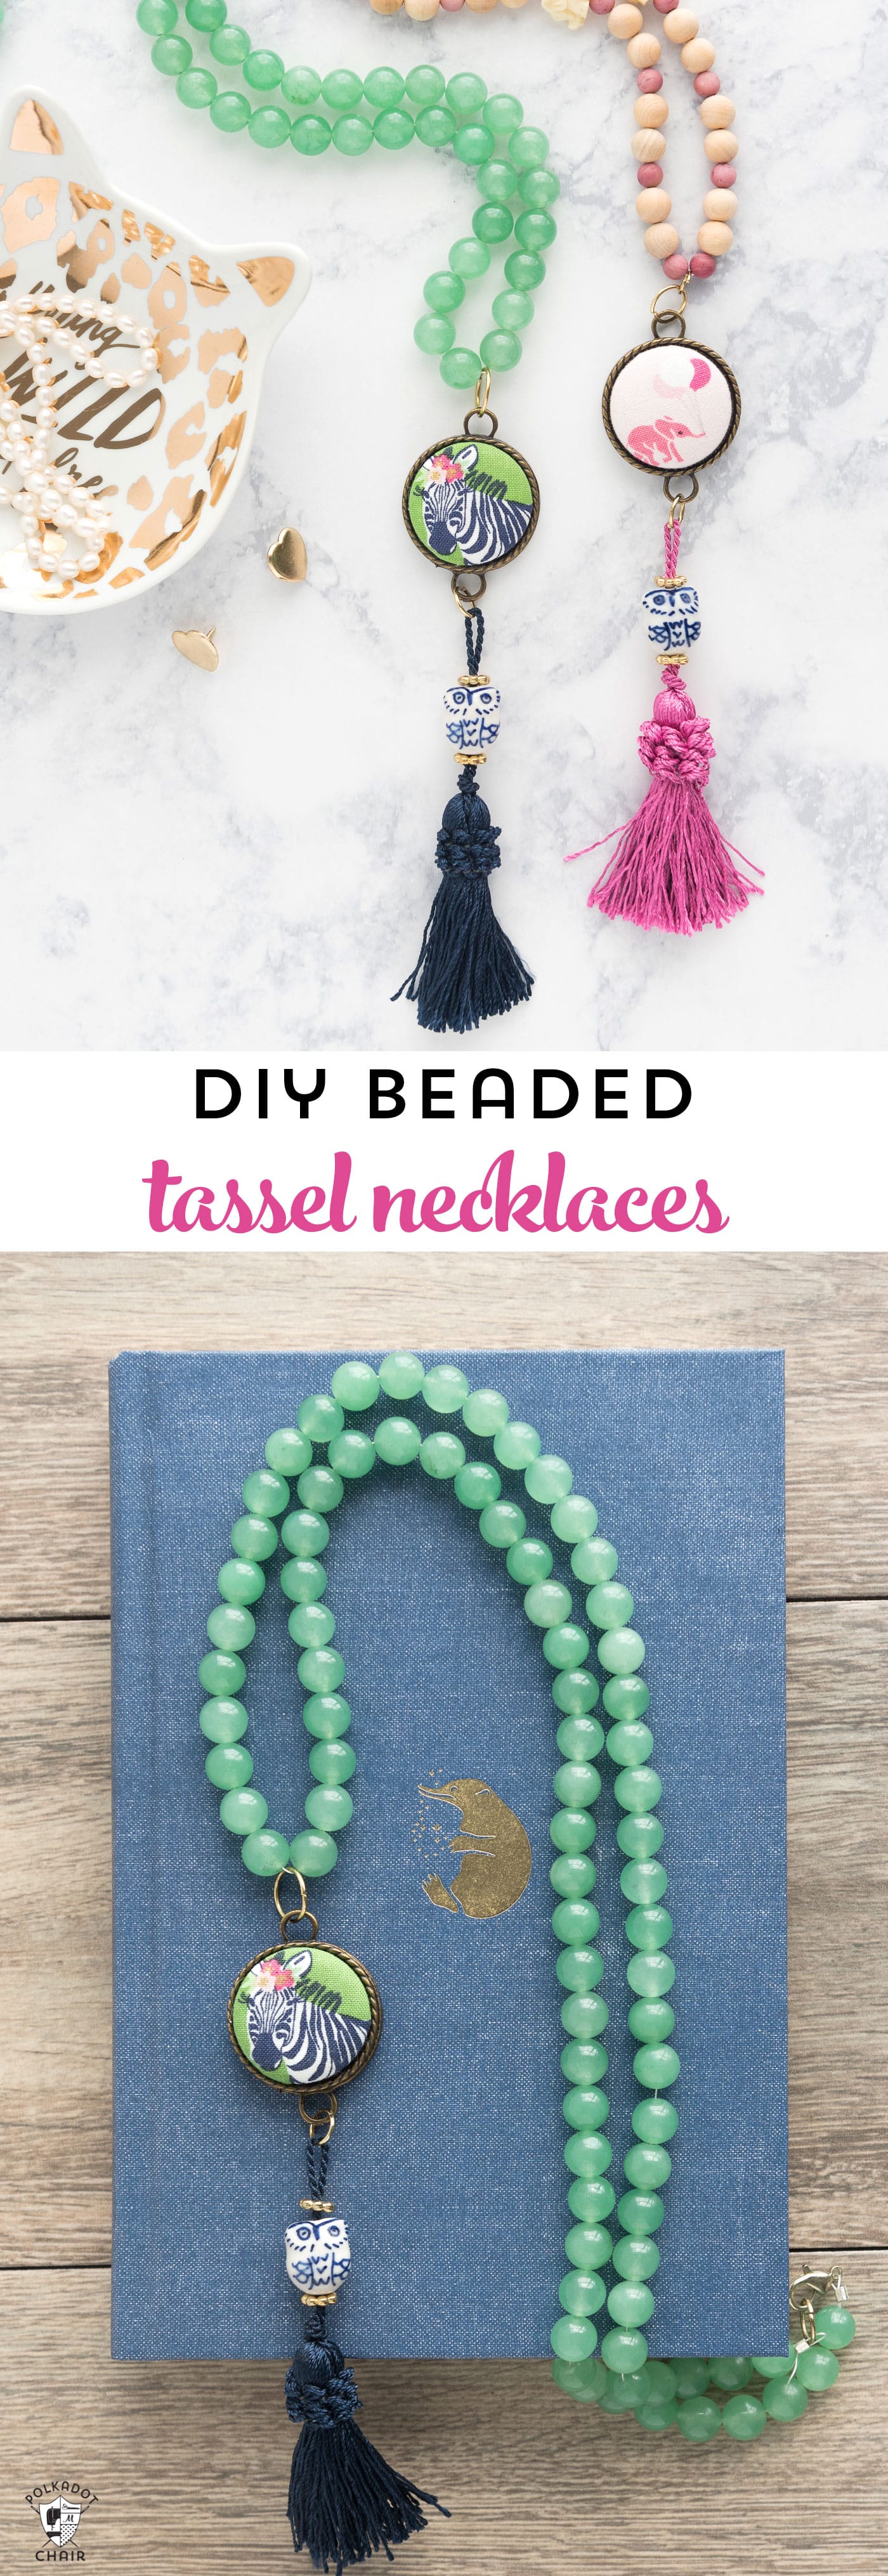
DIY Beaded Tassel Necklace Tutorial
Learn how to DIY a Beaded Tassel Necklace with this simple tutorial. You can even personalize it a bit more by adding a covered button to the end. If you like this post, you may also enjoy our covered button necklace tutorial.
I find the process of designing and printing fabric fascinating. Before I worked as a fabric designer, I had no idea how it all worked; now I know a lot more (but I still have a lot to learn).
Why I Designed This Necklace
One of the things I learned was that before the mills print yards and yards of your fabric, they send small “strike-offs” to you. These small strike-offs are used to check the print quality and color of the fabric.
Designers and manufacturers present their lines at trade shows, such as the International Quilt Market, so stores can see what they have to choose from. In May, I had a booth at the quilt market showing my Safari Party line of fabrics. Since the booth was held before the fabric was released, I was sewing with digitally printed yardage, which is not the same as actual yardage. For example, it is not possible to print gold sparkle on digital fabric.
Since my line featured so much gold sparkle, I was a bit stressed trying to decide how to showcase it at market. After a bit of stress, I realized that I may not have had yardage of the actual fabric, but I did have a lot of strike-offs.
The strike-off fabrics were approximately 4″ x 6″ and, best of all, they had the sparkle!
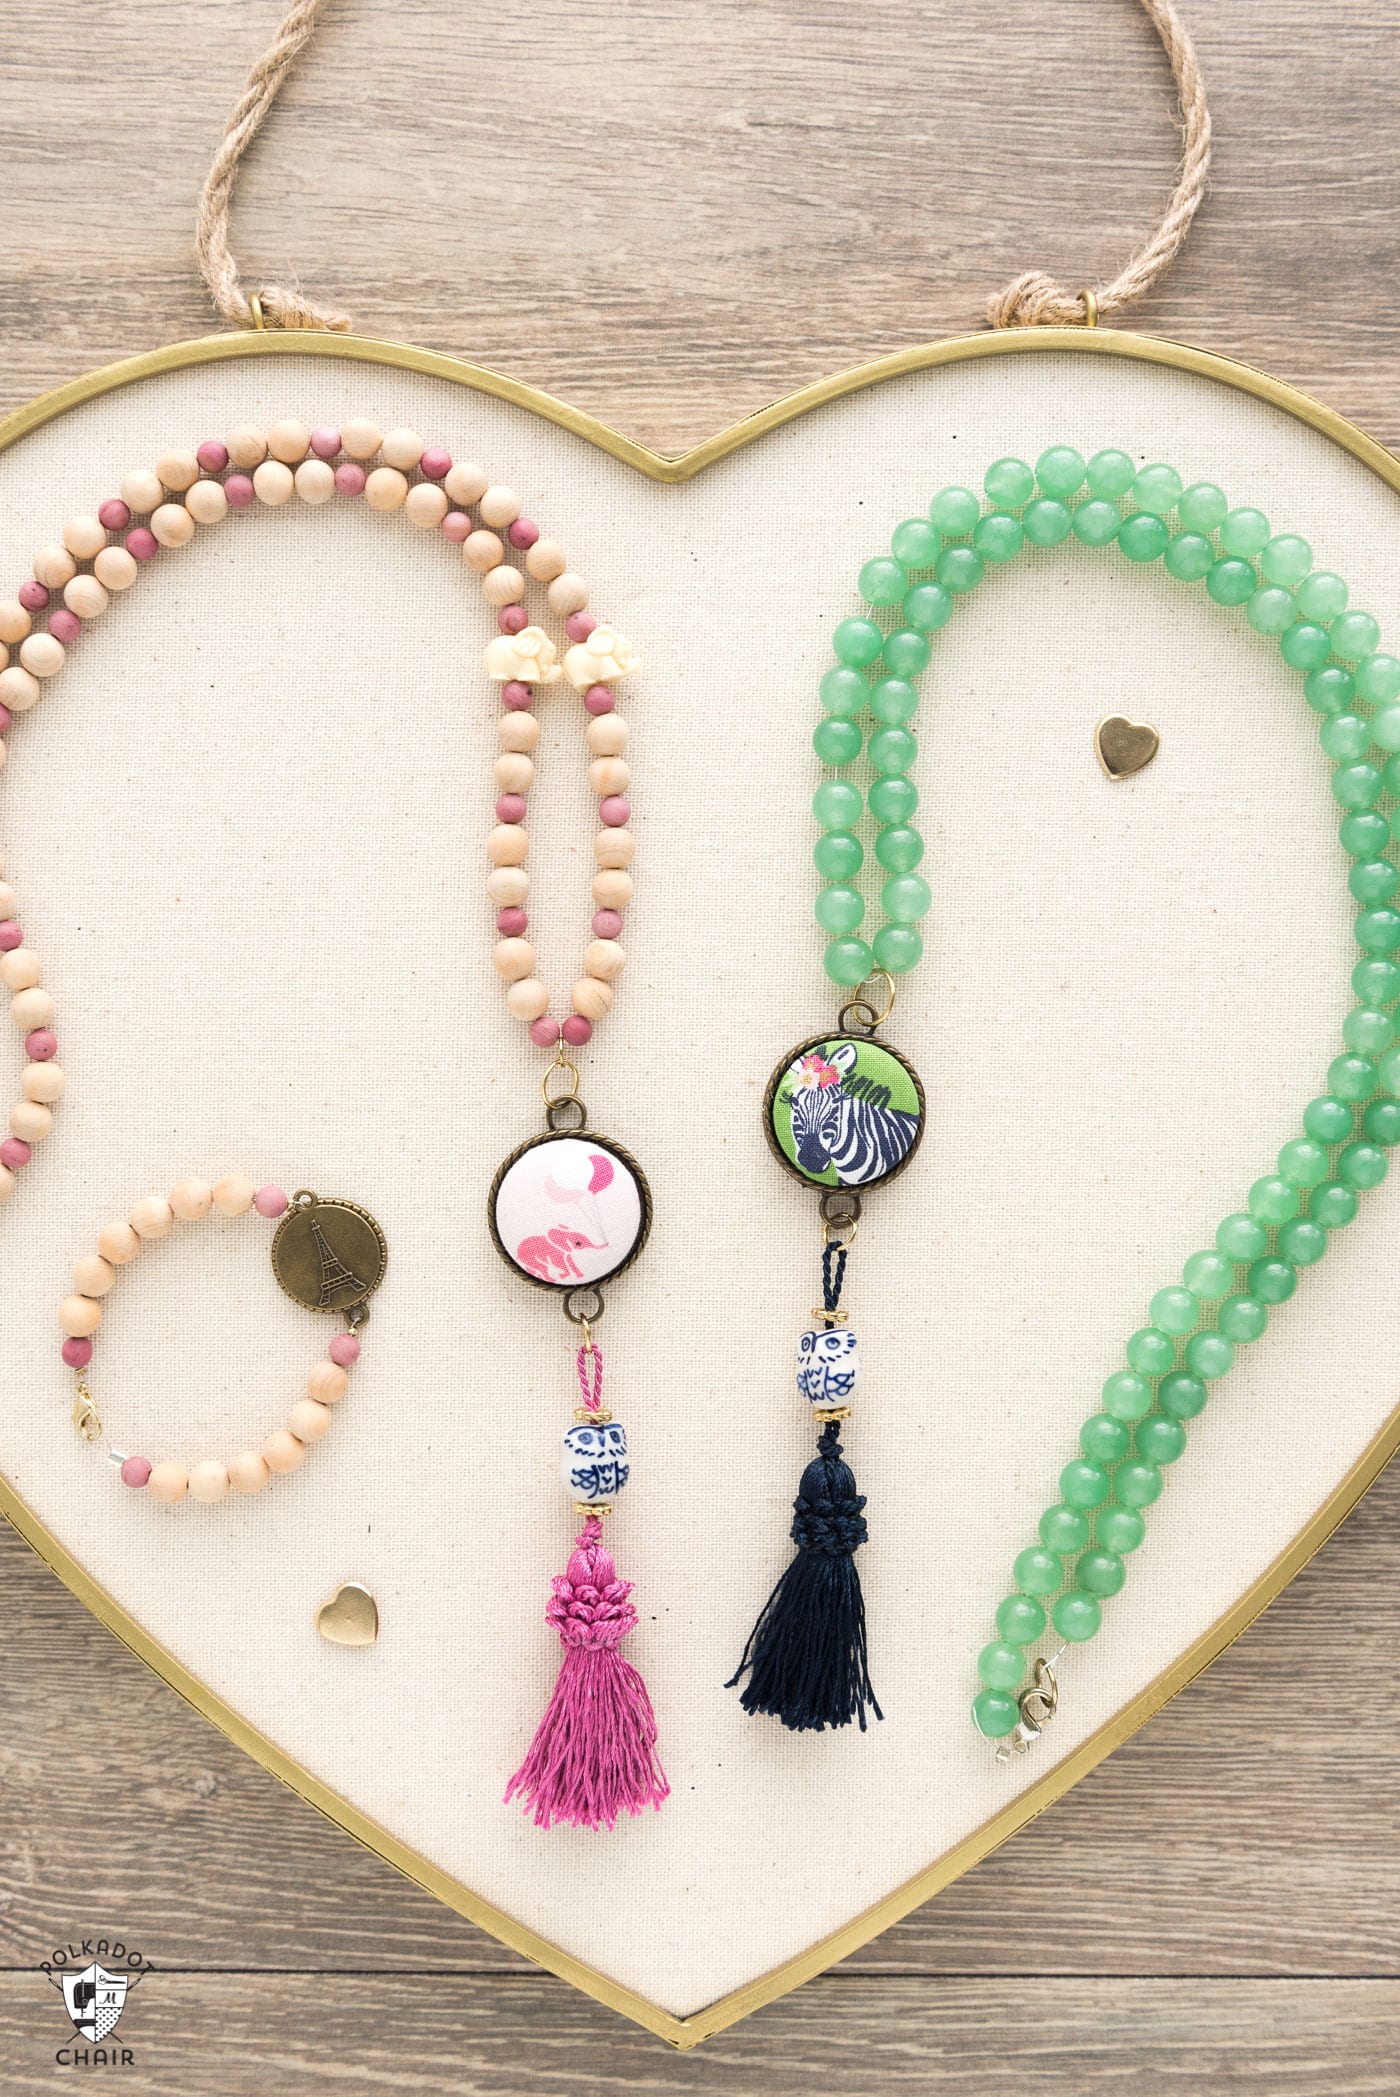
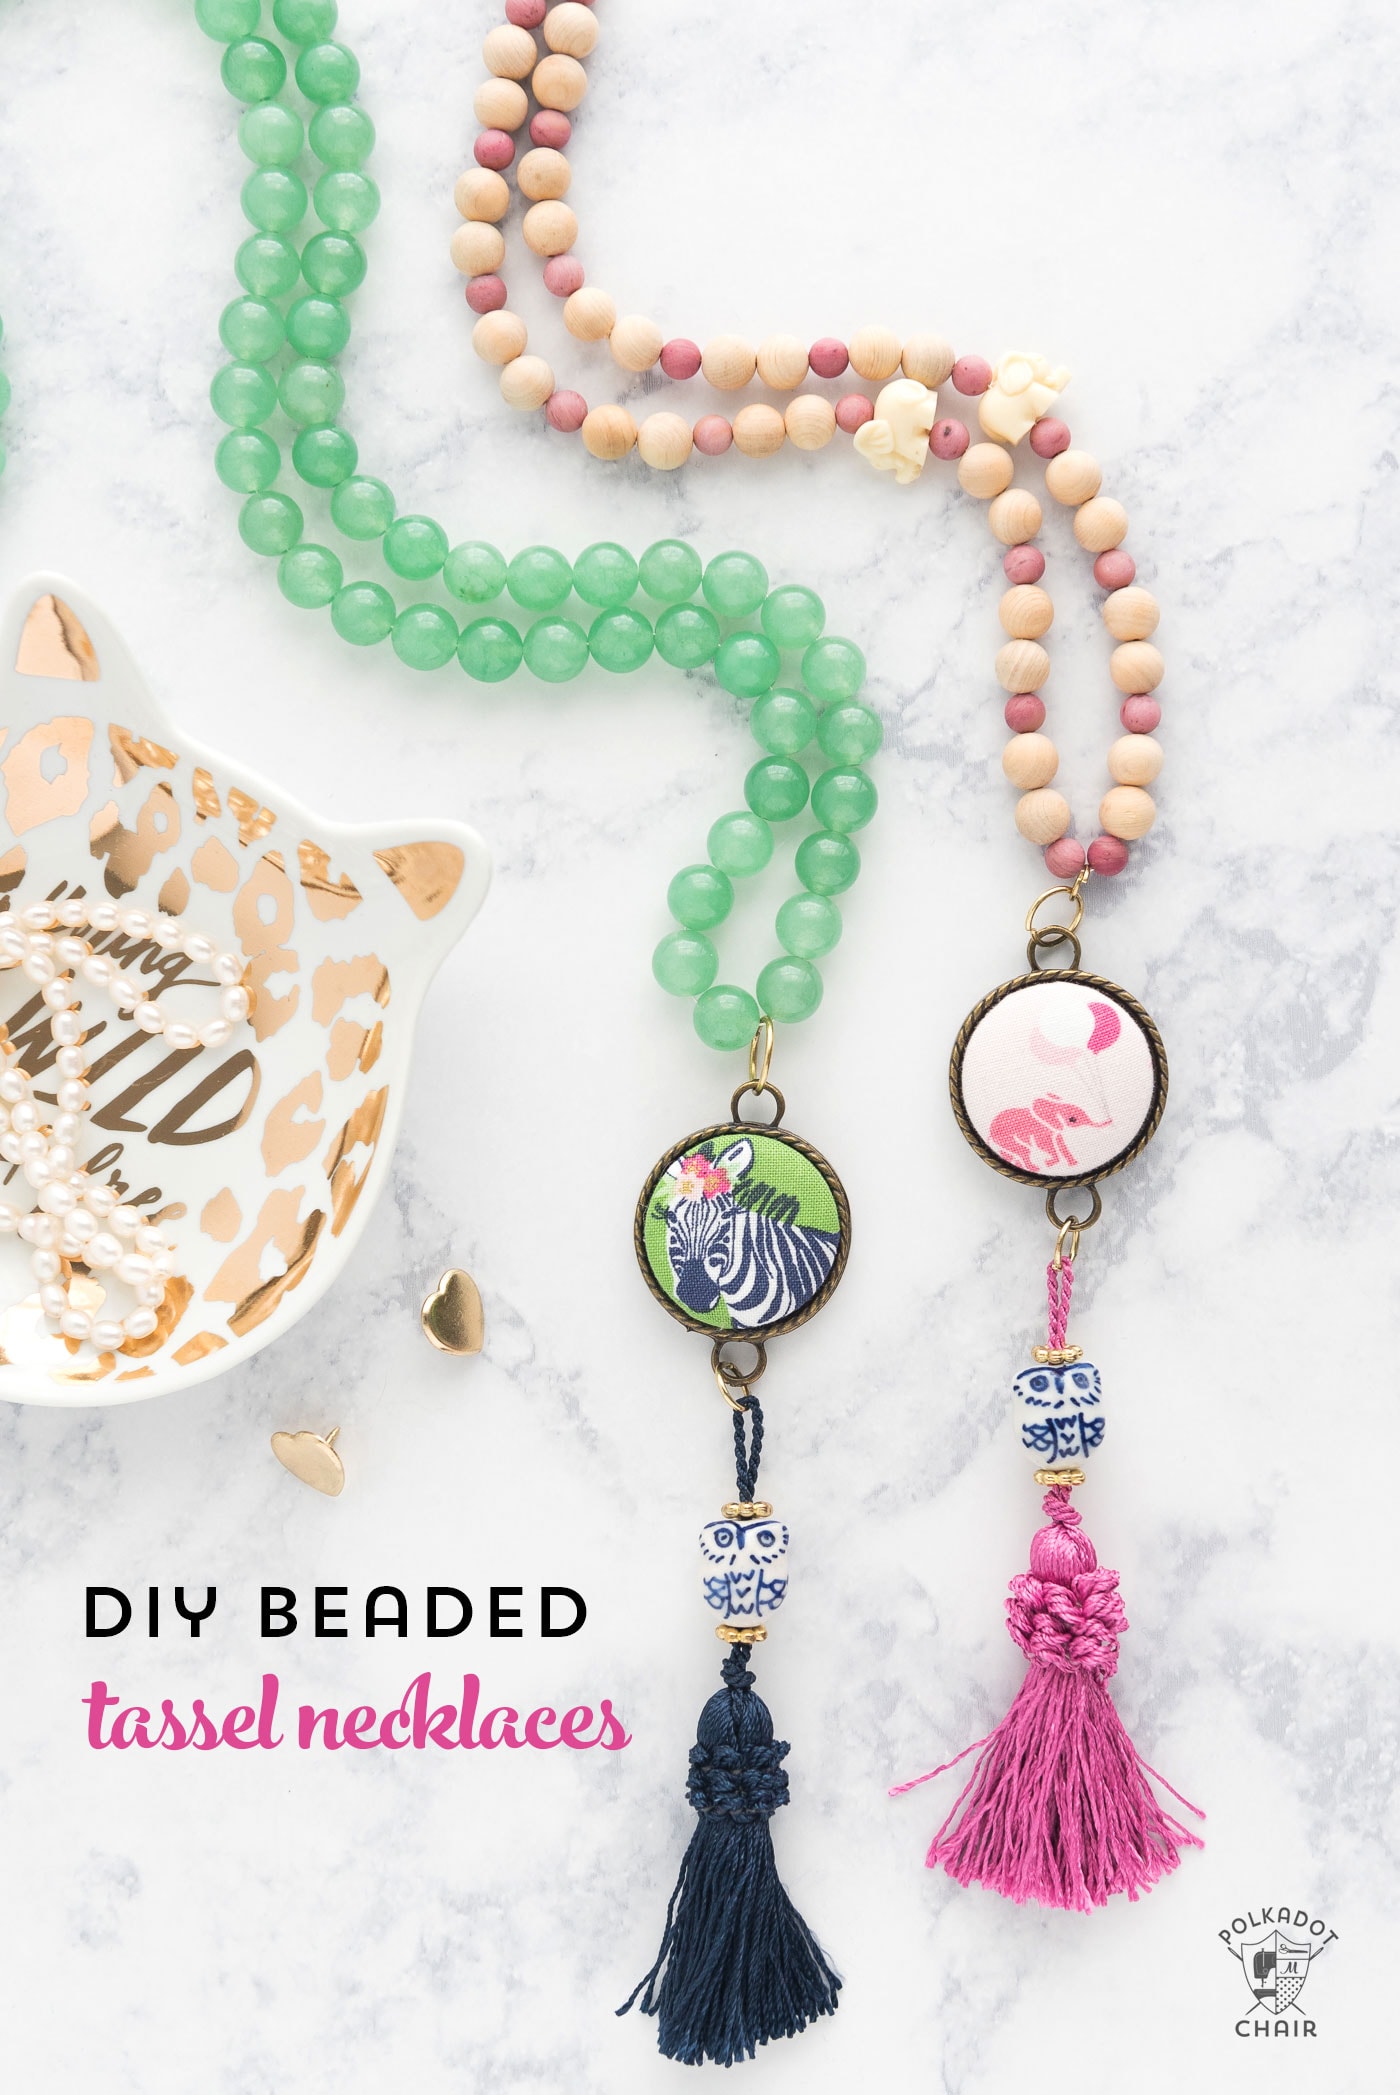
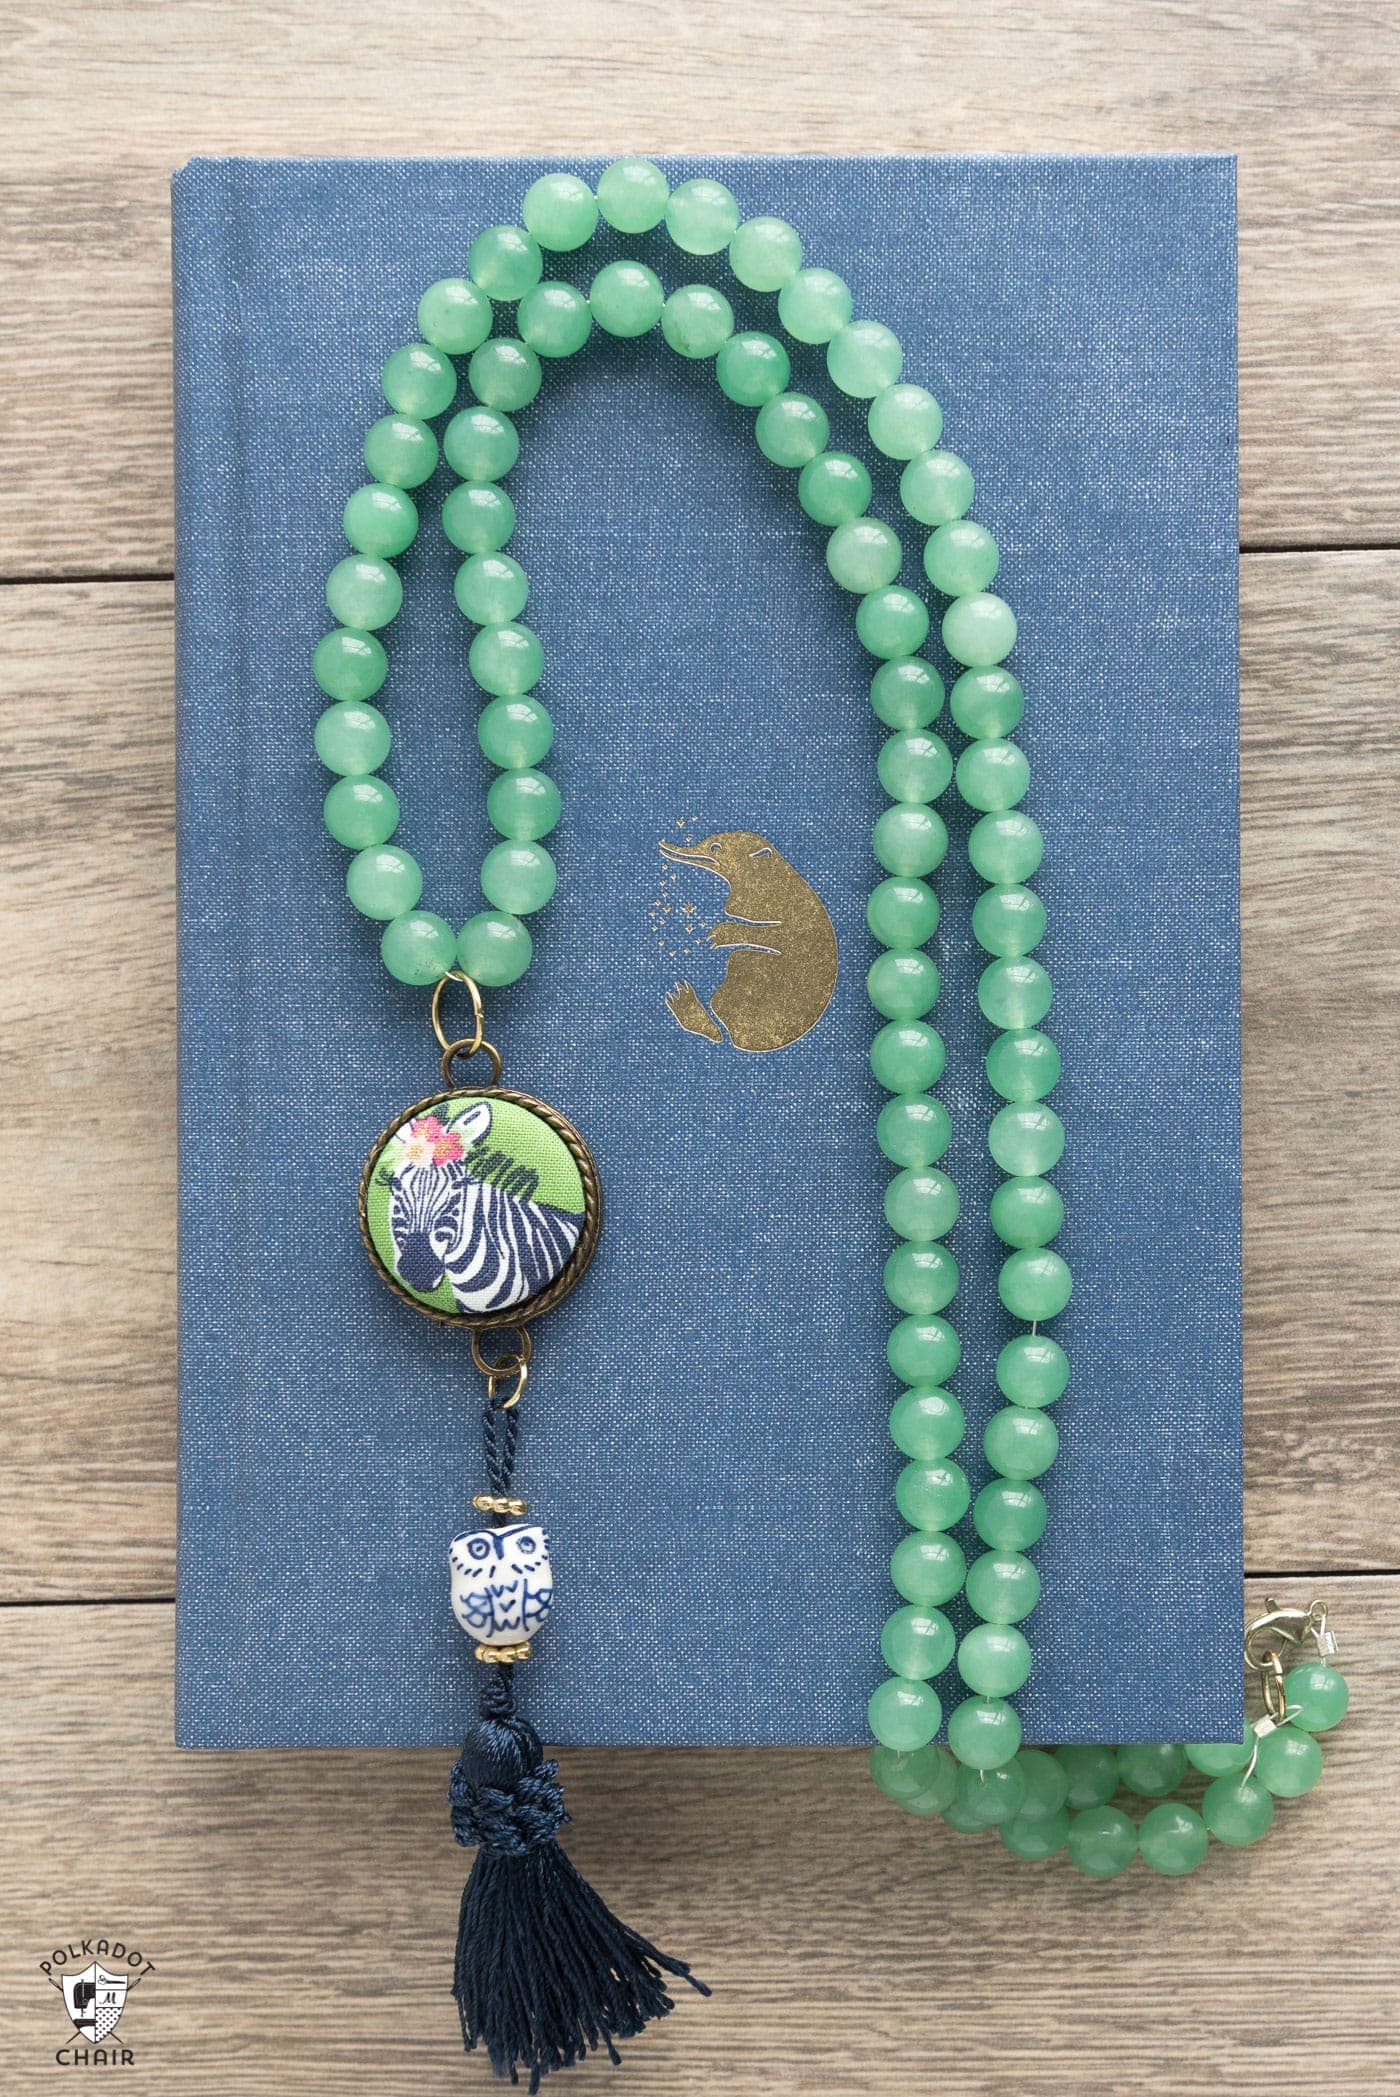
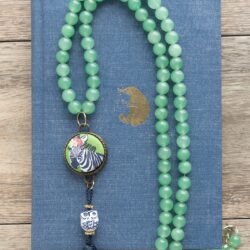
I had no idea what to make with such tiny fabric pieces! In my last-minute preparations, I got the idea to create a tassel necklace to wear during the event. I thought it would be a fun way to show off one of my favorite prints in the line, the zebras.

I made one and wore it throughout the entire market (and have worn it a few times since then as well).
I’ve received a lot of questions about the necklace, and today I’m excited to share with you a tutorial on how to make your beaded tassel necklace.
Beaded Necklace Details & Supply List
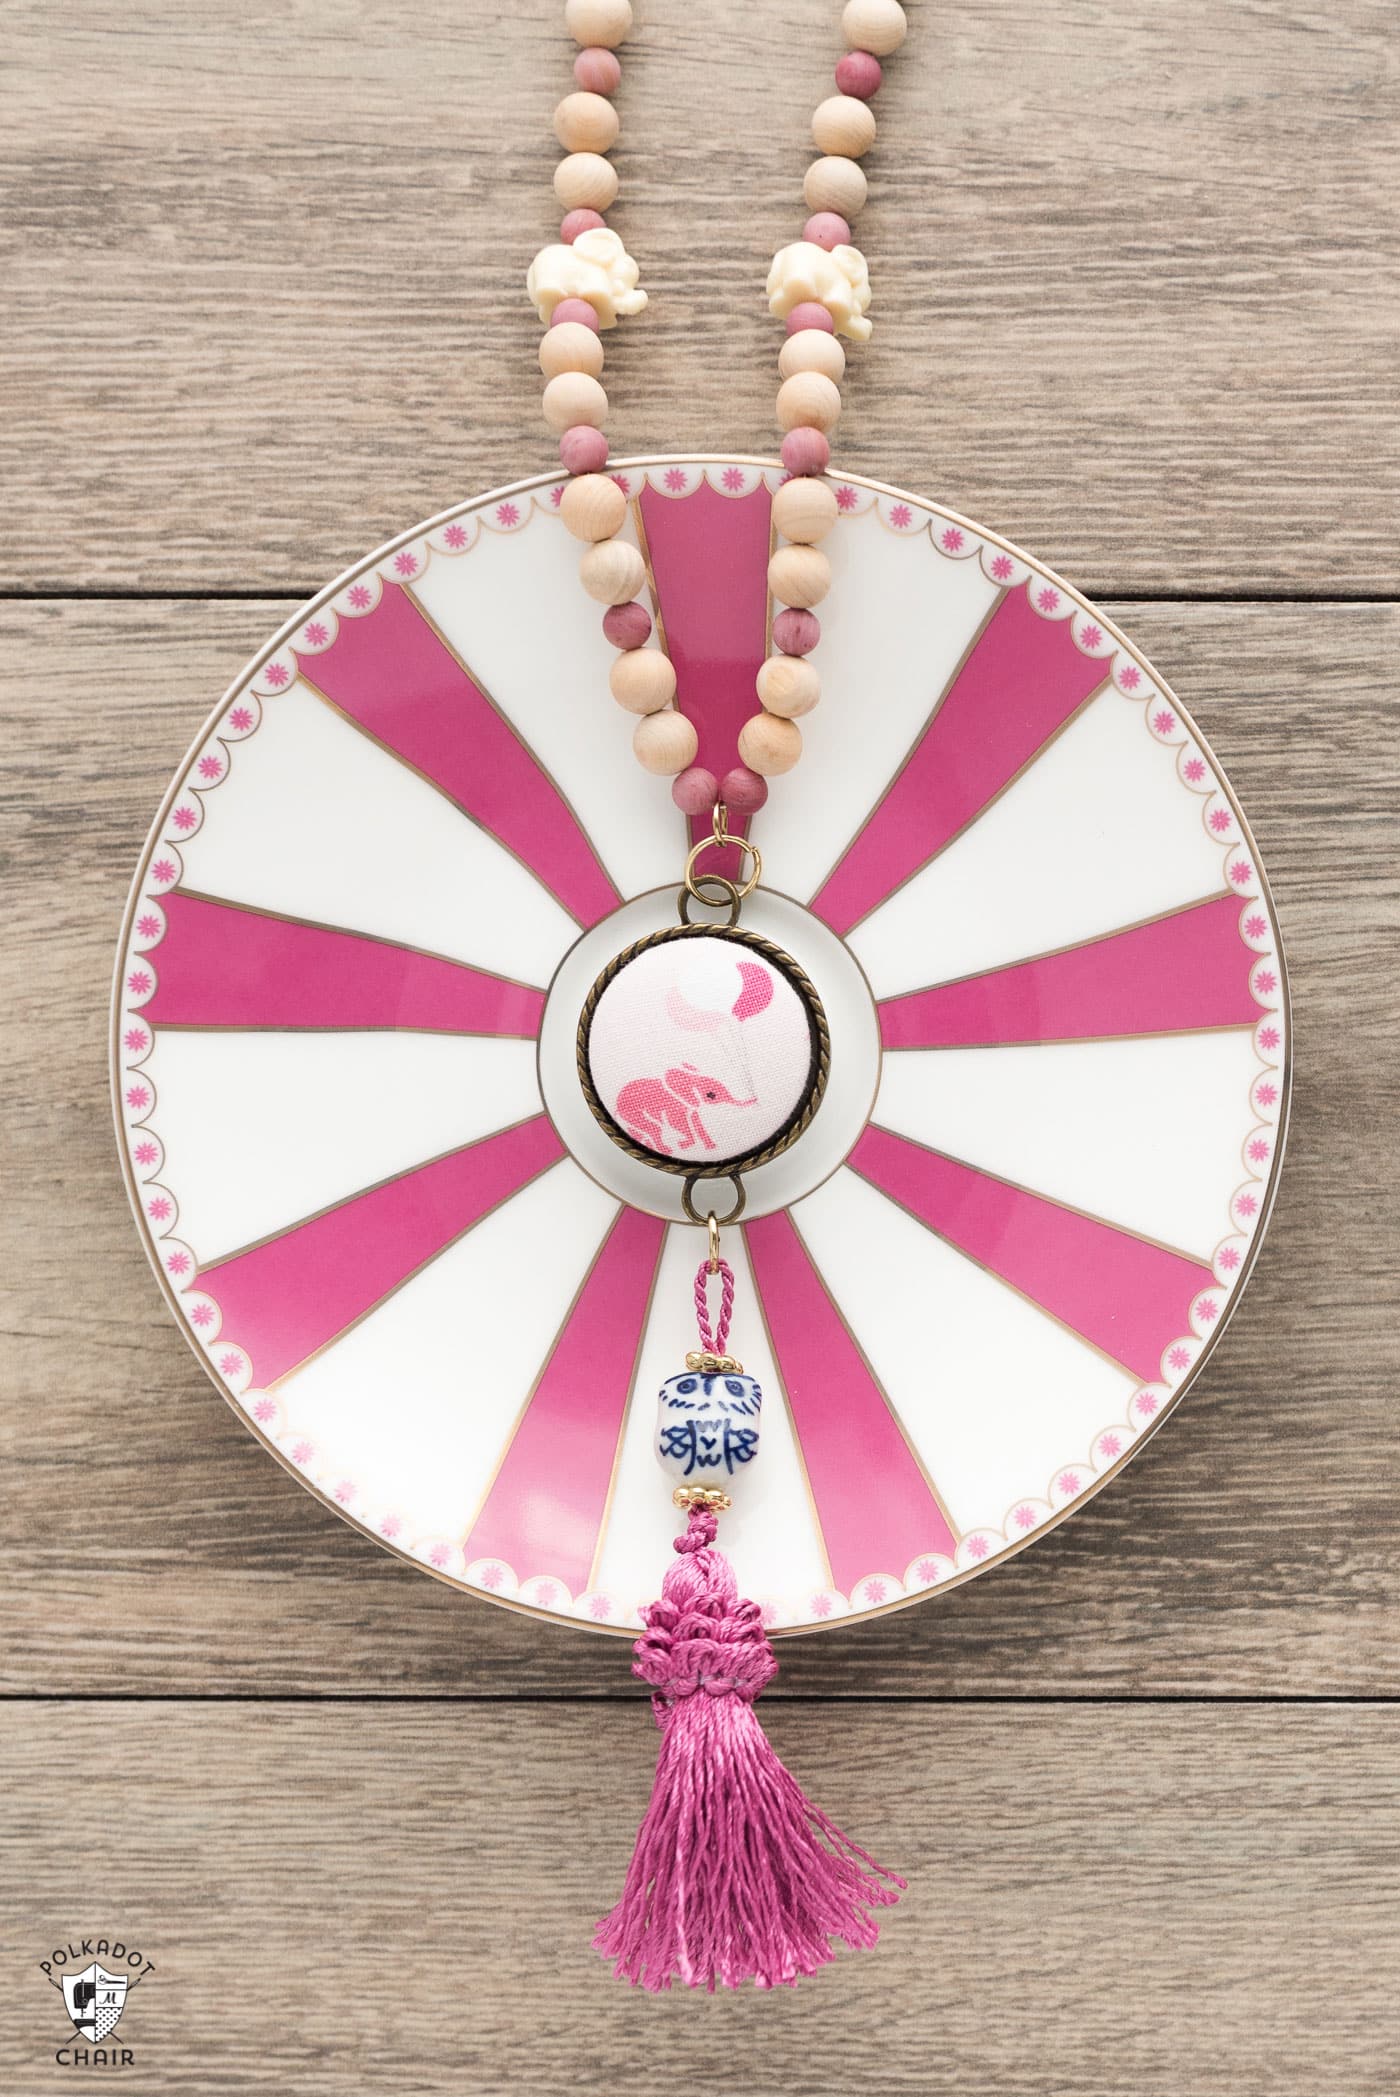
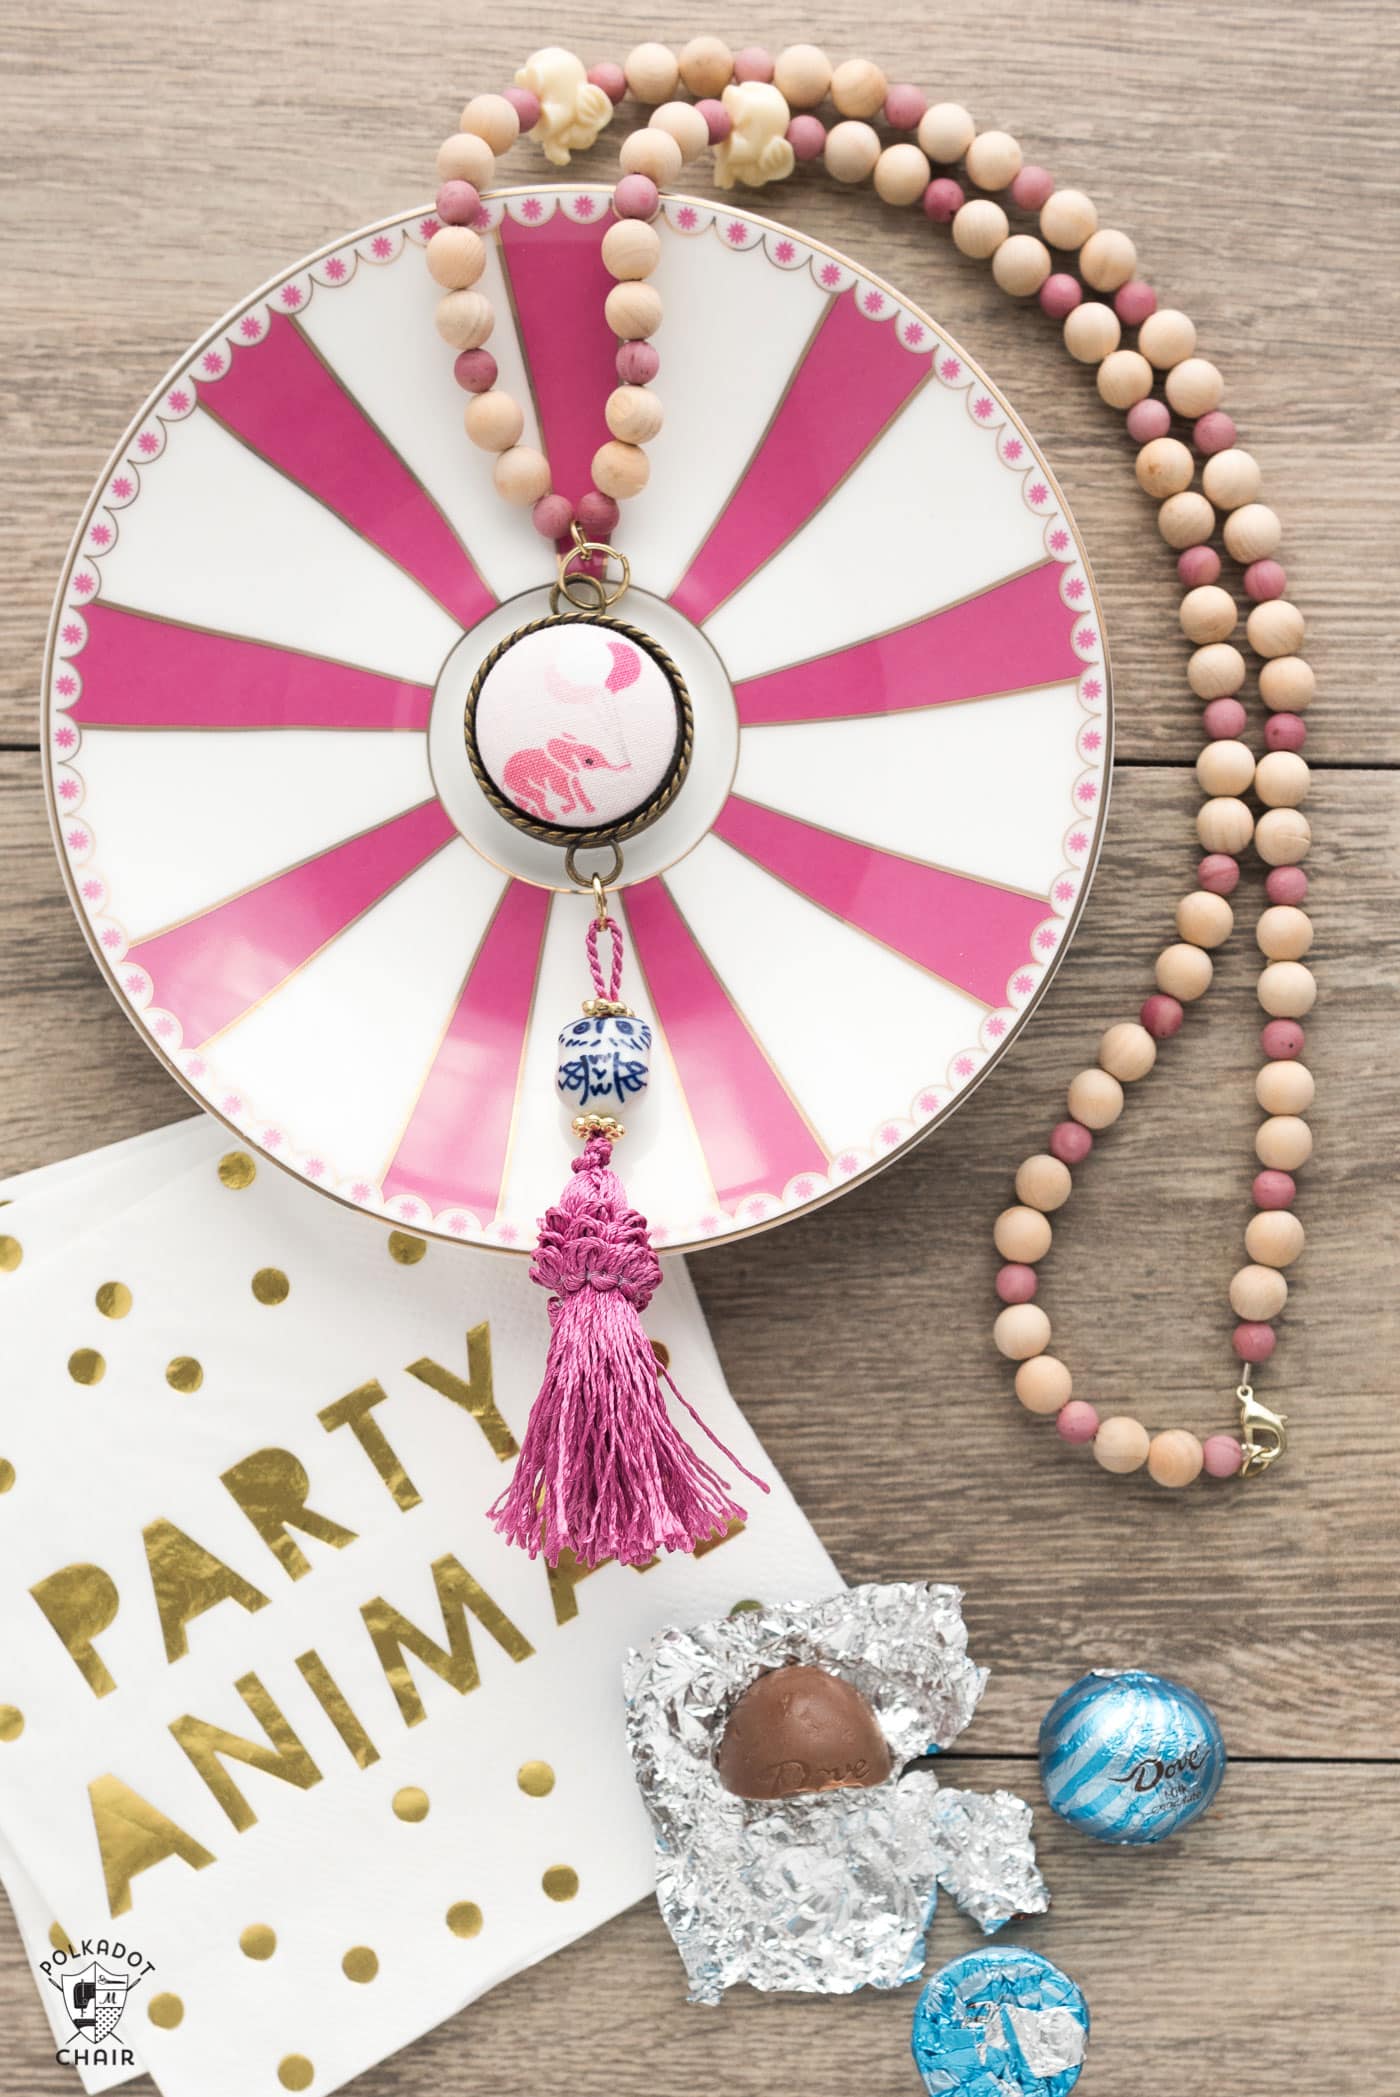
My oldest daughter is home for the summer and is actually the one who taught me about jewelry making, so I asked her to make another necklace using the same technique. She made the pink elephant one, which I think turned out so cute!
- You need basic jewelry-making supplies, including pliers and a wire cutter. It’s easy to find beginner jewelry-making kits online and in craft stores.
- The color and length of the necklace can be customized to your liking. I prefer a longer necklace,e but you can shorten it as you wish.
- Look for a nice “frame” for the covered button section of the necklace. It will really elevate the look of the entire project!
DIY Beaded Tassel Necklace Tutorial
Equipment
- Basic Jewelry Making Supplies: needle-nose pliers, bead tray, tweezers (you can purchase a simple starter kit online, which includes all of these items)
supplies
- 1 package Beads the wood beads were purchased on Amazon
- 1 Size 45 Covered Button 1 1/8″
- 1 scrap Fabric I used scraps from my Safari Party Line
- 30 mm round Cabochon these are similar to the ones I used
- 1 Tassel
- 1 package Ceramic Bead & Gold Spacer Beads purchased locally
- 1 spool Jewelry Wire
- 1 package Jewelry Lobster Clasp
- 1 package Jump Rings
- 1 package Crimping Beads
Instructions
Instructions:
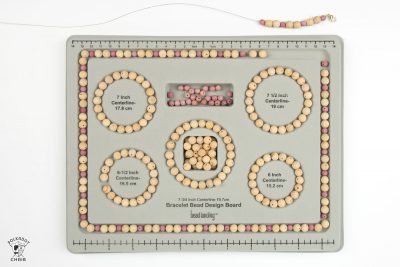
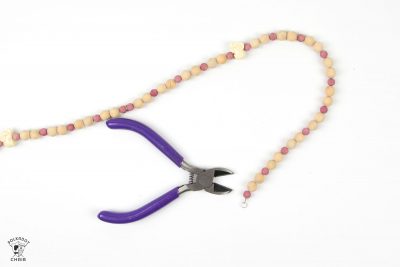
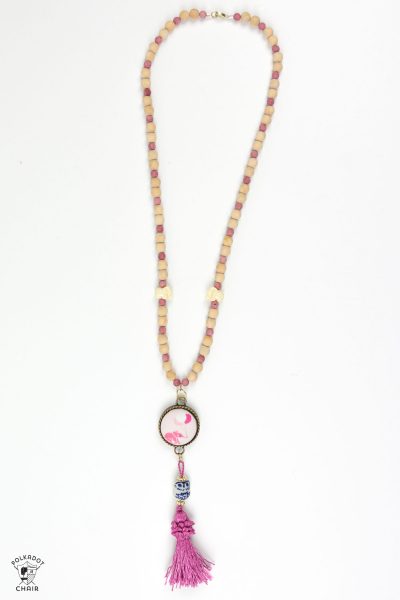
- Using your jewelry tray, lay out the beads of your necklace the way you want them to appear on your finished necklace. You will also need to measure how long you’d like your necklace to be. Some jewelry boards are larger than others, but you should be able to lay out all of your beads at once, if not at least 1/2 of them at a time. At the dead center of your beaded necklace, place a jump ring.

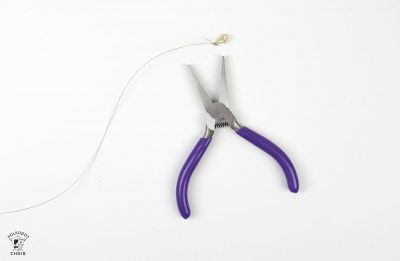
- Cut a piece of jewelry wire that is longer than you want your finished necklace to be. Feed one end of the wire through a crimping bead, then feed the wire through the loop on the lobster clasp and back through the crimping bead. Use the pliers to crimp the bead and hold the lobster clasp in place.

- Feed the beads onto your wire, and ensure that you feed the jump ring through at the midpoint. When you reach the end, repeat the same process, but use a jump ring instead of a lobster clasp.
- Set aside.
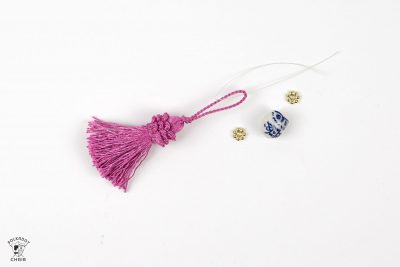
- Cut a small piece of jewelry wire and feed it through the loop on your tassel. Feed the wire through the two spacer beads and the ceramic bead. Pull on the wire to feed the tassel through to the other side.
- Attach a jump ring to the end of the tassel. To do this, slightly open the jump ring using your pliers, then feed it through and close it.

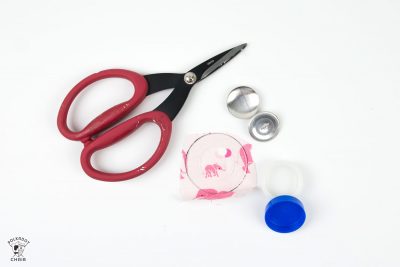
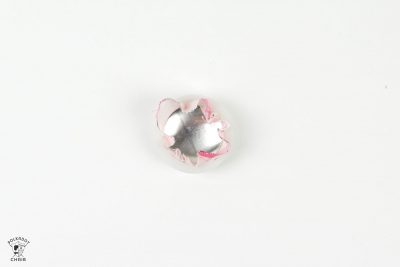
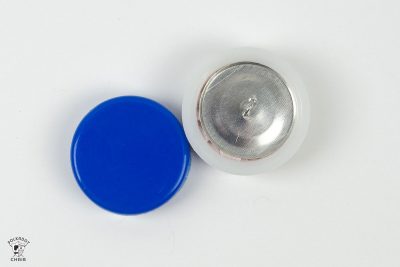
How to Cover the Button with Fabric:
- Next, cover your button with fabric. Use the guide that came with your covered button kit to ensure you have the exact right piece of fabric for the button.
- Cut the shank off of the button after you’ve covered it.
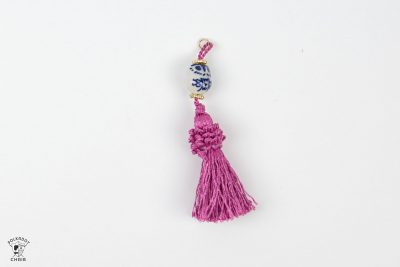
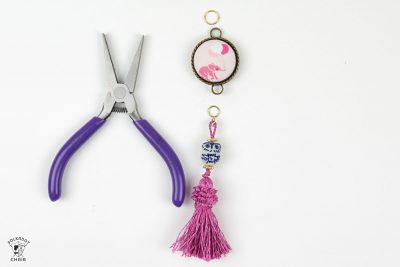
- If your cabochon does not have a ring on the top and bottom, glue two cabochons together back to back, with one ring facing up and the other facing down. I used a hot glue gun; you can also use E6000 glue.
- Glue your covered button to the center of the cabochon.
- Attach the tassel to the bottom of the cabochon using a jump ring. Attach the top of the cabochon to your necklace using the jump ring that you beaded into it.
- That’s it! You’re done!


They are pretty easy to make, and would be a fun project to tackle with older kids!

I love this necklace! The link for the tassels just took me to a page of tassel options. Is there a link to the actual tassels you used? Thanks!